The retail operations of a company or a small-scale business forum is always a fast-moving environment, with hundreds of customers coming in and out; the employees of the firms are always engaged in the operations of service. Usually, these retail establishments will employ multiple employees operating in two or three shifts to cope with the operation. Furthermore to say there will be multiple people working in the same position dispensing upon the business environment.
The management of these em[ployess may always get trickier as it's a fast-moving environment and further to say will get even trickier if there are multiple shift operations involved. Nowadays the business management operations of a retail environment are done by computerized software which could relieve the headaches of owners as well as the managers. Odoo is one of the enterprise and resource planning software which have been delivering its services as a complete business management tool from its earlier stages of development.
The platform has an efficient point of sales module which is being integrated with all the ongoing and performing modules of the platform. The POS module will allow the users of the platform to run the retail operations of the company or the firm. The reliable retails operations management tool can be configured to be employed in a shop or a restaurant/ bar environment.
This blog will provide insight into how the users of the Odoo platform can efficiently manage multiple cashiers in a retails environment.
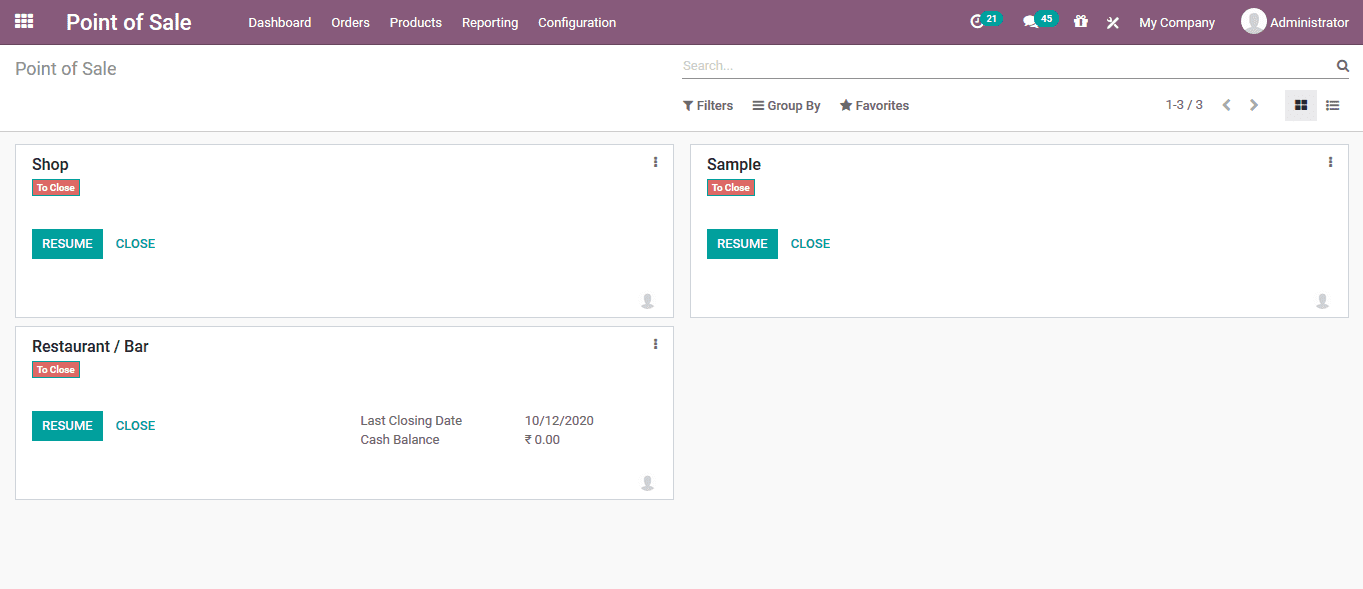
In the point of sale module of the platform the user can view all the retails operations managed by Odoo. The user can easily start a session, pause it, and close one as per the requirements. In case the user needs to define a new point of sale that can be done under the point of the sale menu accessible from the configuration tab of the module.
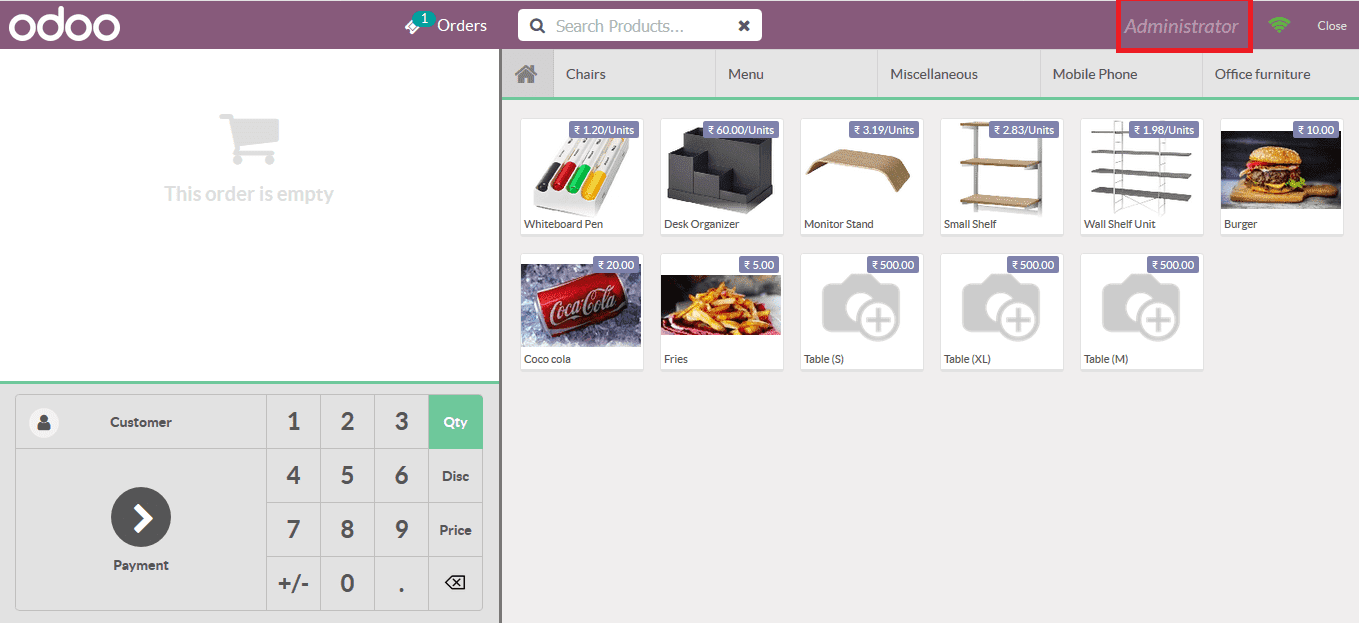
On selecting a respective point of sales section to start the user will be depicted with the products menu. From here the user can select the product to be sold as per the customer demand in a retails environment. In addition, the cashier or the employee using the session will be depicted as shown in the below image. If no restrictions are being set any employee can be using the session to conduct sales operations.
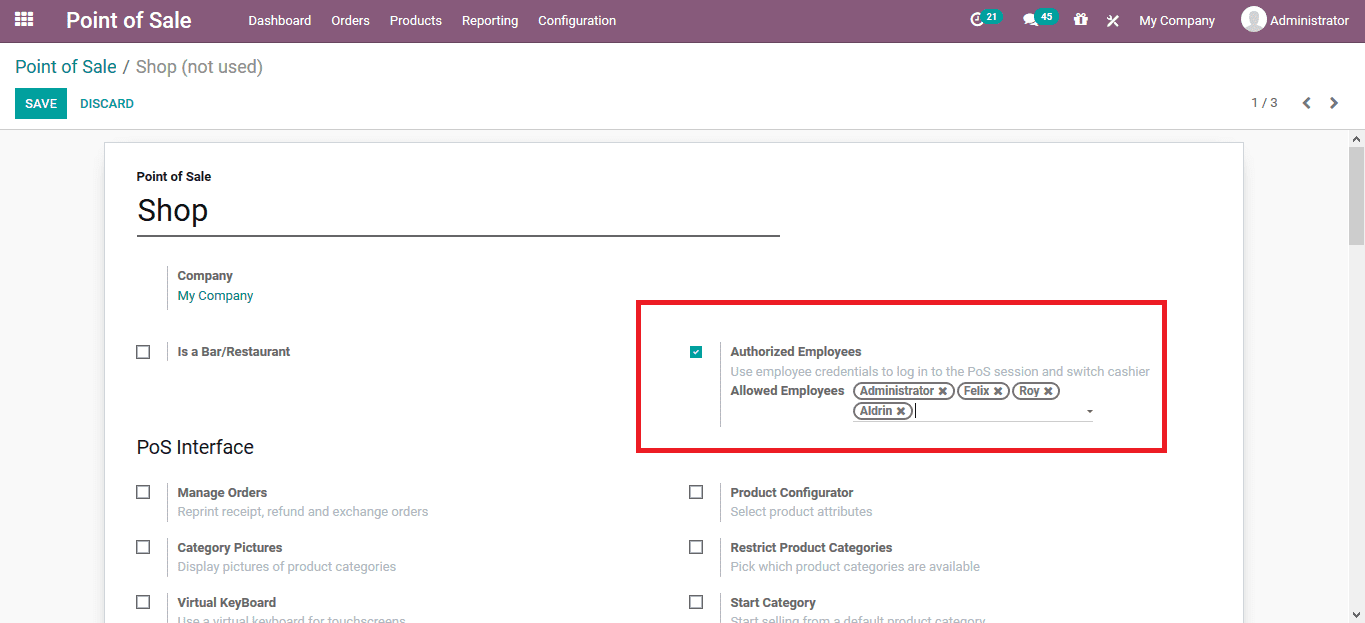
If the user wants to set a restriction and has to assign a security clearance for certain employees, the user can do so under the respective point of sales configuration menu accessible from the point of sales menu. The user can enable the authorized employee's option available and will be depicted with a description icon to choose the employees. The user can choose the respective employees from the ones listed out as per the employee module.
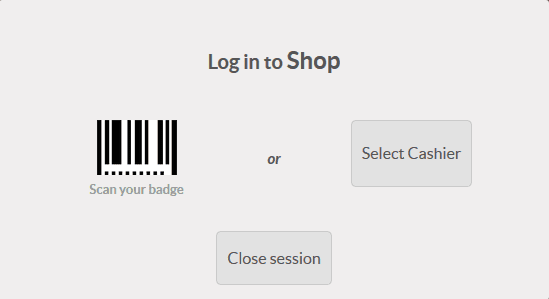
Now save the POS menu and start the POS session for the respective retail operations. Once the session is up and running the user will be asked to log in to the session as depicted in the below image. The employee can either scan the badge containing the barcode or select the kaiser manually.
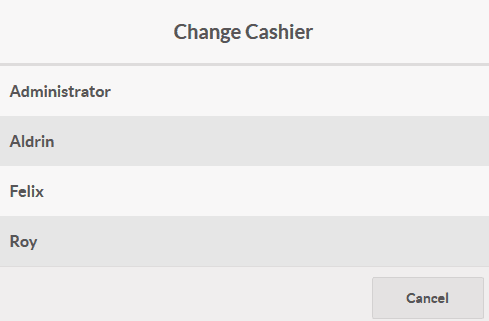
On selecting the cashier option the user will be depicted with the list of employees as described in the POS menu.
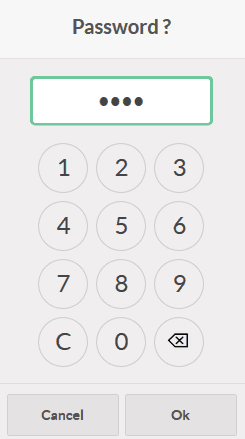
Once the cashier is selected the platform asks for a password. The password is enabled and described under the respective employee description. Once the correct password is entered the user can start the operations if not it will depict an error message.
Assigning unique pin and badges for employees
The unique pin i.e. the password for operations can be assigned under the employed description. To assign the user can select the employee module, select the respective employee and under the HR settings menu assign the PIN code for the operation. In addition, the user should save the menu after verification.
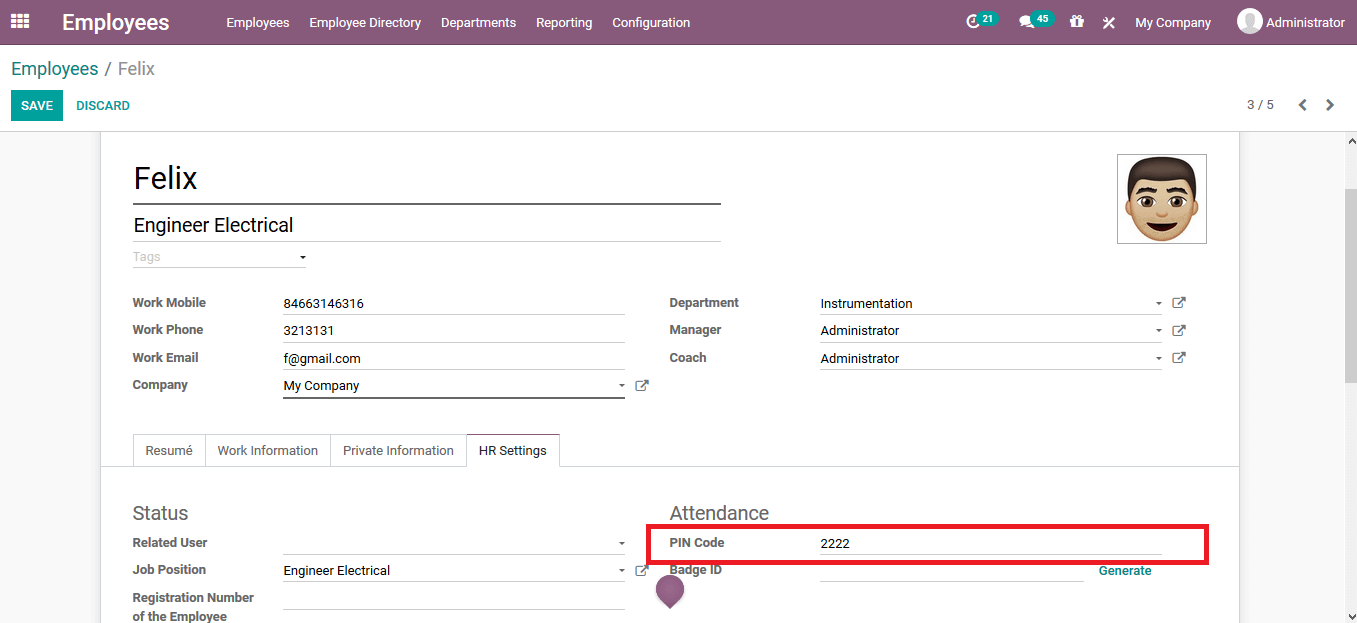
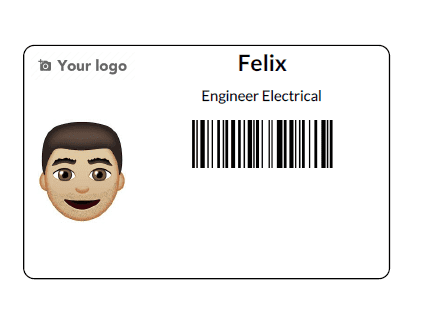
To assign the unique barcode and badges the user can select the generate option available under the Badge ID option available. The Odoo auto generates barcodes as per the nomenclature description in the platform which can be configured by the user.
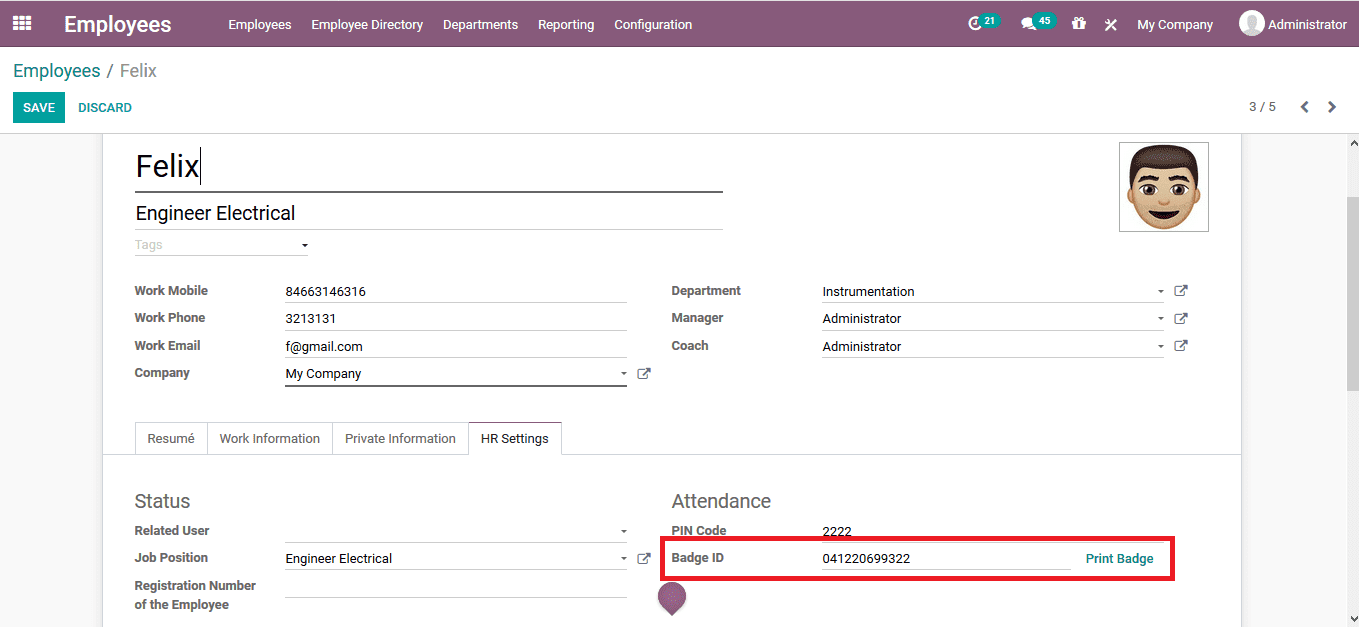
Once the badge containing the barcode is generated the user can print it straight from the platform by selecting the respective print badge option available. Below is the image of a sample bandage containing the barcode generated from the Odoo platform.