The Odoo website builder uses snippets as UI-building pieces. The simplest method for customizing an Odoo website is through snippets. There are two different kinds of snippets which are Static snippets and Dynamic snippets.
1. Static Snippet
Static snippets are those whose content won't change unless we manually alter them.
We just need to define the XML file in order to create a static snippet.
The snippet's content needs to be defined first.
<template id="basic_snippet" name="Basic Snippet">
       <section class="container">
           <div class="row">
               <div class="col-md-12">
                   <h1>Basic Snippet</h1>
                   <p>This is a basic snippet that is used to test the basic functionality of the snippets.</p>
               </div>
           </div>
       </section>
    </template>
After defining the view of the snippet, we need to add the snippet to the website builder snippet blocks. To perform that, we have to inherit the website.snippet template and add our newly created snippet to it.
<template id="external_snippets" inherit_id="website.snippets" priority="8">
  <xpath expr="//div[@id='snippet_feature']//t[@t-snippet][last()]" position="after">
           <t t-snippet="basic_snippet_blog.basic_snippet"/>
   </xpath>
</template>
Now we have to add this file to __manifest_.py inside the data section.
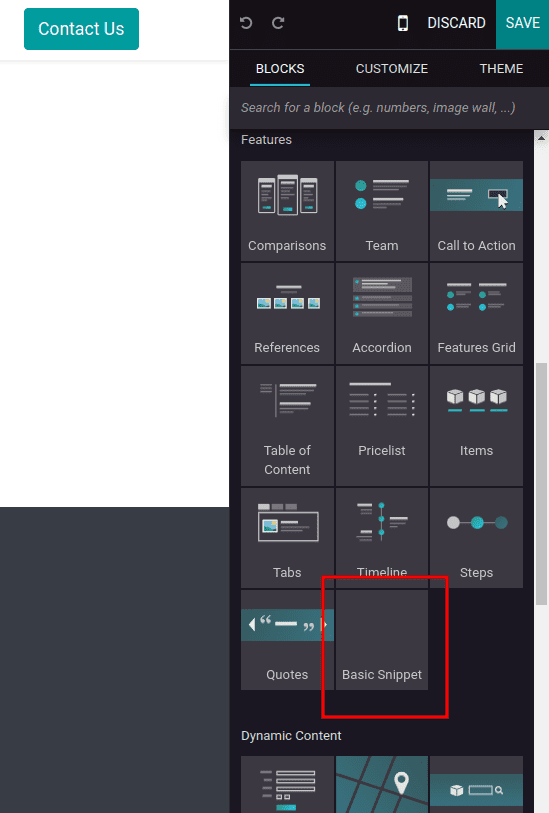
Then after installing or upgrading the module, click on the edit on the website, and we can see our snippet under the features, and we can drag and drop the snippet.
2. Dynamic Snippets
Dynamic snippets are those whose contents are changed whenever there is a change in the backend or the database.
For creating a dynamic snippet, we have to create an XML file for defining the view of the snippet, a python controller for picking data from the backend, and a javascript file for showing data from the backend in the website.
First, we have to define the controller to fetch data from the backend. In the example below, we take the number of products total sold.
from odoo import http
from odoo.http import request
class Sales(http.Controller):
   @http.route(['/total_product_sold'], type="json", auth="public")
   def sold_total(self):
       sale_obj = request.env['sale.order'].sudo().search([
           ('state', 'in', ['done', 'sale']),
       ])
       total_sold = sum(sale_obj.mapped('order_line.product_uom_qty'))
       return total_sold
Then we need to create an XML to define the content of the snippet.
  <template id="basic_snippet" name="Dynamic Snippet">
       <section class="container dynamic_snippet_blog">
           <div class="row">
               <div class="col-md-12">
                   <h1>Dynamic Snippet</h1>
                   Total Products Sold: <span id="total_sold"/>
               </div>
           </div>
       </section>
    </template>
Here, we added a span total_sold for showing the number of total sold products. The value will be fetched in javascript and it will render here.
After defining the view of the snippet, we need to add the snippet to the website builder snippet blocks. To do that, we have to inherit the website.snippet template and add our newly created snippet to it.
<template id="external_snippets" inherit_id="website.snippets" priority="8">
    <xpath expr="//div[@id='snippet_effect']//t[@t-snippet][last()]" position="after">
           <t t-snippet="basic_snippet_blog.basic_snippet"/>
       </xpath>
    </template>
Now we have added the snippet in the Dynamic snippet section.
Then to get the data from the controller and show it on the website, we use javascript.
odoo.define(dynamic_snippet_blog.dynamic', function (require) {
   var PublicWidget = require('web.public.widget');
   var rpc = require('web.rpc');
   var Dynamic = PublicWidget.Widget.extend({
       selector: '.dynamic_snippet_blog',
       start: function () {
           var self = this;
           rpc.query({
               route: '/total_product_sold',
               params: {},
           }).then(function (result) {
               self.$('#total_sold').text(result);
           });
       },
   });
   PublicWidget.registry.dynamic_snippet_blog = Dynamic;
   return Dynamic;
});
Here we are using a class of sections as the selector and fetching data from the controller using rpc.
Now we add an XML file into the data section and js file into the asset action of __manifest__.py file.
'data': [
        'views/snippet.xml'
    ],
    'assets': {
       'web.assets_frontend': [
           '/radom_module/static/src/js/dynami.js',
       ],
    },
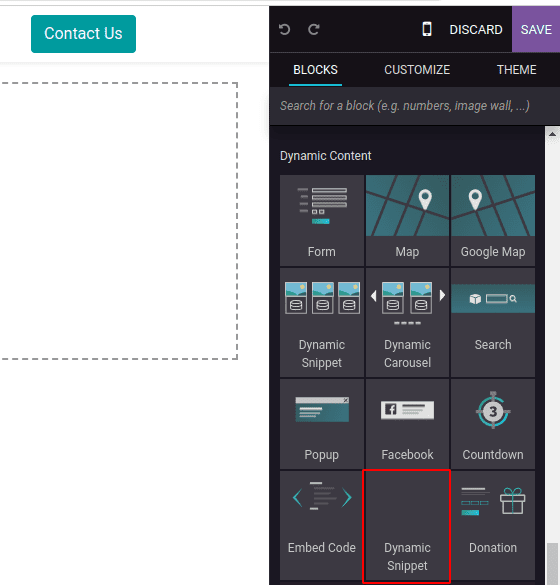
Then after installing or upgrading the module, click on the edit on the website, and we can see our snippet under the Dynamic Content and we can drag and drop the snippet.
Using these snippets, you can customize your website as per your requirements. Have a look at the following blog to explore more about how to create a snippet in Odoo 15 ERP. How to Create a Snippet in Odoo 15 ERP