One of the essential parts of a business is documentation, and accounting documents are the top priority of a firm. We store the vital documents of an organization securely for future reference. A severe loss affects a company by losing any essential documents. It is necessary to take care of the security of documents such as vendor bills, taxes, licenses, transactions, and more. Digitalization paves the way for various solutions for a company with the support of an ERP system. The documents stored manually are transformed digitally and monitored with the assistance of software. Individuals can adopt new business strategies and operations using the Odoo 15.
This blog discusses Accounting document management with the Odoo 15 platform.
Odoo 15 Documents module operations are according to workspace division as per user requirement. It is effortless to accommodate different documents of accounting operations using the Odoo platform. Users can lead the accounting documents by integrating Odoo 15 Accounting and Document modules.
Odoo 15 Documents
Users can manage, store and view the files by operating the Odoo 15 Documents module. Document management boosts workflow actions and improves your business. In addition, users can configure actions, tags, emails, and other aspects. Before enabling the accounting option, let's make a workspace for accounting processes. For that, click on the Workspaces menu in the Configuration tab and select the CREATE icon.
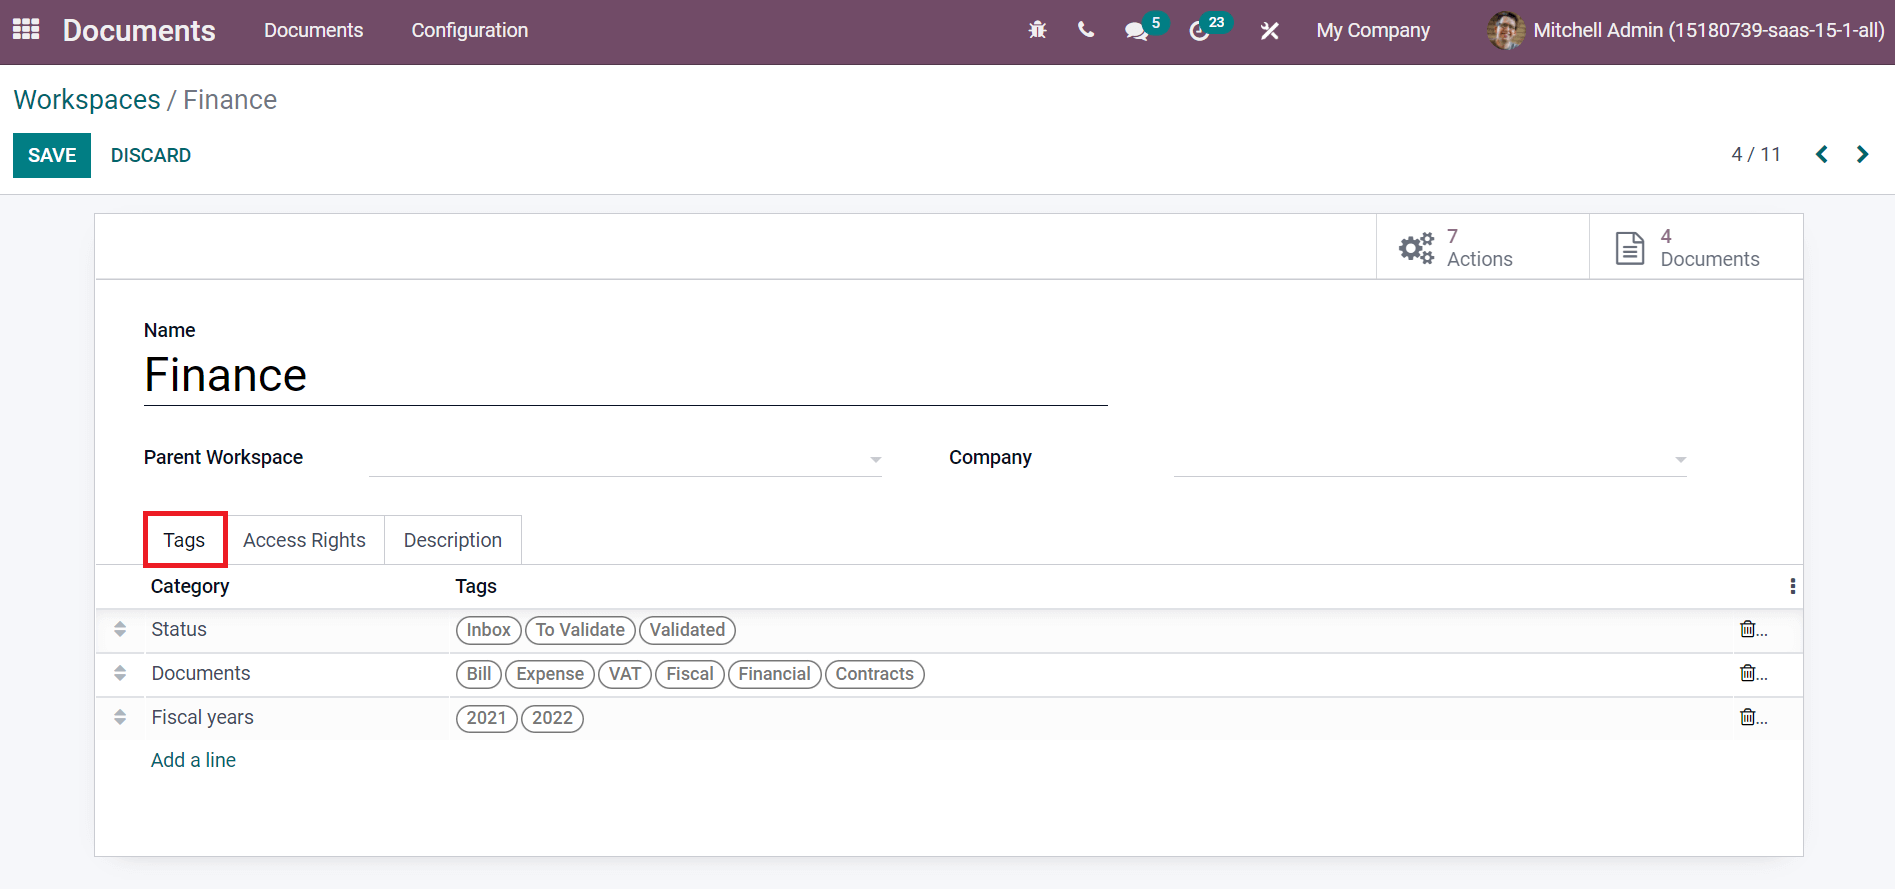
In the new window, add Name as Finance and choose the Parent Workspace that derives the tags. We can choose a company for your Workspace and attach tags by clicking on Add a line option below the Tags tab. Here, we can see the Category and name of the Tags in the screenshot below.
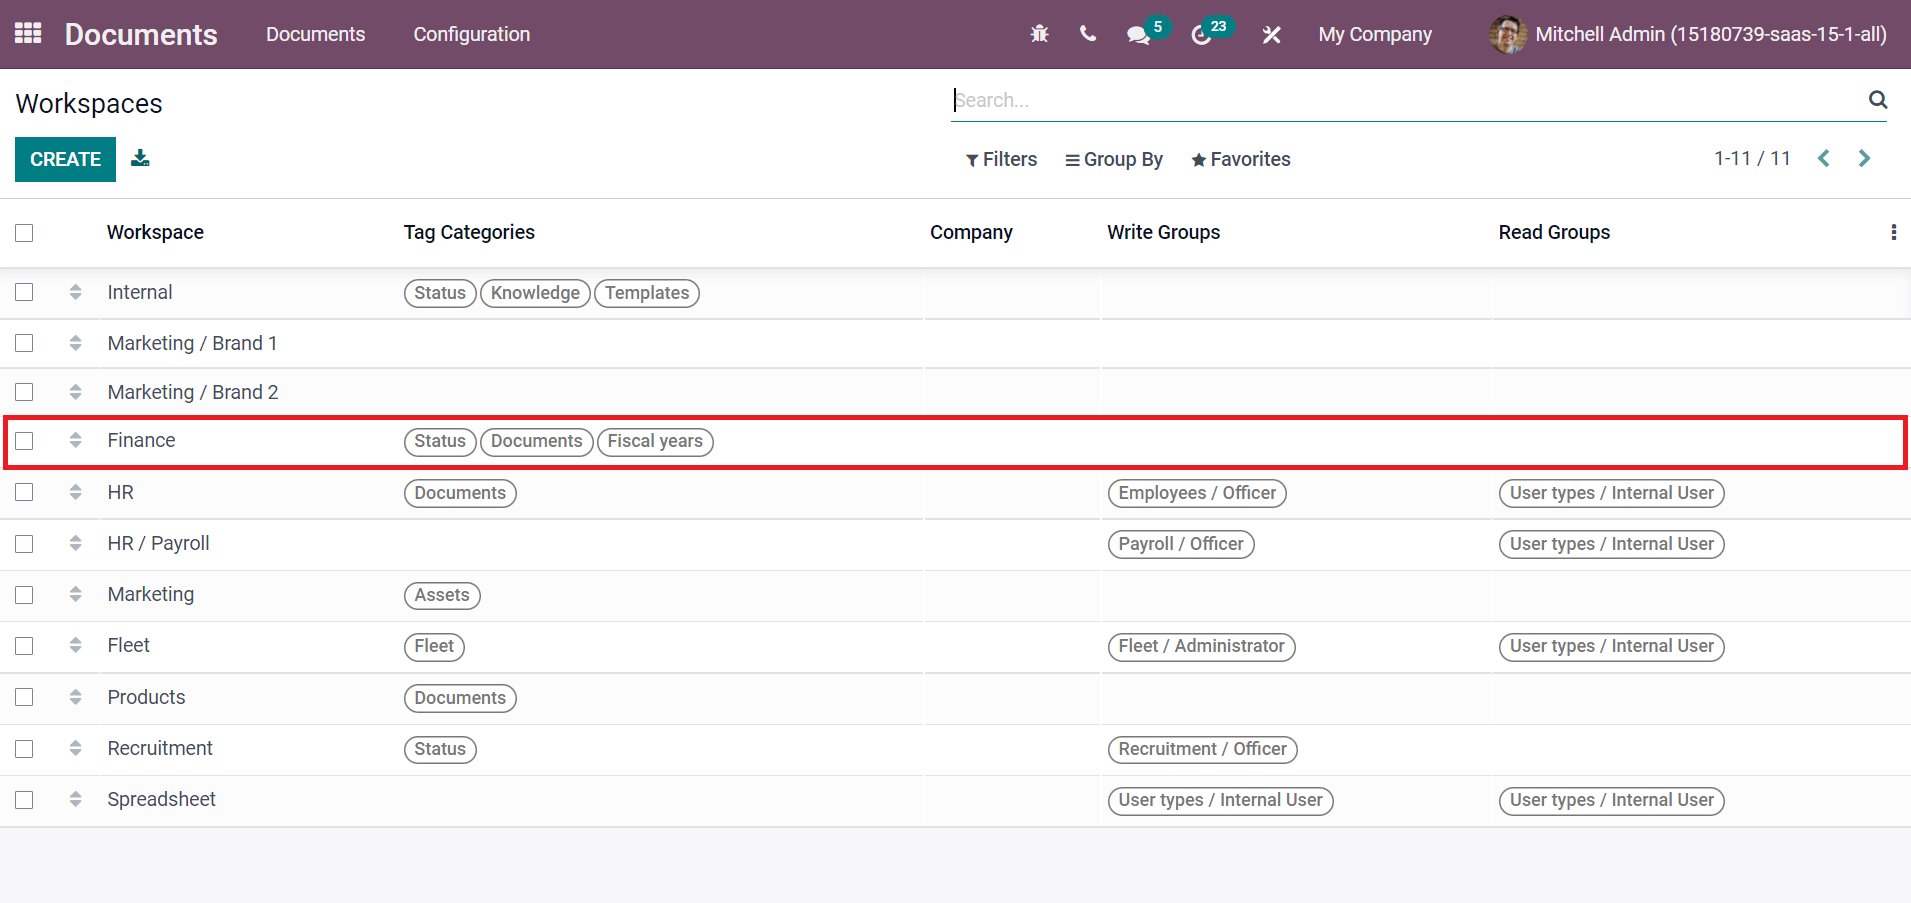
Click on the SAVE icon to save your Workspace data for documents. Created Finance workspace is viewable in the main window. The information such as Workspace name, Company, Tag Categories, Read Groups and Write Groups are available here in the screenshot below.
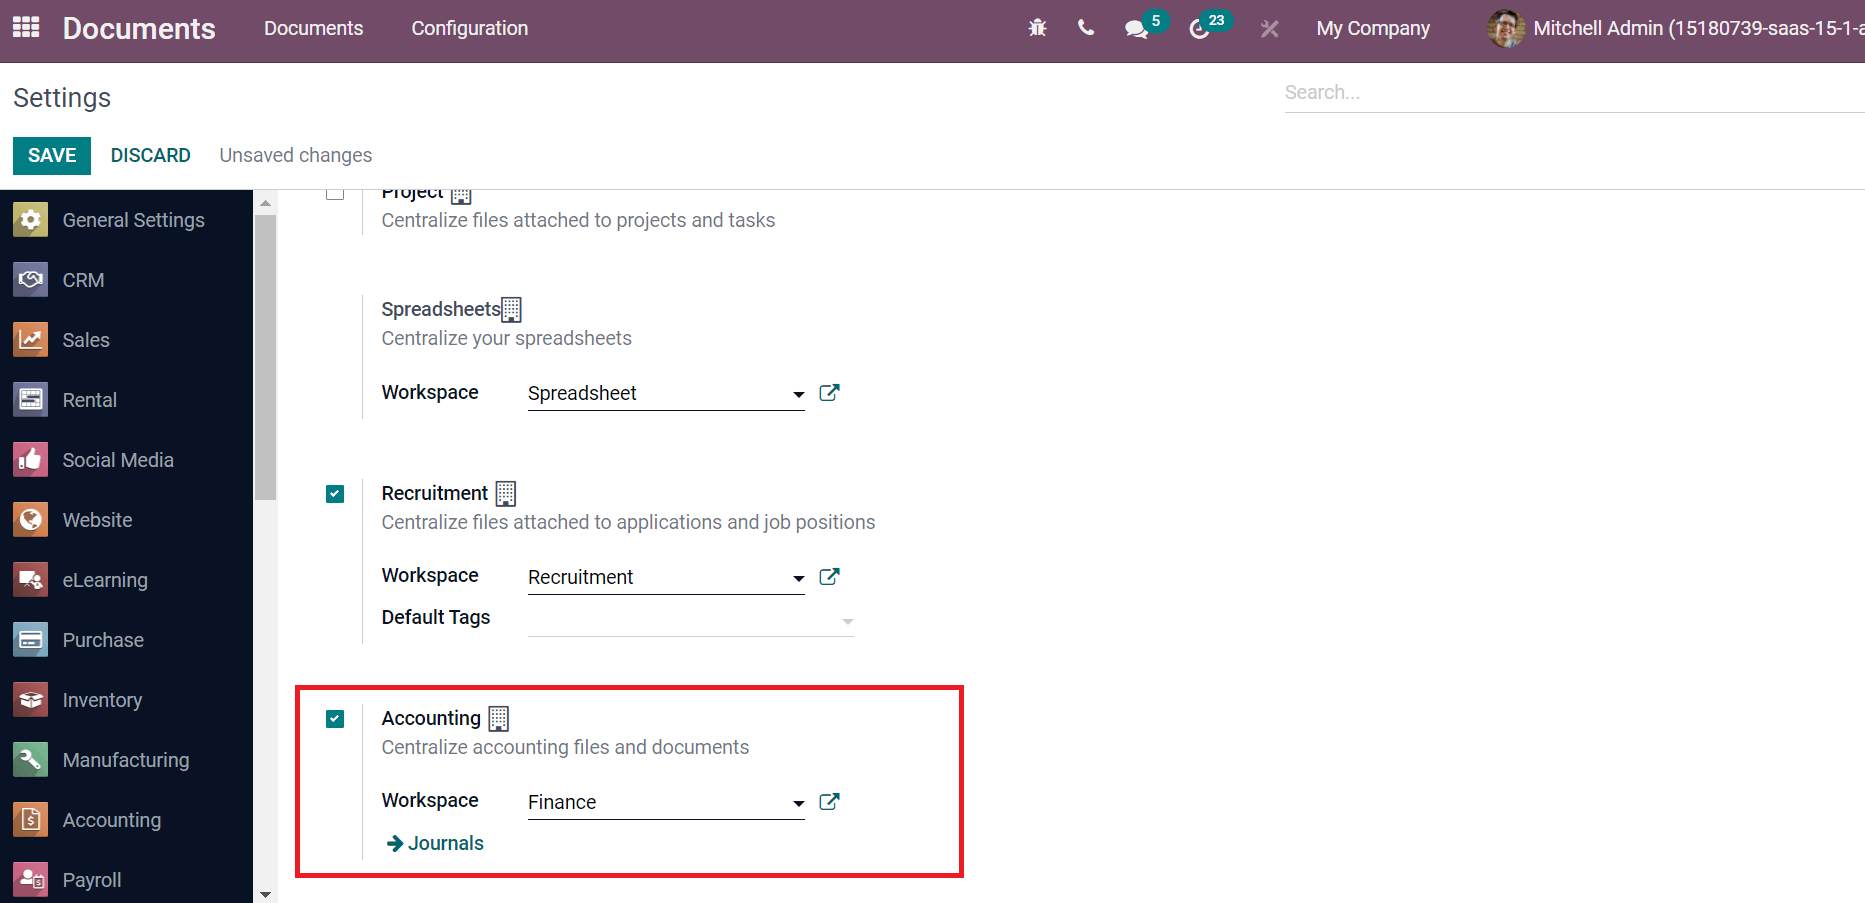
Users should activate the accounting option to use accounting aspects in the Odoo 15 Documents module. For this purpose, select the Settings menu in the Configuration tab. At the bottom of the Settings window, you can view the Accounting field. Activate the Accounting field to streamline accounting documents and files. Next, choose your created Workspace for Accounting, and here we selected the Workspace Finance as mentioned in the screenshot below.
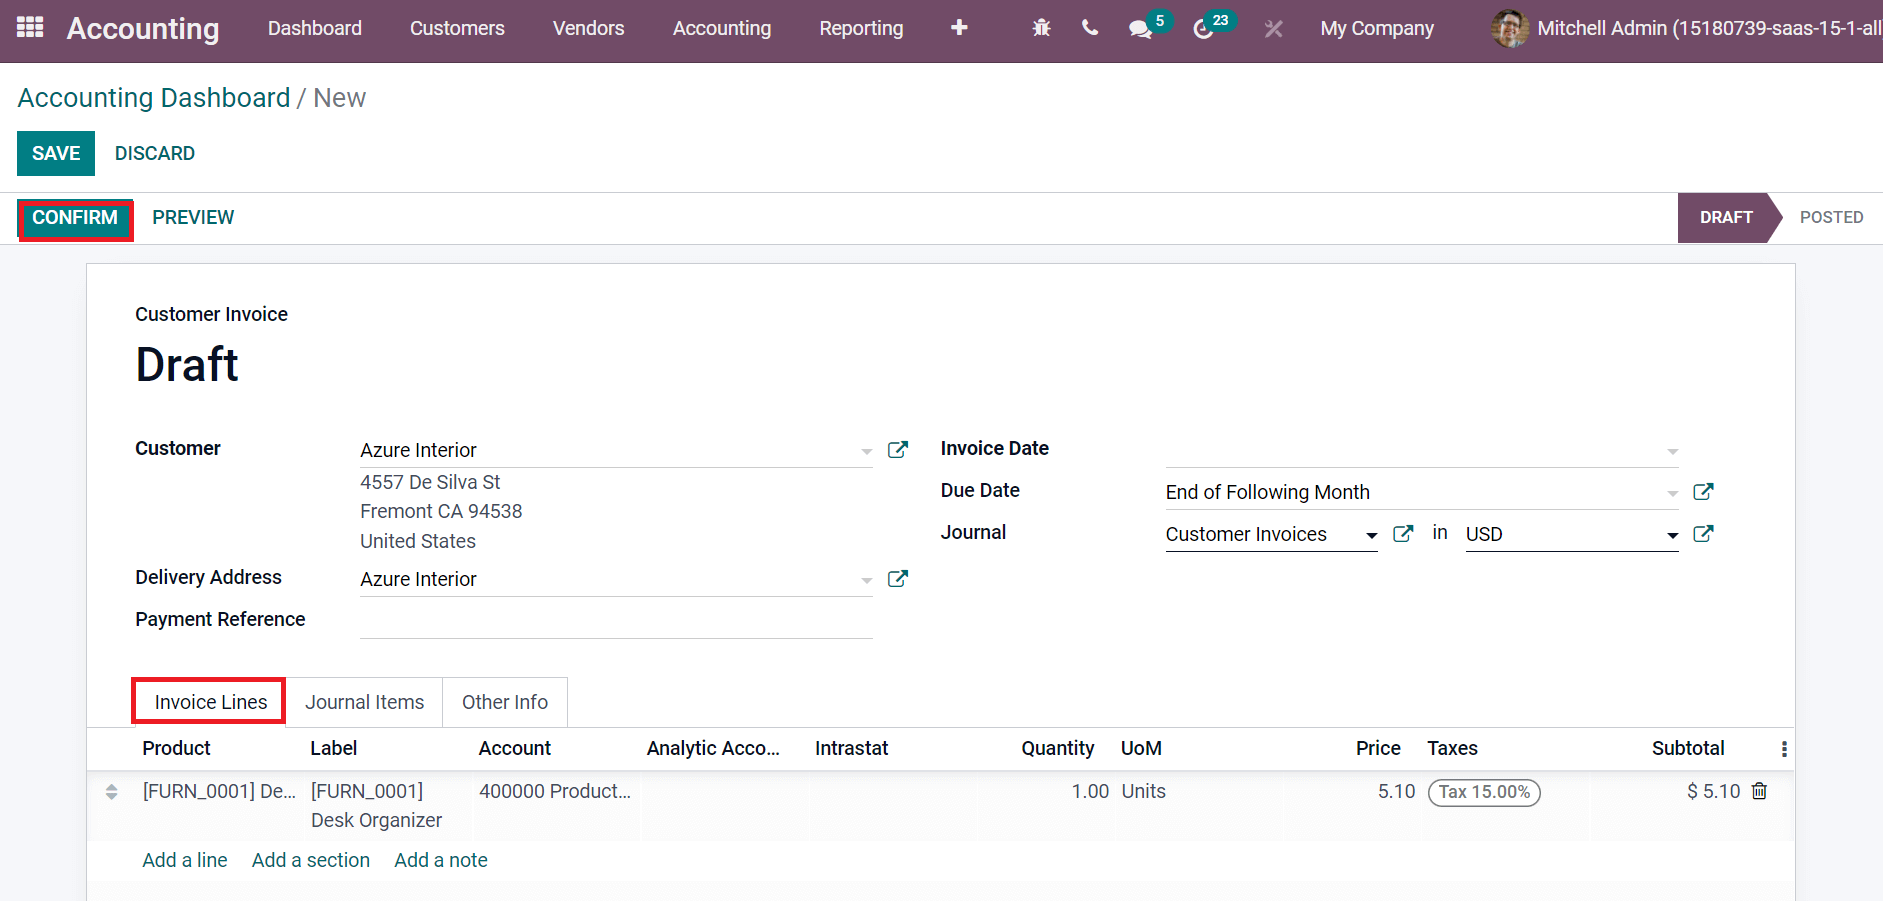
We can click on the SAVE icon after selecting the Workspace in the Settings window. Now, let's develop an invoice for customers from the Odoo 15 Accounting module to evaluate the operations. Click on the New Invoice icon inside Customer Invoices in the Accounting dashboard. Select your Customer and Delivery Address for a recent invoice automatically after choosing the customer in the new window. Users can also set the Due Date and Journal from the Customer Invoice page. Later, select your product from the Invoice Lines tab. By clicking on Add a line option, enter the product name, and its data is clear before you. As portrayed in the screenshot below, we selected Desk Organizer as the product.
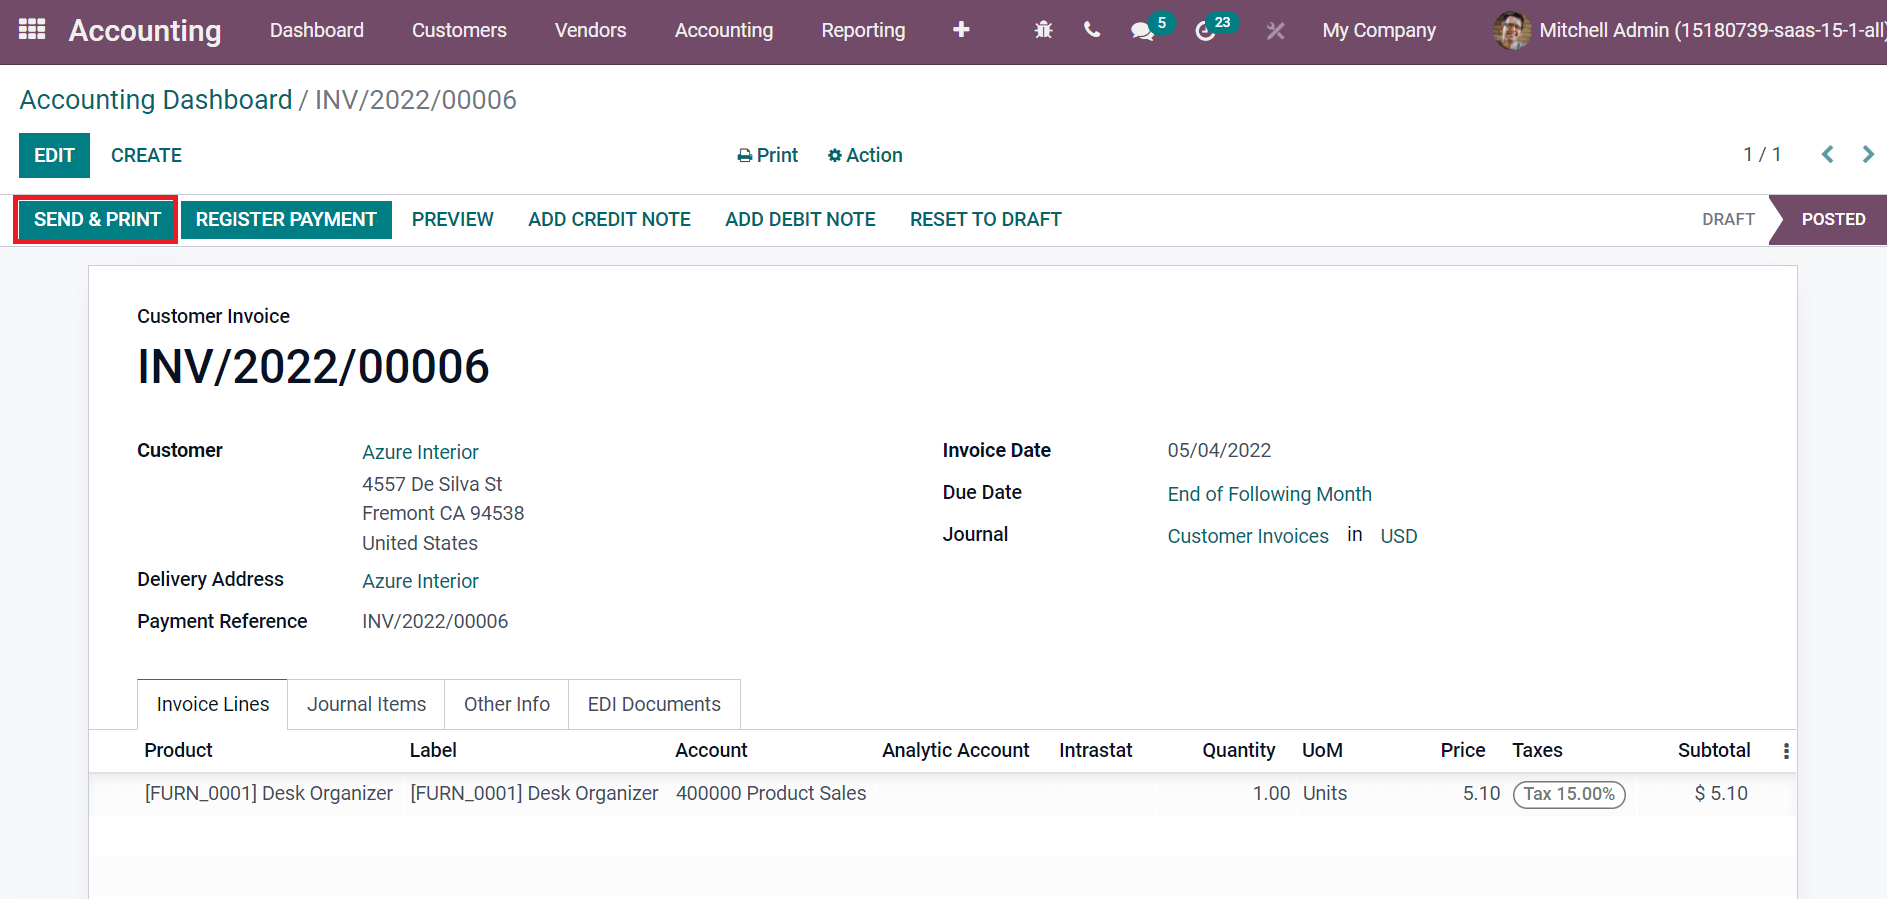
The journal items are automatically visible here after selecting the product. After that, click on the SAVE icon and Confirm the Customer Invoice. Select the Send & Print icon to send an invoice to the customer through email.
After selecting the SEND & PRINT icon, a new Send invoice screen appears before you. Three methods of an invoice are visible here: Print, Email, and Send by Post. Users can send the document through the delivery service by enabling the Send by Post option. You can print and send an invoice through email by activating the Print and Email options, as represented in the screenshot below.
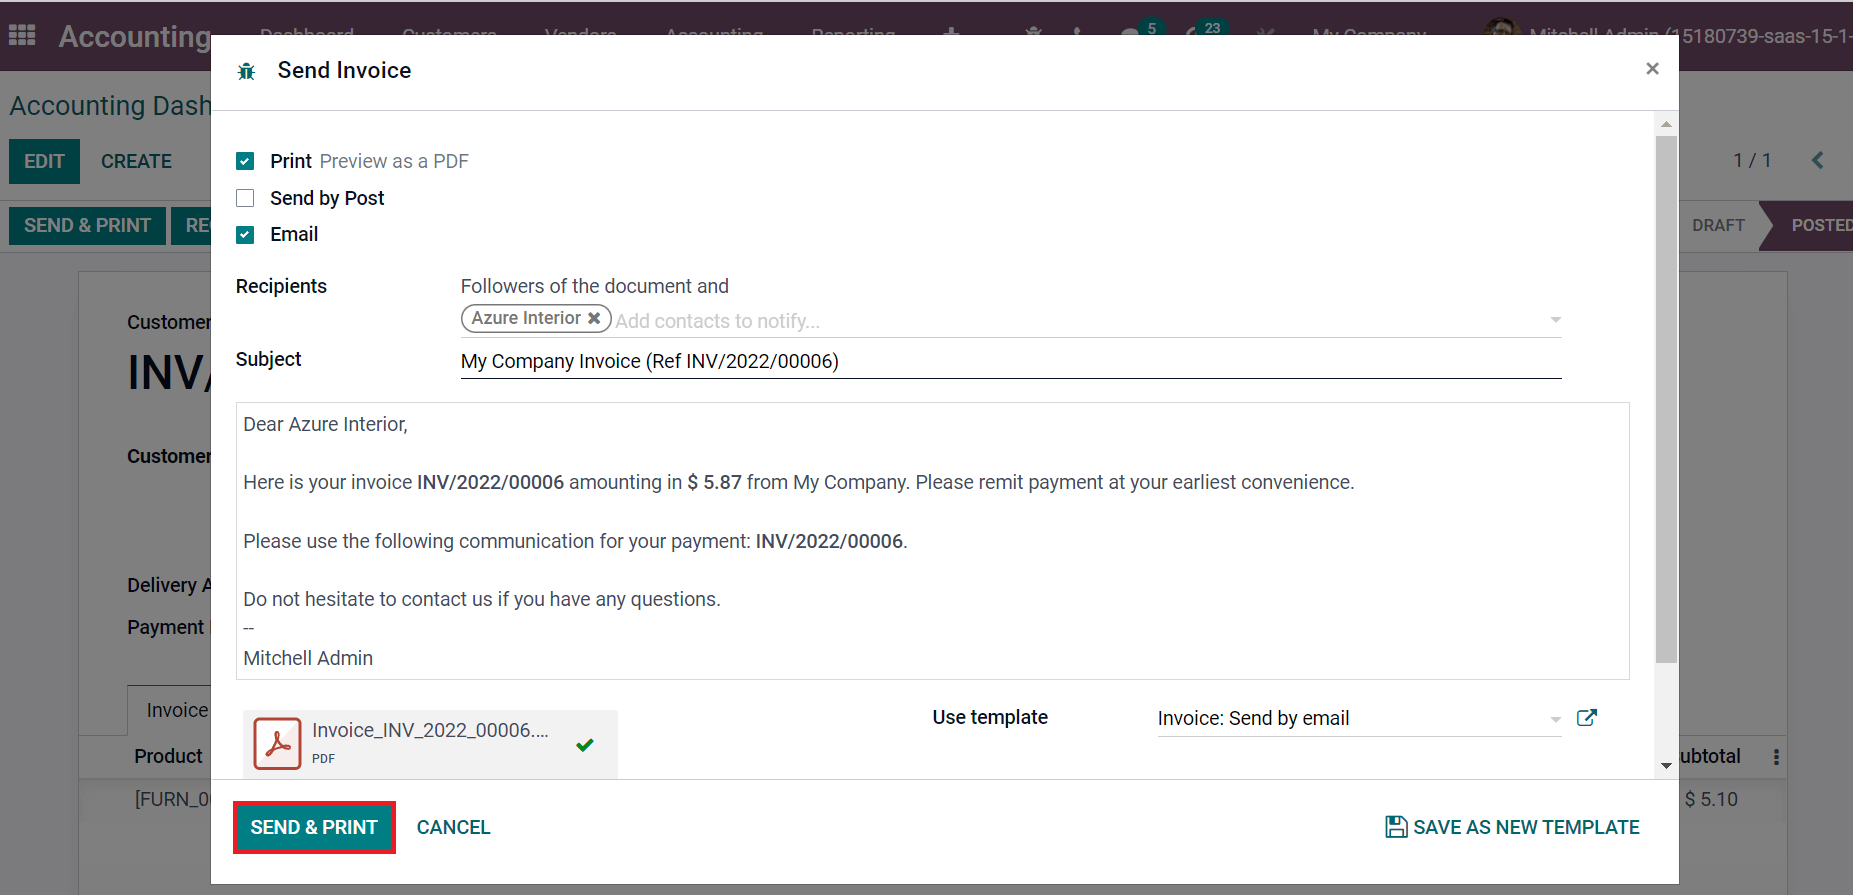
Choose your document followers inside the Recipients field, and the Subject is automatically visible here. Select the Send & Print icon after choosing your template. We can configure the document's layout after selecting the SEND & PRINT icon. In the new window, you can set document Layout as Light, Bold, Striped, and Boxed. Choose your Colors, Layout Background, and Company Logo for the document. Company Details are viewable on top of reports, and you can add Company Tagline displays in the top right corner of documents, as depicted in the screenshot below.
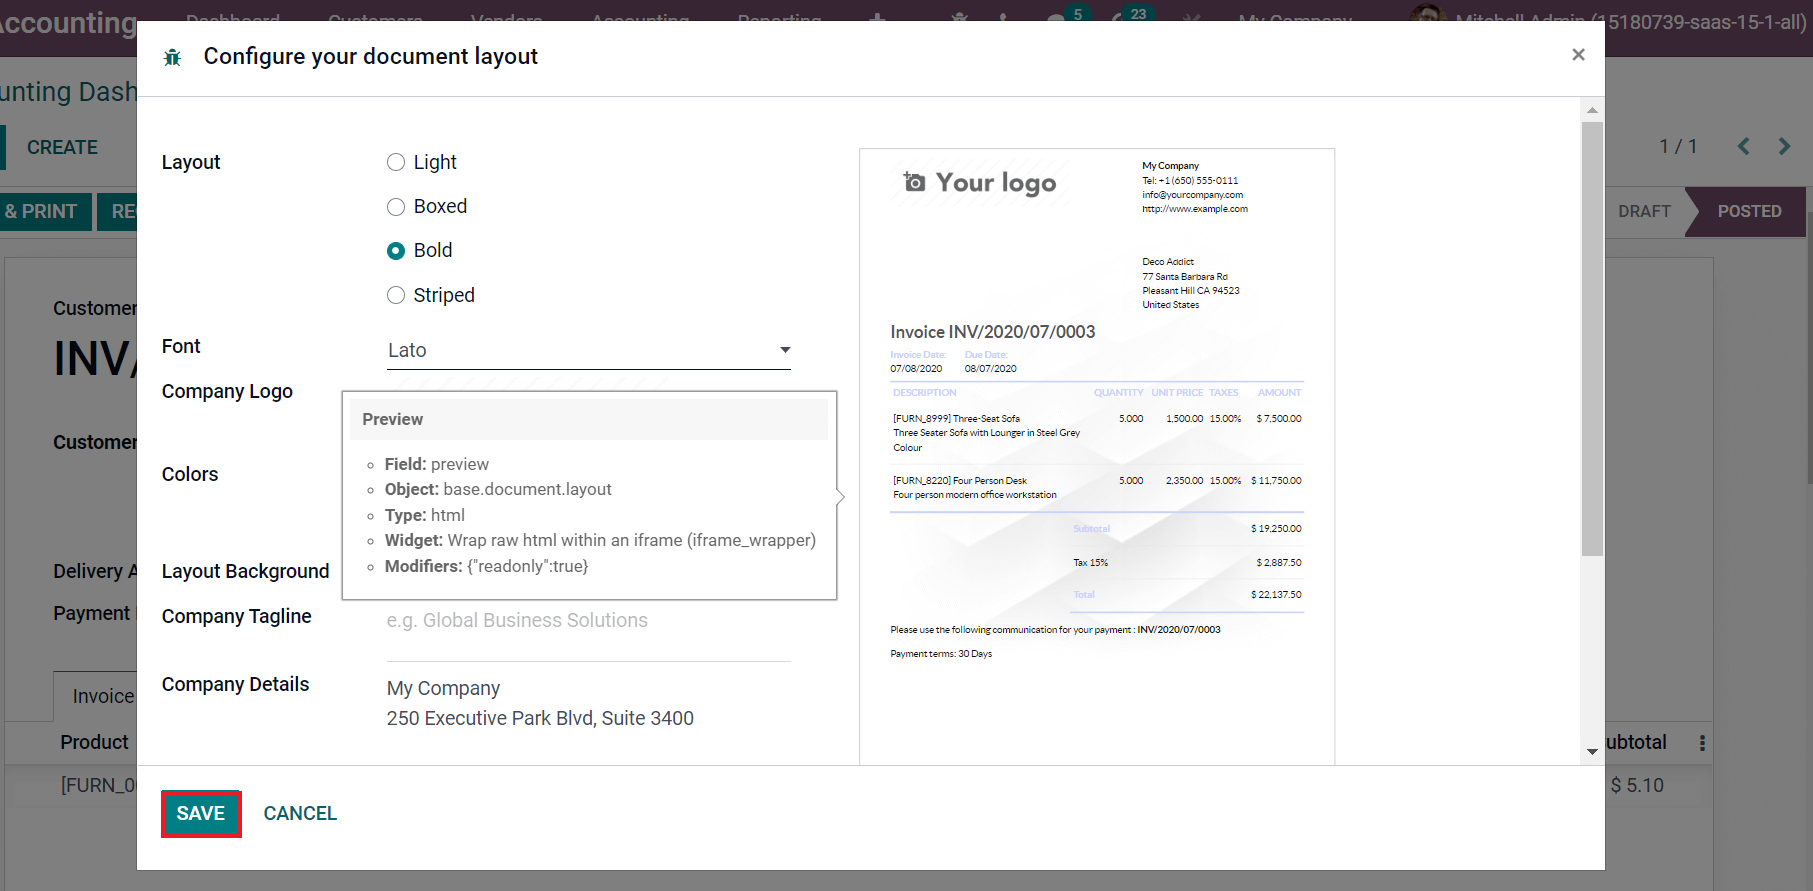
Select the SAVE icon to configure your document layout. Now, let's go back to the Odoo 15 Documents module and pick the Finance section from Workspace. You can see the created document in the Odoo 15 Documents module, as illustrated in the screenshot below.
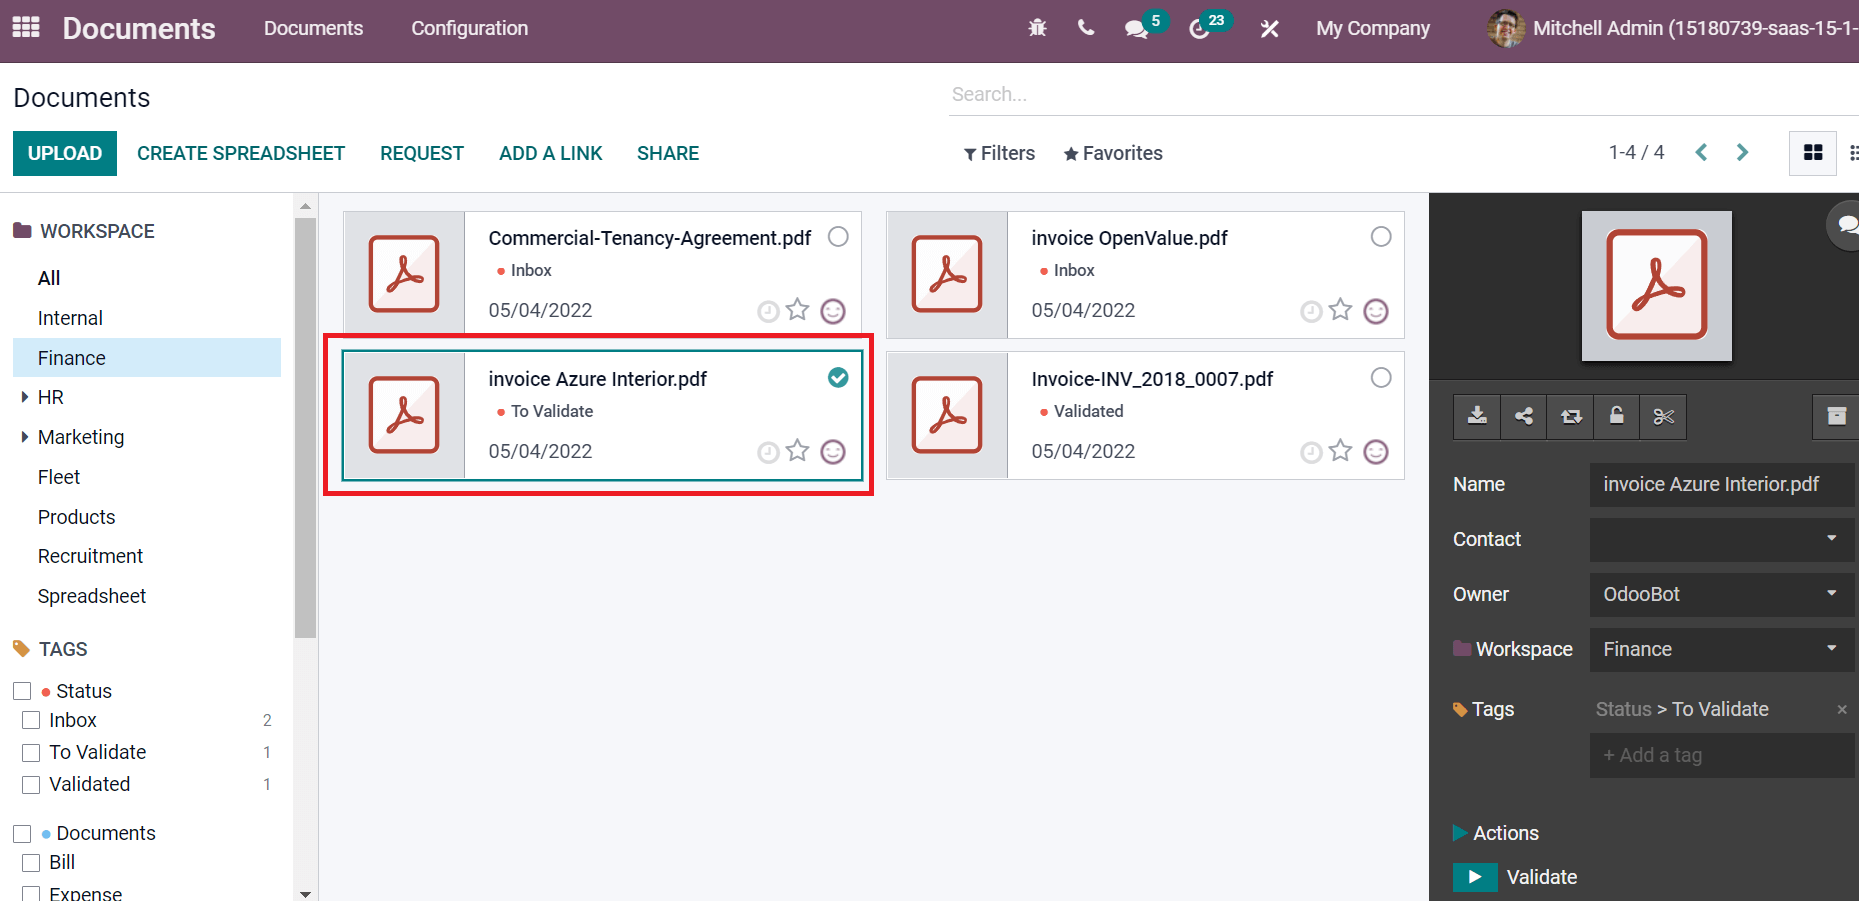
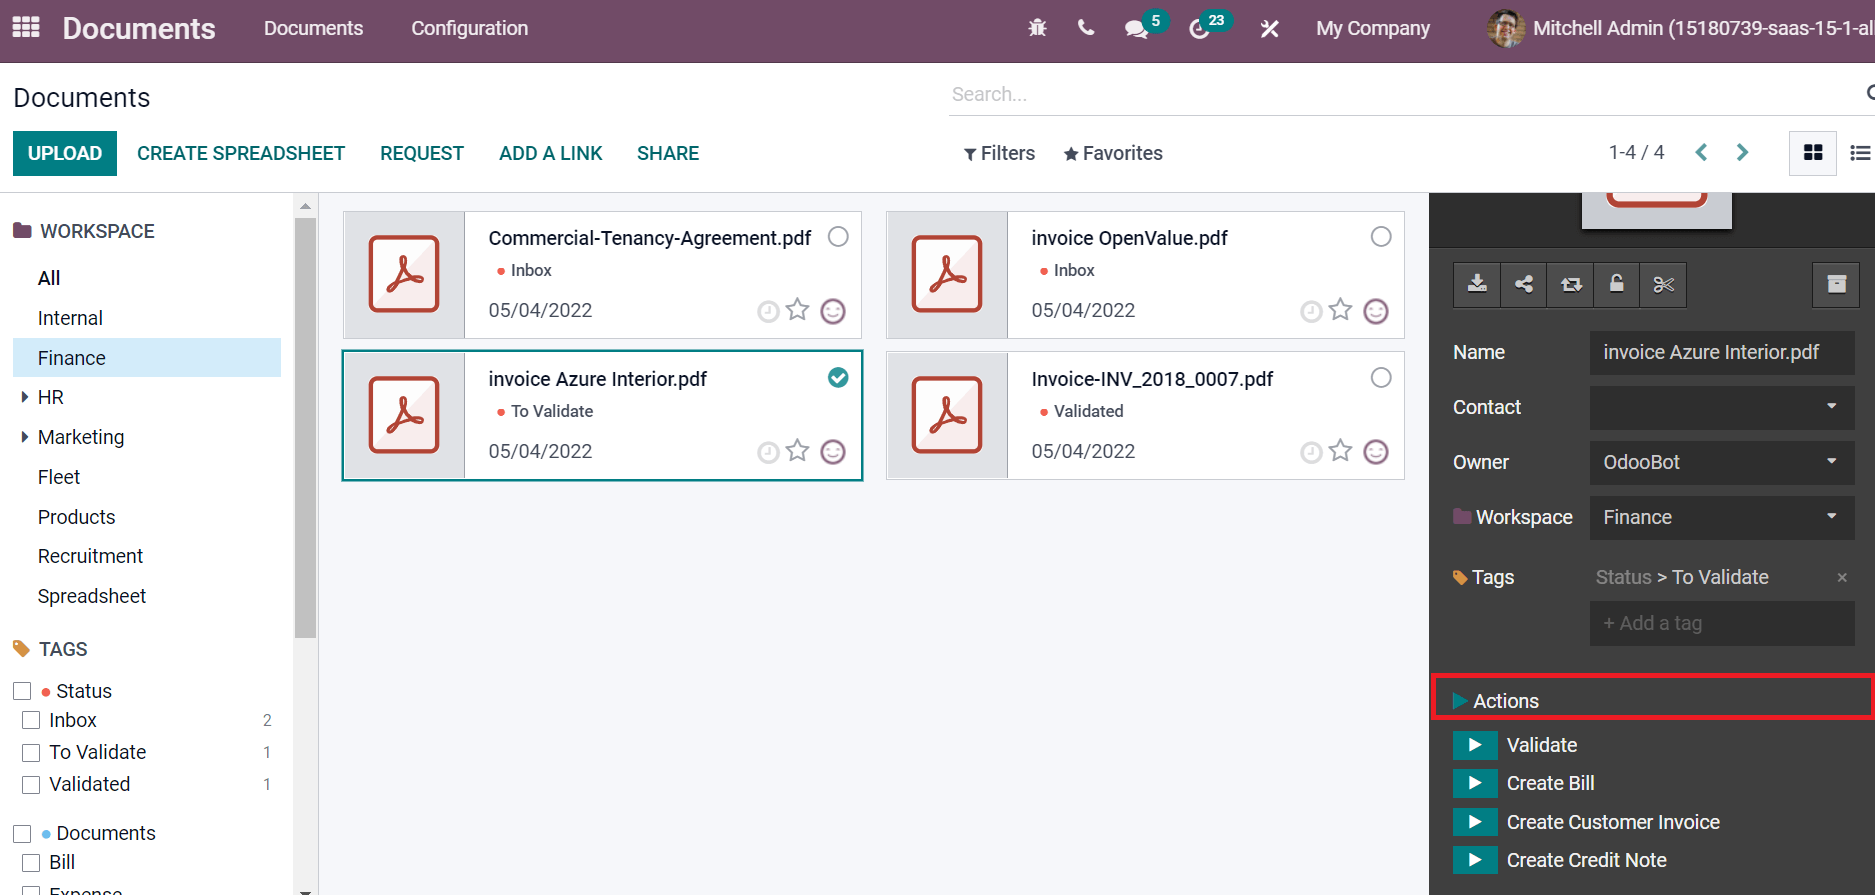
The customer invoice document displays in the Finance Workspace of Odoo 15 Documents dashboard. You can view the date, document name, and status from here. By selecting your document, all prior information is accessible at the box on the right side of the screen. Various icons, including Share, Replace, Split, Download, and Lock, are helpful for your document. Moreover, users can look at the Name, Workspace, Contact and Owner of the document. You can apply the necessary tags for the uploaded file. We can impart different actions for the document, such as Validate, Create Credit Note, Create Bill and Create Customer Invoice, as illustrated in the screenshot below.
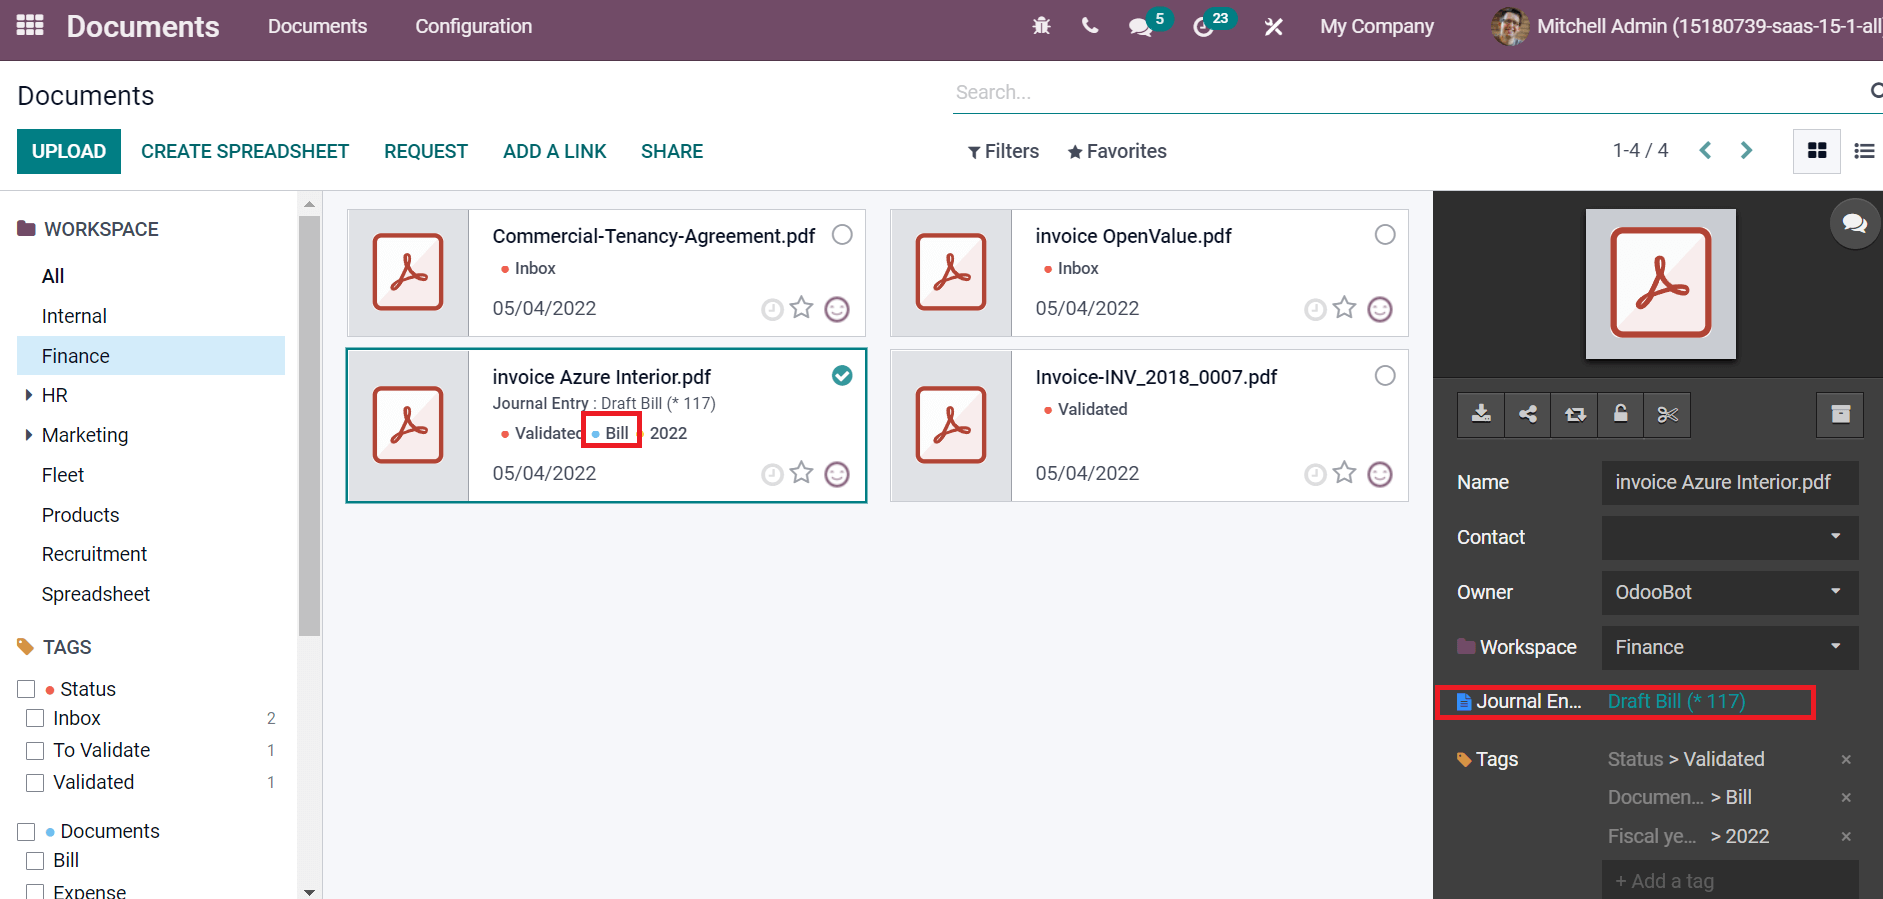
You can develop Bill for your document by selecting the Create Bill option. After generating a Bill, it shows inside the document box as Journal Entry, and the Bill tag is automatically applied to the pdf file.
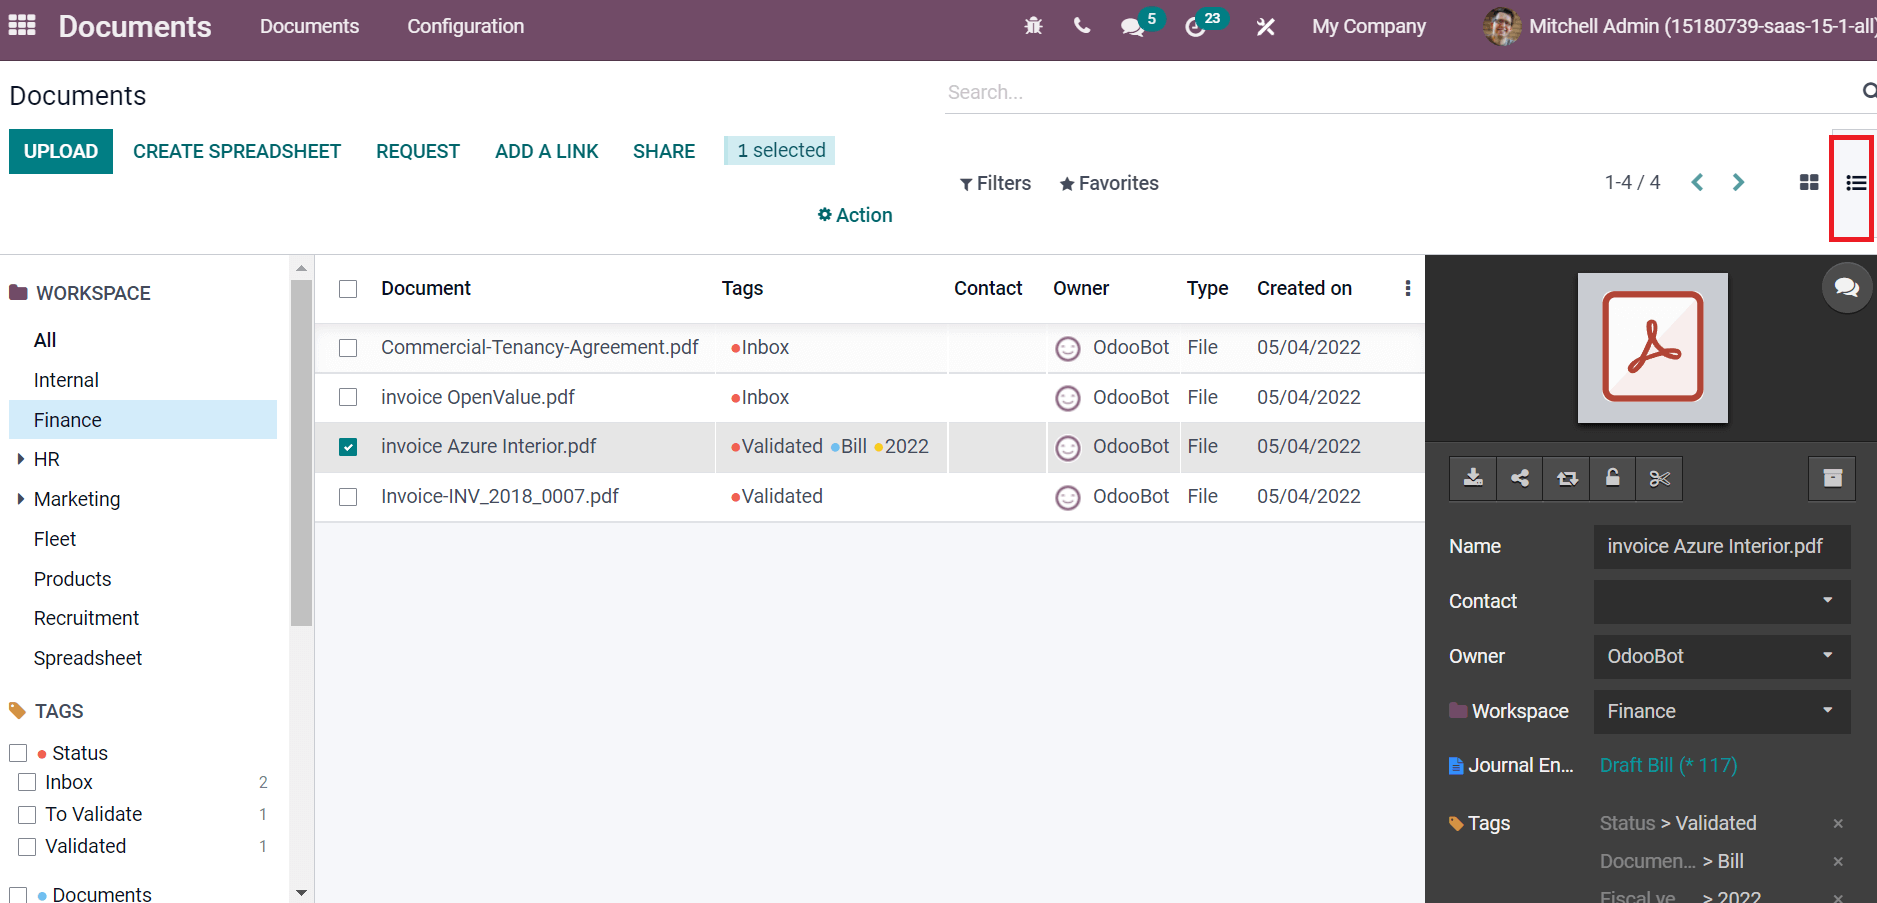
This way, users can implement credit notes, customer invoices and other data. The Documents window is also visible in the List format. Here, you can see each document's info, including Tags, Owner, Created on, Contact, Type and Document.
The Documents window shows all Workspace data and Tags on the left side. Users can create a new spreadsheet, add a link and upload a new file with the assistance of the Odoo 15 Documents module.
We can manage the Accounting documents in a firm using an Odoo ERP system. Users can view the accounting-related documents developed in the Accounting module in the Odoo 15 Documents module. The integration feature of Odoo ERP ensures the functioning of business quickly, and a firm achieves great success within less time.