A work schedule is a strategy that enumerates tasks in order to prioritize time and accomplish objectives. It describes the days, hours, and duties of an employee. It might be a written paper, a digital document, or an app for scheduling. Regardless of the size of the workforce or its composition (full-time, seasonal, or freelance), work schedules are crucial for effectively managing time and human resources.
In enterprises, scheduling tasks or activities may reduce stress and increase productivity. It improves decision-making and productivity while fostering a good work environment for employees. Important projects and activities may be prioritized with the use of a schedule, improving work management and efficiency. As it automates processes, improves the quality of work, and decreases errors, it also aids in decreasing mistakes and losses. Scheduling encourages task ownership by enabling workers to take action to finish their assignments on time. This increases employee engagement and accountability. Another advantage of scheduling is progress monitoring, which enables businesses to establish precise objectives and provide staff members with the flexibility they need to complete jobs and projects. Overall, scheduling is essential for increasing productivity and achieving a successful organization.
The Odoo 16 Calendar Module is a useful tool for organizing and scheduling meetings, appointments, and any other discussion-like activities inside a company. It may also be beneficial to business owners and also people with hectic work or life schedules. The Odoo 16 Calendar Module provides facilities that include;
*Organize meetings online to simplify scheduling and give clients the freedom to schedule sessions whenever it suits them.
*Add meeting links to websites, social media postings, and email signatures for simple scheduling.
*To provide flexibility, set working hours and change time-slot intervals.
*A Google Calendar synchronization will help you avoid scheduling conflicts.
*Users can quickly add and reschedule meetings based on availability, and automatic reminders are sent out.
In this blog article, we'll go over the steps involved in setting up a new online appointment and scheduling it using the Odoo 16 Calendar Module. You can immediately configure a new appointment using the “Configure” button provided inside the homepage banner illustrated in the screenshot below.

Odoo also provides a menu section to manage and schedule every appointment created inside the Calendar Module within the “Online Appointments” menu. Here, we are going to create a new appointment in the “Online Appointments” window.
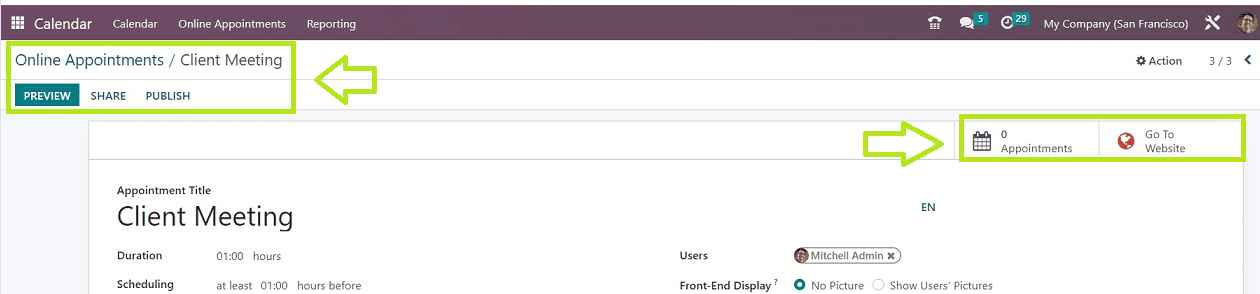
All of the appointments that have been previously created in this application are displayed in this window page's Kanban view arrangement. We will get a quick overview of each of the appointments through these Kanban Cards, including the Appointment Name, Duration, Number of Schedules, etc. You can check the appointment website preview using the “PREVIEW” button and share the appointment details using the “SHARE” button.
Creating a New Appointment
You can click on the “NEW” button to create a new appointment through the Odoo 16 Calendar Module. This action will open a configuration window, as shown below.
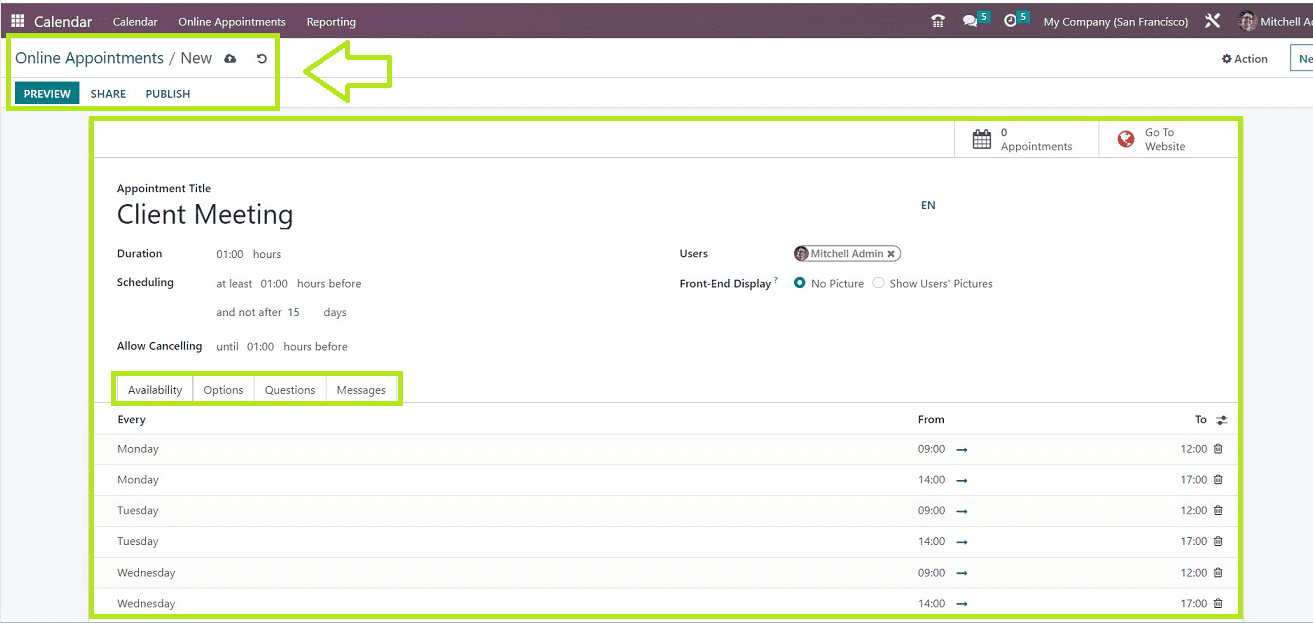
Inside the displayed form, enter your appointment name in the “Appointment Title” and “Duration.” According to the time needed for the appointment in the designated place, you can plan the meeting's “Scheduling.” To cancel the appointment within the allotted time, utilize the “Allow Cancellations” option. Mention the “Users” if required. The front-end display can be configured to show no photographs of the users or their photos. This configuration form contains some tab sections such as “Availability,” “Options,” “Questions,” and “Messages.”
Availability Tab
You can configure the appointment availability inside the “Availability” tab, as illustrated in the screenshot below.
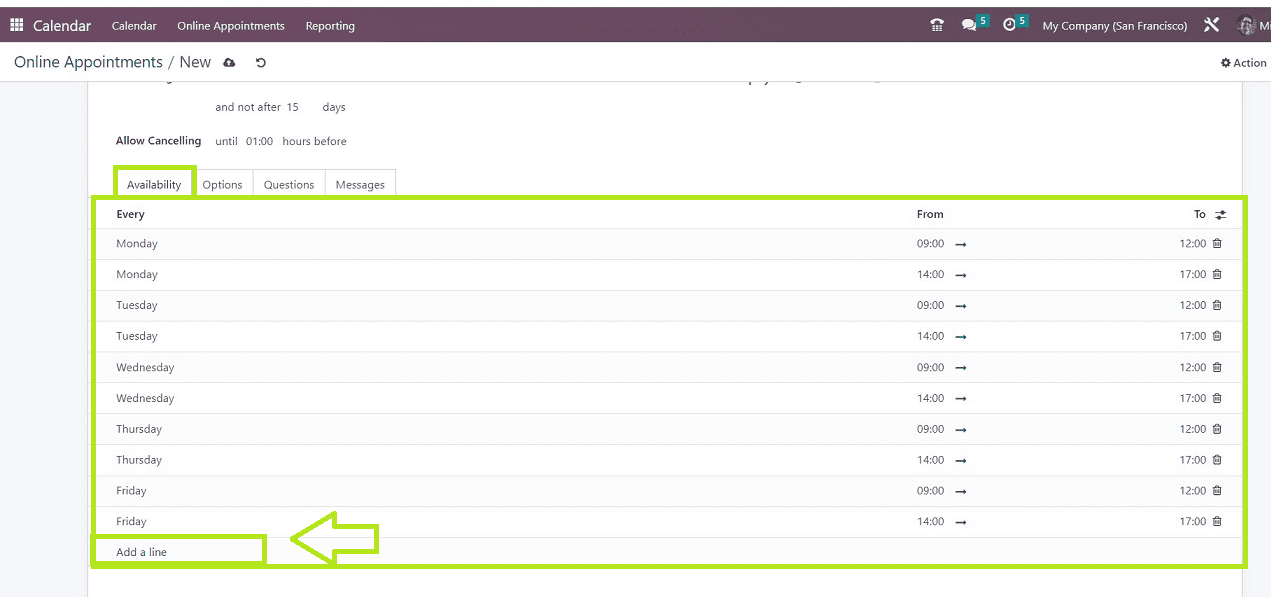
You can select any default availability days from the tab section or use the “Add a Line” feature under the Availability Tab to specify the appointment's available days of the week.
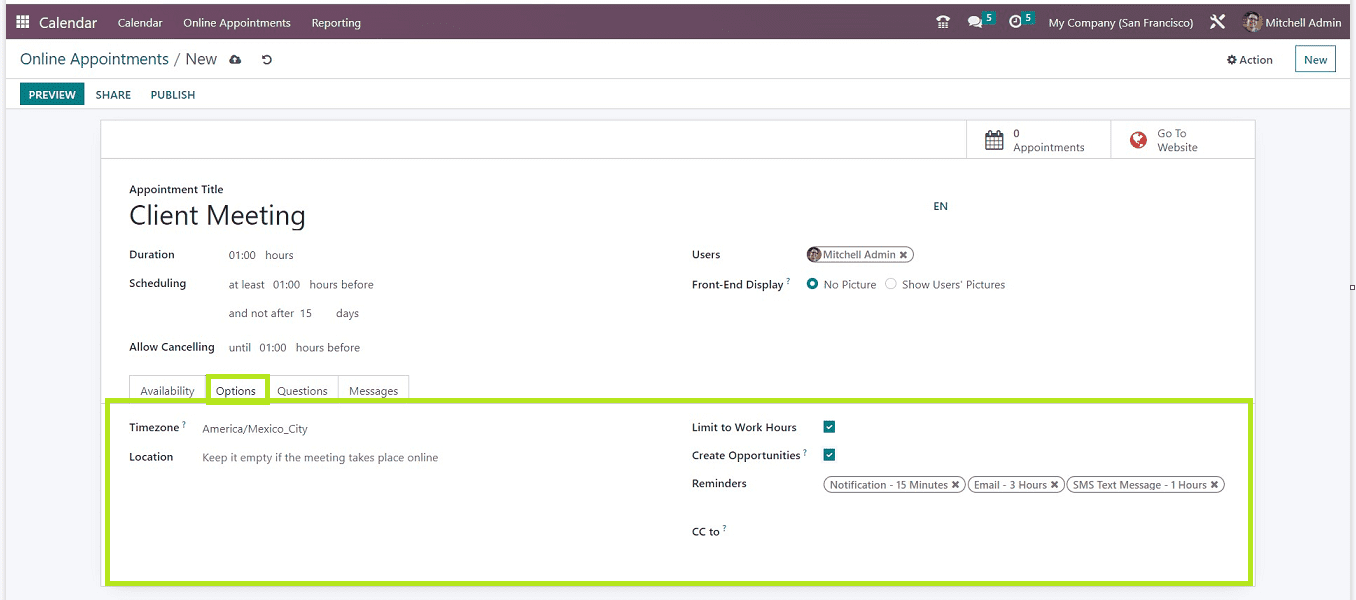
Options Tab
You can choose parameters like “Timezone,” “Location,” the ability to “Limit to work Hours,” the option to “Create Opportunities,” and the option to add “Reminders” in the designated places under the “Options” Tab. You may also choose to send the appointment to the person you specified in the ”CC to” field.
Questions Tab
You can configure the questions related to the appointment inside the “Questions” tab.

To add any questions regarding the appointment, please click on the “Add a line” option found inside the “Questions” tab. The “Add a line” option will open a small popup window, as illustrated below.
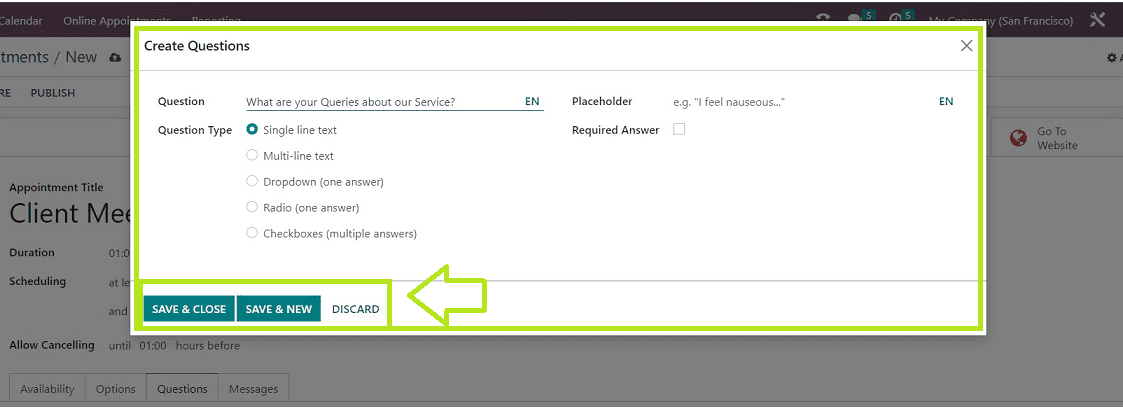
This form will help you to add the question inside the “Question” field, and you can also select the “Question Type” as per the requirement from a list of options such as Single line Text, Multi-line text, Dropdown(one answer), etc. it is also possible to add a customized text for the “Placeholder,” and Additionally, you can choose "Required Answer" to make responding to the questions mandatory for the appointment. Use the "SAVE & CLOSE" button to save the questions or the "SAVE & NEW" button to add an additional question.
Messages Tab
In this tab section, you can add any messages based on your upcoming appointment, The option enables you to provide an “Introduction Message” and an “Extra Message On Confirmation.”

You can use the Save icon after the creation procedure is complete. After saving the details, you can check the website preview of the appointment by clicking on the “PREVIEW” button.

In the screenshot above, you can see the appointment page preview. You may schedule the meeting by selecting the available day and time from this page. By pressing the "SHARE" button, sharing the appointment is simple.
You will receive a share link from the popup window that is opened when you click the "SHARE" button, as shown below.
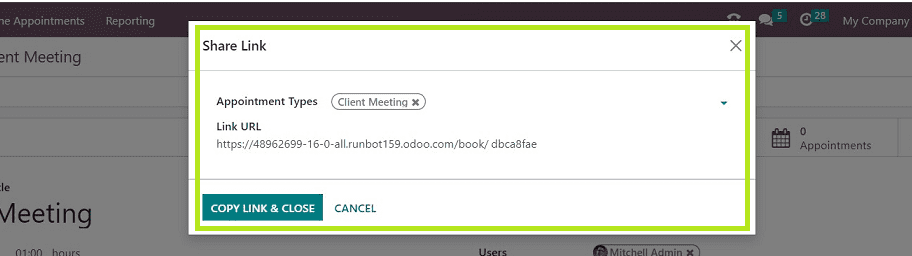
Any Odoo platform can be used to disseminate the link once it has been copied. To publish the appointment, you can use the “PUBLISH” button. The "Appointments" smart button on the configuration form itself will instantly display the number of appointments, and you can use the “Go To Website” smart button to enter the appointments webpage.
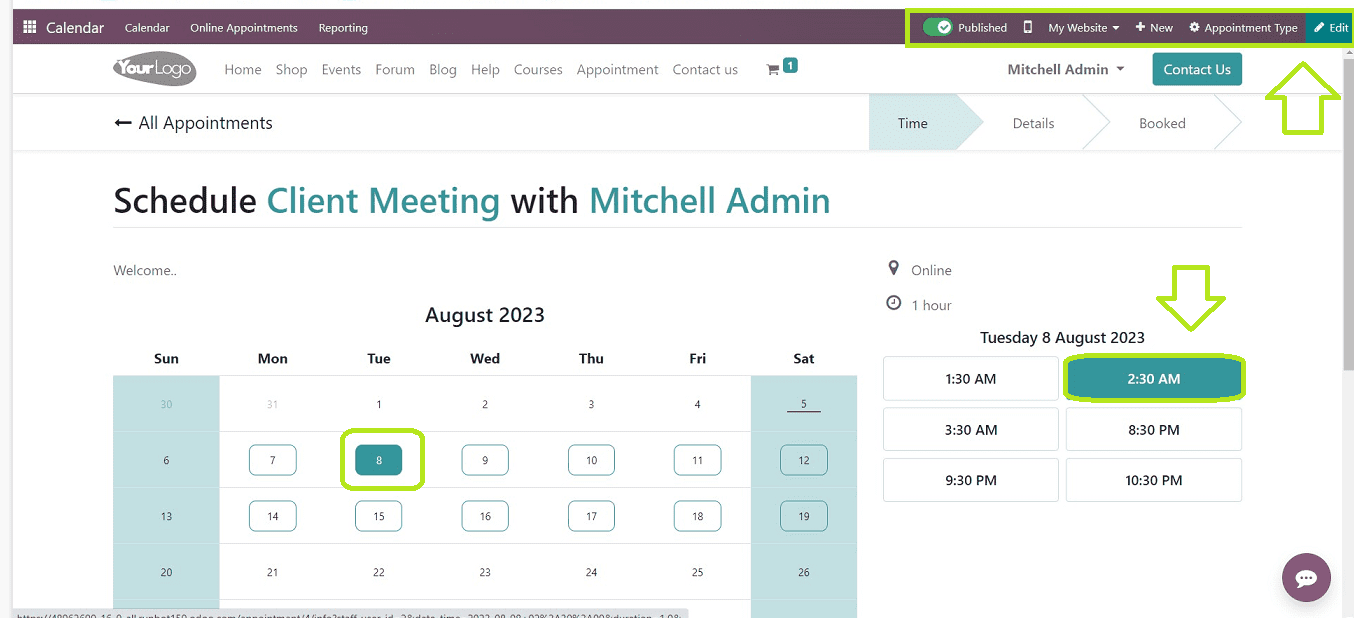
Using the different editing tools and facilities available in the "Edit" area of the website menu, you may modify the displayed web page's appearance and design. Using the "Publish & Unpublish" button from here, you can also publish and unpublish the webpage.
Scheduling an Appointment
By choosing a suitable day and times from the calendar and date facilities supplied by Odoo, as shown in the above image, we can easily schedule the appointment using the website interface of the newly formed appointment.
After choosing the Date and Time, you will be sent an appointment request form, as shown below.
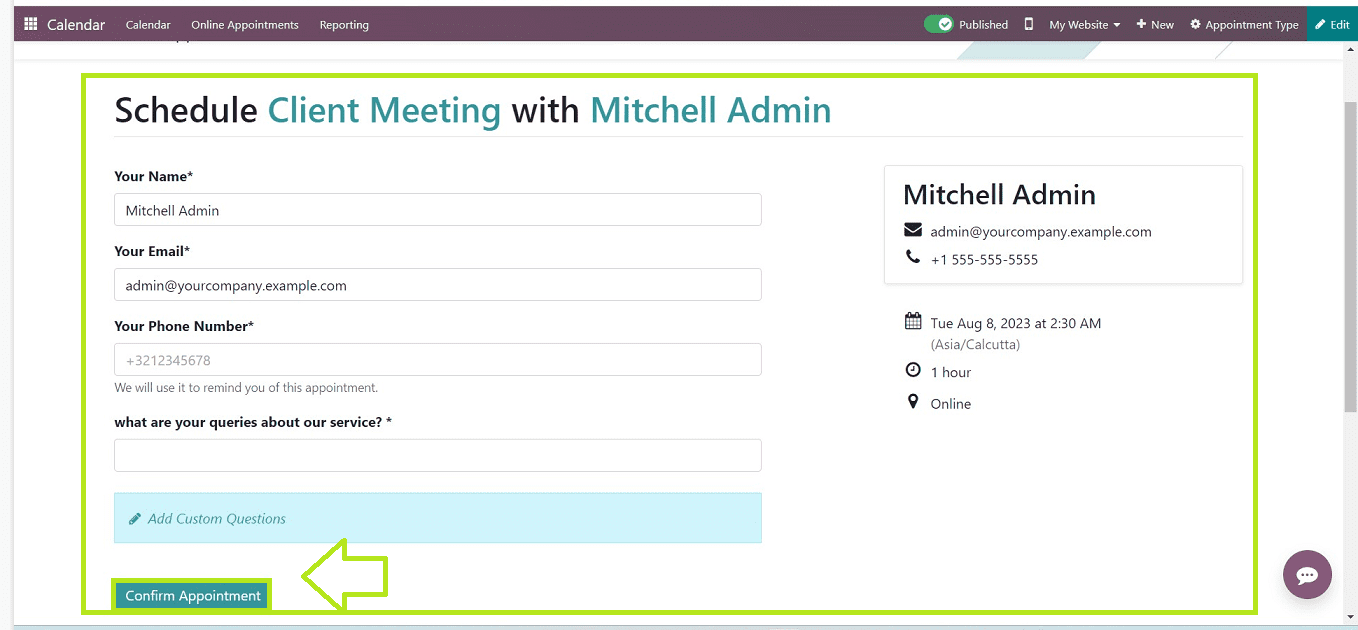
The administrative users can also add extra questions from here using the “Add Custom Questions” option found under the application form. Website visitors or users can fill out the appointment form details from here and click the “Confirm Appointment” button to ensure the schedule. The appointment will be booked, and a new window will be displayed as shown below.
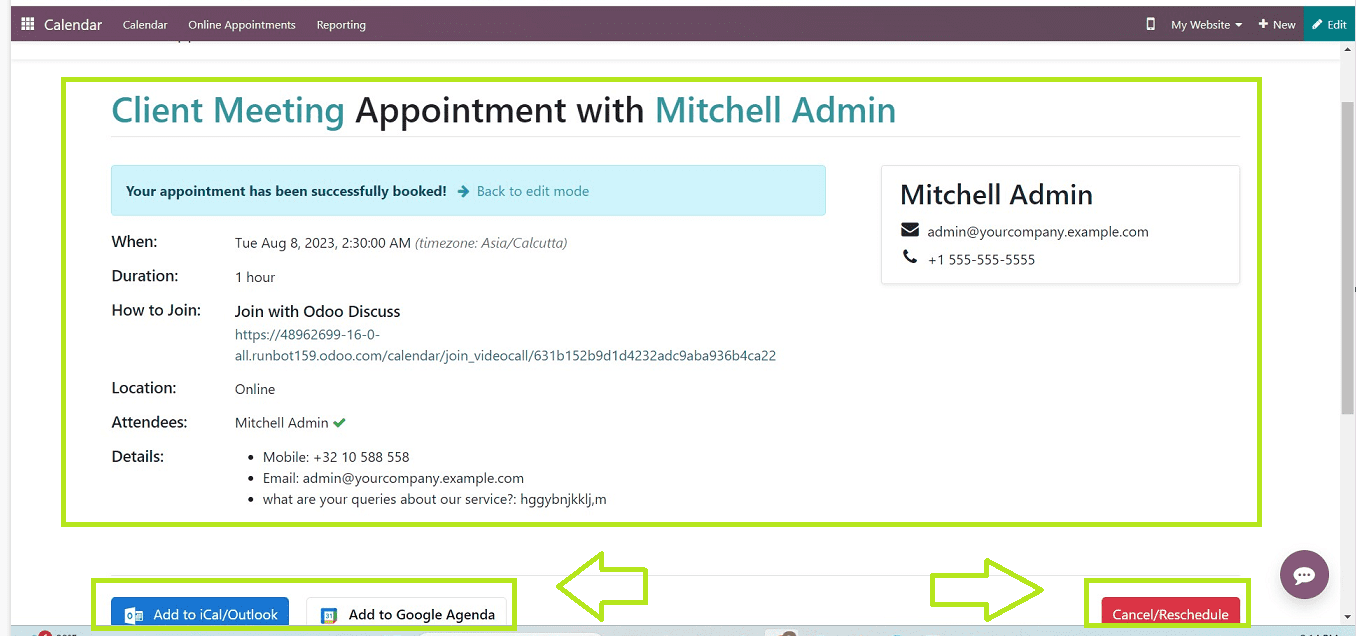
Integrations and Rescheduling
With the joining URL for the online meeting, you can review the appointment details, such as the Time, Date, Duration, Location, Attendees, etc. you can add the meeting to iCal or Outlook and Google Agenda using the “Add to iCal/Outlook” and “Add to Google Agenda” buttons, respectively.
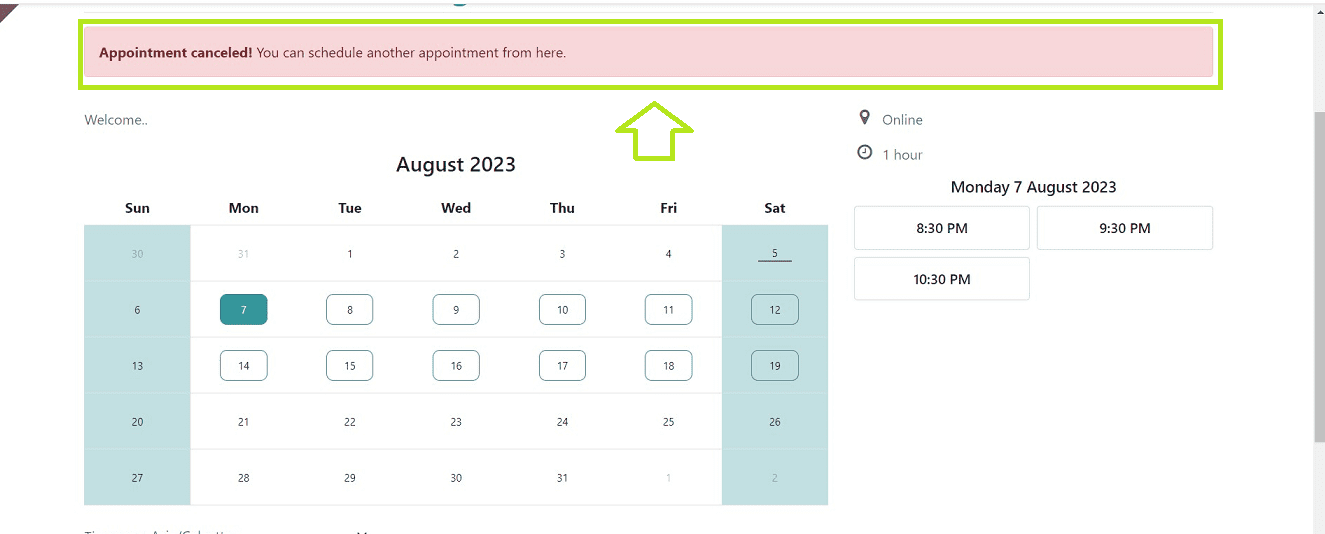
The "Cancel/Reschedule" option on the Odoo Calendar website interface enables users to cancel or reschedule their appointments conveniently. If you click the button to cancel the appointment, a notification will appear at the top of the page, and the appointment will be canceled. Then, using the procedure we covered above, you can cancel or reschedule with a different day and time.
This Odoo Application offers a thorough and practical approach to handling every aspect of schedule management.
The whole procedure for Creating, Scheduling, and Canceling or Rescheduling an appointment using the Odoo 16 Calendar Application feature set has been described in this article on our website. With the help of this blog, you should be able to comprehend the features and functions of the Application more clearly.