A sales quote is a document that gives customers access to the price of particular services or goods. Usually, suppliers or resellers utilize it to start a commercial transaction. A professional sales quote provides a detailed breakdown of the goods and services offered, together with the associated costs and payment arrangements. It is an official declaration that the buyer requested; it is not a binding agreement. The consumer agrees to purchase the item at the agreed-upon price after acceptance.
With the help of the newly released Odoo 17 Sales Module, Users or Companies can make reusable quotation templates for their popular products or services, enabling them to provide clients with faster, more customized quotations without constantly producing new ones. Thus, this platform simplifies the process of generating quotations for clients by enabling users to specify product data, sections, and notes. Users can also rapidly calculate the total cost of a quotation order by minimizing the time-consuming operations of quotations.
This blog will give insight into the process of adding Products, Sections, and Notes in a Sales Quotation Configuration form in the Odoo 17 Sales Module.
Creating a New Product for Sale
Before generating a new quotation, it is vital to determine the products that should be included in the quotation. You can select the necessary goods from your product inventory. In Odoo Sales, this can be accessed from the “Products” window of the “Products” menu.
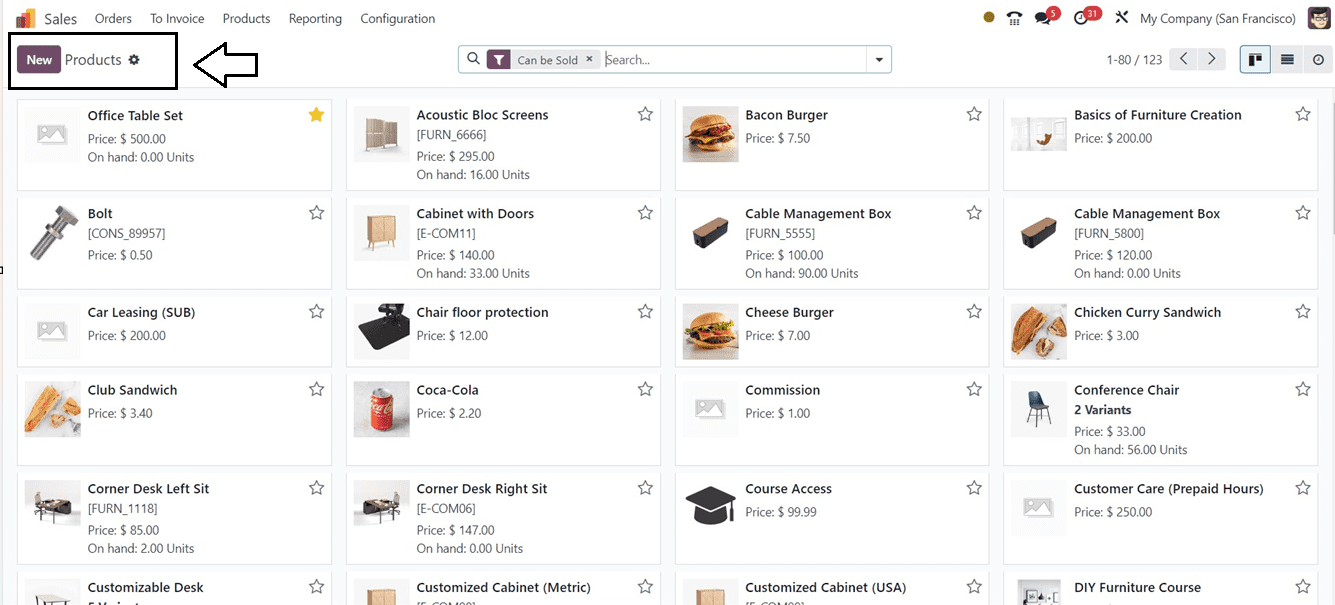
Here, I have created a new product to demonstrate the process by pressing the “New” button.
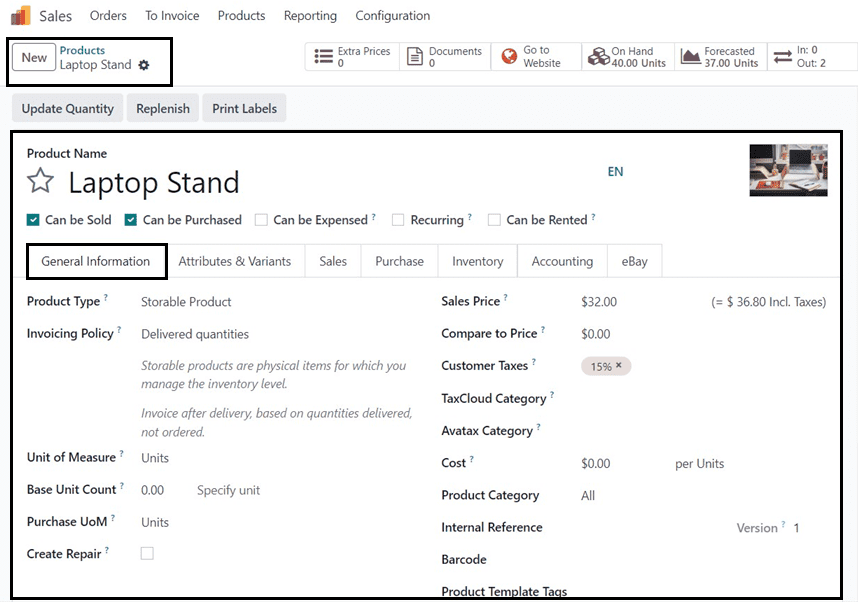
Enter your “Product Name” in the displayed form, click on the star symbol, and add a product image as the basic step of configuring a new product. In the “General Information” tab, you may apply basic information about the product. To manage inventory levels, choose “Storable Product from the “Product Type” drop-down menu and choose “Ordered Quantities” as the “Invoice Policy.” Mention the total price of the item in the “Sales Price” area. Add the relevant product details to the form's other tab sections, then save the information. Let us now utilize this product to build a new quotation.
Creating a new Quotation
Choose the “Quotations” option from the “Orders” menu to create a new quotation.
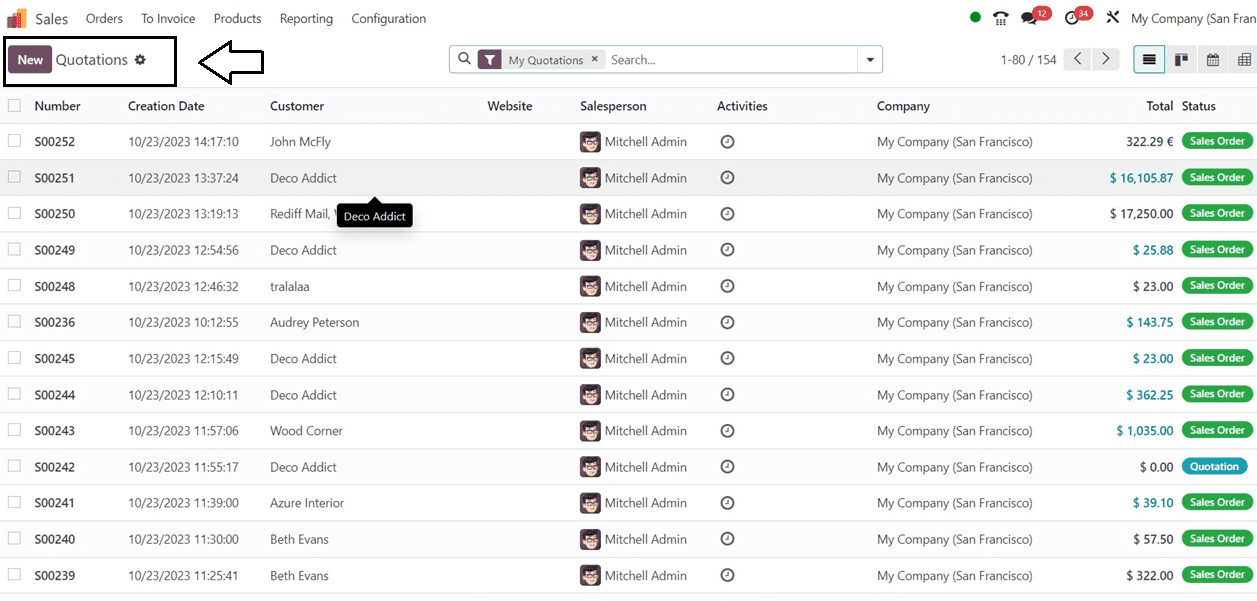
From the “Quotations” dashboard, create a new quotation using the “New” menu and start editing the form fields.
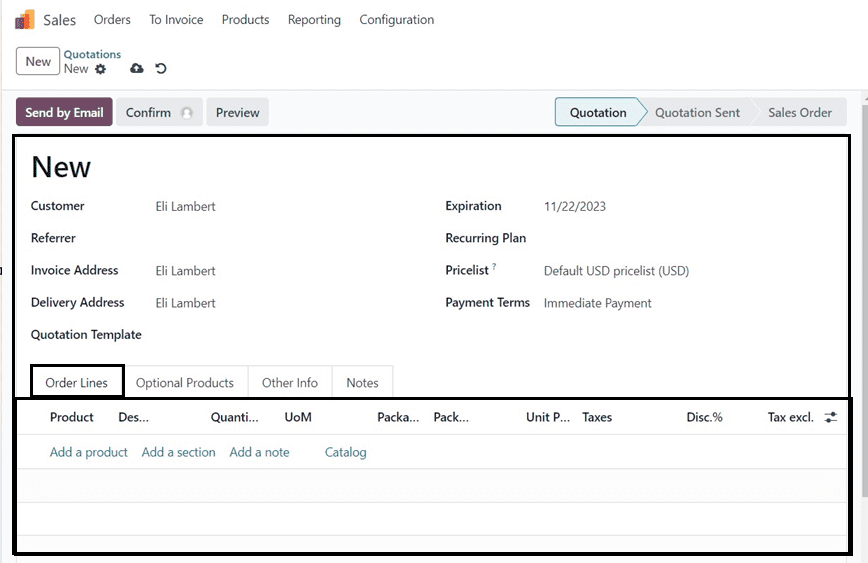
Choose or edit the customer name in the “Customer” field, and the relevant address has to be provided inside the “Invoice Address” and “Delivery Address” fields. Specify the expiration date in the "Expiration" option and the quote template in the "Quotation Template" field.
You can choose a recurring plan in the “Recurring” field. The “Pricelist” and “Payment Terms” can be configured as per the specified quotation.
Adding Products, Sections, and Notes
The “Order Lines” tab will allow you to manage Products, Notes, and Quotation Sections. Selecting the “Add a product” option will allow you to add a new product to a quote. Choose the newly formed product ‘Laptop Stand” from the product inventory.
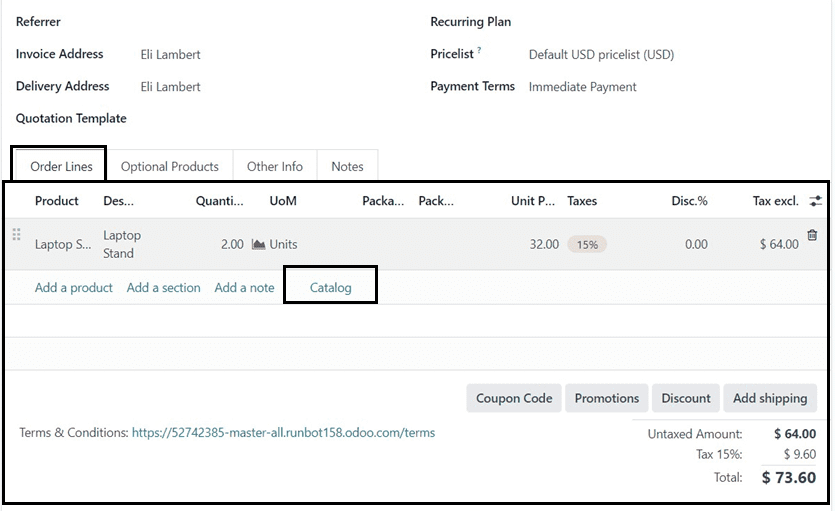
You can type the product name or choose from the dropdown list provided under the “Product” field after pressing the “Add a product” button or directly select the products from the product catalog window.
Adding products from a Catalog: just click on the “Catalog” button provided inside the “Order Lines” tab and select the product from the dashboard window as shown below.
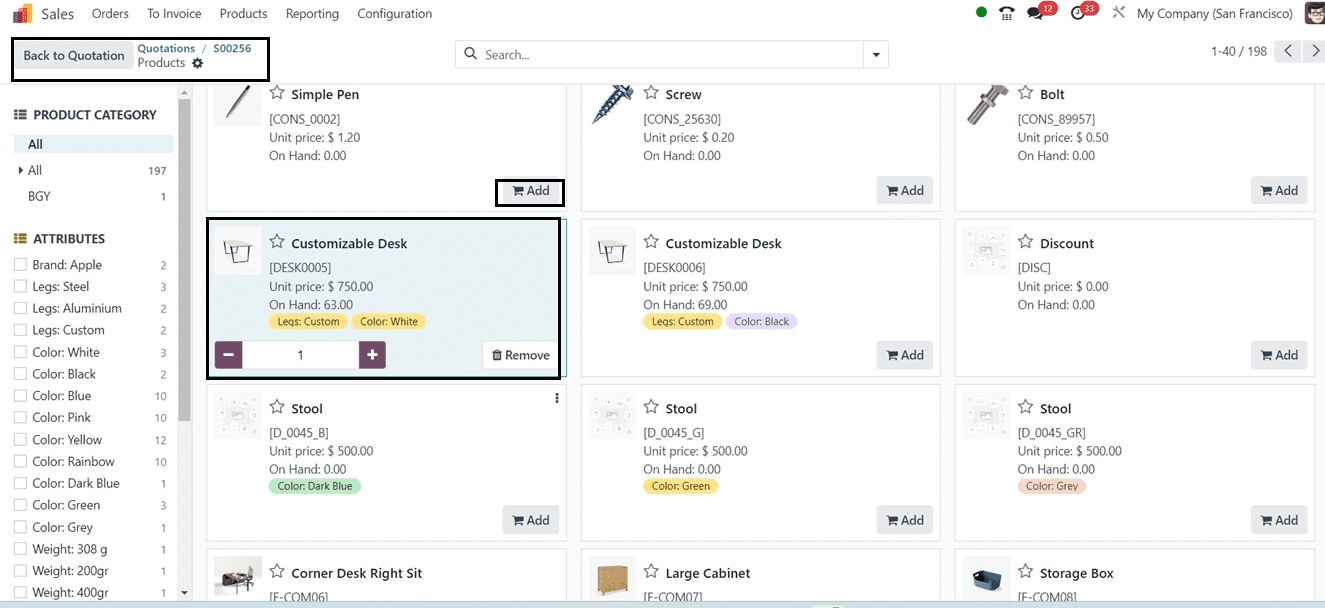
Use the "Add" button in each Kanban view to add goods to a sales order. The quantity of the product can be entered inside the designated area by pressing the “+” and “-” symbols. The item may be removed by clicking the "Remove" button, and then you can go back to the form view by clicking the "Back to Quotation" button.
Adding Sections
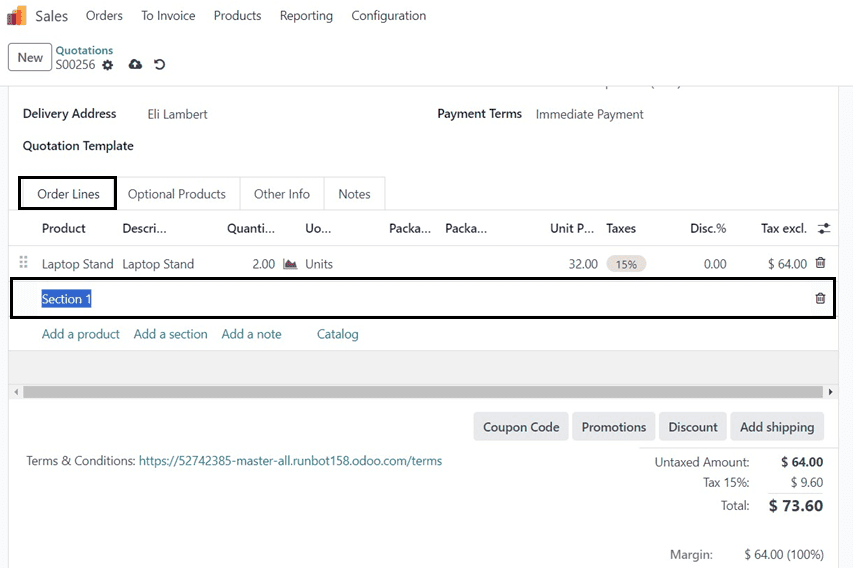
By selecting the “Add a Section” option, a new section may be created. In the blank field, type the section's name.
Adding Notes
Click the “Add a note” button under the “Order Lines” tab to add a note to a quotation. Then, you can edit the product information in the blank space displayed by this action, as seen in the screenshot.
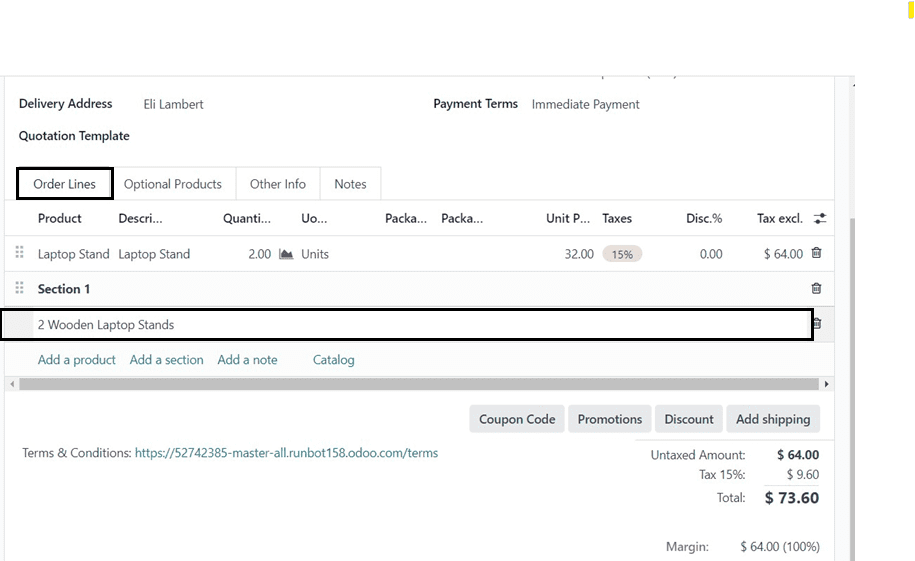
In the same way, I am adding another product named “Customizable Desk” and also adding its sections and notes.
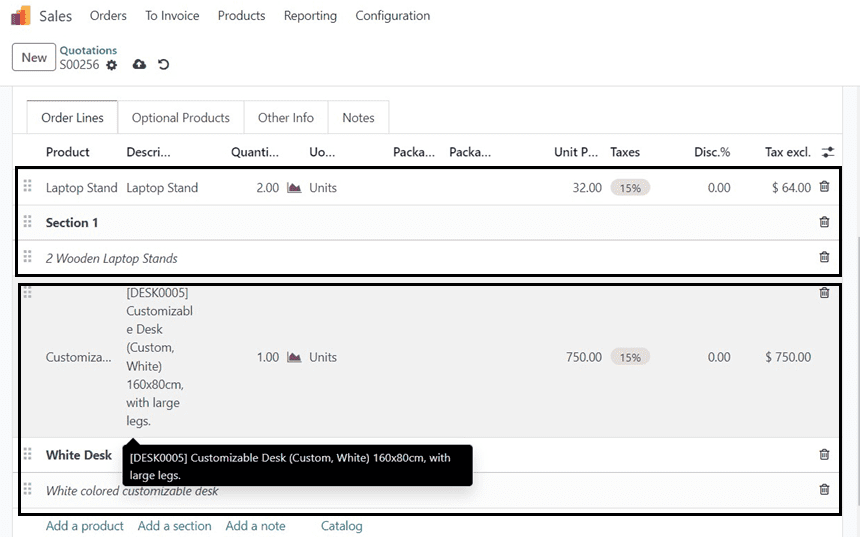
You can see the Product Sections in Bold letters, and the “Notes” will be shown in Italic fonts. Save your data after providing the required data.
Reviewing Quotation Subtotals
After adding the products to the “Order Lines” tab, you can view the product subtotal amount under the “Order Lines” tab as shown below.
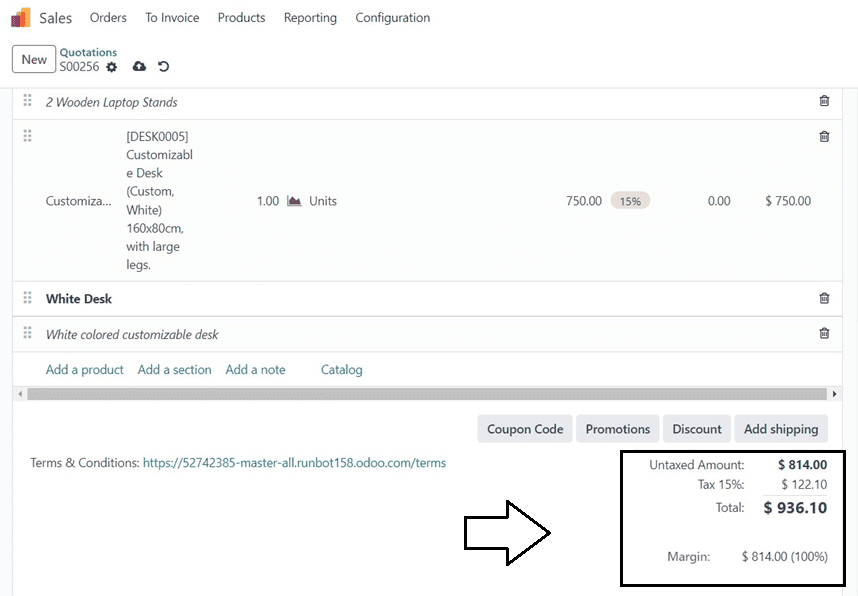
Adding Optional Products and Altering the Subtotals
You can include more products inside the "Order Lines" page itself if you wish to include extra or inside the quotation. Also, you can add the related products to the main products inside this quotation. This can be added in the same way as previously stated by selecting the "Optional Products" tab.
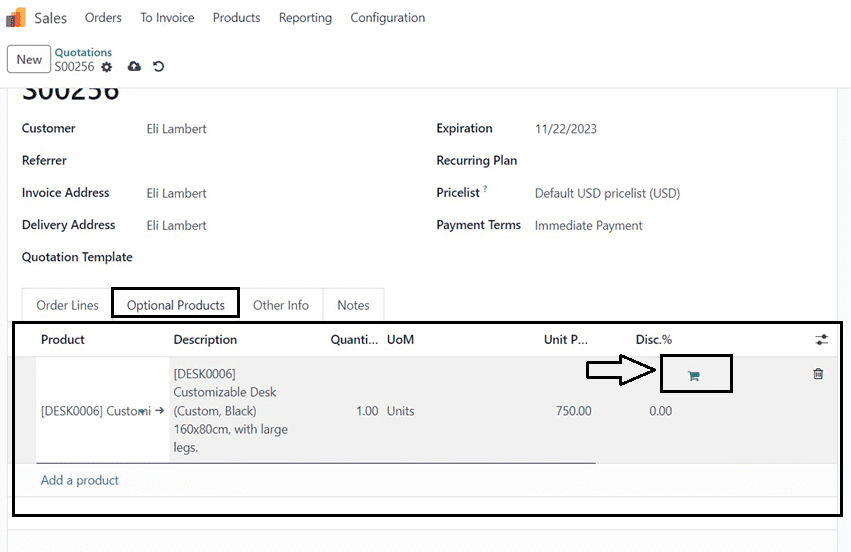
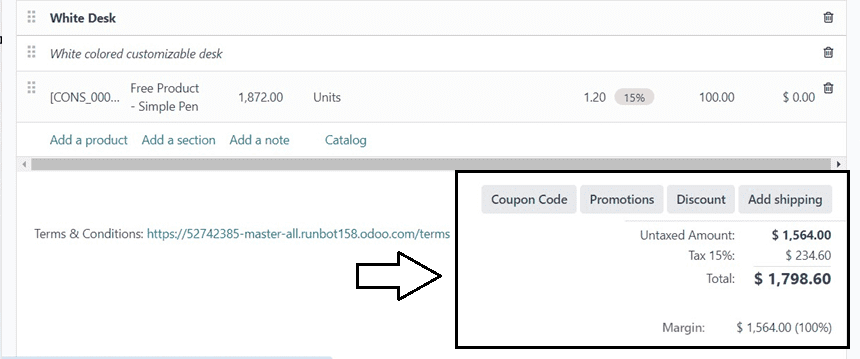
Product sections and remarks cannot be added to the "Optional Products" tab. Only after you choose the "Add to order lines" option, represented by a shopping cart icon, will the invoice for this product be included in the subtotal area. Now, the cost of the optional product is added to the previous subtotal, as depicted in the screenshot below.
Applying Coupon Codes, Promotions, Discounts and Shipping Charges
After adding the products and completing the file editing, you can apply the coupon codes and promotions to pay the quotation invoice inside the form view itself. Setting the discount rates and adding shipping charges for the order can also be done using the “Discount” and “Add shipping” buttons.
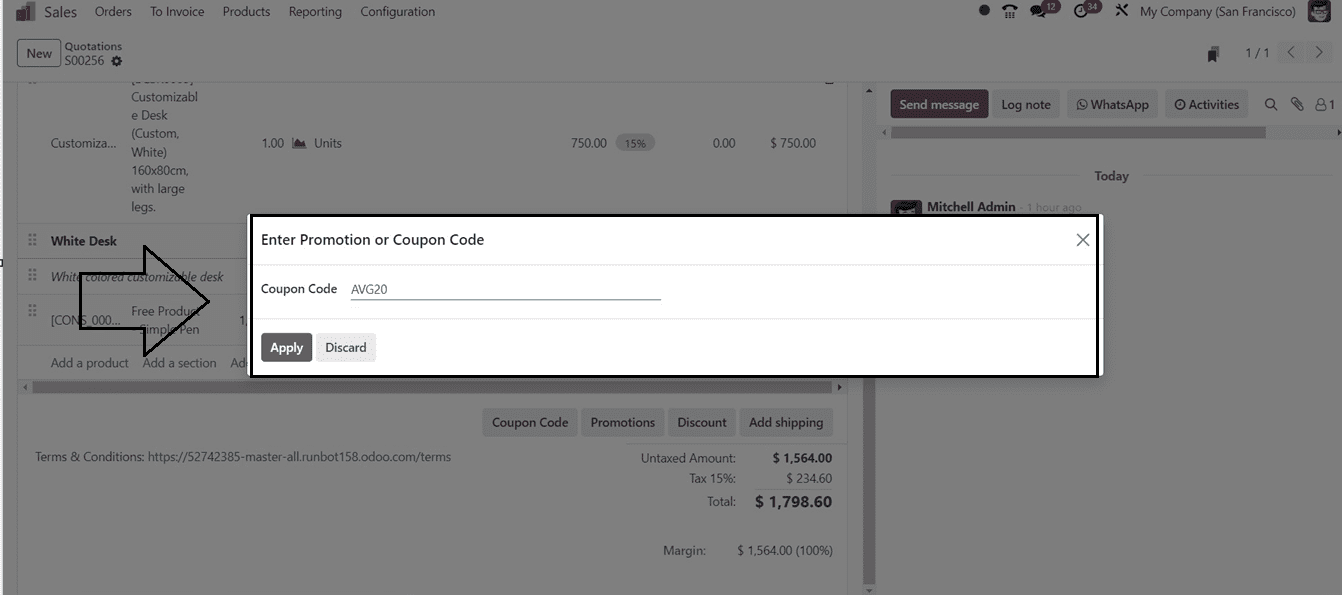
Pressing on the “Coupon Code” button above the subtotal section will open a pop-up window, where you can enter the coupon codes and apply them to your invoice by hitting the “Apply” button.
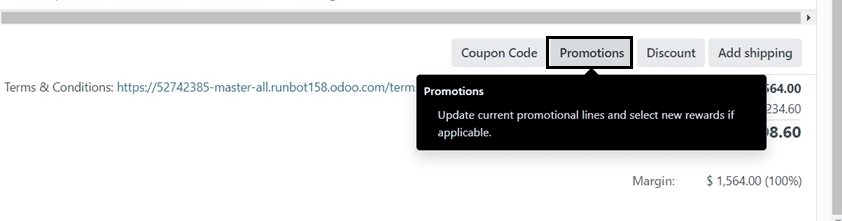
Clicking on the “Promotions” button will display a flash pop-up, as shown below. Then, you can apply the promotion code from your rewards section during checkout.
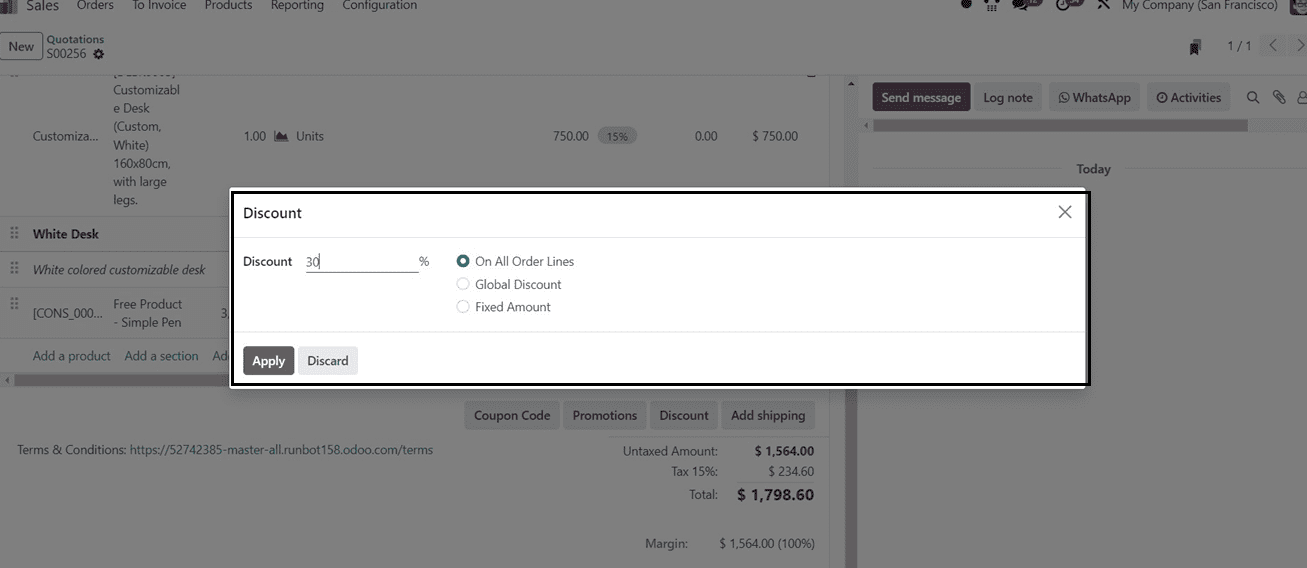
The “Discounts” button will open a pop-up window where you can set the percentage of the discount price and also choose any one of the conditions according to your business norms, as shown below.
The shipping charges for this quotation order can be set inside the pop-up window that is displayed after pressing the “Add shipping” button.
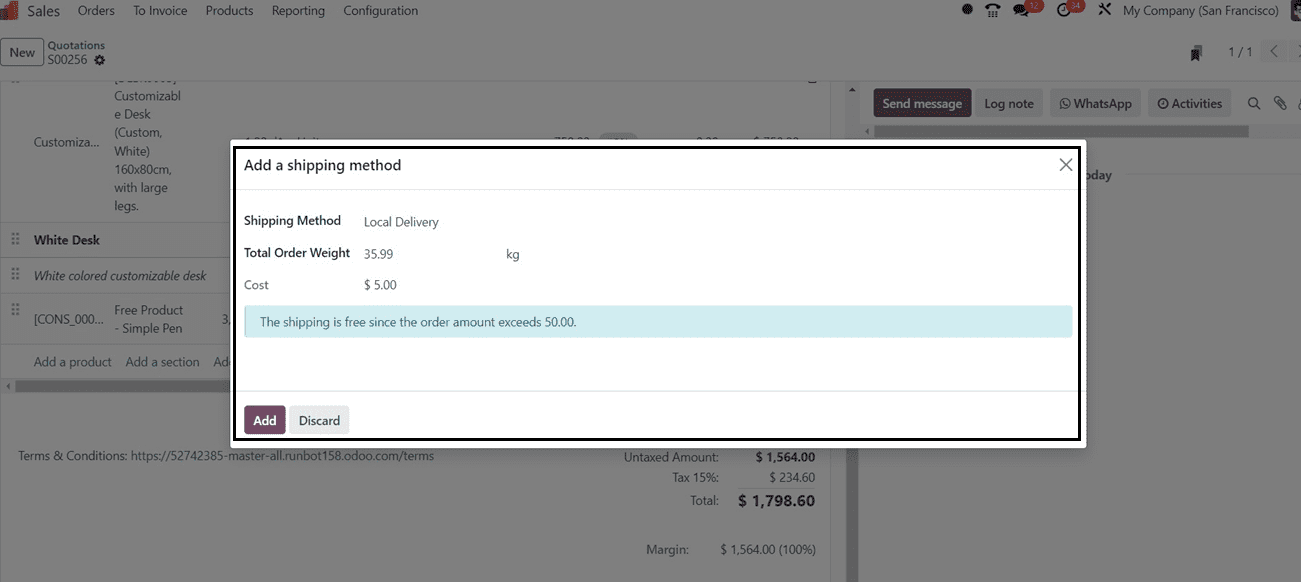
The "Shipping Method" section has a drop-down list from which you may choose your shipment option. It is possible to add different shipping charges for different shipping methods such as Standard Delivery, Local Delivery, The Post, DHL US, DHL EU, etc.
The “Total Order weight” of the products that come under the shipping charge and the shipping cost can be specified inside the relevant fields, and press the “Add” button to apply the shipping charges inside the quotation invoice.
After applying the promotions, coupons, and shipping charges, save the changes inside the Quotation configuration form, and you can proceed with the next steps, such as confirming the quotation, Invoicing, etc.

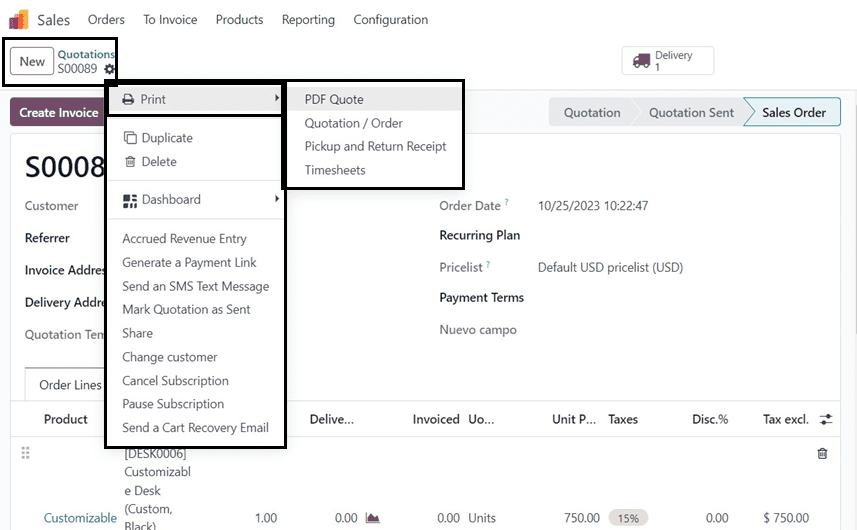
You can see the quotations delivery details from the “Delivery” smart button located at the top of the configuration page. The new “Action” menu placement on the quotation page can be used to print the PDF Quotation, Timesheets, Pickup/ Return Receipts, and Timesheets. The “Action” Menu can also be used to perform various quotation-related activities such as Delete, Duplicate, Share, Change Customer, Cancel Subscription, Pause Subscription, etc.,
These are the capabilities that the Odoo 17 Sales Module provides to manage quotes and make them more flexible for all users, depending on their specific requirements.