pgcli is a modern command-line client for the postgres that makes working with databases faster and more convenient. It provides features such as syntax highlighting, auto-completion, formatted query results, and customizable prompts, making it easier to write and manage sql commands.
In this article, we will explore how to install pgcli, connect to postgres databases, understand its commonly used options, and see practical examples of how these features can improve the command-line experience.
In Linux, we can easily install this by using the sudo apt command like this.
sudo apt install pgcli
Check the installed version.
pgcli --version
Result:
Version: 3.3.1
Use the help command and check the available options we can use with the pgcli tool.
pgcli --help
Result:
Usage: pgcli [OPTIONS] [DBNAME] [USERNAME]
Options:
  -h, --host TEXT            Host address of the postgres database.
  -p, --port INTEGER         Port number at which the postgres instance is
                             listening.
  -U, --username TEXT        Username to connect to the postgres database.
  -u, --user TEXT            Username to connect to the postgres database.
  -W, --password             Force password prompt.
  -w, --no-password          Never prompt for password.
  --single-connection        Do not use a separate connection for completions.
  -v, --version              Version of pgcli.
  -d, --dbname TEXT          database name to connect to.
  --pgclirc FILE             Location of pgclirc file.
  -D, --dsn TEXT             Use DSN configured into the [alias_dsn] section
                             of pgclirc file.
  --list-dsn                 list of DSN configured into the [alias_dsn]
                             section of pgclirc file.
  --row-limit INTEGER        Set threshold for row limit prompt. Use 0 to
                             disable prompt.
  --less-chatty              Skip intro on startup and goodbye on exit.
  --prompt TEXT              Prompt format (Default: "\u@\h:\d> ").
  --prompt-dsn TEXT          Prompt format for connections using DSN aliases
                             (Default: "\u@\h:\d> ").
  -l, --list                 list available databases, then exit.
  --auto-vertical-output     Automatically switch to vertical output mode if
                             the result is wider than the terminal width.
  --warn [all|moderate|off]  Warn before running a destructive query.
  --help                     Show this message and exit.
Check the current clusters running in your system like this.
pg_lsclusters
Result:
Ver Cluster Port Status Owner    Data directory               Log file
14  main    5435 online postgres /var/lib/postgresql/14/main  /var/log/postgresql/postgresql-14-main.log
18  main2   5433 online postgres /var/lib/postgresql/18/main2 /var/log/postgresql/postgresql-18-main2.log
19  main    5436 online postgres /var/lib/postgresql/19/main  /var/log/postgresql/postgresql-19-main.log
We can also use the pg_lscluster command in three ways.
pg_lsclusters --help
Result:
Usage: /usr/bin/pg_lsclusters [-hjs]
Options:
  -h --no-header   Omit column headers in output
  -j --json        JSON output
  -s --start-conf  Include start.conf information in status column
     --help        Print help
Now, use the pg_lsclusters command with the -h, and we can see the output should hide the header columns.
pg_lsclusters -h
Result:
14 main  5435 online postgres /var/lib/postgresql/14/main  /var/log/postgresql/postgresql-14-main.log
18 main2 5433 online postgres /var/lib/postgresql/18/main2 /var/log/postgresql/postgresql-18-main2.log
19 main  5436 online postgres /var/lib/postgresql/19/main  /var/log/postgresql/postgresql-19-main.log
Use the -j flag with the pg_lsclusters command to see the output in JSON array format, and this output contains more details about each cluster.
pg_lsclusters -j
Result:
[{"version":"14","logfile":"/var/log/postgresql/postgresql-14-main.log","port":"5435","ownergid":137,"running":1,"pgdata":"/var/lib/postgresql/14/main","owneruid":129,"configuid":129,"configdir":"/etc/postgresql/14/main","cluster":"main","start":"auto","configfile":"/etc/postgresql/14/main/postgresql.conf","socketdir":"/var/run/postgresql","config":{"max_wal_size":"1GB","ssl_key_file":"/etc/ssl/private/ssl-cert-snakeoil.key","datestyle":"iso, dmy","ident_file":"/etc/postgresql/14/main/pg_ident.conf","lc_time":"en_IN","shared_buffers":"128MB","data_directory":"/var/lib/postgresql/14/main","lc_monetary":"en_IN","hba_file":"/etc/postgresql/14/main/pg_hba.conf","ssl_cert_file":"/etc/ssl/certs/ssl-cert-snakeoil.pem","max_connections":"100","stats_temp_directory":"/var/run/postgresql/14-main.pg_stat_tmp","log_timezone":"Asia/Kolkata","min_wal_size":"80MB","lc_numeric":"en_IN","unix_socket_directories":"/var/run/postgresql","default_text_search_config":"pg_catalog.english","log_line_prefix":"%m [%p] %q%u@%d ","port":"5435","cluster_name":"14/main","timezone":"Asia/Kolkata","dynamic_shared_memory_type":"posix","ssl":"on","external_pid_file":"/var/run/postgresql/14-main.pid","lc_messages":"en_IN"}},{"socketdir":"/var/run/postgresql","configfile":"/etc/postgresql/18/main2/postgresql.conf","config":{"lc_monetary":"en_IN","hba_file":"/etc/postgresql/18/main2/pg_hba.conf","ssl_cert_file":"/etc/ssl/certs/ssl-cert-snakeoil.pem","max_connections":"100","autovacuum_worker_slots":"16","shared_buffers":"128MB","data_directory":"/var/lib/postgresql/18/main2","default_table_access_method":"heap","ident_file":"/etc/postgresql/18/main2/pg_ident.conf","lc_time":"en_IN","max_wal_size":"1GB","ssl_key_file":"/etc/ssl/private/ssl-cert-snakeoil.key","datestyle":"iso, dmy","external_pid_file":"/var/run/postgresql/18-main2.pid","ssl":"on","lc_messages":"en_IN","timezone":"Asia/Kolkata","dynamic_shared_memory_type":"posix","cluster_name":"18/main2","min_wal_size":"80MB","log_line_prefix":"%m [%p] %q%u@%d ","port":"5433","lc_numeric":"en_IN","default_text_search_config":"pg_catalog.english","unix_socket_directories":"/var/run/postgresql","shared_preload_libraries":"","log_timezone":"Asia/Kolkata"},"version":"18","ownergid":137,"pgdata":"/var/lib/postgresql/18/main2","running":1,"owneruid":129,"logfile":"/var/log/postgresql/postgresql-18-main2.log","port":"5433","configdir":"/etc/postgresql/18/main2","cluster":"main2","start":"auto","configuid":129},{"port":"5436","logfile":"/var/log/postgresql/postgresql-19-main.log","ownergid":137,"owneruid":129,"running":1,"pgdata":"/var/lib/postgresql/19/main","configuid":129,"configdir":"/etc/postgresql/19/main","start":"auto","cluster":"main","version":"19","config":{"max_wal_size":"8192MB","ssl_key_file":"/etc/ssl/private/ssl-cert-snakeoil.key","max_parallel_workers_per_gather":"4","datestyle":"iso, mdy","ident_file":"/etc/postgresql/19/main/pg_ident.conf","checkpoint_completion_target":"0.90","effective_cache_size":"23GB","lc_time":"C.UTF-8","shared_buffers":"8GB","data_directory":"/var/lib/postgresql/19/main","autovacuum_worker_slots":"16","lc_monetary":"C.UTF-8","max_parallel_workers":"16","hba_file":"/etc/postgresql/19/main/pg_hba.conf","ssl_cert_file":"/etc/ssl/certs/ssl-cert-snakeoil.pem","max_connections":"100","shared_preload_libraries":"pg_stat_statements,hypopg","max_worker_processes":"16","default_statistics_target":"200","log_timezone":"Asia/Kolkata","effective_io_concurrency":"200","work_mem":"18MB","min_wal_size":"2048MB","lc_numeric":"C.UTF-8","unix_socket_directories":"/var/run/postgresql","max_parallel_maintenance_workers":"4","default_text_search_config":"pg_catalog.english","maintenance_work_mem":"2GB","log_line_prefix":"%m [%p] %q%u@%d ","port":"5436","random_page_cost":"1.10","cluster_name":"19/main","dynamic_shared_memory_type":"posix","timezone":"Asia/Kolkata","ssl":"on","external_pid_file":"/var/run/postgresql/19-main.pid","lc_messages":"C.UTF-8"},"configfile":"/etc/postgresql/19/main/postgresql.conf","socketdir":"/var/run/postgresql"}]Here each json array represents the each cluster-related metadata that includes
- Postgres version (version)
- Cluster name (cluster)
- Port number (port)
- Running status (running)
- Startup configuration (start)
- Data directory path (pgdata)
- Configuration directory (configdir)
- Main configuration file path (configfile)
- Log file path (logfile)
- Unix socket directory (socketdir)
- Owner user ID (owneruid)
- Owner group ID (ownergid)
- Configuration owner user ID (configuid)
- Configuration parameters (config), which include settings such as max_connections, shared_buffers, shared_preload_libraries, max_wal_size, timezone, ssl, hba_file, ident_file, and many other PostgreSQL configuration options.
We can use the -s flag to include the start.conf information in the output of pg_lsclusters like this.
pg_lsclusters -s
Result:
Ver Cluster Port Status      Owner    Data directory               Log file
14  main    5435 online,auto postgres /var/lib/postgresql/14/main  /var/log/postgresql/postgresql-14-main.log
18  main2   5433 online,auto postgres /var/lib/postgresql/18/main2 /var/log/postgresql/postgresql-18-main2.log
19  main    5436 online,auto postgres /var/lib/postgresql/19/main  /var/log/postgresql/postgresql-19-main.log
Inspect the contents of the start.conf file of postgres like this.
sudo cat /etc/postgresql/19/main/start.conf
Result:
# Automatic startup configuration
#   auto: automatically start the cluster
#   manual: manual startup with pg_ctlcluster/postgresql@.service only
#   disabled: refuse to start cluster
# See pg_createcluster(1) for details. When running from systemd,
# invoke 'systemctl daemon-reload' after editing this file.
auto
Now, use the pgcli tool in postgres like this
sudo -u postgres pgcli -U postgres -d postgres -p 5436
Result:
Server: PostgreSQL 19beta2
Version: 3.3.1
Home: http://pgcli.com
postgres>
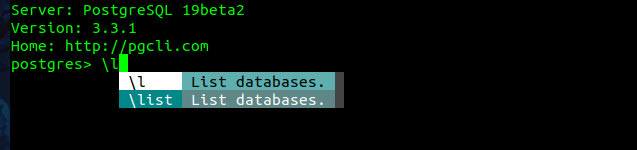
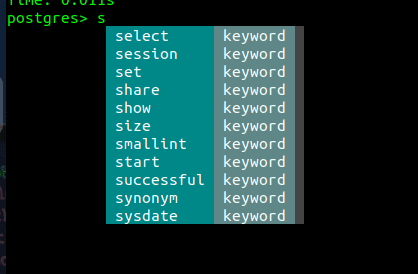
Now, when you enter any commands in psql terminal, it will recommend the syntax.
Now, try any other commands.
Now, explore each option one by one.
-h, --host TEXT
It represents the address of the postgres database where the pgcli connects.
-p, --port INTEGER
It represents the port number at which the postgres instance is listening.
-U, --username TEXT
It represents the username to connect to the postgres database.
-u, --user TEXT
This is the same as the -U flag, and it represents the username to connect to the postgres database.
-W, --password
This option makes the force password prompt.
-w, --no-password
This option makes not prompt for password.
--single-connection
This flag makes the connection where you do not use a separate connection for completions.
-v, --version
This displays the version of the pgcli tool.
-d, --dbname TEXT
This represents the database name to connect to.
-l, --list list available databases, then exit.
Now try the -l flag with the pgcli command like this.
sudo -u postgres pgcli -U postgres -d postgres -p 5436 -l
Result:
List of databases
+-----------+----------+----------+---------+---------+------------------------------------+
| Name      | Owner    | Encoding | Collate | Ctype   | Access privileges                  |
+-----------+----------+----------+---------+---------+------------------------------------+
| postgres  | postgres | UTF8     | C.UTF-8 | C.UTF-8 | <null>                             |
| template0 | postgres | UTF8     | C.UTF-8 | C.UTF-8 | =c/postgres\npostgres=CTc/postgres |
| template1 | postgres | UTF8     | C.UTF-8 | C.UTF-8 | =c/postgres\npostgres=CTc/postgres |
+-----------+----------+----------+---------+---------+------------------------------------+
SELECT 3
Now, these are the two flags that are related to the dsn alias.
-D, --dsn TEXT             Use DSN configured into the [alias_dsn] section
                             of pgclirc file.
  --list-dsn                 list of DSN configured into the [alias_dsn]
                             section of pgclirc file.
These two options are related to each other.
In this pgcli tool, there is a config file, and we can see its configuration like this.
cat ~/.config/pgcli/config
Result:
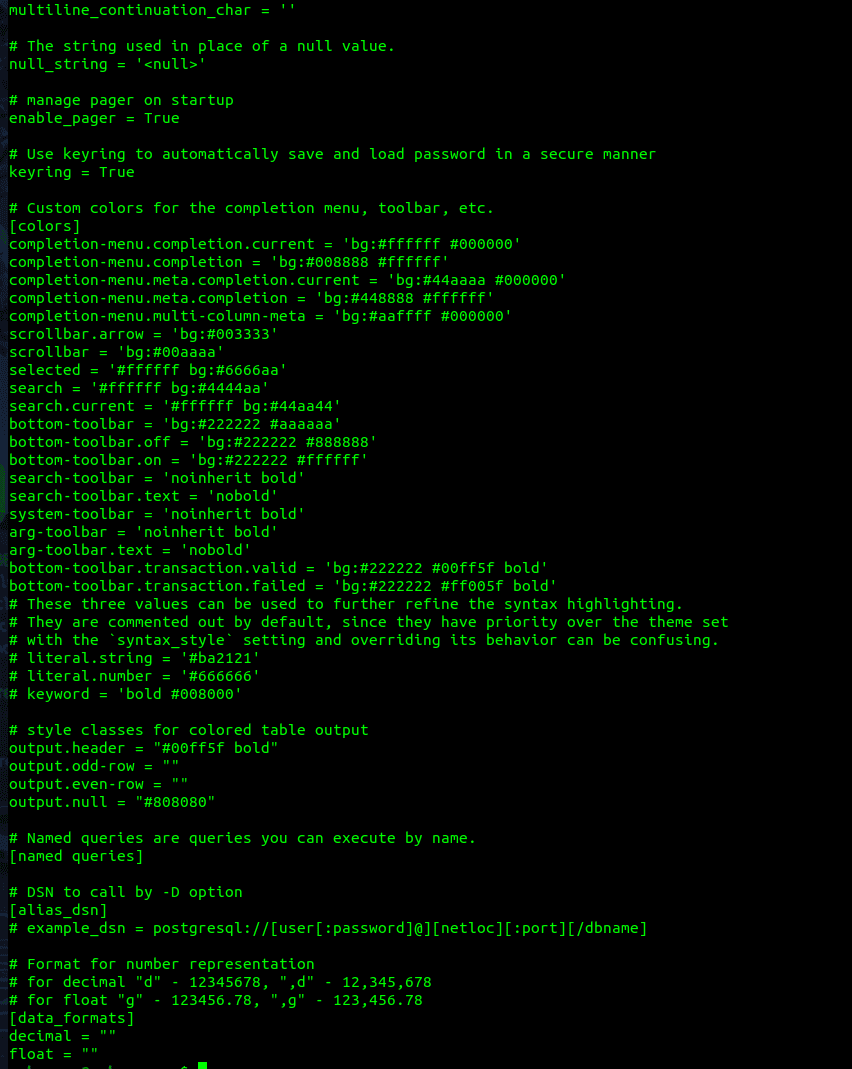
We can add the new dsn alias like this in the config file of pgcli.
[alias_dsn]
# example_dsn = postgresql://[user[:password]@][netloc][:port][/dbname]
pg18 = host=localhost port=5433 dbname=postgres user=postgres
Now, use the - - list-dsn flag like this.
pgcli --list-dsn
Result:
pg18 : host=localhost port=5433 dbname=postgres user=postgres
Now, we can connect to the psql by using this dns alias like this.
sudo -u postgres pgcli -D pg18
Result:
Server: PostgreSQL 19beta2
Version: 3.3.1
Home: http://pgcli.com
postgres>
This will show the dns alias we set earlier in the conf file of pgcli.
  --row-limit INTEGER        Set threshold for row limit prompt. Use 0 to
                             disable prompt.
Now, use this in the pgcli command like this.
sudo -u postgres pgcli -U postgres -d postgres -p 5436 --row-limit 10
Result:
Server: PostgreSQL 19beta2
Version: 3.3.1
Home: http://pgcli.com
postgres> select count(*) from employee;
+-------+
| count |
|-------|
| 10000 |
+-------+
SELECT 1
Time: 0.008s
postgres> select * from employee;
The result was limited to 10 rows
+----+-------------+------------+----------+--------------+
| id | name        | department | salary   | joining_date |
|----+-------------+------------+----------+--------------|
| 1  | Employee_1  | Sales      | 64607.81 | 2026-09-18   |
| 2  | Employee_2  | IT         | 88298.65 | 2026-09-17   |
| 3  | Employee_3  | Finance    | 75115.65 | 2026-09-16   |
| 4  | Employee_4  | Marketing  | 94059.67 | 2026-09-15   |
| 5  | Employee_5  | HR         | 63685.11 | 2026-09-14   |
| 6  | Employee_6  | Sales      | 38706.06 | 2026-09-13   |
| 7  | Employee_7  | IT         | 82639.43 | 2026-09-12   |
| 8  | Employee_8  | Finance    | 55357.04 | 2026-09-11   |
| 9  | Employee_9  | Marketing  | 86336.69 | 2026-09-10   |
| 10 | Employee_10 | HR         | 45088.87 | 2026-09-09   |
+----+-------------+------------+----------+--------------+
SELECT 10
Time: 0.008s
postgres>
The total number of records in the employee table is 10000. But after we use the --row-limit flag to 100, we can only get the 100 records total when we execute the select * query from the employee table.
--less-chatty Skip intro on startup and goodbye on exit.
Use the --less-chatty flag in pgcli like this.
sudo -u postgres pgcli -U postgres -d postgres -p 5436 --less-chatty
Result:
postgres> exit
This didn't show the server version message, and there was no goodbye at the time when we exited from the postgres.
--prompt TEXT Prompt format (Default: "\u@\h:\d> ").
Use the –prompt flag with pgcli command, and it looks like this.
sudo -u postgres pgcli -U postgres -d postgres -p 5436 --prompt PG19
Result:
Server: PostgreSQL 19beta2
Version: 3.3.1
Home: http://pgcli.com
PG19exit
Goodbye!
Now, use the –prompt flag with pgcli on another port.
sudo -u postgres pgcli -U postgres -d postgres -p 5435 --prompt PG14
Result:
Server: PostgreSQL 14.24 (Ubuntu 14.24-0ubuntu0.22.04.1)
Version: 3.3.1
Home: http://pgcli.com
PG14
The --prompt option does not affect the connection. It only changes what we see before typing commands, making it easier to identify the current session.
  --prompt-dsn TEXT          Prompt format for connections using DSN aliases
                             (Default: "\u@\h:\d> ").
Now, use this with the pgcli command like this.
sudo -u postgres pgcli -D pg18 --prompt-dsn PG18
Result:
Server: PostgreSQL 18
Version: 3.3.1
Home: http://pgcli.com
PG18
There is only one difference between these two flags named –prompt text and –prompt-dsn text.
This flag is mainly used to connect through the dsn alias.
  --auto-vertical-output     Automatically switch to vertical output mode if
                             the result is wider than the terminal width.
Usage of --auto-vertical-output with the pgcli command like this.
sudo -u postgres pgcli -U postgres -d postgres -p 5436 --auto-vertical-output
Result:
Server: PostgreSQL 19beta2
Version: 3.3.1
Home: http://pgcli.com
postgres> select * from pg_stat_database;
-[ RECORD 1 ]-------------------------
datid                      | 0
datname                    | <null>
numbackends                | 0
xact_commit                | 0
xact_rollback              | 0
blks_read                  | 589
blks_hit                   | 234253
tup_returned               | 87204
tup_fetched                | 42726
tup_inserted               | 29
tup_updated                | 4
tup_deleted                | 0
conflicts                  | 0
temp_files                 | 0
temp_bytes                 | 0
deadlocks                  | 0
checksum_failures          | 0
checksum_last_failure      | <null>
blk_read_time              | 0.0
blk_write_time             | 0.0
session_time               | 0.0
active_time                | 0.0
idle_in_transaction_time   | 0.0
sessions                   | 0
sessions_abandoned         | 0
sessions_fatal             | 0
sessions_killed            | 0
parallel_workers_to_launch | 0
parallel_workers_launched  | 0
stats_reset                | <null>
Now, the result should be displayed in the vertical mode.
--warn [all|moderate|off] Warn before running a destructive query.
Usage of the –warn flag with pgcli looks like this.
sudo -u postgres pgcli -U postgres -d postgres -p 5436 --warn all
Result:
Server: PostgreSQL 19beta2
Version: 3.3.1
Home: http://pgcli.com
postgres> drop table demo;
You're about to run a destructive command.
Do you want to proceed? (y/n): y
Your call!
DROP TABLE
Time: 0.029s
pgcli offers a more user-friendly way to work with postgresql from the terminal. By learning its installation process, connection methods, configuration options, and useful command-line flags, we can perform database tasks more efficiently and make everyday postgresql administration easier.
Exploring these features in your own environment will help you become more comfortable and productive when managing the postgresql databases.