When managing projects, problems occur when developers work on different platforms. There is a practice in many companies to use Jira for software development and Odoo for conducting business. Switching between these two systems leads to duplication of effort, inconsistency of project data, and manual updates.
Odoo Jira Connector makes this process easier, as it allows synchronizing projects, tasks, users, comments, attachments, and Agile sprints between Odoo 18 and Atlassian Jira. Both manual and automatic real-time synchronisation are possible with this connector, giving the possibility for teams to work effectively without switching platforms.
In this blog, we are going to configure this module and show how to synchronize projects and users in Odoo and Jira.
Configure Jira Connection in Odoo
Open the Jira Configuration.
Navigate to the Projects app in Odoo to access and manage your projects.
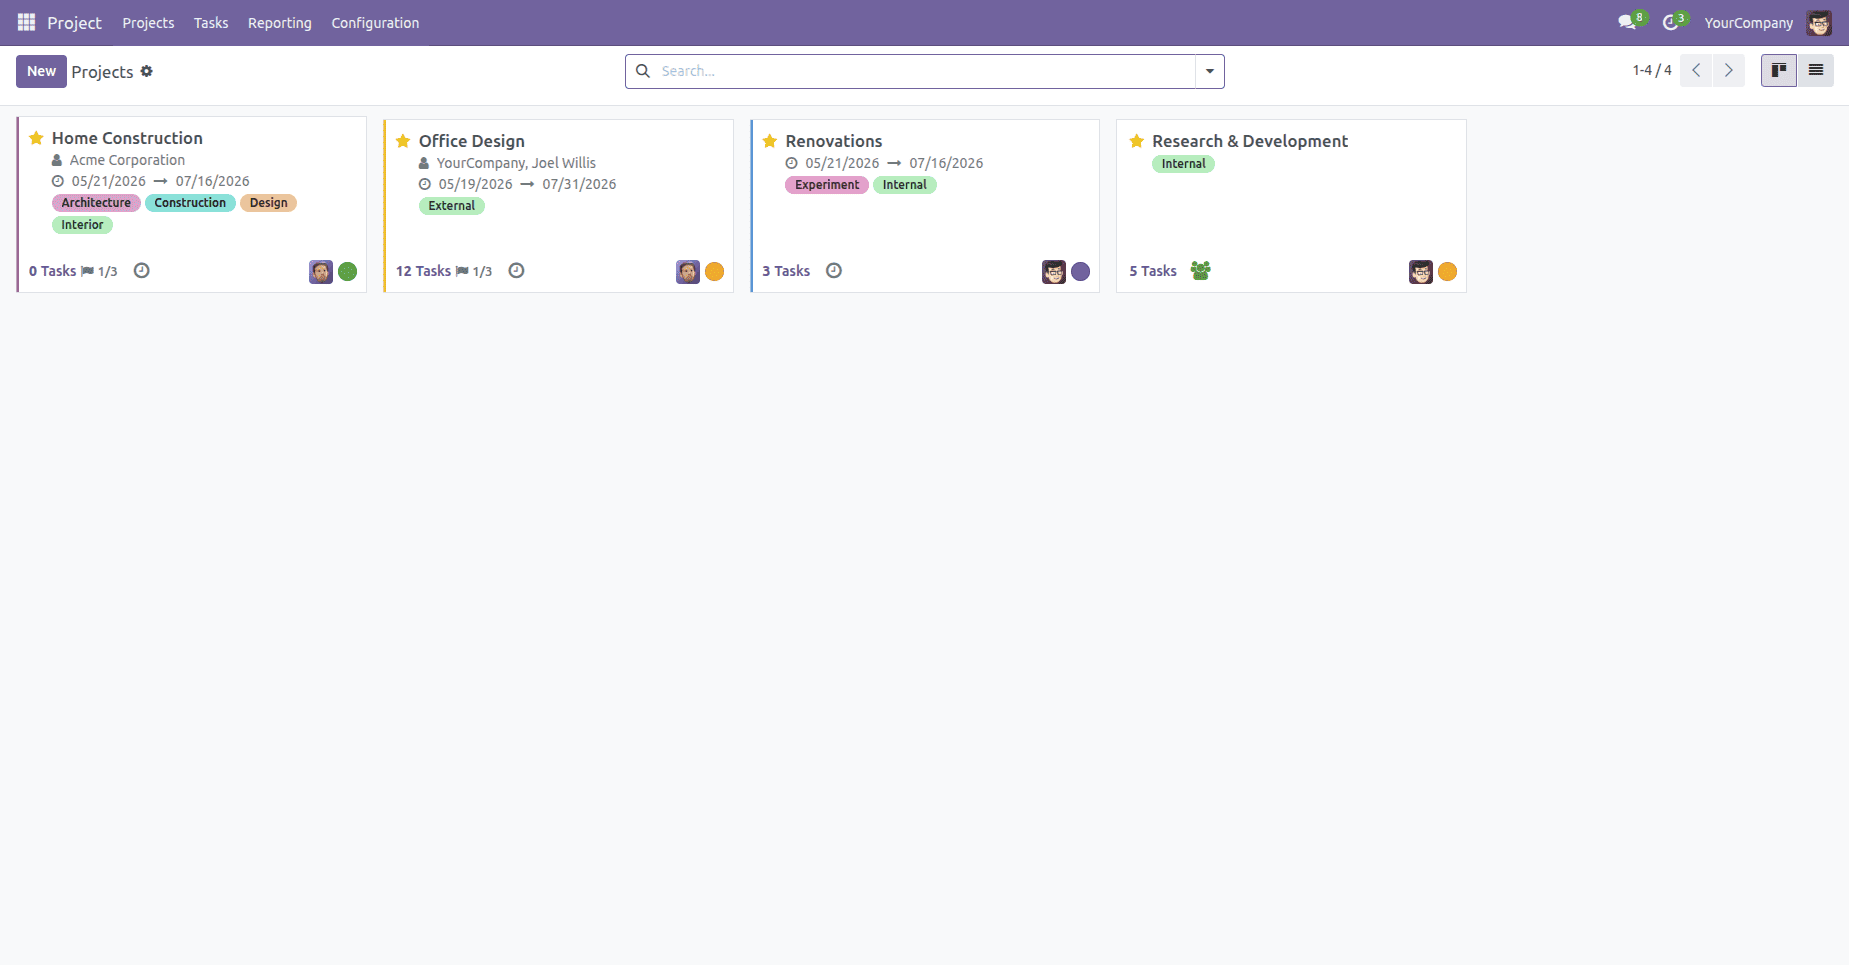
Navigate to:
Project > Configuration > Settings
The Jira Connector configuration section will appear in Project settings.
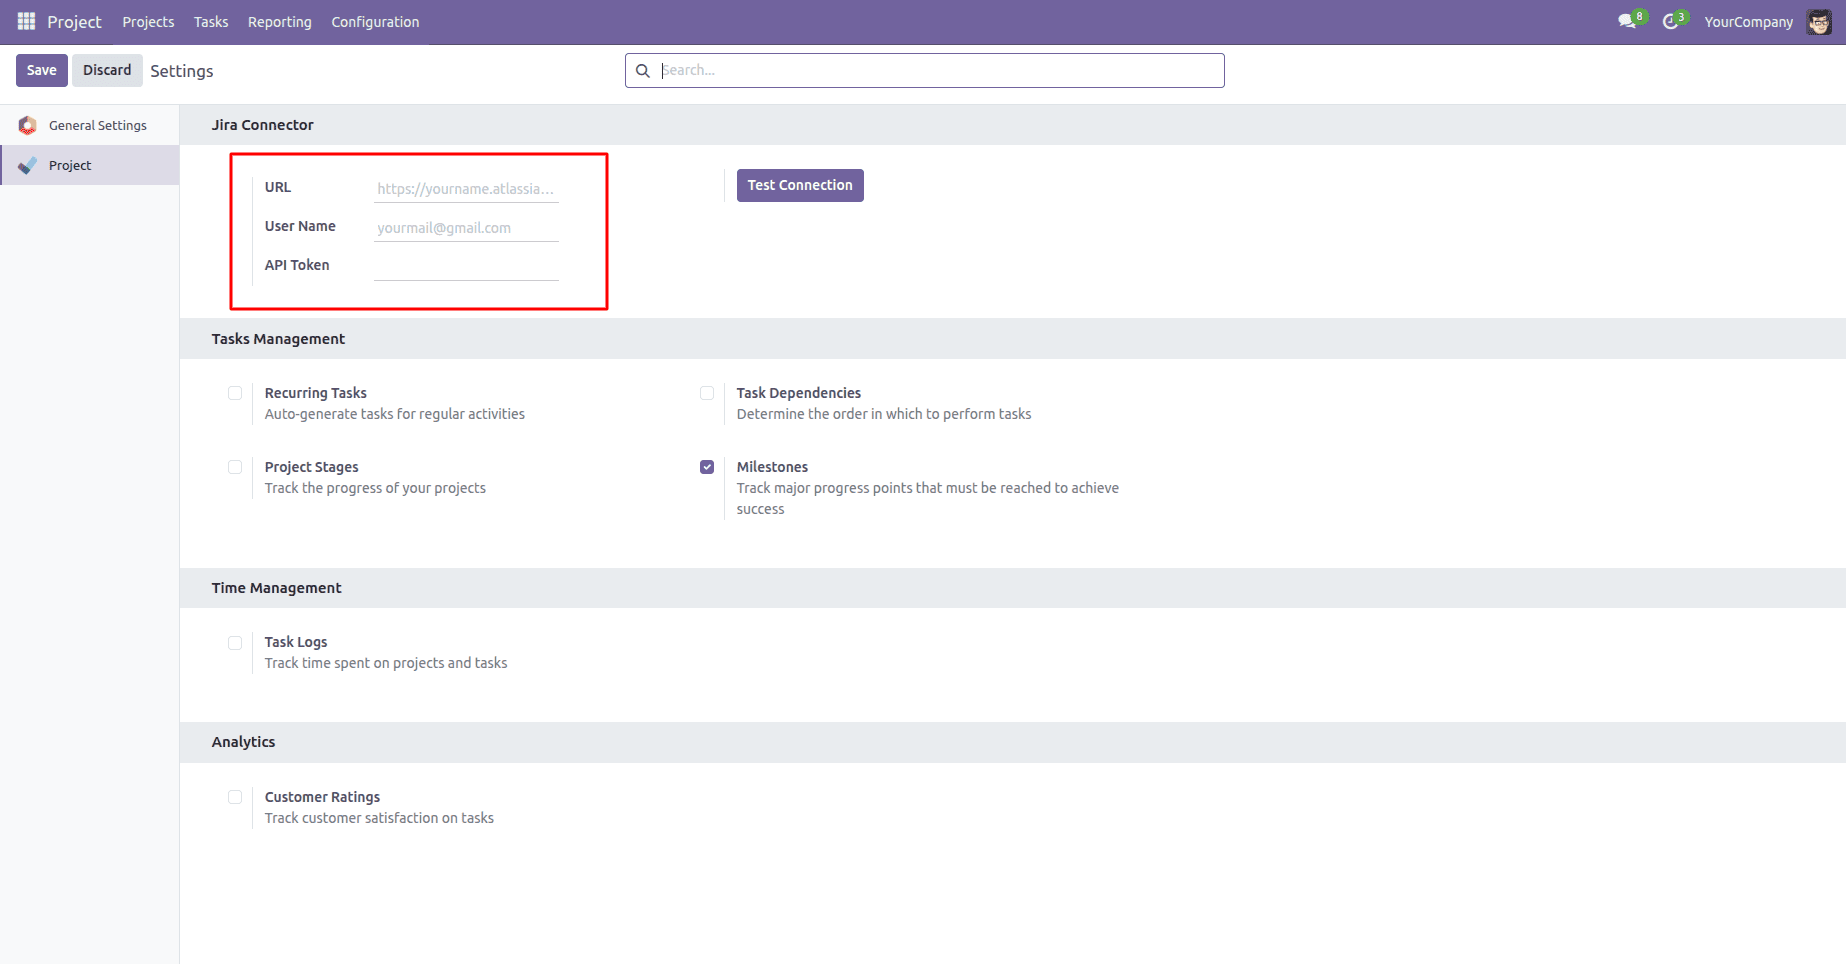
Generate a Jira API Token
Jira uses API tokens to authenticate users instead of passwords.
To get started, sign in to your Atlassian account. If you don’t have a Jira account, create one through the Atlassian website before generating the API token.
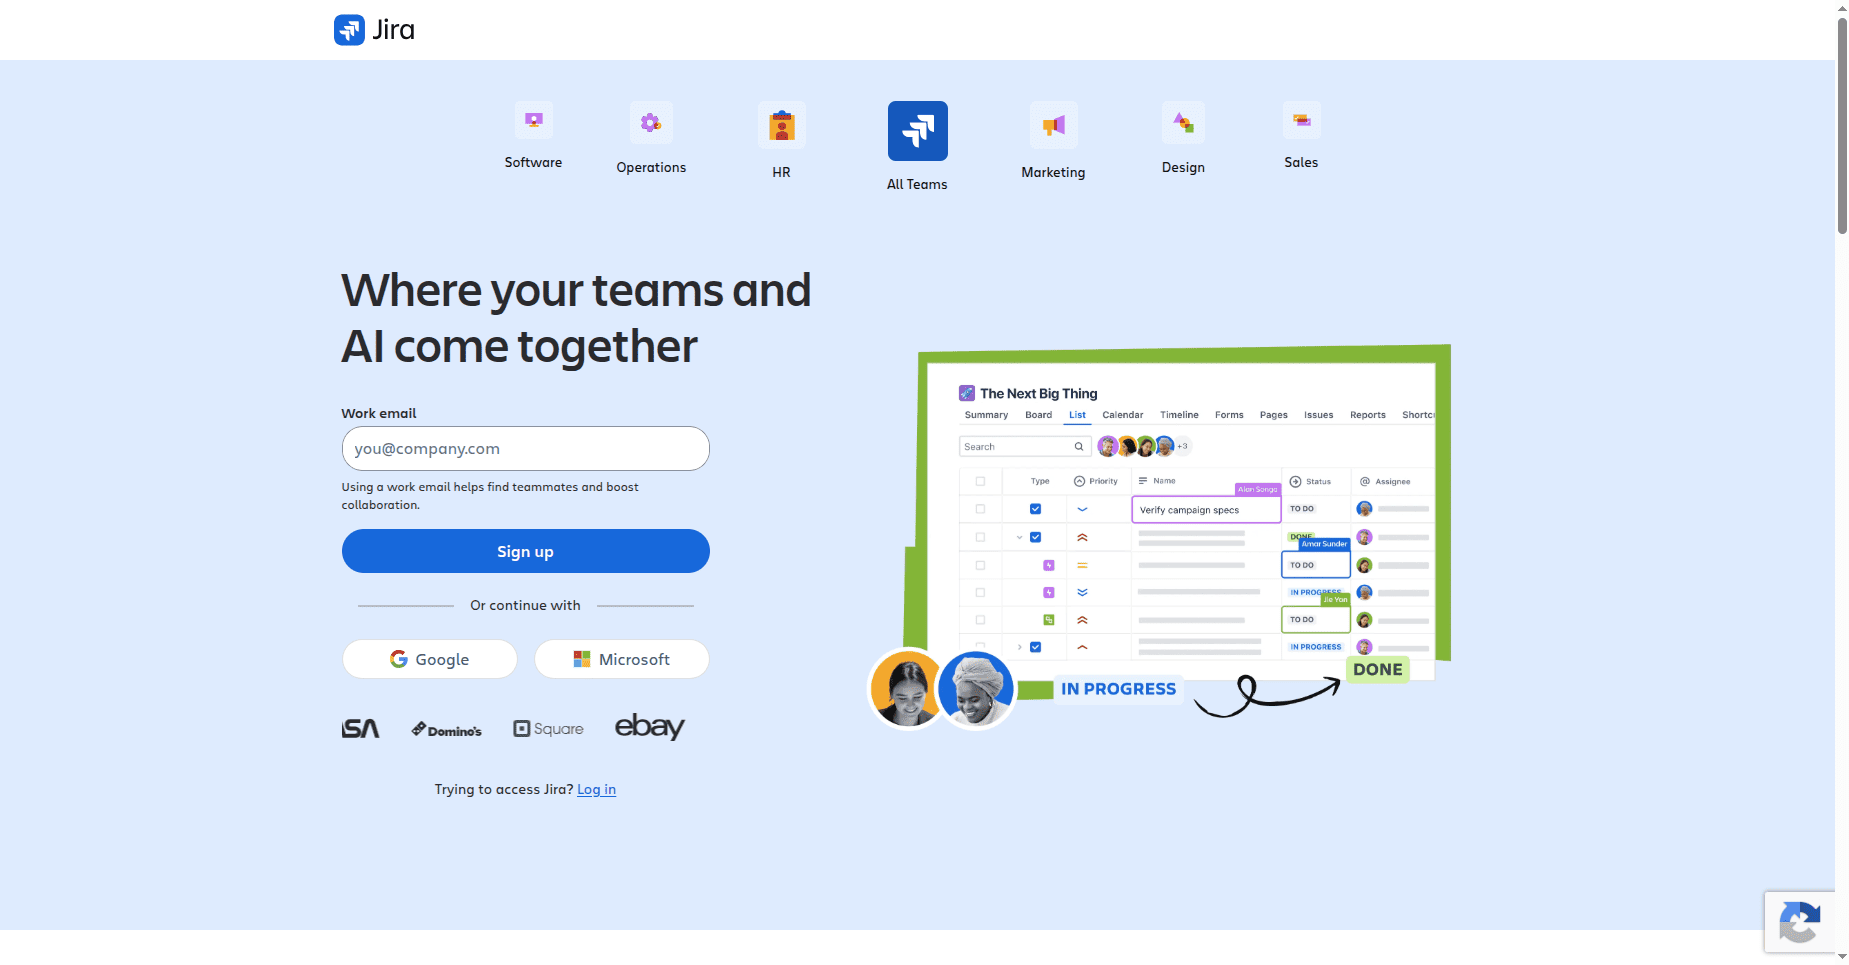
After logging in, click on your profile icon and go to Account Settings.
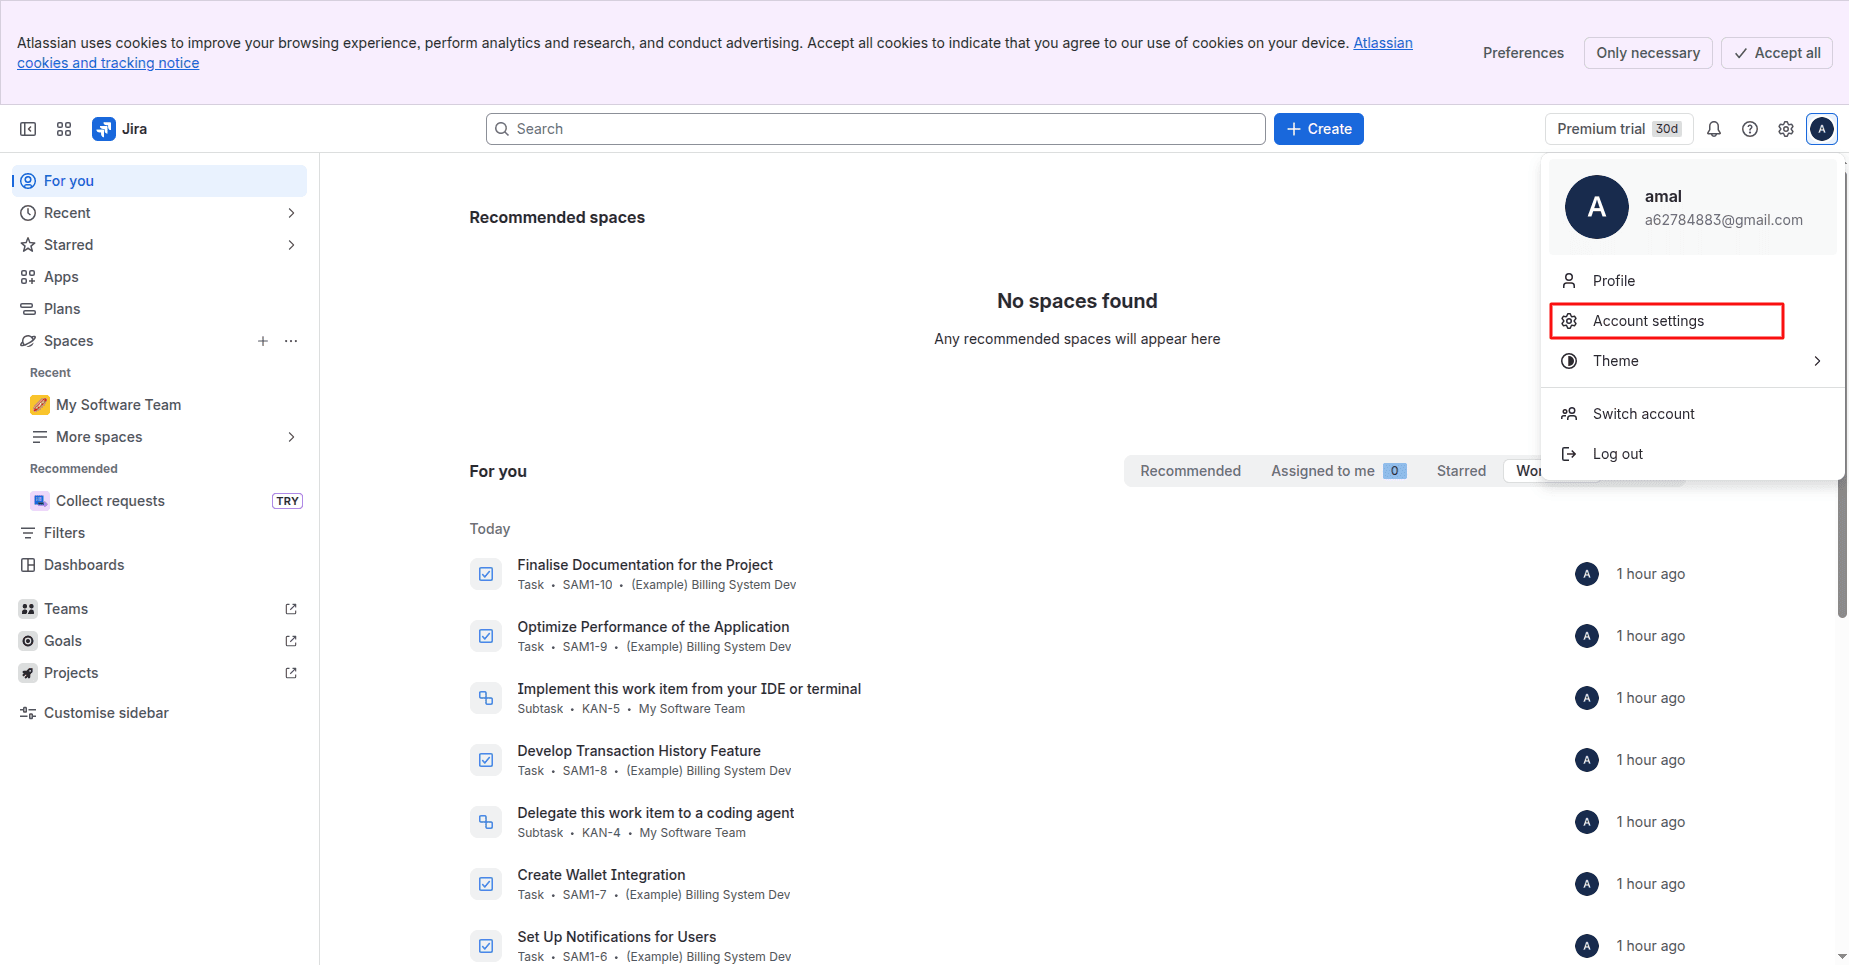
Go to the Security tab.
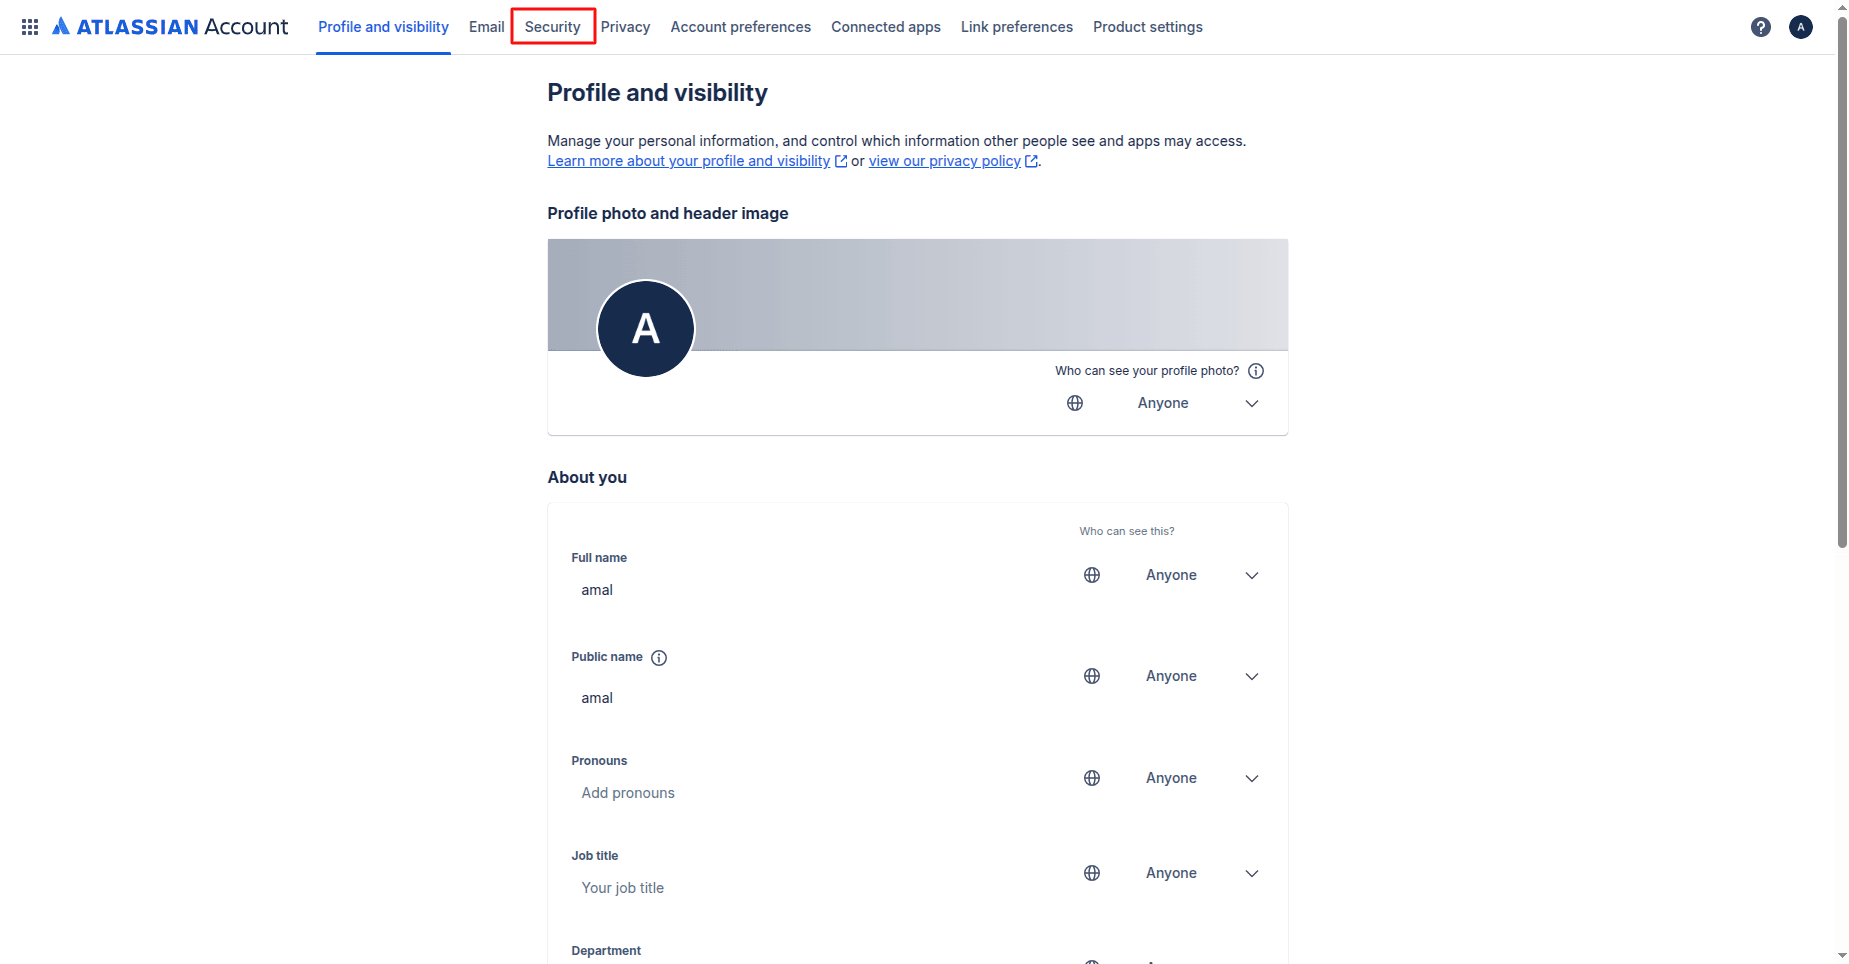
Locate the API Tokens section in the list and click Create and manage API tokens.
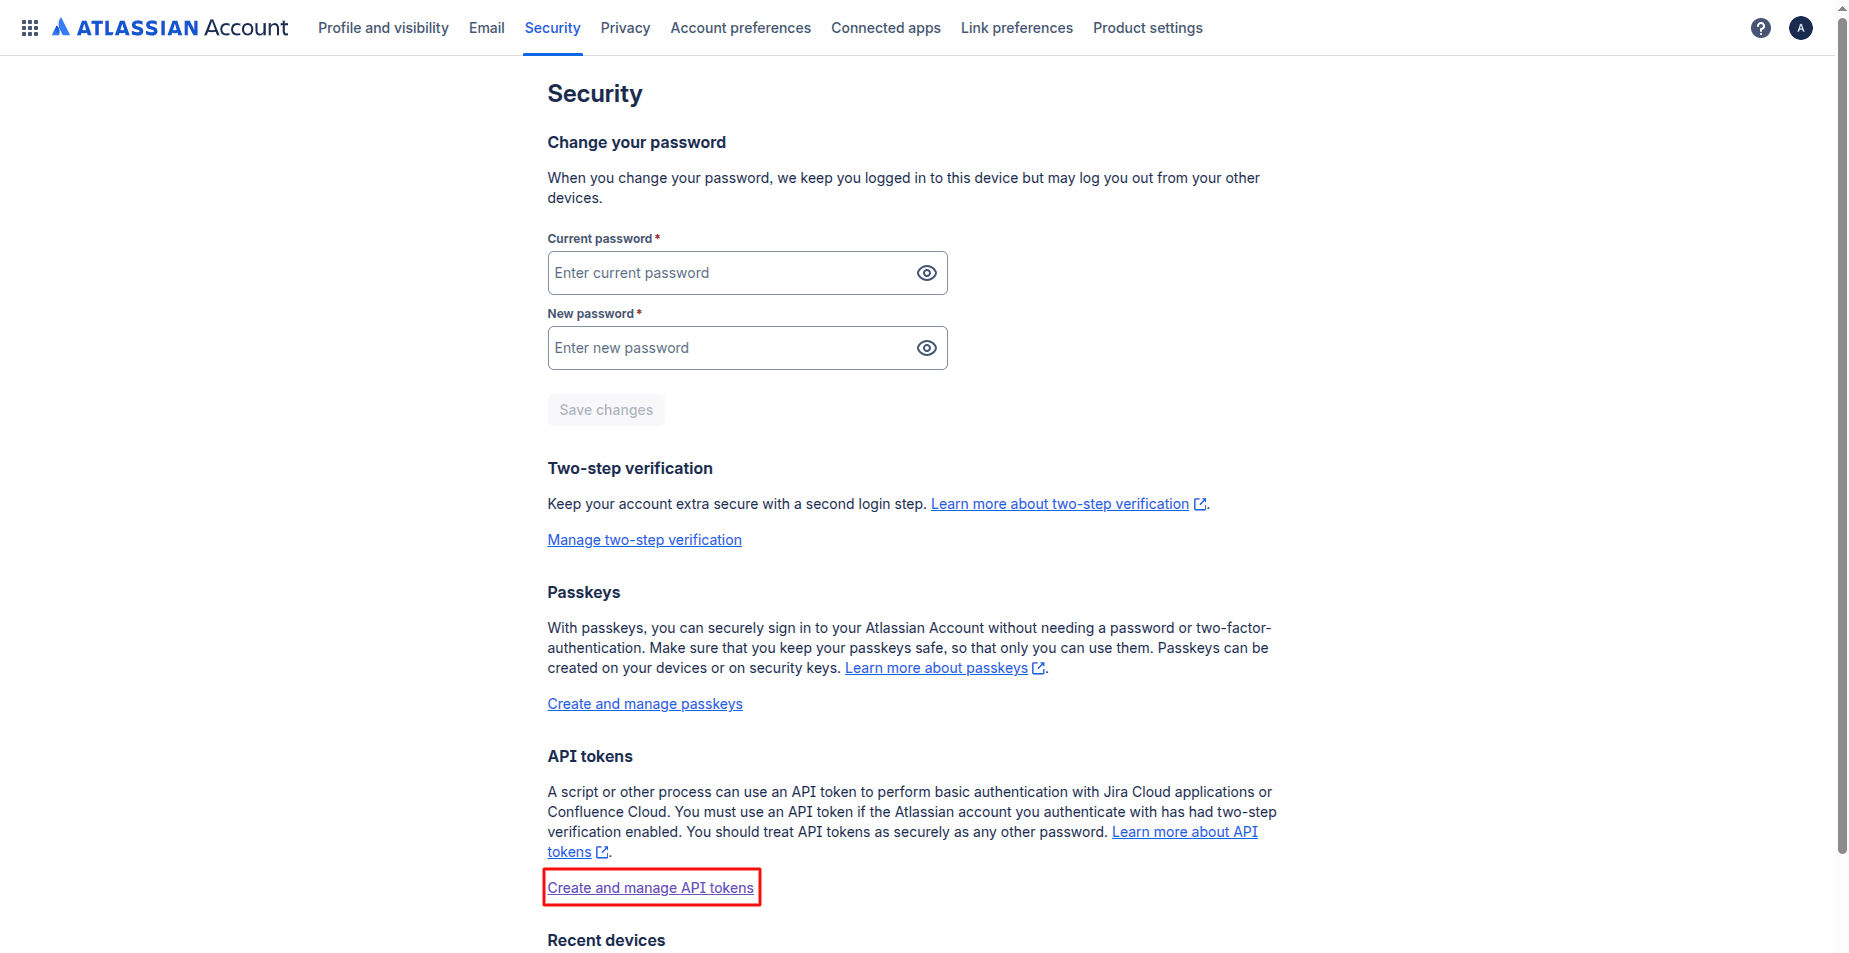
Enter a meaningful name for your token and pick the expiration date.
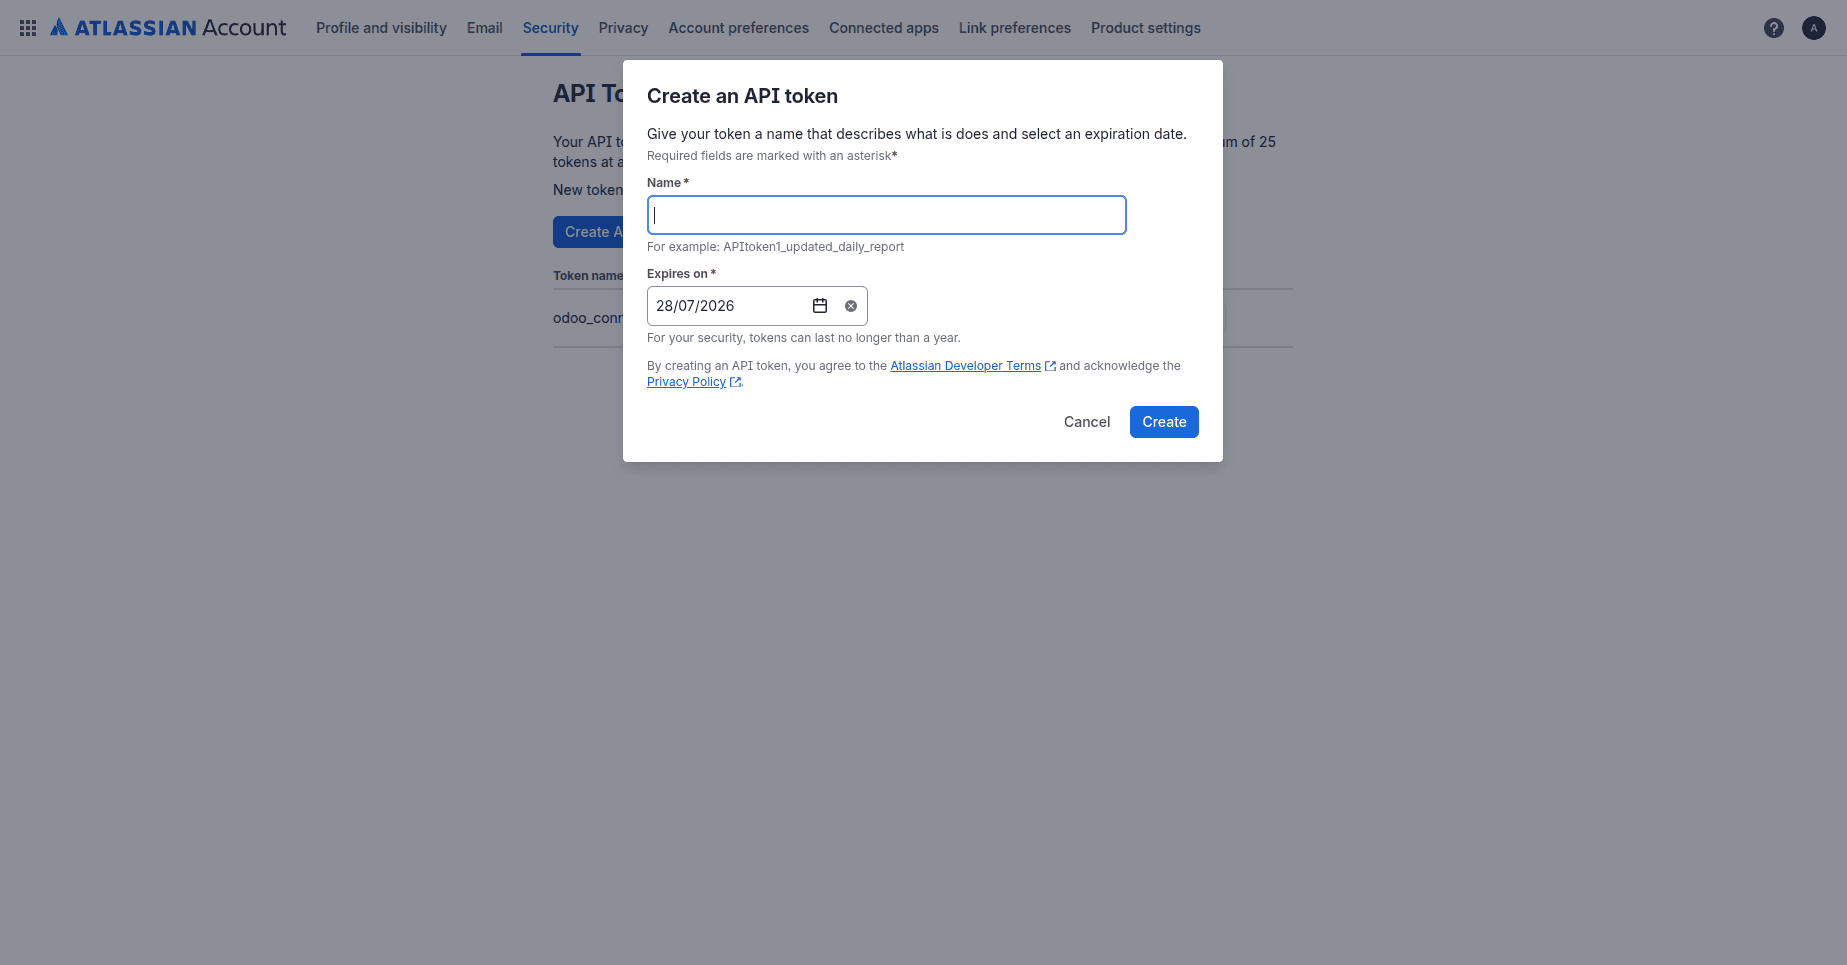
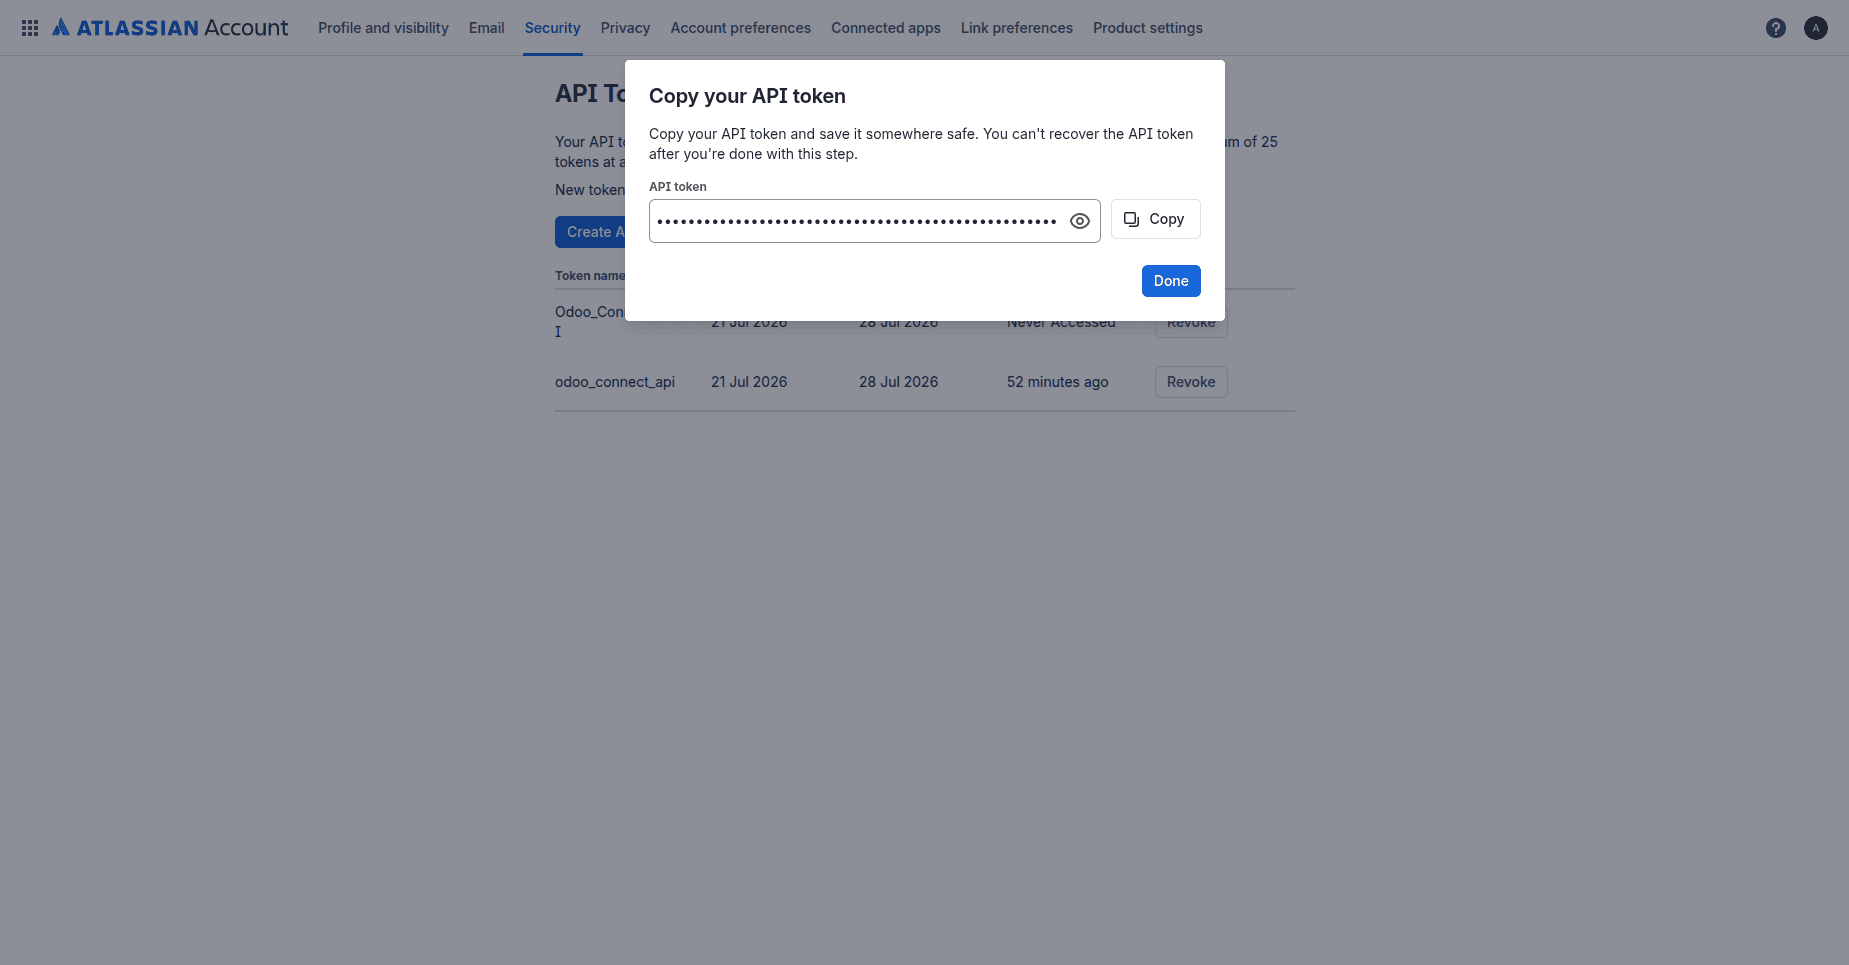
Copy the created token and keep it safe, as it will not be available again.
Obtain the Jira URL
To set up a Jira Connector in Odoo, you should get your Jira URL, which will be used for integration of your Odoo and Jira.
Sign in to your Atlassian account and launch Jira using the Atlassian app launcher.
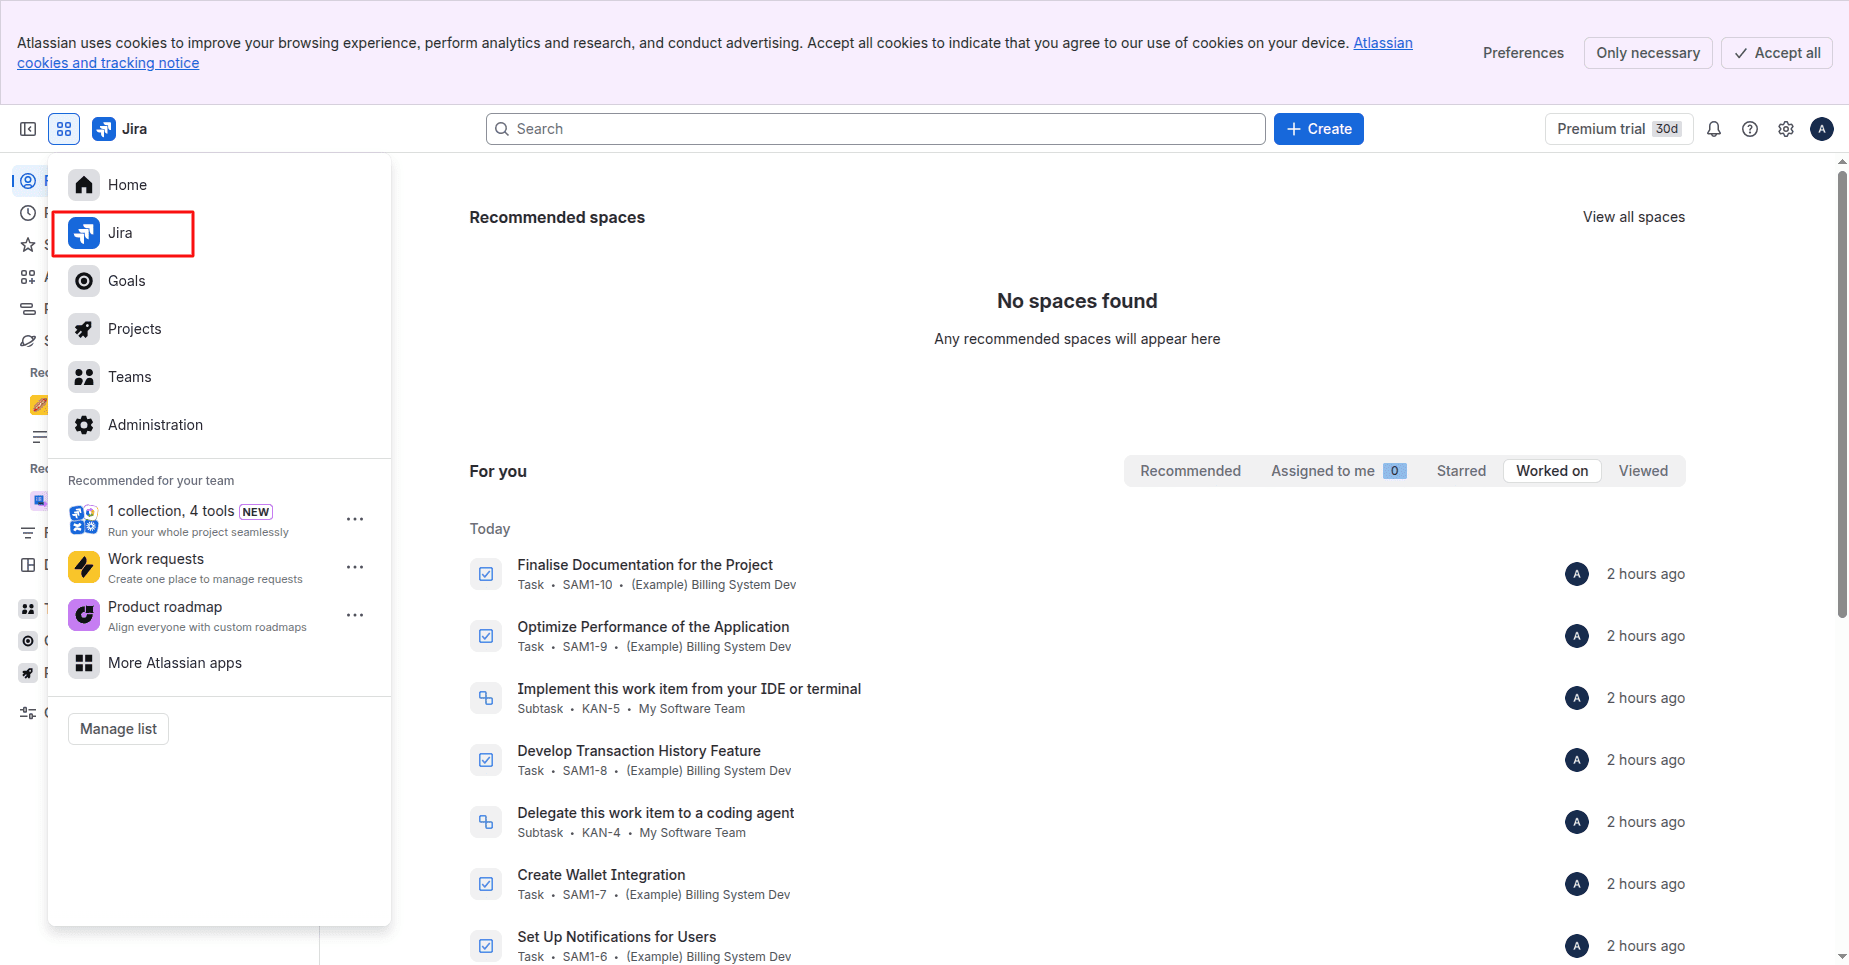
Now, copy the URL from the address bar of your browser. Take into consideration that you should use only the base URL, like:
https://your-domain.atlassian.net
without any extra path after the domain name.
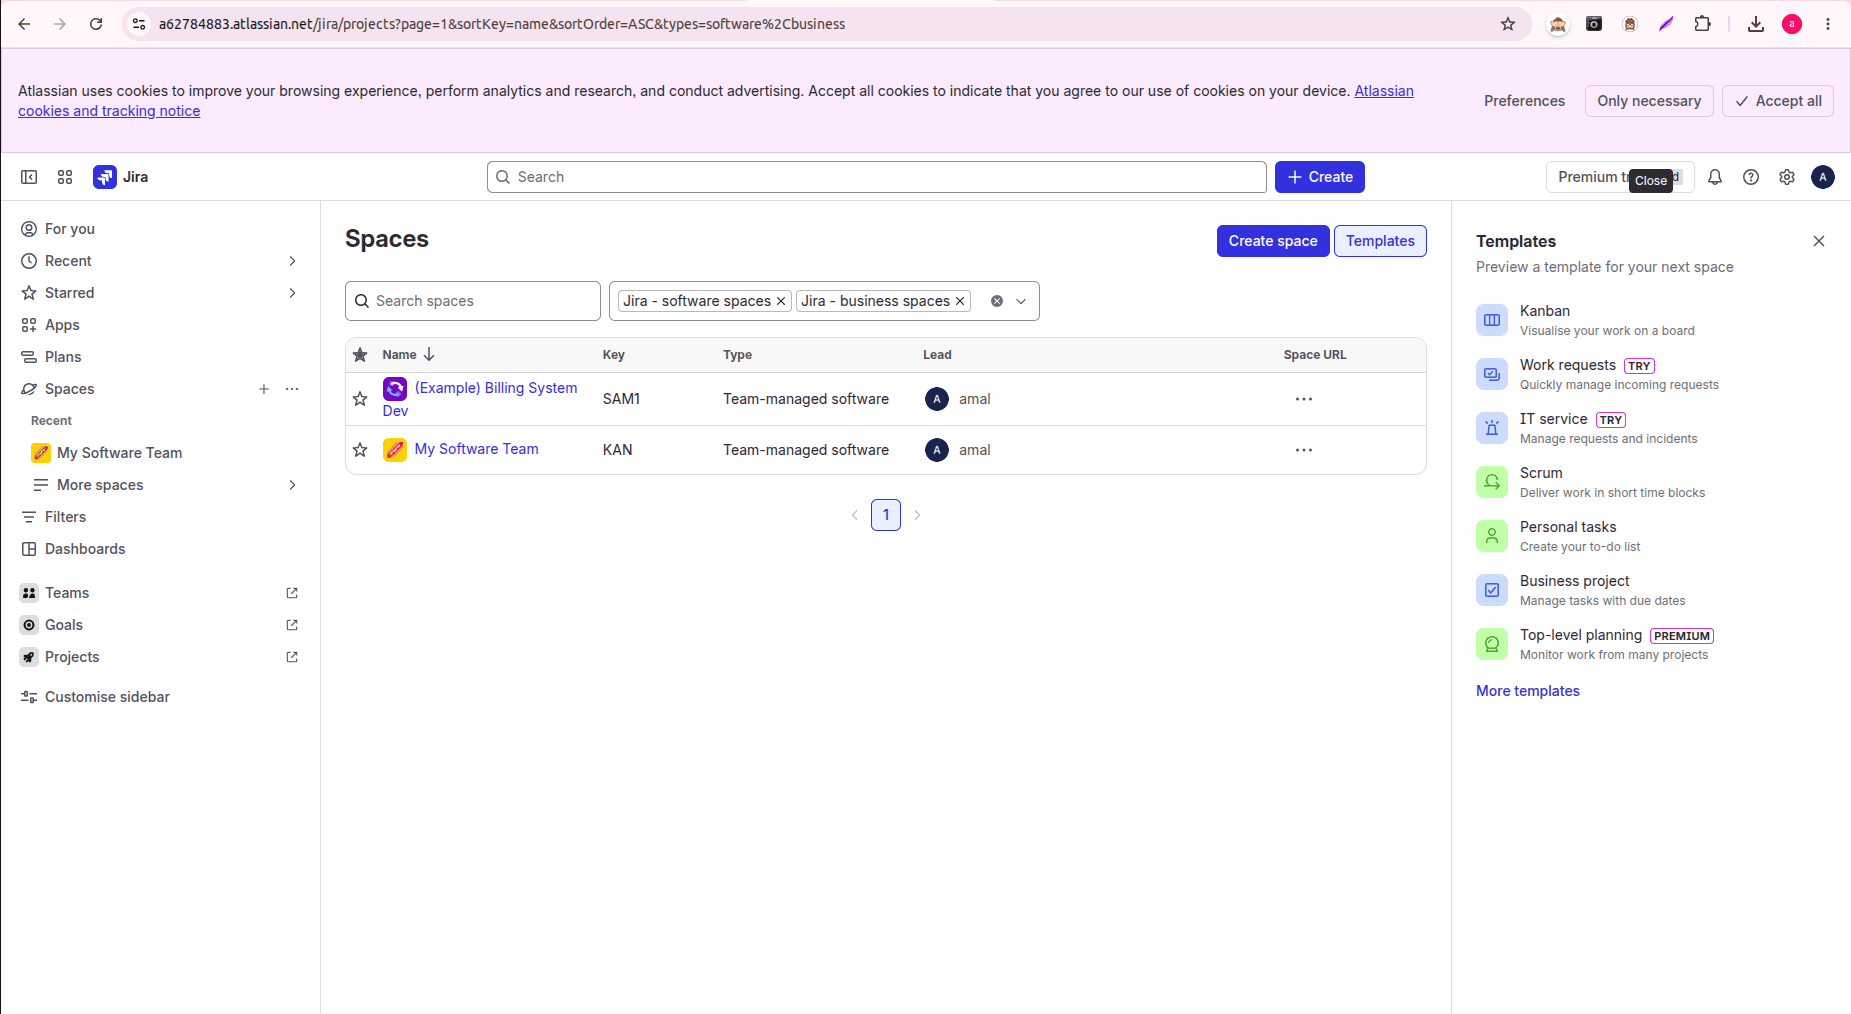
This is the URL you will need when configuring the Jira Connector in Odoo.
Find Your Jira Username
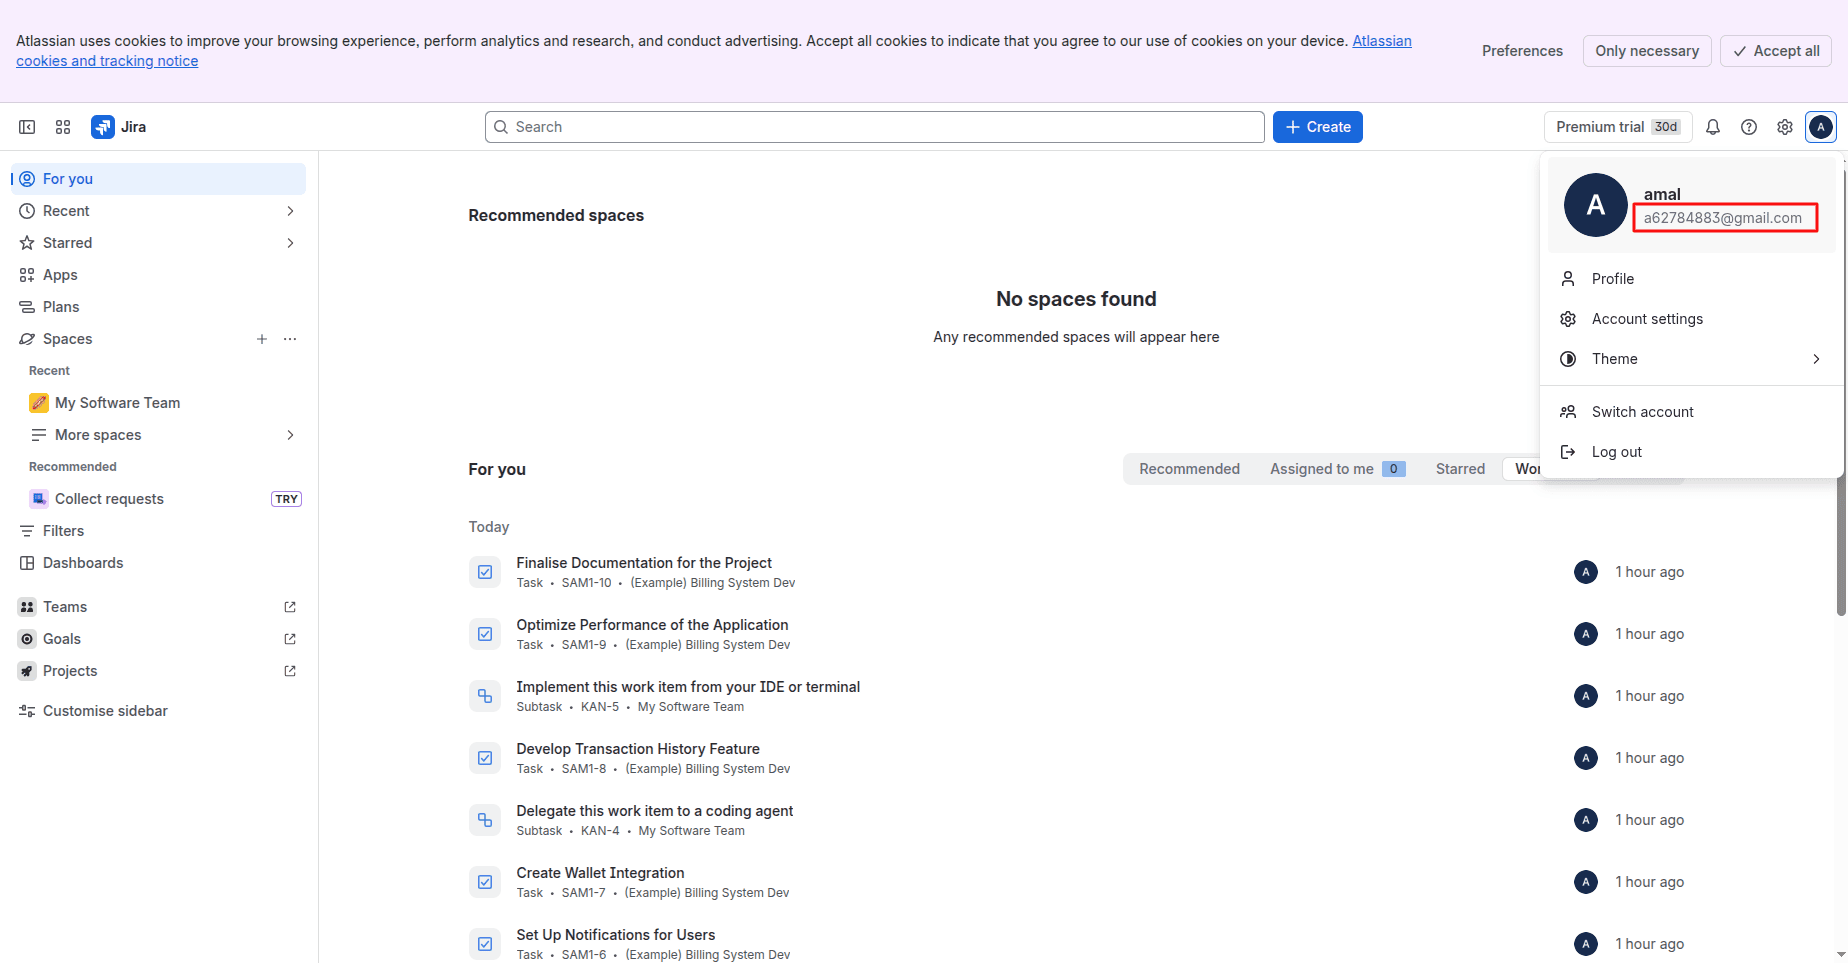
Jira Connector uses your Jira Username (email ID) for authentication with your Jira Account.
You can find your Jira username by clicking the Profile icon in the top-right corner of Jira. The email address used when registering your Atlassian account is displayed in the profile menu. Copy your email address and enter it as your User Name in the Jira Connector configuration of Odoo.
Configure the Jira Connector
Go back to Odoo and access the following page:
Project > Configuration > Settings
Enter the following details for the Jira Connector:
- Jira URL
- Jira account email
- API Token
Click the Test Connection button to check your credentials.
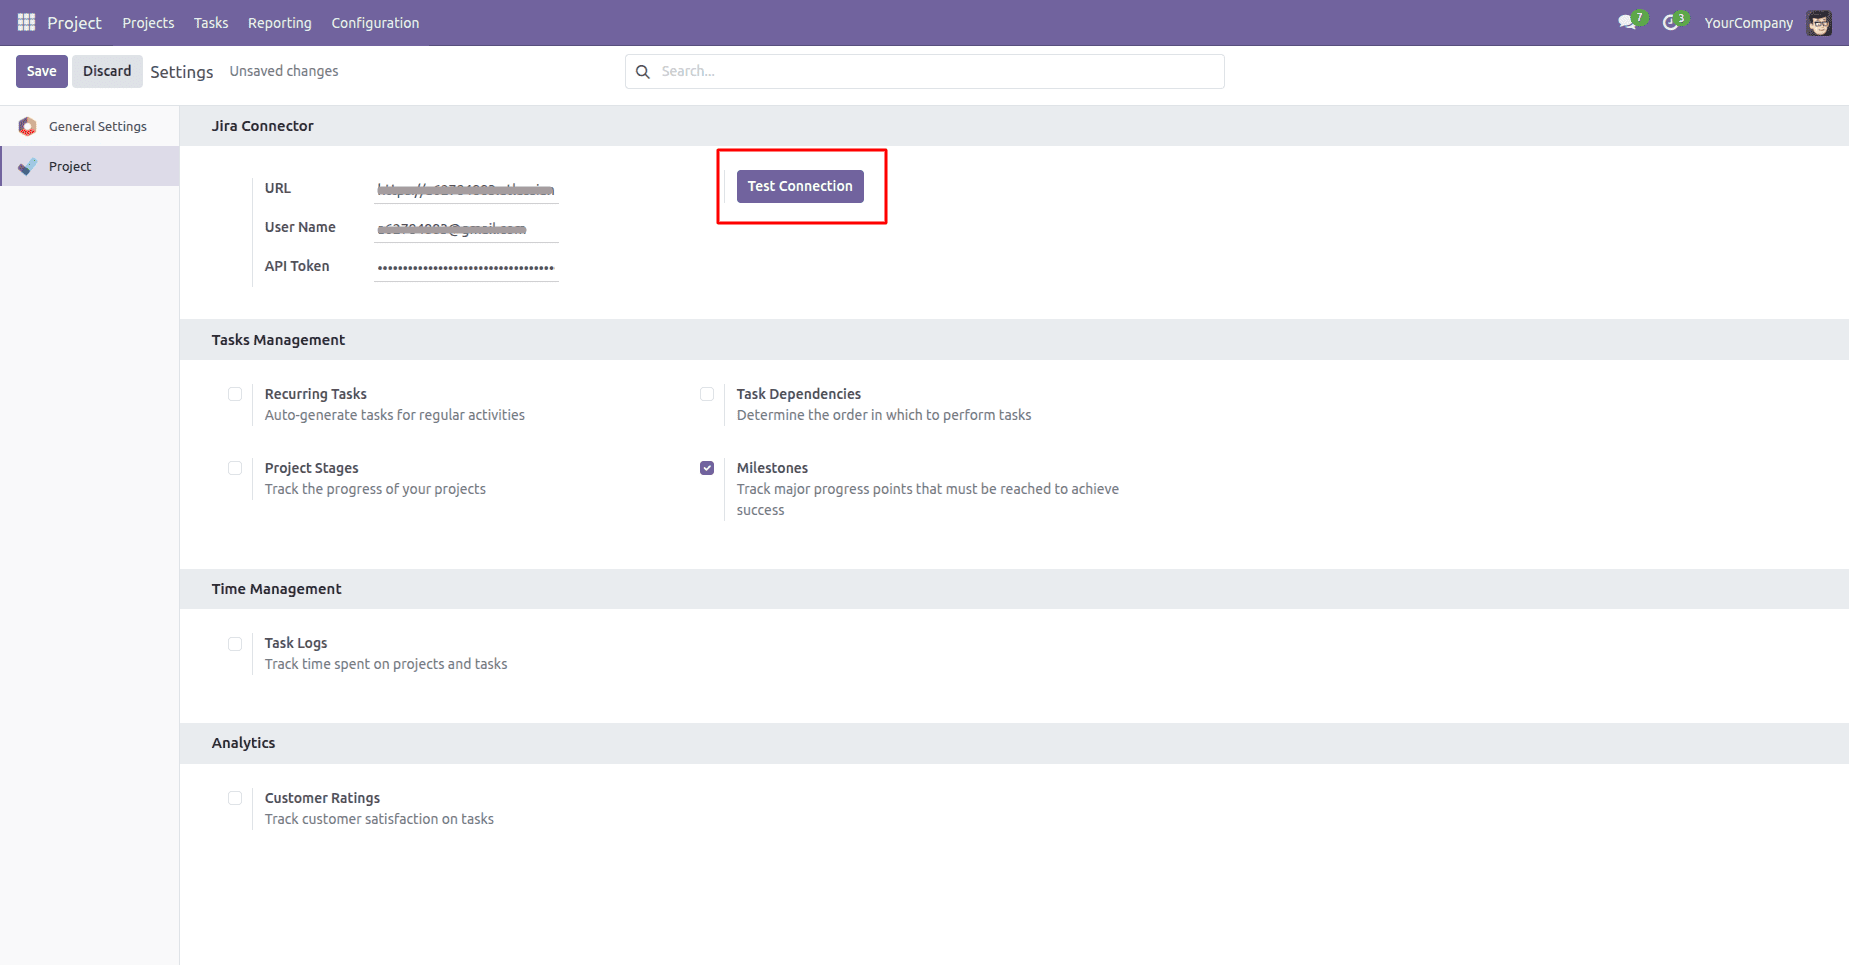
Upon successful authentication, a success message pops up from Odoo.
Once connected, the synchronization options become available.
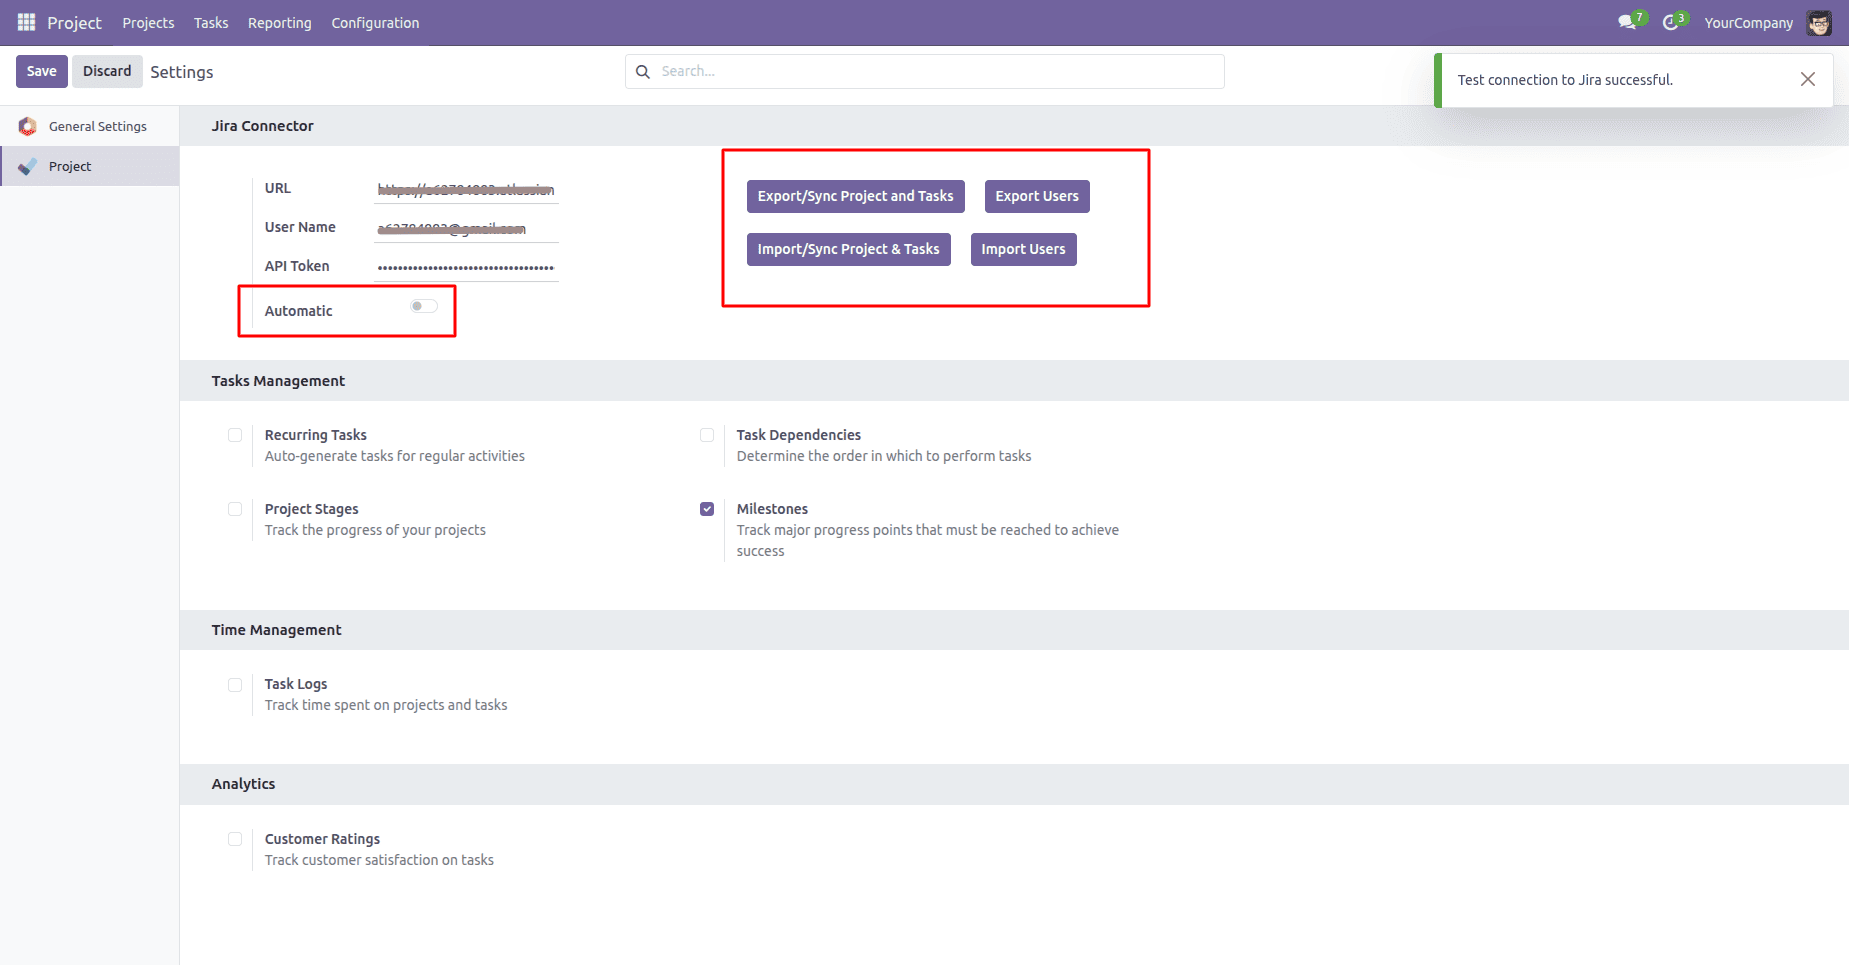
The connector provides the following synchronization actions:
- Export/Sync Projects & Tasks
- Import/Sync Projects & Tasks
- Export Users
- Import Users
An Automatic toggle is also available for enabling real-time synchronization.
Import Projects and Tasks from Jira
To import existing Jira projects into Odoo, click Import/Sync Project & Tasks.
The connector retrieves Jira spaces/projects and creates the corresponding Odoo projects.
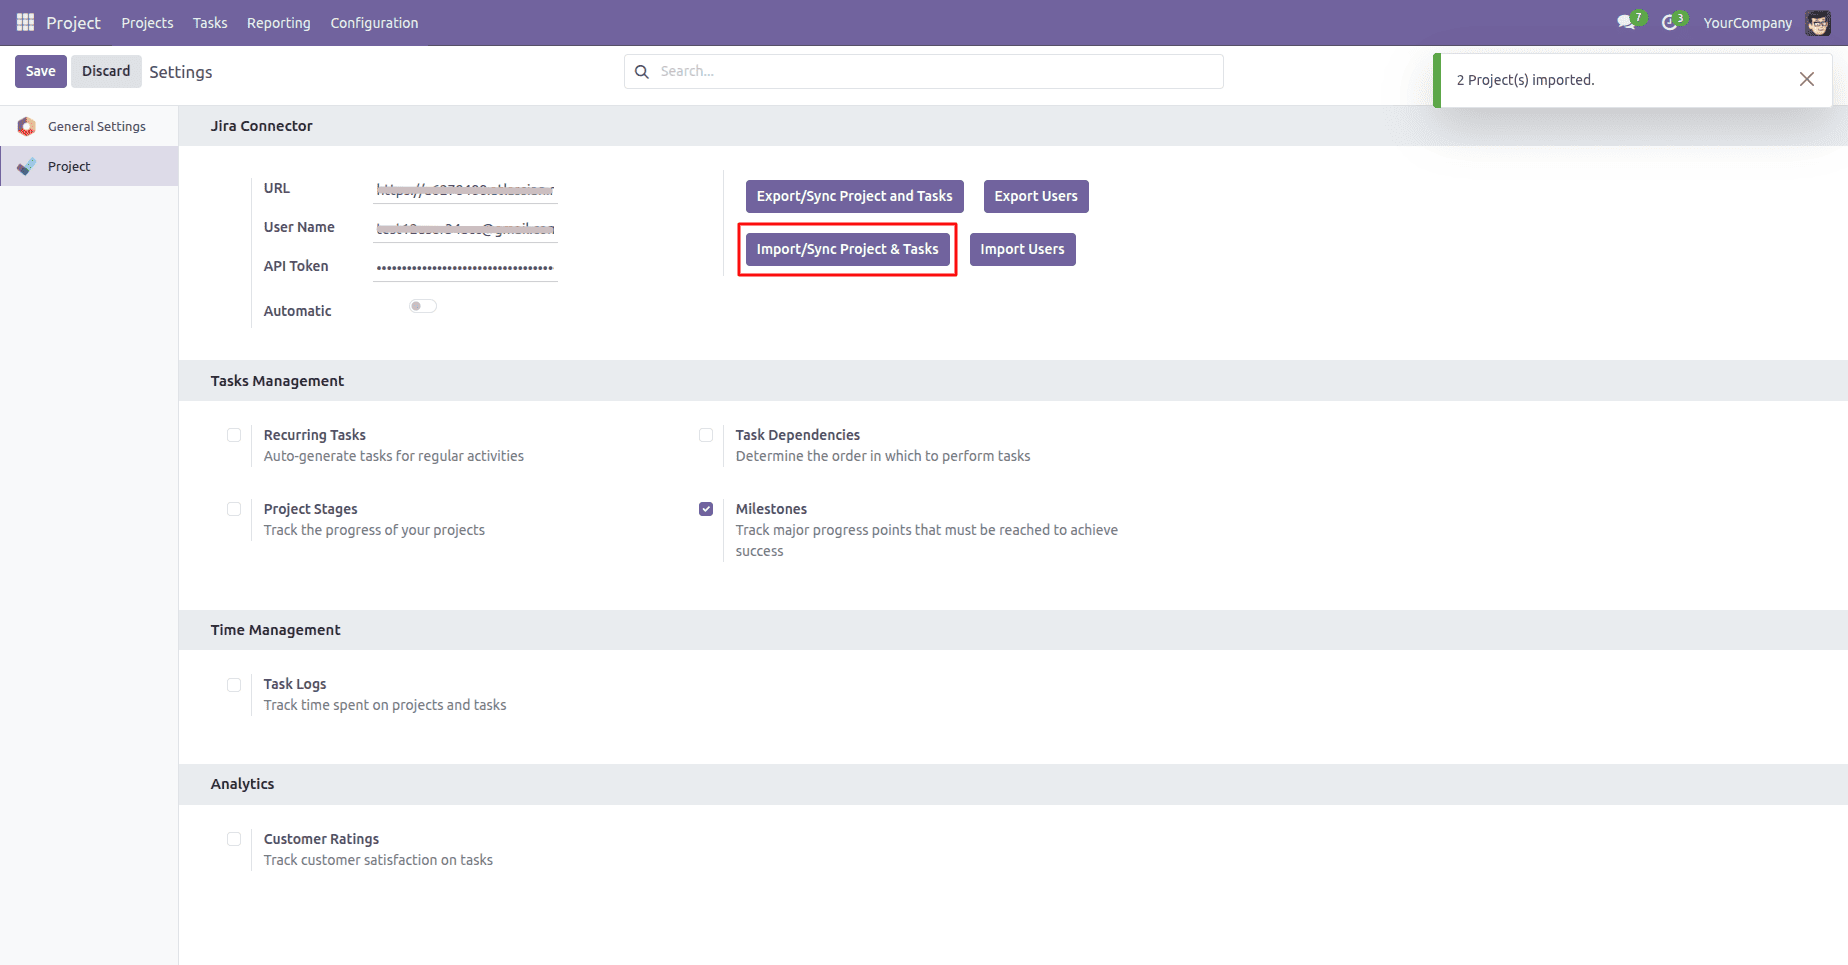
A confirmation message displays the number of imported projects.
After importing the project(s), go to the Project dashboard to check if the projects have been synchronized.
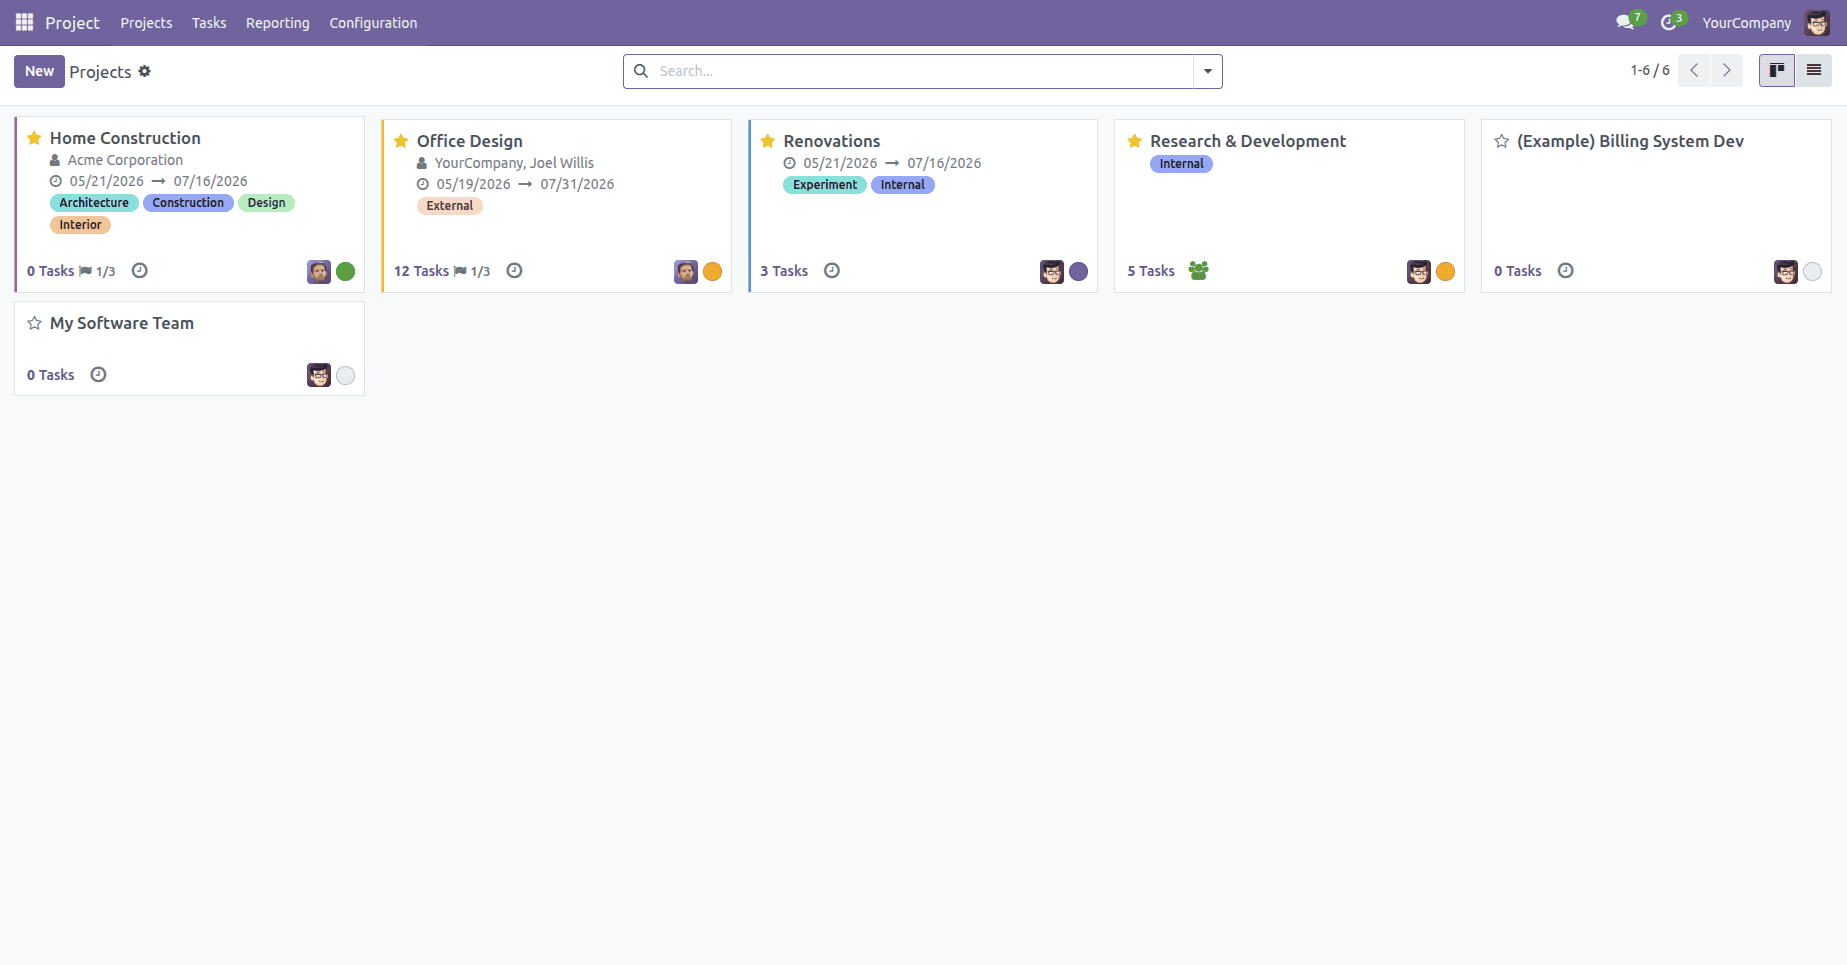
Import Jira Users
Click the Import Users button to synchronize Jira users with Odoo.
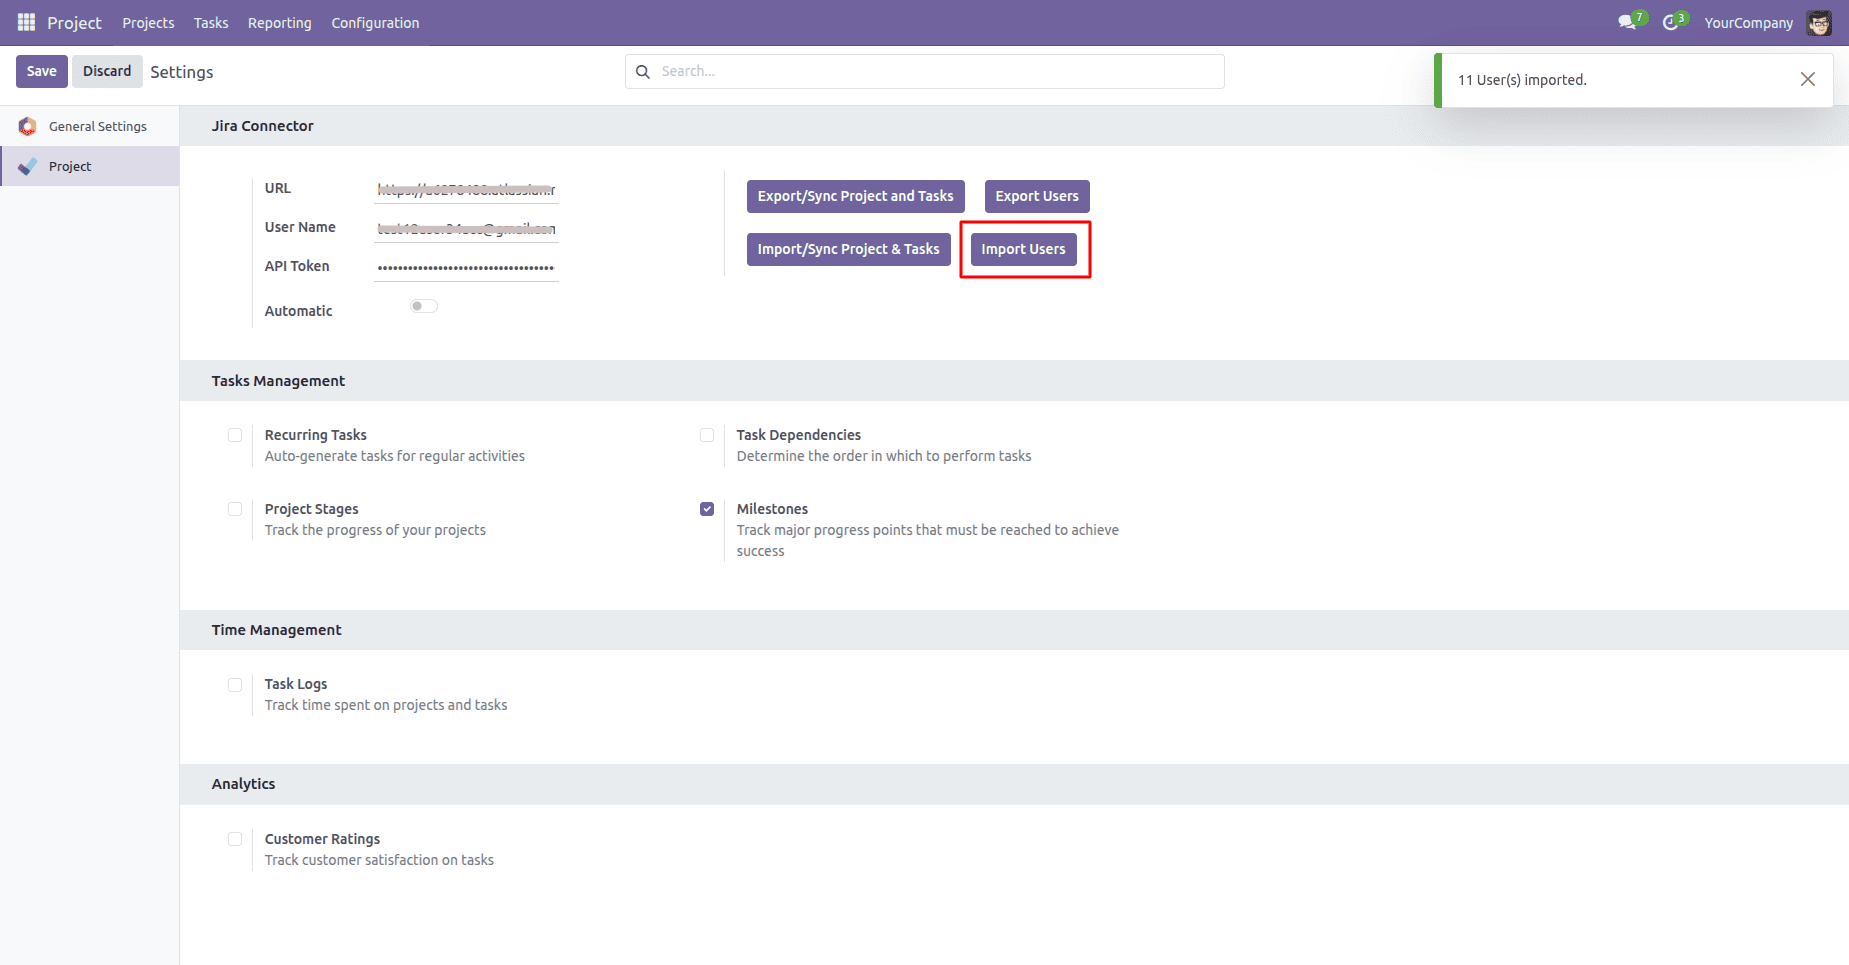
This operation synchronizes the Jira users available in Jira and creates respective Odoo users.
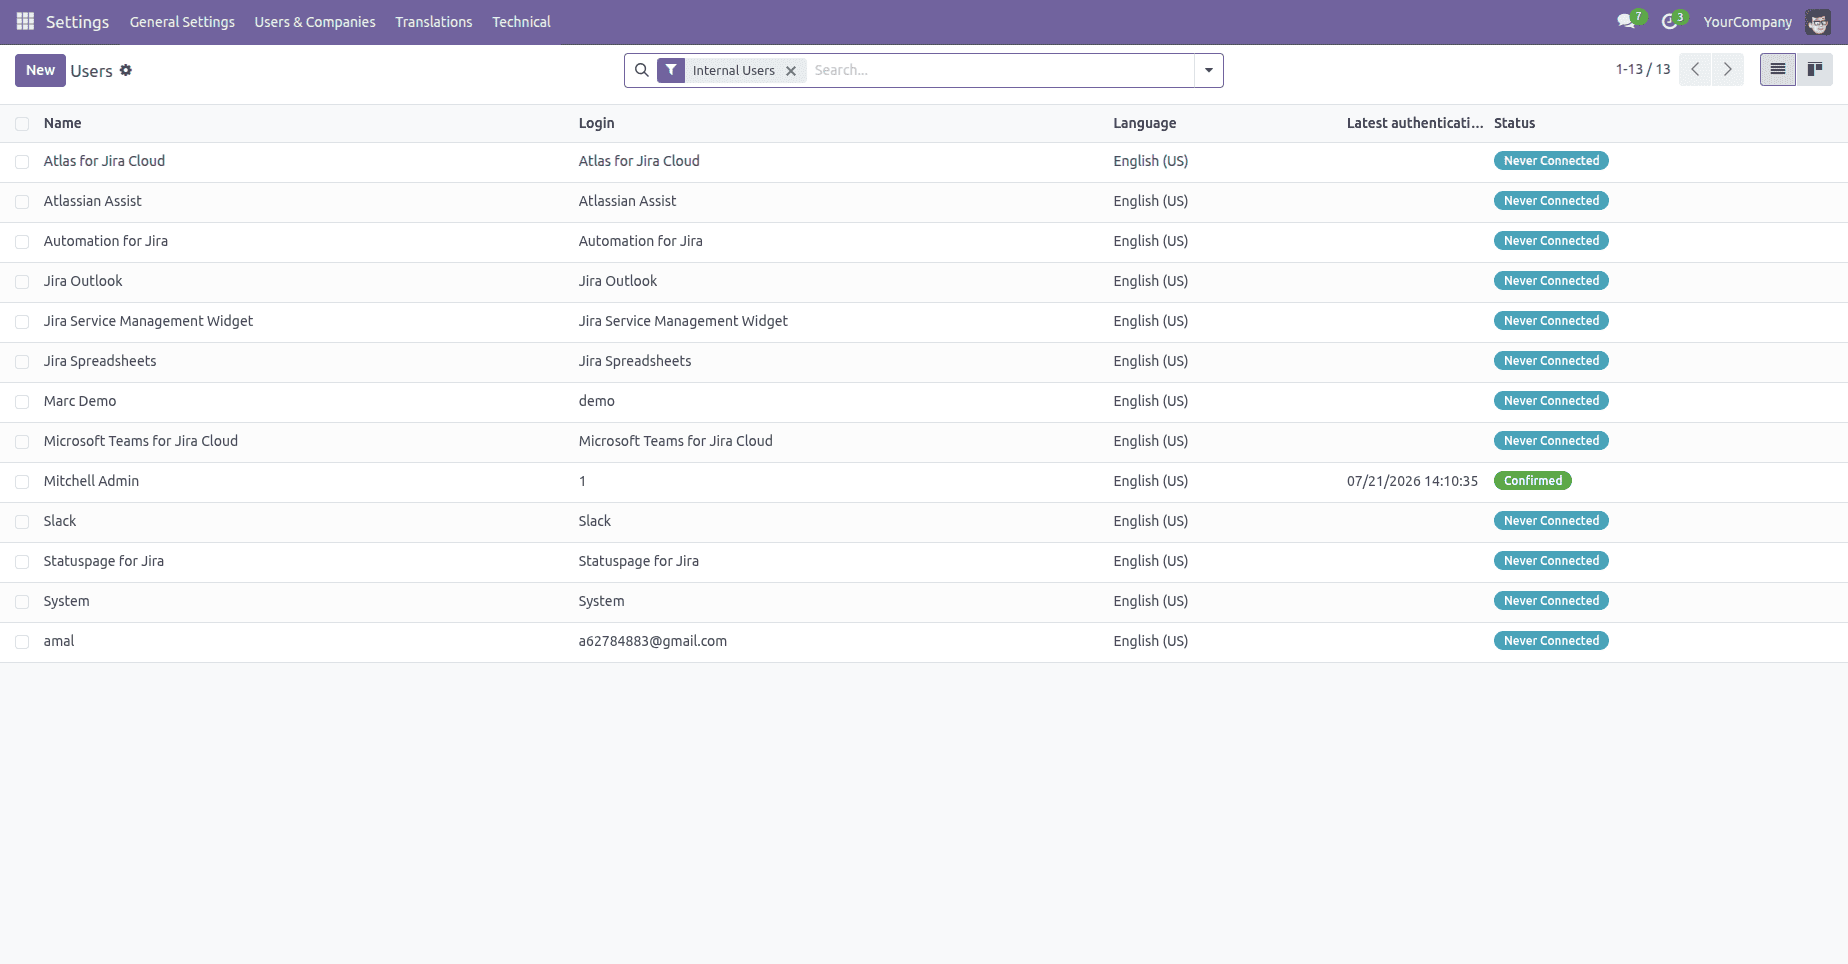
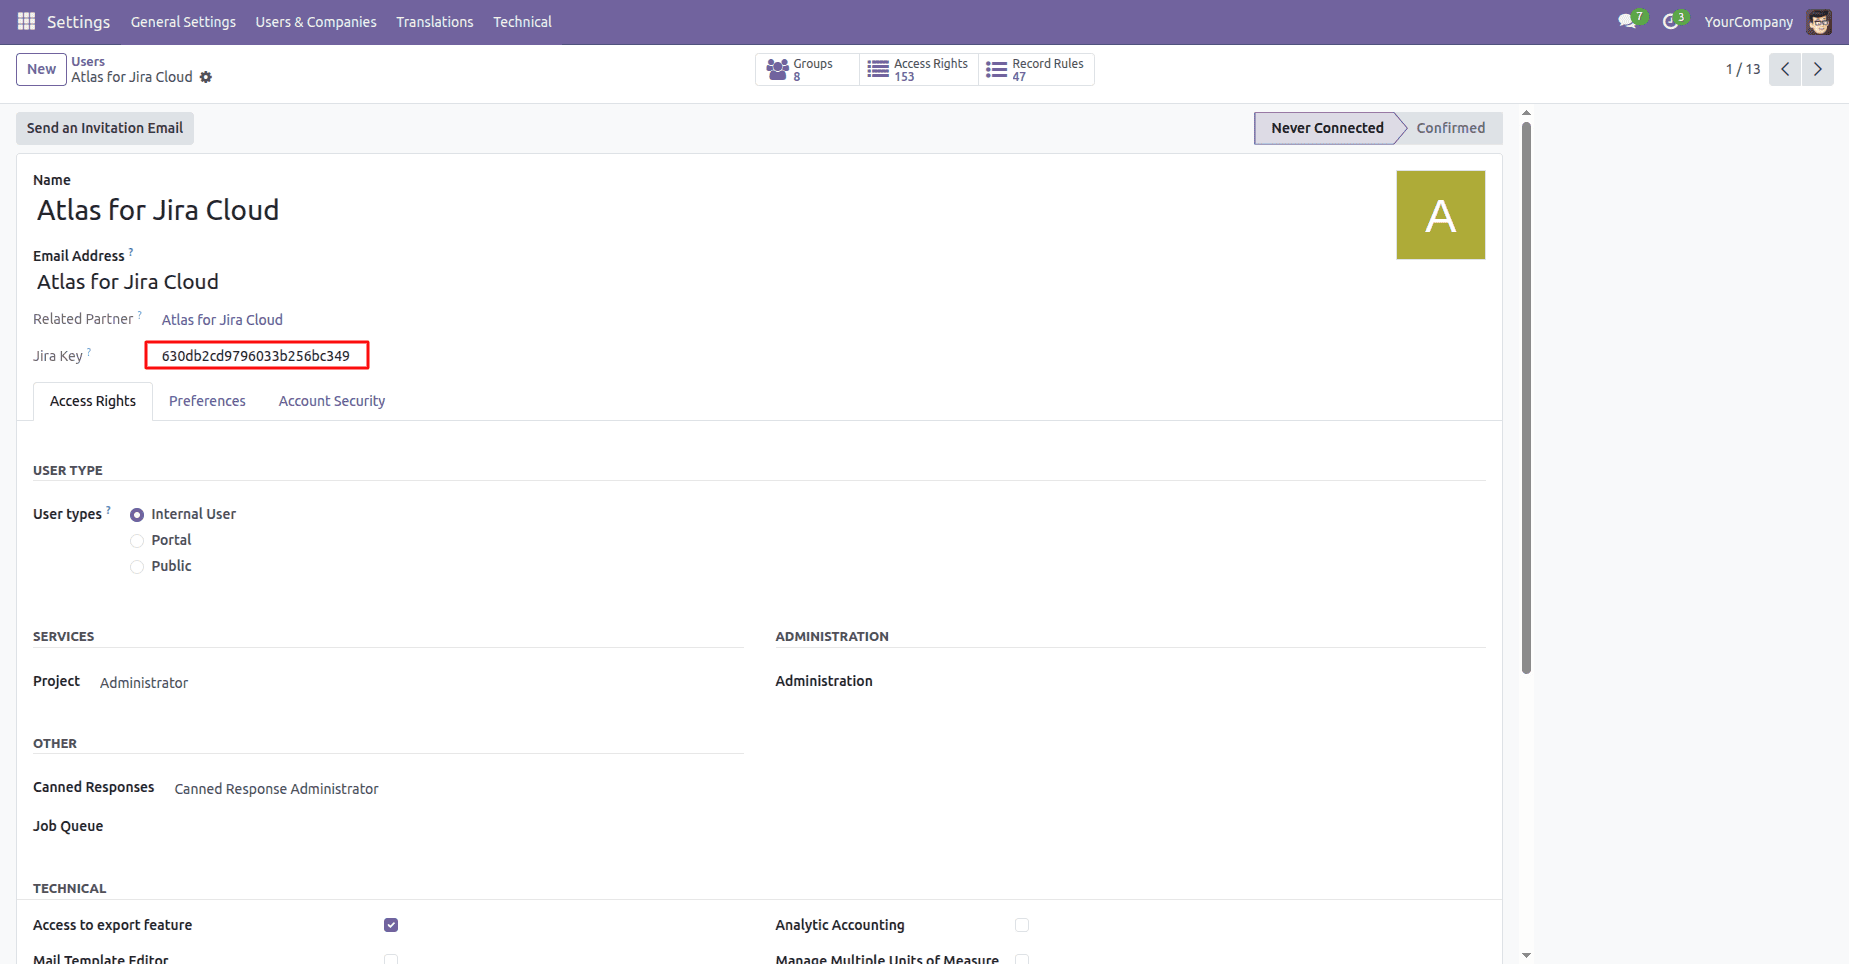
Every synchronized user has a Jira Key in their profile. This helps the connector to keep track of the Jira Account-Odoo User relationship while synchronizing in the future.
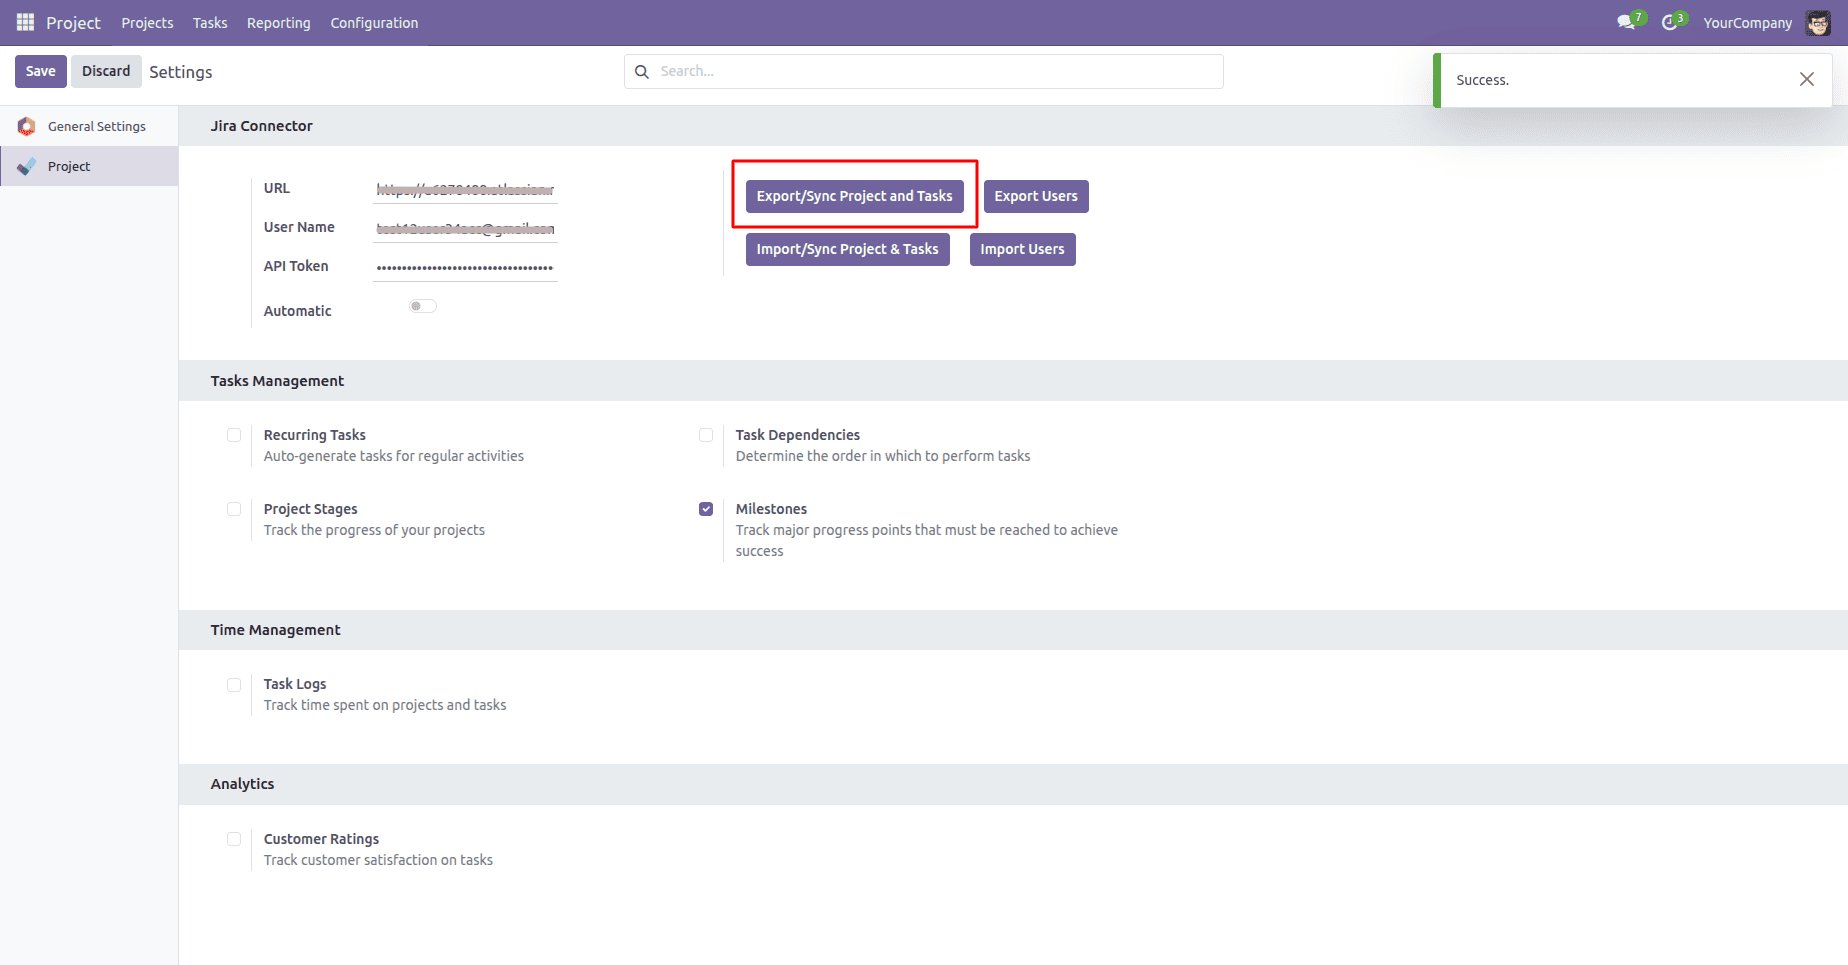
Export Projects and Tasks to Jira
Projects created inside Odoo can also be exported to Jira.
Click Export/Sync Project & Tasks.
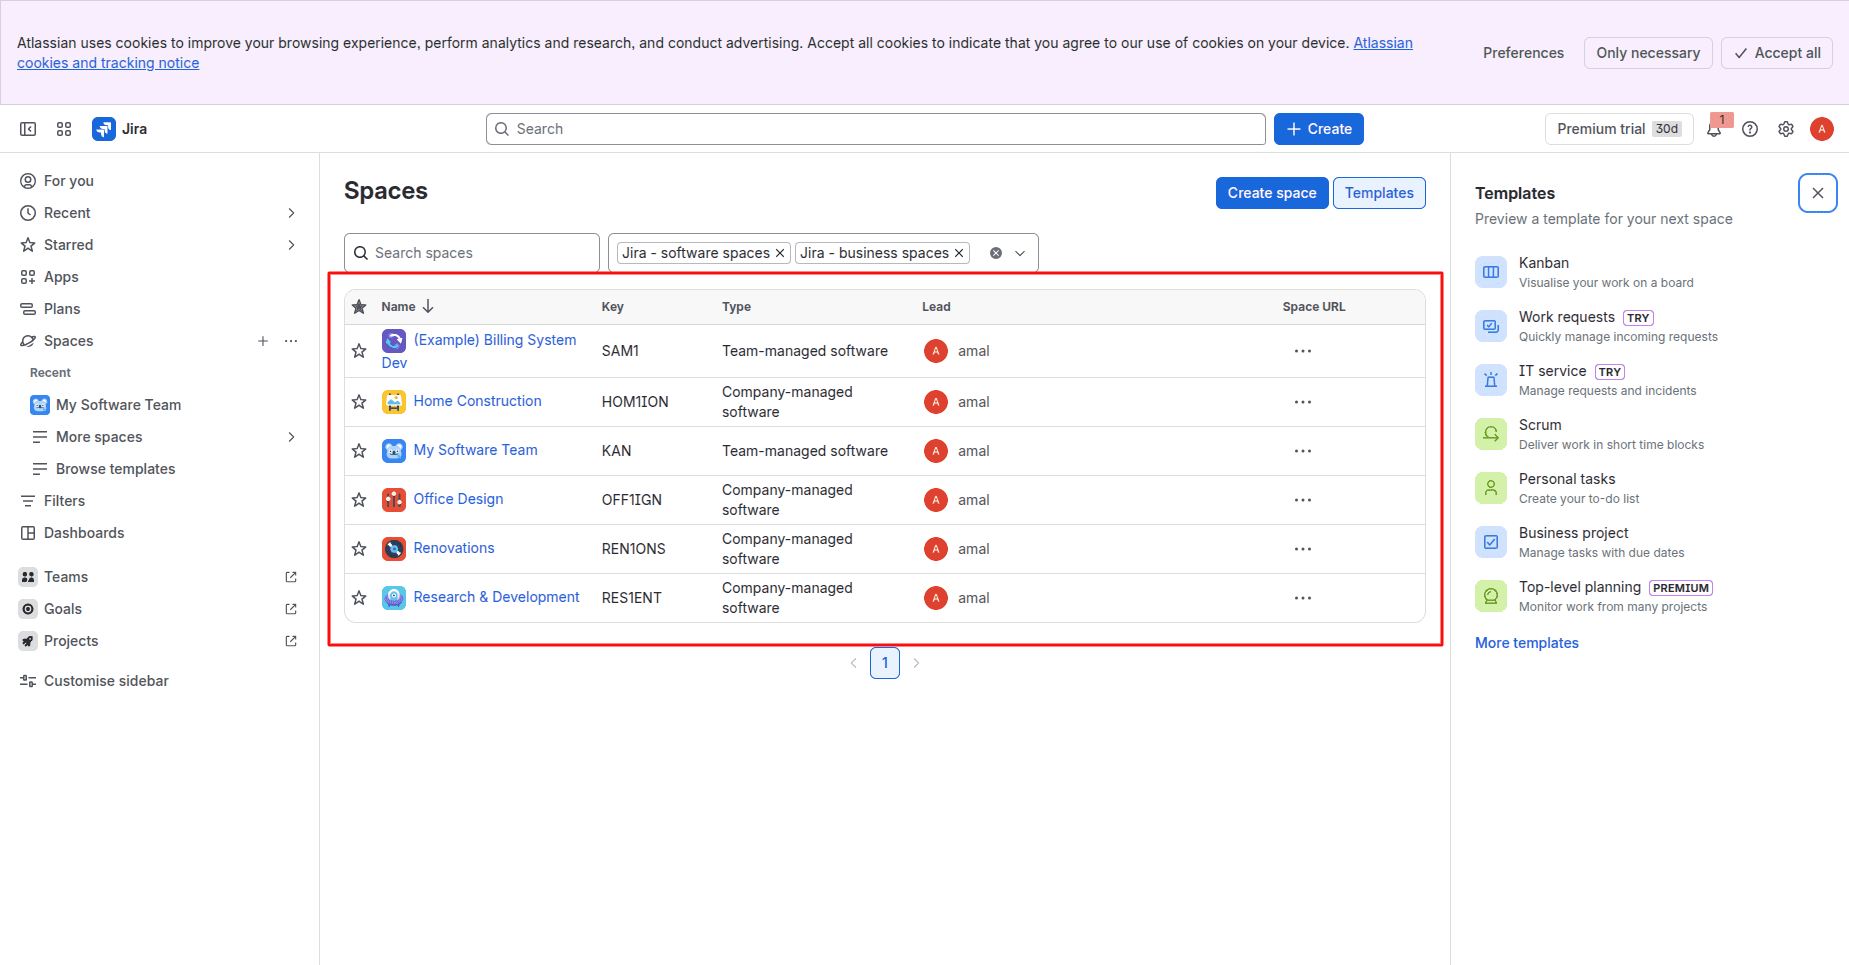
The connector creates corresponding Jira spaces/projects while maintaining the project mapping.
Automatic Synchronization
Besides manual synchronization, the connector also supports real-time synchronization.
Enable the Automatic option in the Jira Connector settings.
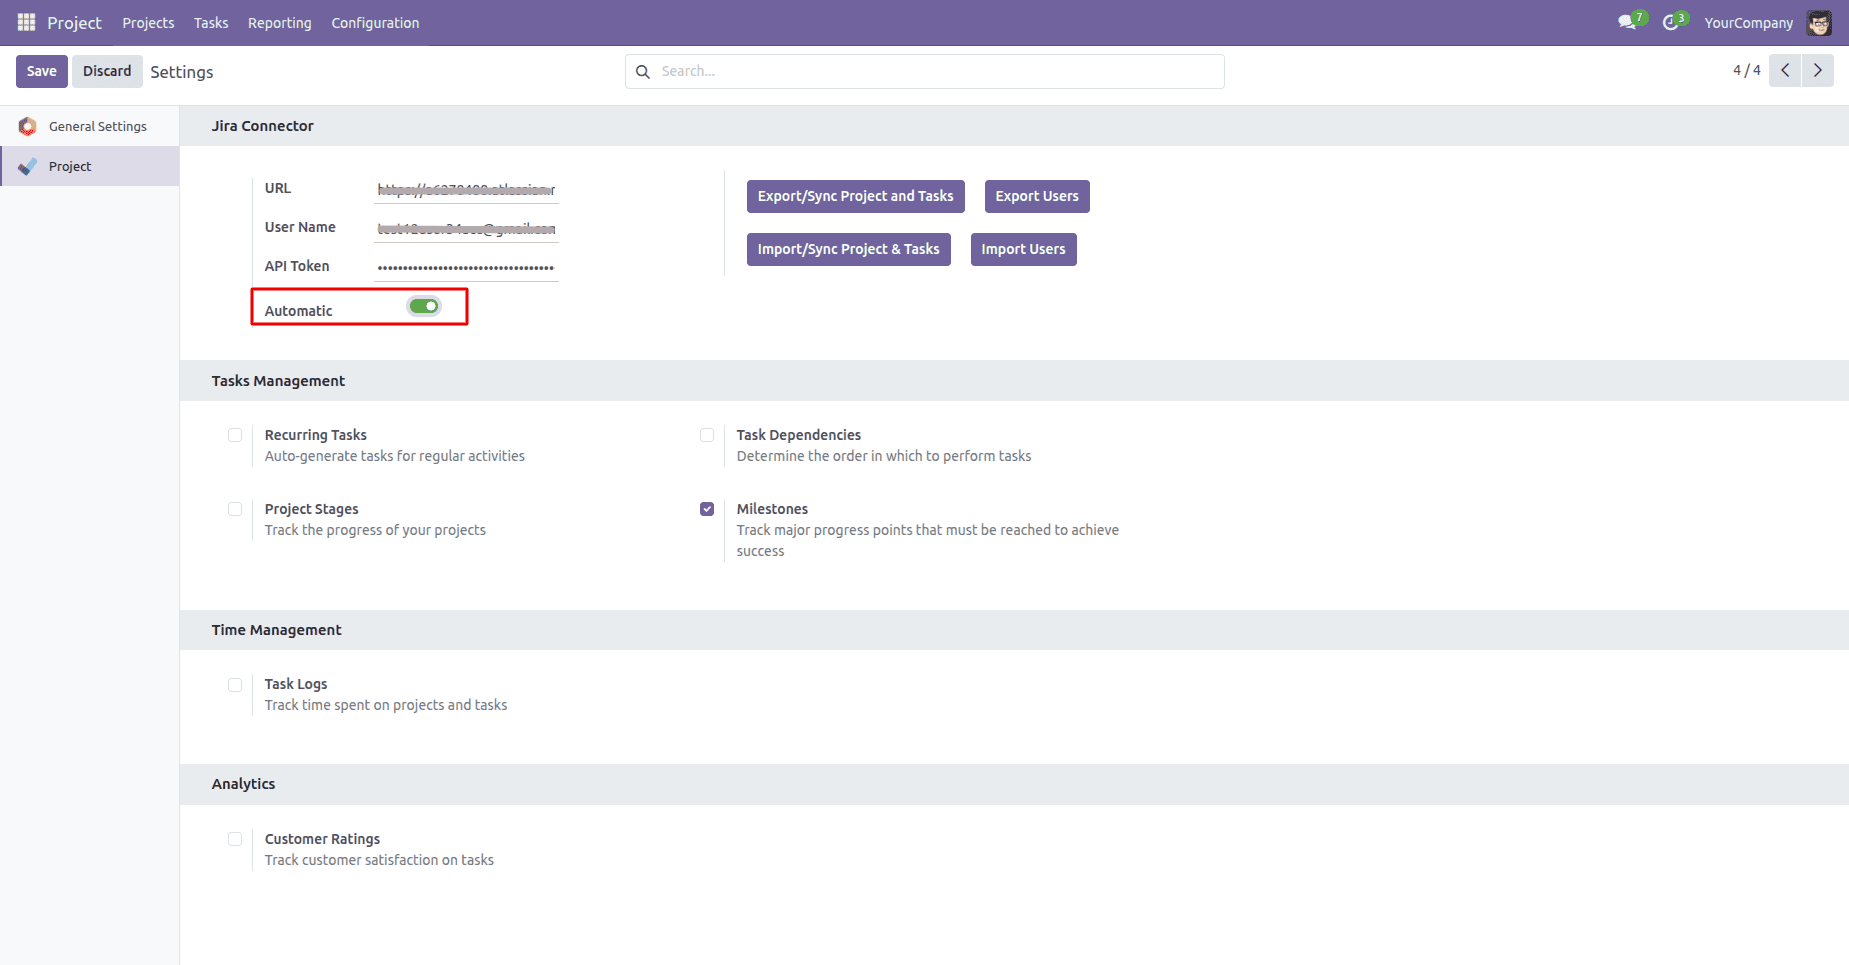
Upon enabling, Odoo automatically synchronizes the operations in the Supported Operations tab whenever there is any record creation or update.
For example, creating a project in Odoo will lead to the automatic creation of the respective project in Jira.
Create a new project in Odoo.
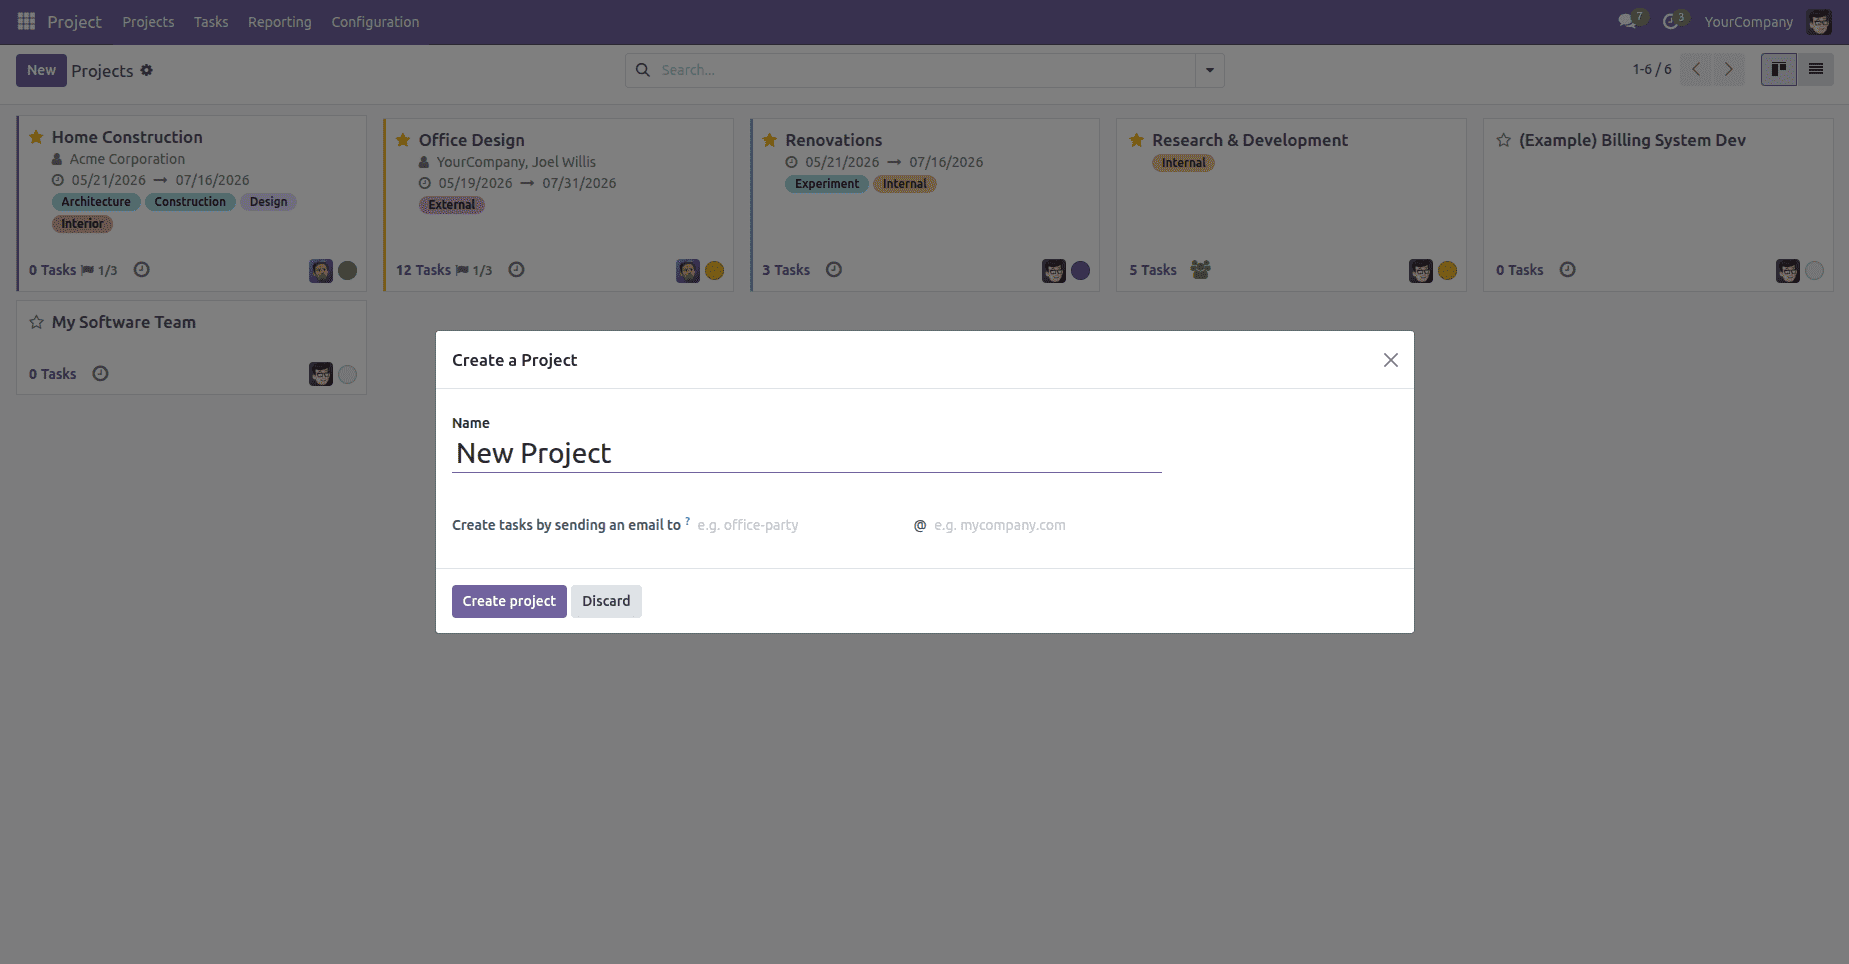
After saving the project, open Jira.
The new project will be automatically created in Jira, eliminating the need for manual synchronization.
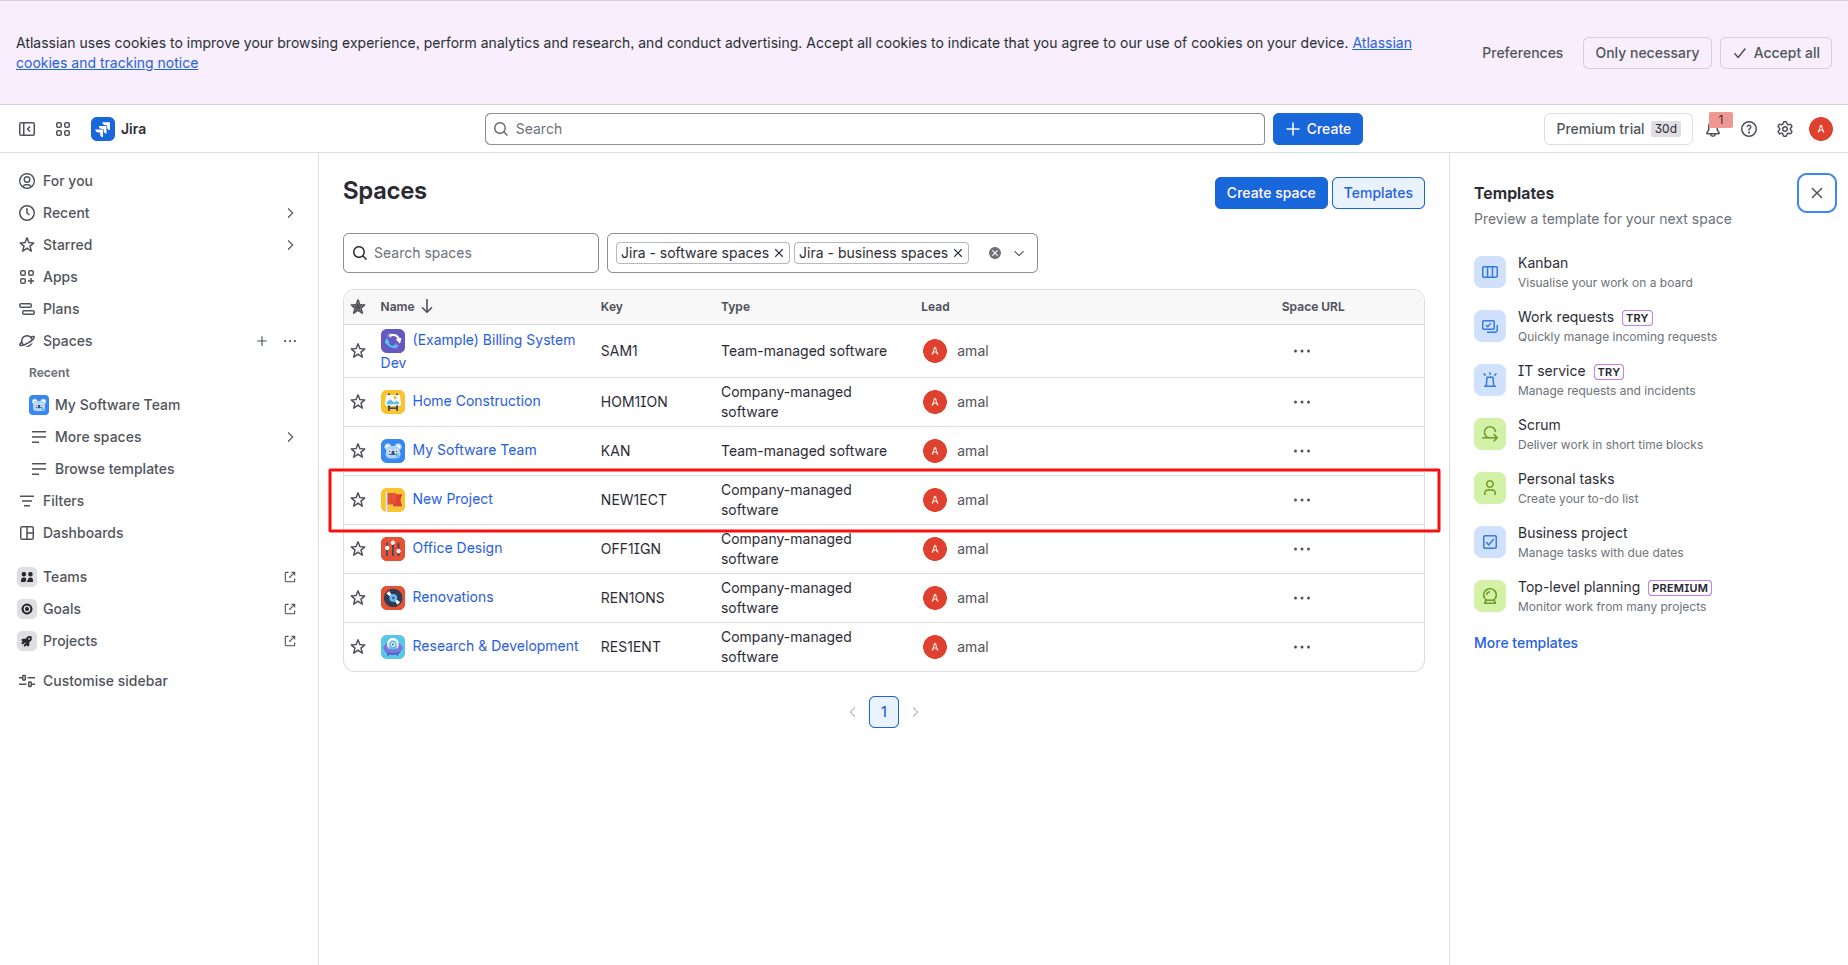
Such synchronization is facilitated by the use of webhook integration and an asynchronous background job provided by the connector.
How the Synchronization Works
The connector follows two synchronization approaches.
Manual Synchronization
Administrators can manually import or export projects, tasks, and users using the available buttons in the configuration page. Such an approach can be used at the initial configuration stage and/or during bulk synchronization.
Automatic Synchronization
When Automatic mode is enabled:
- Project creation in Odoo will create the project in Jira.
- Task changes will be updated automatically.
- Webhook events in Jira will update Odoo records.
- The queue job will handle synchronization in the background without disturbing the user.
It is a solution that requires minimal manual actions and guarantees the synchronization of both systems.
Odoo Jira Connector is a reliable solution for project management synchronization between Odoo and Atlassian Jira. The connector supports both manual synchronization and automatic synchronization in order to keep projects, tasks, users, comments, and attachments synchronized between two environments.
Thanks to API token authentication and webhooks, as well as asynchronous processing using Queue Job, businesses can avoid duplication of effort and collaborate efficiently within projects in Odoo and Jira.
To read more about Complete Guide to Setting Up Braintree Payment Gateway in Odoo 19, refer to our blog Complete Guide to Setting Up Braintree Payment Gateway in Odoo 19.