In this blog, we introduce the Live Chat for Instant Support feature in Odoo 18, designed to enhance customer engagement and service quality. With the Live Chat module, businesses can provide real-time assistance directly from their website, ensuring visitors receive quick answers to their queries. This feature helps reduce response time, boost customer satisfaction, and improve conversion rates by addressing concerns instantly. The Odoo 18 Live Chat is easy to configure, allowing support agents to manage conversations seamlessly from the backend. It is a powerful tool for building trust, increasing sales opportunities, and creating a better customer experience.
To activate this feature, simply enable the Live Chat option under your website settings in Odoo 18.
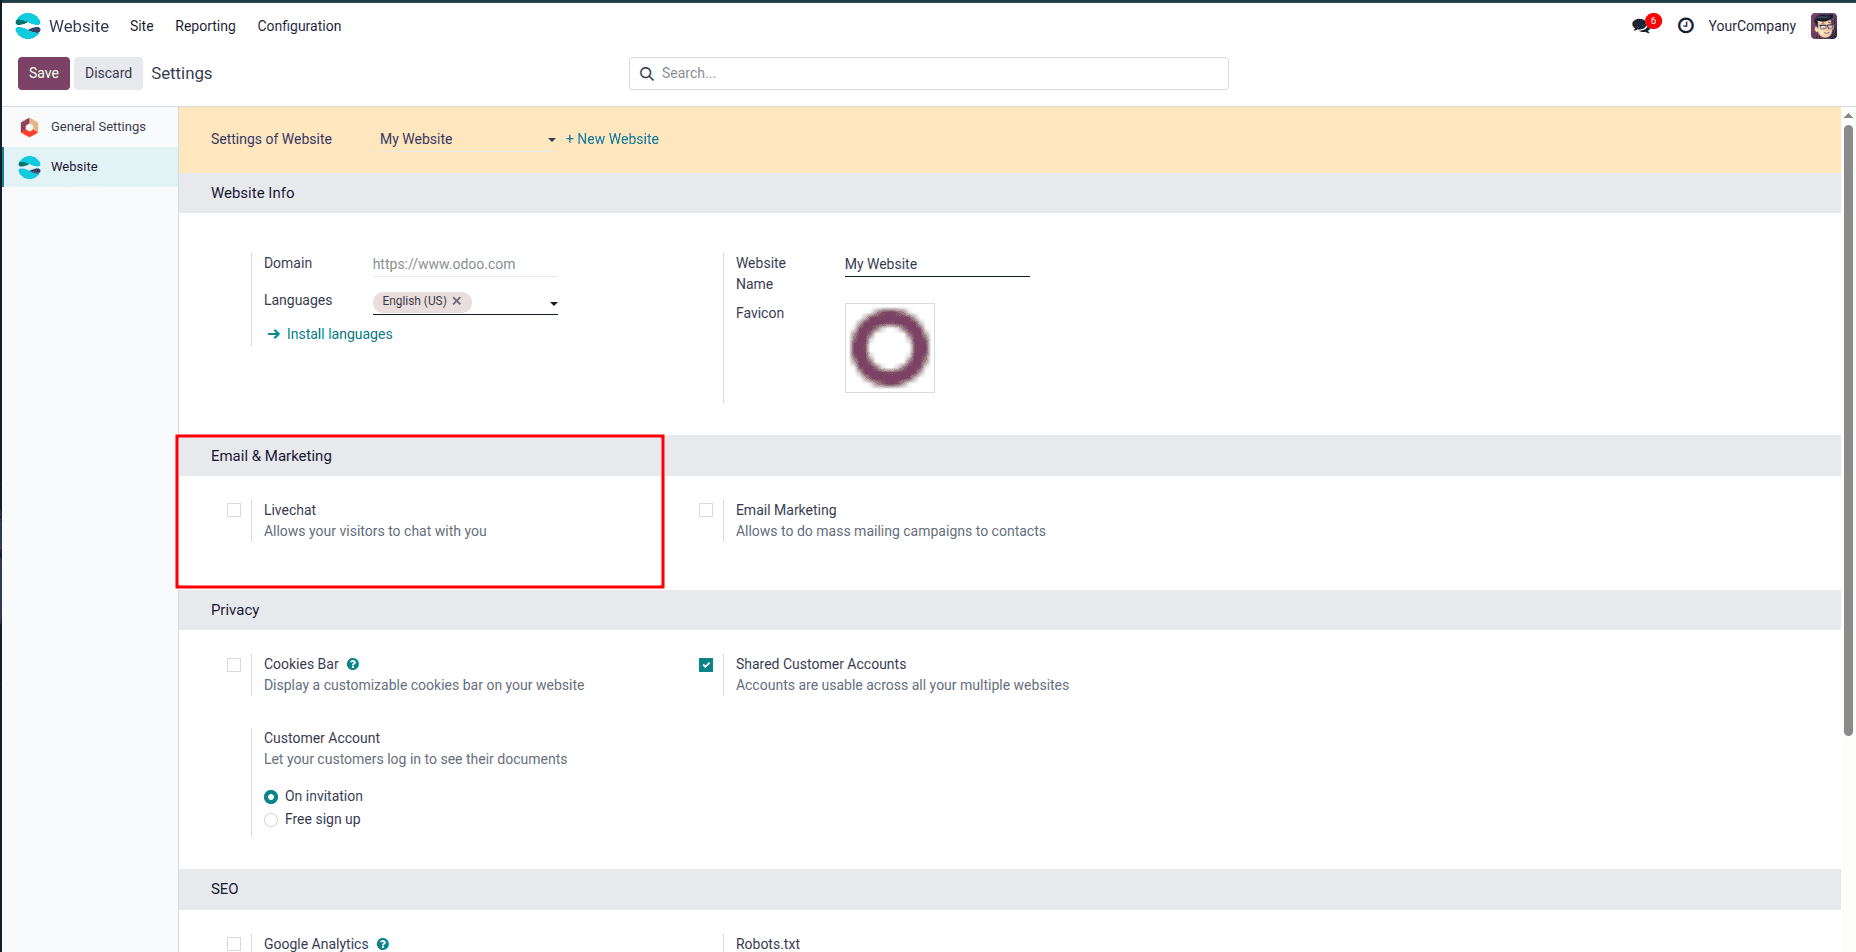
Once enabled, visitors can instantly connect with support agents for real-time assistance. Additionally, a chatter icon will appear on the website footer, allowing users to easily start conversations with support teams.
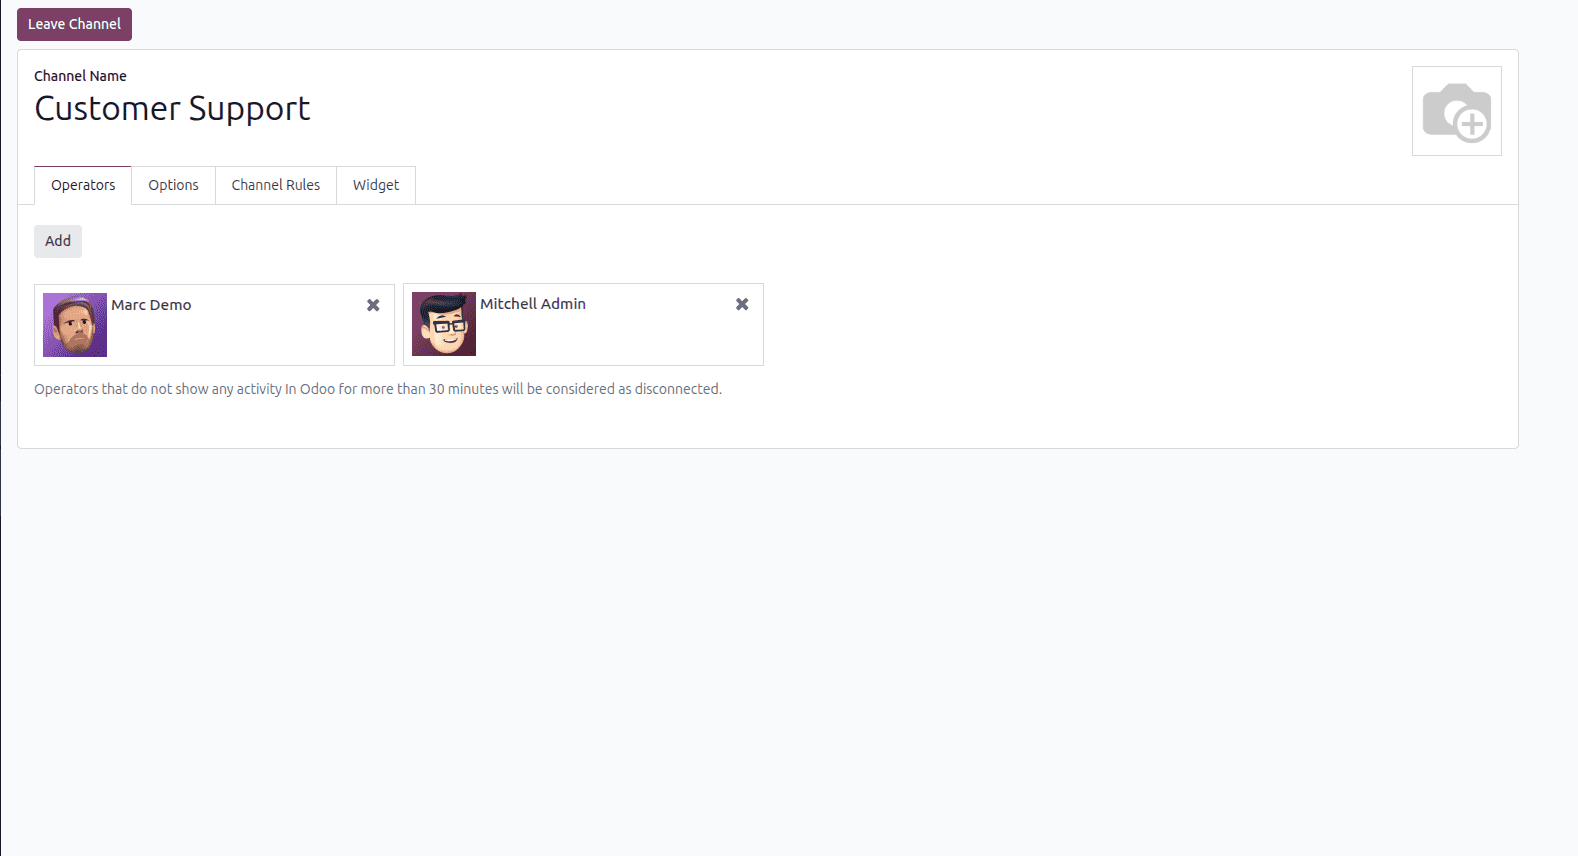
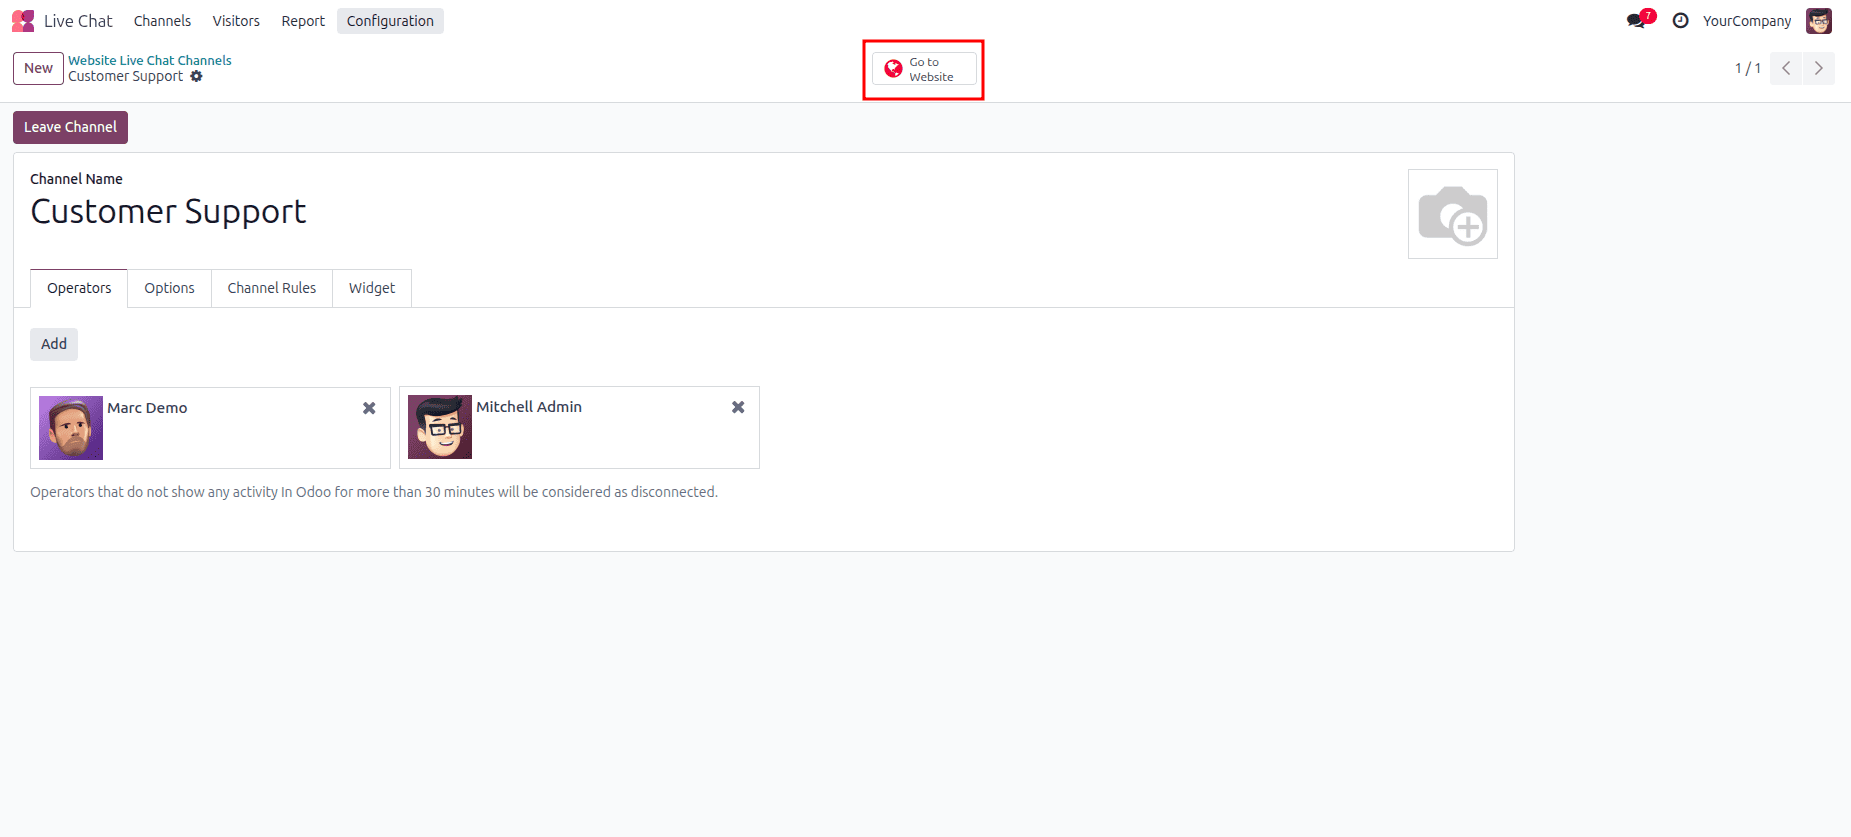
After enabling the feature, the next step is to create a Website Live Chat Channel in the Live Chat module. This channel connects website visitors with assigned support agents for instant interaction. We can add a support team by clicking Add under the Operators section. This allows assigning multiple agents to the live chat channel, ensuring quick responses and continuous customer support availability.
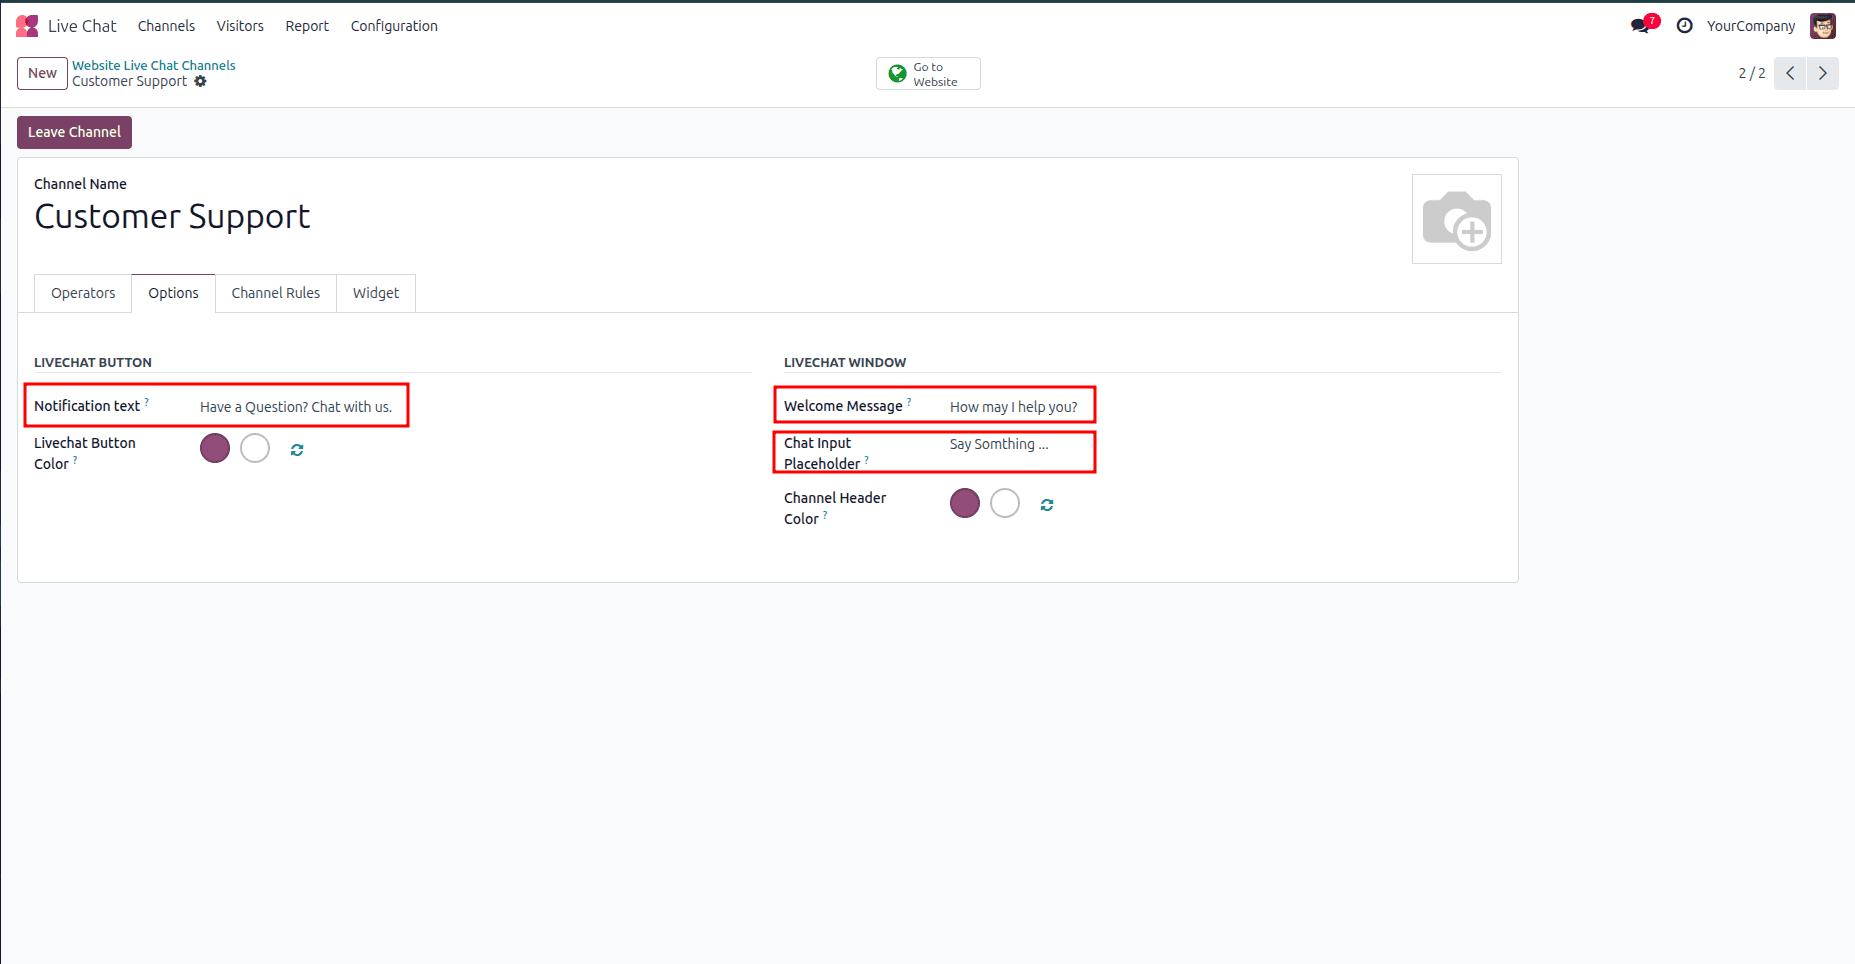
Under the options, we have settings like Welcome Message, Chat Input Placeholder, and Notification Text.
- Welcome Message: This is the first message shown to visitors when they enter the chat box, creating a friendly and engaging start.
- Chat Input Placeholder: This defines the placeholder text displayed in the typing area, guiding users on what to enter.
- Notification Text: This message appears as a small notification to alert visitors about the availability of live chat, encouraging them to start a conversation.
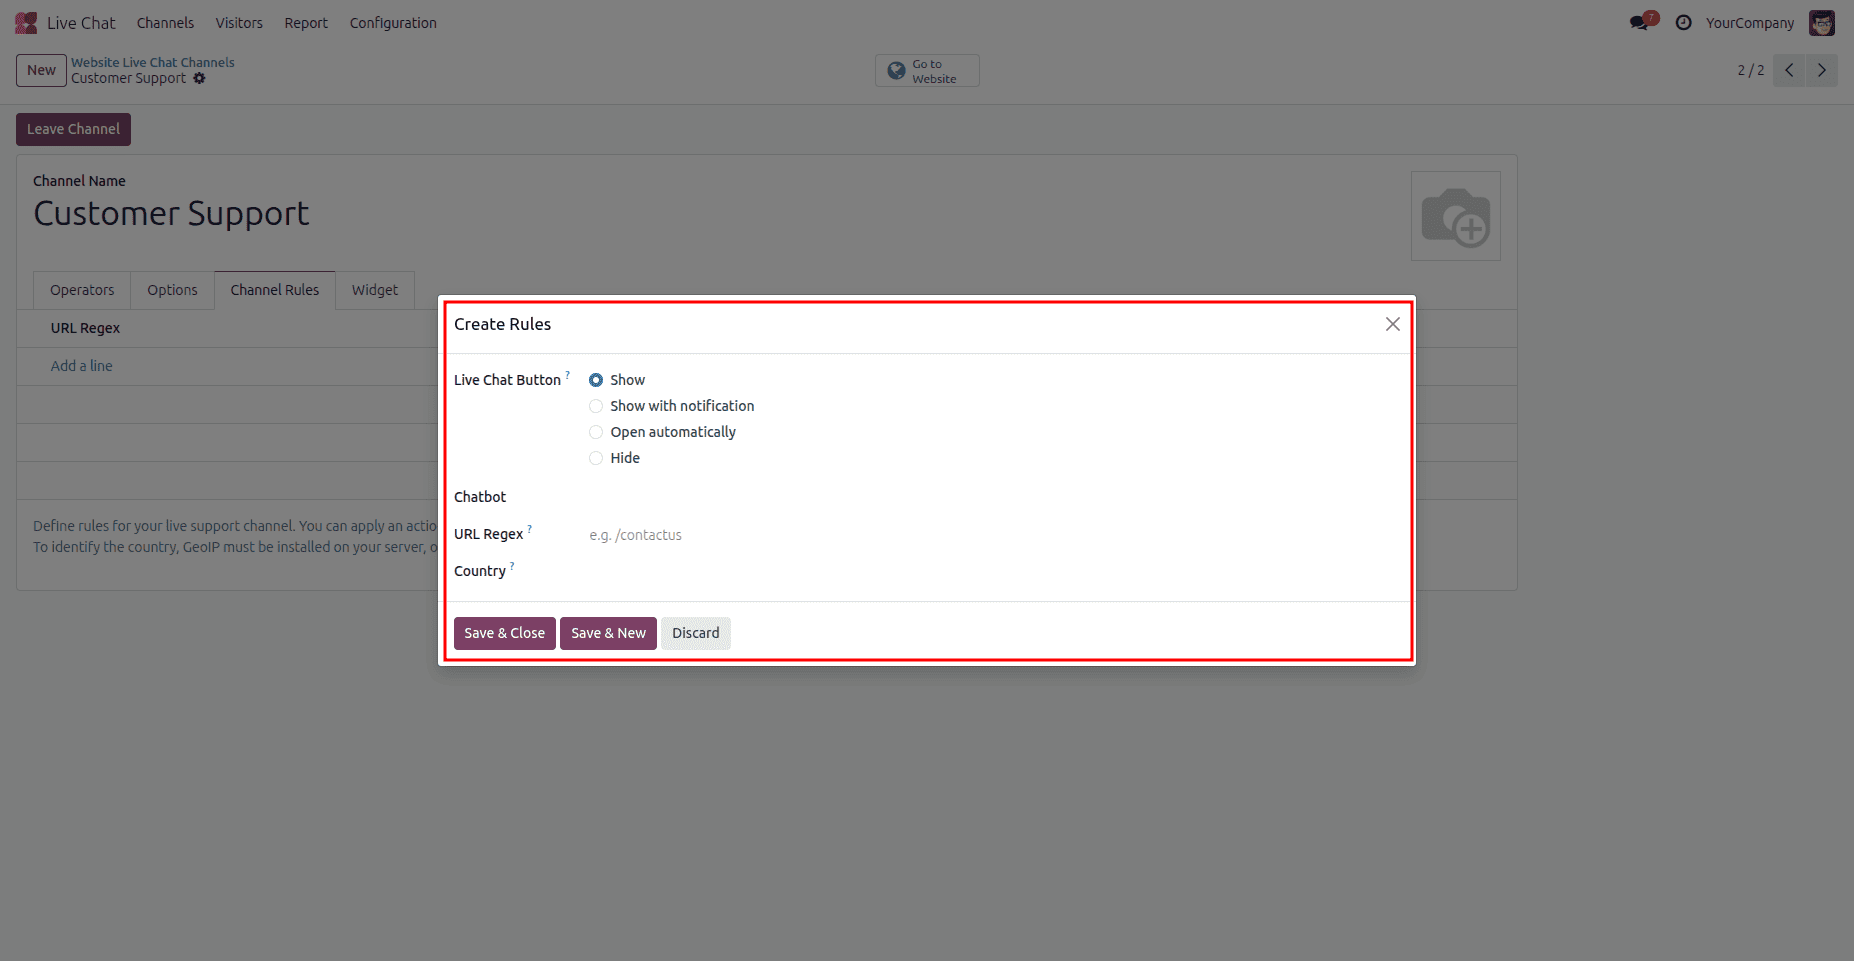
Channel rules allow us to control the visibility of the chat option on the website. These rules define how the chat button appears to visitors and when it should trigger. The Button Visibility settings include four options: Show, which displays only the chat button; Show with Notification, which shows the chat button along with a notification count to highlight activity; Open Automatically, which opens the chat window automatically when a visitor lands on the website; and Hide, which makes the chat option invisible. Additionally, we can configure the chat bot for specific purposes, such as automated responses. Rules can also be tailored to display the chat option on specific URLs for targeted pages or restricted to a specific country to engage only relevant visitors. These flexible rules make Live Chat a powerful tool for delivering personalized, real-time customer support.
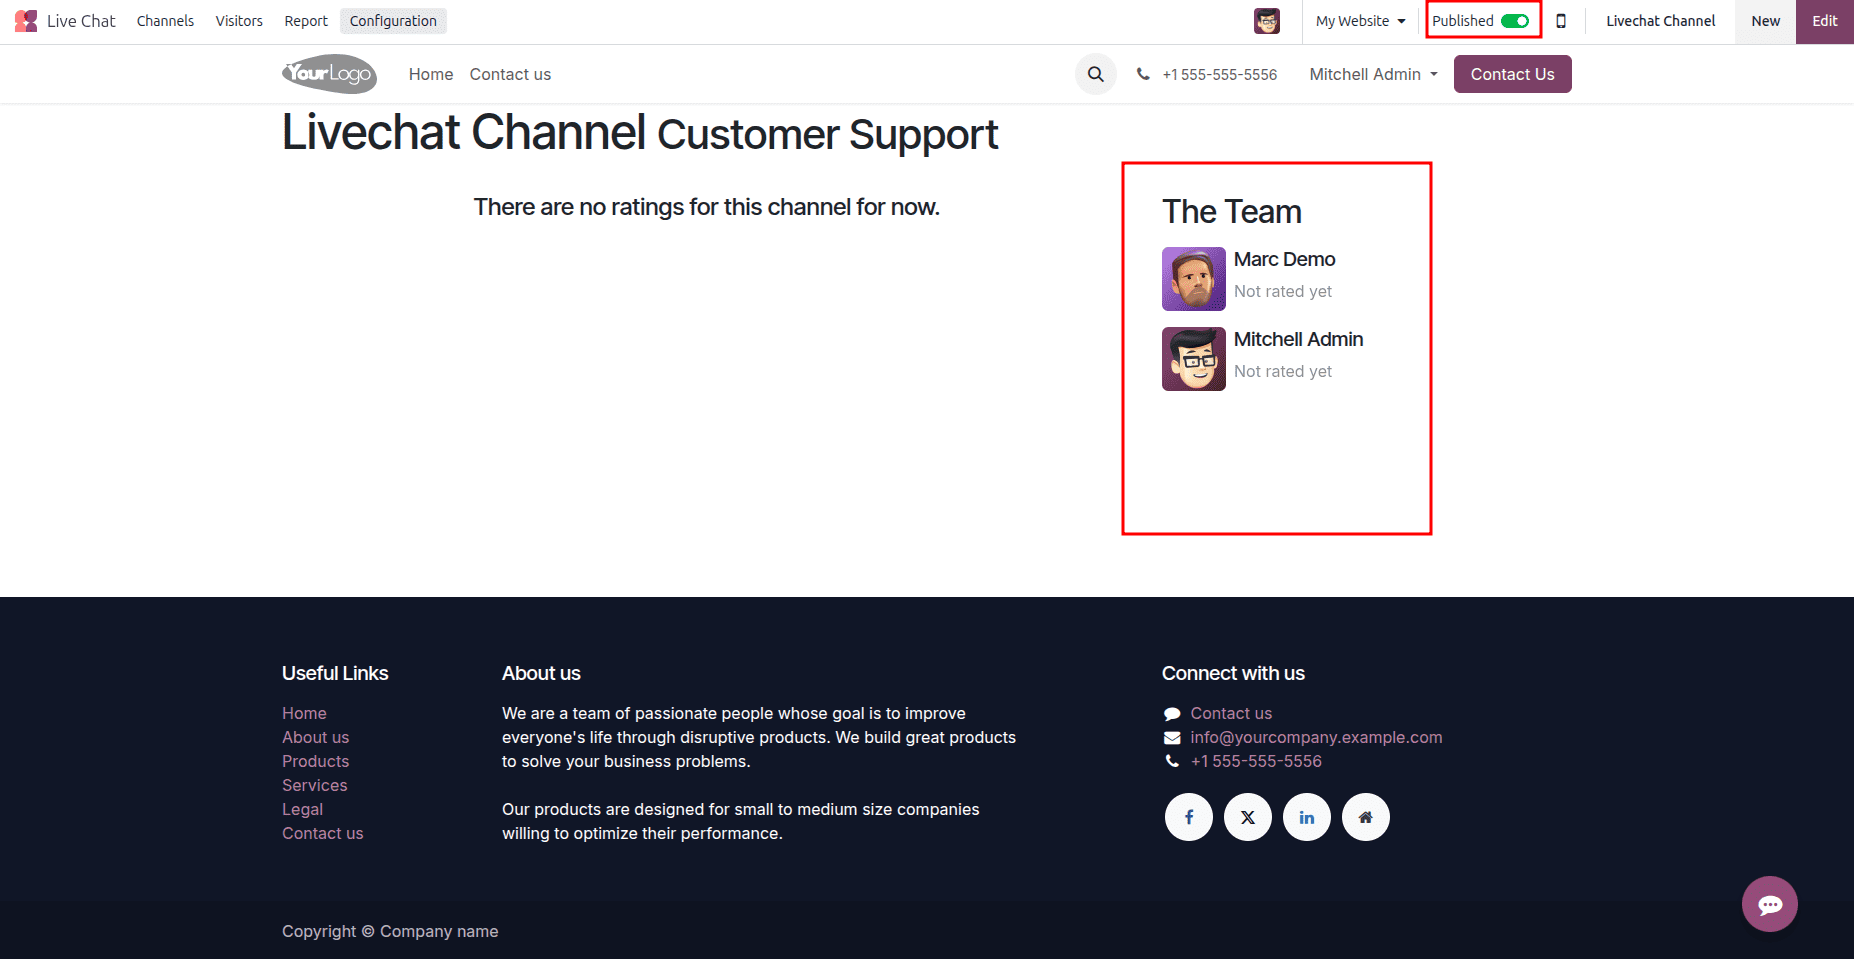
After completing the channel setup, simply click the Go to Website button. From there, you can preview the live chat feature and then publish the channel to make it active on your website.
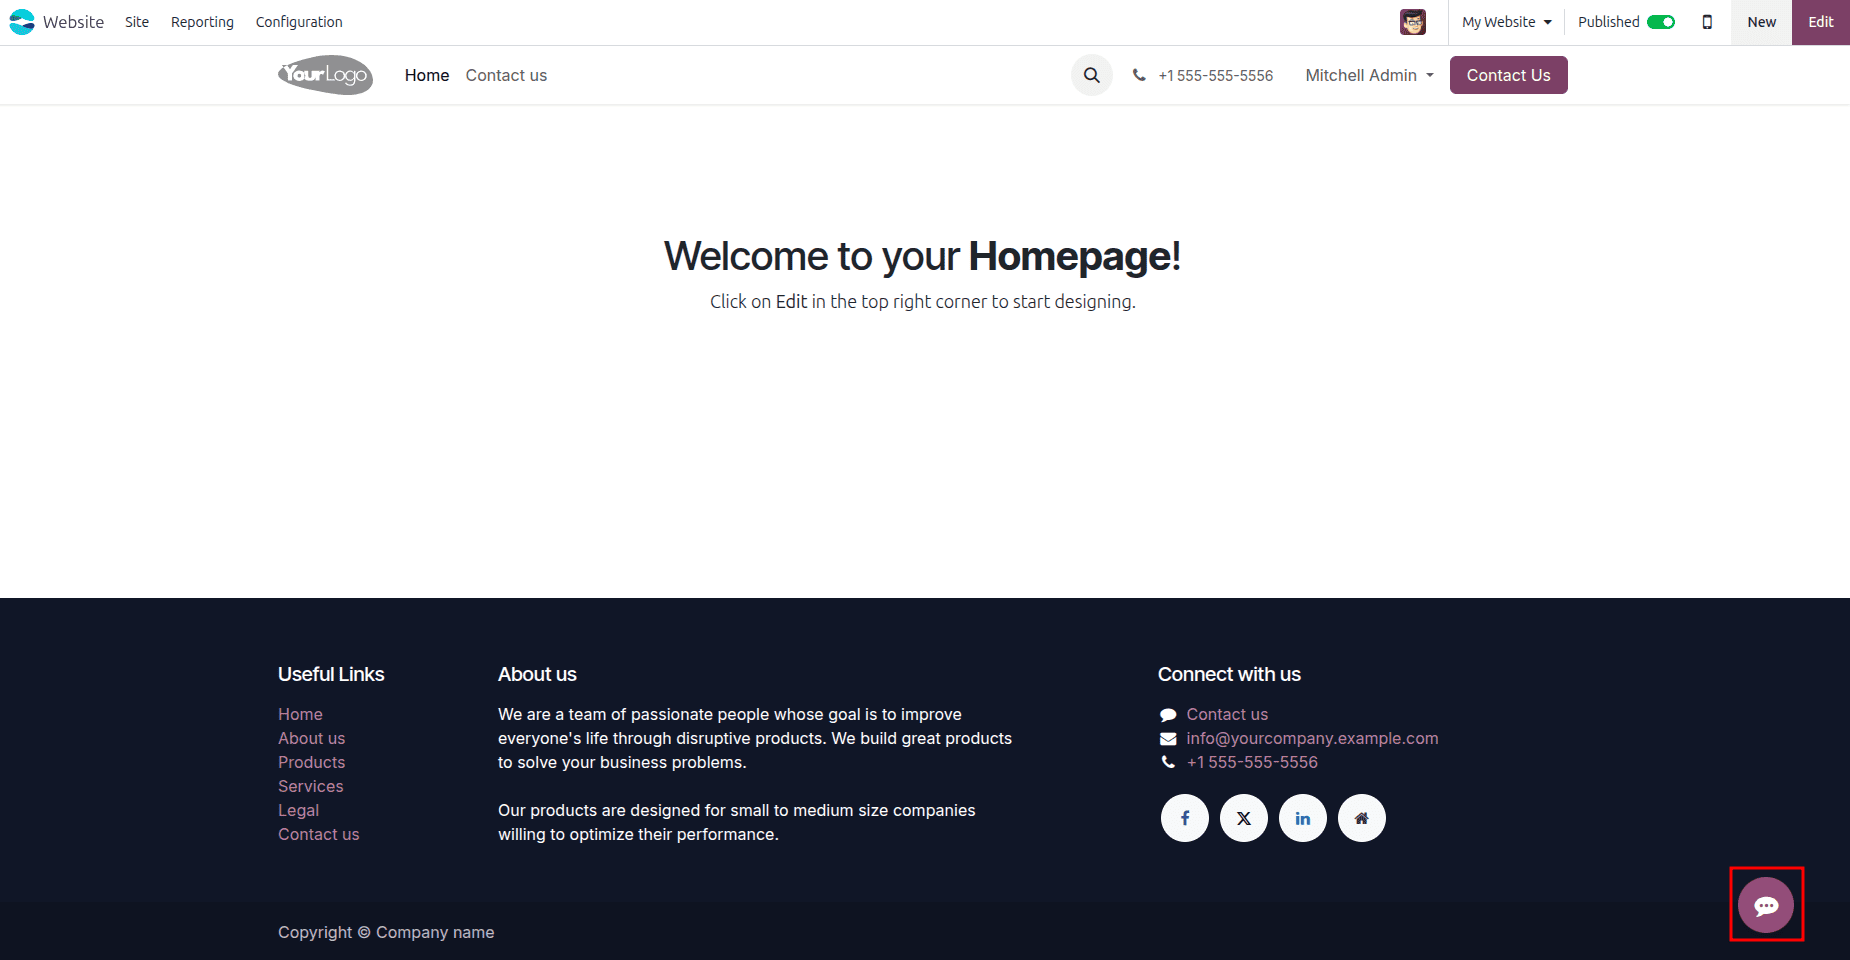
Once the channel is published, we can see the assigned team members displayed on the website page. This gives visitors a clear view of the available support agents, adding trust and transparency.
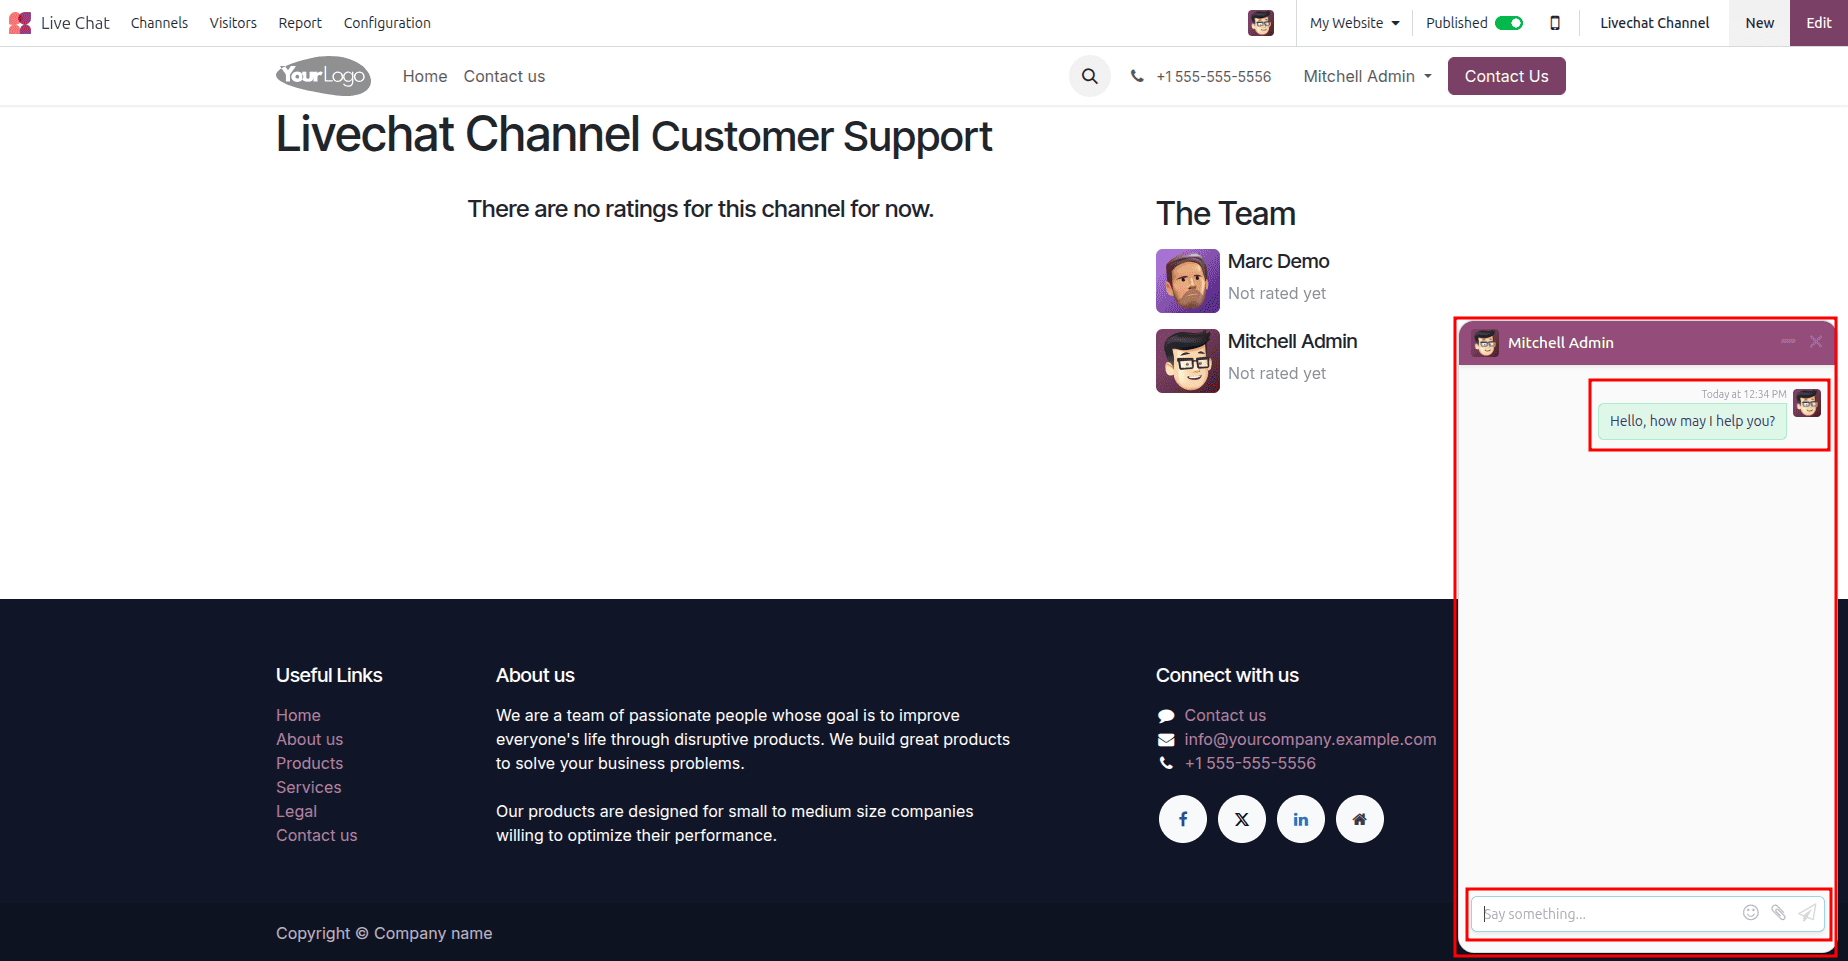
When the chat button is clicked, the system displays a personalized Welcome Message along with the Chat Input Placeholder, guiding users to easily start their conversation and engage effectively with support.
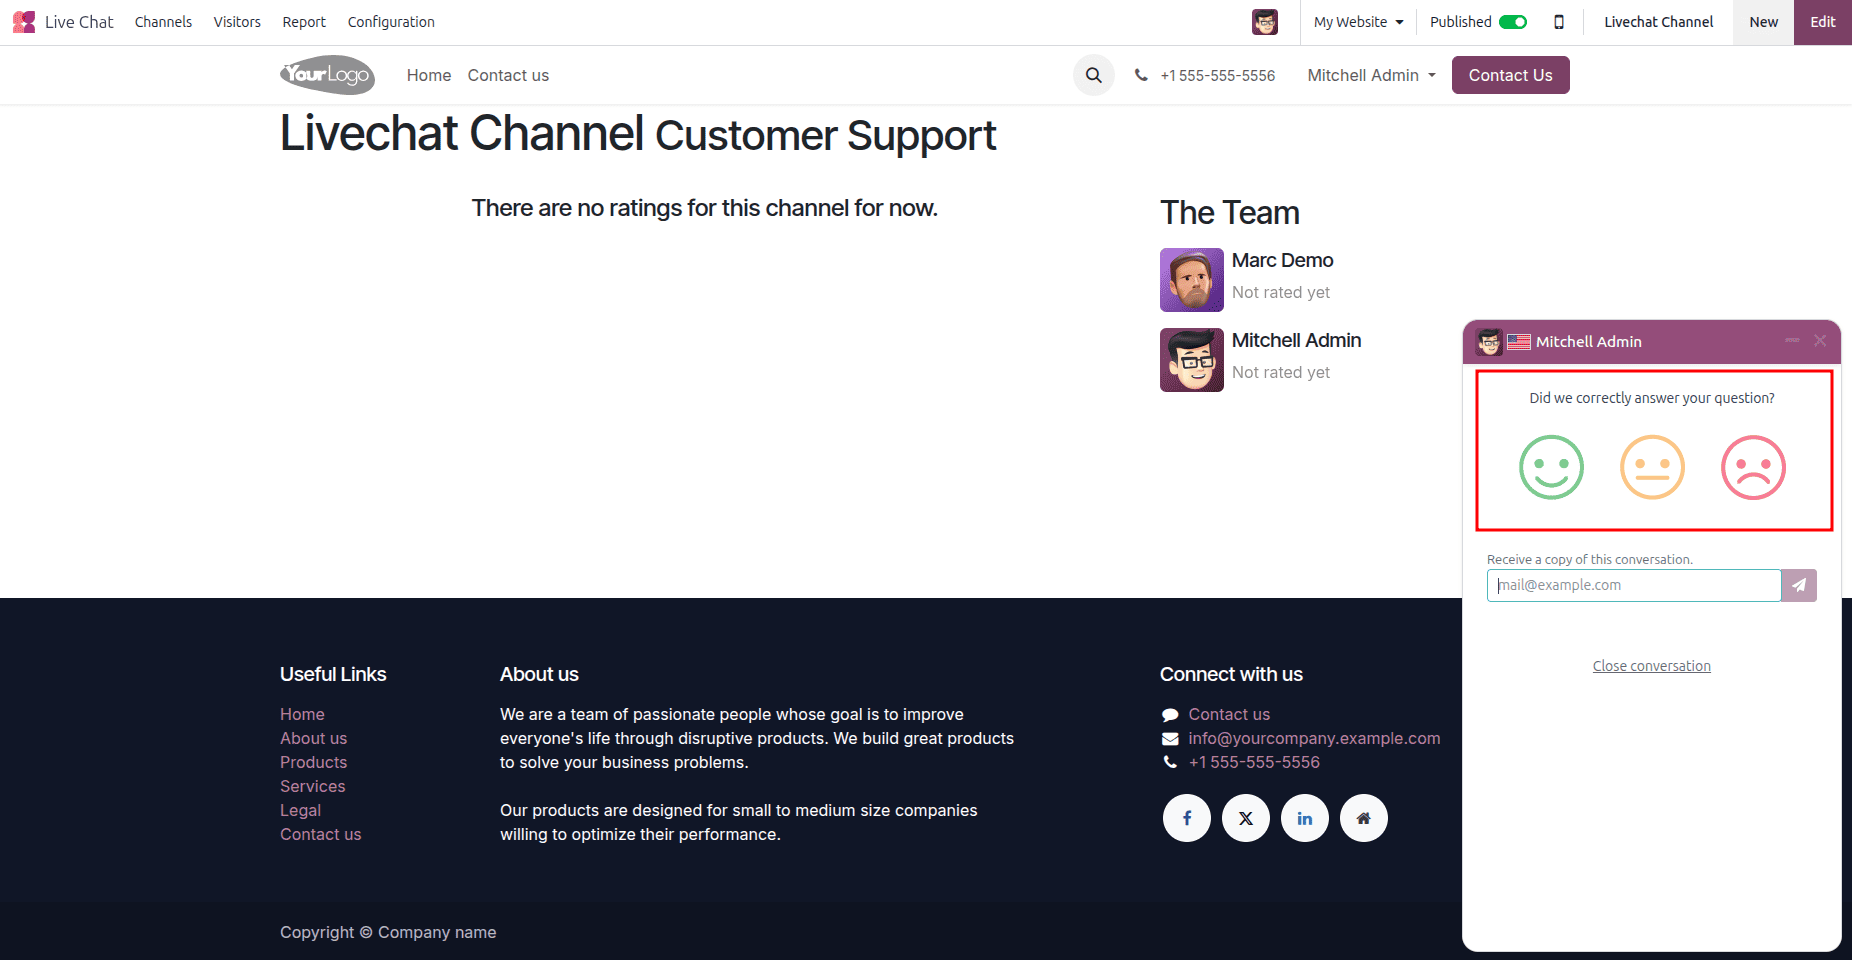
We can enable a rating option for the conversation, allowing users to provide feedback on the team’s performance. This helps measure satisfaction, track quality, and improve overall communication efficiency.
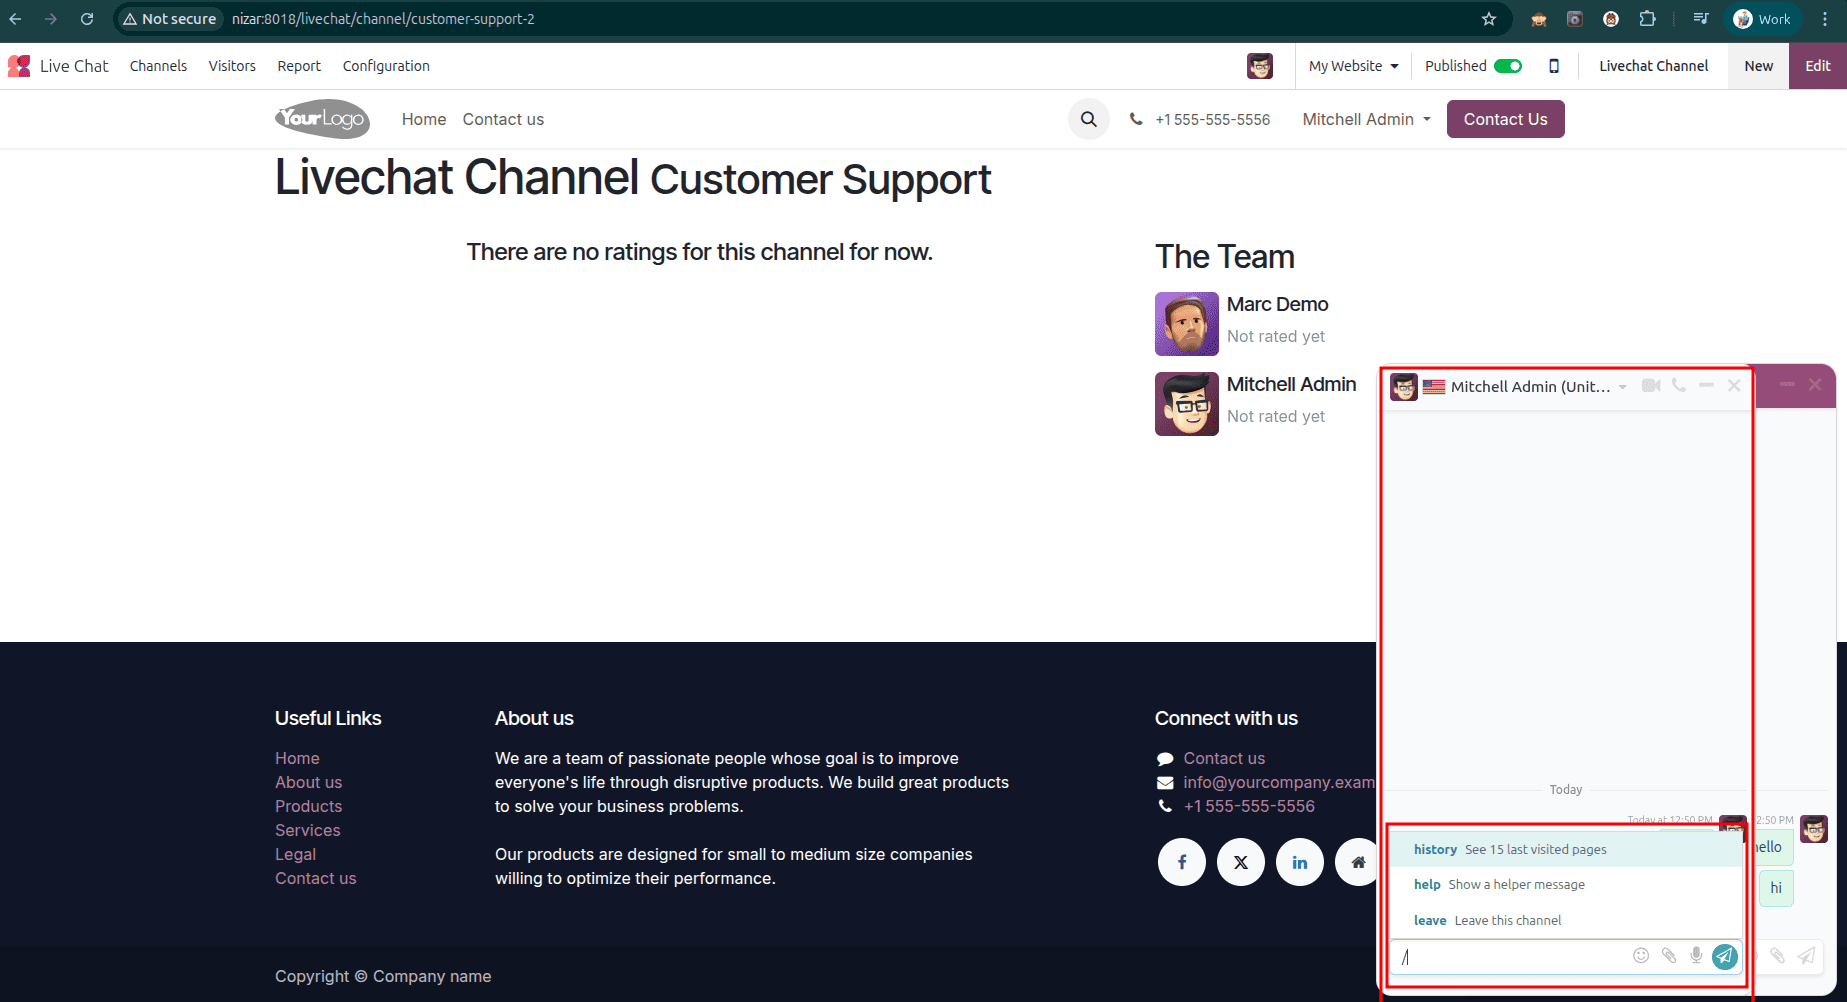
We can create useful shortcuts by simply clicking the ‘/’ key. This feature allows quick access to frequently used commands, making conversations faster, more efficient, and user-friendly.
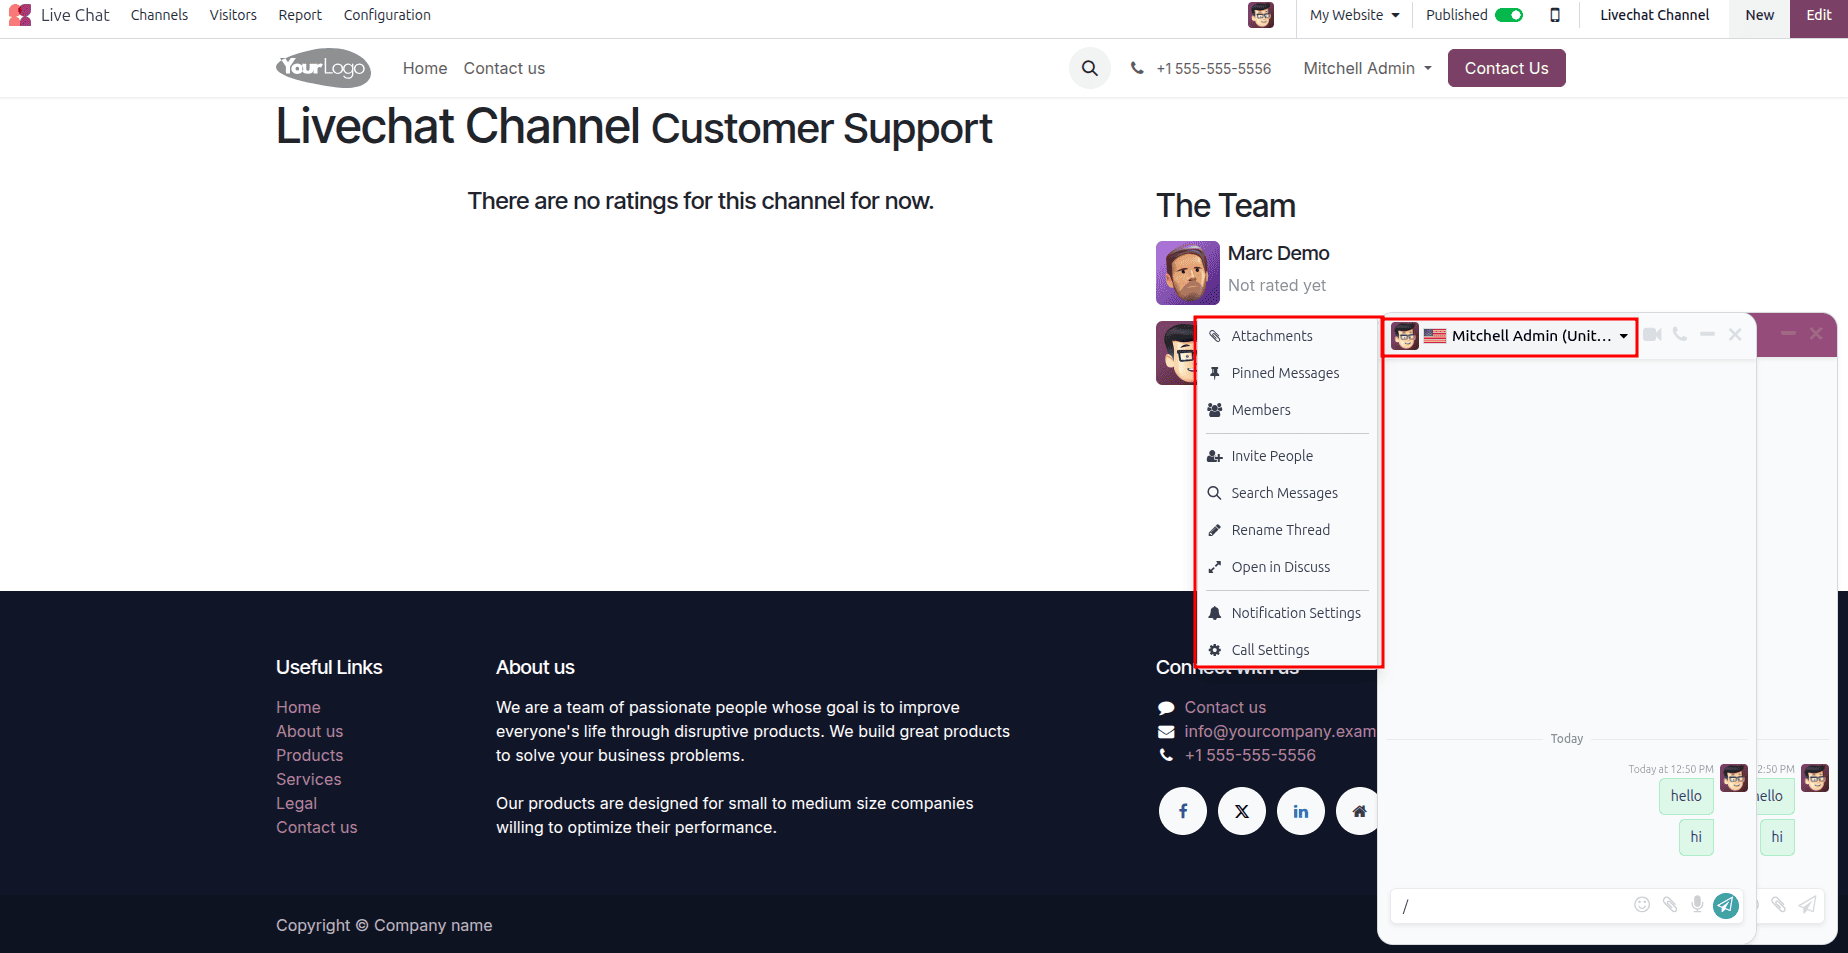
By clicking the dropdown menu shown in the screenshot below, users can access several useful features. These include adding attachments, pinning important messages, viewing members, inviting new people, searching messages, renaming a thread, and opening discussions, all of which enhance collaboration, organization, and communication efficiency within the platform.
We can easily close the popup window by clicking the cross mark located at the top corner. This provides a simple and quick way to dismiss the window, ensuring a smoother user experience. With this, we wind up the blog, concluding our overview of the discussed features.
To read more about What are the Differences Between Community & Enterprise in Odoo 18 Live Chat, refer to our blog What are the Differences Between Community & Enterprise in Odoo 18 Live Chat.