The checkout experience can make or break an online sale. In Odoo 18’s Website module, businesses have control over how customers interact during checkout using the "Sign in/up at checkout" setting. This feature offers three flexible options: Optional, Disabled, and Mandatory, allowing store owners to choose whether customers must log in, can check out as guests, or have the choice to register later. Each option serves different business needs, balancing customer convenience with operational requirements.
Enabling Guest Checkout with Optional Sign In/Up in Odoo 18
On any e-commerce website, providing a smooth checkout experience is crucial. One feature that helps improve this experience is allowing customers to check out as guests without forcing them to create an account. Odoo 18 supports this using the "Sign in/up at checkout" setting. Let’s explore what the “Optional” option does and how it works step by step.
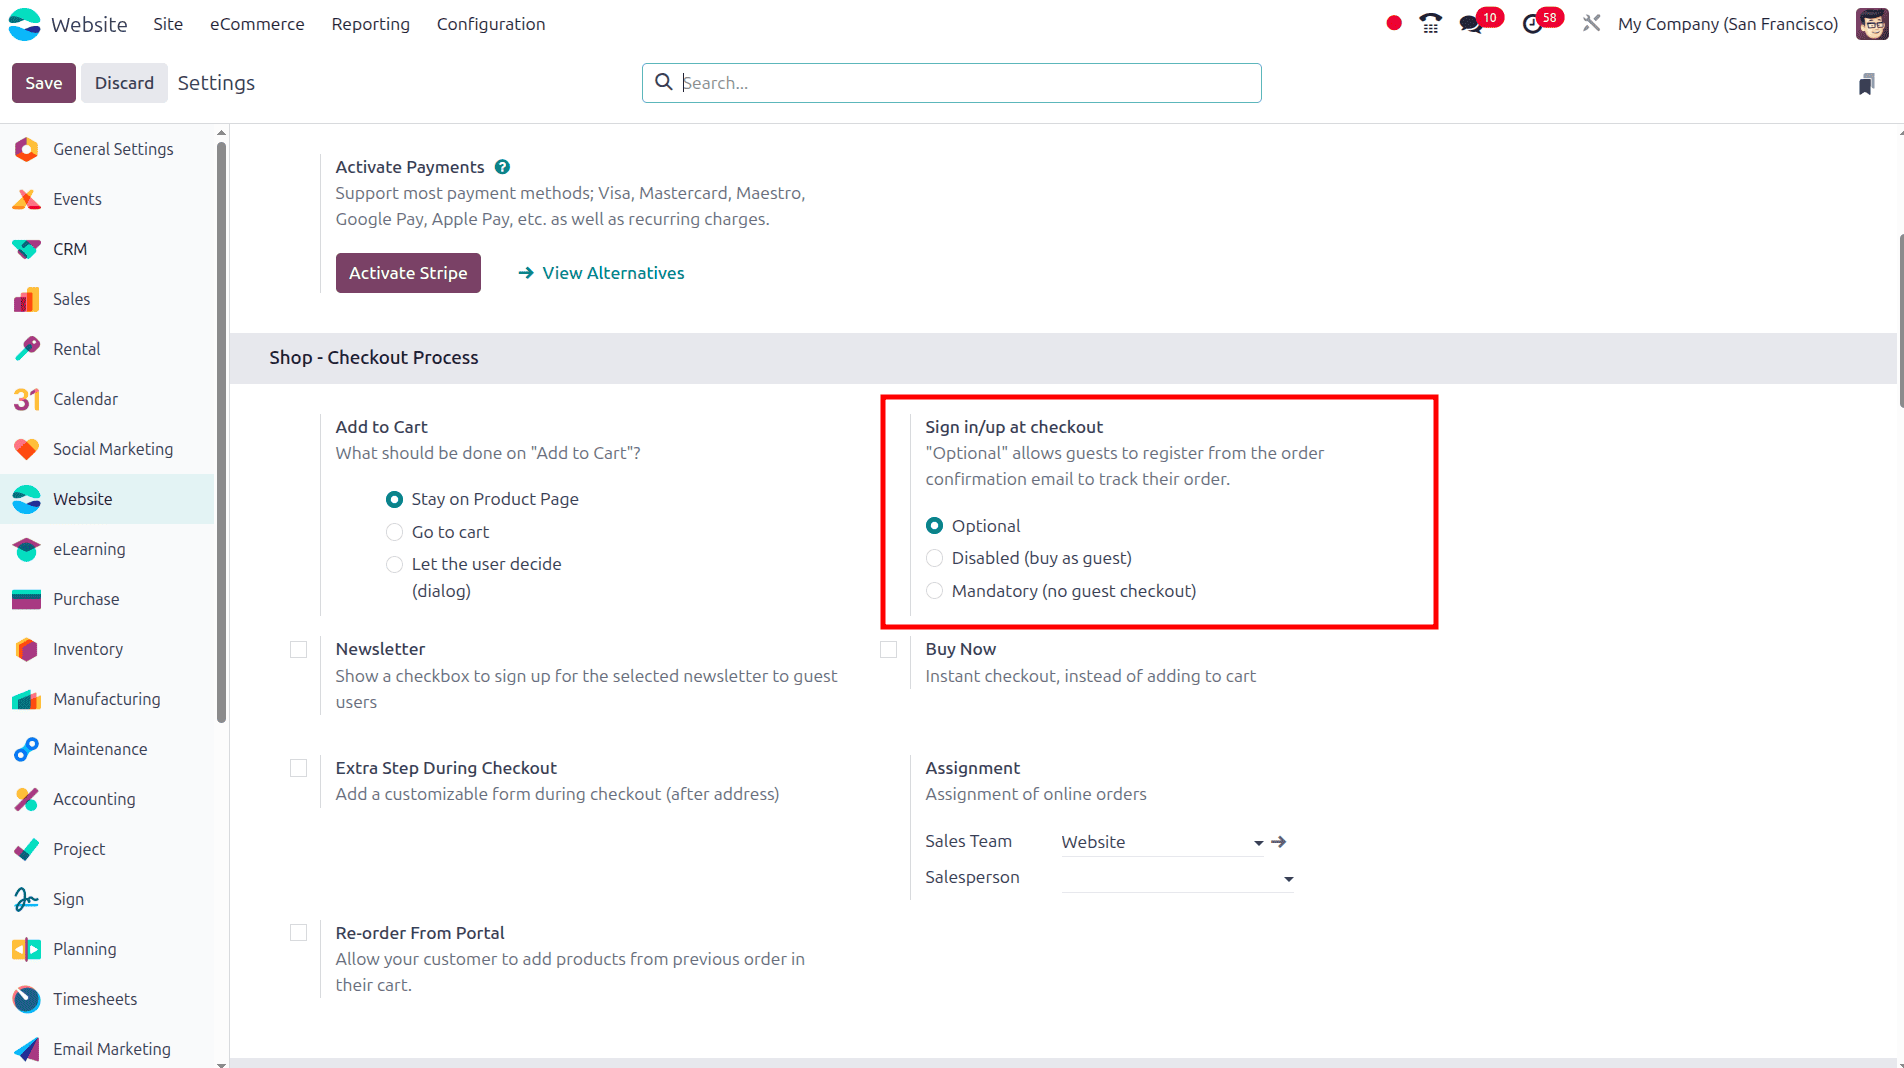
To set up optional sign-in/up at checkout, move to the Configuration settings of the website module. Under the Shop-checkout section, there is a Sign in/up at Checkout option. There, we can select the option ‘Optional’ and click the save button to save this feature. Here, Odoo 18 allows users to enter their login information on the order confirmation page of the website in order to proceed with their purchase, though it is not required.
Then we can move to the Odoo 18 website without signing in; we can simply use the website as a guest.
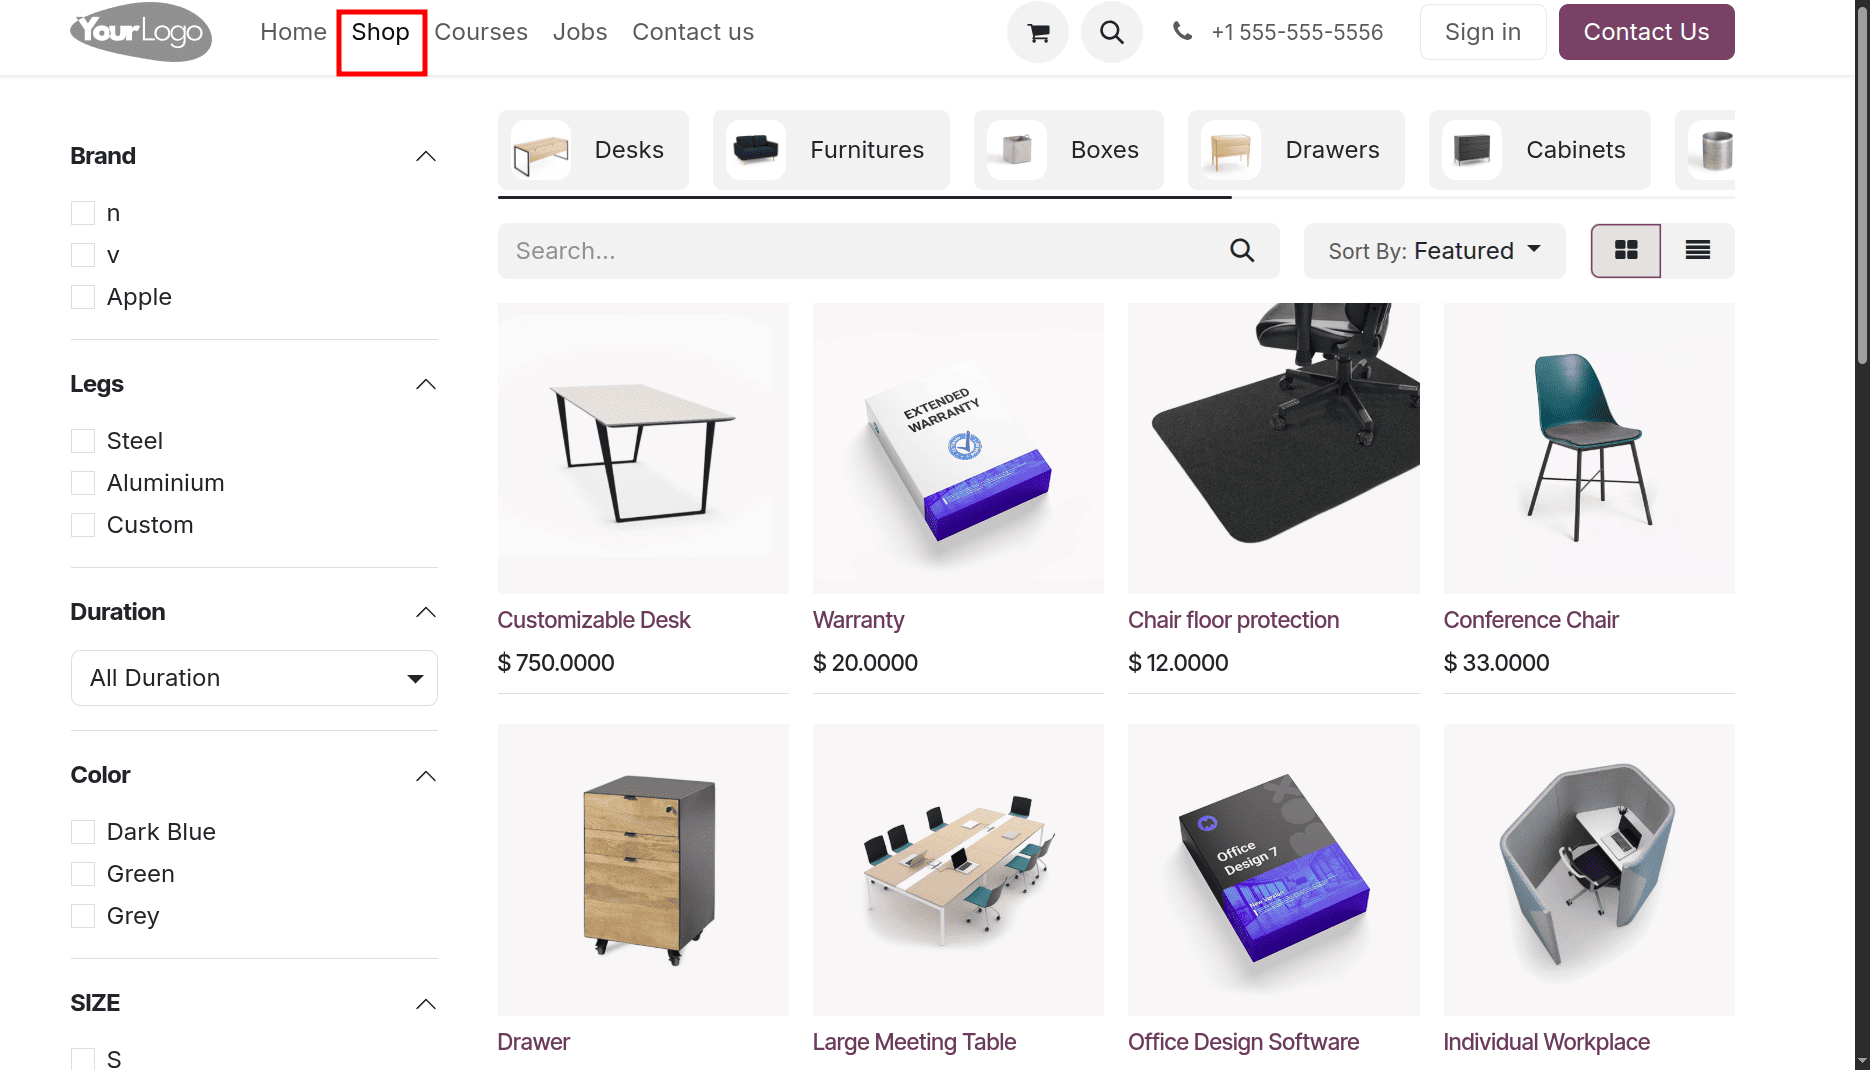
Once we reach the shop as guests, select the product that you need to purchase, and once the product is selected, click the ‘Proceed to checkout’ option.
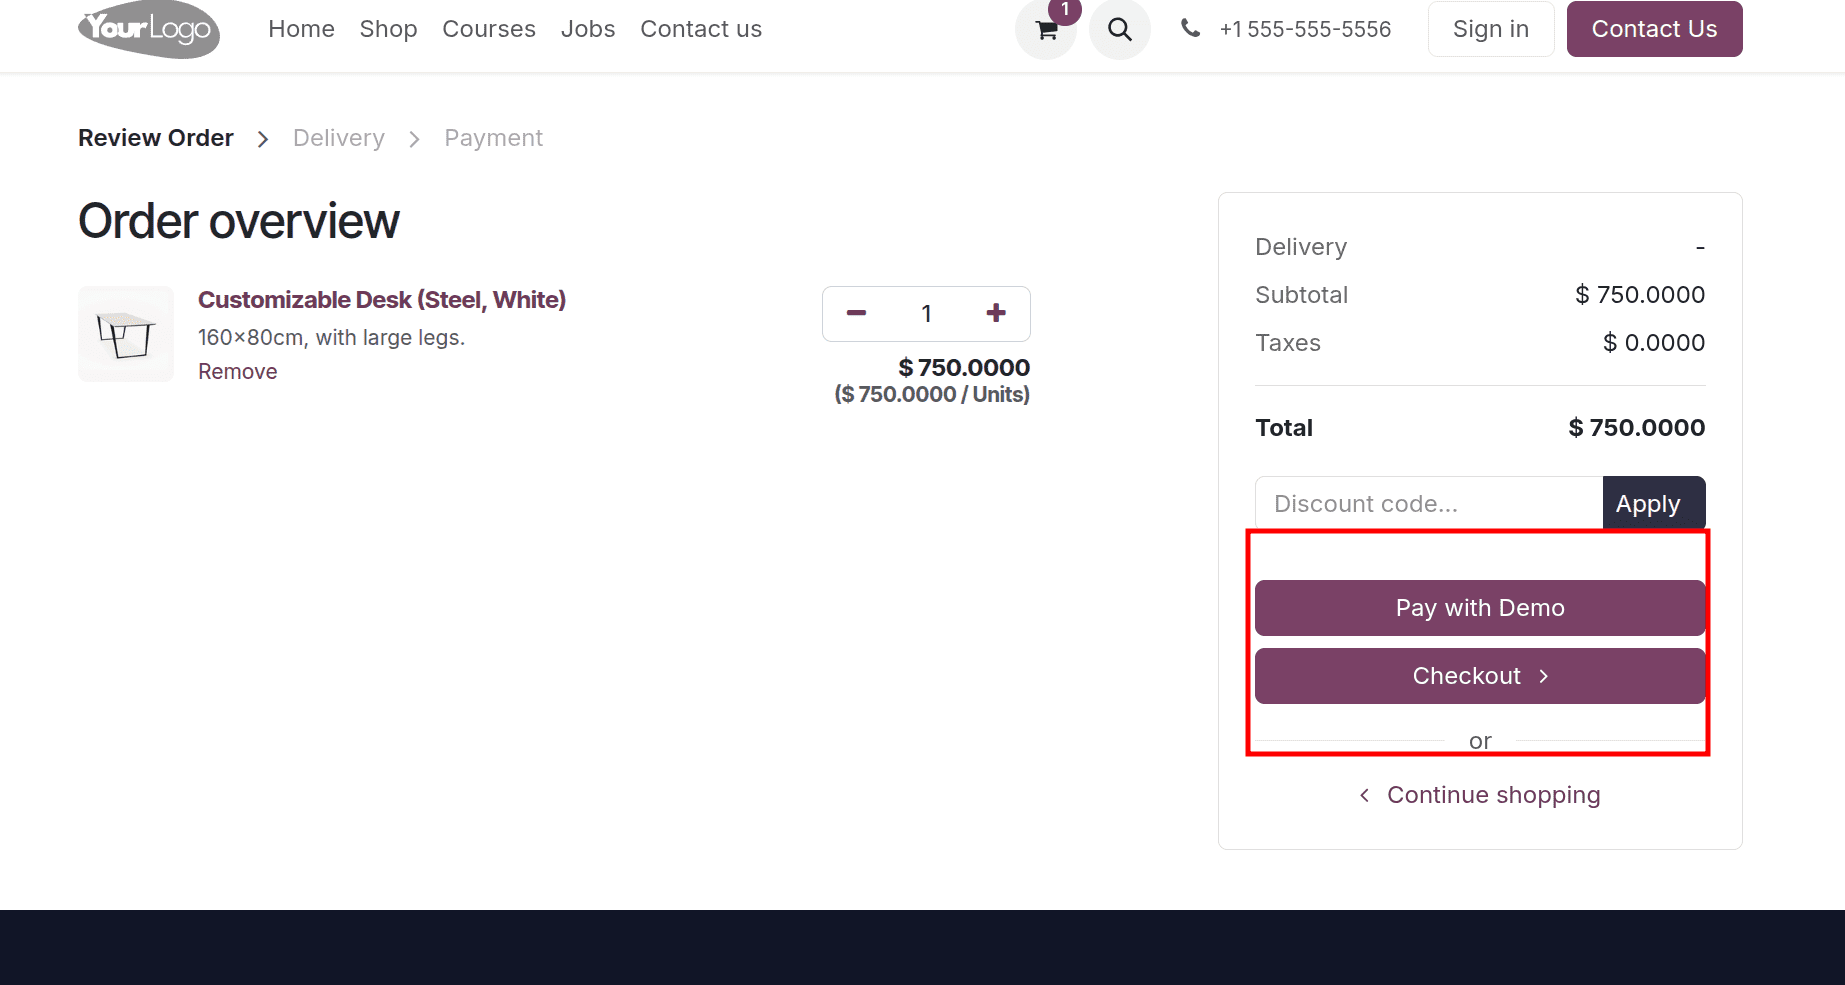
There we can see a pay with a demo option and a checkout option. Here, Demo is one of the payment methods. Once we click the 'Checkout' option, a page will be displayed that offers the option to sign in. But if the user is not interested in signing in to the website, they can provide the customer's details like email, name, address, etc. If we click the sign-in button, the customer can sign in to the customer portal and complete the purchase.
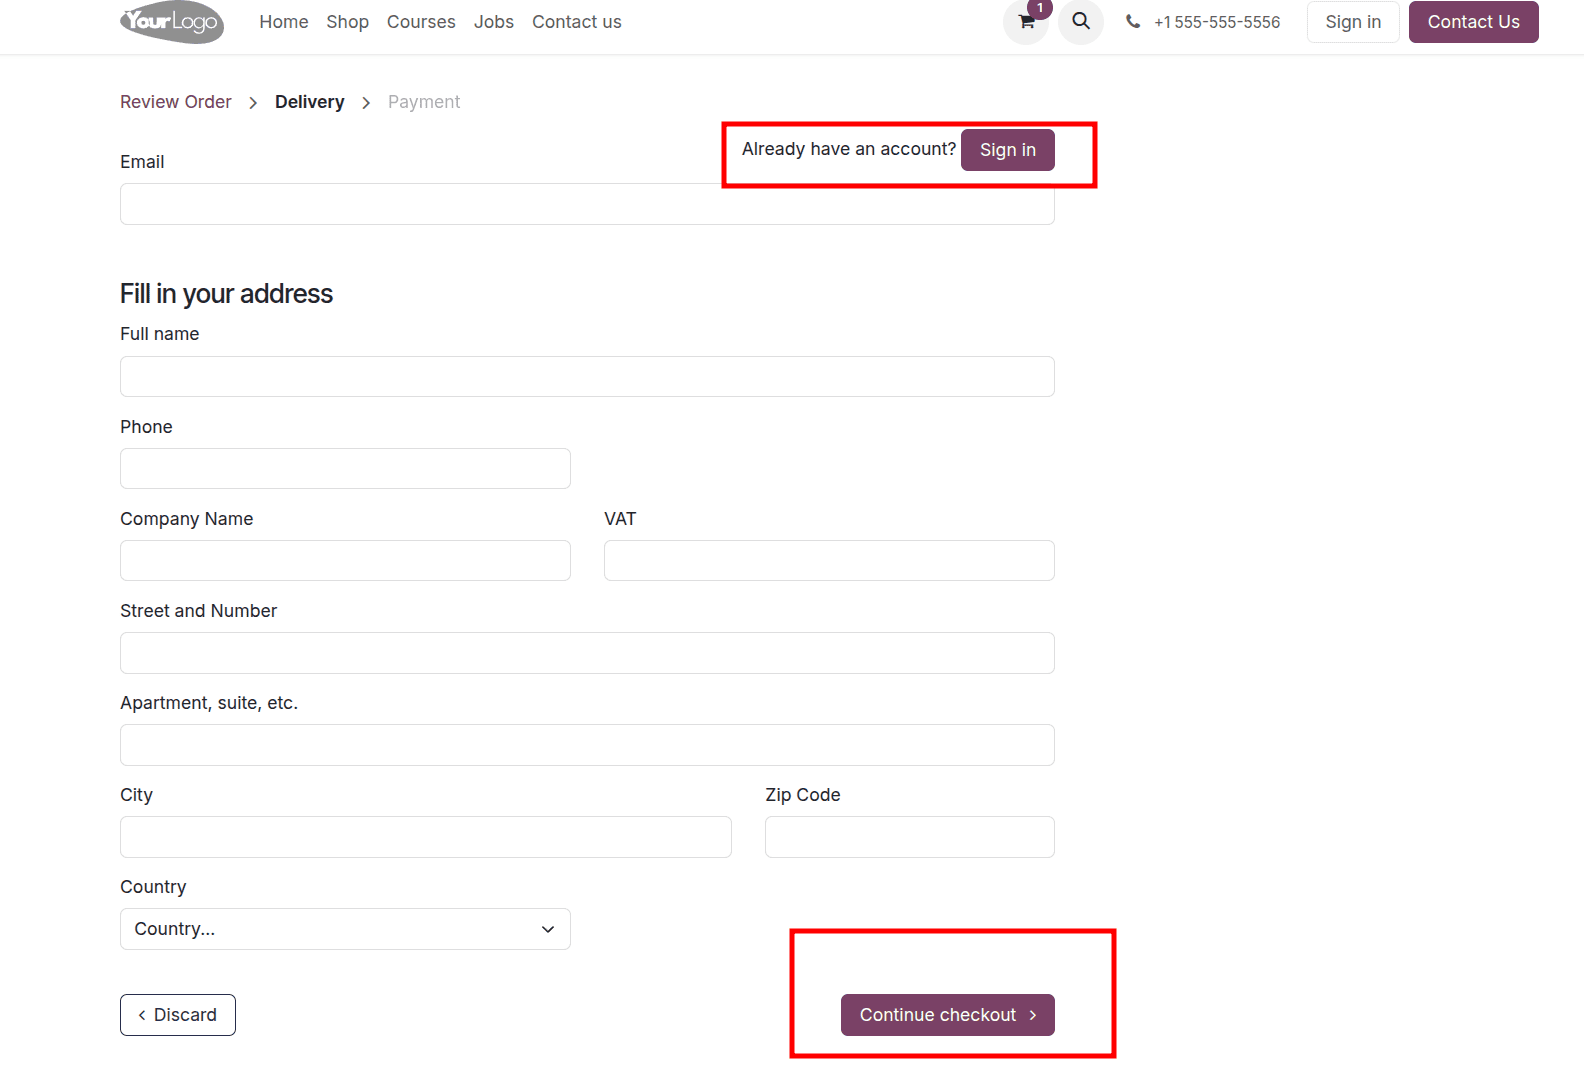
After adding the customer's details, the customer can click the continue checkout option. Then on the next page, there will be the delivery address and the order summary.
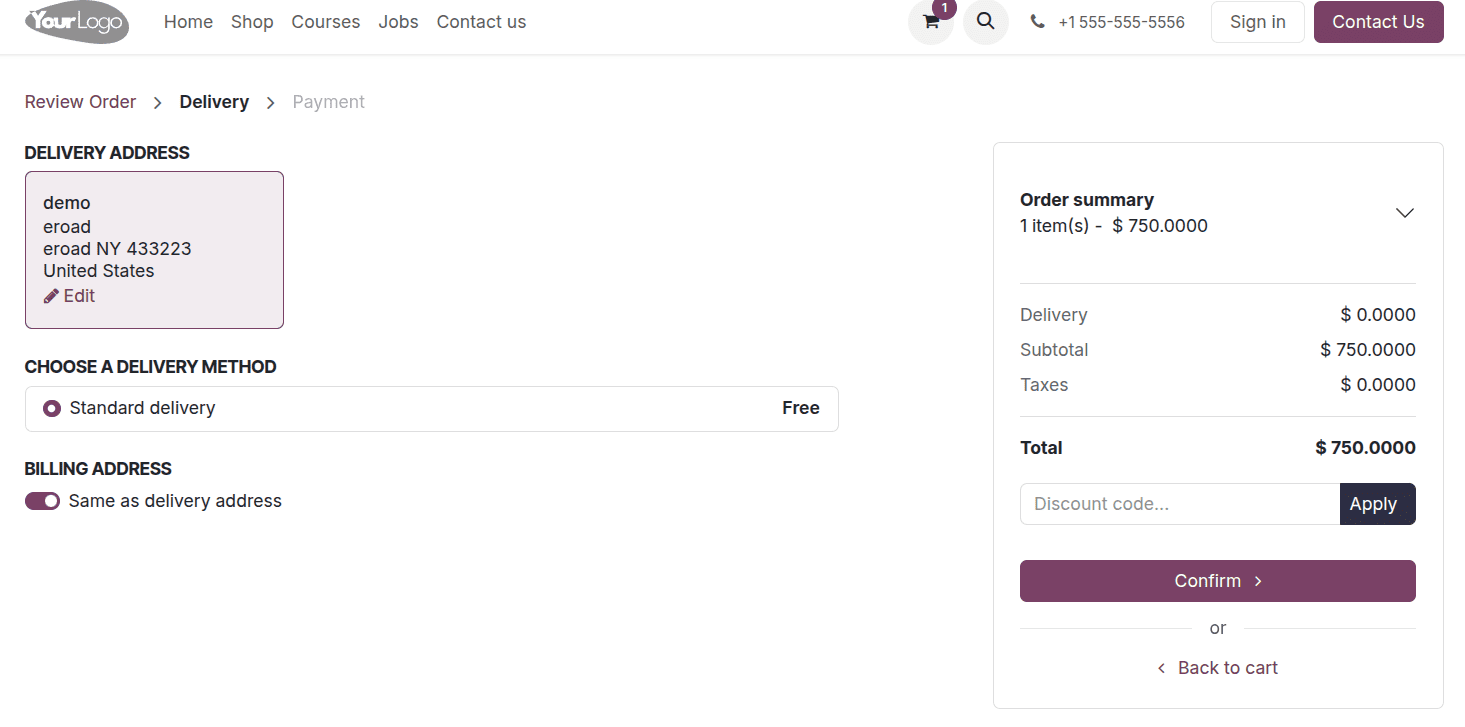
Then on the next page, there will be the delivery address and the order summary. If the details are correct, then click the confirm button.
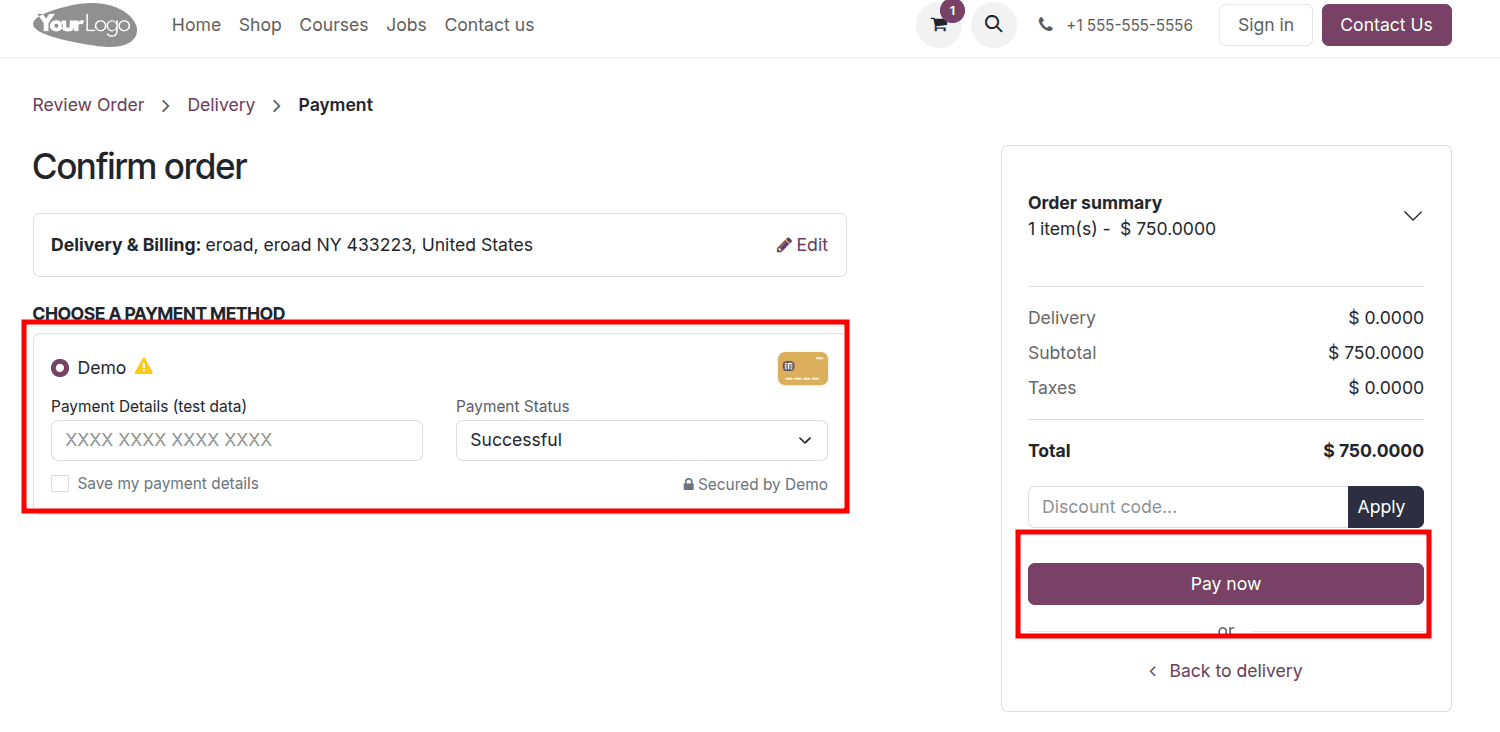
If we have different payment methods, all of these will be listed, and the customer can choose the payment method from there. Once the payment method is chosen, click the pay now button and complete the purchase of the product.

Once the payment method is chosen, click the pay now button and complete the purchase of the product.
While using this option, the customer doesn't need to face a login delay, reduces abandoned carts, and is also helpful for first-time or one-time users.
If your store needs recurring purchases or tracking features, you can still encourage sign-ups via email after the order.
Enabling Guest Checkout with Disabled (buy as guest) Sign In/Up in Odoo 18
When you select "Disabled (buy as guest)" in Odoo 18, customers can complete their purchase without logging in or registering. They won’t see any login or sign-up prompts during checkout. It ensures a completely anonymous, fast checkout experience. This is ideal for one-time buyers or quick purchases where account creation isn’t needed.
To set up this, move to the configuration settings of the website application, and in the configuration settings, set up the sign-in/up at checkout as Disabled (Buy as guest), and click the save button to save it.
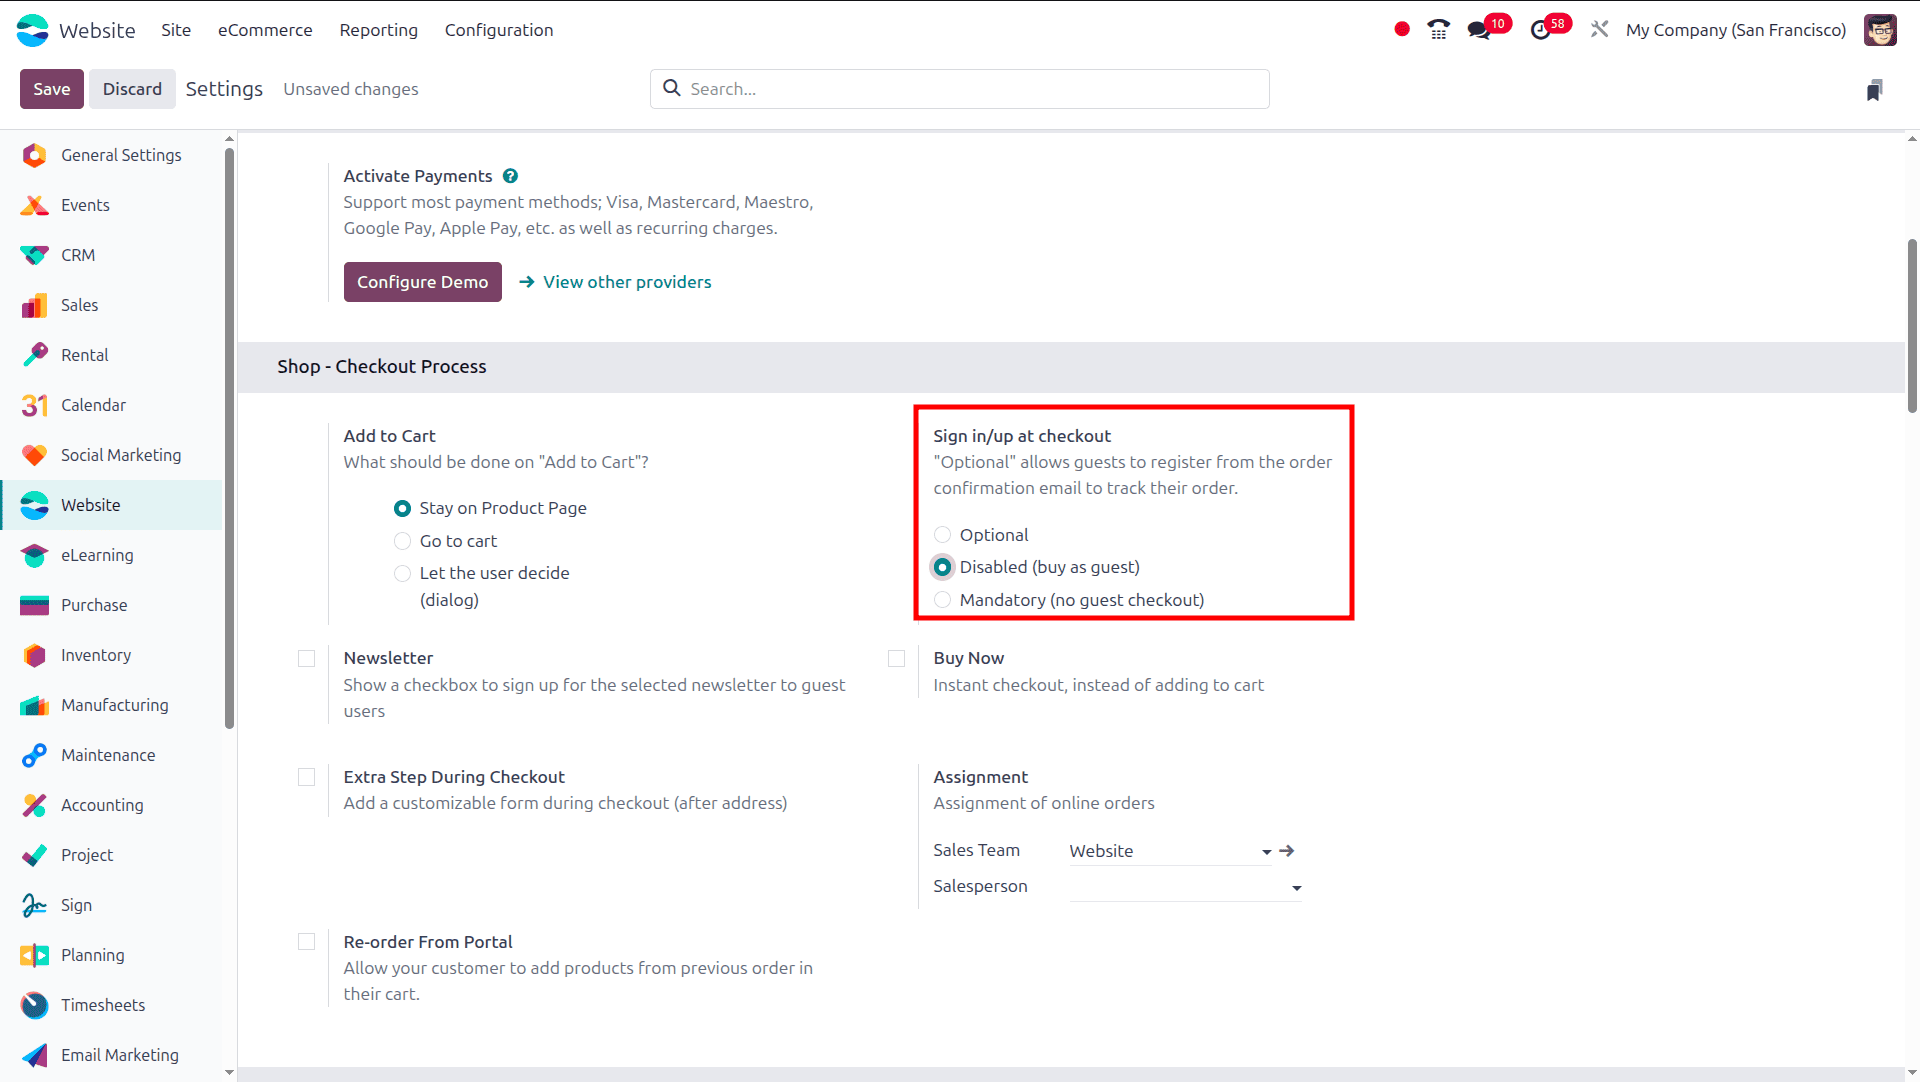
Then, when a user opens the website application without logging in to the website, and the user opens the shop from the website, then chooses a product to purchase.
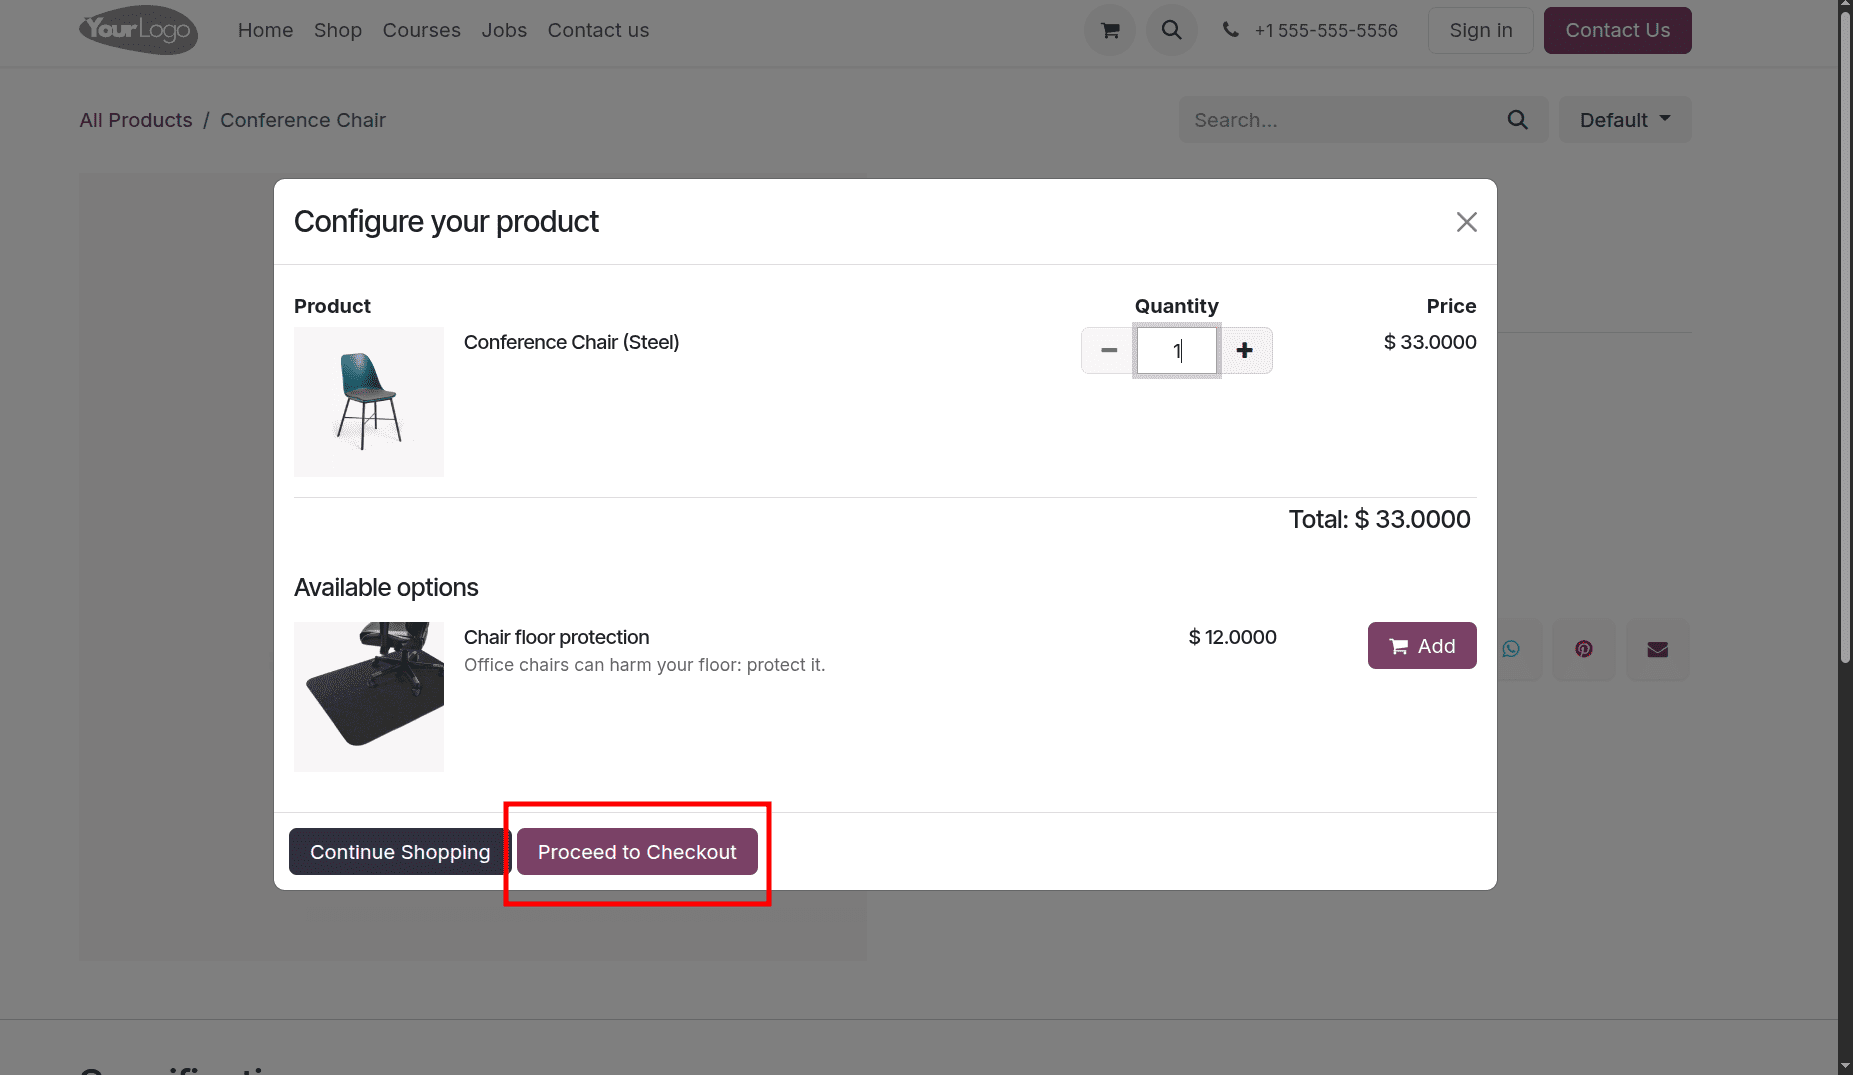
If the product is selected, and on purchasing the product, add it to the cart and we have two options: Continue Shopping and Proceed to Checkout. If the customer needs to purchase more products, just click the Continue Shopping option, or to checkout, click the Proceed to Checkout option. On clicking the Proceed to Checkout. On clicking the Proceed to Checkout option, the order overview will be shown. There we have two options: Pay with Demo, which is a payment provider, and the Checkout option.
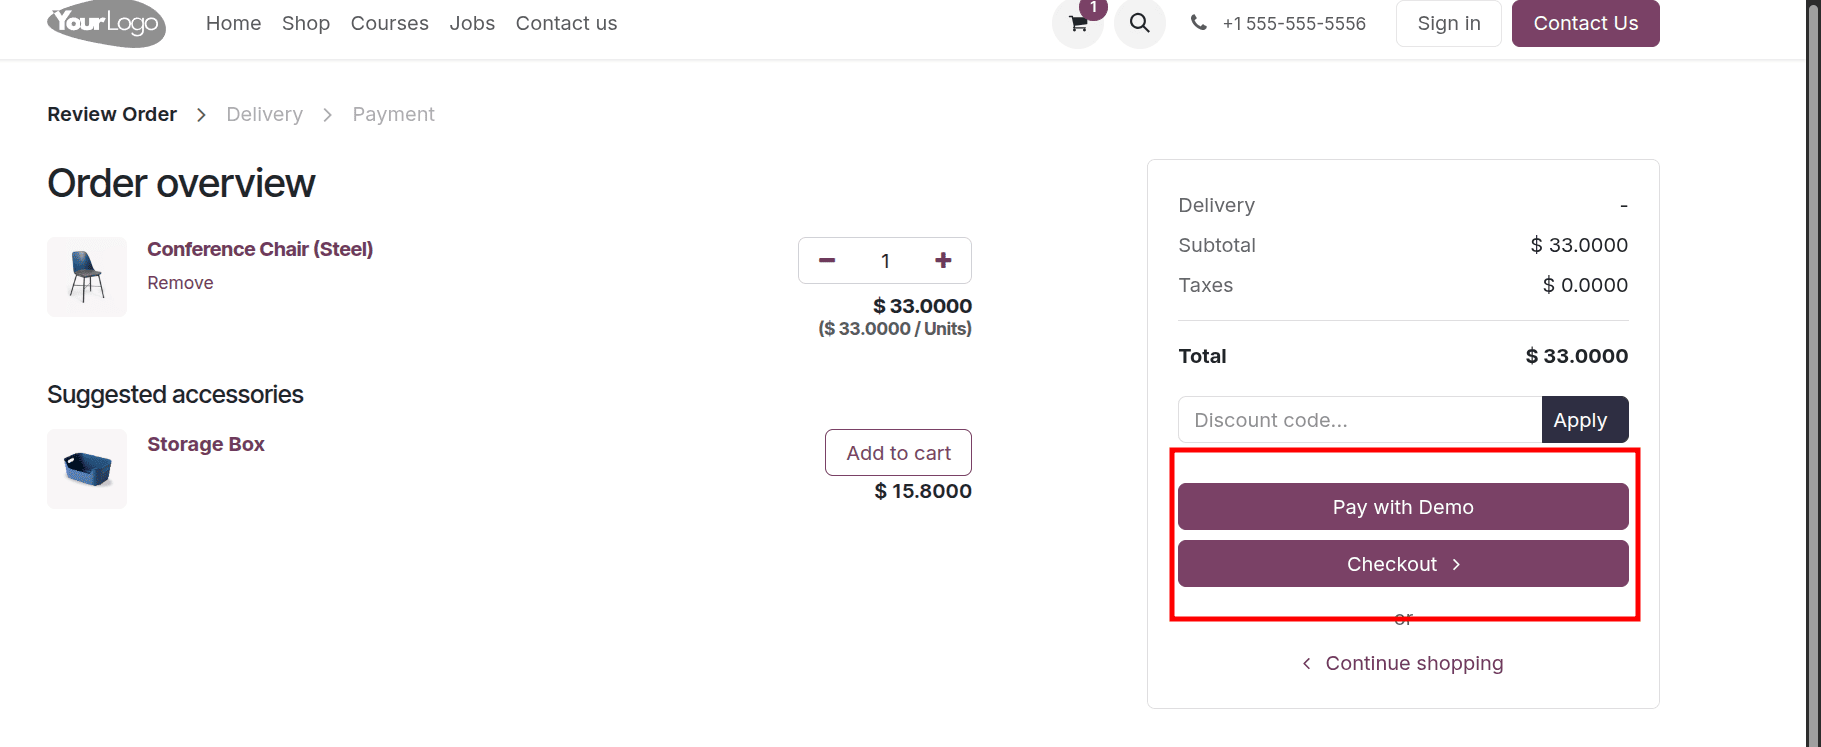
On clicking the checkout option, a new page will be displayed, and there we have the option to fill in the customer details. The sign-in option will not be available on this page. But if we choose the optional sign-in/out option, the sign-in option will be there.
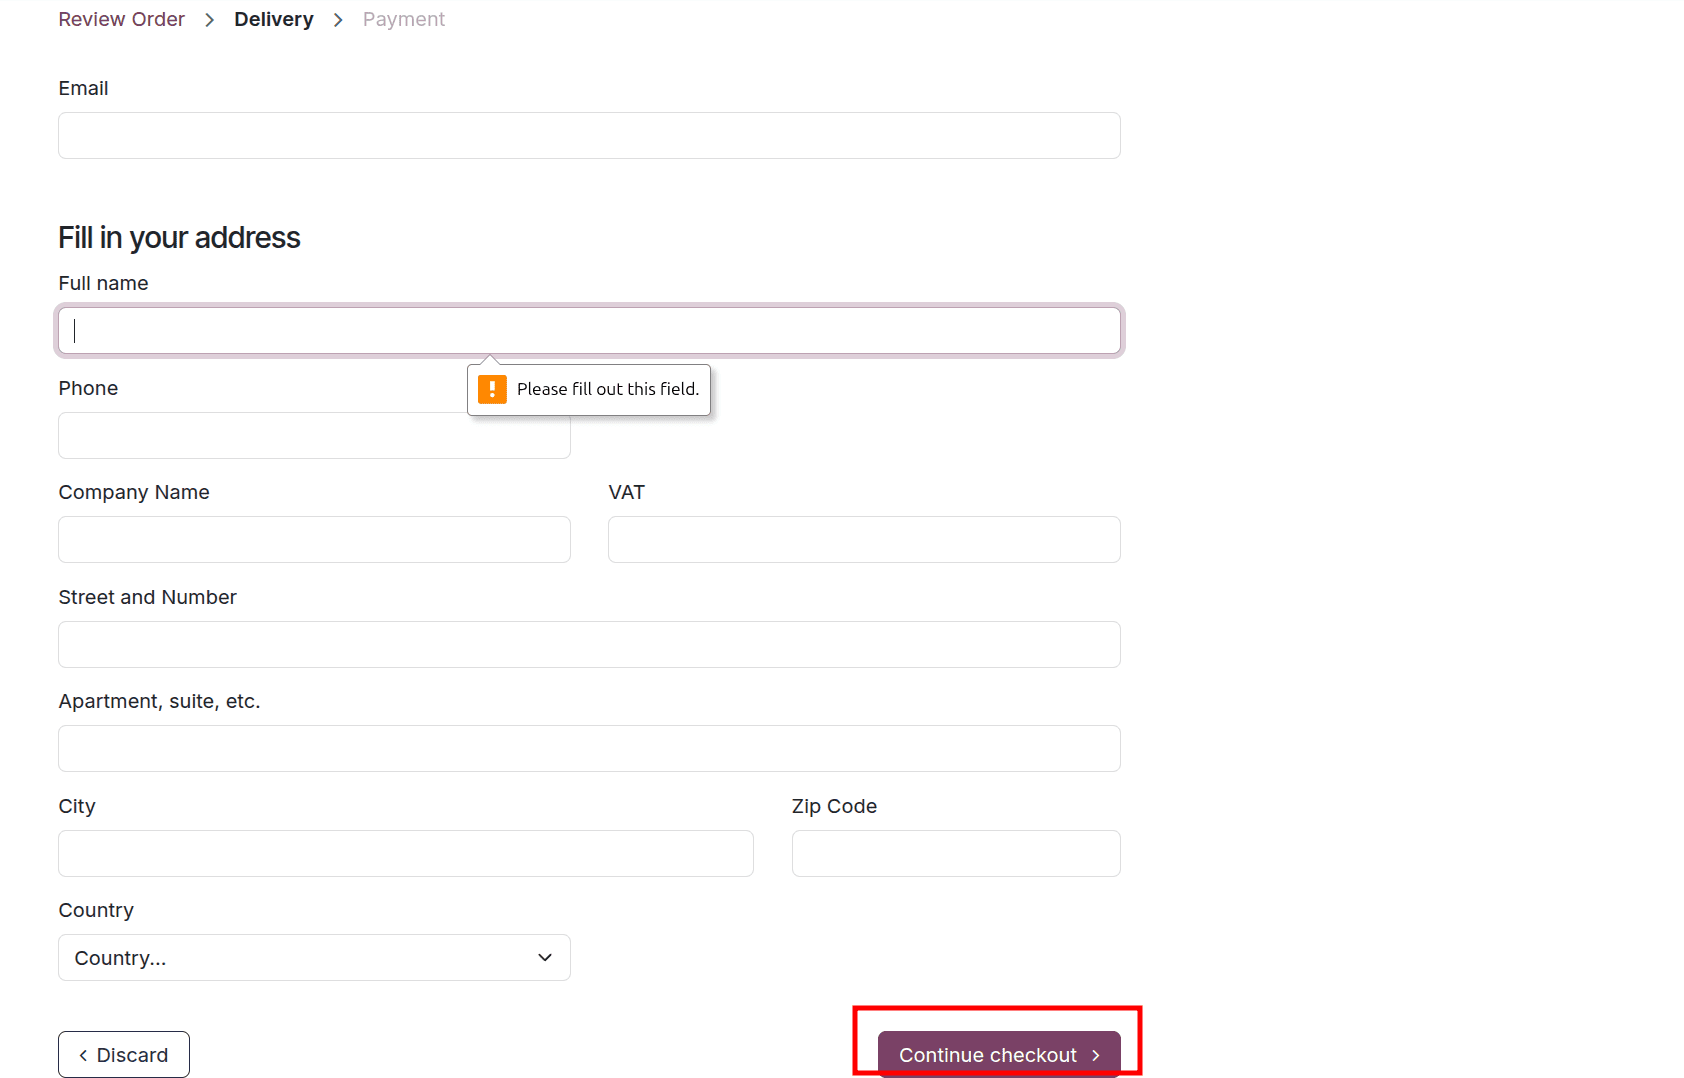
Here, the customer can add the customer details and complete the purchase process by clicking the Continue checkout button.
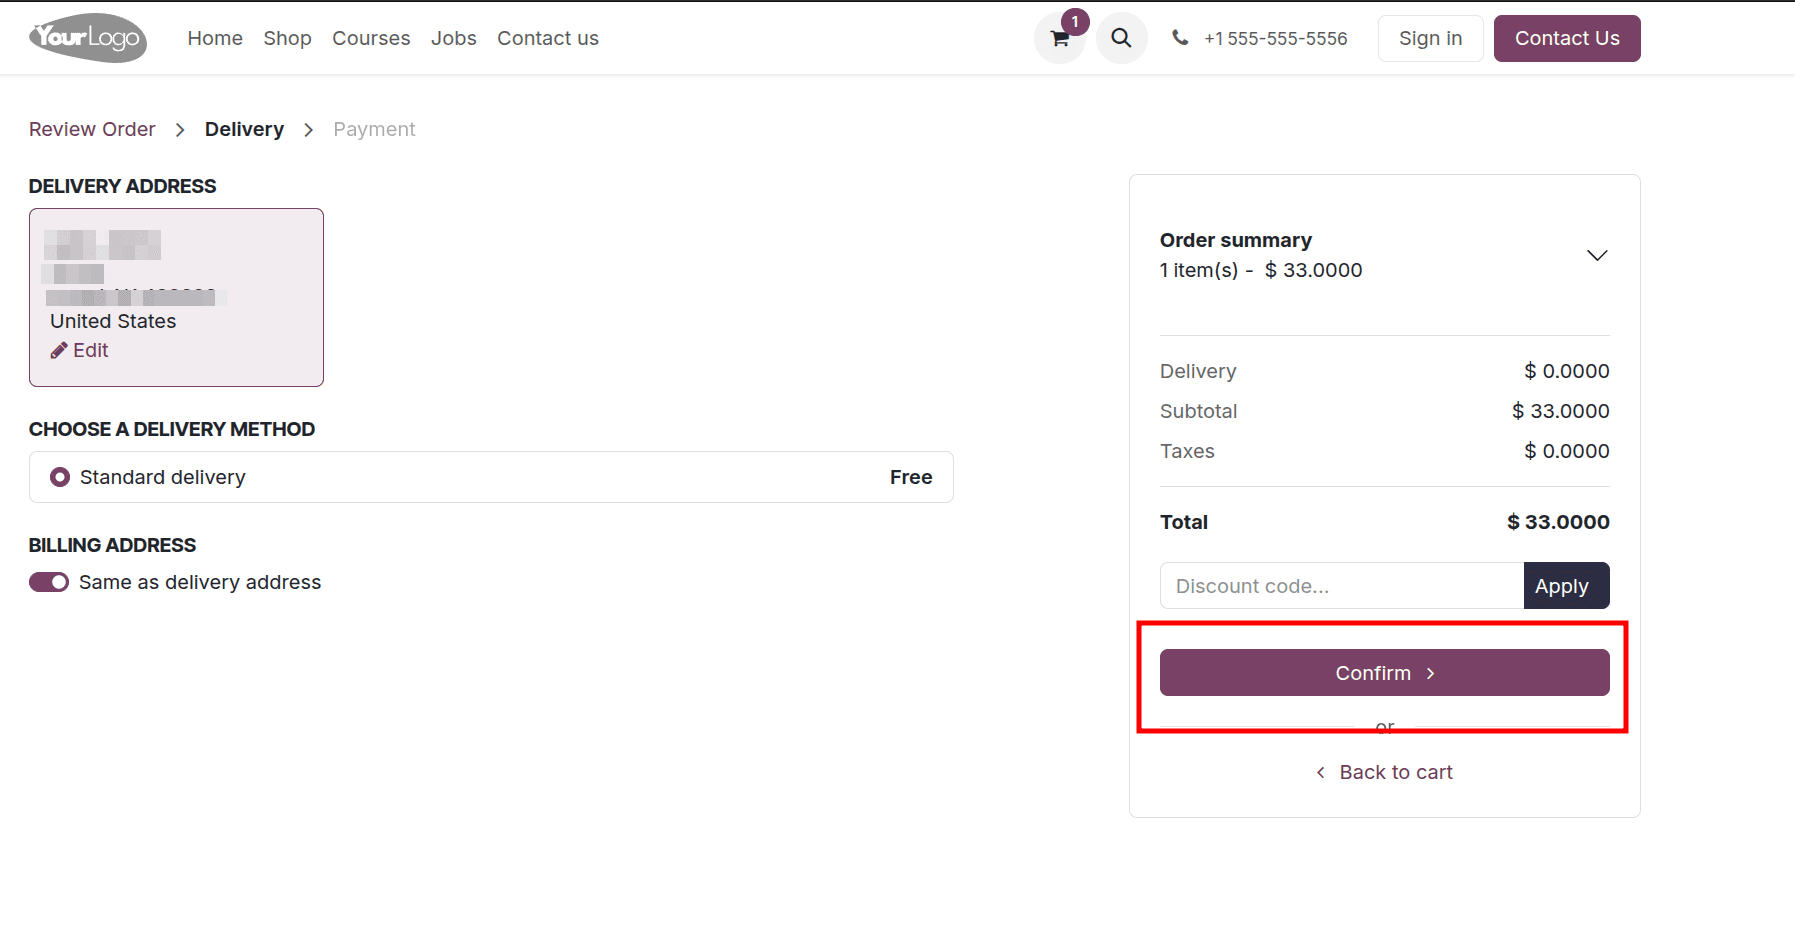
On the next page, the delivery address, the delivery method, the order summary, etc, will be displayed. Once the data is checked correctly, the customer can click the confirm button.
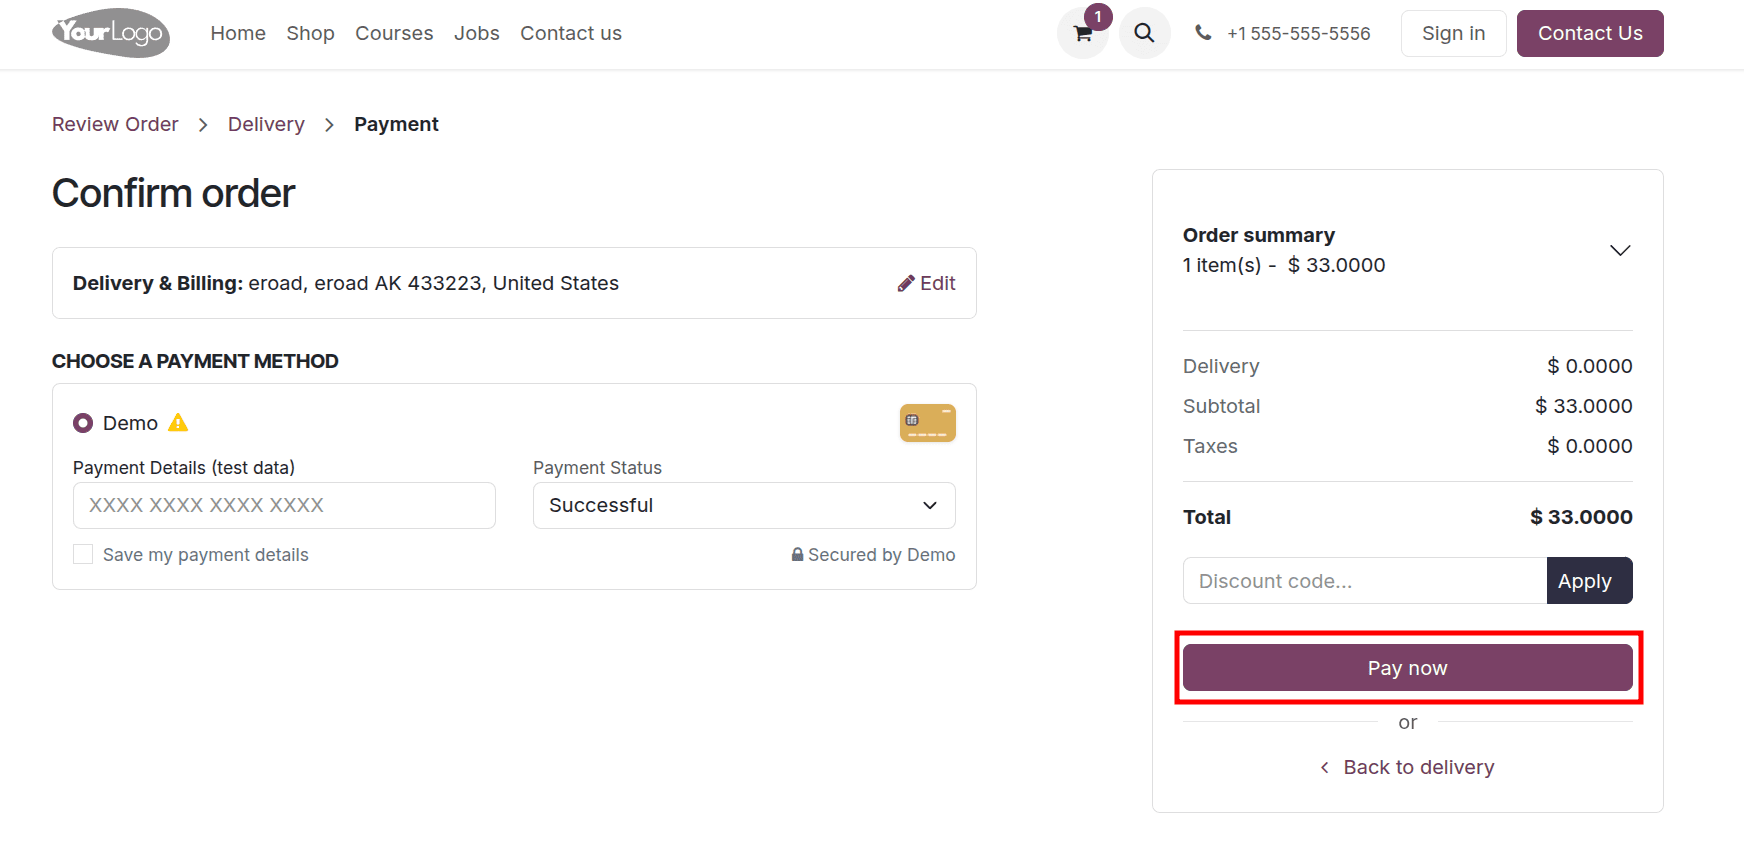
The payment methods, the amount details, and whether the customer has any coupons can also be accessed here. Then there is a Pay Now button. Using this button, the customer can complete their purchase. Here, the customer can purchase a product and check out from a website built using Odoo 18 without signing in to the website. That is, using this option, a customer purchases a product from a website as a guest.
Enabling Guest Checkout with Mandatory (no guest checkout) Sign In/Up in Odoo 18
When you set the Sign in/up at checkout option to Mandatory in Odoo 18, customers must log in or create an account before completing their purchase. Guest checkout is not allowed. This ensures all orders are linked to registered users, useful for tracking, loyalty programs, or subscription services. It's best suited for businesses that need customer accounts for managing purchases or ongoing relationships. To set up Mandatory Sign In/Up, move to the Configuration settings of the Website module and enable the boolean Mandatory (no guest checkout) option in your website.
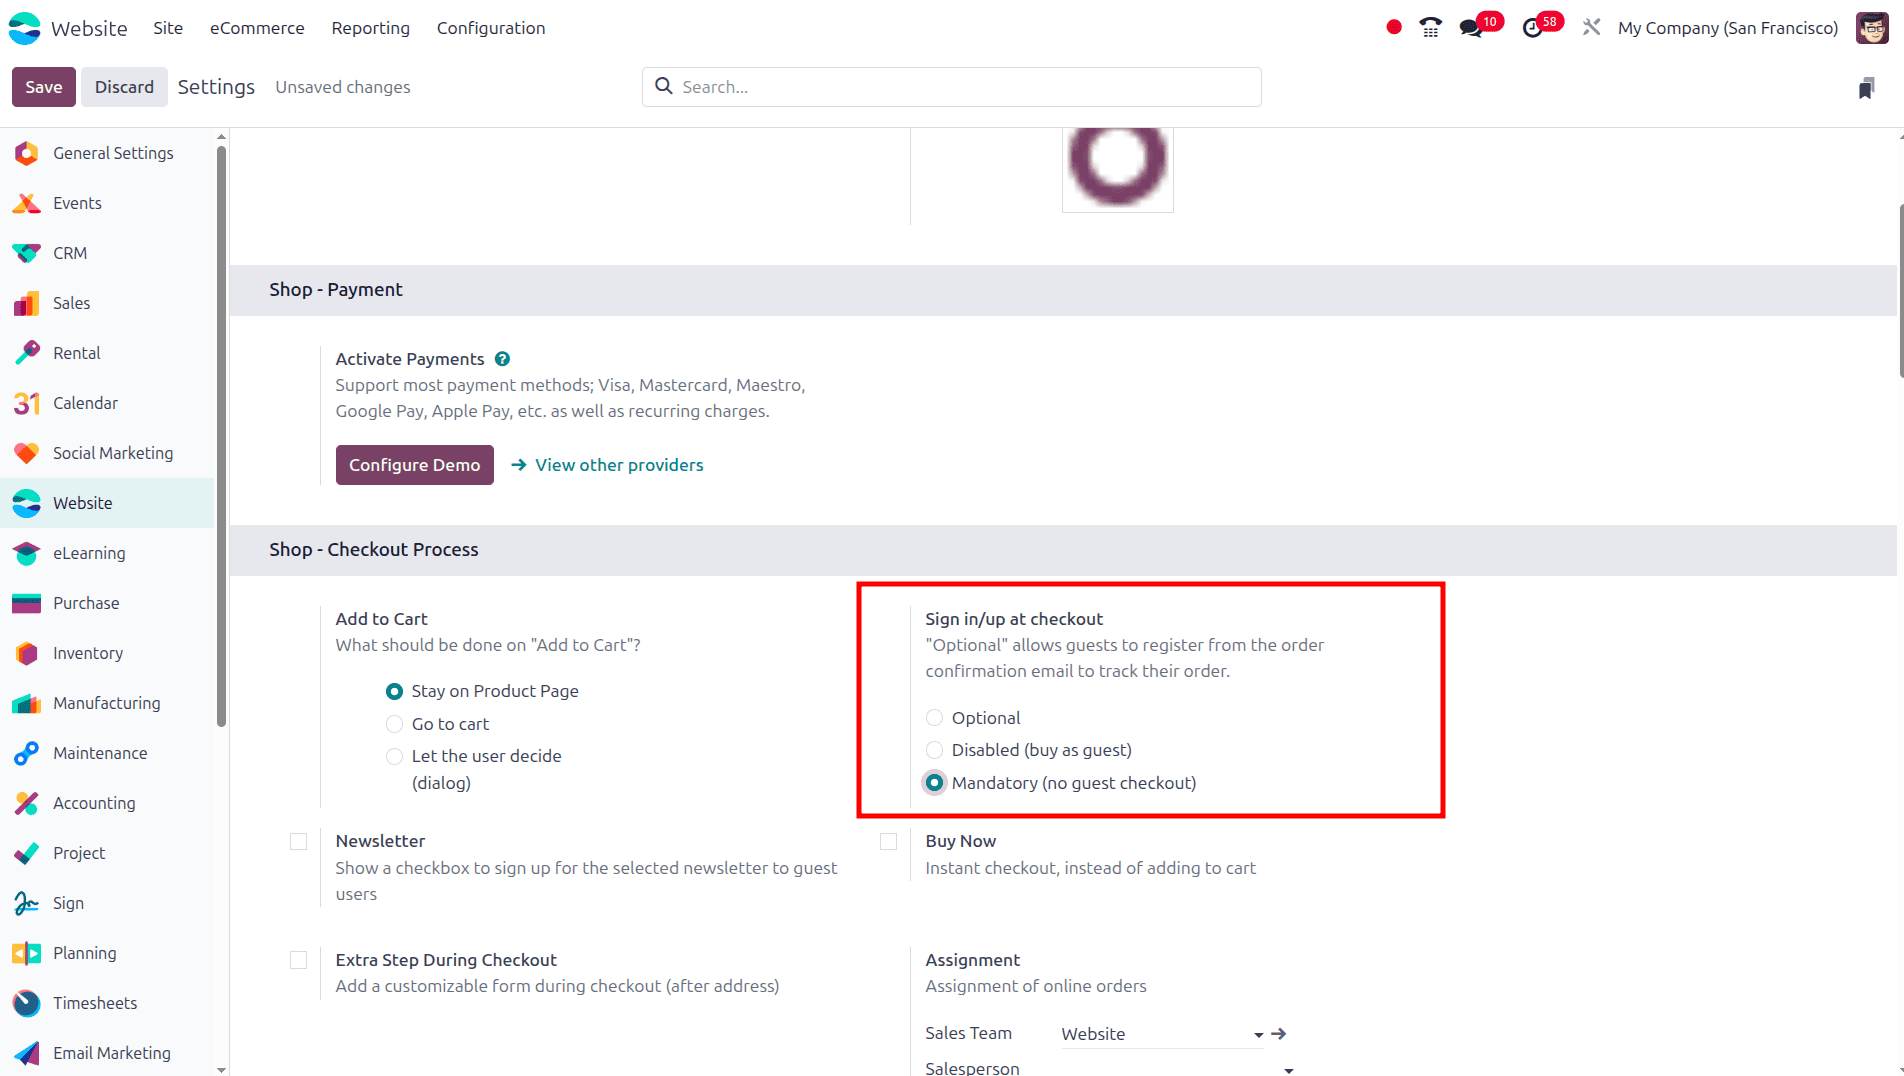
Then move to the e-commerce store without logging in to your account. Select the product that you need to purchase from the store.
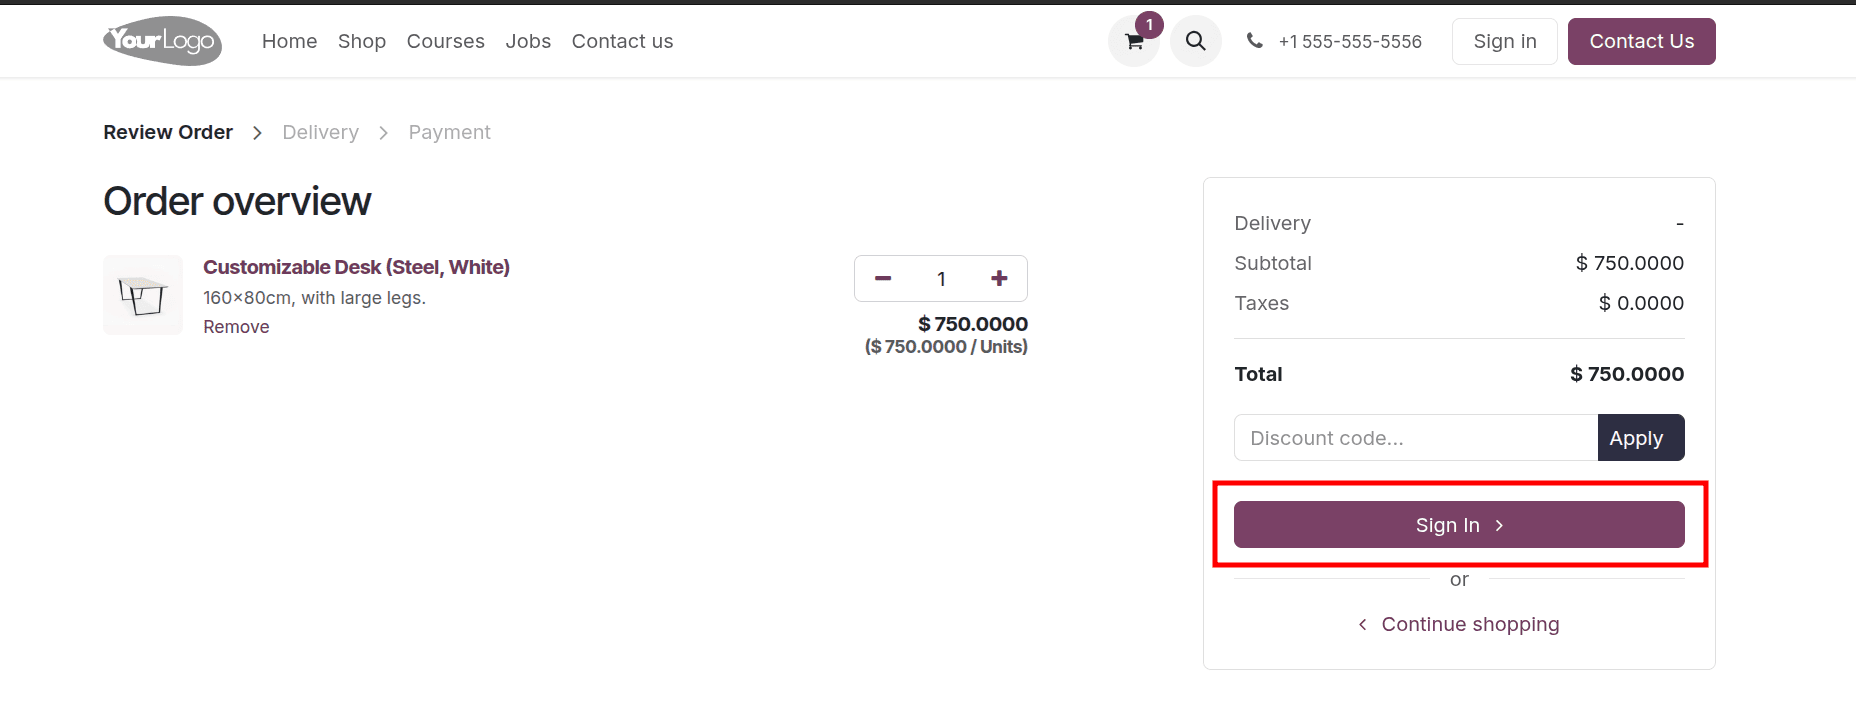
Once the product is added to the cart, you can either continue your shopping or you can proceed with your checkout process. On clicking the proceed to checkout option order overview page will be displayed. On this order overview page, the payment option or the checkout options are not available. Only the Sign in button will be shown.
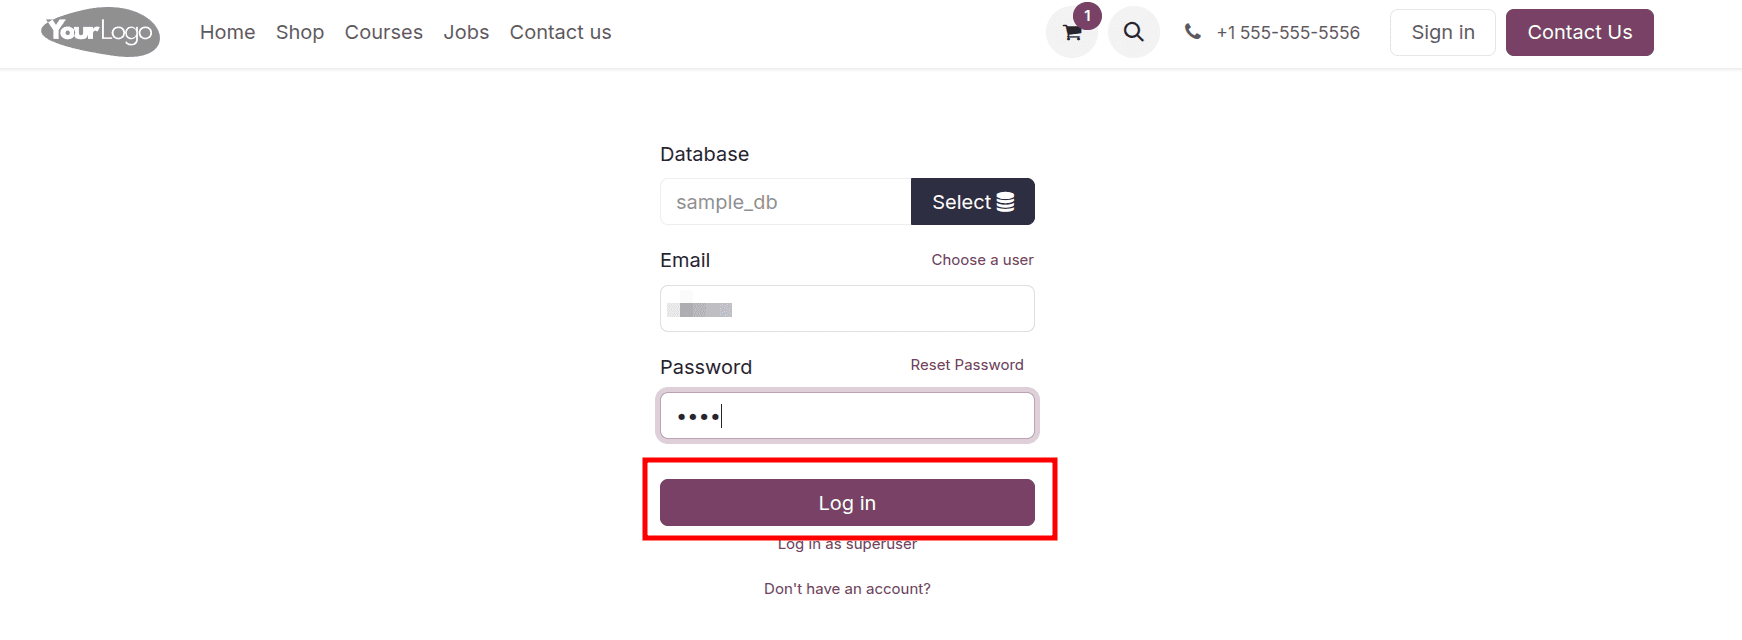
On clicking the Sign in button, Odoo 18 provides the login page. There, the customer can provide their login details, like the email address and the password. In Odoo 18, there is one more option that, from the login page itself, we can choose a user to log in, then Odoo will automatically add the user's email.
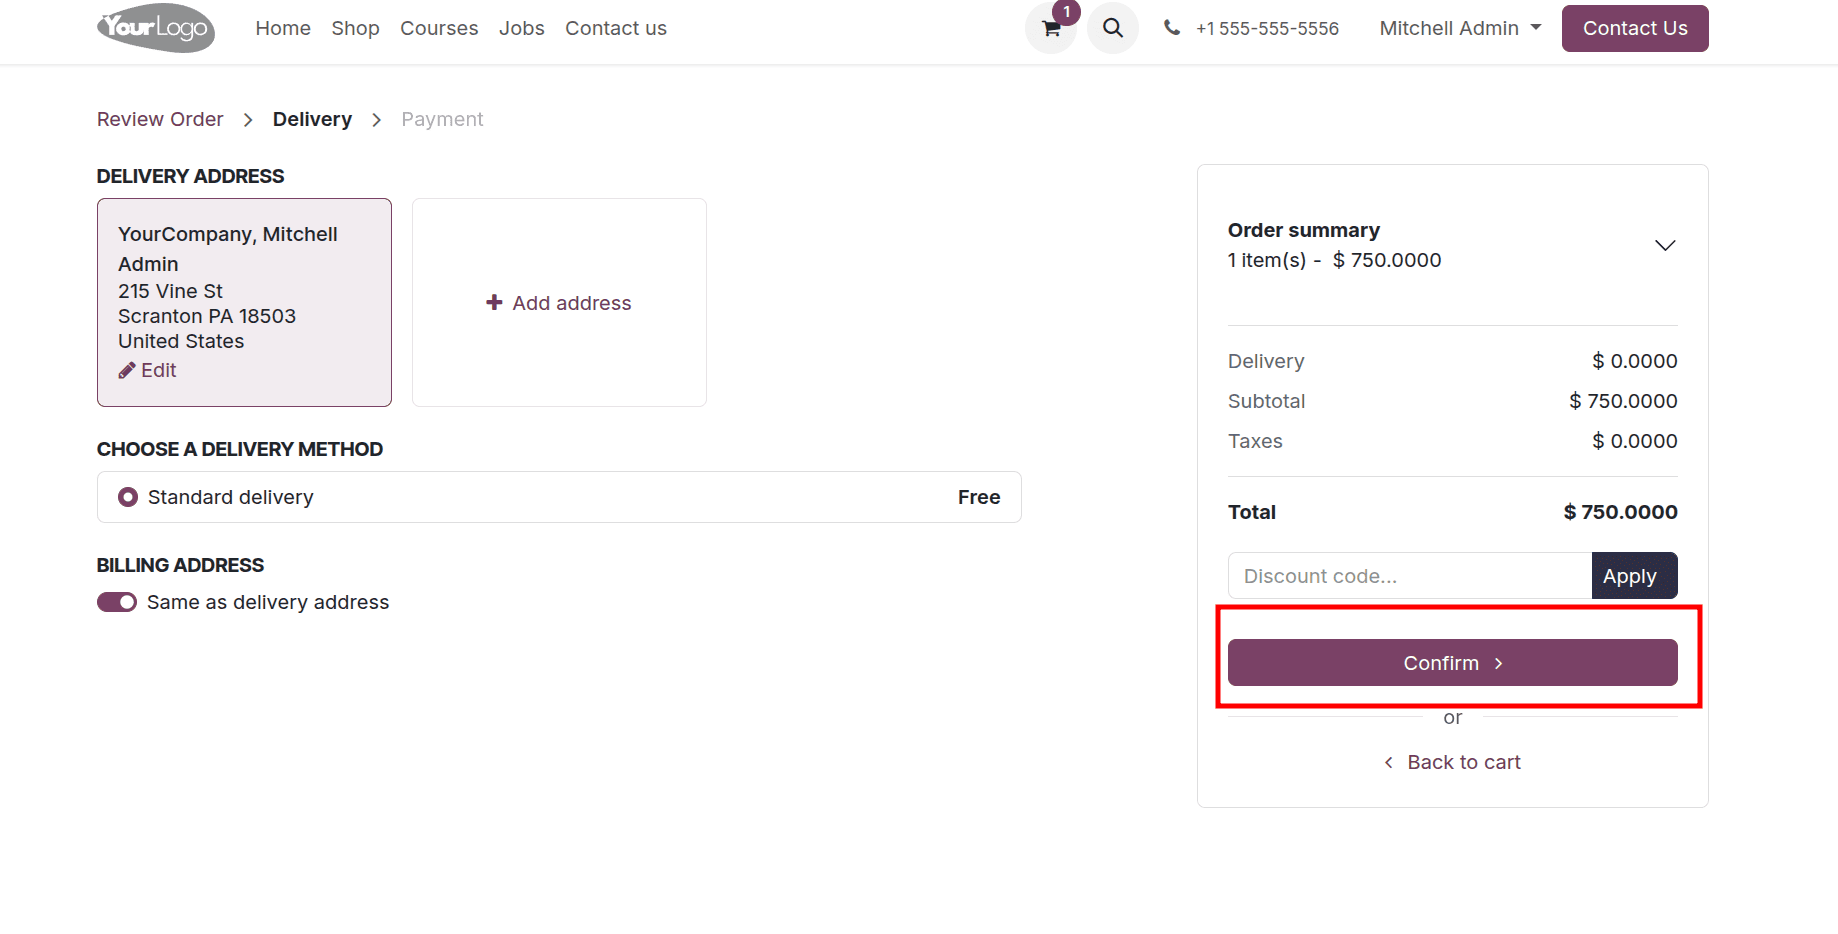
Once the login details are added, the customer can complete the remaining checkout process. Hereby clicking the confirm button customer can confirm his order.
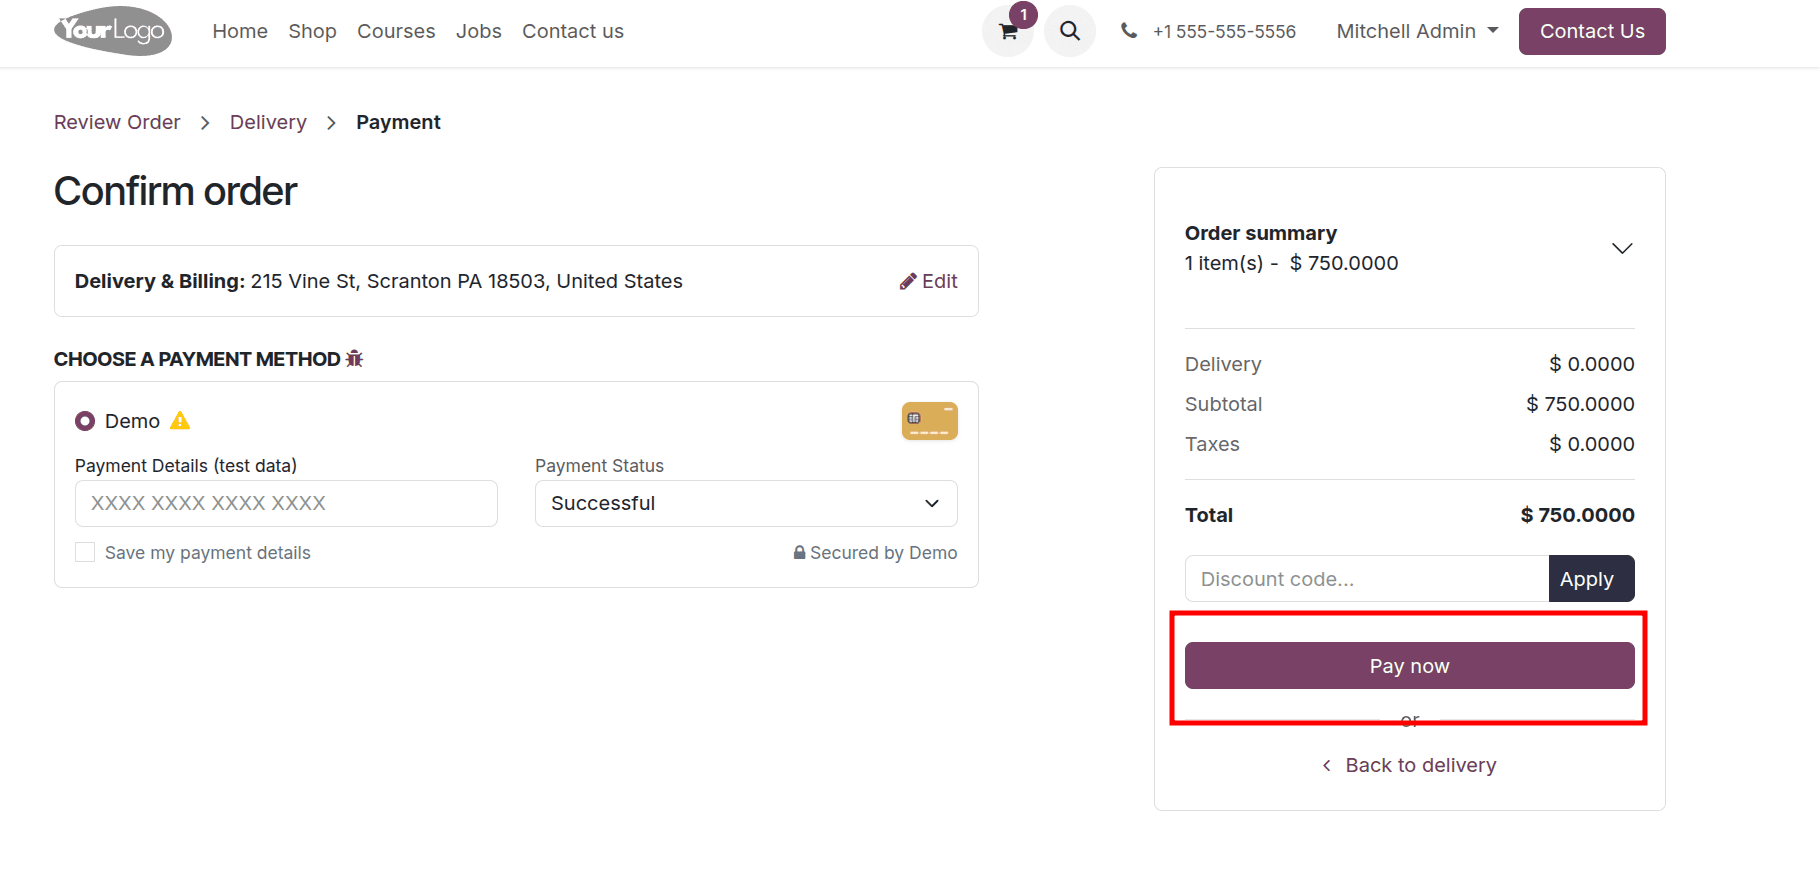
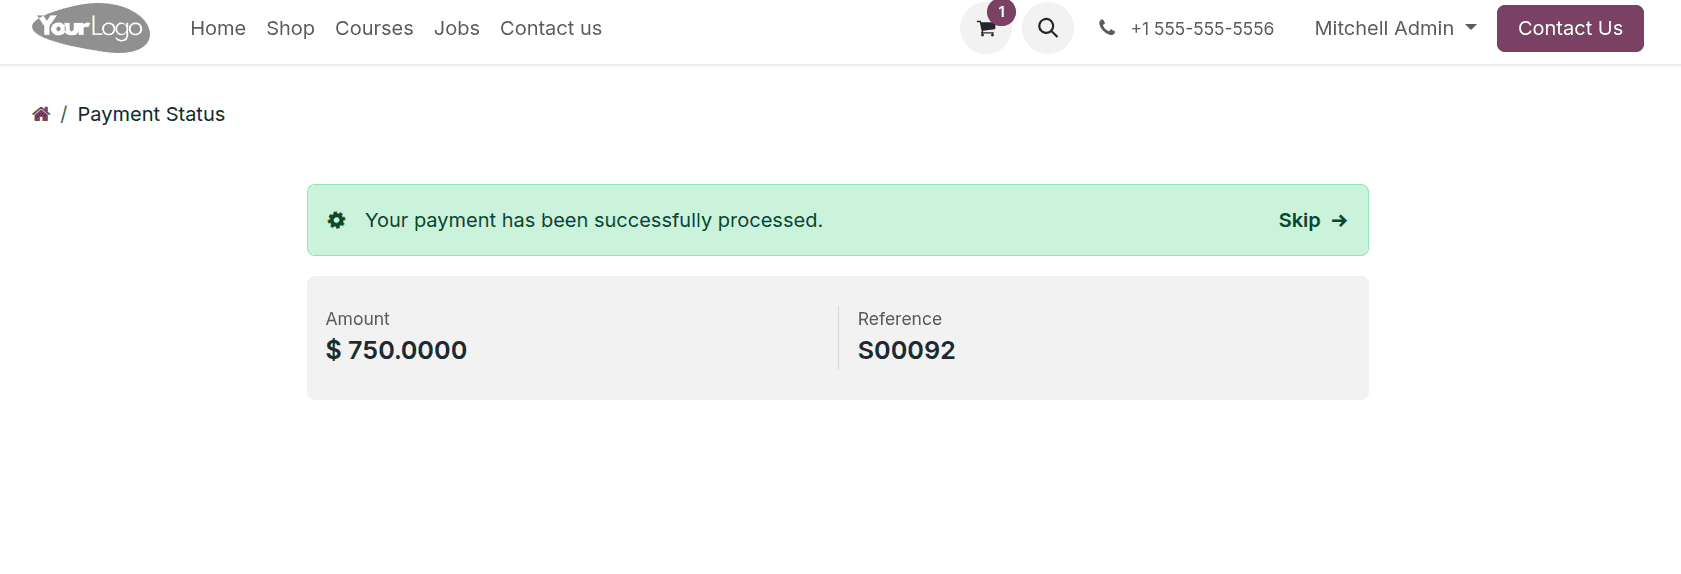
Then the customer can complete the payment procedures for the order. Odoo 18 provides different payment methods. From these different payment methods, customer can choose their convenient payment method and click the pay now button to complete the payment of the
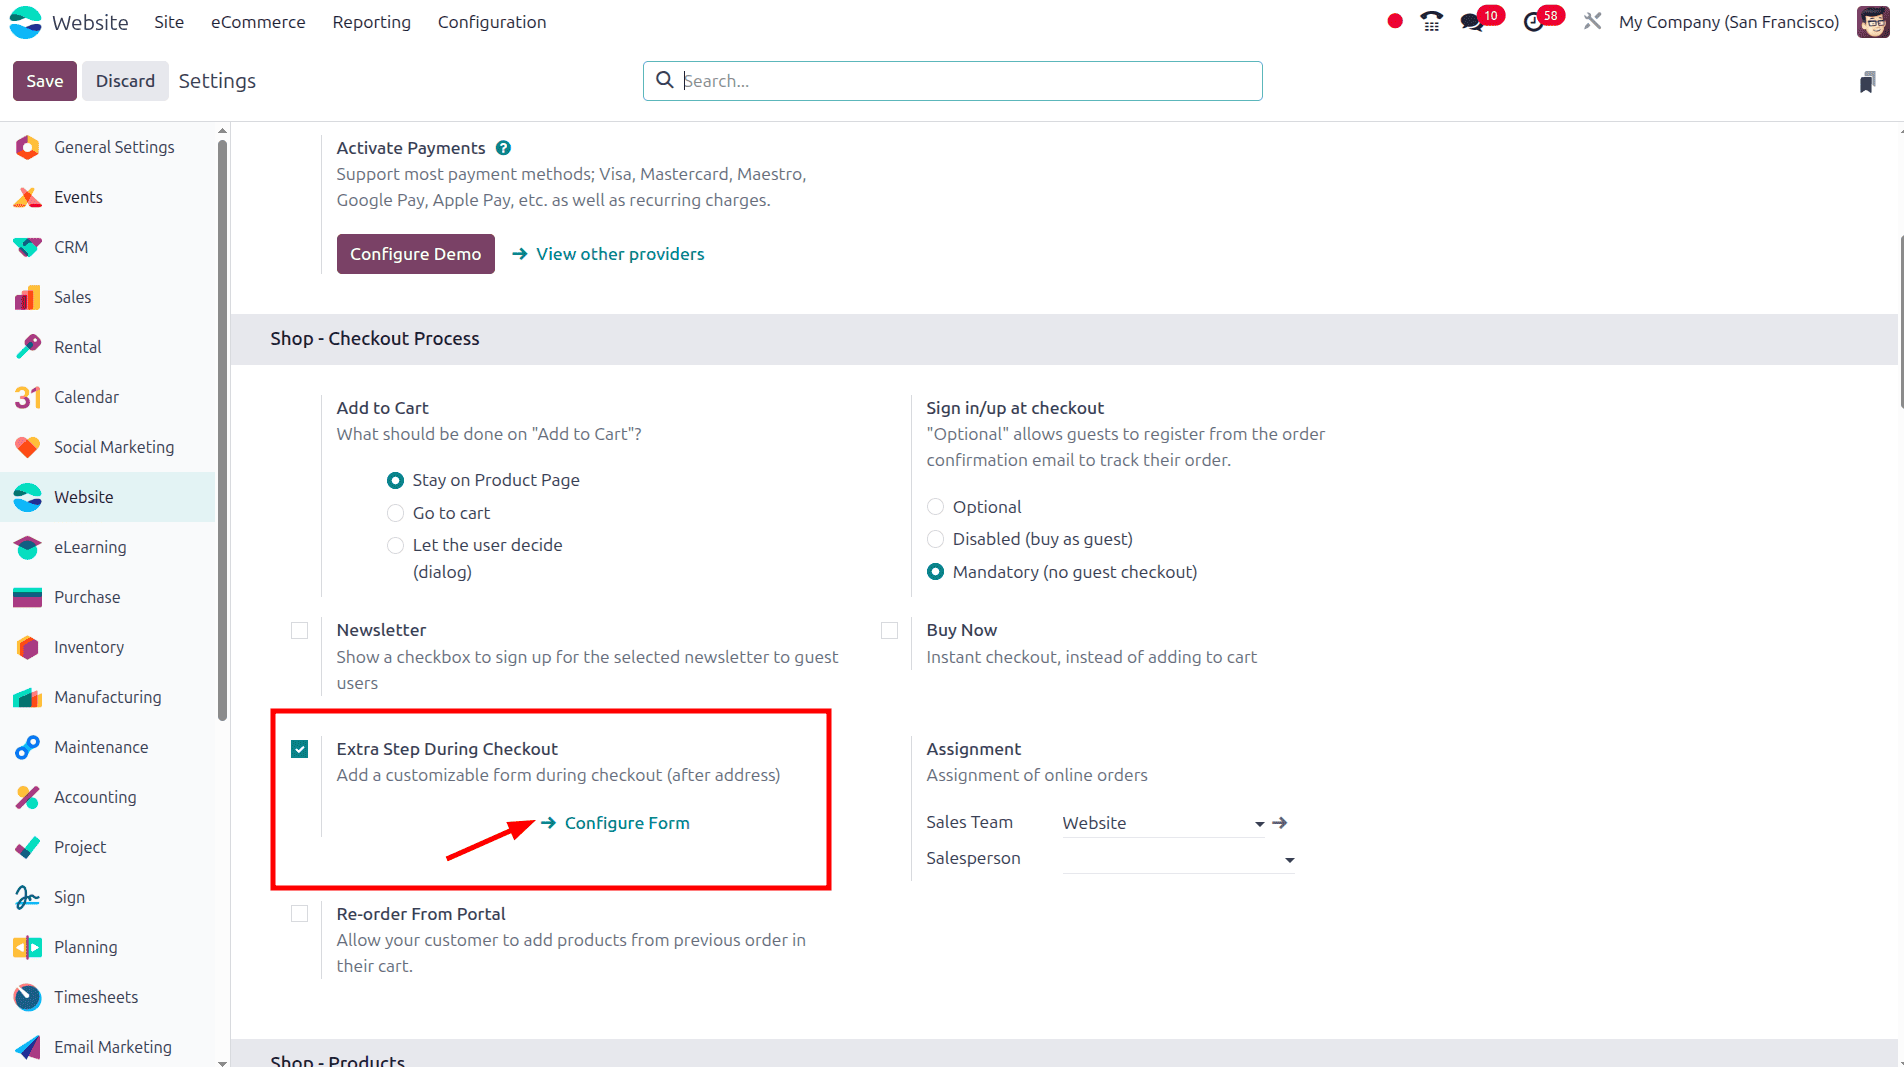
Extra Step During Checkout
The "Extra Step During Checkout" option is used to add a custom step to the checkout process on your eCommerce website. This option is typically used when you want to collect additional information from the customer before they complete the order. To set up this move to the configuration settings of the website application and enable the option, Extra Step During Checkout. Once it is saved, we have the option to configure the form of the ‘extra step’.
Here we can configure the form using the different snippets provided on the Odoo website. Using these snippets, we can design this form view as our need.
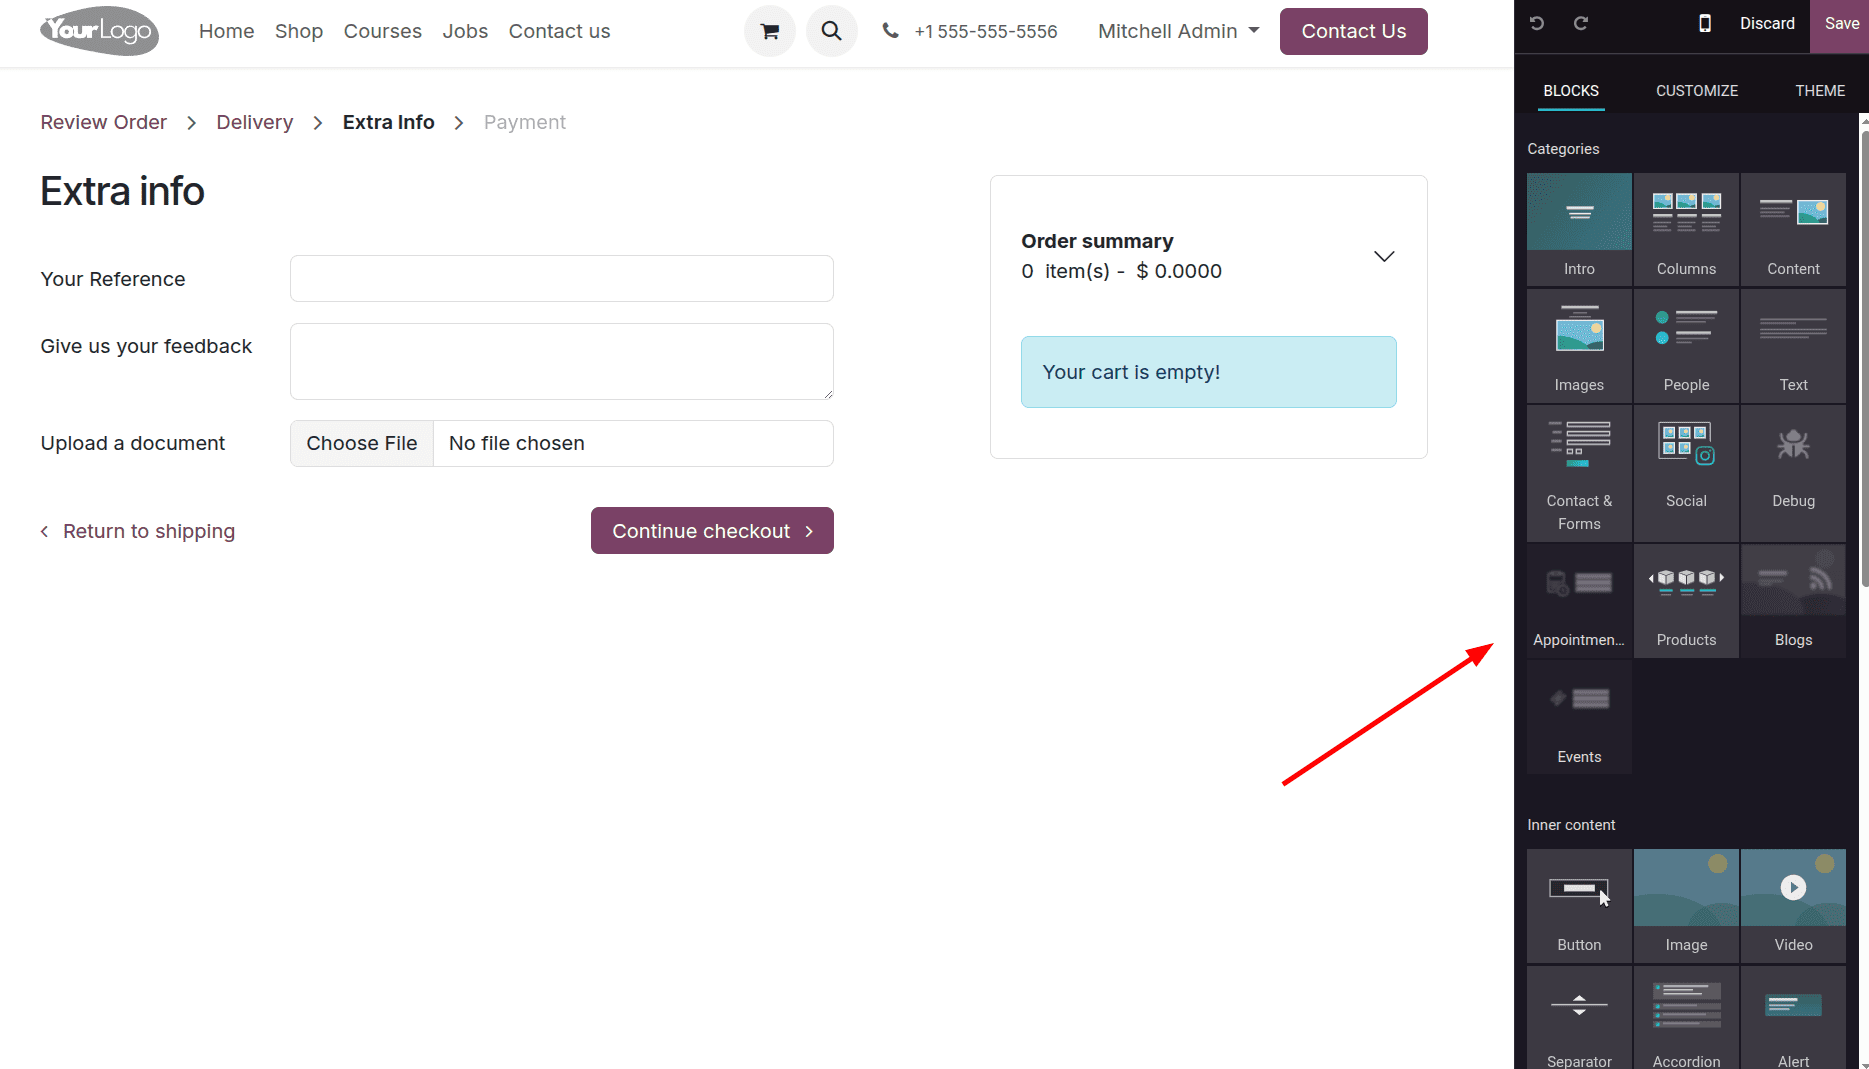
When the form is designed, if a customer is purchasing some products from a website designed with Odoo, this designed form will be the form shown as the extra step. So we can select a product and proceed with the checkout process.
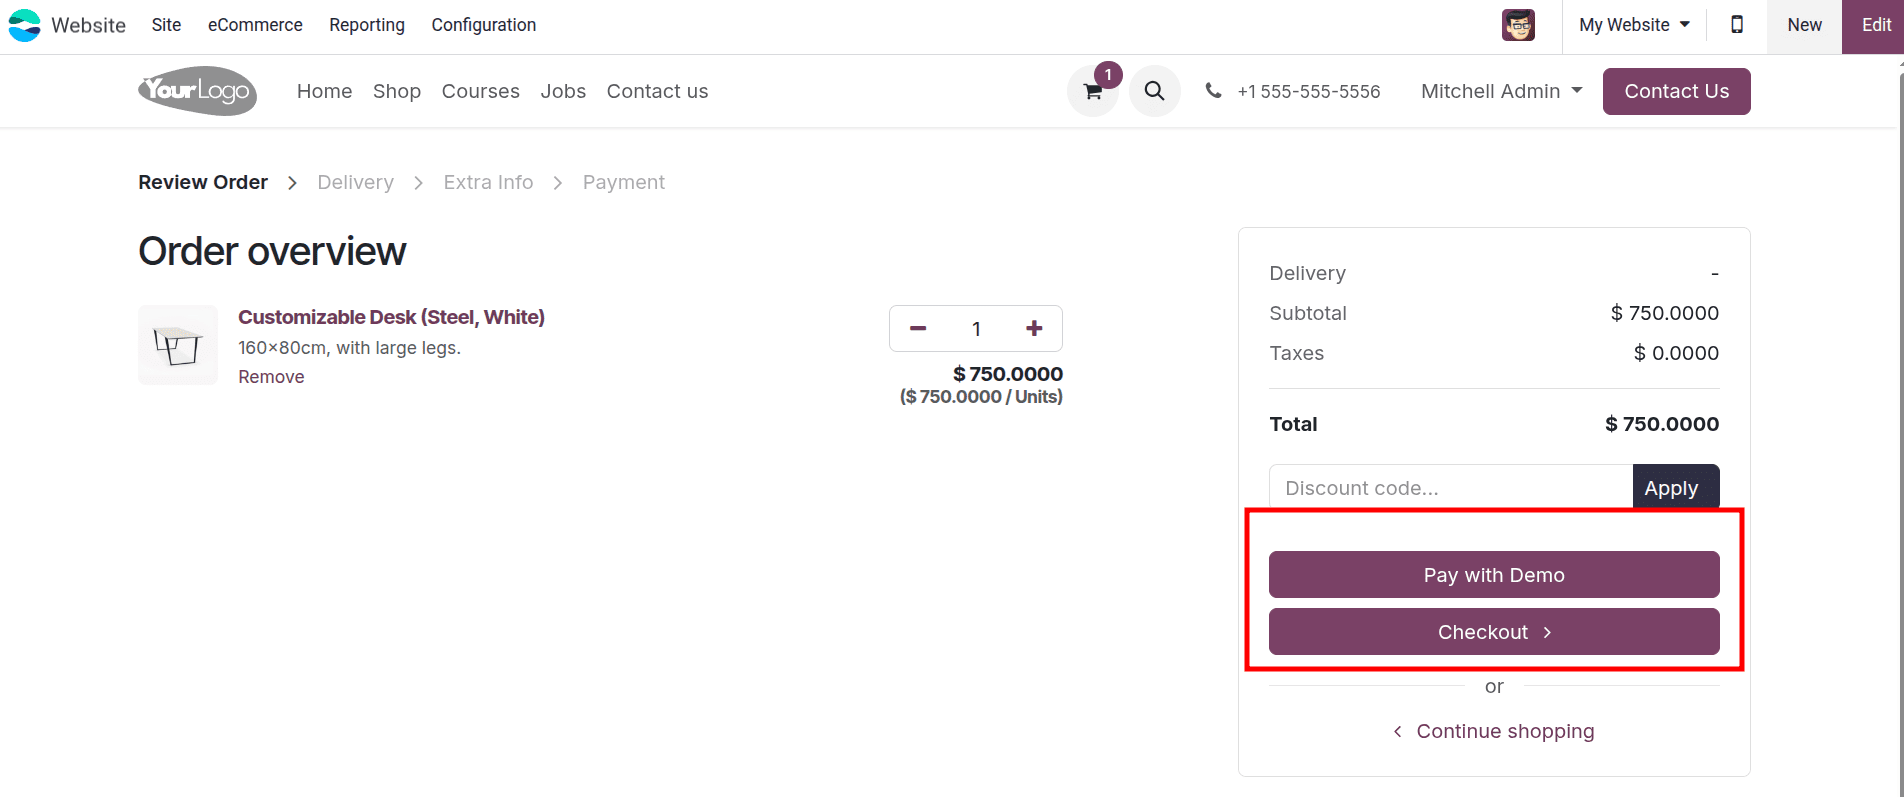
Here we have selected the product to purchase and chosen the proceed to checkout option. Then we can make the payment by choosing the pay with demo option or choose the checkout option.
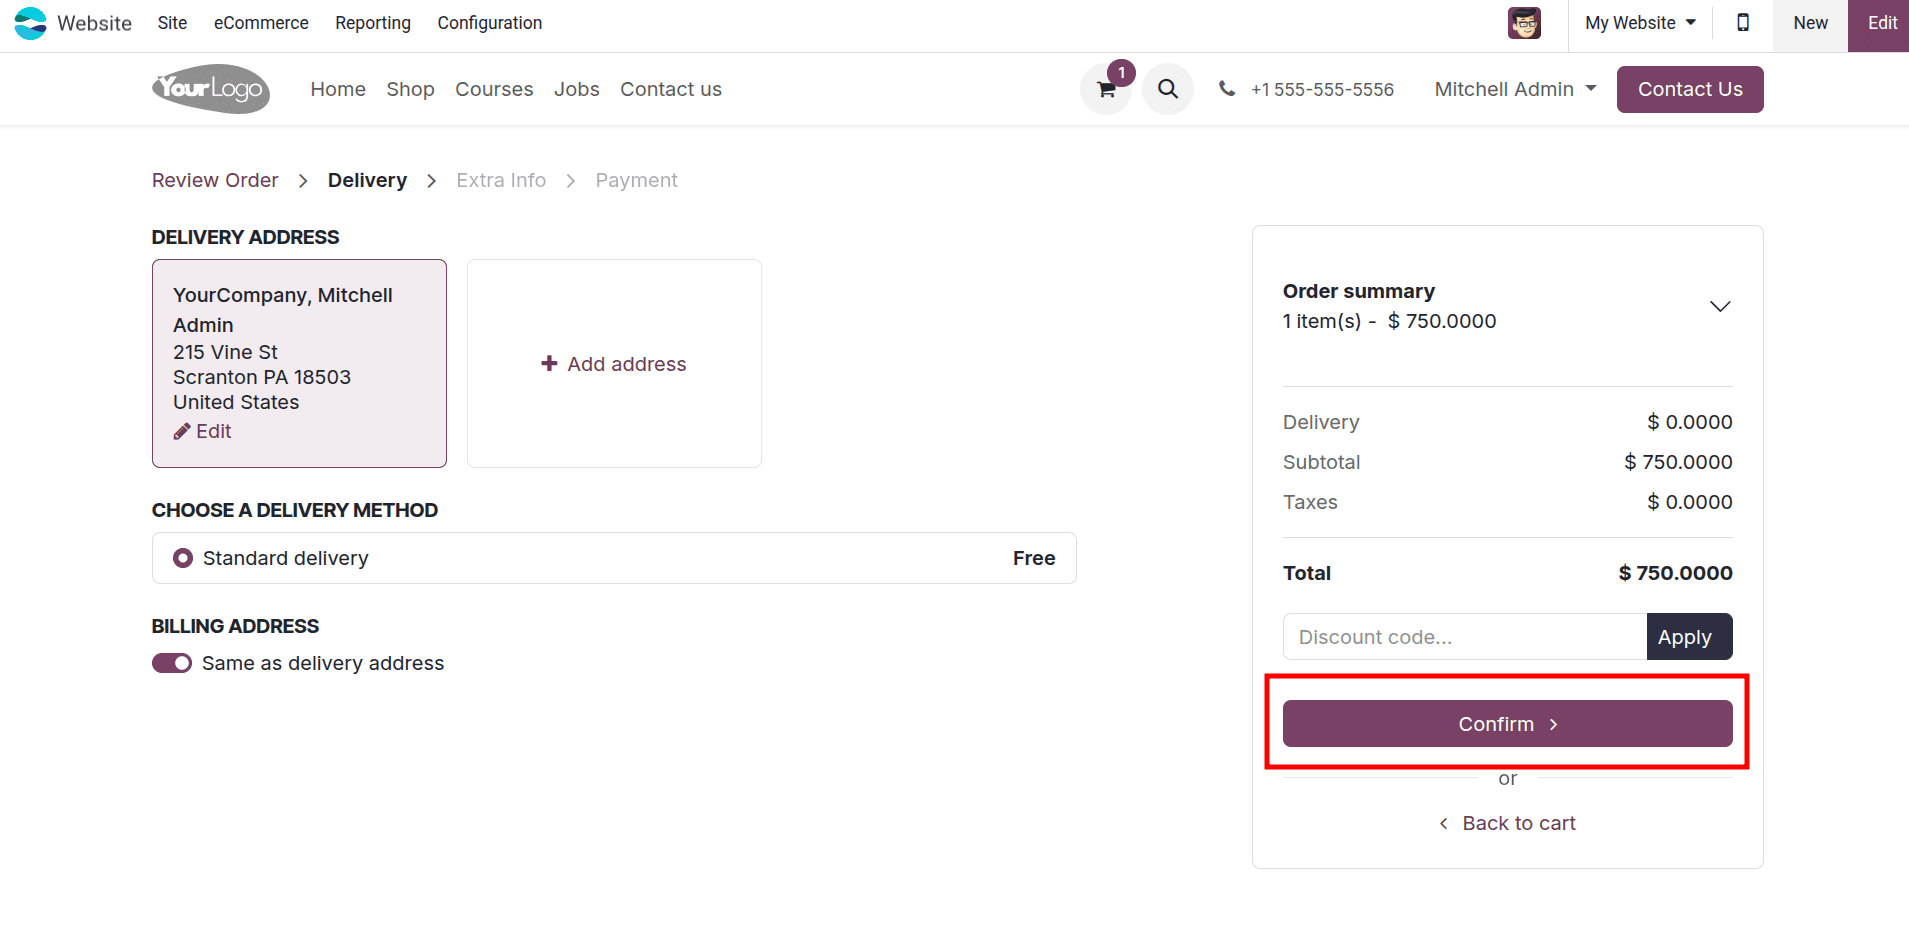
On clicking the checkout option, we can click the confirm button, so before confirming the order, the customer should check the order summary and click the confirm button. When we click the confirm button, the extra step will be displayed.
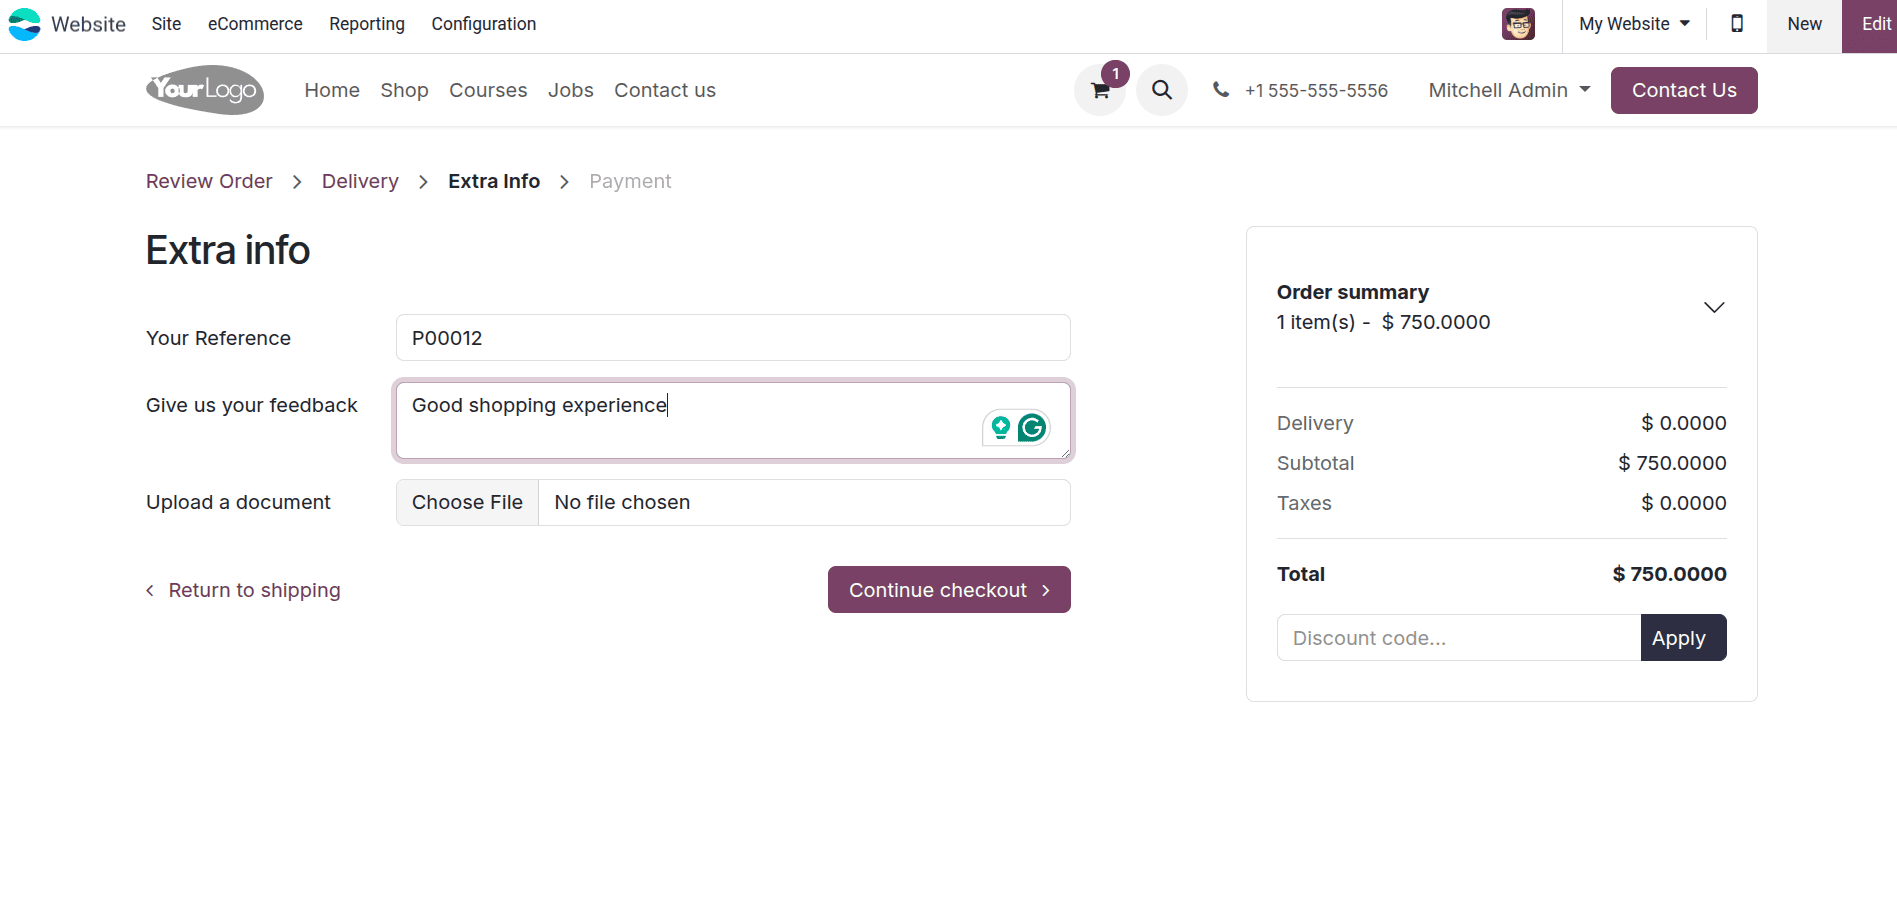
In this step, while designing the form, we can include the questions for the additional details that we need. Here, the customer can fill out the form, and they can click the Continue Checkout button.
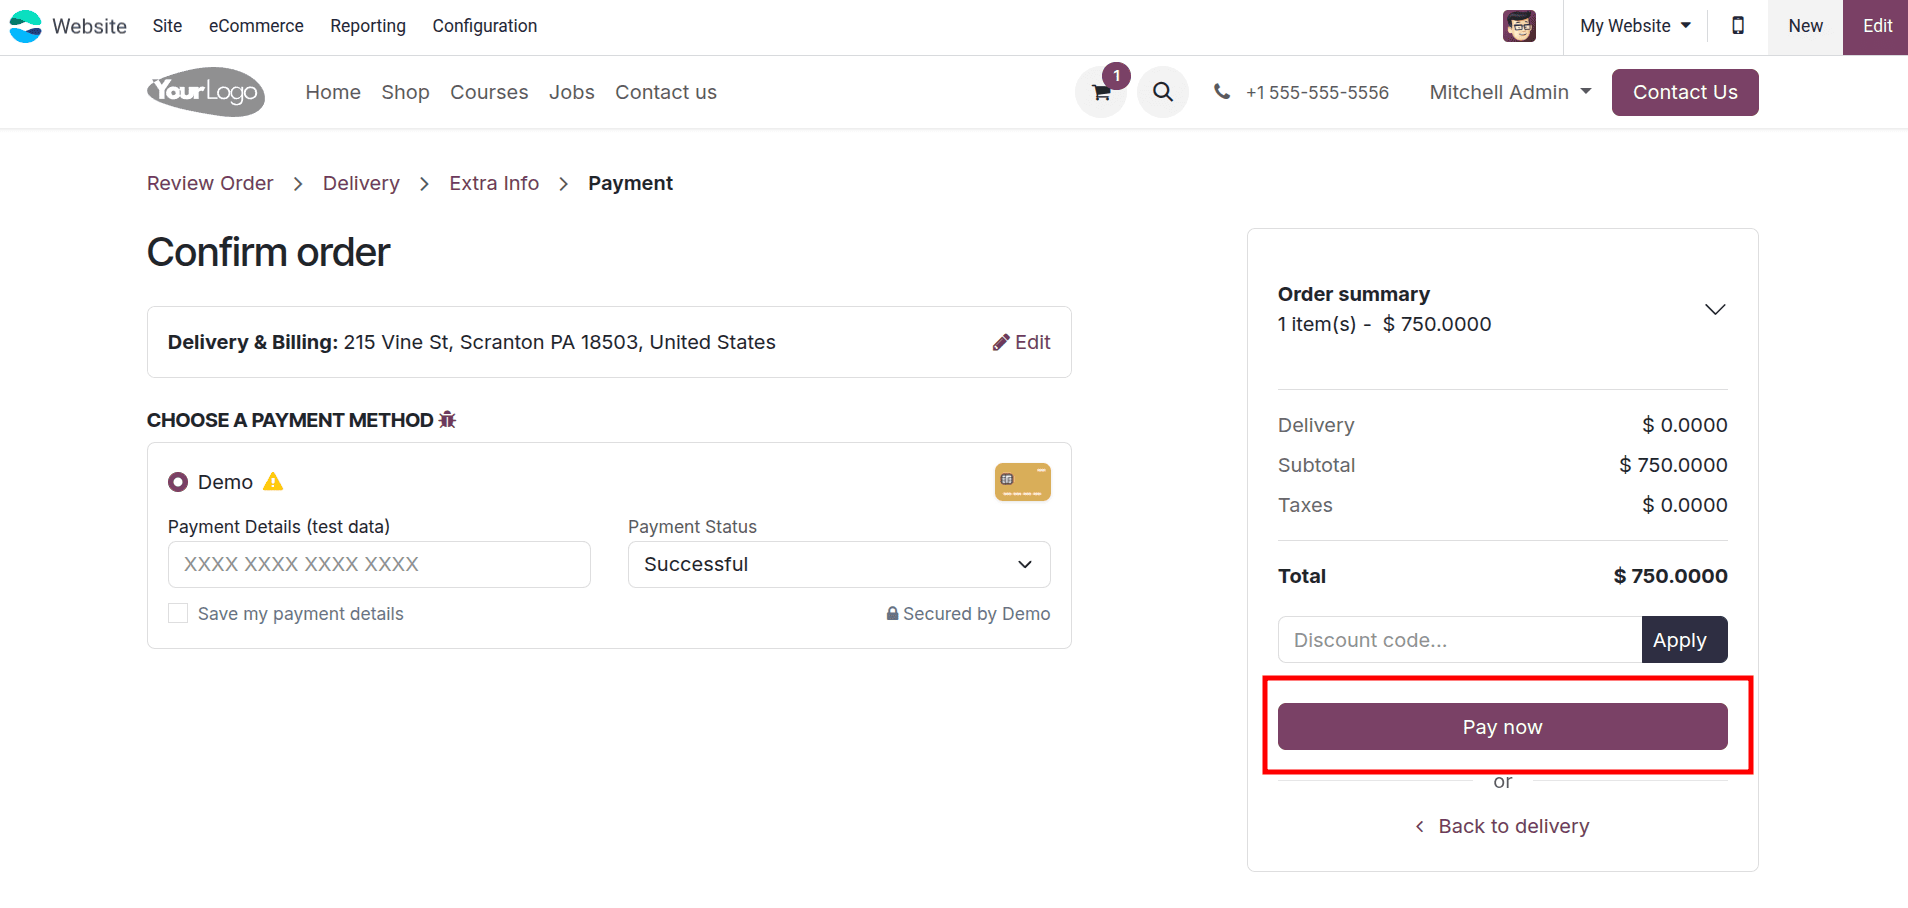
Then, from the next page, the customer can complete the payment for their purchase order and complete the purchase.
By implementing "Mandatory (no guest checkout)," you are making a clear statement about your business's customer engagement strategy. While it might add an extra step for first-time buyers, it pays off in the long run by building a robust customer database, fostering customer loyalty, generating repeat business, and enabling personalized marketing and support efforts. This setting transforms every purchase into an opportunity to build a lasting relationship with your customers in Odoo 18.
These are all the different options and features Odoo provides on the website as a part of the checkout process.
To read more about How to Configure Guest Check-in & Check-out Options in Odoo 17 Website, refer to our blog How to Configure Guest Check-in & Check-out Options in Odoo 17 Website.