For the flawless and lubricated functioning of a business firm, proper planning is a must. Without a well-scheduled activity table, the overall performance of your business could not necessarily be favorable. The problematic manual planning and the assignment of employees into various jobs without contradicting their shifts and for a couple of coming weeks can be a humongous task taking up a lot of time. But no worries, the new Planning Module of Odoo 13 will take care of everything regarding the planning of schedules in your firm.
With Odoo 13’s Planning module, the whole activity of shift scheduling, employee assignment, etc. is made super simple. Not only that, the provision for Reporting makes a huge difference when it comes to analyzing the work schemes and work hours of each employee.
Let’s see how the Planning module works. Firstly, install the module and click open it.
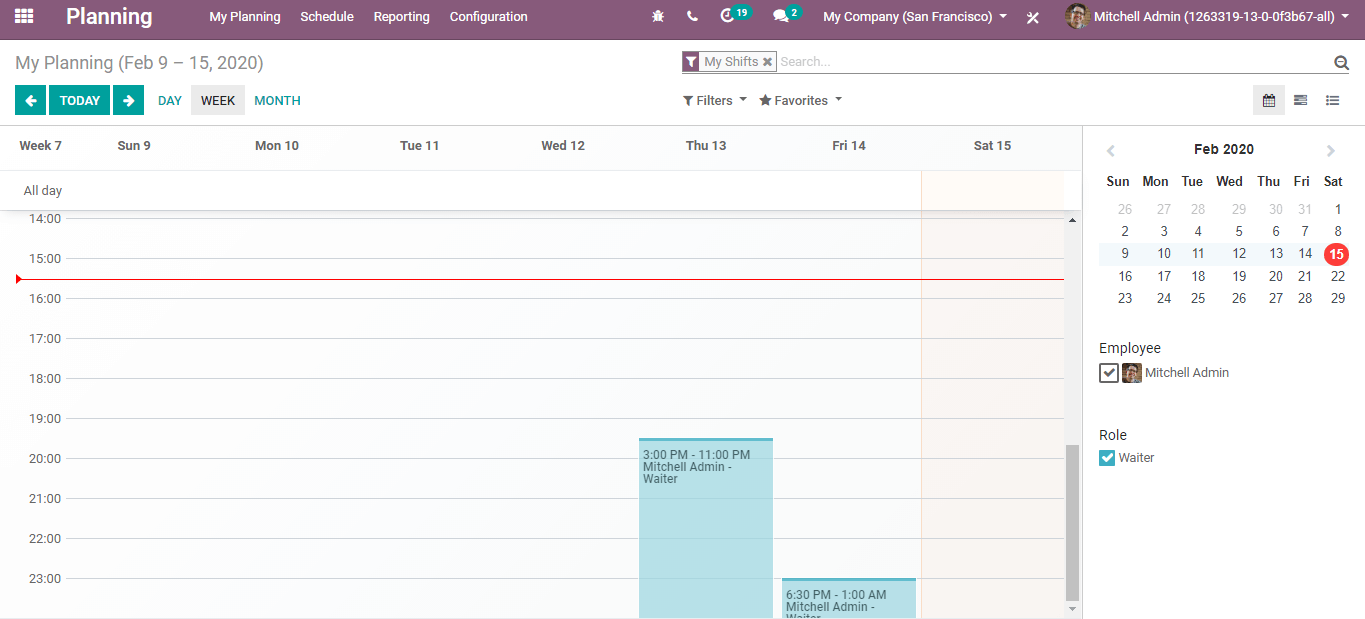
Upon clicking a window like the one above will appear. Here we can see the works assigned to you. You can view your assignments for a Day to the Week and the Month by clicking the corresponding buttons on the top right-hand side. There are three options for the mode of view, Calendar, Gantt and List. In the calendar view, you can see the schedule in a calendar-like format, a bit similar to the Kanban view. With the Gantt, you can view the schedules in Gantt chart fashion, and like a list with the list view.
In the filter option, along with other filters, you can select ‘Open Shifts’ to see any vacant shift and you can assign an employee by simply clicking the newly appeared block of open shift.
General Configuration
For adding a new work role in the planning module;
Go to Planning -> Configuration -> Roles
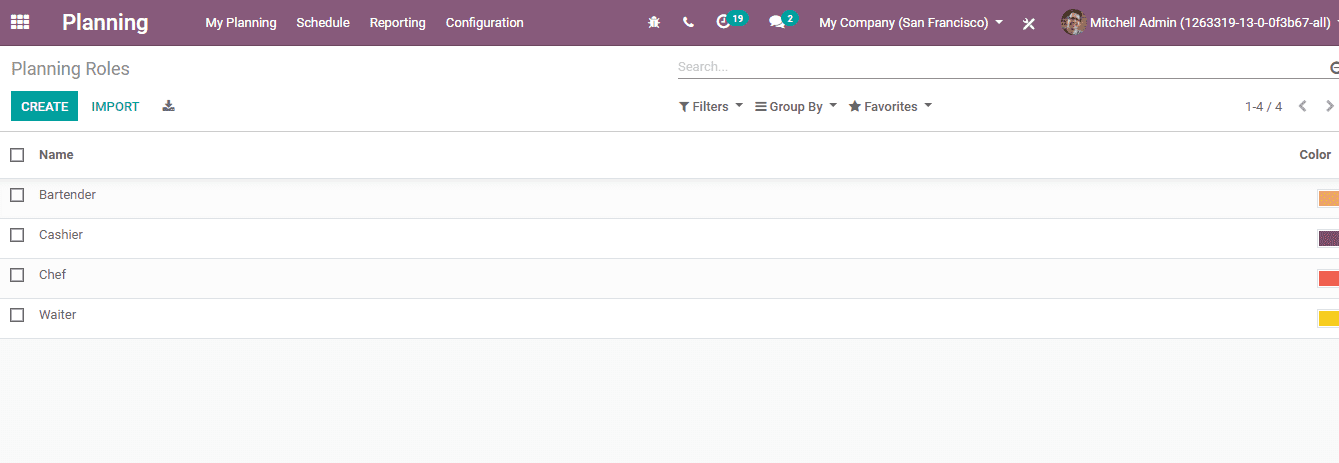
Upon clicking this a window like the one above will appear. Here you can see the different work roles, once created, like in the depiction above. For creating new work roles click the ‘Create’ button. Now a new bar will appear. Here enter the name of the work role and also assign a theme color for this role from the given options and save it by clicking save.
Now go to Planning -> Configuration -> Shift Templates
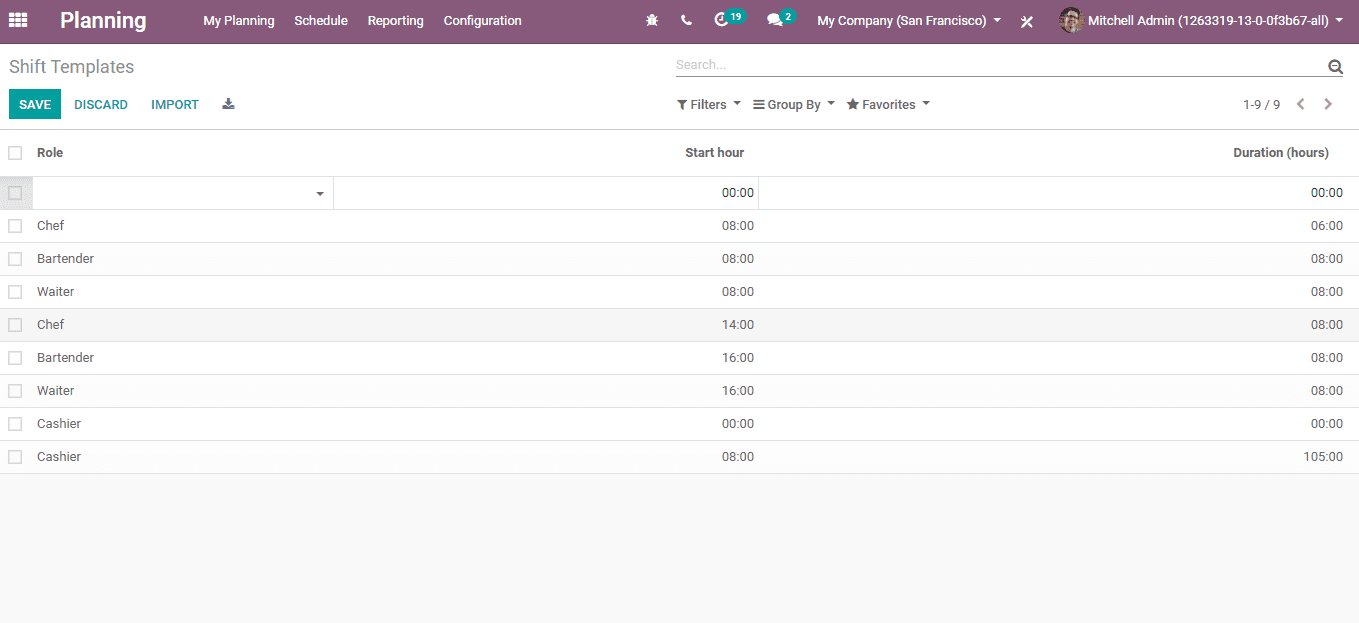
A window like the one above will appear now. Here also click the ‘Create’ button on the top left corner. Now like before a tab will appear for entering the information about the role and the time schedule of work in hours. After entering the required details save it by clicking the ‘Save’ button on the top-left corner.
Now a new work role has been created.
Next, go to Planning -> Schedule -> By Role
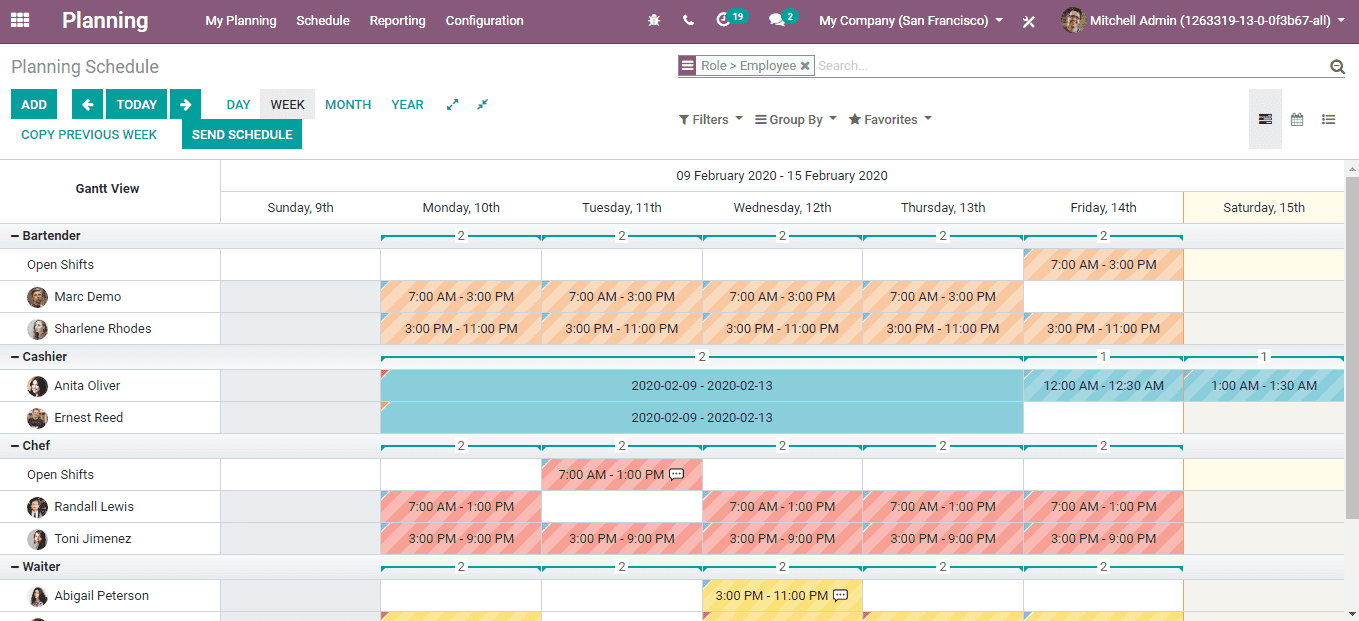
Like in the picture given above, this will be where all the planned schedules will appear once done planning. This is just one of the three optional sortings for schedule. The other two sorting methods are ‘By Employee ’and ‘By Project’.
To schedule a new work role and assign it to an employee, click on the ‘Add’ button.
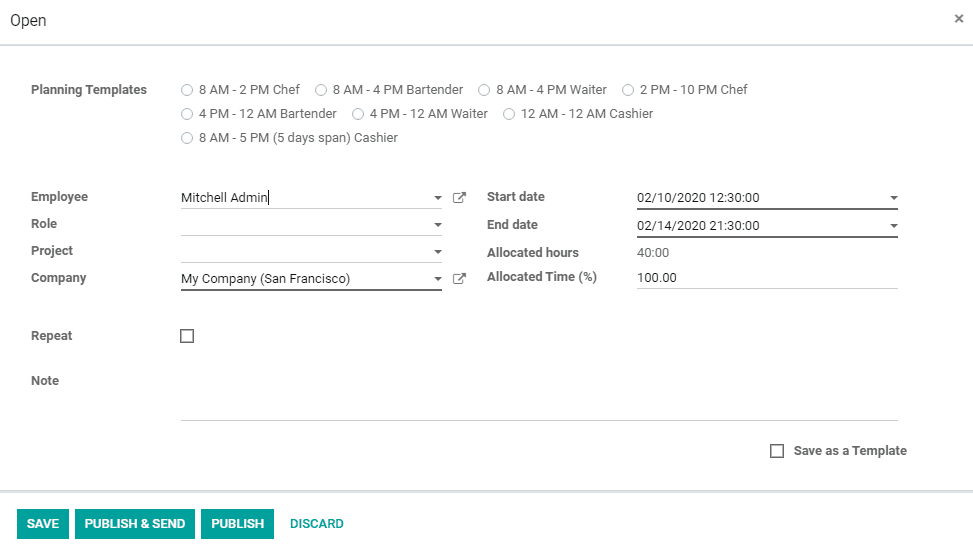
Now a popup window like the one above will appear. On this fill in all the details required. Enter the employee Name, Role, Project name, etc. on the corresponding tabs. With the allocation of work shifts, you can either select from the already available templates or manually create a new one. After allocating the time schedules you can tick mark the ‘Repeat’ option if you want to repeat this pattern for the coming weeks or similar intervals of time. Once all the information is filled, click ‘Save’ to save it and also click ‘Publish’ to publish it.
Now your new assignments will appear in the schedule.
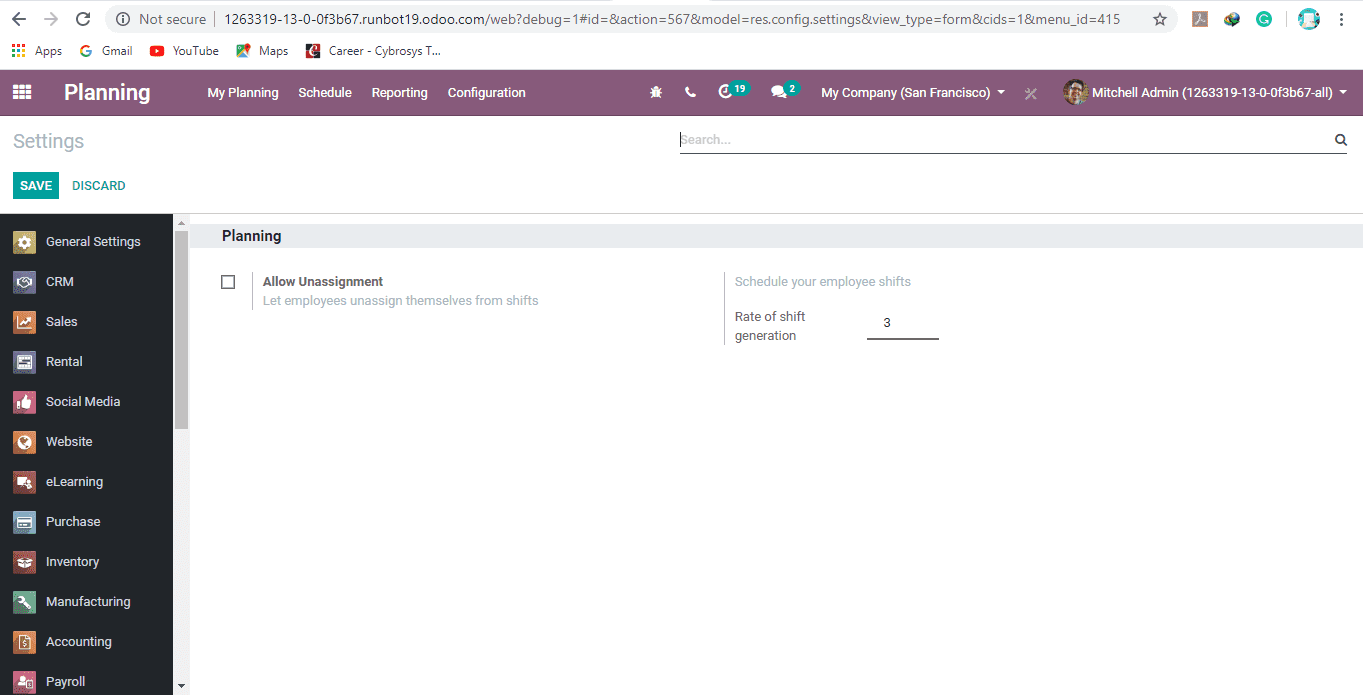
You can enable the option of ‘Allow Unassignments’ in ‘Settings’ if you want to allow your employees to head out of their assignments without consulting you.
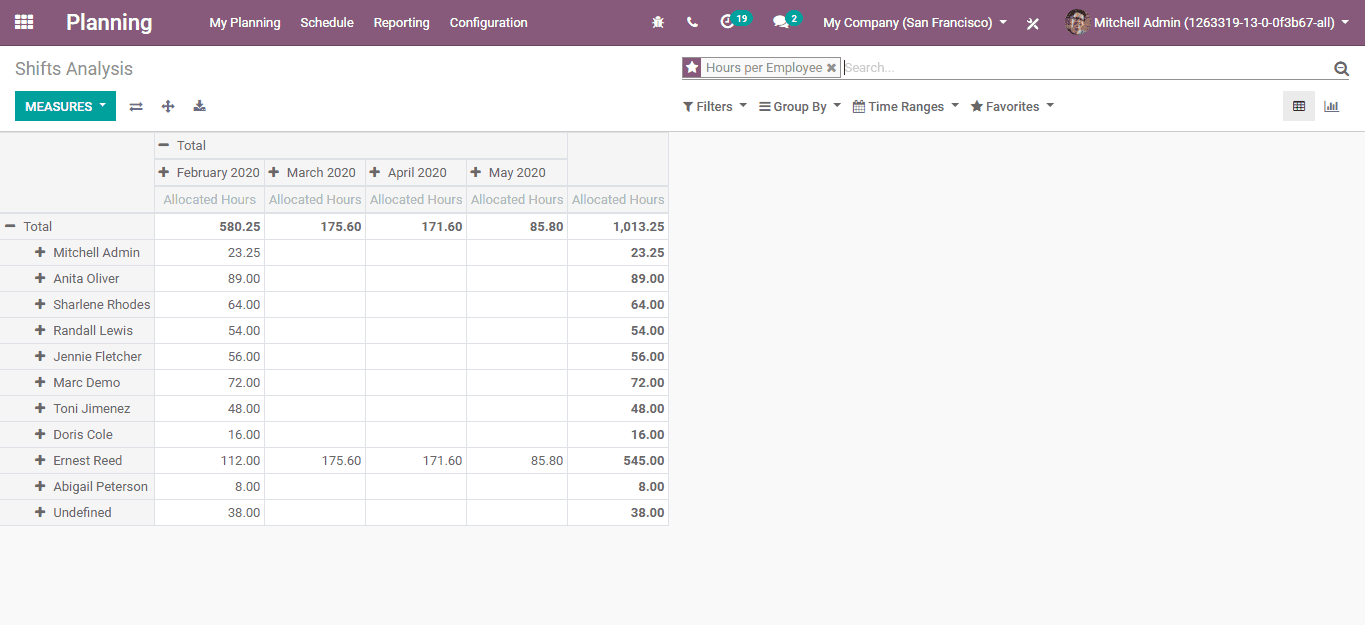
You can check the reports of your schedules and the total working hours of each employee in ‘Reporting’.
In order to do that;
Go to Planning -> Reporting -> Planning Analysis
That would cover the basics planning Planning module in Odoo 13.