Odoo provides a user-friendly way to enhance the website portal by allowing users to sort data efficiently. By adding a sorting feature, customers can quickly find relevant information within the portal. In this blog post, we’ll walk you through the process of implementing a sorting option in your Odoo 18 website portal.
Adding a Custom Menu in the Customer Portal
When a user clicks on "My Account" in Odoo, they can access various menus like Quotations, Sale Orders, and Purchase Orders. Suppose we add a new custom menu called "Recruitment" in the customer portal. We need to define an XML template to include this menu.

XML Template for Adding a Custom Menu
<template id="portal_recruitment" name="Recruitment"
              inherit_id="portal.portal_breadcrumbs" priority="30">
        <xpath expr="//ol[hasclass('o_portal_submenu')]" position="inside">
            <li t-if="page_name == 'recruitment'"
                t-attf-class="breadcrumb-item #{'active ' if recruitment else ''}">
                <a t-if="recruitment"
                   t-attf-href="/recruitment?{{ keep_query() }}">Recruitment
                </a>
                <t t-else="">Recruitment</t>
            </li>
        </xpath>
    </template>
Adding Recruitment Section in the Portal Home Menu
<template id="portal_my_home_menu_recruitment" name="Recruitment"
              inherit_id="portal.portal_my_home"
              customize_show="True" priority="30">
        <xpath expr="//div[hasclass('o_portal_docs')]" position="before">
            <t t-set="portal_client_category_enable" t-value="True"/>
        </xpath>
        <div id="portal_client_category" position="inside">
            <t t-call="portal.portal_docs_entry">
                <t t-set="icon"
                   t-value="'/portal_recruitment/static/src/img/recruitment.png'"/>
                <t t-set="title">Recruitment</t>
                <t t-set="url" t-value="'/recruitment'"/>
                <t t-set="text">View the Recruitments</t>
                <t t-set="placeholder_count" t-value="'portal_recruitment'"/>
            </t>
        </div>
    </template>
Creating a View for the Recruitment Page
<template id="portal_my_home_recruitment_views" name="Recruitment">
        <t t-call="portal.portal_layout">
            <t t-set="breadcrumbs_searchbar" t-value="True"/>
            <t t-call="portal.portal_searchbar">
                <t t-set="title">Recruitment</t>
            </t>
            <t t-call="portal.portal_table">
                <thead>
                    <tr class="active">
                        <th class="text-left">Applicant</th>
                        <th class="text-center">Create Date</th>
                        <th class="text-center">Job Position</th>
                        <th class="text-end">Status</th>
                    </tr>
                </thead>
                <t t-foreach="recruitment" t-as="record">
                    <tr>
                        <td class='text-left'>
                            <span t-field="record.partner_name"/>
                        </td>
                        <td class='text-center'>
                            <span t-field="record.create_date"/>
                        </td>
                        <td class='text-center'>
                            <span t-field="record.job_id.name"/>
                        </td>
                        <td class='text-end'>
                            <span t-field="record.stage_id.name"/>
                        </td>
                    </tr>
                </t>
            </t>
        </t>
    </template>
Adding Sorting Functionality in the Python Controller
To display recruitments and add a sorting feature, we need to modify the Python controller.
Updating Home Portal Values
from odoo import http, _
from odoo.http import request
from odoo.addons.portal.controllers.portal import CustomerPortal, \
    pager as portal_pager


class WebsiteEvents(CustomerPortal):
   """To get the recruitments in the website portal"""
   def _prepare_home_portal_values(self, counters):
       """To get the count of recruitments in portal"""
       values = super()._prepare_home_portal_values(counters)
       if 'portal_recruitment' in counters:
           values['portal_recruitment'] = request.env[
               'hr.applicant'].sudo().search_count([('user_id', '=', request.env.uid)])
       return values
Implementing the Sorting Feature in the Controller
We now define a controller function to handle sorting options when viewing recruitments.
@http.route(['/recruitment', '/Recruitment/page/<int:page>'], type='http',
               auth="user", website=True)
   def portal_recruitment(self, sortby=None):
       """To sort the recruitments in the portal"""
       searchbar_sortings = {
           'date': {'label': _('Date'), 'order': 'create_date desc'},
           'stage': {'label': _('Status'), 'order': 'stage_id'},
       }
       if not sortby:
           sortby = 'date'
       order = searchbar_sortings[sortby]['order']
       recruitment = request.env['hr.applicant'].sudo().search([
           ('user_id', '=', request.env.uid)], order=order)
       return request.render('portal_recruitment.portal_my_home_recruitment_views',
                             {
                                 'recruitment': recruitment,
                                 'searchbar_sortings': searchbar_sortings,
                                 'sortby': sortby,
                                 'page_name': 'recruitment',
                             })
When we click on the menu, we can see the following view, and there, on the top right, we can see the Sort By option.
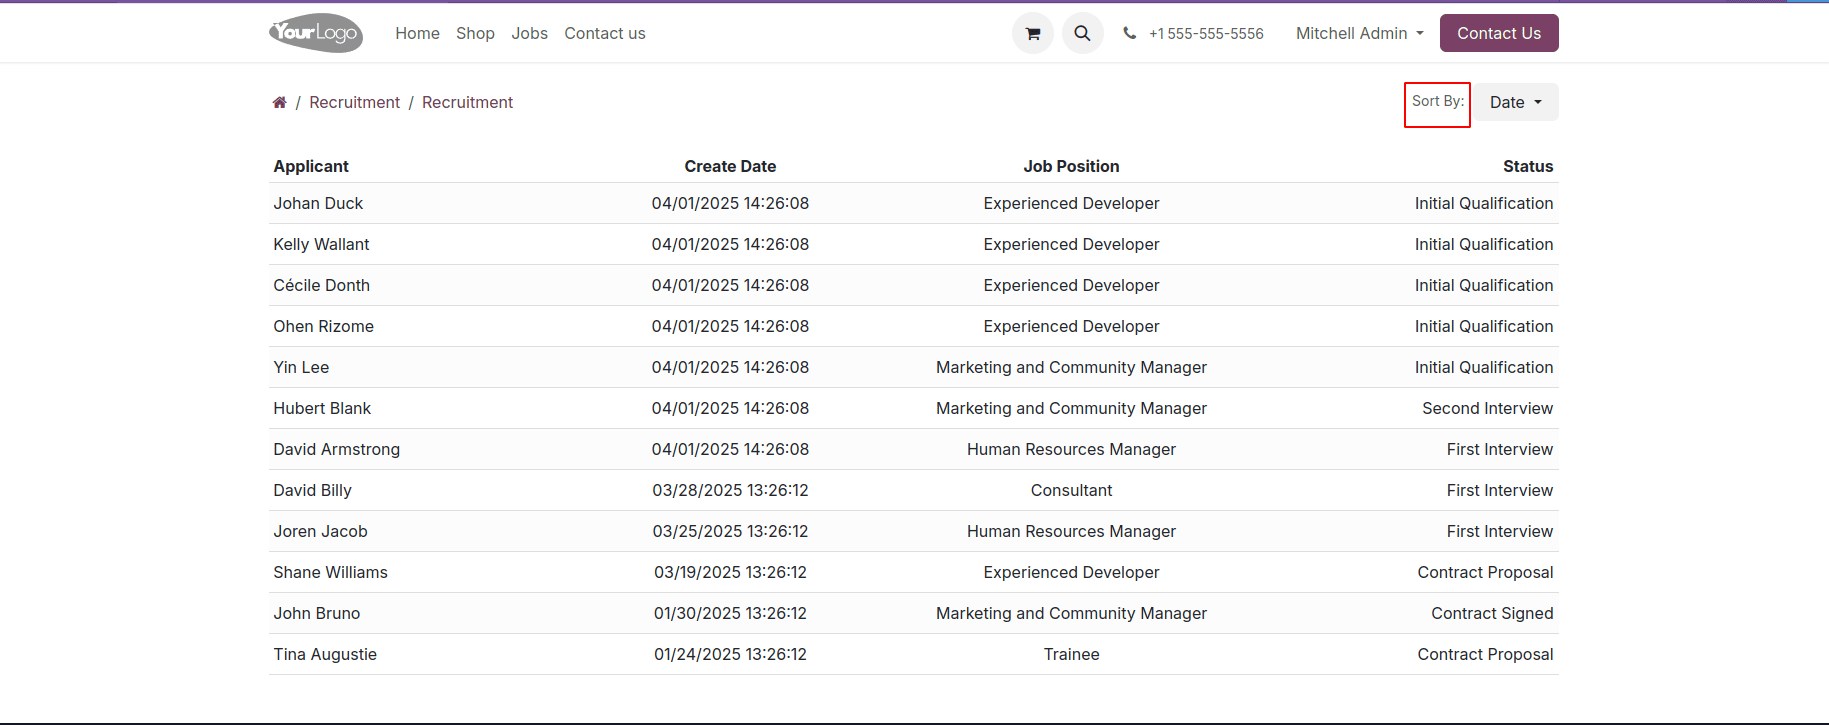
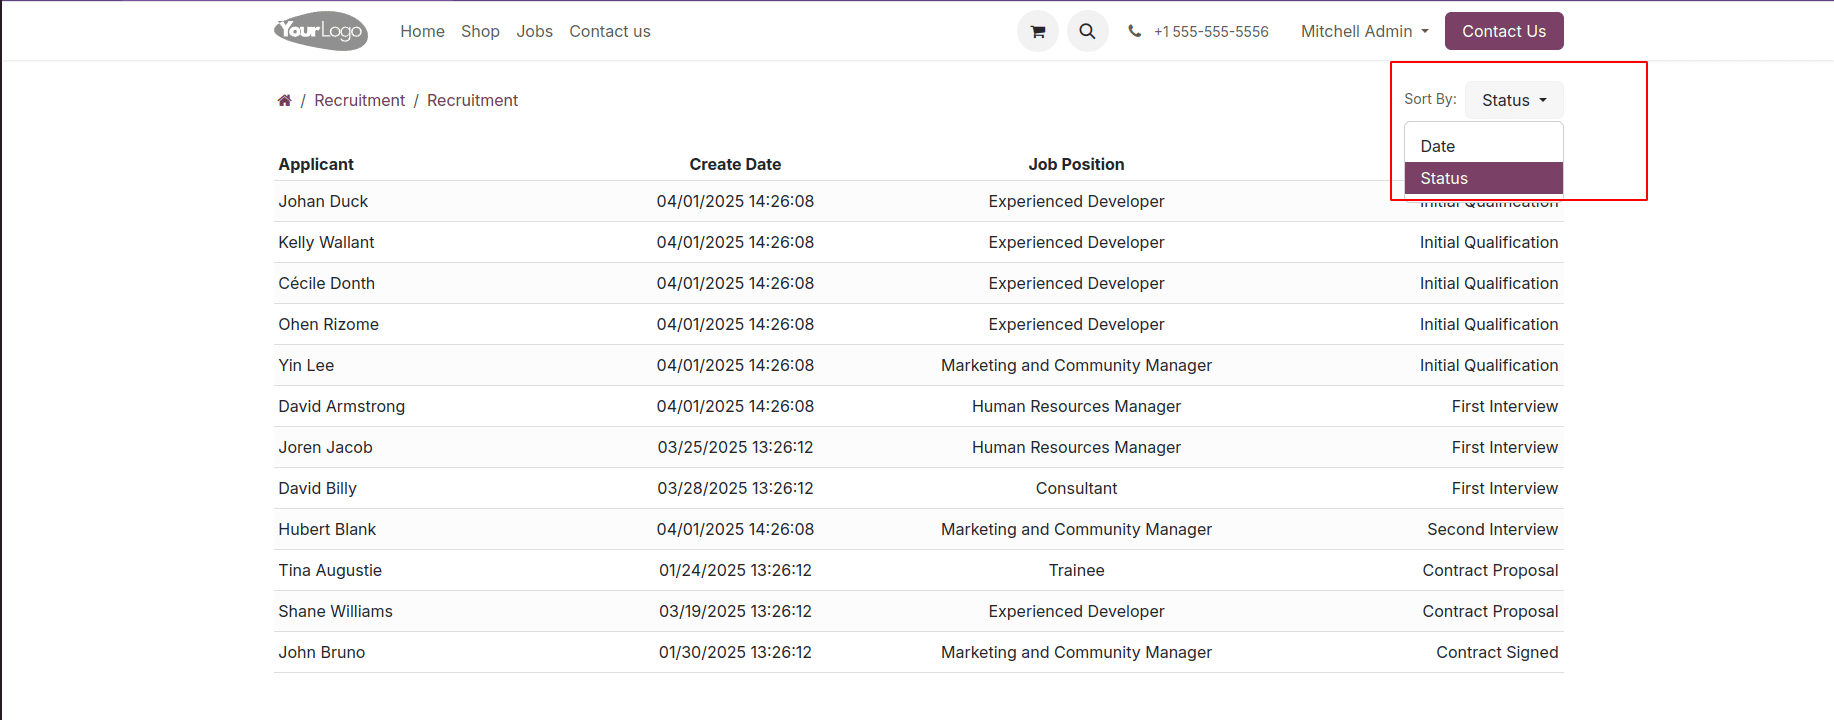
You can enable sorting in the Odoo website portal by implementing a "Sort By" option, allowing users to arrange records based on specific fields. In this case, recruitment records are sorted by their respective stages. By following these steps, you can integrate sorting functionality into your portal and tailor it to your requirements.
Understanding the Sorting Logic
1.Define Sorting Options:
  searchbar_sortings = {
           'date': {'label': _('Date'), 'order': 'create_date desc'},
           'stage': {'label': _('Status'), 'order': 'stage_id'},
       }
This dictionary defines sorting options where the key represents the sort type, and the value contains a label and an order clause.
2. Set Default Sorting Option:
if not sortby:
   sortby = 'date'
If no sorting option is provided, the default sorting is set to ‘date’.
3. Apply Sorting When Fetching Data:
order = searchbar_sortings[sortby]['order']
recruitment = request.env['hr.applicant'].sudo().search([
    ('user_id', '=', request.env.uid)
], order=order)
The order parameter applies the chosen sorting field and order when fetching records.
Conclusion
By implementing the steps above, you can successfully add a sorting option to your Odoo 18 website portal. This feature allows users to organize recruitment records based on date or status, improving their experience while navigating the portal. You can extend this functionality to other customer portal sections based on your business needs.
To read more about How to Add Sort Option in Website Portal Odoo 17, refer to our blog How to Add Sort Option in Website Portal Odoo 17.