In this blog, we are going to discuss how to add fields to a new view.
For example, let’s have a look at how to create a ‘many2one’ field in a new view or a new action window.
Consider the screenshot below, which represents a new view type or client action window with no fields included.
We can now introduce a 'many-to-one' field associated with 'res.partner' into our new view or client action window.
To achieve this, include the specified component in the XML template, leveraging the <Many2XAutocomplete> element with attributes such as placeholder, value, fieldString, activeActions, resModel, getDomain.bind, and update.bind to seamlessly integrate the 'Partner' many-to-one field functionality into the view.
<template id="template" xml:space="preserve">
   <t t-name="NewFieldTemplate" owl="1">
       <div class="o_action_manager" style="height:100%; overflow-y: scroll; width: 100%;">
           <div class="res_partner">
              <Many2XAutocomplete
                  placeholder="'Partner'"
                  value="model.modelTarget.display_name"
                  fieldString="''"
                  activeActions="{}"
                  resModel="’res.partner’"
                  getDomain.bind="getDomainTarget"
                  update.bind="onUpdateTarget"
               />
           </div>
       </div>
   </t>
</template>
Next, import the Many2XAutocomplete in your JavaScript file and integrate the component accordingly to ensure the smooth addition of the desired functionality.
import { registry } from "@web/core/registry"
import { Component } from "@odoo/owl";
import { Many2XAutocomplete } from "@web/views/fields/relational_utils";
class NewField extends Component{
    setup(){
    }
}
NewField.template = "NewFieldTemplate"
NewField.components = {
    Many2XAutocomplete
}
registry.category("actions").add('new_field_tags', NewField);
After incorporating the Many2XAutocomplete component in the JavaScript file, proceed to add the necessary functionalities for each attribute, ensuring a comprehensive implementation that aligns with the specified attributes such as placeholder, value, fieldString, activeActions, resModel, getDomain.bind, and update.bind.
import { registry } from "@web/core/registry"
import { Component, useState } from "@odoo/owl";
import { useService } from "@web/core/utils/hooks";
import { Many2XAutocomplete } from "@web/views/fields/relational_utils";
class NewField extends Component{
    setup(){
        this.model = useState({ modelTarget: {} })
        this.orm = useService("orm");
    }
    getDomainTarget(ev){
        if (ev){
            return []
        }
    }
    async onUpdateTarget(ev){
        if(ev){
            let getRecord = await this.orm.nameGet('res.partner',[ev[0].id])
            this.model.modelTarget = {id : getRecord[0][0], display_name : getRecord[0][1] }
        }
        else{
            this.model.modelTarget = { }
        }
        return ;
    }
}
NewField.template = "NewFieldTemplate"
NewField.components = {
    Many2XAutocomplete
}
registry.category("actions").add('new_field_tags', NewField);
In this, each attribute is used for
* placeholder: It sets the placeholder text for the Many2XAutocomplete field, providing a hint or description to users.
* value: Specifies the value or data binding for the Many2XAutocomplete field, which the data need to be displayed
* fieldString: In a typical scenario, it might be used to define additional properties or configurations for the field.
* activeActions: Defines the active actions for the Many2XAutocomplete field. This could involve specifying actions or behaviors that occur when certain events take place.
* resModel: Specifies the target model for the Many2XAutocomplete field,
* getDomain.bind: Binds the 'getDomainTarget' function to dynamically determine the domain for the Many2XAutocomplete field, influencing the data displayed in the dropdown.
* update.bind: Binds the 'onUpdateTarget' function, which likely handles the update or change events for the Many2XAutocomplete field, ensuring synchronization with the underlying data model.
After completing all these steps, open your new view or window.
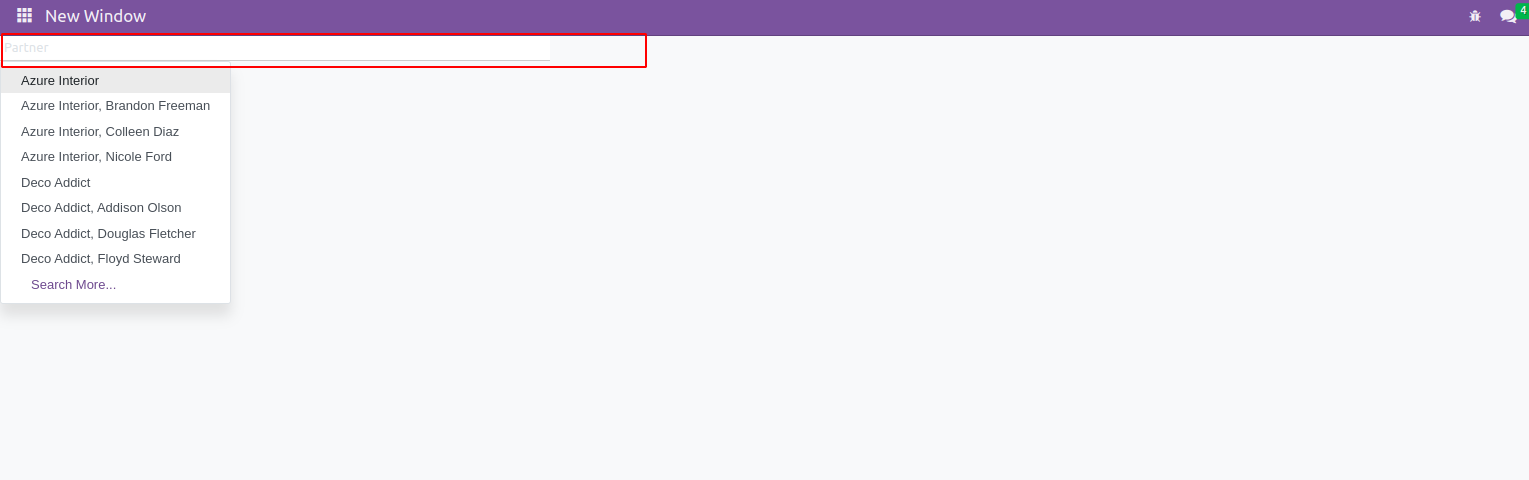
You can see the many2one field linked with the ‘res.partner’, as shown in the screenshot above.
To read more about creating a new view type in Odoo 16, refer to our blog How to Create a New View Type in Odoo 16