In a business application, for easy and quick actions to be delivered to the customers, we configure our business applications to with certain conditions, and so it is done in automation. In an enterprise, a customer buys an item if the customer pays the money for the items. If the enterprise needs to acknowledge them for their shopping with them, they can acquire it by providing their contact number. They can provide an SMS and also through email they can provide this service. These automated actions make the customers get quick information about the offers and discounts that happen for specific items in their shop in a particular area.
Many organizations provide a secret database that is restricted to use for every staff, and some have access to view and edit these functions. In such cases, we use Access Control Lists. And also, you can set Filter rules and enable in use of these filter options by the user and make changes in the database.
In a business organization, automated actions are necessary to maintain daily business operations. Nowadays, in all business resources, computerized measures are implemented. However, in the Odoo platform, the Odoo developers and creators encompass adding many automated activities with its updated versions and its functions.
This blog entails insight into the configuration of automated actions, access control lists, and filter rules in your business applications with Odoo 15 Studio.
Configuration of Automated Actions in Odoo 15 Studio
Let us see how Automated Actions and other configurations are generated with Odoo 15 Studio in a business application.
Before moving into detail with the configurations for more additional configurations you need to refer to the link given:-
Odoo Customization using Odoo 15 studio - Smart Tabs
Let us see in your sales application how it is configured and how it can be placed.
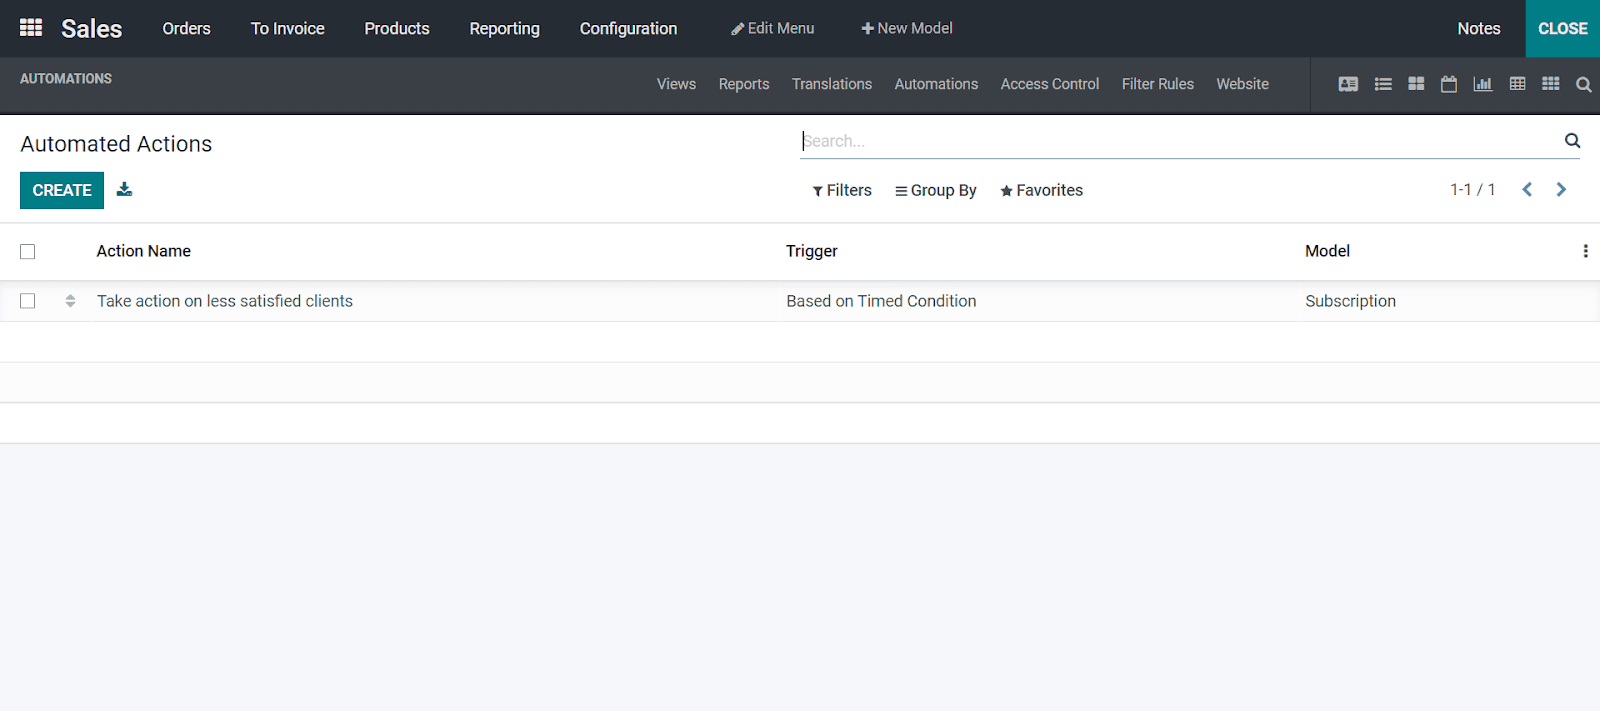
As seen in the above image, along with your sales application in Odoo 15 Studio, you can see the automated actions by clicking the automation. From the image seen is the already created automated action, and now we can create the new automation by clicking on the CREATE button.
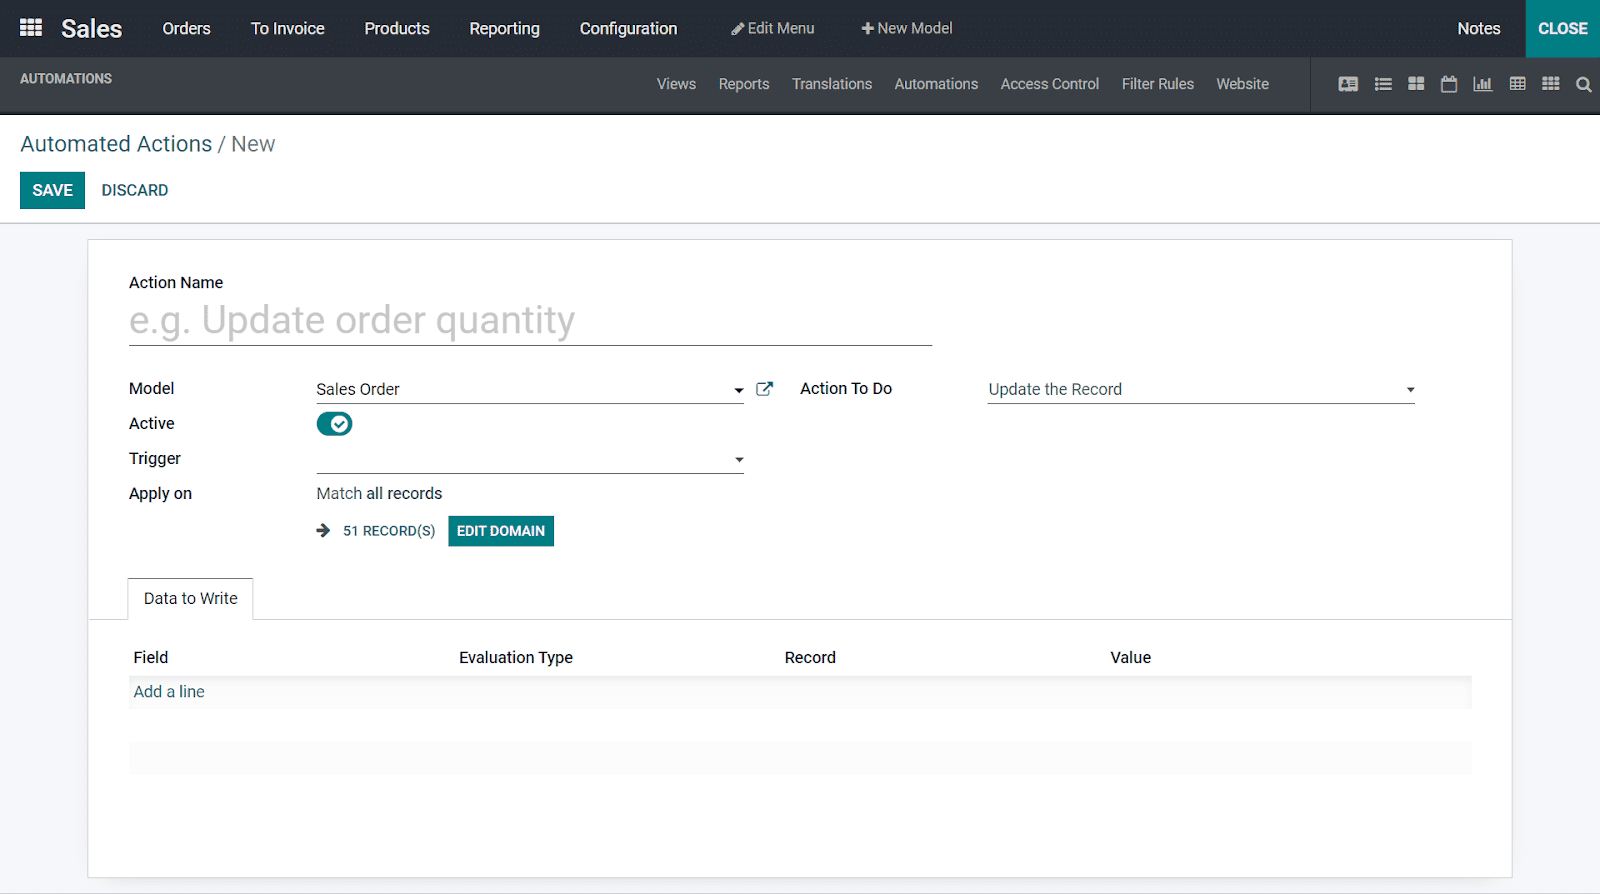
This image is formed by clicking on the CREATE button, and then here in this window, you can give the Action Name which your company requires and by default, the model is formed, and it is also active. You can even change the model from the drop-down menu and select it as your wish. And you can select Trigger and Action To Do from the drop-down menu and list them accordingly.
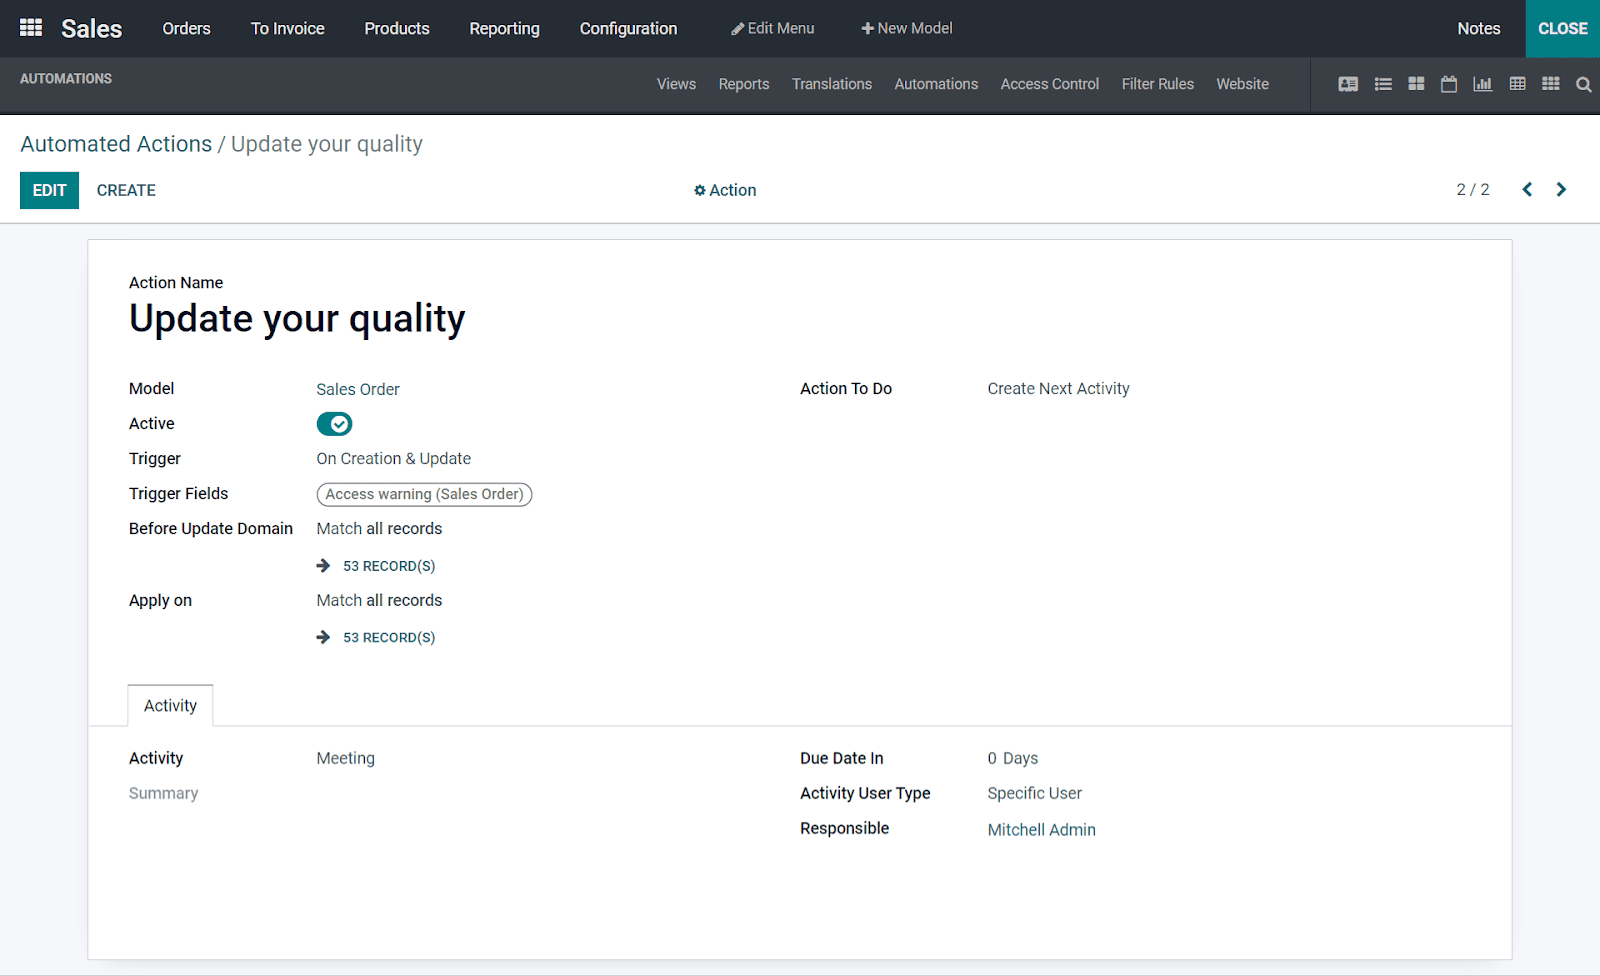
Now by entering all the necessary fields and clicking the SAVE button, you will see a window as emerged, and if you need to change any field again, you can click on the EDIT button.
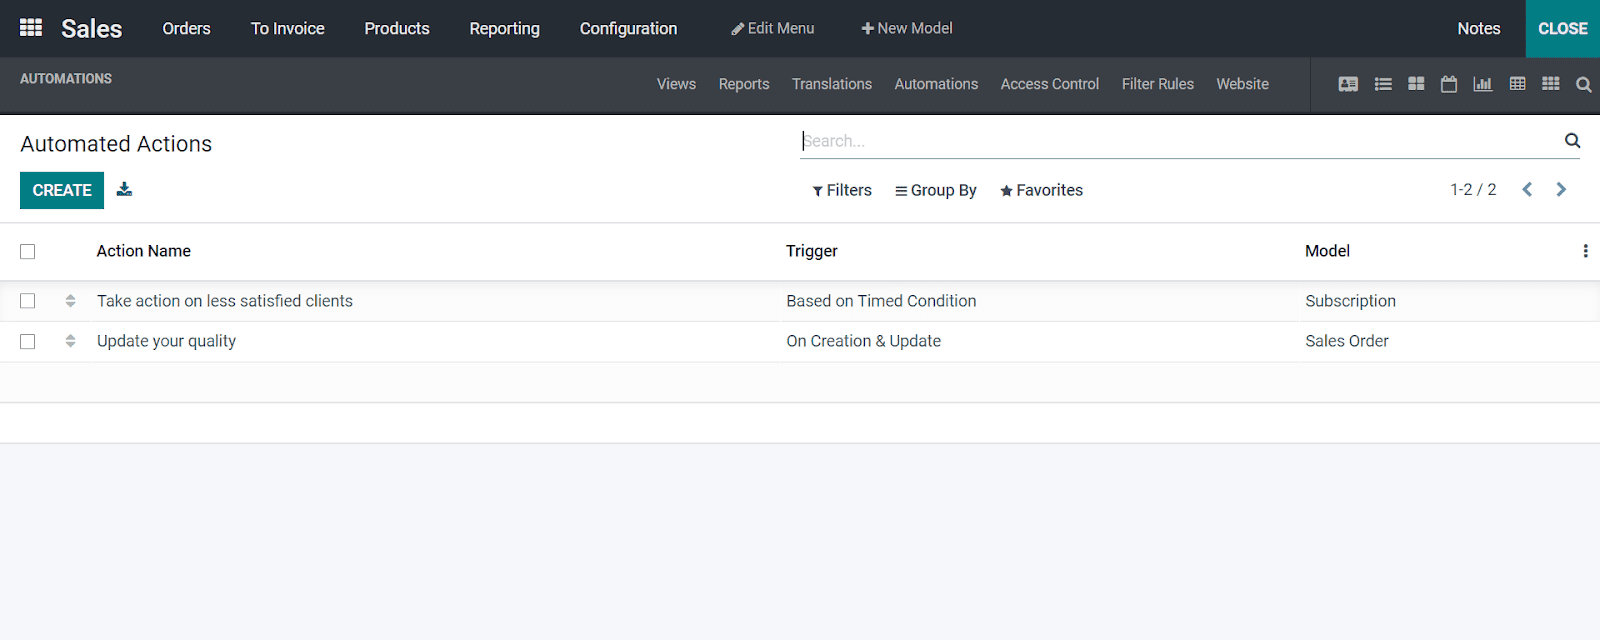
After entering all, you can move to the front page of the Odoo 15 Studio, in Automations, and you can see the inserted Automated Actions with Trigger and Model.
ACCESS CONTROL LISTS
In a business management tool by using a software application, the user must possess authorization and security both together in functioning.
The Odoo developers have prepared an Access Control Lists configuration by keeping all these aspects.
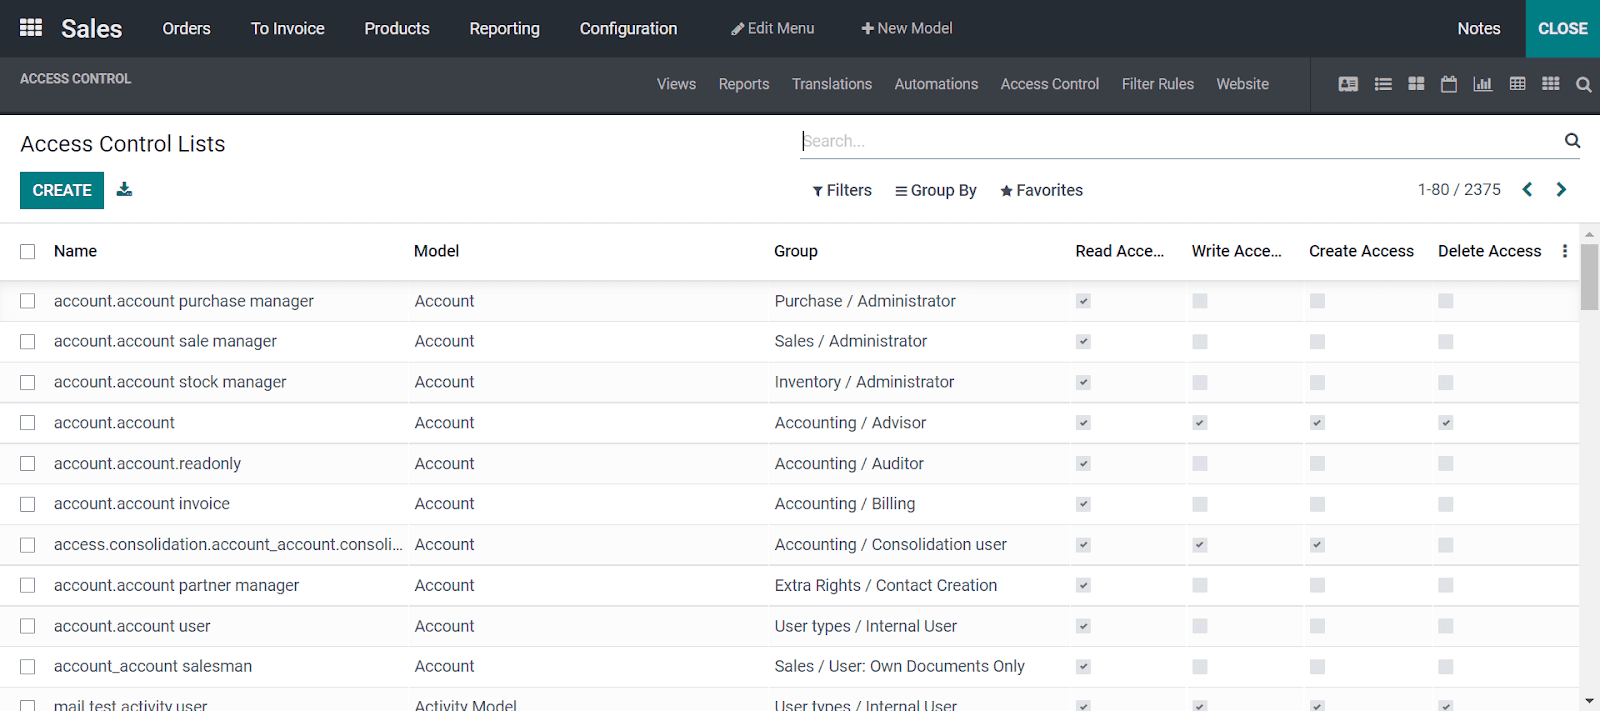
As seen in the above image, you can observe that different individuals control different kinds of access. Now you can see the read access, write access, create access, and delete access given to other users as in the above illustration. You can enable access control by marking a tick mark in each section. With the search filters grouped by option, you can segregate the operations and work on them. If you need to create a new Access Control, you can do it by clicking on the CREATE button in the above image.
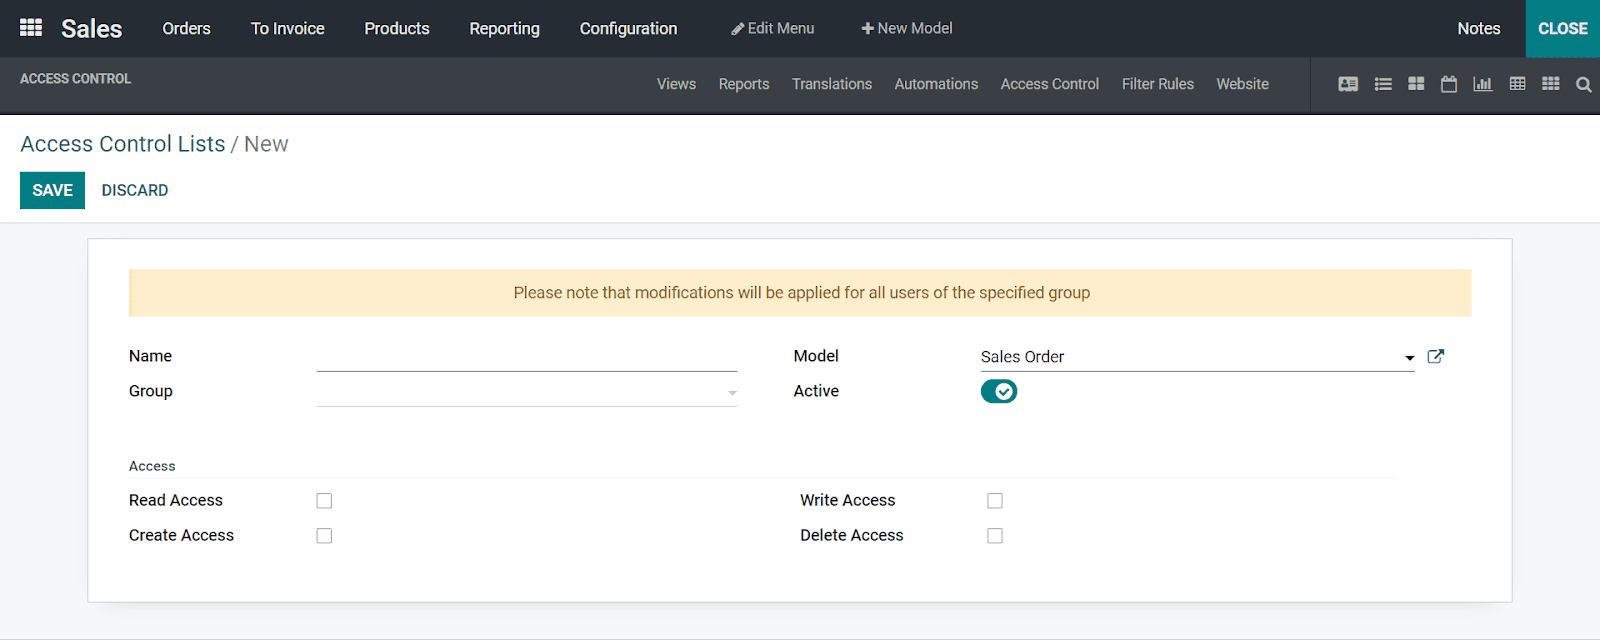
In the above image, the window appeared by clicking on the CREATE button, and now you can click on the SAVE button and form a new access control list.
FILTER RULES
Let us now move to the configuration of Filter rules in detail and its configuration in your business application with Odoo 15 Studio.
In the Filter Rules, you can define the filtering elements required in business management and maintain them with Odoo 15 Studio module. The Odoo platform sets the default filter elements, and you can either enable or disable these functions.
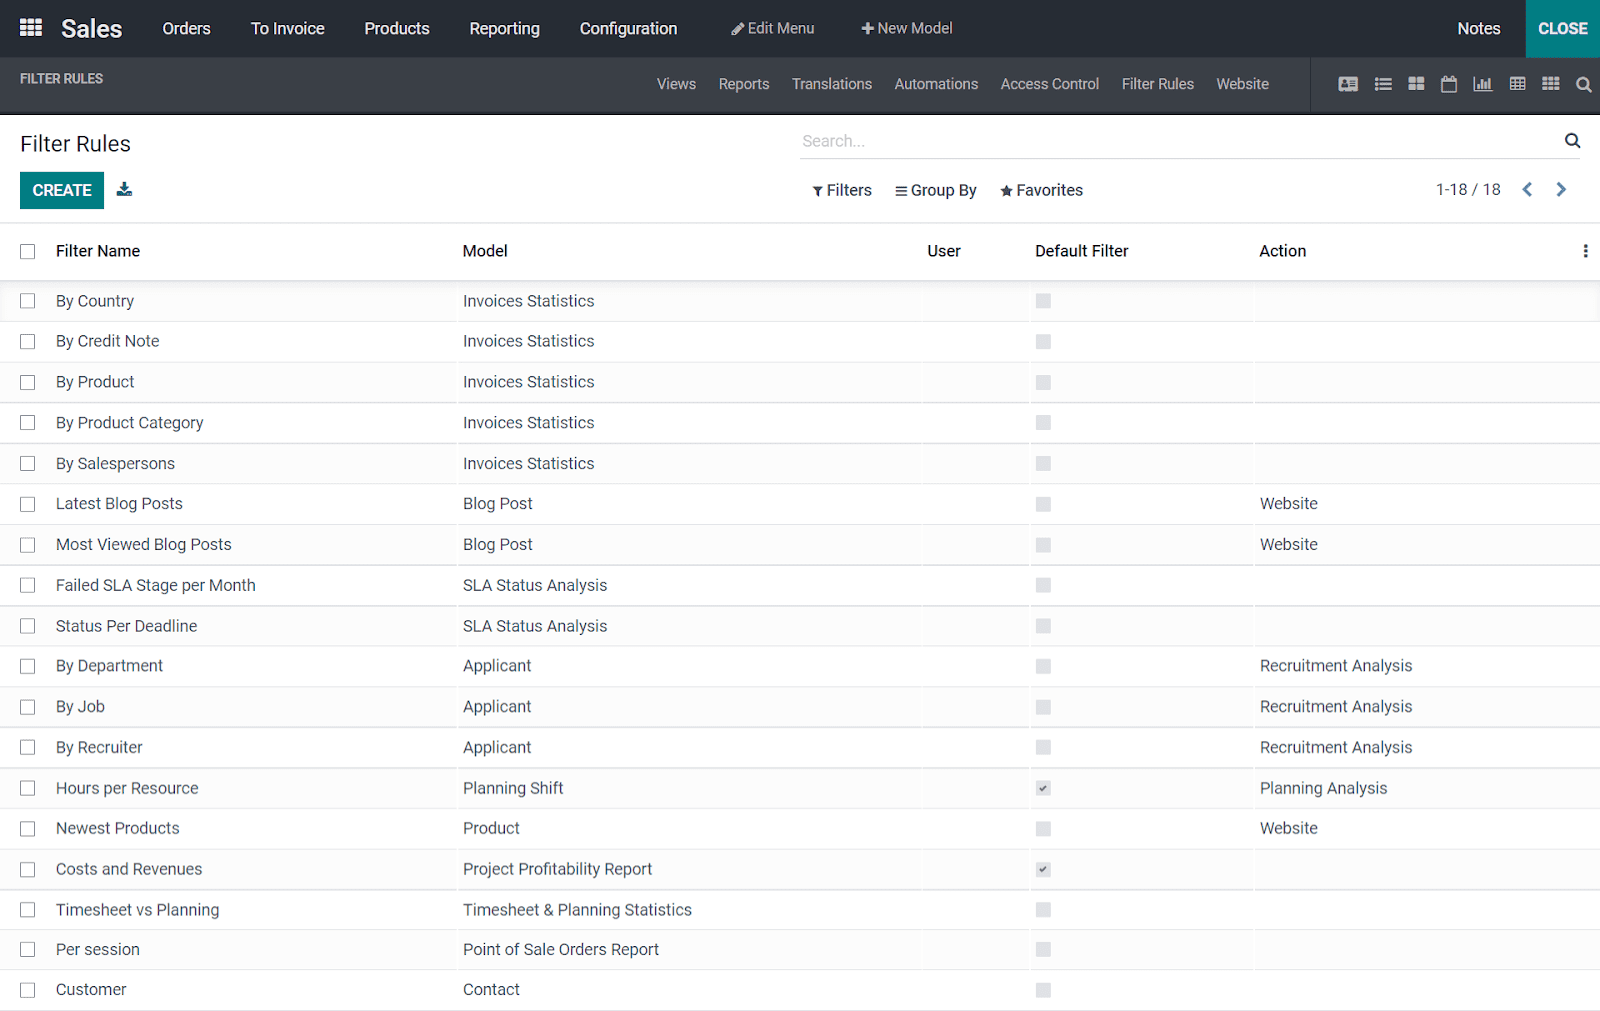
In the above screenshot, you can observe that some of the default filters are enabled and disabled as per your business requirements. Here you can get the Filter Name and Model, and you can define the user who can access filters and the Action by enabling or disabling the default filter. Now, if you want to create a filter, you need to click on the CREATE button, and the rest are as follows in the screenshot.

Here in the above screenshot, while creating a new filter rule, you need to add a Filter Name, Model from the drop-down menu, Action and the respective Available User, and the other required details. Then you need to click on the SAVE button, it would appear at the front of the Filter rules. By mentioning the respective Domain, the Context is sorted, and you can also define the Active by enabling it as per the functionality in filters. Based on the web pages on the website, you can add filters in this configuration.
With this, we conclude the blog, by giving a detailed acumen on how to configure the main functions like automation, access control lists, and filter rules in your business application with Odoo-15 Studio. By studying the blog you will be able to configure readily each function in your business application on your own since it is configured with an XML editor and not with any programming tools. We Cybrosys Technologies with our experts make your business application with your comfort and scale up your business to the above profit margin.