The IoT Box allows us to connect our database with external devices. External devices can be connected through Wifi, Bluetooth, USB, or HDMI. We can connect different devices such as barcode readers, printers, cameras, etc. with the IoT box.
How to Flash SD Card
The IoT Box allows you to connect devices to your database. IoT Box in Odoo is a Raspberry Pi with Odoo Image flashed in it. For that, we have to download the latest version of the image form nightly. We can download Etcher (example) for burning the image file, from where you can download the Etcher for your corresponding OS.
Download the Latest Version Of Nighty: http://nightly.odoo.com/master/iotbox/
Download Etcher: https://www.balena.io/etcher/
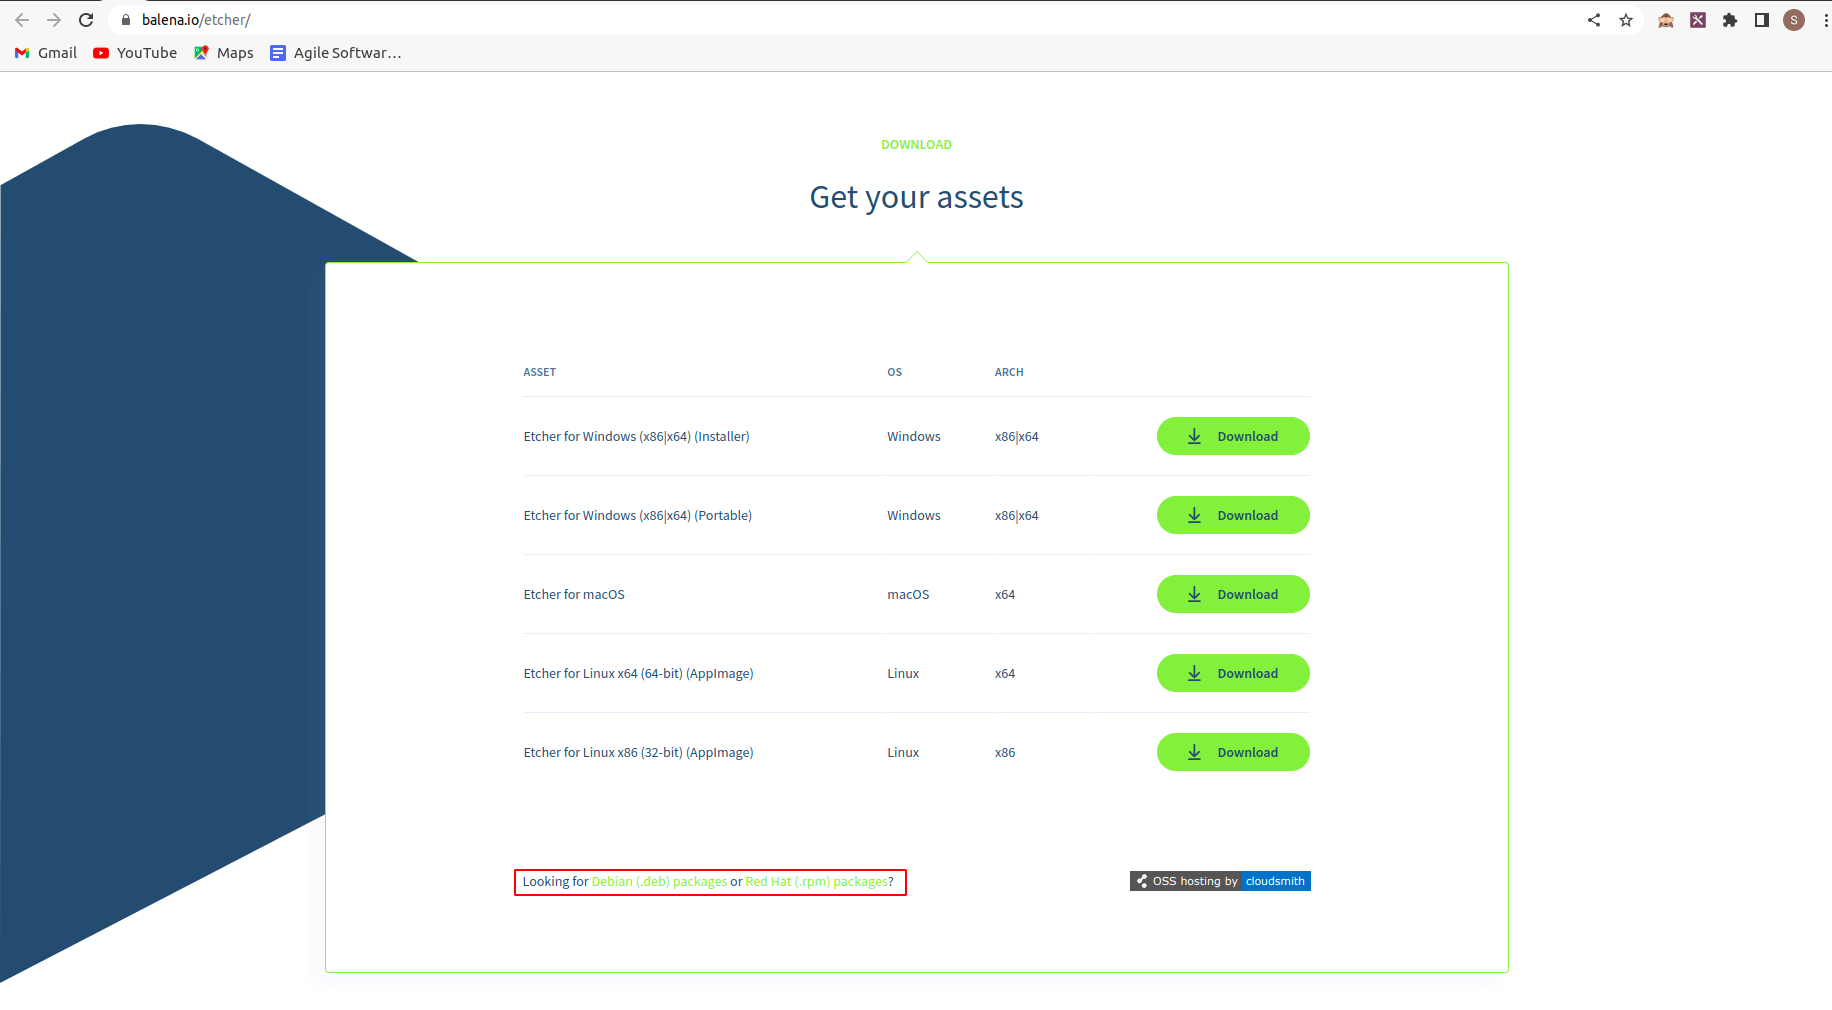
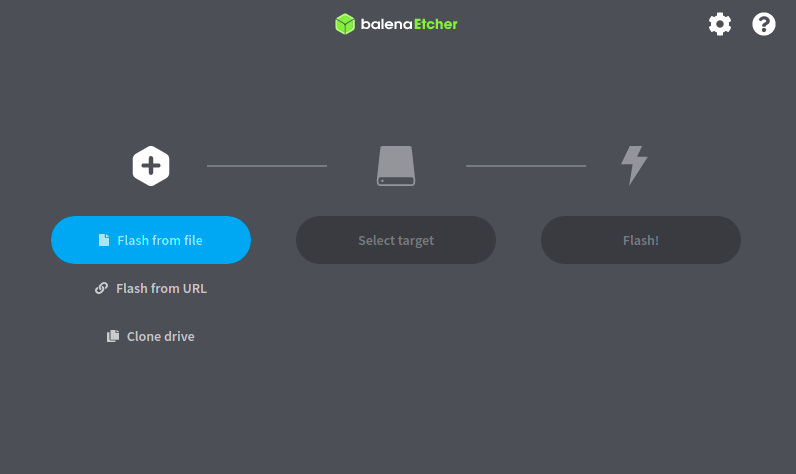
The link for downloading Etcher for Ubuntu is highlighted. After downloading, we can flash the SD card with the Image. We can select the image file we downloaded as the file to flash, then select the SD card to which we want to flash, then click on the Flash button to Flash. Now our SD card is Flashed with the image.
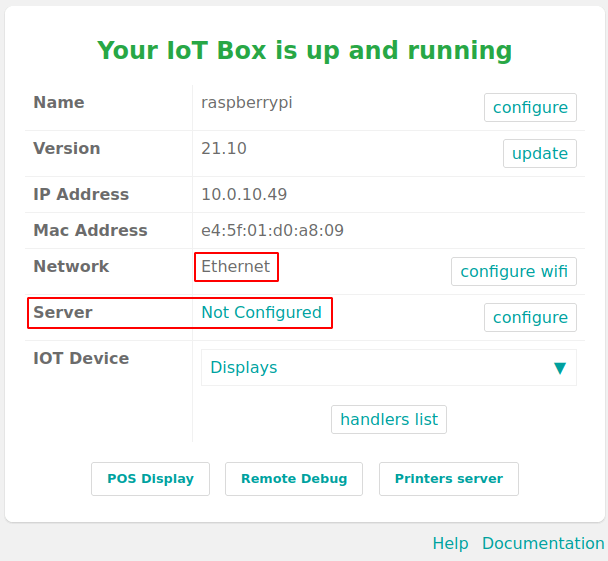
Then power the IoT Box. When it is booted completely, as indicated by Green LED, we can connect the IoT Box with Ethernet or with Wifi.
When we connect to Ethernet, Network will be automatically selected as Ethernet. Then we configure the server to connect our IoT box with the Database. For that, we have to go to the IoT Module and get the server token. Then click on the configure button in the server shown below and paste the server token. Then the IoT box will automatically connect to our database. Also, we have to ensure that there is no multiple Database. For that, we can add desired Database name in the conf parameter db_name as shown below:
db_name = our_database_name
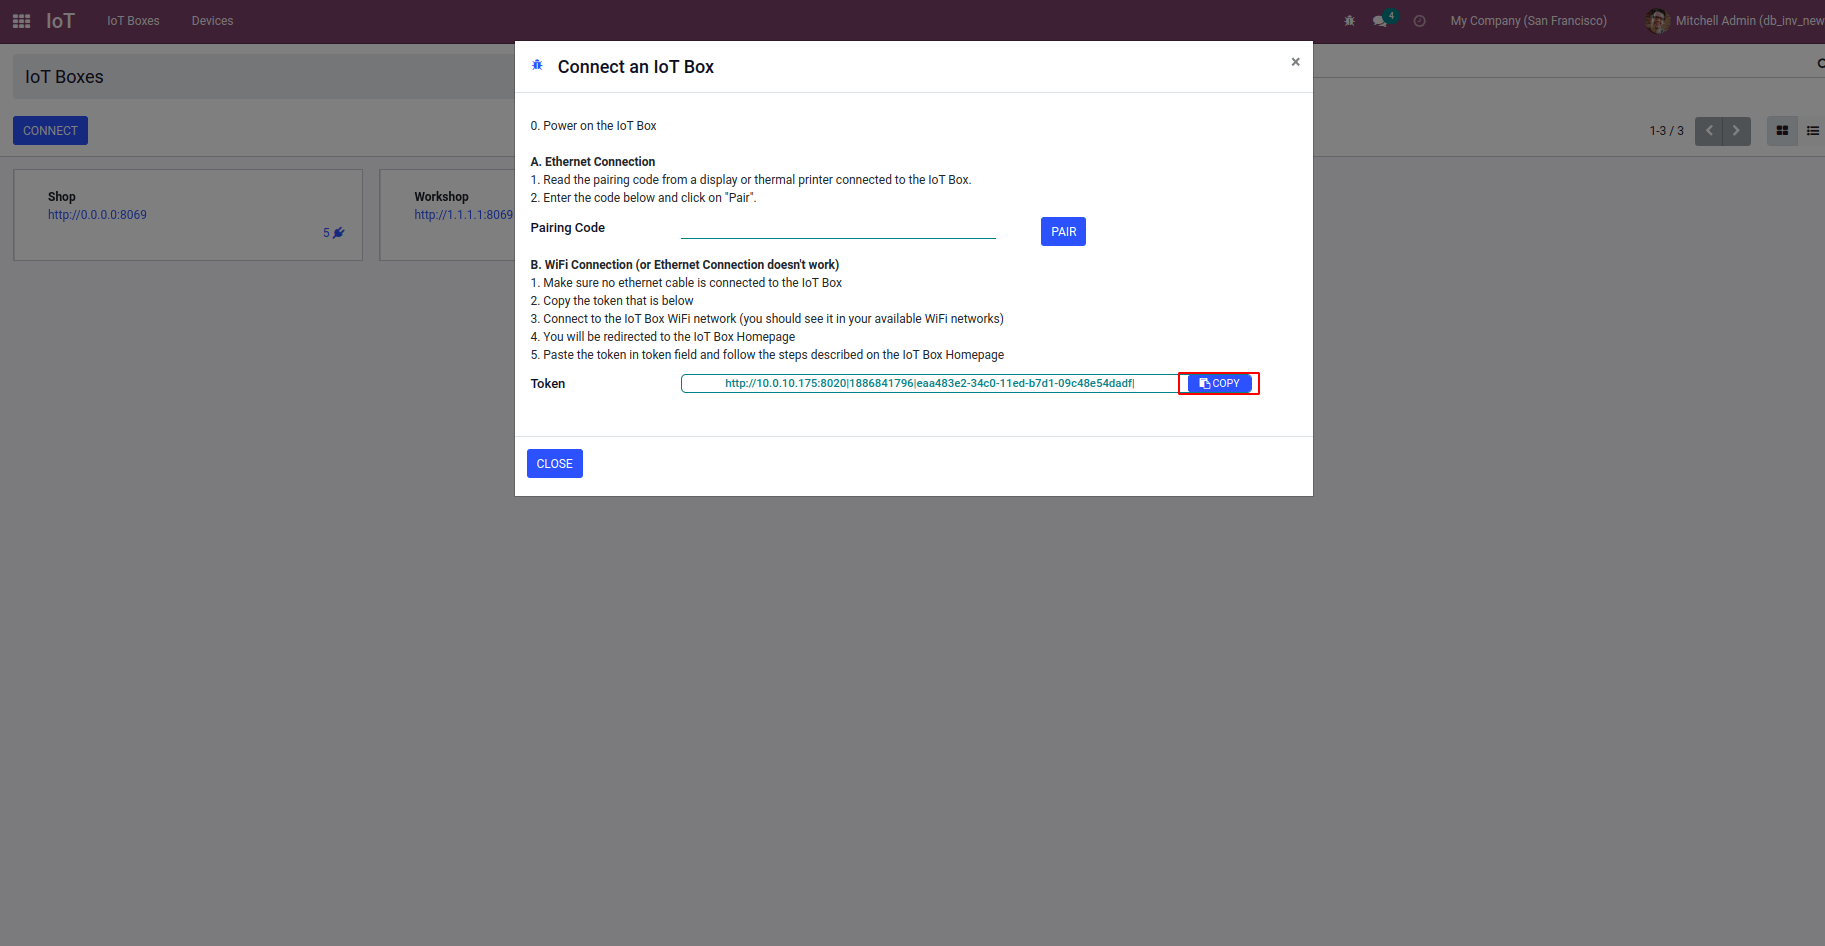
Similarly, we can connect the IoT box with Wifi. First, we have to connect our system with the IoT box by using the wifi of our system (We can connect to the wifi of the raspberry pi). Then we will be redirected to the Home page of IoT. There we can configure the Wifi. We can connect to the desired one which we need. There will be an option to select the Wifi which has a BandWidth of 2.4Ghz. Else the Wifi will not be visible there. Then Enter the password of the wifi to connect to that wifi. Then we have to go to the IoT Module and get the server token. Then click on the configure button in the server shown below and paste the server token. Then the IoT box will automatically connect to our database.
We can also update to the latest version by clicking on the update button in the version on the home page of the IoT.
Thus we can configure the IoT Box with Odoo. We can connect the barcode scanner for scanning the products in POS, taking pictures in manufacturing for quality purposes, for connecting the calipers and gauges for measurements, and making our business smooth and productive.