Odoo provides multiple types of views to present and analyze data, including list, form, kanban, graph, pivot, calendar, and cohort. The cohort view is designed specifically for tracking patterns and behaviors across groups of records over time. It arranges information in a grid format, with each row corresponding to a cohort and each column representing a different time interval. This structure allows users to easily monitor how values evolve on a daily, weekly, monthly, or yearly basis, making it a valuable tool for identifying trends and measuring long-term performance.
To create a cohort view in Odoo, first, you have to create a model with the necessary fields. Below is the demonstration for setting up a cohort view:
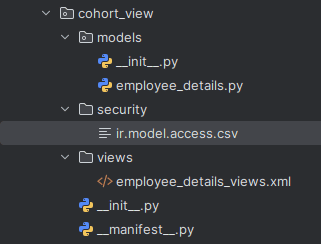
To set up a cohort view in Odoo, you’ll need to create a model and then define the view for it. For example, we can add a new model inside the Employee module and place a menu option for it under the Configuration tab.
# -*- coding: utf-8 -*-
from odoo import models, fields

class EmployeeDetails(models.Model):
 _name = 'employee.details'
 _description = 'Employee Details'
 _rec_name = "employee_id"

 employee_id = fields.Many2one('hr.employee', string="Employee")
 phone= fields.Char(related="employee_id.work_phone")
 email= fields.Char(related="employee_id.work_email")
 date = fields.Date(string="Date", required=True)
The employee_id field is used to choose the employee for whom the record will be created. The phone and email fields are defined as related fields, so they will be filled in automatically when the employee is selected. The date field is required and will be used as the date_stop in the cohort view.
Since this is a new model, we need to set up a security file to define access rights. To do this, create a new directory for security and add a file inside it. In that file, specify the ID, name, and model ID for the access rule. Finally, make sure to add this security file in the module’s __manifest__.py file.
access_employee_details,access.employee.details,model_employee_details,base.group_user,1,1,1,1
Make sure to add ‘web_cohort’ in the dependency of __manifest__.py file.
Next, create an XML file to define the view. Begin by adding an ir.actions.act_window record for the employee.details model. In this action, set the view modes you want to use, such as list, form, and cohort. Give it an ID, for example, employee_details_action_menu, which will later be used to connect the action to a menu item.
<record id="employee_details_action_menu" model="ir.actions.act_window">
   <field name="name">Employee Details</field>
   <field name="res_model">employee.details</field>
   <field name="type">ir.actions.act_window</field>
   <field name="view_mode">list,form,cohort</field>
</record>
Now, let’s define the cohort view. Create a record with a unique ID and set its model to ir.ui.view. Give it a name and link it to the employee.details model. Within the cohort tag, add a title using the string attribute. Use create_date as the date_start, and for date_stop, use the date field from the model you created earlier. You can choose the interval as day, week, month, or year. In this example, the mode is set to churn.
<record id="employee_details_view_cohort" model="ir.ui.view">
   <field name="name">employee.details.view.cohort</field>
   <field name="model">employee.details</field>
   <field name="arch" type="xml">
       <cohort string="Analysis" date_start="create_date" date_stop="date" interval="day" mode="churn"/>
   </field>
</record>
We also need to add a menu item for the new model. In the <menuitem> tag, connect the action to the ID of the record you created earlier, and set the parent to define where it should appear in the menu hierarchy.
<menuitem id="employee_details_menu_root"
   name="Employee Details"
   action="employee_details_action_menu"
   parent="hr.menu_config_employee"
   sequence="20"/>
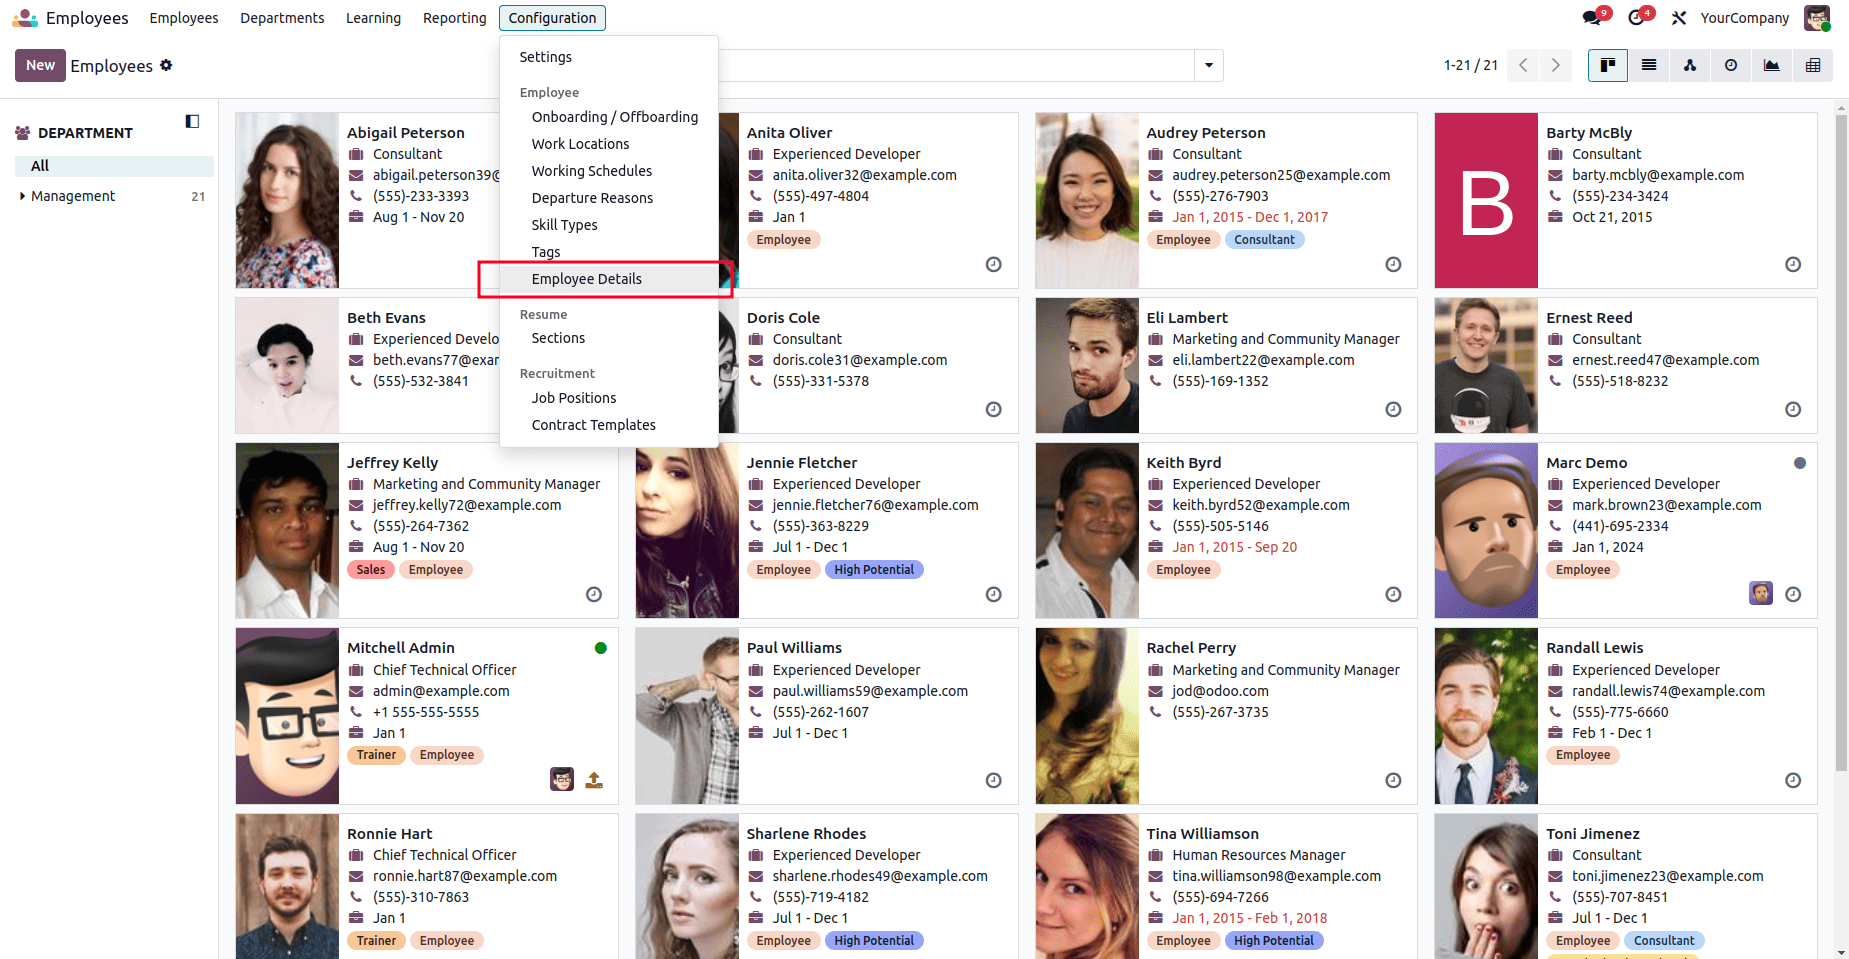
You can now install the module from the Apps and open the Employee module. You can find the employee details menu under the configuration menu of the employee module.
Clicking the menu will open the list view of the model, where you can create and manage records. This is what the list view looks like.
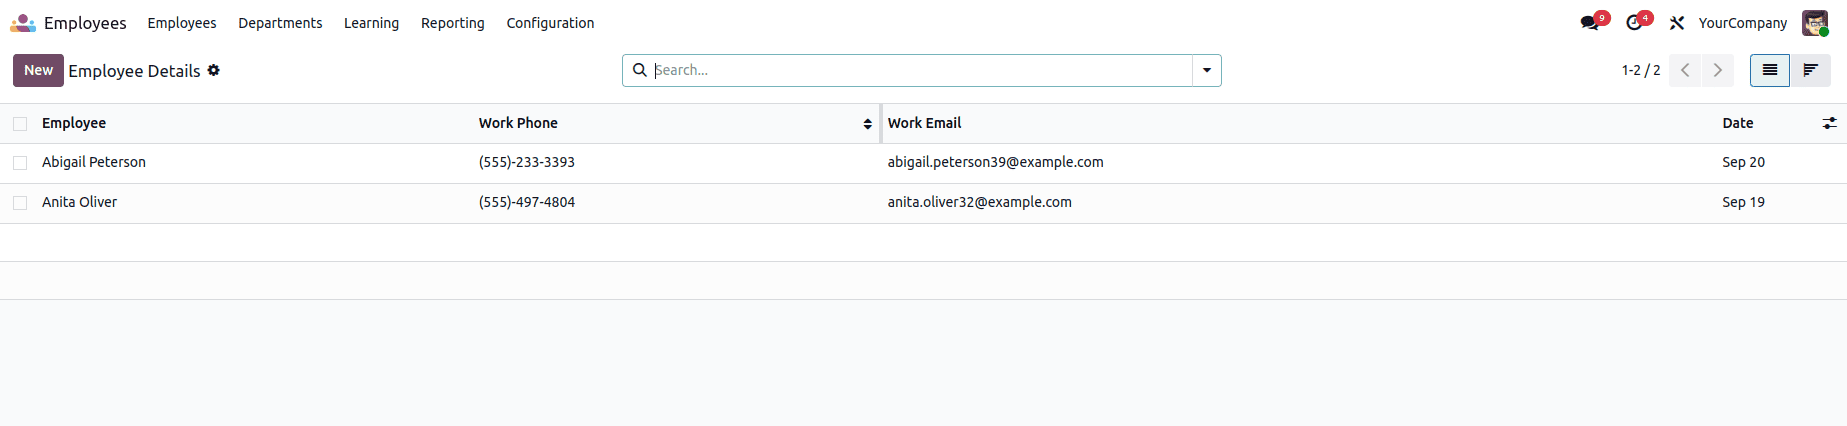
The records created in the module are displayed in the list view. You can also see the icons for switching between the list and cohort views. You can add multiple records, and by clicking the cohort view icon, you can see a day-by-day report of the records directly within the interface.
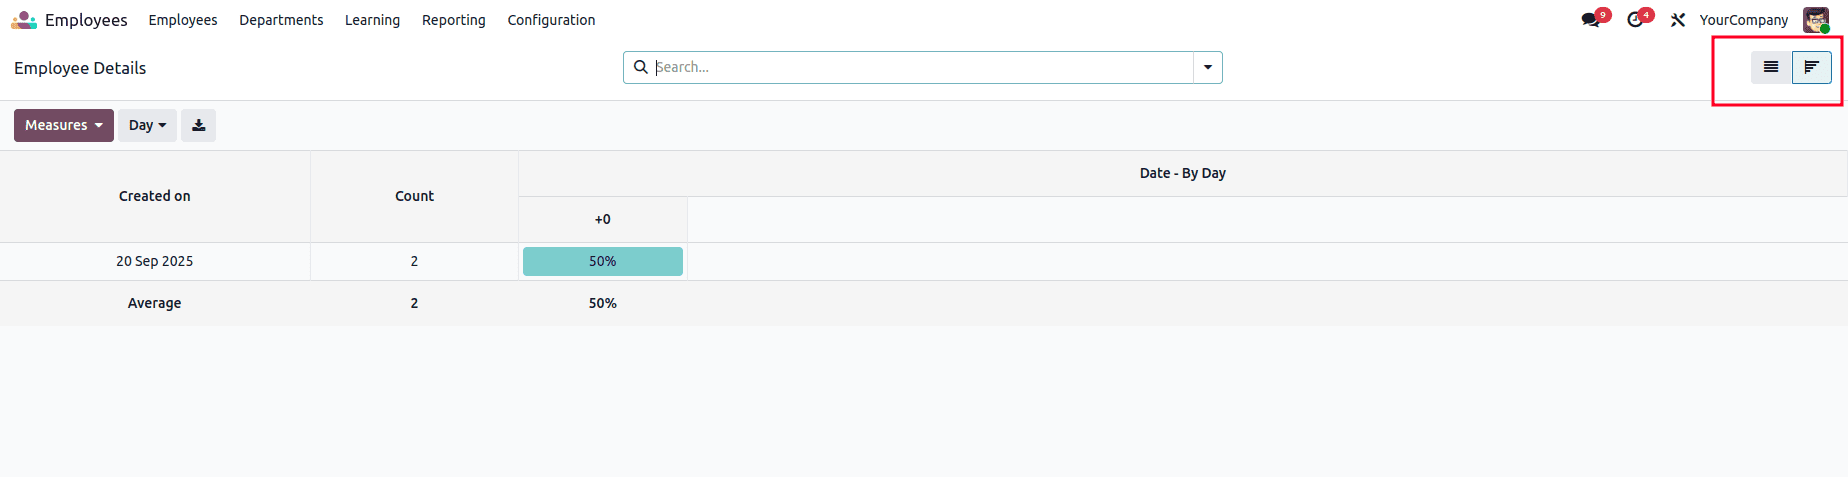
The figure above shows the cohort view in the Odoo 18 interface. It reflects the result of successfully setting up a cohort view for the model. Hopefully, the steps outlined above make it easier to understand how to create and use a cohort view in Odoo 19.
To read more about How to Create a Cohort View in Odoo 18, refer to our blog How to Create a Cohort View in Odoo 18.