Odoo 19, the latest iteration of the popular open-source ERP platform, continues to build on its robust notification system to enhance user experience. Display notifications—often referred to as "sticky notifications"—are pop-up alerts that appear in the top-right corner of the Odoo interface. These can inform users of successes, warnings, errors, or other events, and they can be configured to stick around until dismissed.
This blog post will guide you through creating display notifications in Odoo 19, covering both Python (backend) and JavaScript (frontend) approaches. We'll assume you have a basic custom module set up, as notifications are typically integrated into custom workflows.
By the end, you'll be able to trigger notifications for events like record creation, validation errors, or user actions, making your Odoo apps more interactive and user-friendly.
Why Use Display Notifications in Odoo 19?
Display notifications provide immediate feedback without disrupting the user's workflow. Key benefits include:
- Real-Time Alerts: Notify users instantly about approvals, errors, or completions.
- Customization: Support titles, messages, types (success, warning, danger), and sticky behavior.
- Cross-Platform: Work seamlessly in the backend web interface.
Prerequisites
- Odoo 19 has been installed (either community or enterprise edition).
- A custom module (e.g., my_notification_module) with __manifest__.py and basic structure.
Supported Notification Types
Odoo notifications can show in various styles:
- success – Green background, for successful actions.
- warning – Yellow background, for cautionary messages.
- danger – Red background, for errors or failures.
- info – Blue background, for general information.
Method 1: Creating Notifications from Python (Backend)
This example assumes you have a custom module (sale_notification) set up in Odoo 19. We'll extend the sale.order model to trigger a notification when the sale order is confirmed.
Step 1: Set Up the Module Structure
Ensure your module has the following structure:
sale_notification/
+-- __init__.py
+-- __manifest__.py
+-- models/
¦   +-- sale_order.py
+-- static/
¦   +-- src/
¦       +-- js/
¦       ¦   +-- sale_notification.js
¦       +-- xml/
¦           +-- sale_notification.xml
+-- views/
¦   +-- sale_order_views.xml
Step 2: Configure the Manifest
In __manifest__.py, include the dependency on the sale module:
{
    'name': 'Sale Order Notification',
    'version': '19.0.1.0.0',
    'depends': ['sale','web'],
    'data': [],
    'installable': True,
    'application': False,
}
Step 3: Extend the Sale Order Model
In models/sale_order.py, override the action_confirm method to add a notification:
from odoo import models, api
class SaleOrder(models.Model):
_inherit = 'sale.order' # Inherit the sale.order model
def action_confirm(self):
# Call the original confirm method
res = super(SaleOrder, self).action_confirm()
# Add a display notification
return {
'type': 'ir.actions.client',
'tag': 'display_notification',
'params': {
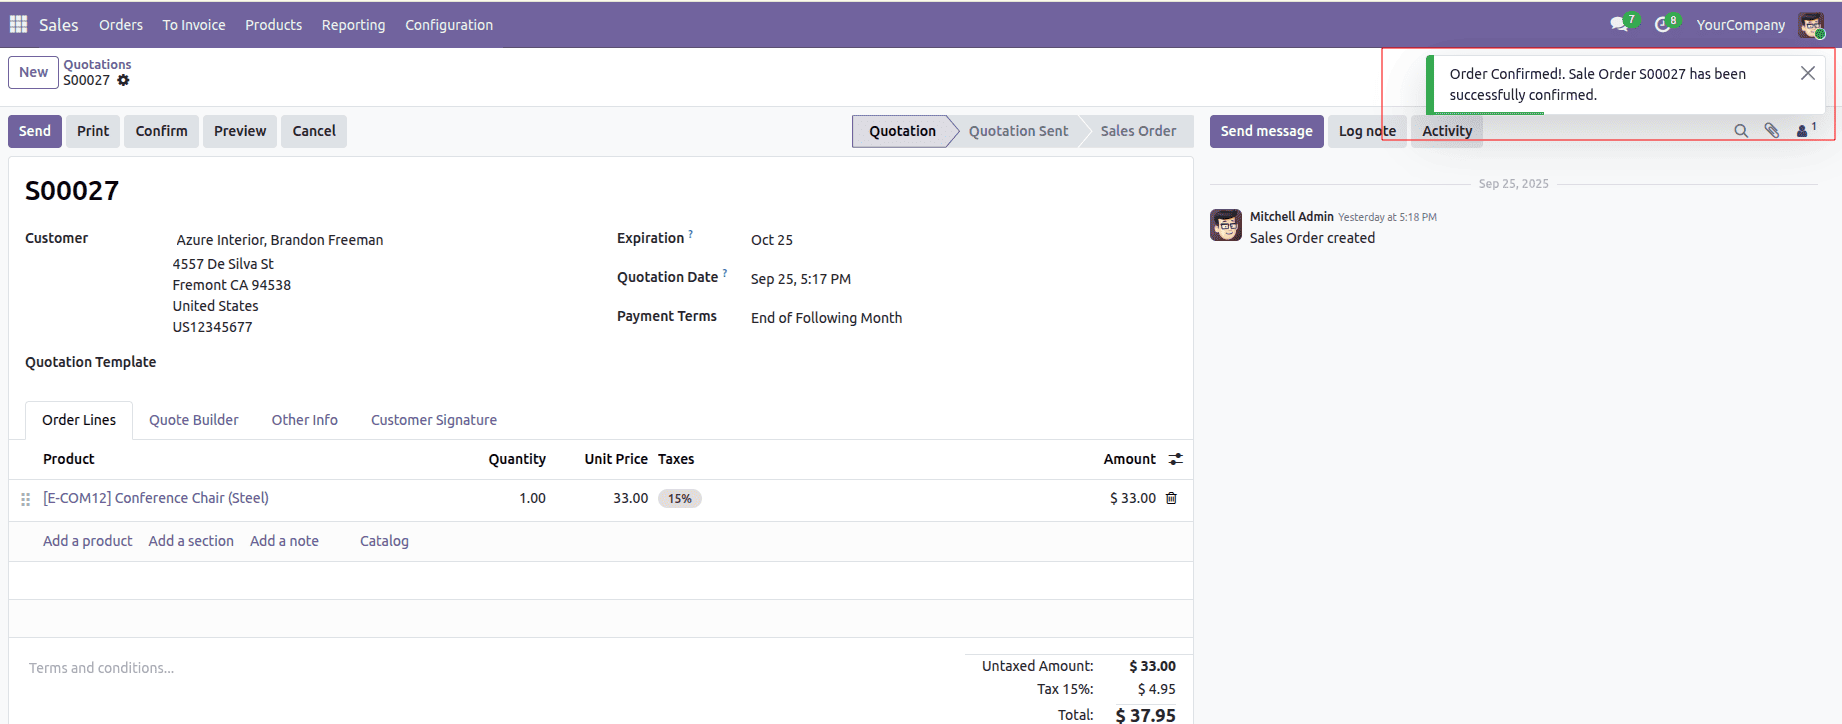
'title': 'Order Confirmed!',
'message': f'Sale Order {self.name} has been successfully confirmed.',
'type': 'success', # Blue success notification,
'sticky': False, # Auto-dismiss after a few seconds
}
}
Step 4: Install the Module
- Add your module to Odoo's addons path
- Go to Apps in Odoo, enable developer mode, and click Update Apps List.
- Search for "Sale Order Notification" and install the module.
Step 5: Test the Notification
- Navigate to Sales > Orders > Sales Orders in Odoo 19.
- Create a new sale order or open an existing draft order.
- Click the Confirm button.
- A notification should appear in the top-right corner saying, "Order Confirmed! Sale Order S00027 has been successfully confirmed."
Method 2: Creating Notifications from JavaScript (Frontend with OWL)
Odoo 19 heavily relies on OWL (Odoo's JavaScript framework) for the frontend. Notifications can be triggered from OWL components, such as custom fields or buttons.
Step 1: Set Up an OWL Component
In static/src/js/sale_notification.js, define the OWL component to handle the button click and trigger a notification:
File: static/src/js/sale_notification.js
/** @odoo-module **/
import { registry } from "@web/core/registry";
import { Component } from "@odoo/owl";
import { useService } from "@web/core/utils/hooks";
export class SaleNotificationButton extends Component {
static template = "sale_notification.SaleNotificationButton";
static props = [
"record", // The record data
"readonly", // Whether the field is readonly
"*" // Wildcard to allow additional props
];
setup() {
this.notification = useService("notification");
}
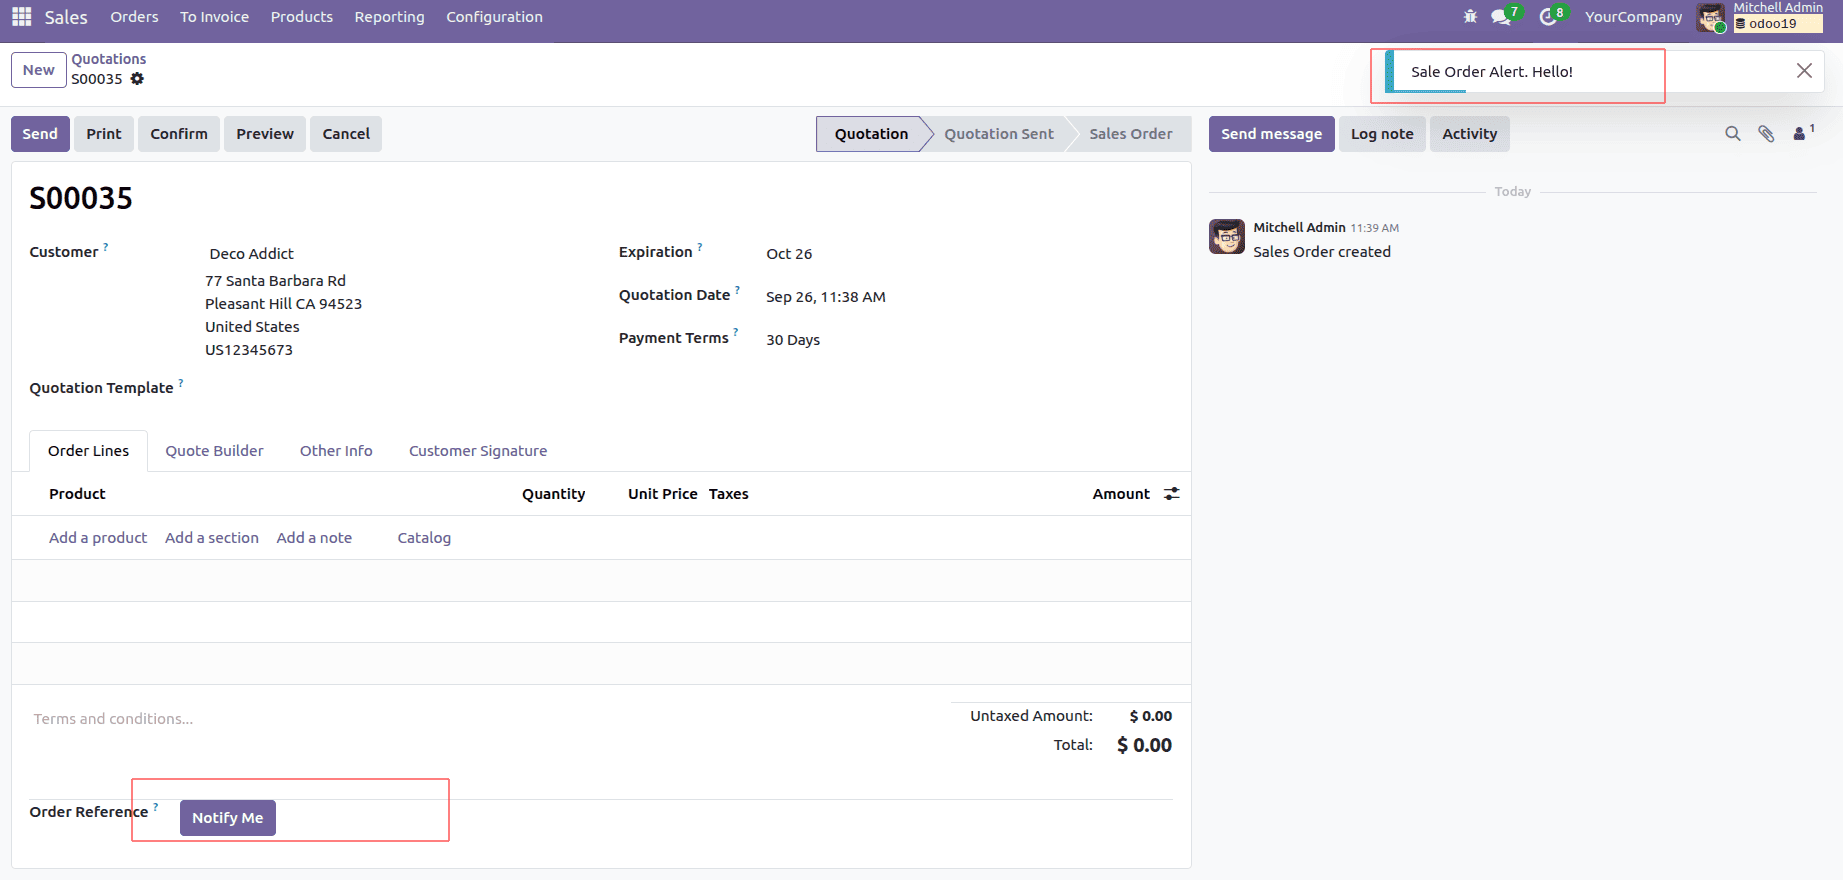
onClick() {
this.notification.add("Order Info!", {
title: "Sale Order Alert",
type: "info",
});
}
}
registry.category("fields").add("sale_notification_button", {
component: SaleNotificationButton,
});
File: static/src/xml/sale_notification.xml
<?xml version="1.0" encoding="UTF-8"?>
<templates>
   <t t-name="sale_notification.SaleNotificationButton">
       <button t-on-click="onClick" class="btn btn-primary">Notify Me</button>
   </t>
</templates>
Step 3: Update Sale Order Form View
Add the JavaScript button to the Sale Order form.
File: views/sale_order_views.xml
<?xml version="1.0" encoding="UTF-8"?>
<odoo>
   <record id="view_order_form_inherit_notification" model="ir.ui.view">
       <field name="name">sale.order.form.inherit.notification</field>
       <field name="model">sale.order</field>
       <field name="inherit_id" ref="sale.view_order_form"/>
       <field name="arch" type="xml">
           <xpath expr="//sheet" position="inside">
               <group>
                   <field name="name" widget="sale_notification_button"/>
               </group>
           </xpath>
       </field>
   </record>
</odoo>
Step 4: Configure Manifest
Update the module's manifest to include dependencies and assets.
File: __manifest__.py
'data': [
        'views/sale_order_views.xml',
    ],
    'assets': {
        'web.assets_backend': [
            'sale_notification/static/src/js/sale_notification.js',
            'sale_notification/static/src/xml/sale_notification.xml',
        ],
    },
Step 5: Test the notification
Go to Sales > Orders, open a sale order. In the form, click the "Notify Me" button to trigger the frontend notification ("Order Info!" with type "info").
Adding display notifications to sales orders in Odoo 19 enhances user interaction with real-time feedback. By implementing backend notifications in Python and frontend notifications with OWL, you can create a seamless experience. Use the provided code to trigger alerts on order confirmation or button clicks, and customize as needed. Happy coding, and elevate your Odoo apps with engaging notifications!
To read more about How to Create a Display Notification in Odoo 18, refer to our blog How to Create a Display Notification in Odoo 18.