The Odoo 17 Customer Relationship Management module is a great application for generating leads and increasing market demand. Through the configuration of features like Activity Types, Lost Reasons, Commission Plans, and Lead Mining Requests, the module enables the conversion and filtering of website visits into leads. This enhances sales orders for businesses and promotes growth.
With features like Activity Types, Lost Reasons, Commission Plans, and Lead Mining Requests, the module improves sales orders and promotes expansion. Businesses can use the Visits to Lead Rule in order to turn website visits into leads. Utilizing an ERP system like Odoo 17 enables users to manage opportunities and generate lead rules quickly. The CRM software makes it simple to manage leads, create opportunities, and establish lead restrictions.
The blog will help you understand the functionality of creating various rules to turn website visitors into CRM Leads. To do this activity, we have to configure the functionality inside the CRM application settings window.
Configuring Visits to Leads
The "Settings" window of the Odoo 17 CRM is accessible via the "Configuration" menu.
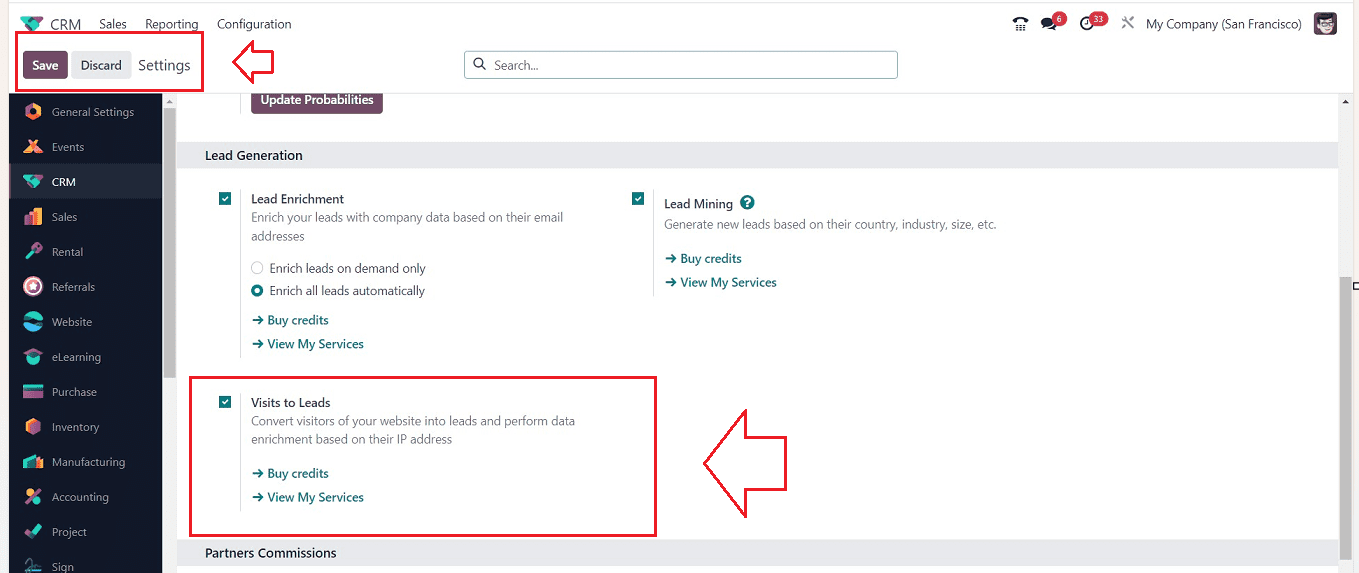
The “Visits to Leads” option can be activated from the “Lead Generation” tab of the “Settings” window. In order to derive the Visits to Leads rule, the system enhances data based on IP addresses. To do so, select “Buy credits” from the menu that appears after the Leads rule's visits. You can now purchase credits for lead generation from a new page with different packages based on the Google credit, as shown below.
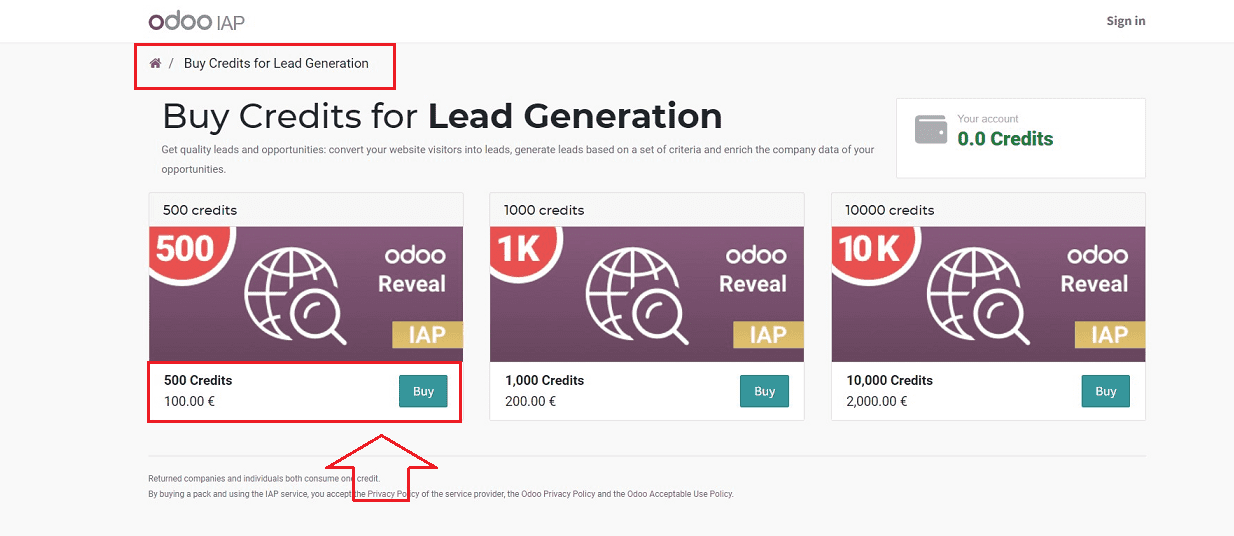
In the “Buy Credits for Lead Generation” window, the whole cost of a given credit will be shown inside the “Your Account” box. By clicking the “Buy” button, we can get access to the required credits. Additionally, after purchasing credits, we can quickly generate visits to lead rules in the Odoo 17 CRM module by selecting "View My Services" from the "Settings" window.
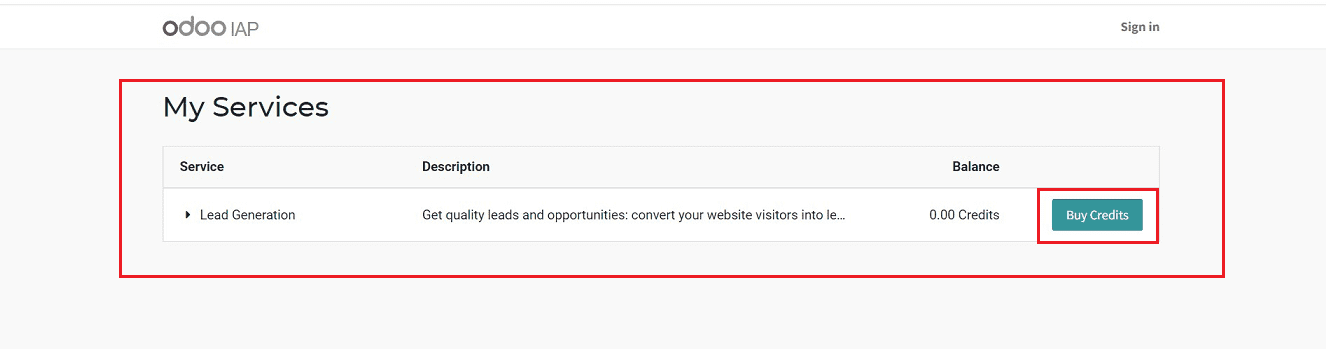
You will get more details about your services and also recharge your accounts with the available services listed on this “Services” page. For creating visits and guiding rules, credits can also be used. To recharge, Simply click the Recharge symbol to add credits to your account right now.
Defining a new Visits to Leads Rule
You may configure different "Visits to lead rules" in the Odoo 16 CRM module by choosing them from the “Lead Generation” section of the “Configuration” page. These rules are presented in the “Visits to Lead Rule” section, along with information about each rule's type and name.
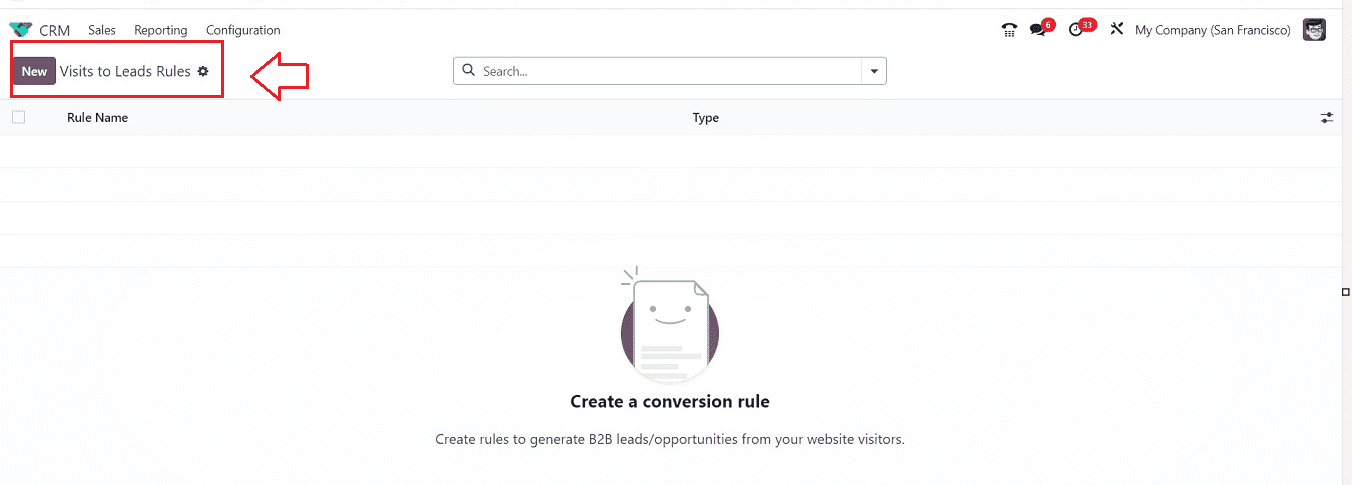
To create a visit to leads rule, click the “New” button, you will be directed to a rule configuration form as shown below.
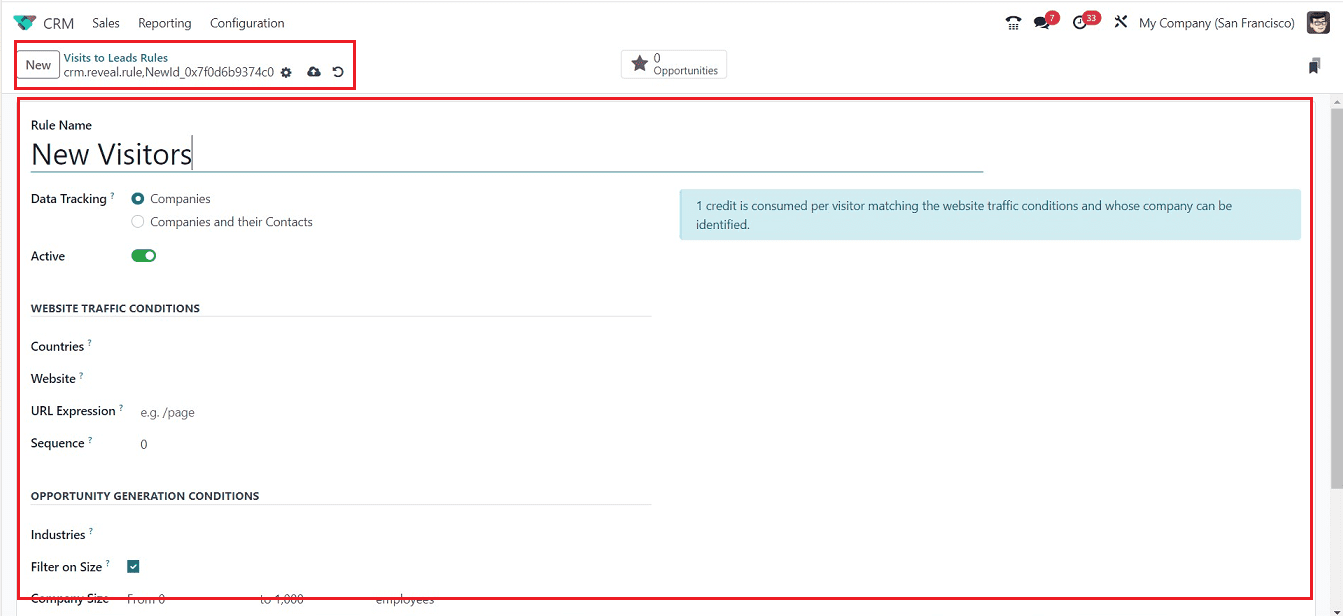
Inside the displayed form, you can enter the name of the rule inside the “Rule Name” field and track data based on Companies and their contacts in the “Data Tracking” field.
WEBSITE TRAFFIC CONDITIONS Tab
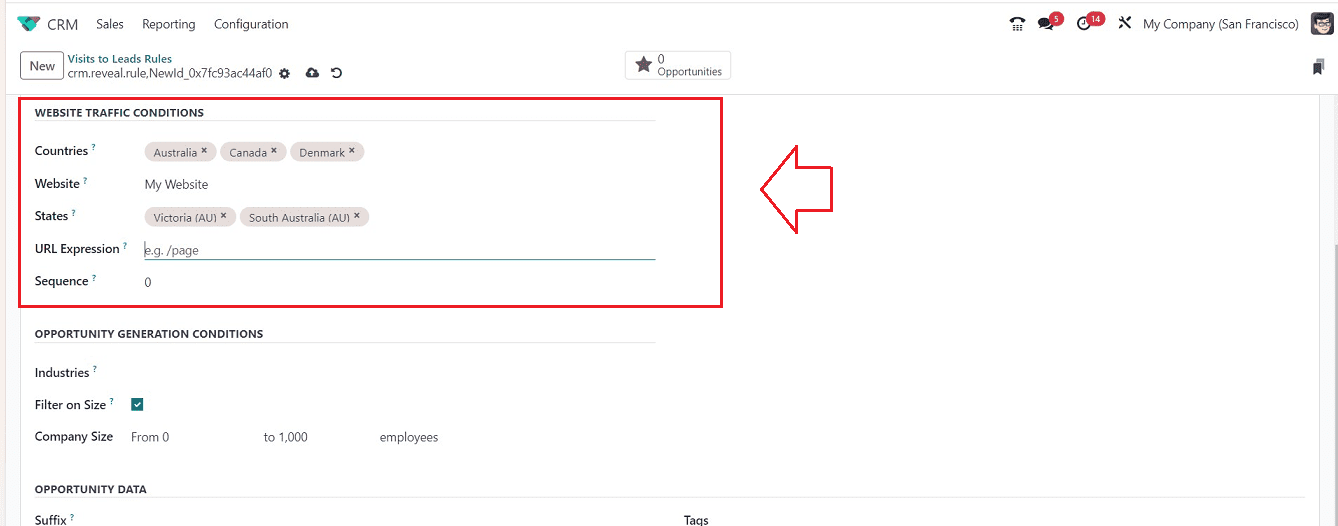
By choosing particular provinces in the "Countries" column under the "WEBSITE TRAFFIC CONDITIONS" tab, you may manage the website traffic conditions for the lead rule. Select your website and restrict lead generation to it inside the “Website” area, and visitors from selected states are converted into opportunities or leads. To track specific website pages, users can add site links to the “URL Expressions” field; to track the whole website, you can leave the area blank. Ordering rules with similar countries and URLs requires the addition of sequence numbers inside the Sequence field.
OPPORTUNITY GENERATION CONDITIONS Tab
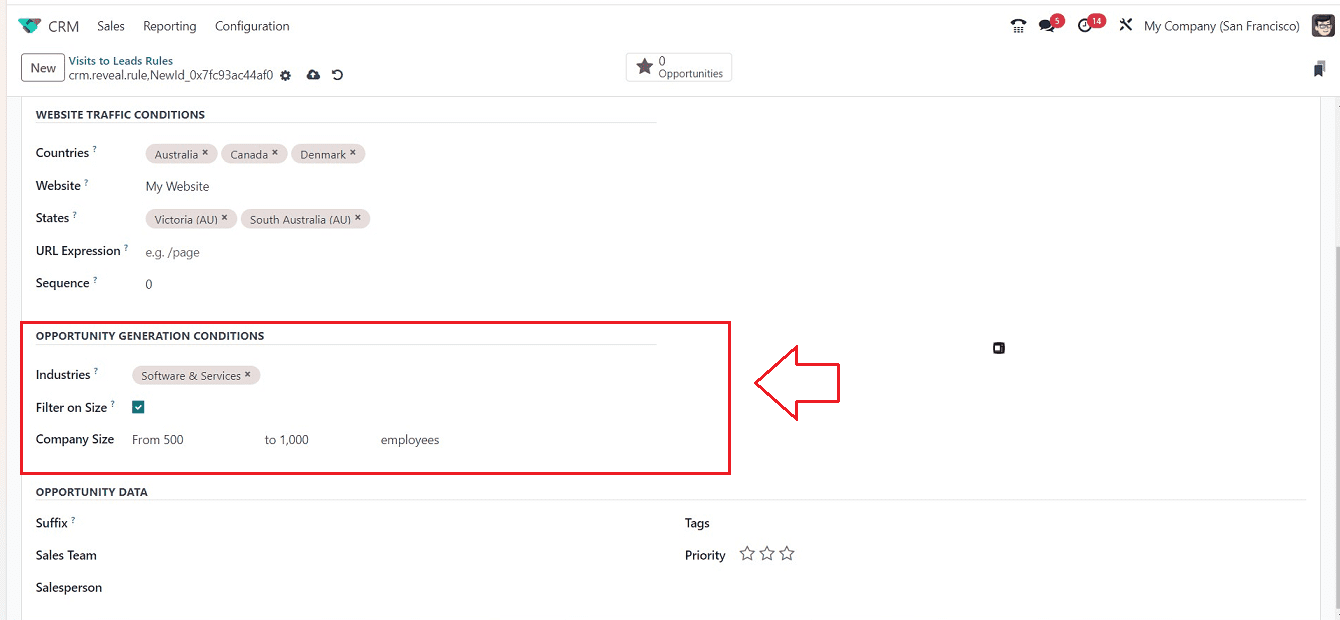
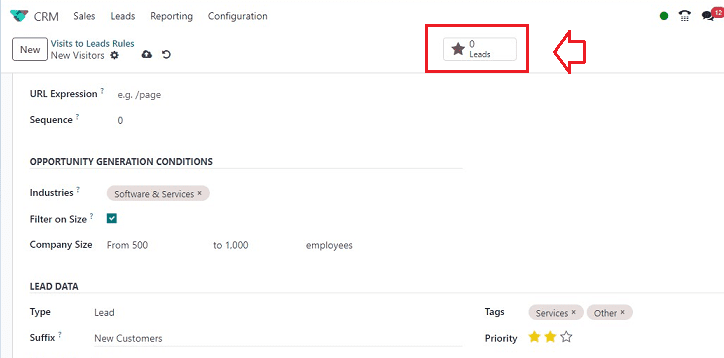
You can apply the industries field under the “OPPORTUNITY GENERATION CONDITIONS” section's “Industries” field to create opportunities. To facilitate matching, leave the Industries field unfilled. Companies can be filtered based on size by enabling the “Filter on Size” check box. After the filter activation, fill the “Company Size” area with the number of workers, as illustrated in the screenshot below.
OPPORTUNITY /LEAD DATA Tab
You can choose the “Sales team” and “Salesperson” responsible or assigned to handle the opportunity data inside the “OPPORTUNITY DATA” tab. We can choose the data type from the “Type” field, whether it is an ‘Opportunity” or a “Lead. the name of the tab will be changed to “LEAD DATA” if we select the “Type” as “Lead.” The “Suffix” field can be used to name the newly created lead. After that, you can select appropriate tags in the “Tags” field and designate the opportunity as a previous one by clicking the star in the “Priority” field.
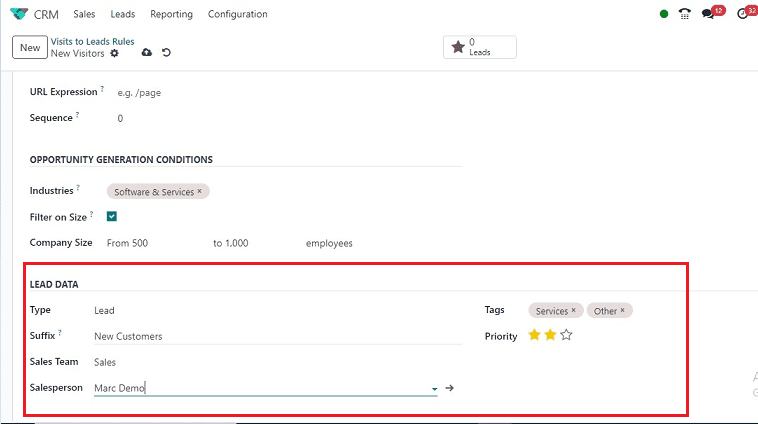
You have to save the data by selecting the "Save" icon after entering the necessary information. Your new visits to leads rule will be added to the CRM database, and it will be added to the dashboards shown below.

For writing several rules, the exact same procedure can be used. You can access the rule configuration form from the dashboard. The number of Leads that fit this particular Rule will be displayed inside the "Lads" smart button placed at the top of the page.
You can confirm the opportunities to create Leads based on specific rules by simply opening the "Leads" smart tab illustrated as shown below.
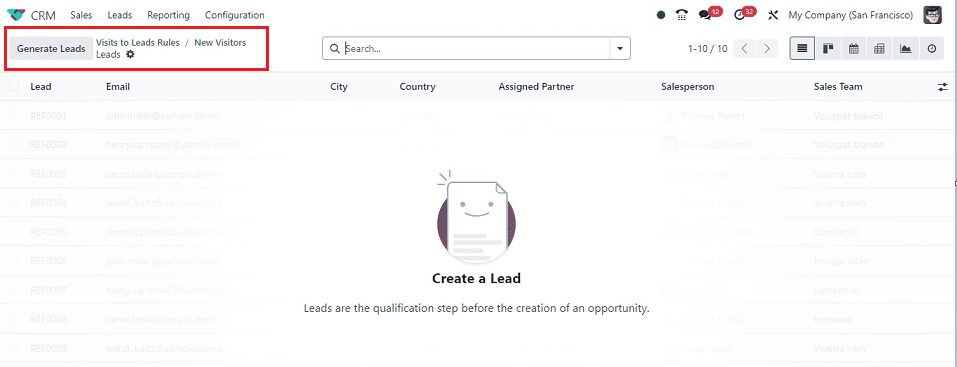
The “Generate Leads” button can be used to generate leads directly from the available opportunities or visitors.
The updated Odoo 17 CRM platform offers a secure and elegant solution for managing leads, creating opportunities, and regulating market demand, enhancing business efficiency. While the overall functionalities remain similar to the older platform, In the future, we can expect more features from the Odoo team.
To read more about How to Create Visits to Lead Rule in Odoo CRM, refer to our previous blog about lead rules in CRM.