Magento is an open-source e-Commerce Merchant software. It is mainly useful for online businesses. Multiple methods of product searching and sorting are available in Magento. Many of the third-party websites required to run an effective e-commerce website can be simply integrated with Magento.
For the installation of Magento 2.4.5, we need some requirements:
1)Install Apache2
2)Install MySQL
3)Install PHP 8.1 and the extensions
4)Elasticsearch
5)Composer
6)Install Magento 2.4.5
Install Apache2
First, we need to install Apache2. The standard Ubuntu software repositories contain Apache. We'll start by updating the local package index to reflect the most recent changes due to this.
Open the terminal.
sudo apt update
Then, install Apache using the command.
sudo apt install apache2
After installing Apache, you can check the Apache Version using the following command:
sudo apache2ctl -v
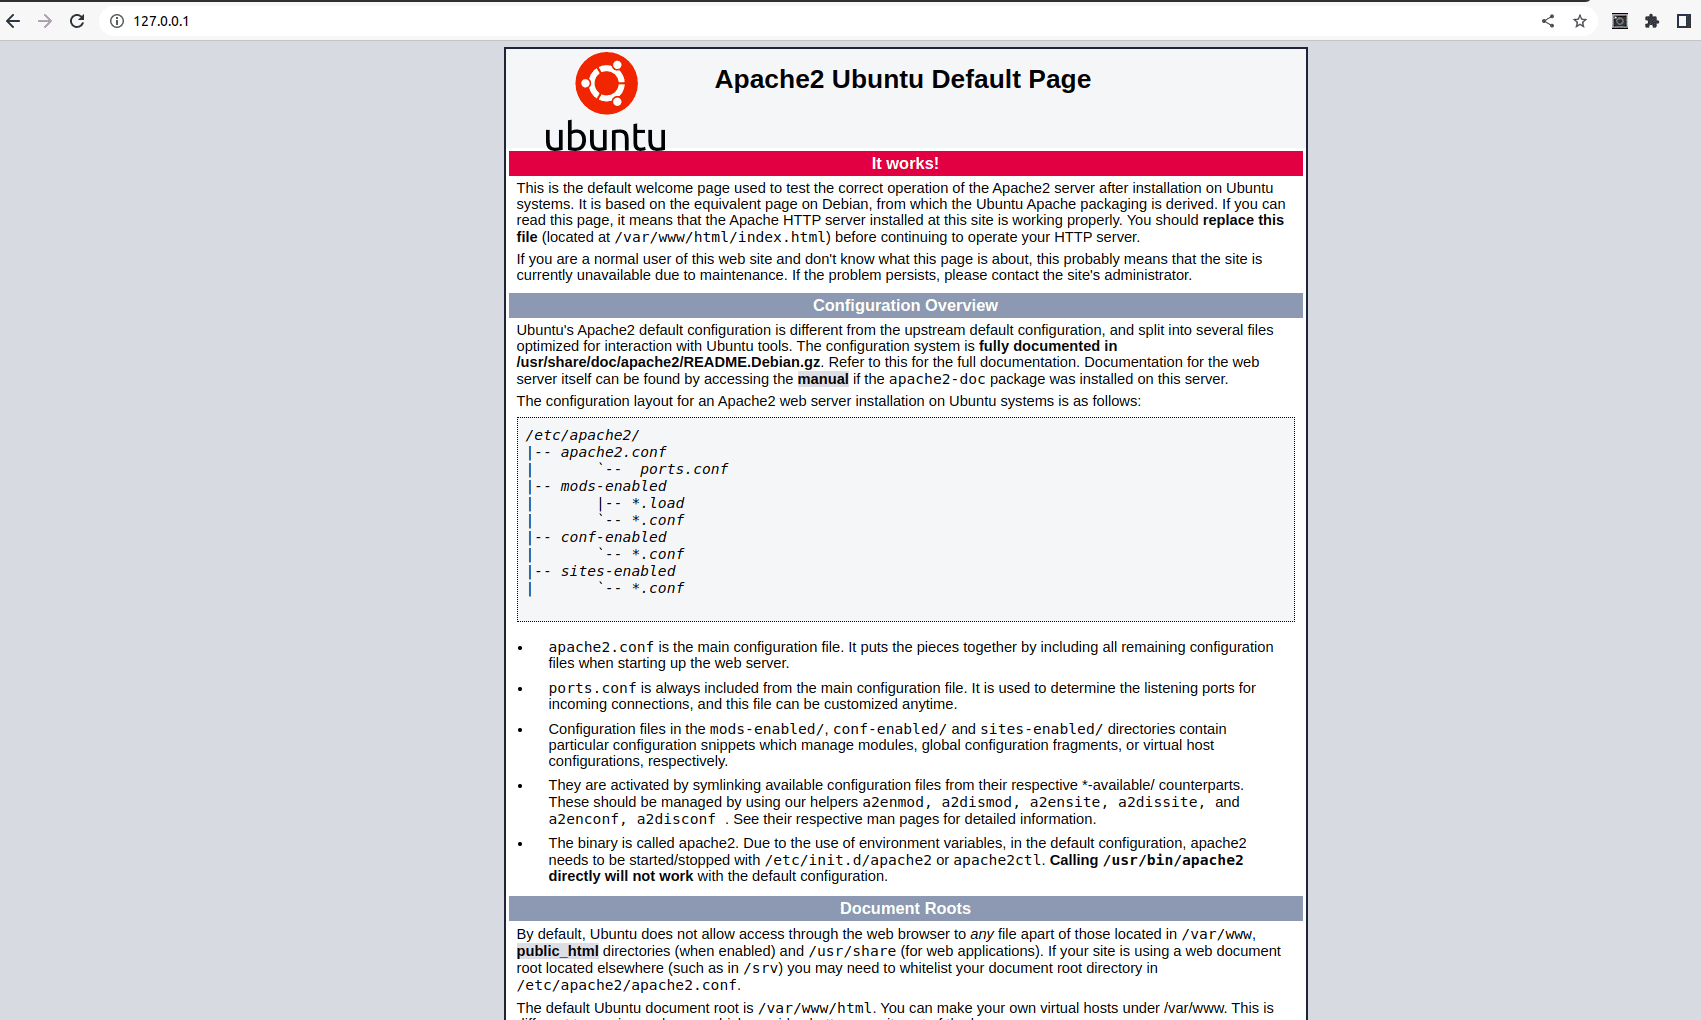
You can verify that Apache is correctly installed by entering your domain name, IP address, or 127.0.0.1 in your browser, you will get the following result.
Use the following command to enable auto-starting for Apache:
systemctl is-enabled apache2
Install MySQL and Create a database for Magento
Install MySQL by using the following command:
sudo apt install mysql-server
After installing MySQL, Configure Password Access for the MySQL Root Account.
sudo mysql
SELECT user,authentication_string,plugin,host FROM mysql.user;
NB: Replace the 'your_password' with your own secure password.
ALTER USER 'root'@'localhost' IDENTIFIED WITH mysql_native_password BY 'your_password';
exit
Then you need to create a user for Magento:
mysql -u root -p
SELECT user,authentication_string, plugin, host FROM mysql.user;
CREATE USER 'magento2'@'localhost' IDENTIFIED BY 'your_password';
After creating the user, you should modify the user and grant the permissions.
ALTER USER 'magento2'@'localhost' IDENTIFIED WITH mysql_native_password BY 'your_password';
GRANT ALL PRIVILEGES ON *.* TO 'magento2'@'localhost' WITH GRANT OPTION;
exit
After that, create a database for Magento2.
mysql -u magento2 -p
CREATE DATABASE magento2;
exit
Install PHP and required extensions
We want to install the PHP for Magento. Magento 2.4 versions need PHP 7.3 to 8.2. We need PHP 8.0 for Magento 2.4.5.
First, update the apt repositories.
Then install PHP 8.1 and packages.
sudo apt install php8.1 libapache2-mod-php php-mysql
To verify the PHP version, you can use the following command:
php -v
Open /etc/apache2/mods-enabled/dir.conf file and edit the file.
sudo nano /etc/apache2/mods-enabled/dir.conf
Modify the index.php file order to the top listed in the DirectoryIndex.
After that, Install mbstring and enable the extension.
sudo apt install php8.1-mbstring
sudo phpenmod mbstring
sudo a2enmod rewrite
We want to install the PHP extensions for Magento 2.4.5
sudo apt install php8.1-bcmath php8.1-intl php8.1-soap php8.1-zip php8.1-gd php8.1-curl php8.1-cli php8.1-xml php8.1-xmlrpc php8.1-gmp php8.1-common
Then reload the Apache,
sudo systemctl reload apache2
After reloading the apache2, we need to make some changes in the configuration file. For that,
php -i | grep "Configuration File"
You will get the path of ini file from the above command.
sudo nano <path_of_php.ini_file>
Open the file, and make some changes as follows.
max_execution_time=18000
max_input_time=1800
memory_limit=4G
Search the values and update and save the file. Reload the Apache.
sudo systemctl reload apache2
Install and configuration of Elasticsearch
Earlier, Elasticsearch is not mandatory in the installation of Magento. But from Magento 2.4, Elasticsearch is a mandatory component.
For the installation of Elasticsearch first, we can install Openjdk17 (Java).
sudo apt install openjdk-17-jdk
Using the command below, import the GPG key for the Elasticsearch packages:
sudo apt install curl
sudo curl -sSfL https://artifacts.elastic.co/GPG-KEY-elasticsearch | sudo gpg --no-default-keyring --keyring=gnupg-ring:/etc/apt/trusted.gpg.d/magento.gpg --import
Then, add the Elasticsearch repository to the system:
sudo sh -c 'echo "deb https://artifacts.elastic.co/packages/7.x/apt stable main" > /etc/apt/sources.list.d/elastic-7.x.list'
sudo chmod 666 /etc/apt/trusted.gpg.d/magento.gpg
The following commands must be used to refresh the cache after you have finished the above steps. And install Elasticsearch.
sudo apt update
sudo apt install elasticsearch
To start and enable the Elasticsearch engine, use the following commands below:
sudo systemctl daemon-reload
sudo systemctl enable elasticsearch.service
sudo systemctl start elasticsearch.service
After installing Elasticsearch properly, you need to configure the Elasticsearch file. For that, open the elasticsearch.yml file and make some changes in the file.
sudo nano /etc/elasticsearch/elasticsearch.yml
Change the node.name and cluster.name variables.
node.name, as its name implies, defines the name of the server ( node) and the cluster with which it is affiliated. If you don't modify these variables, a node.name will be assigned according to the server hostname automatically. The default cluster's name will be automatically configured as the cluster.name.
Elasticsearch's auto-discovery feature uses the cluster.name value to find and link Elasticsearch nodes to clusters automatically. As a result, if you leave the default value alone, your cluster may have unintended nodes that are connected to the same network.
Remove the # symbol to uncomment the line of node.name and cluster.name, network.host, http.port, and update the values.
...
node.name: "Your Node Name"
cluster.name: your application
network.host: 127.0.0.1
http.port: 9200
...
You need to modify this setting if your server only has 1GB of RAM.
sudo nano /etc/elasticsearch/jvm.options
Open the jvm.options file and update the Xms and Xmx values.
...
-Xms256m
-Xmx256m
...
After saving the file, start Elasticsearch,
sudo nano /usr/lib/systemd/system/elasticsearch.service
Set TimeoutStartSec as 900.
Then again reload the system,
sudo systemctl daemon-reload
sudo systemctl start elasticsearch.service
After the completion of the entire installation process of Elasticsearch, you need to test the Elasticsearch using curl. The elasticsearch uses 9200 port to run.
curl -X GET 'http://localhost:9200'
If the process is successful, you get the output as like following,
{
    "name": "Your Node Name",
    "cluster_name": "your application",
    "cluster_uuid": "ksht21377494",
    "version": {
        "number": "7.14.0",
        "build_flavor": "default",
        "build_type": "deb",
        .
        .
        .
        .
        .
    },
    "tagline": "Your search.."
}
If you get the output, elastic search installation process is completed.
Then, we can install the composer
Install Composer
To install Composer using this command, start with the root directory,
cd ~
curl -sS https://getcomposer.org/installer -o composer-setup.php
sudo php composer-setup.php --install-dir=/usr/bin --filename=composer
To check the composer version use this command below,
composer
Download and Install Magento2
Open the HTML folder in the terminal using the command,
cd /var/www/html
Create a composer project,
sudo composer create-project --repository-url=https://repo.magento.com/ magento/project-community-edition=2.4.5 magento2
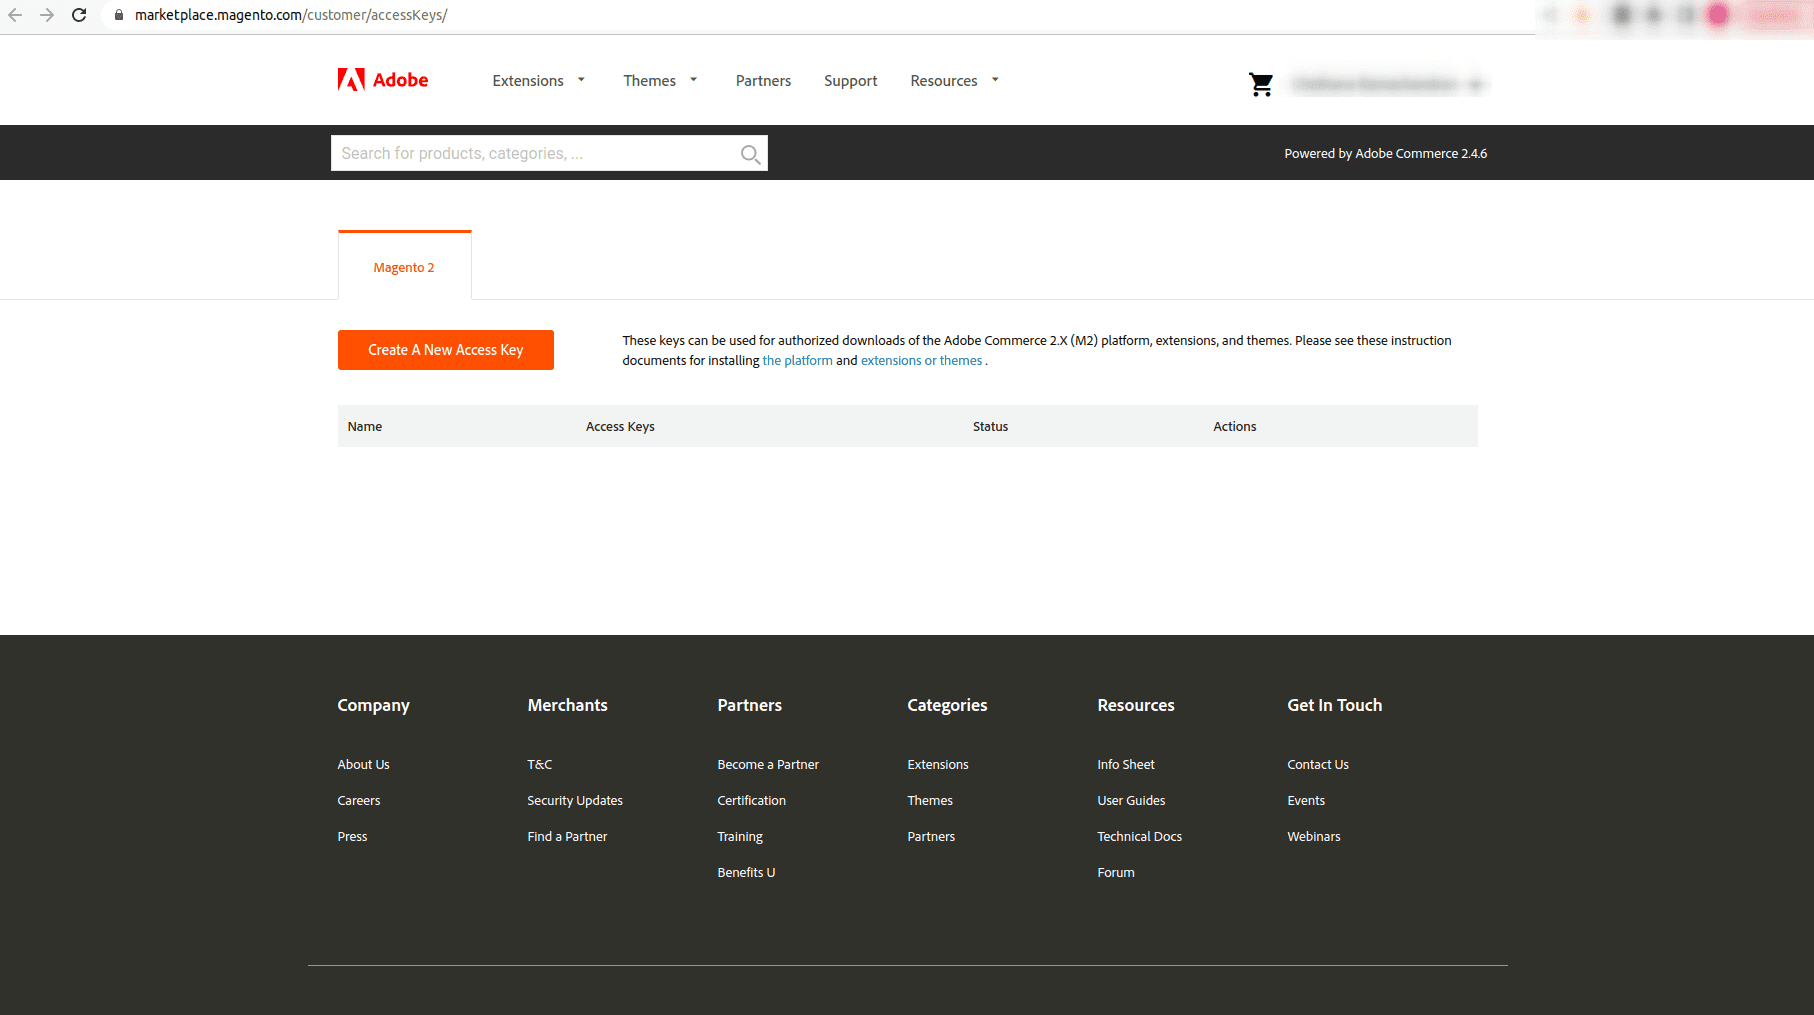
Click Create A New Access Key to create the access keys. You will get a private key and a public key.
The public key will be the username and the private key will be the password.
You can enter the username and password in the terminal. After entering the username and password, downloading and installation will start.
After the completion of the process, set permissions:
cd /var/www/html/<magento install directory>
sudo find var generated vendor pub/static pub/media app/etc -type f -exec chmod g+w {} +sudo find var generated vendor pub/static pub/media app/etc -type d -exec chmod g+ws {} +sudo chown -R user_name:www-data.
Note: user_name is the user with root access
sudo chmod u+x bin/magento
All set, let's run the last command to complete the installation of Magento 2.4.
Initially, change the current directory to the folder for your website.
Open the install directory for Magento 2.
cd /var/www/html/<magento install directory>
php bin/magento setup:install --base-url=<your-domain> --db-host=localhost --db-name=magento2 --db-user=magento2 --db-password=<your-db-password-of-magento2-user> --admin-firstname=Admin --admin-lastname=Admin --admin-email=admin@admin.com --admin-user=admin --admin-password=<your-admin-password> --language=en_US --currency=USD --timezone=America/Chicago --backend-frontname=admin --search-engine=elasticsearch7 --elasticsearch-host=localhost --elasticsearch-port=9200
--base-URL: your domain, eg: cybrosys.magento.com.
--db-name: give your Magento database name that you created earlier
--db-user: give the database user name that you created.
--db-password: password of the MySQL user
Hold off until the installation is complete. This will take some minutes to complete the installation.
When installing Magento, if you added a directory name to the hostname or IP address of your server to construct the base URL, you'll need to clear it out.
sudo nano /etc/apache2/sites-available/cybrosys.magento.com.conf
Edit the file as demonstrated below:
<VirtualHost *:80>
ServerAdmin master@localhost
DocumentRoot /var/www/html/magento2/pub
         ServerName cybrosys.magento.com
ErrorLog ${APACHE_LOG_DIR}/error.log
CustomLog ${APACHE_LOG_DIR}/access.log combined
<Directory "/var/www/html">
AllowOverride all
</Directory>
</VirtualHost>
Restart the Apache,
sudo systemctl restart apache2
If you are installing Magento locally, then you have to update the host file at /etc/hosts.
127.0.0.1 cybrosys.magento.com
Save the file and run the below command:
sudo a2ensite cybrosys.magento.com.conf
php bin/magento indexer:reindex && php bin/magento se:up && php bin/magento se:s:d -f && php bin/magento c:f && php bin/magento module:disable Magento_TwoFactorAuth
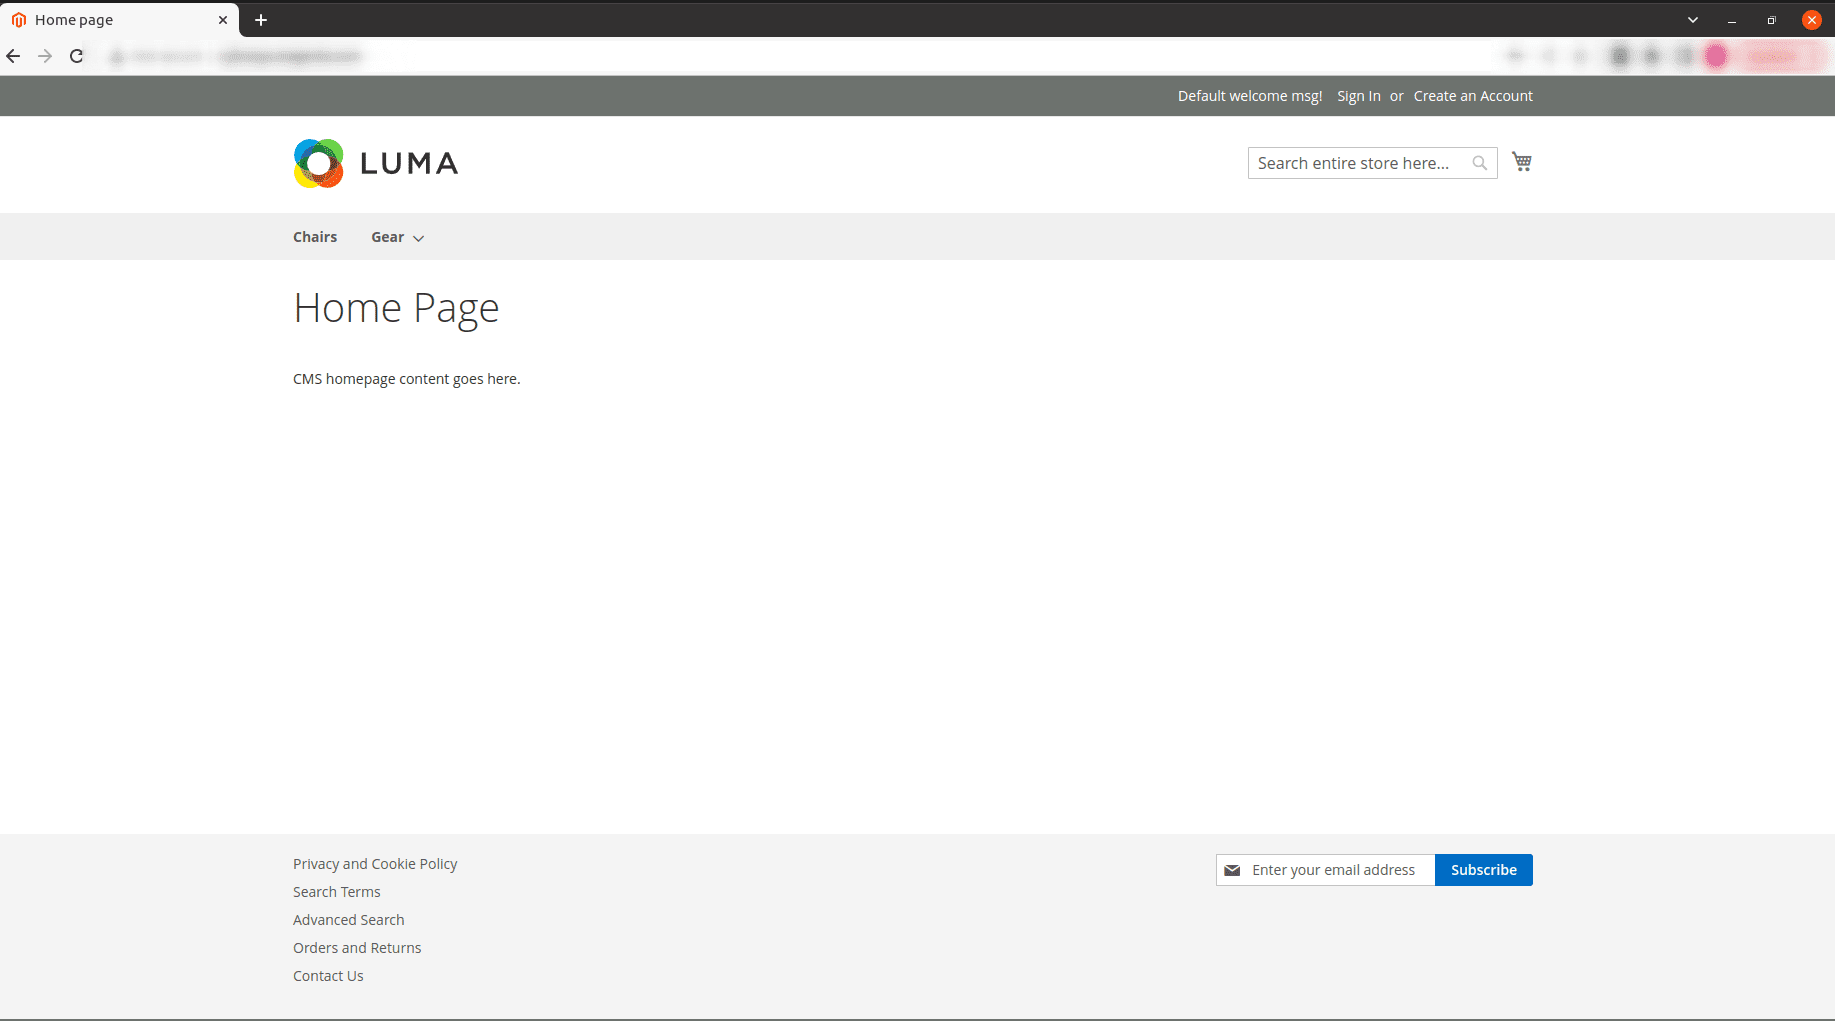
Finally, you can browse the URL http://cybrosys.magento.com. Your page will be like this: