Multiple companies are set up in an organization using a centralized management system. Overall management process becomes easy by balancing the company data. The initial setting of a firm is vital to maintain all accounting transactions. Using ERP software, we can smoothen the workflow of business transactions. Odoo 16 Accounting module ensures users set company information for managing all finance deals. Administration of payments, taxes, accounts charts, and more become more reliable within the Odoo 16 Accounting application.
This blog obliges you to set up company data in Odoo 16 Accounting.
A company can easily organize invoices, journals, payments, budgets, credit notes, etc., using Odoo 16 Accounting application. Users can quickly make business transactions after specifying the particular company date. Let's view the process of setting up company information in Odoo and how to run it on the Accounting module.
To Formulate Company Data in Odoo 16
Customers look into company information when purchasing a product or service for their needs. Recording your company data for securing accounts and financial statements is necessary. In Odoo 16, we can configure several company details easily for managing transactions. To set up new company data, go to Settings of Odoo 16. Two methods are possible to update company data in the Odoo 16. Firstly, the user can select the Update info option below the Companies section of Odoo 16 settings, as denoted in the screenshot below.
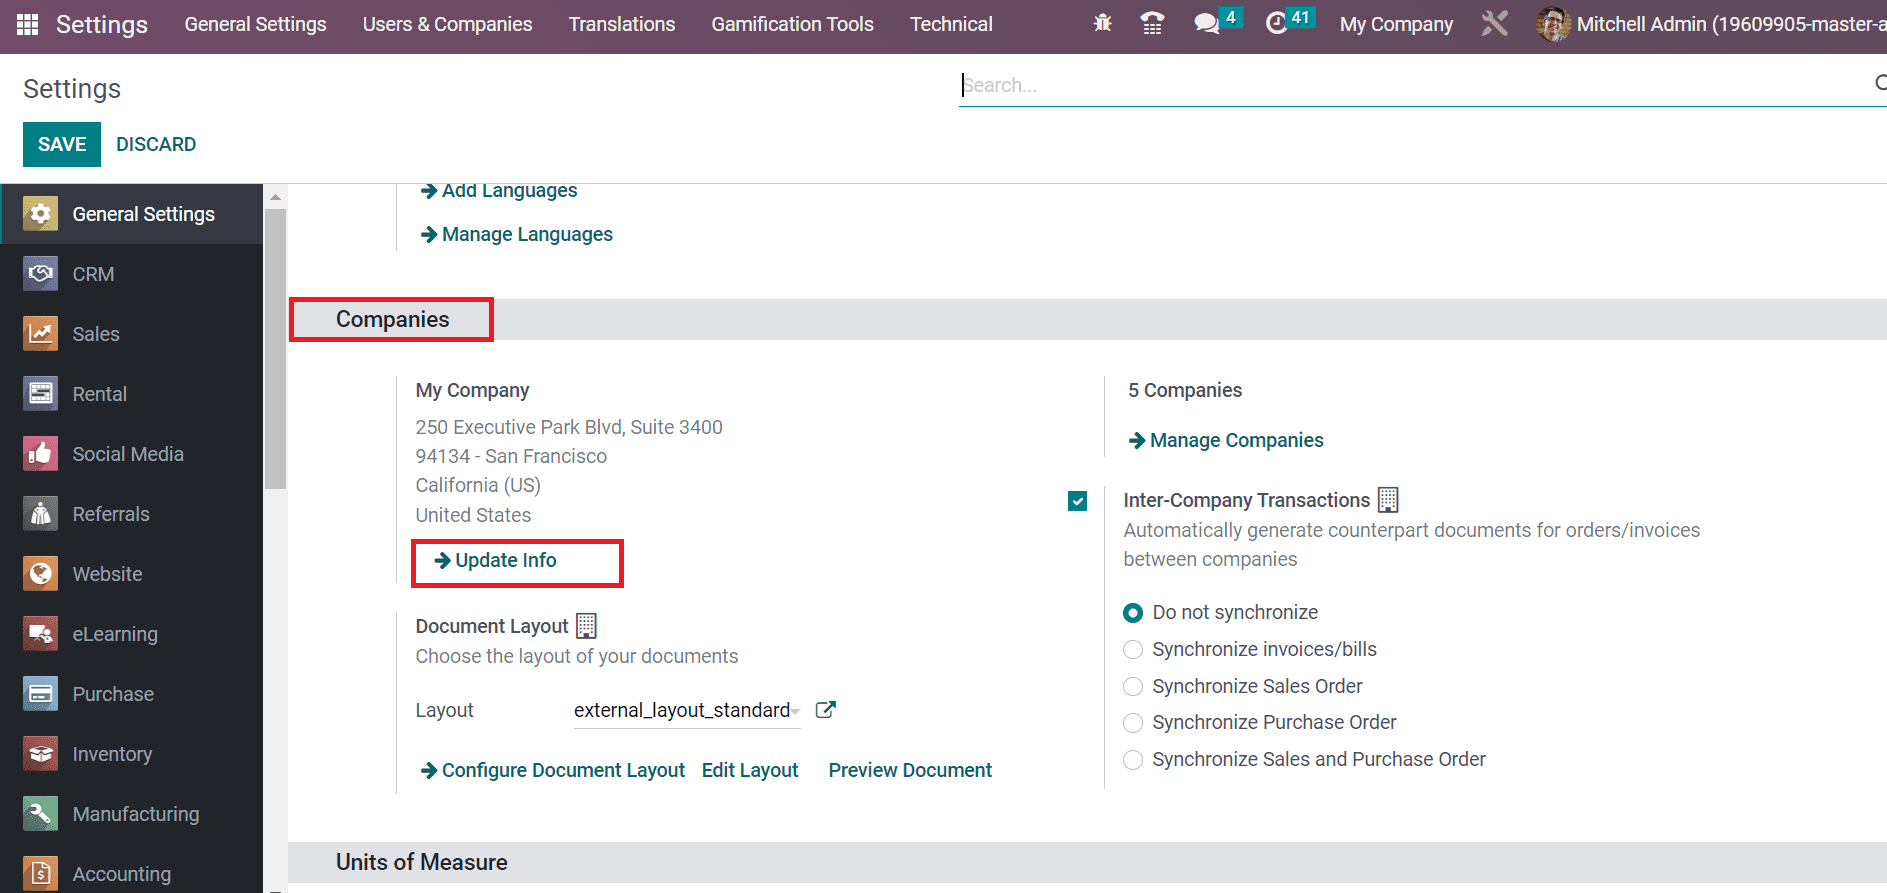
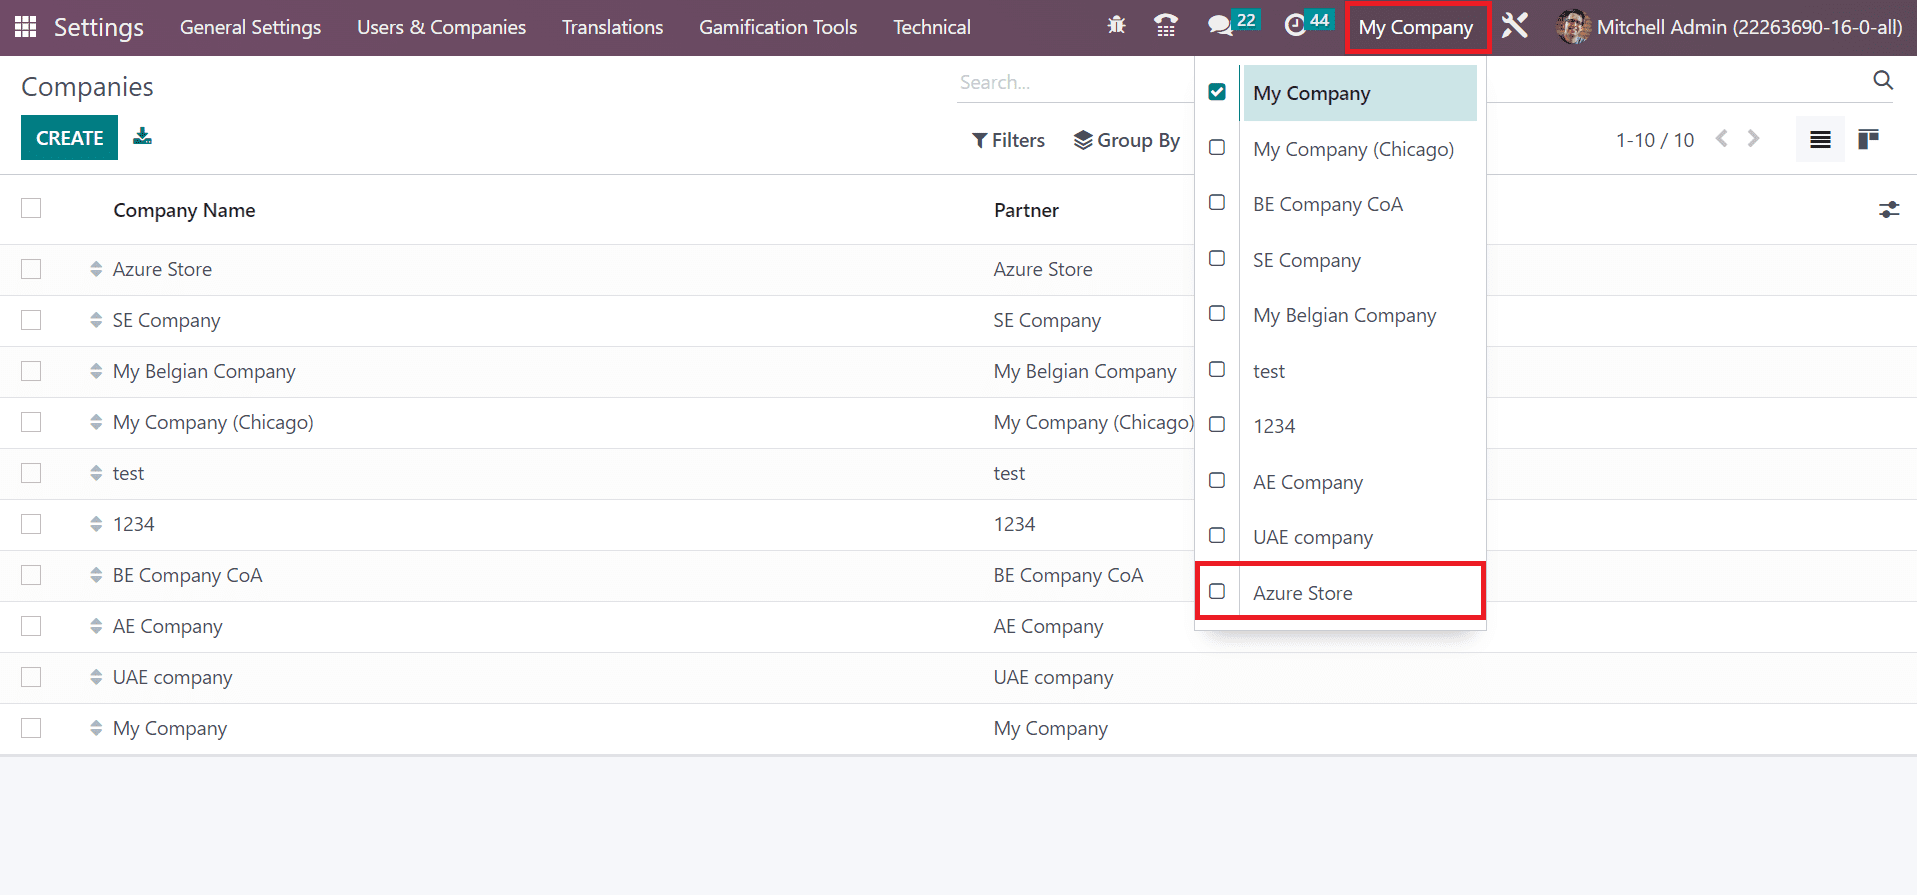
By clicking on the Update info option, you will be directed to the company data page. Another method is to press the Companies menu in User & Companies tab. A new window appears before the user, and a list of all generated companies is accessible. We can obtain the details of each company, including Partner and Company Name, as described in the screenshot below.

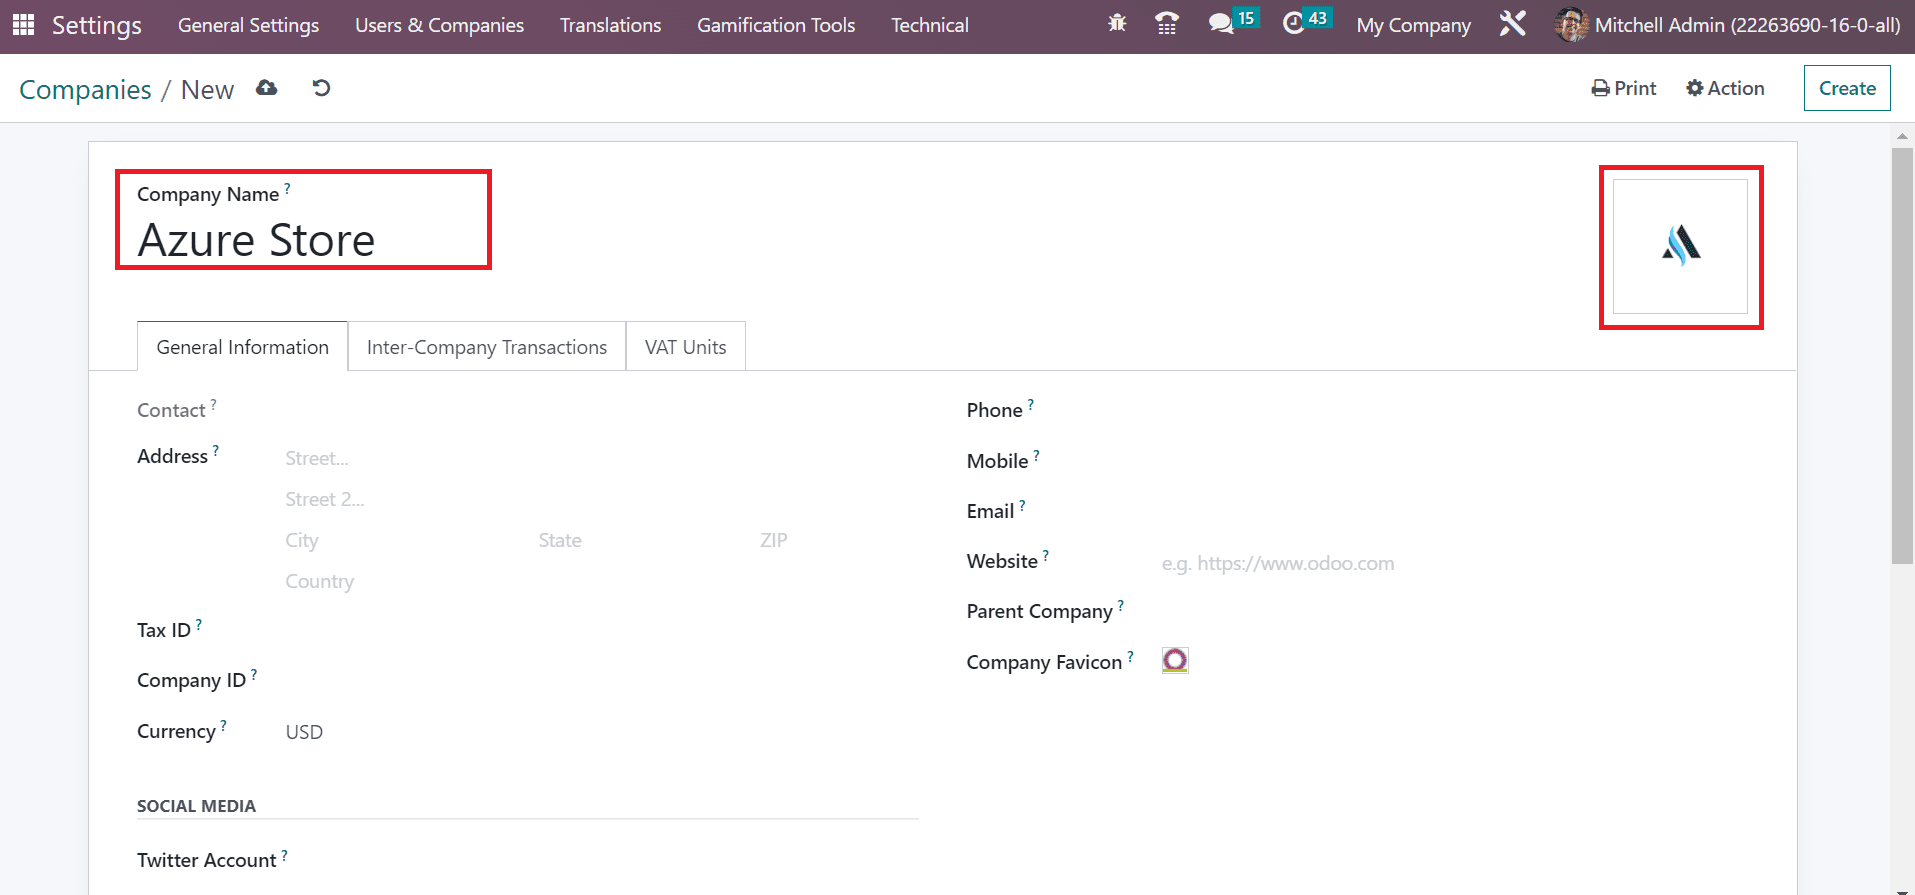
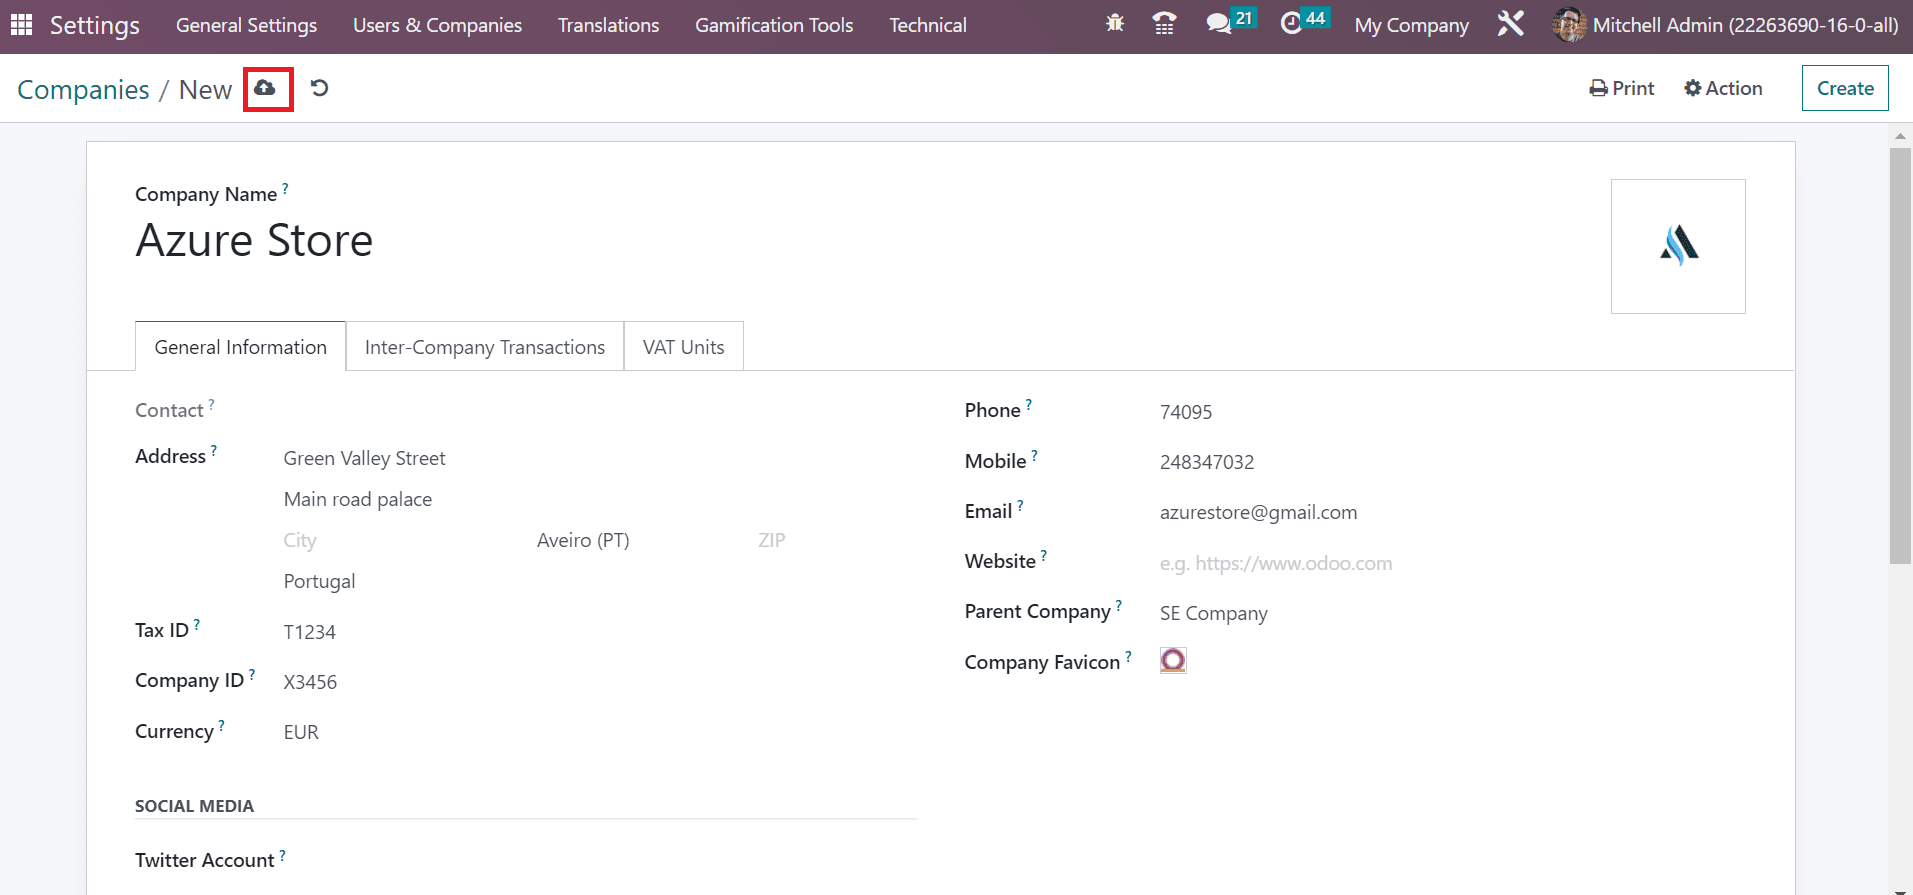
Press the CREATE icon to generate new company data for your accounting module. A new screen opens to a user after choosing the CREATE button. Add the firm's name in the Company Name field as Azure Store, and the user can apply the company logo on the right end, as demonstrated in the screenshot below.
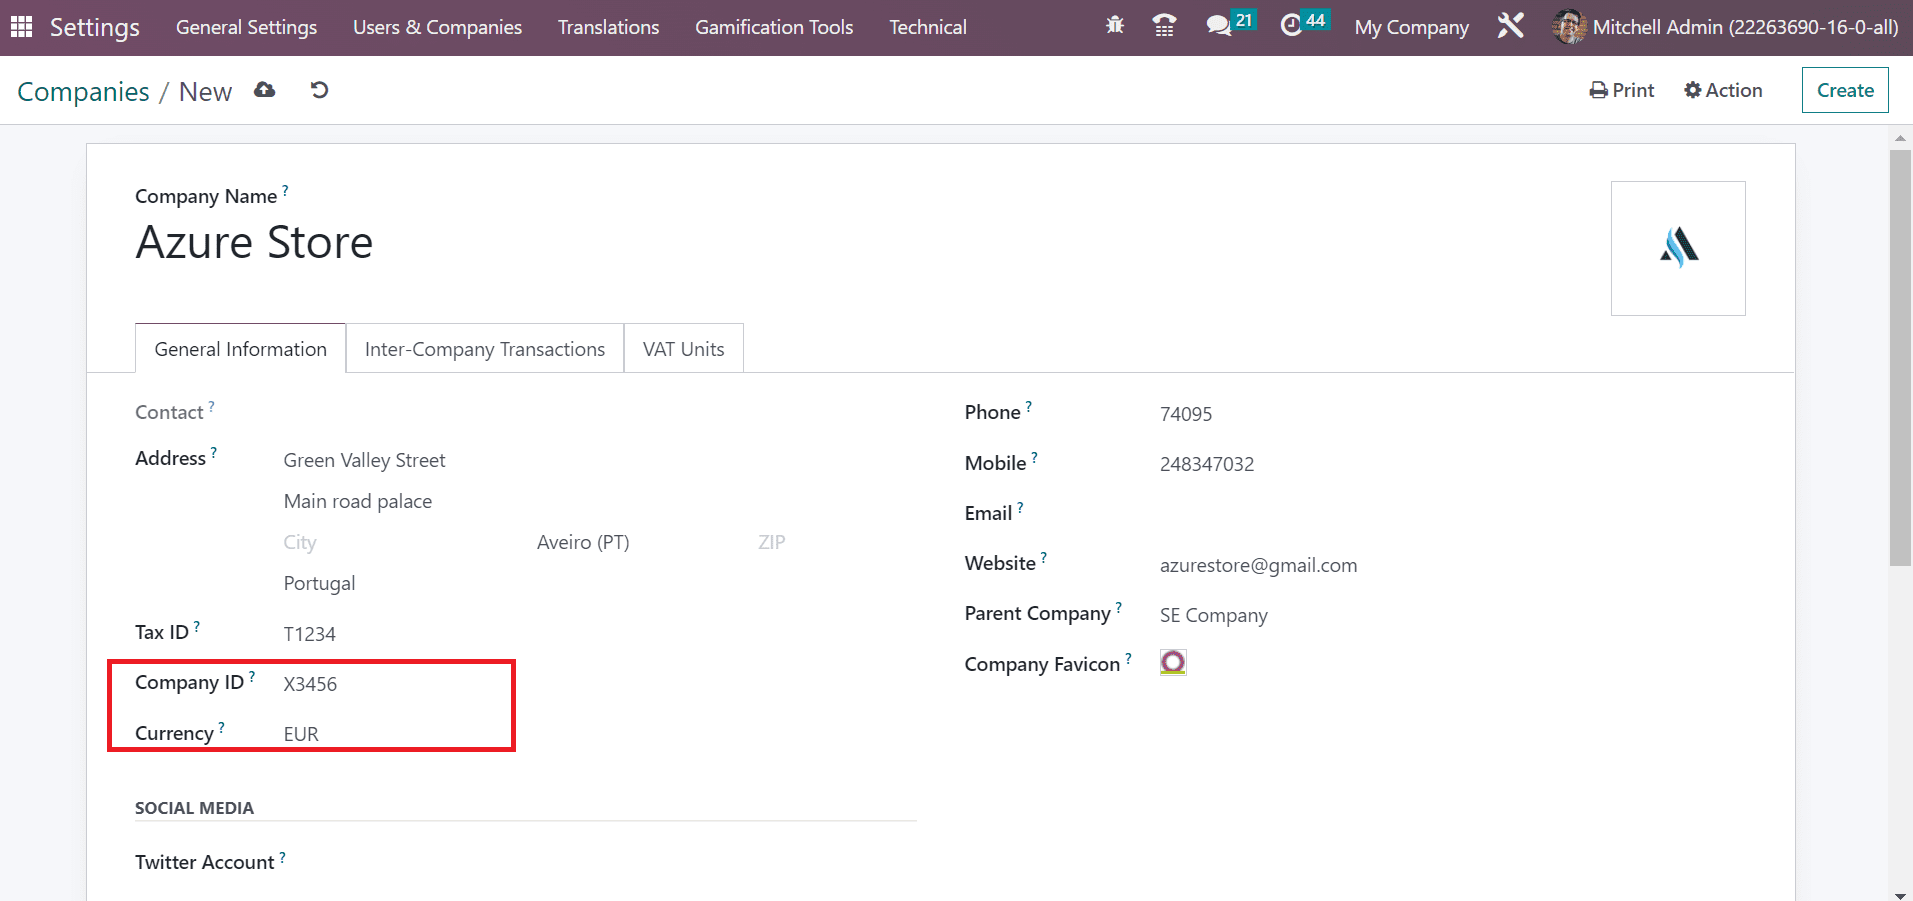
Next, we can mention basic information about the firm inside the General information tab. Enter your added company's street, city, state, country, and ZIP. Also, apply the tax identification number of a company that will be subjected to government taxes and legal statements in the Tax ID field as specified in the screenshot below.

Specify the company registered number in all partner firms within the Company ID option. After applying the Company ID, you need to set the Currency of your specific firm, as represented in the screenshot below.
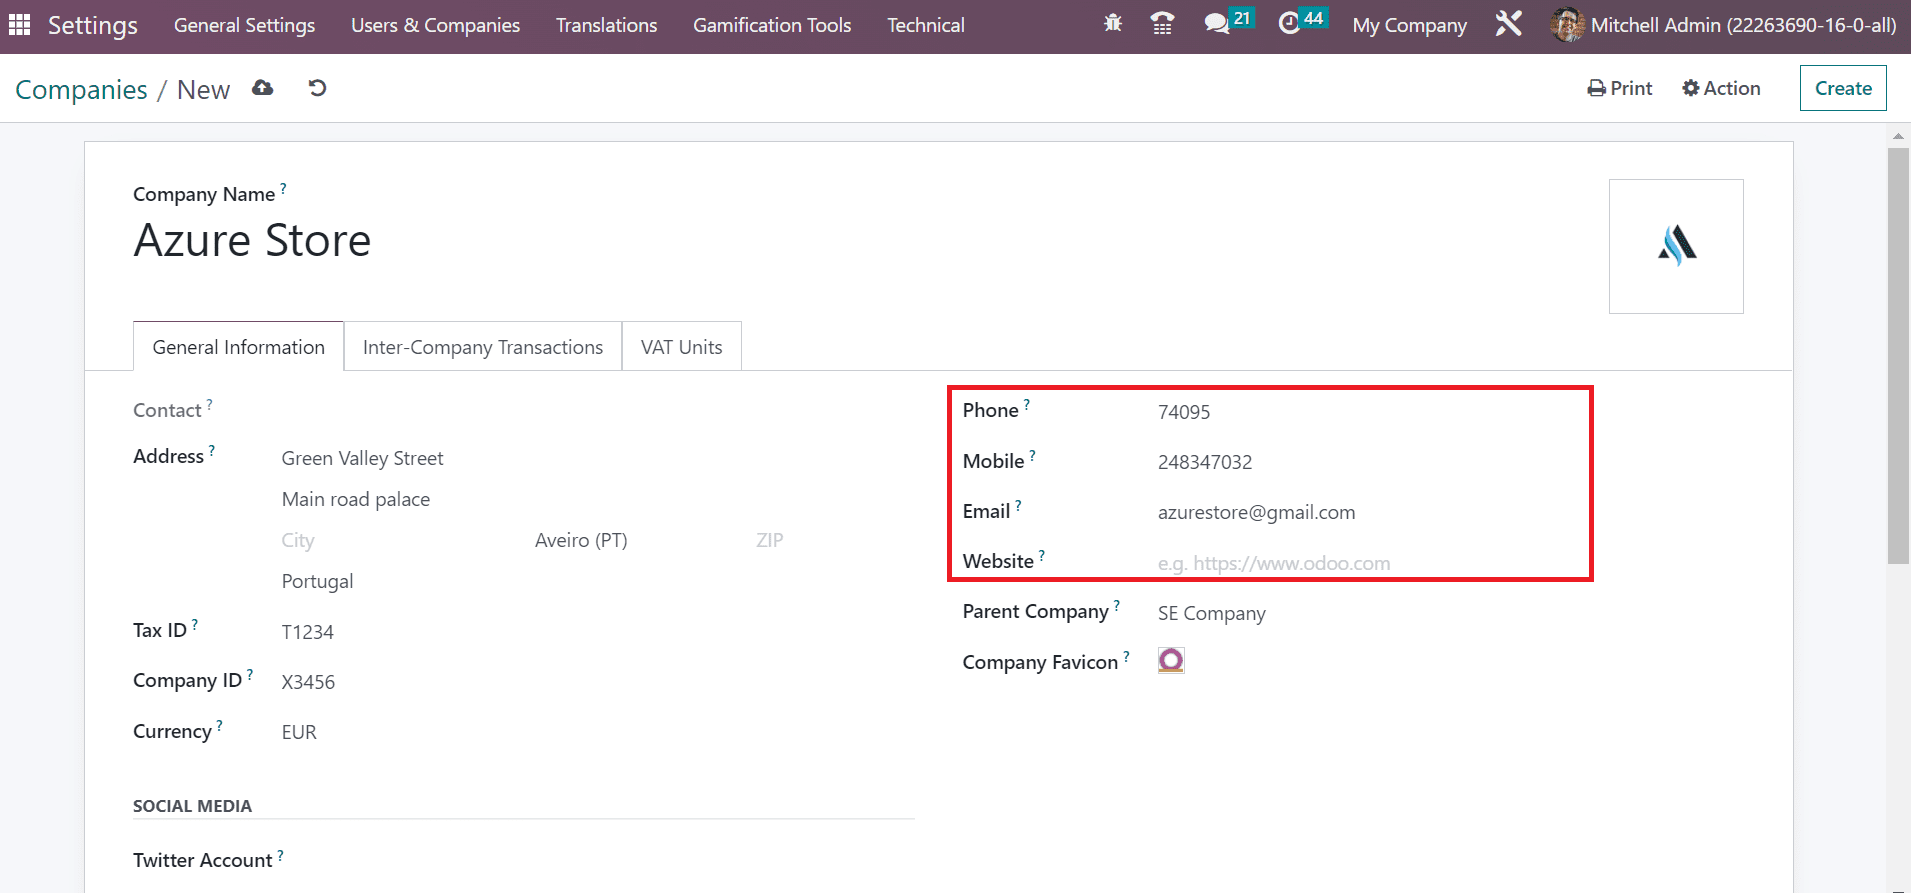
Later,apply the Phone, Mobile, and Email addresses of a chosen company in theCompanies window. Moreover, you must add the official website link of the firminside the Website field.
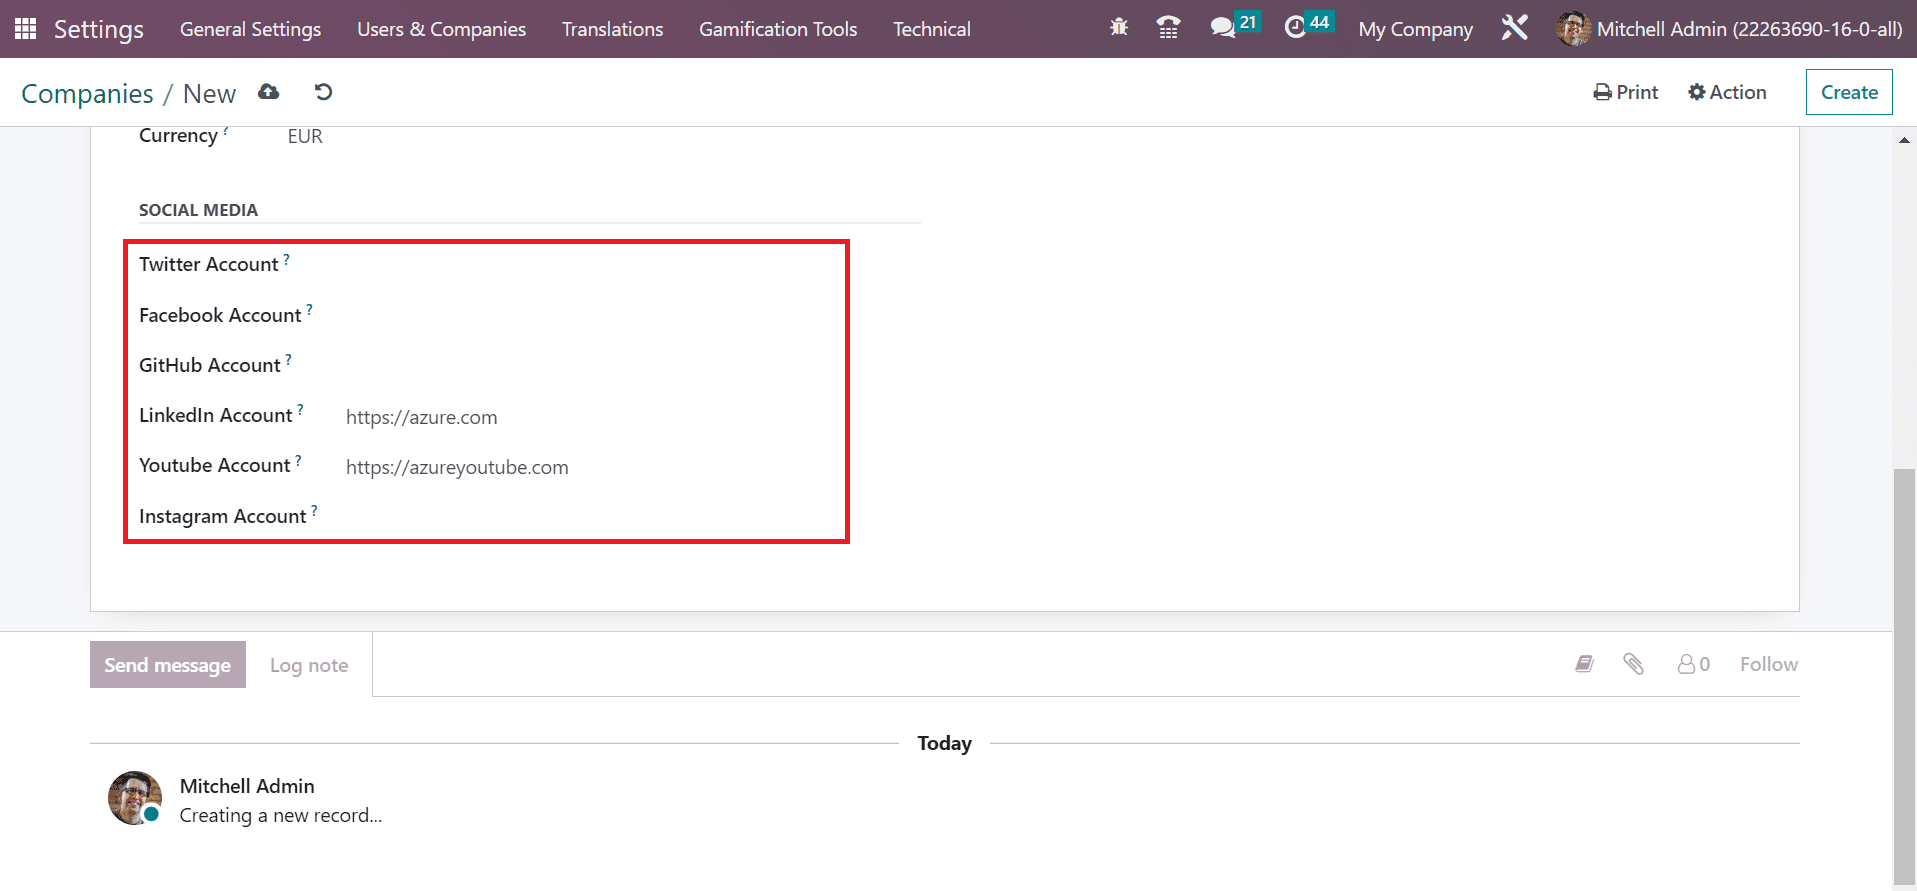
We can configure the company's social media sites below the SOCIAL MEDIA section in the Companies window. Specify your company's Linkedin, Instagram, Youtube, and other necessary social accounts inside the SOCIAL MEDIA section, as mentioned in the screenshot below.
After applying essential details, secure your company data by clicking on the Save manually button.
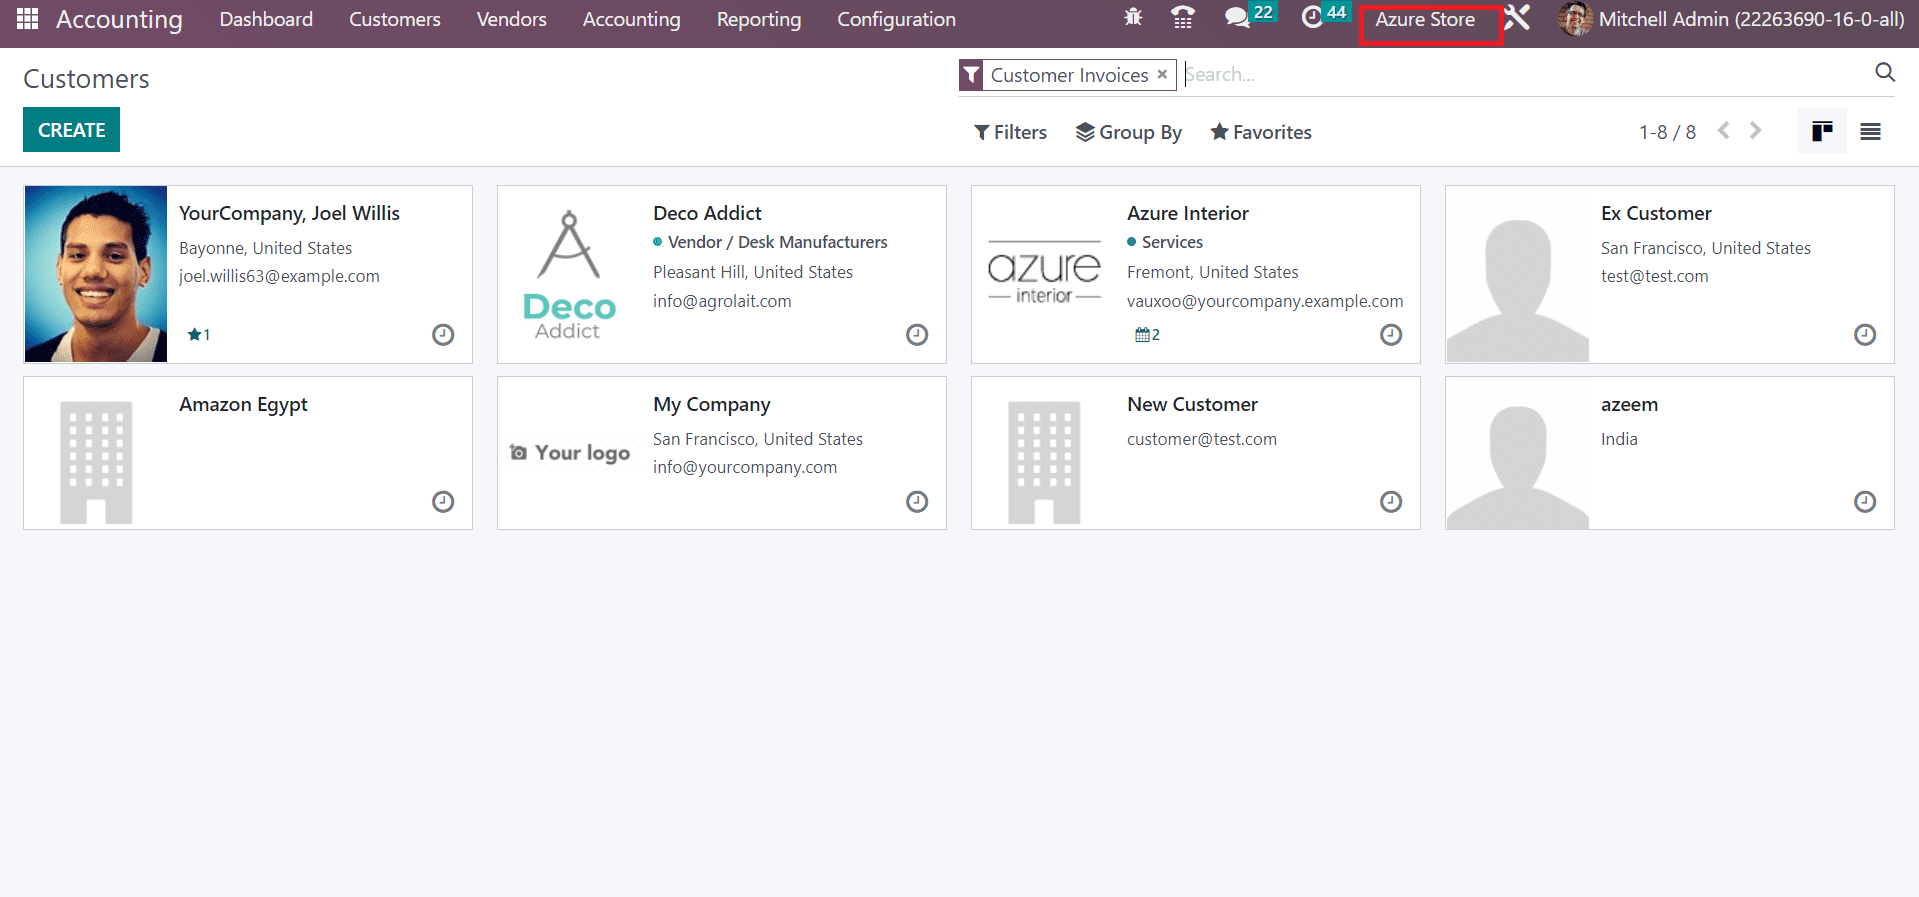
You can obtain the created company Azure store within the Companies field. To activate the specific company, move to the Odoo 16 Accounting module and click the Company tab at the top. Switch your recent company into created company Azure Store as presented in the screenshot below.
After switching the company, we can view Azure Store as a company in the top bar of the Odoo 16 Accounting module.
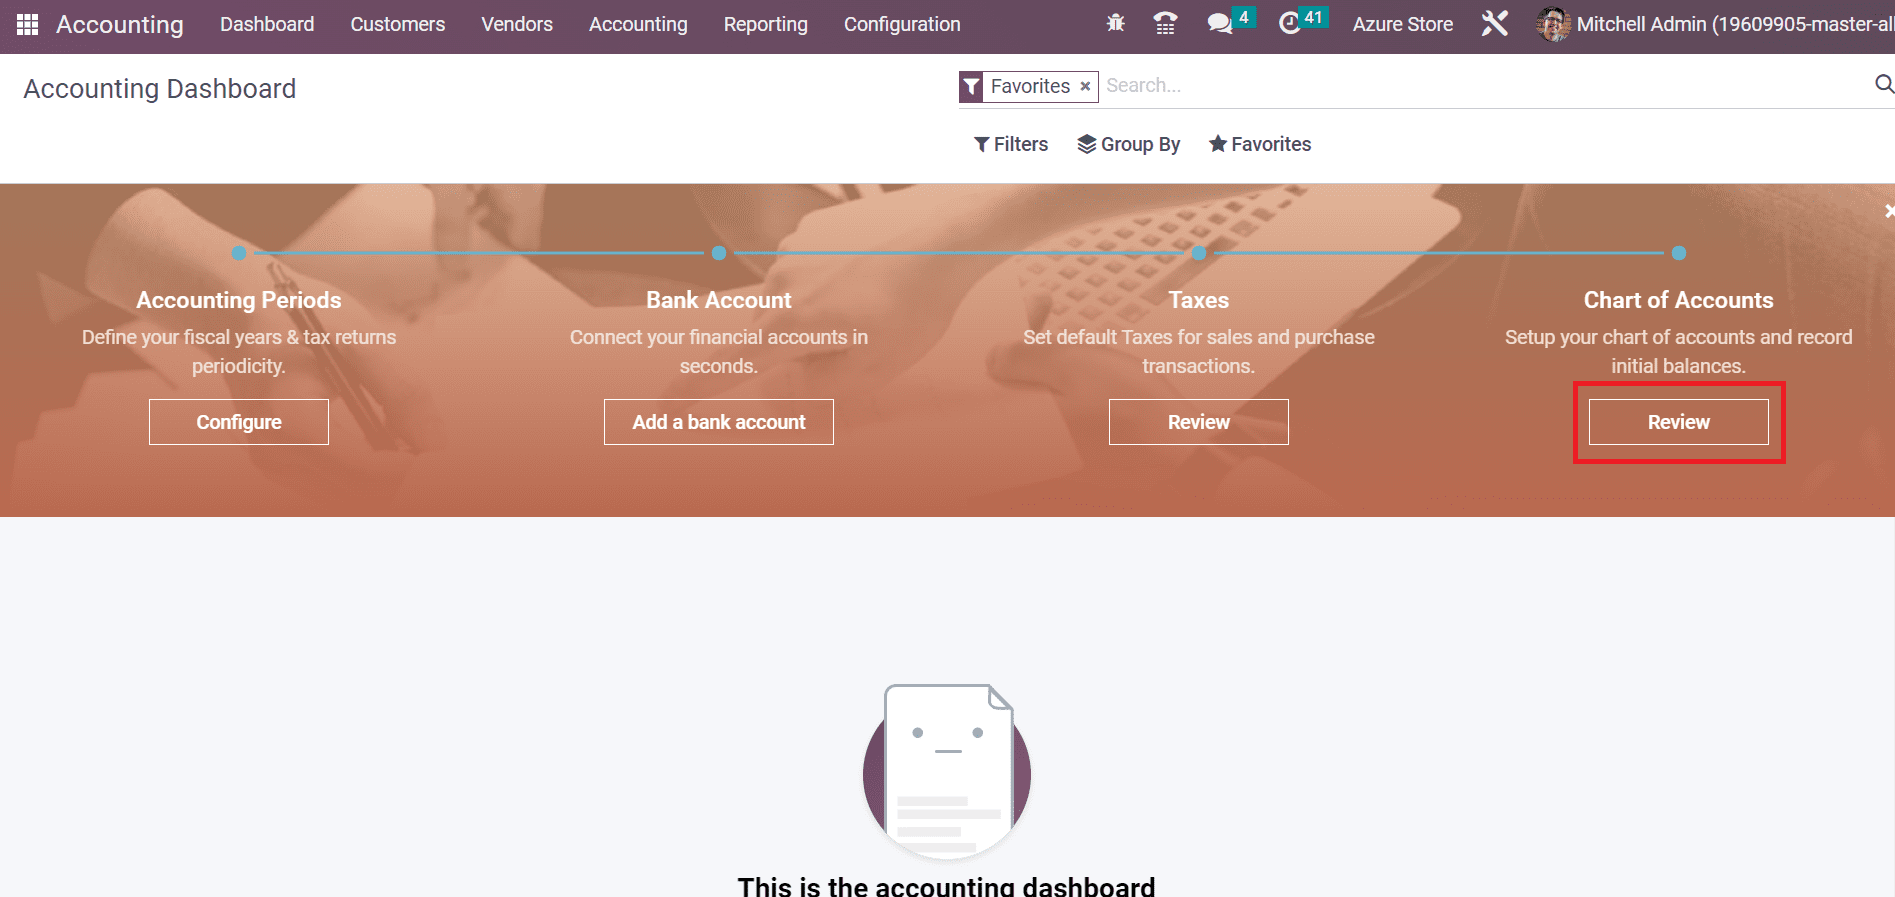
So, it is easy to maintain your created company within the Odoo Accounting application for managing financial transactions. Now, we can maintain the Accounting periods, Bank accounts, Chart of Accounts, and Taxes for Azure Store from the Accounting dashboard of Odoo 16. Users can set a chart of accounts for Azure Store by choosing the Review button below the Chart of Accounts section, as marked in the screenshot below.
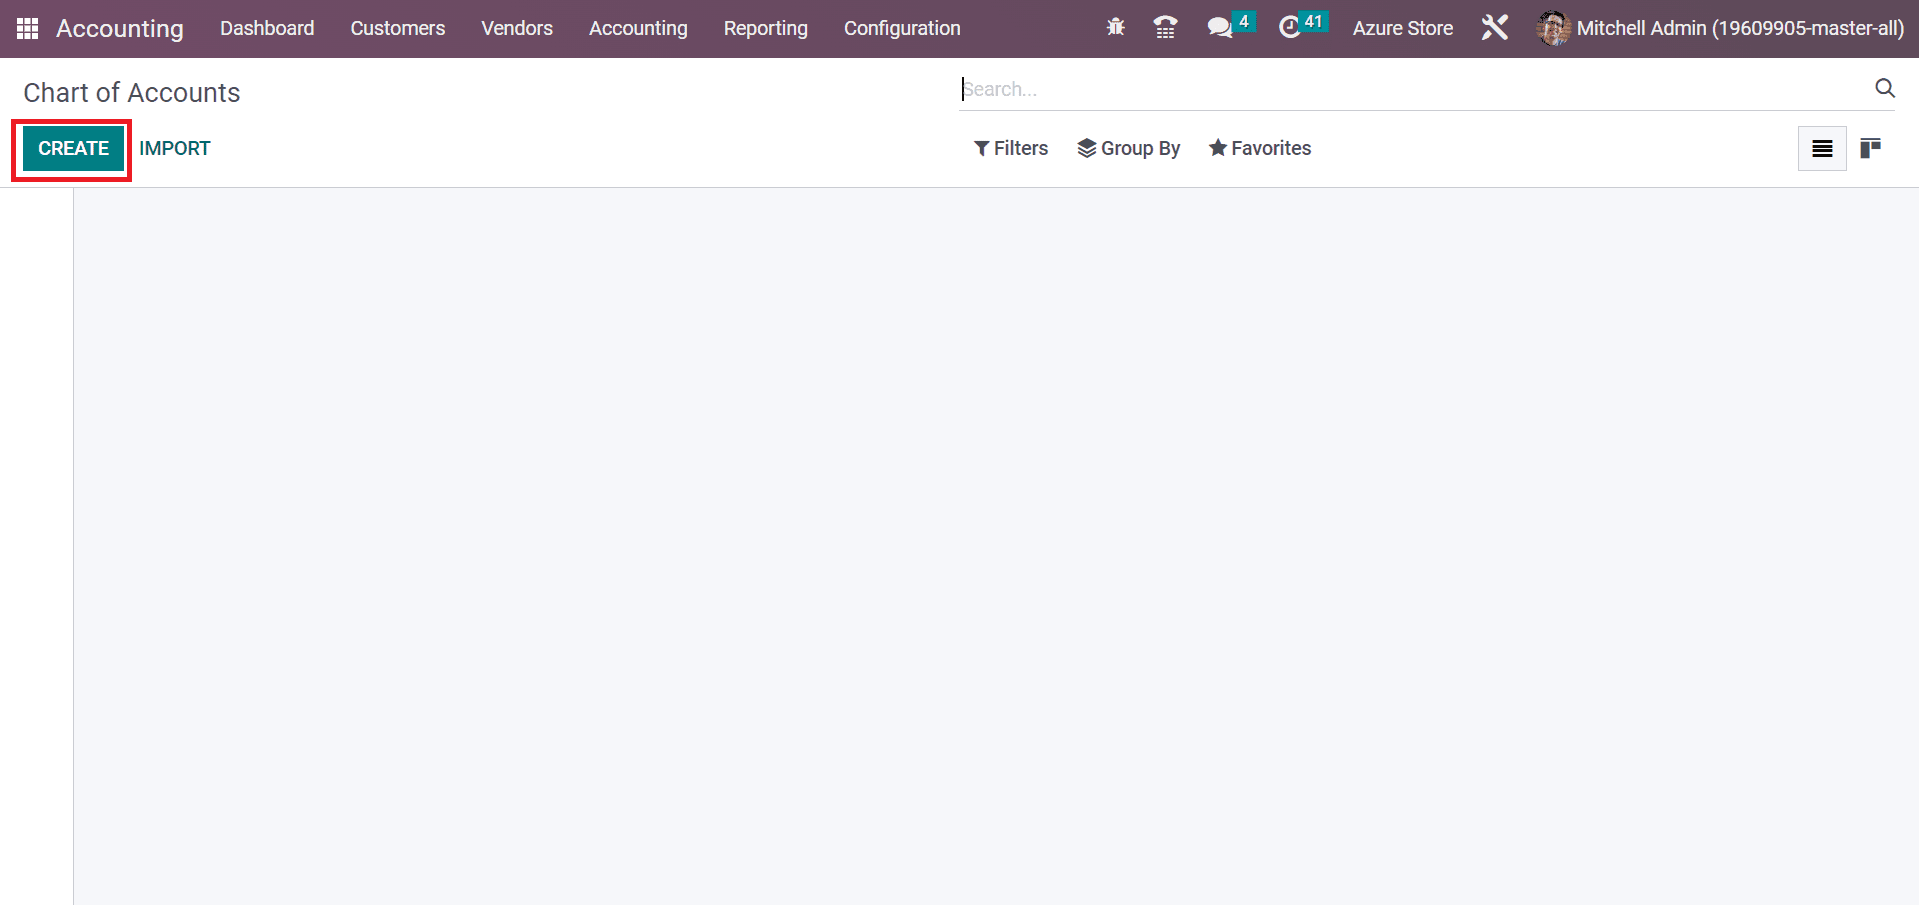
A new window opens before the user after pressing the Review icon. Select the CREATE button to develop a new chart of accounts in your company, as cited in the screenshot below.
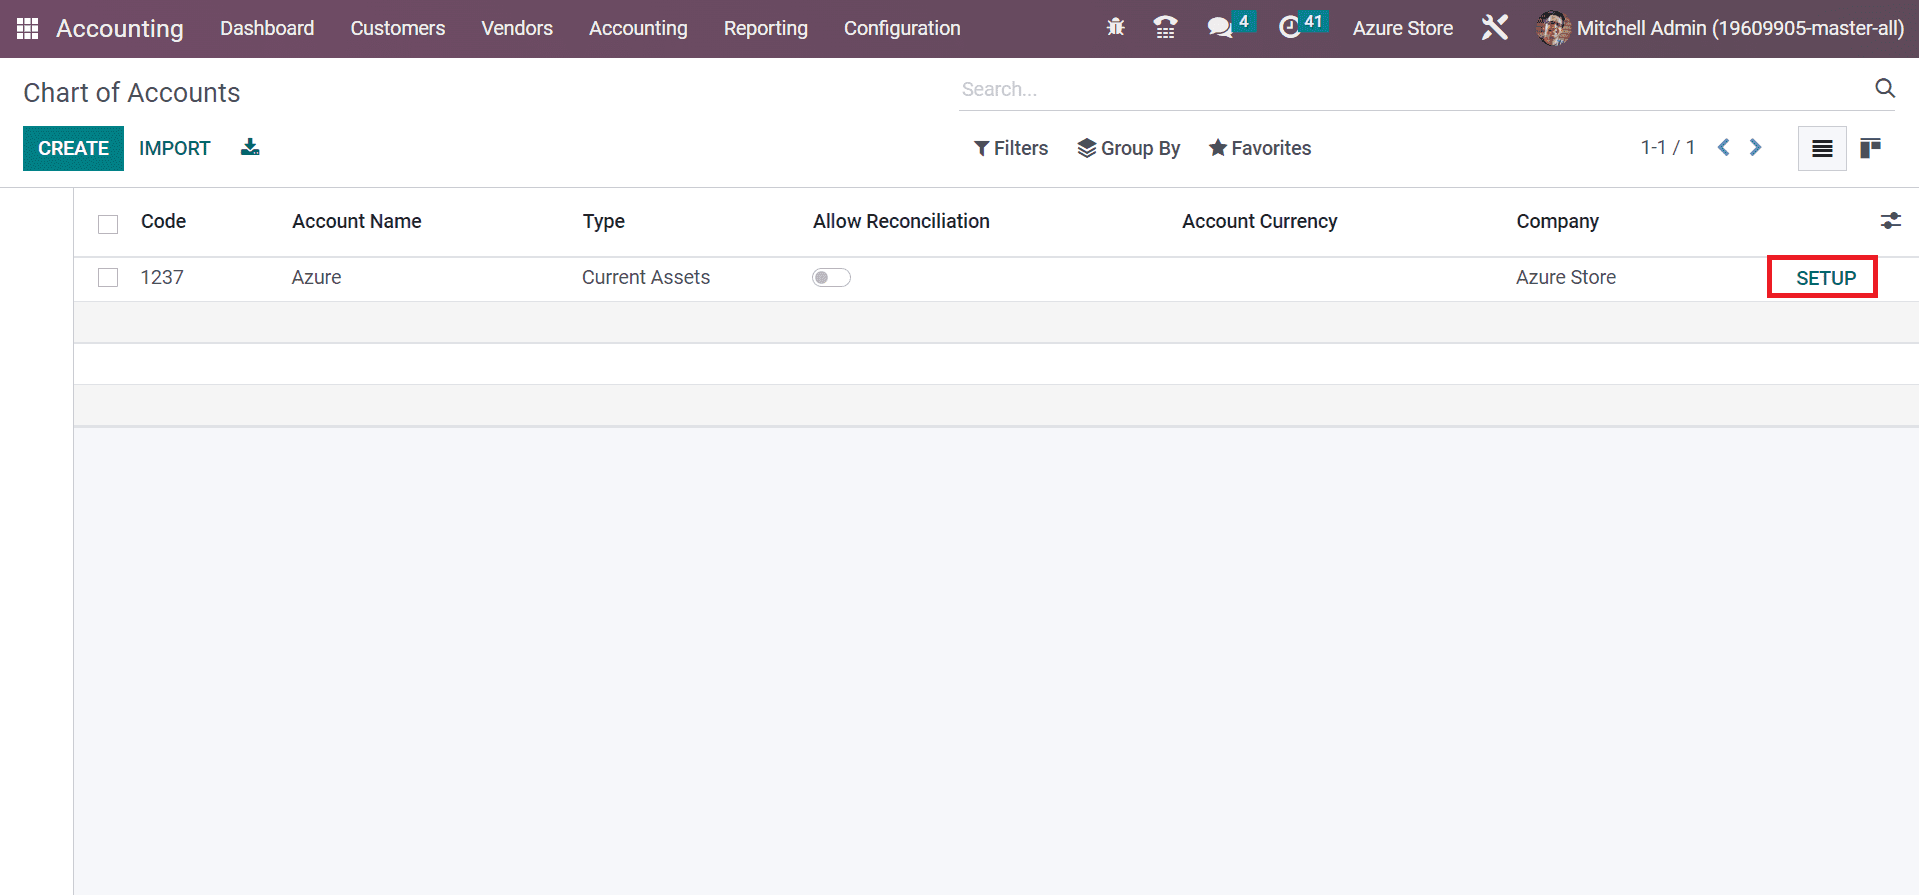
In the new space, you can apply details of charts of accounts such as Code, Type, Company, and more. Click the SETUP icon at the right end to manage the created chart of accounts in your company, as described in the screenshot below.
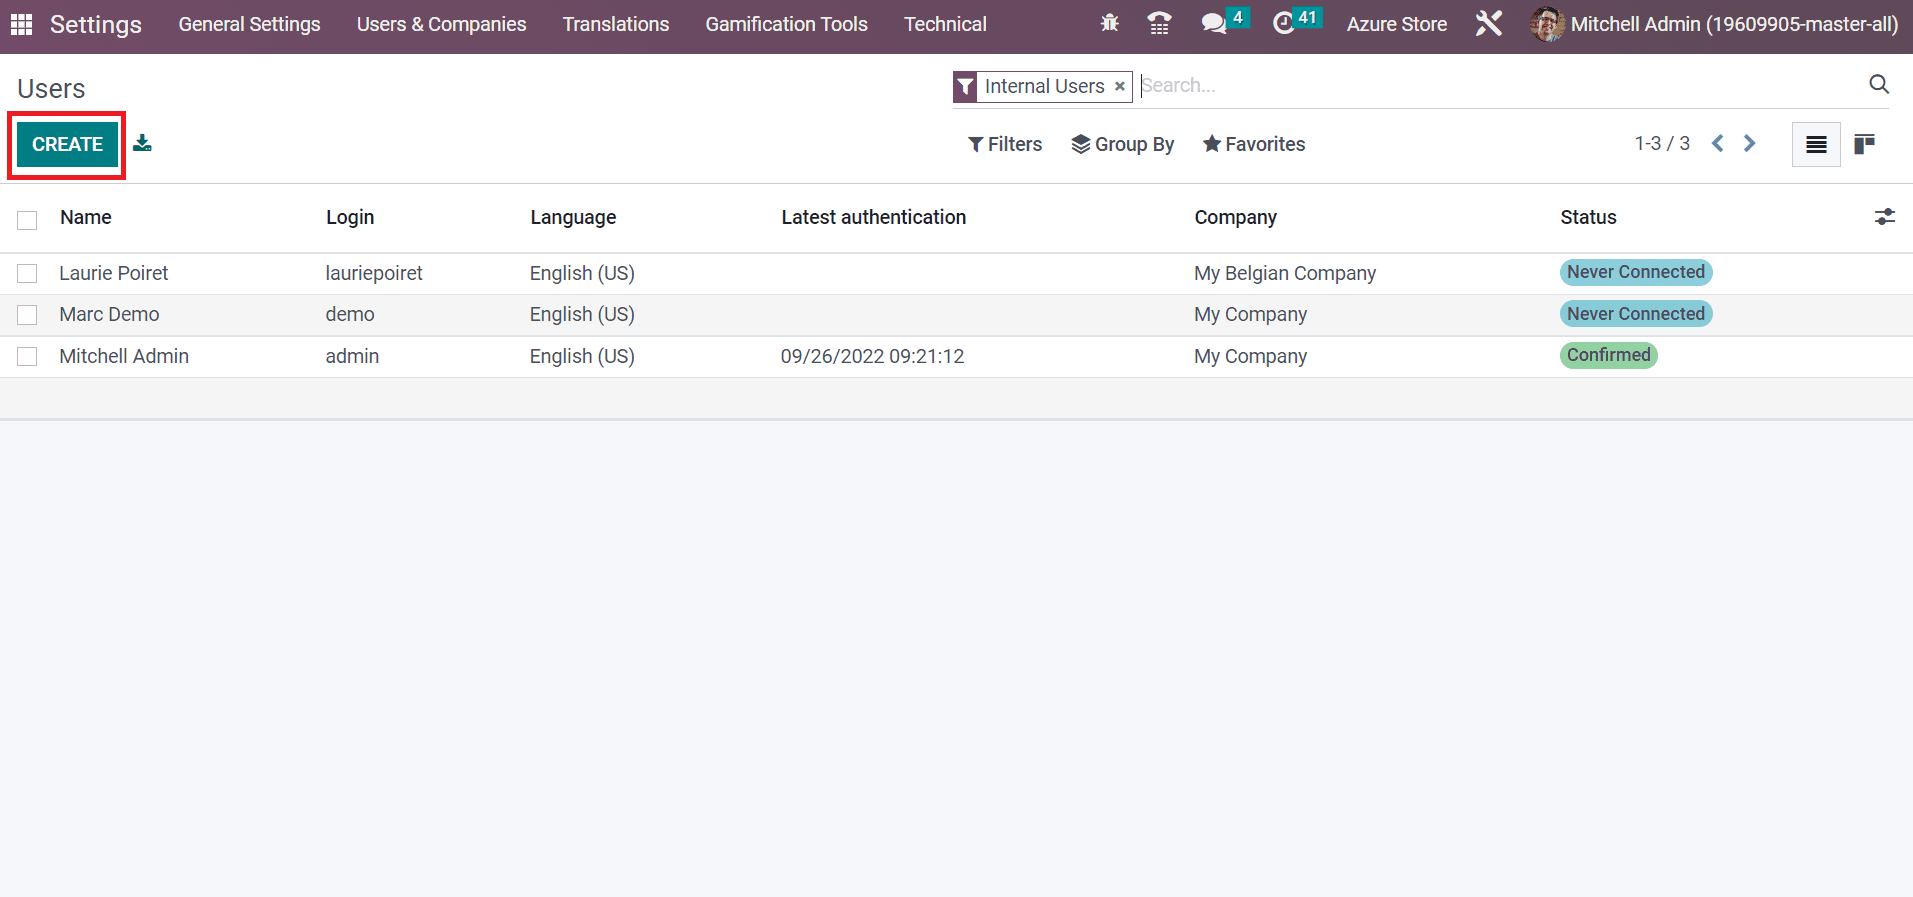
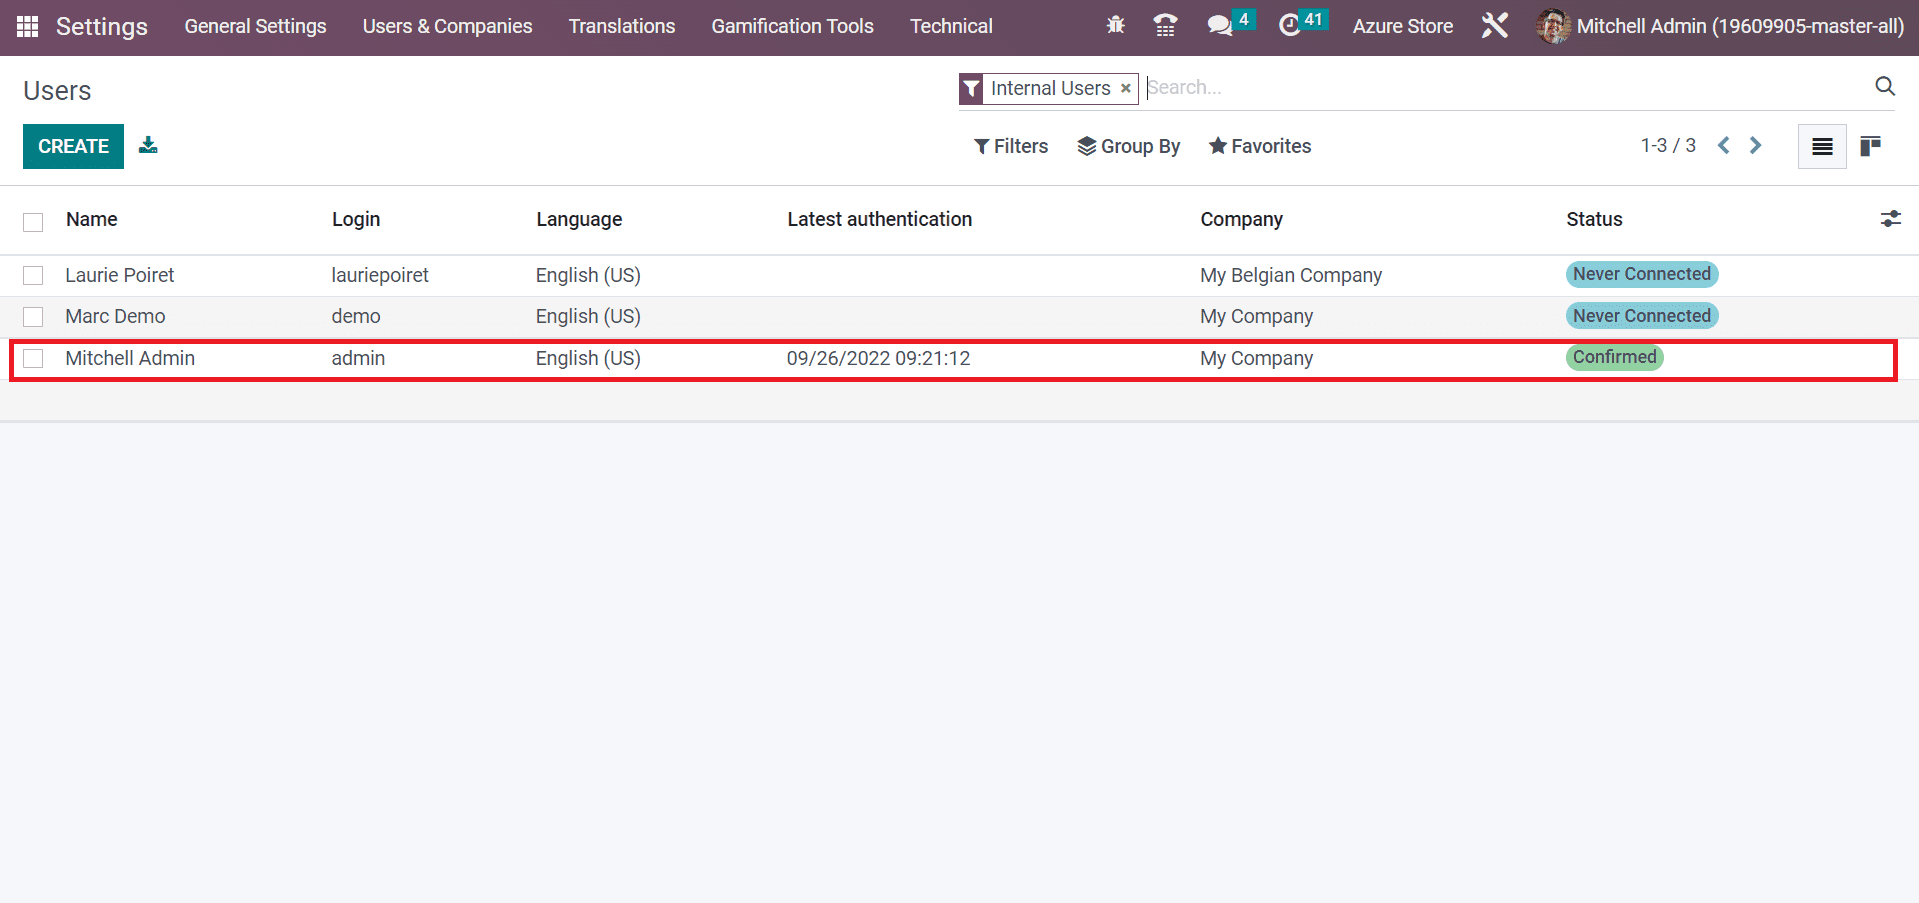
So, processing a chart of accounts within your new company is easy. Additionally, you can manage detailed user data for the accounting module within the Settings window. Select the Users menu within the Users & Companies tab, and records of all users are available to you. Information about each user, such as Company, login, Status, Language, Name, and more, is available in the Users window.
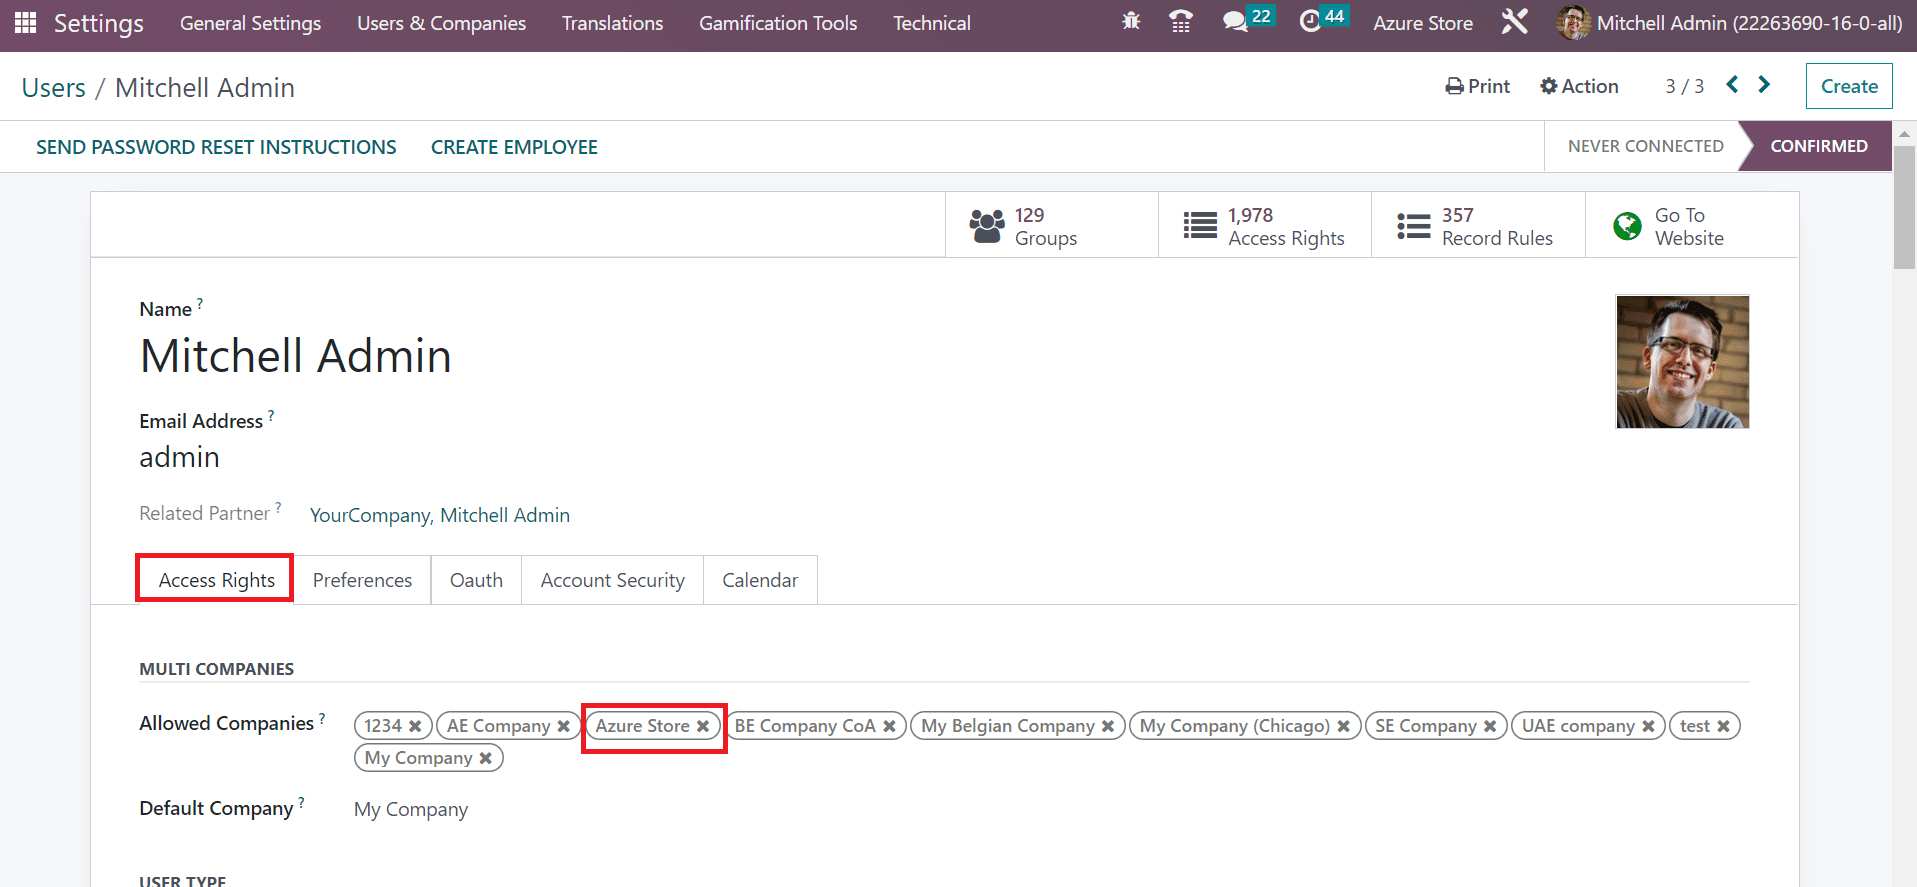
By pressing the CREATE icon, we can set the new user information in Odoo 16. We choose a default user Mitchell Admin from the Users window, as presented in the screenshot below.
On the new screen, we can view the user's Name, Email address, and Related partner.

Below the Access Rights tab, you can choose the allowed companies for users in Odoo 16 below the MULTI COMPANIES section. We set the company Azure Store in the Allowed Companies fields, as illustrated in the screenshot below.
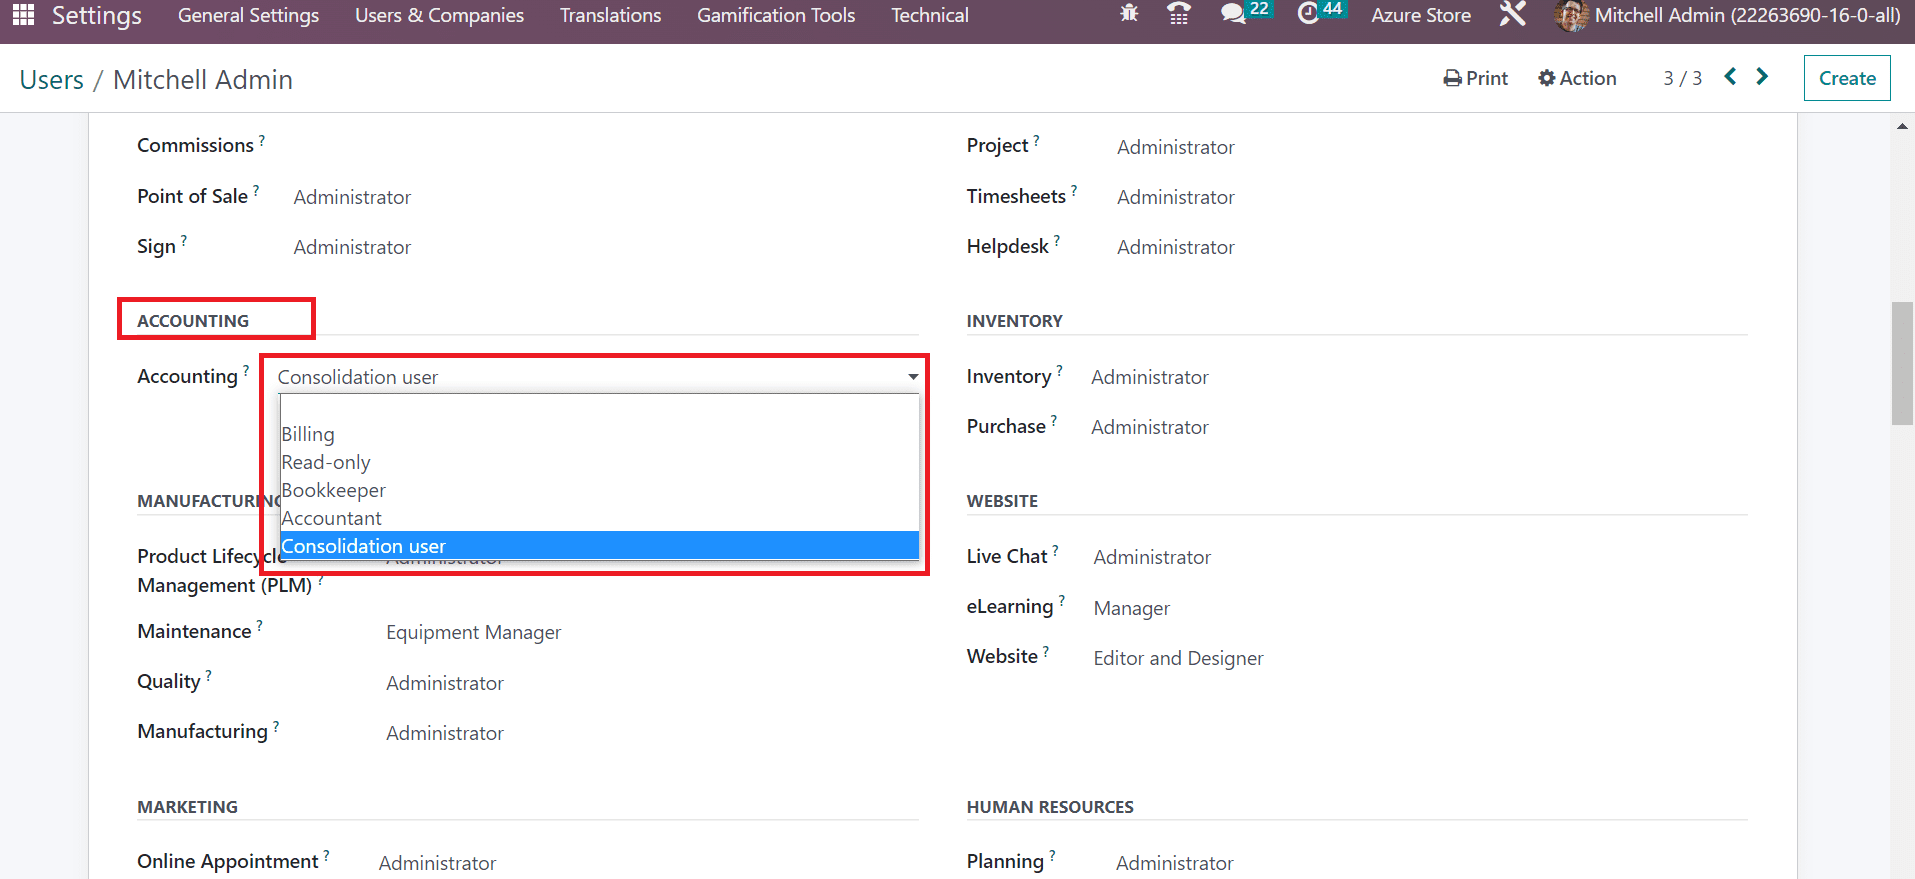
We can manage users' data concerning the accounting module below the ACCOUNTING section of the Access Rights window. The accounting field helps the user to handle the company accounts. It is possible to set a user's accounting as Bookkeeper, Billing, Accountant, Read-only, Consolidated user, and more. We set the Accounting for the user as Consolidated user below the ACCOUNTING section, as indicated in the screenshot below.
After making essential modifications, save your changes in the Users window. Hence, we can quickly set up user setup for the Odoo Accounting module.
The administration of users and companies is accessible within the Odoo 16 Accounting module. Organizing specific company data makes it possible to secure all accounting or financial information. Business productivity is ensured by evaluating an organization's accounting details and is easy to process by running ERP software.