Odoo Chatter is one of the most useful features in Odoo for tracking changes users make to a record. The tracking feature can be enabled for a field in a model by adding the attribute tracking=True to the field definition. This will automatically log any changes made to that field and will show those changes in the chatter section of the record. The tracking feature will log details such as who modified the field, when the modification was done, and the old and new value of the field which will help users to keep track of any changes made in a record.
However, like all other normal field types such as Many2One, Char, Date, or Selection, the tracking feature does not work for One2Many fields by default. Odoo will not show the changes made to a One2many record in the chatter.
In this blog, we will explore how to implement custom tracking for One2many fields in Odoo 19.
Let's consider a custom model called Delivery Schedule. This model helps users to create and manage delivery schedules for a Sales Order. Every delivery schedule has information, like the delivery date, location, quantity, and remarks.
from odoo import fields, models

class SaleDeliverySchedule(models.Model):
   _name = "sale.delivery.schedule"
   _description = "Sale Delivery Schedule"
   order_id = fields.Many2one("sale.order", ondelete="cascade")
   delivery_date = fields.Date(required=True)
   location = fields.Char()
   quantity = fields.Float()
   remarks = fields.Char()
This model is linked to the Sale Order model through a One2many relationship
class SaleOrder(models.Model):
   _inherit = "sale.order"
   delivery_schedule_ids = fields.One2many(
       "sale.delivery.schedule",
       "order_id",
       string="Delivery Schedule",
   )
<?xml version='1.0' encoding='utf-8'?>
<odoo>
   <record id="view_sale_order_form_delivery_schedule" model="ir.ui.view">
       <field name="name">sale.order.form.delivery.schedule</field>
       <field name="model">sale.order</field>
       <field name="inherit_id" ref="sale.view_order_form"/>
       <field name="arch" type="xml">
           <xpath expr="//page[@name='order_lines']" position="after">
               <page string="Delivery Schedule">
                   <field name="delivery_schedule_ids">
                       <list editable="bottom">
                           <field name="delivery_date"/>
                           <field name="location"/>
                           <field name="quantity"/>
                           <field name="remarks"/>
                       </list>
                   </field>
               </page>
           </xpath>
       </field>
   </record>
</odoo>
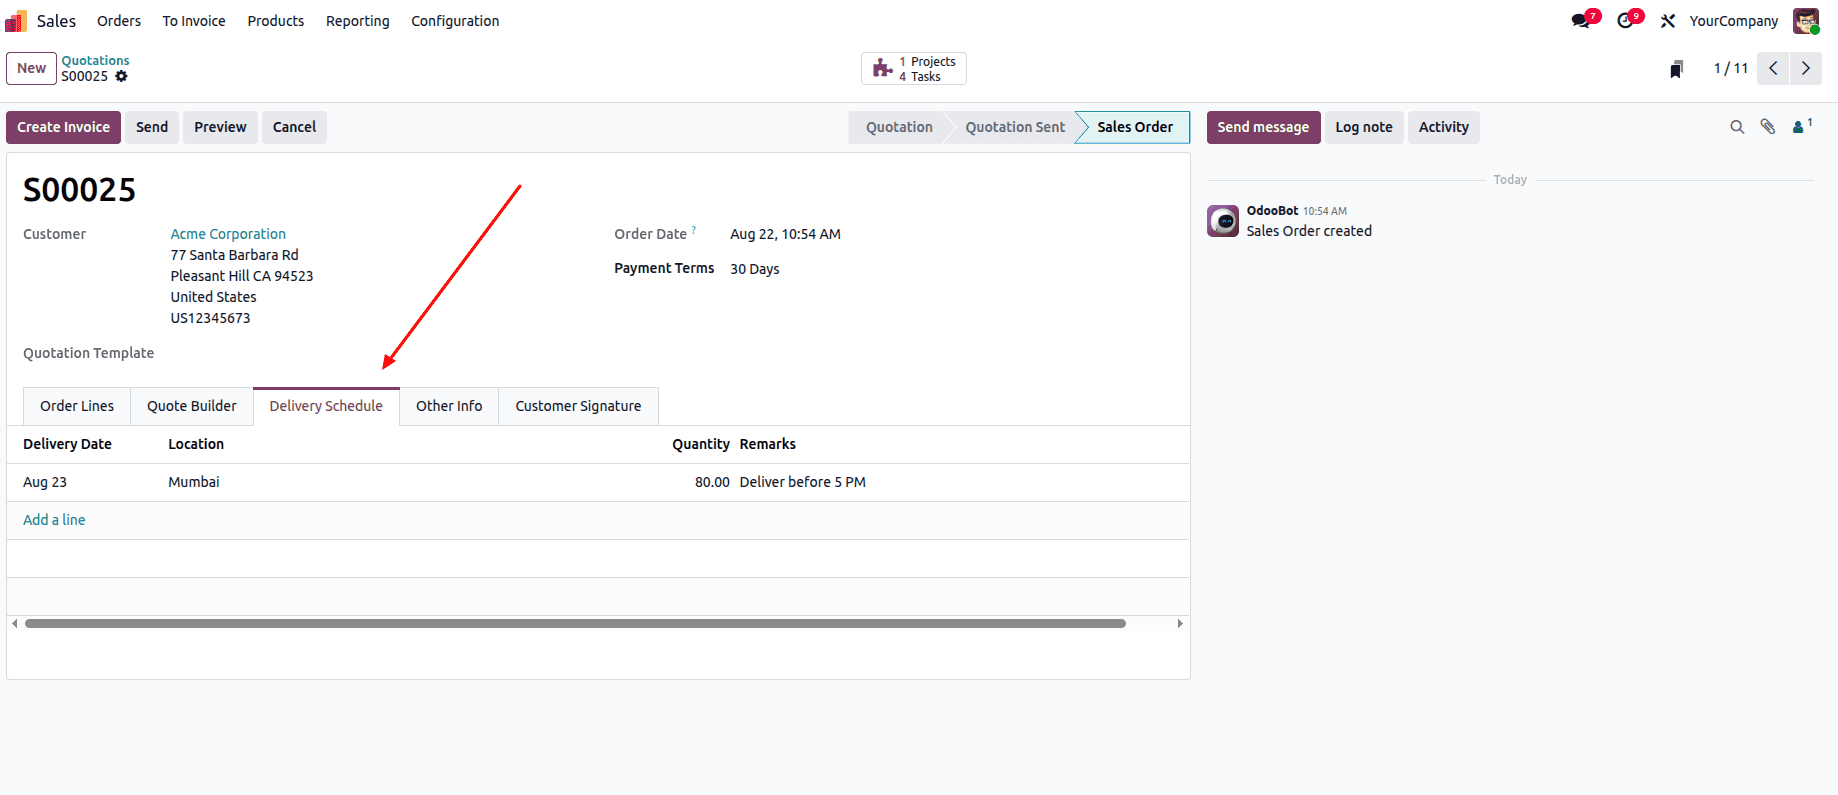
However, if you modify a delivery schedule, for example by changing the quantity, updating the delivery location, or deleting an existing schedule, no log message appears in the Sales Order chatter. In the following sections, we will implement a custom solution that detects these changes and records them in the chatter whenever the delivery_schedule_ids field is updated.
1. Track modifications using write()
When a delivery schedule is changed, Odoo calls write(). By using write(), we can compare values to new values and create a tracking message for every field that changes.
def write(self, vals):
   for record in self:
       message = ""
       if "delivery_date" in vals:
           message += record._create_tracking_message(
               record.delivery_date,
               vals["delivery_date"],
               "Delivery Date"
           )
       if "location" in vals:
           message += record._create_tracking_message(
               record.location,
               vals["location"],
               "Delivery Location"
           )
       if "quantity" in vals:
           message += record._create_tracking_message(
               record.quantity,
               vals["quantity"],
               "Quantity"
           )
       if "remarks" in vals:
           message += record._create_tracking_message(
               record.remarks,
               vals["remarks"],
               "Remarks"
           )
       res = super(SaleDeliverySchedule, record).write(vals)
       if message and record.order_id:
           record.order_id.message_post(body=message)
   return res
2. Creating a Tracking Message
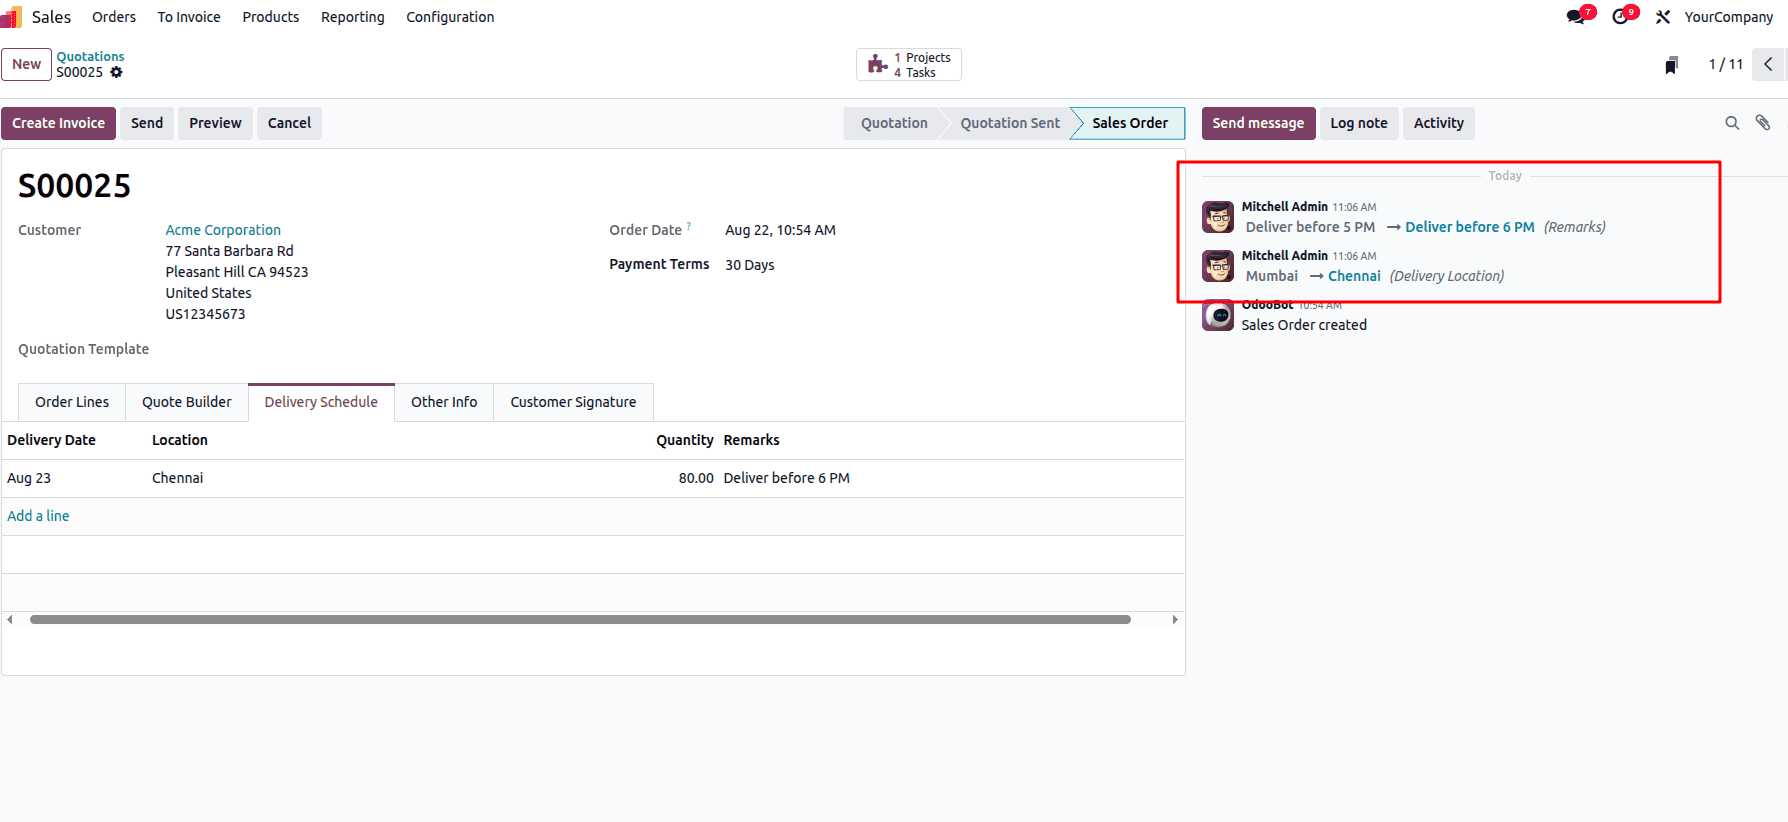
The _create_tracking_message() is a helper method that creates the HTML structure used to show field changes in the Sale Order chatter. It will consider the old value, new value, and the field name as arguments.
Then it formats these into a tracking message that shows the change from the previous value to the updated value.
def _create_tracking_message(self, old_value, new_value, field_name):
   """ Generate chatter message for field changes."""
   return Markup("""
       <ul class="o_Message_trackingValues mb-0" style="list-style: none; padding-left: 0;">
           <li>
               <div class="o_TrackingValue d-flex align-items-center flex-wrap mb-1">
                   <span class="o_TrackingValue_oldValue me-1 px-1 text-muted fw-bold">%s</span>
                   <i class="fa fa-long-arrow-right mx-1 text-600"></i>
                   <span class="o_TrackingValue_newValue me-1 fw-bold text-info">%s</span>
                   <span class="o_TrackingValue_fieldName ms-1 fst-italic text-muted">(%s)</span>
               </div>
           </li>
       </ul>
   """) % (old_value, new_value, field_name)
3. Tracking Deleted Delivery Schedules
def unlink(self):
   for record in self:
       if record.order_id:
           message = Markup("""
               <div class="o_Message_trackingValues">
                   <div class="o_TrackingValue d-flex align-items-center flex-wrap mb-1">
                       <span class="fw-bold text-danger me-1">
                           Delivery Schedule Removed
                       </span>
                   </div>
                   <div class="ms-2">
                       <span class="text-muted">Delivery Date:</span>
                       <span class="fw-bold">%s</span>
                   </div>
                   <div class="ms-2">
                       <span class="text-muted">Delivery Location:</span>
                       <span class="fw-bold">%s</span>
                   </div>
                   <div class="ms-2">
                       <span class="text-muted">Quantity:</span>
                       <span class="fw-bold">%s</span>
                   </div>
                   <div class="ms-2">
                       <span class="text-muted">Remarks:</span>
                       <span class="fw-bold">%s</span>
                   </div>
               </div>
           """) % (
               escape(record.delivery_date or "-"),
               escape(record.location or "-"),
               escape(record.quantity or "-"),
               escape(record.remarks or "-"),
           )
           record.order_id.message_post(body=message)
   return super().unlink()
Similarly, we can track any One2many fields by overriding write() and unlink() methods for related models and then displaying those logs in the chatter of the parent record. This way, all important changes to One2many records would be easily visible and available for tracking and auditing purposes.
To read more about An Overview of Relational Fields in Odoo 19, refer to our blog An Overview of Relational Fields in Odoo 19.