Odoo the Open ERP provides a repair module that integrally works with manufacture and inventory modules. While manufacturing or due to long time storage of products in warehouses, there may be some sort of tear and wear is identified. Some of them may have a warranty, so the components having damage can be repaired or replaced.
Repair is not only for the customers who bought the product. Customers will be happy and satisfied when the damage is fixed on an immediate basis. This will lead the customer interest towards the producer and hence increase the trust and worth of business.
Repair module is one of the most resilient modules under Odoo which triggers works of broken or damaged products to be fixed or redesigned. The module takes details of the product that was damaged and tracks it throughout the repair stages. This highlights the functionality of the repair module.
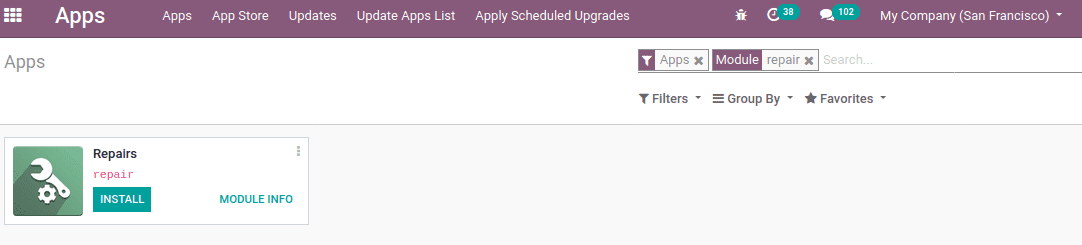
Initially, install the Repair module from Odoo Apps.
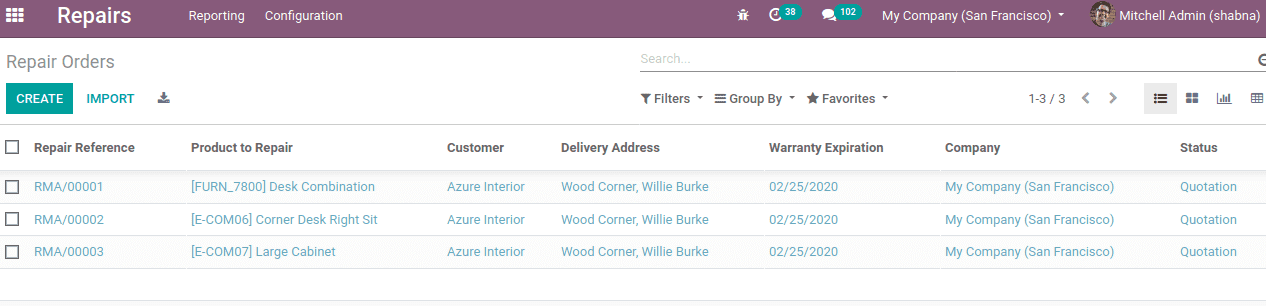
Completing the installation, go to the Repair module. There you can find the repair order of products for which damage is already reported. You can access the existing repair orders and create new repair orders from here itself.
Create and manage the repair
When a customer reported damage over a product and he needs to repair it. So firstly create a repair order by clicking CREATE. Under the repair order, the repair reference field will be automatically filled.
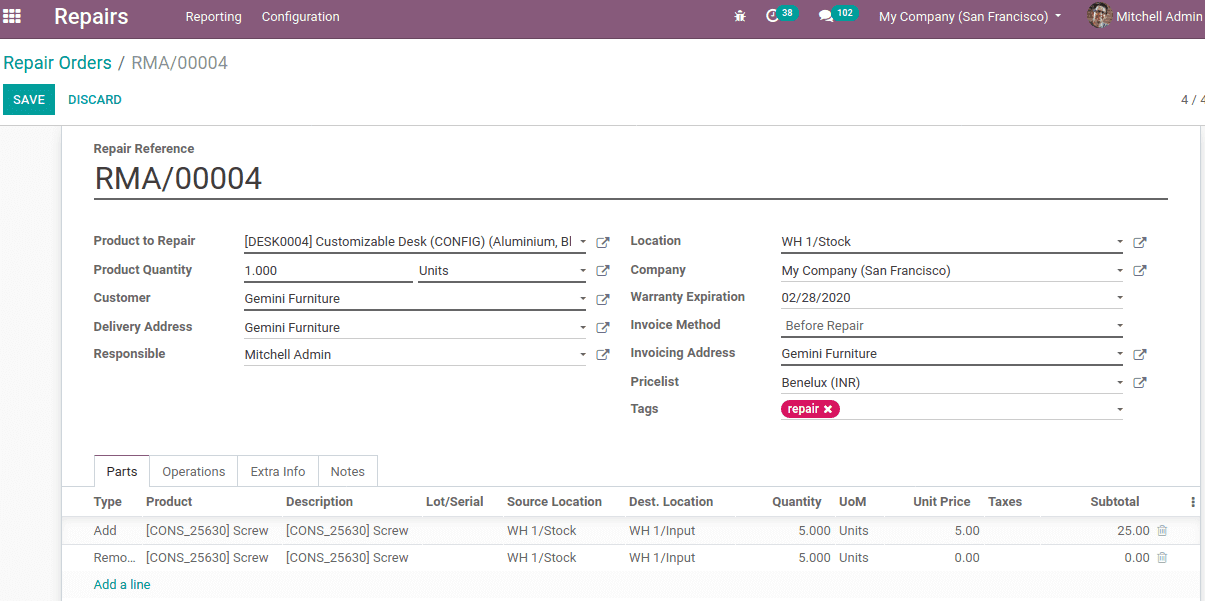
We have to add details like the product we want to repair, its quantity, customer who reported the damage, the responsible person for this repair, invoicing method, location of the product, delivery address, invoicing address if the invoice is needed, warranty expiration date, pricelist, etc. Also if a tag is required, you can create a tag by typing tag text and click create and use it.
Under tab ‘Parts’ add details of product parts that want to add and remove in order to fix the damage.
The type specifies the operation type, either add or remove product parts.
Product refers to the product parts which we want to remove and add, in order to fix damage to the product.
Description of the product chosen.
To identify the product Lot/Serial can be used. Lots are used to identify the batch of a product while serial numbers used to identify individual products.
Source Location refers, the current location from where the product parts are taken for reparation
Destination Location refers to the location where the repaired products are moved. For instance, if the product part is removed due to damage it may be dumped at the scrap locations.
Quantity of the product parts used while reparation.
Unit price is the charge for a single amount of the product part.
Taxes refers to the tax imposed on the product.
Subtotal refers to the total price of the added quantity.
Invoicing methods
The invoicing method is based on whether the reparation is charged or not. If repairs need payment, the invoicing methods decide when the invoice needs to be generated. The invoicing method under the repair is categorized as:
1-No invoice
2-Before repair
3-After repair
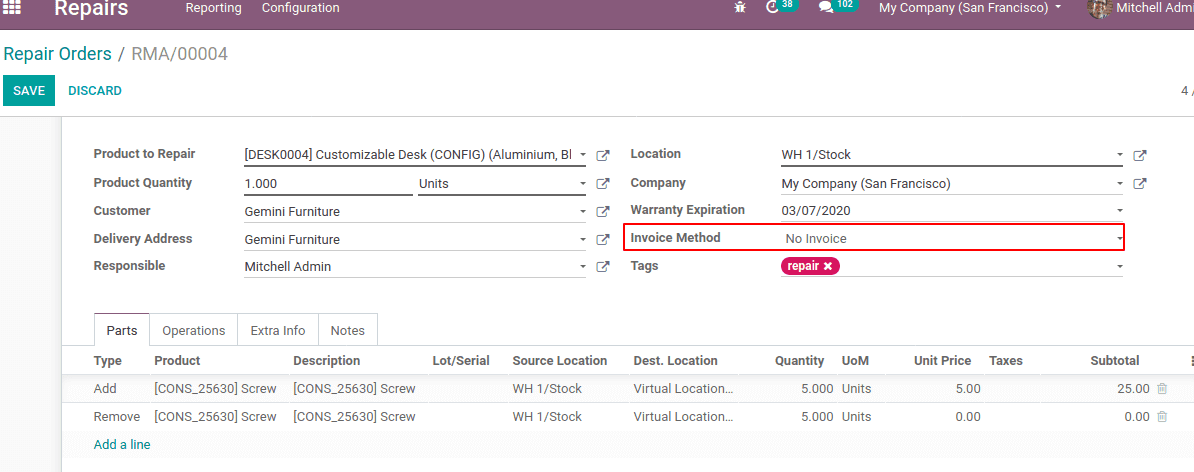
No Invoice
In case of a product possessing a warranty or a free service, it may not require any payment for repair and hence invoice. So invoicing method ‘No invoice’ can be used.
Save and confirm the repair.
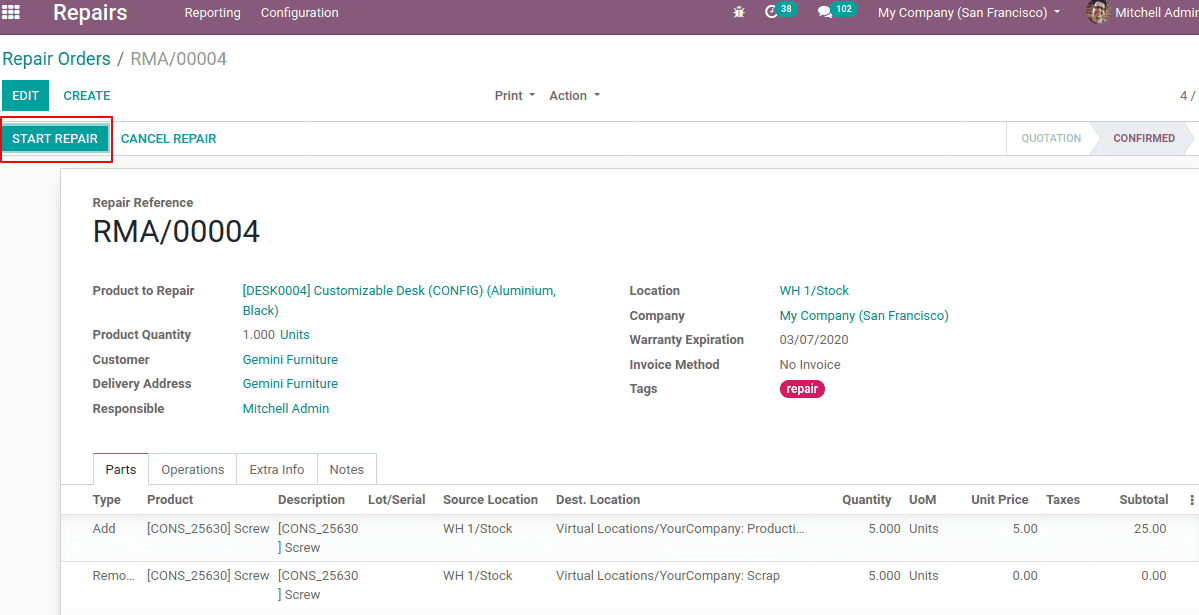
Now click on START REPAIR, so the repair gets started.
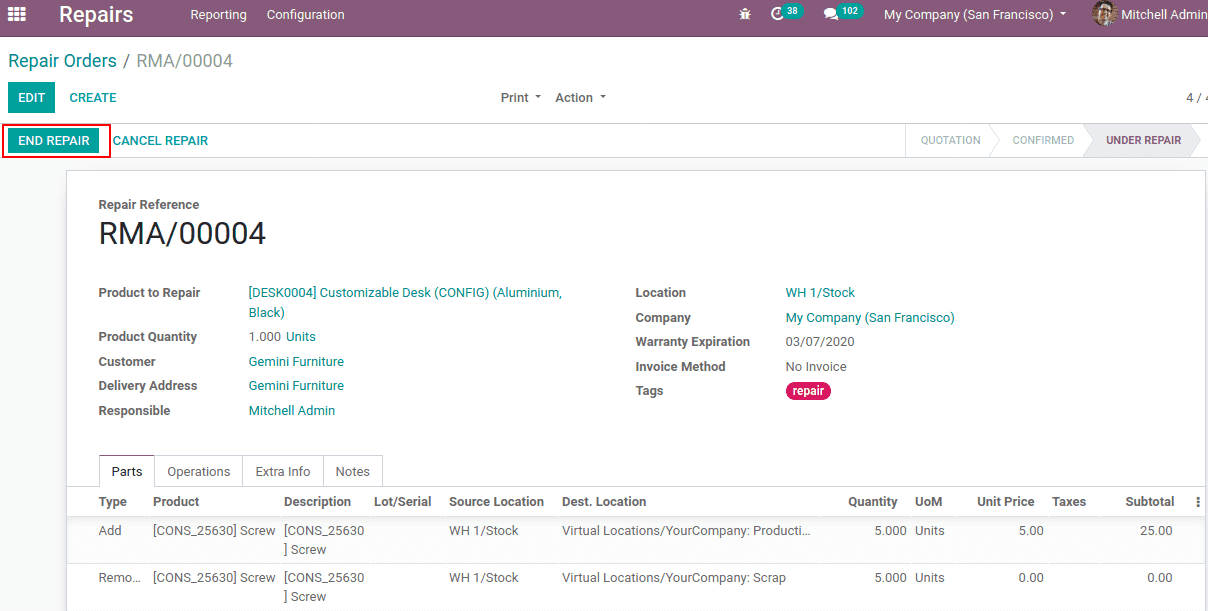
Once repair completed and fixed the damage click on ‘END REPAIR’.
After reparation, the product move can be shown under the ‘Extra Info’ tab. Also one can see ‘repaired’ is automatically enabled.
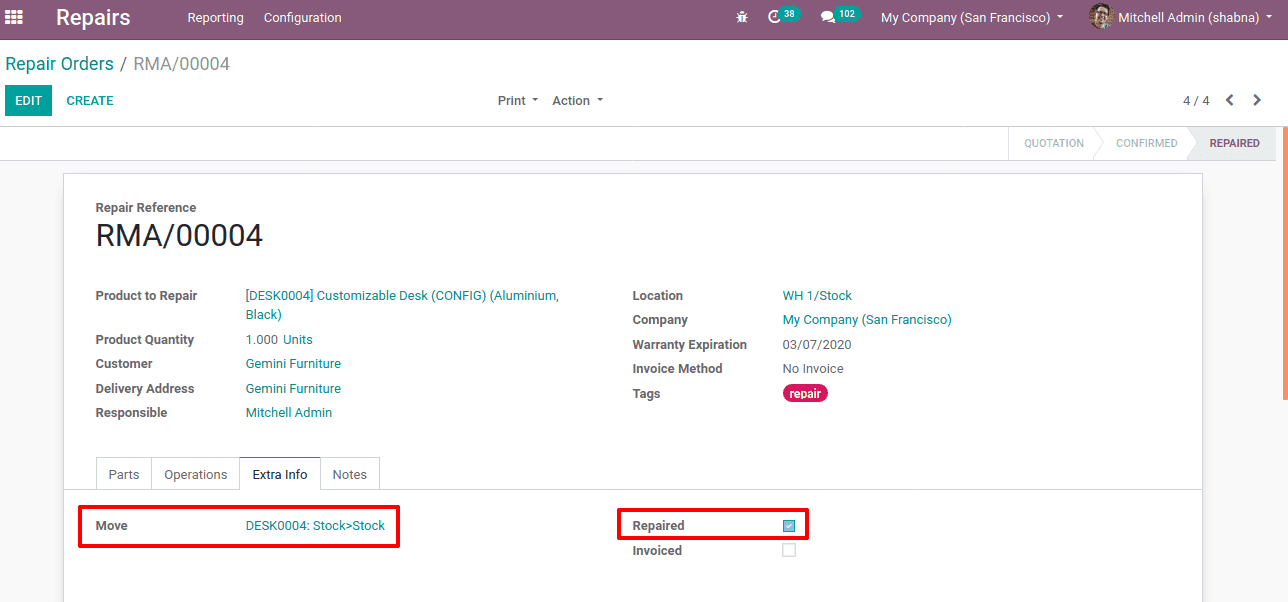
Since for this repair order, the invoicing method is ‘no invoice’, no invoice is generated and under ‘extra info’ tab ‘invoiced’ is disabled automatically.
Before repair
Another invoicing method is ‘Before repair’. In this case, it will generate an invoice for the product part before starting the reparation.
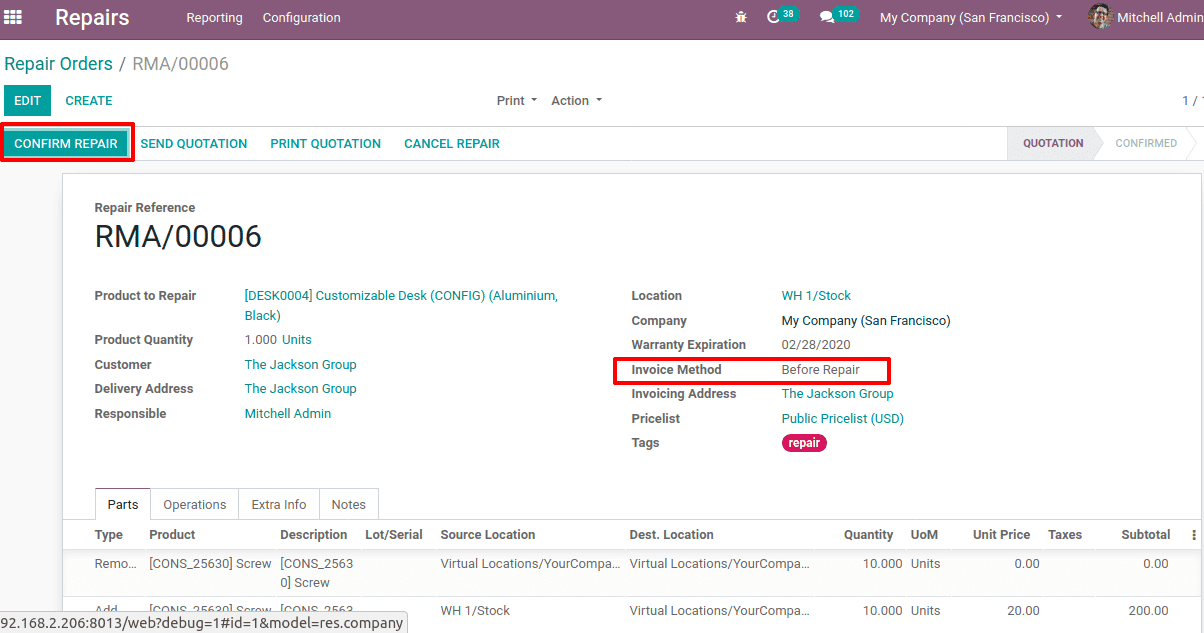
Create a repair order with invoicing policy ‘Before repair’. Also, add an invoicing address for the customer and confirm the repair. Once we click on confirm repair, it navigates to creating invoice and status shown as ‘TO BE INVOICED’.
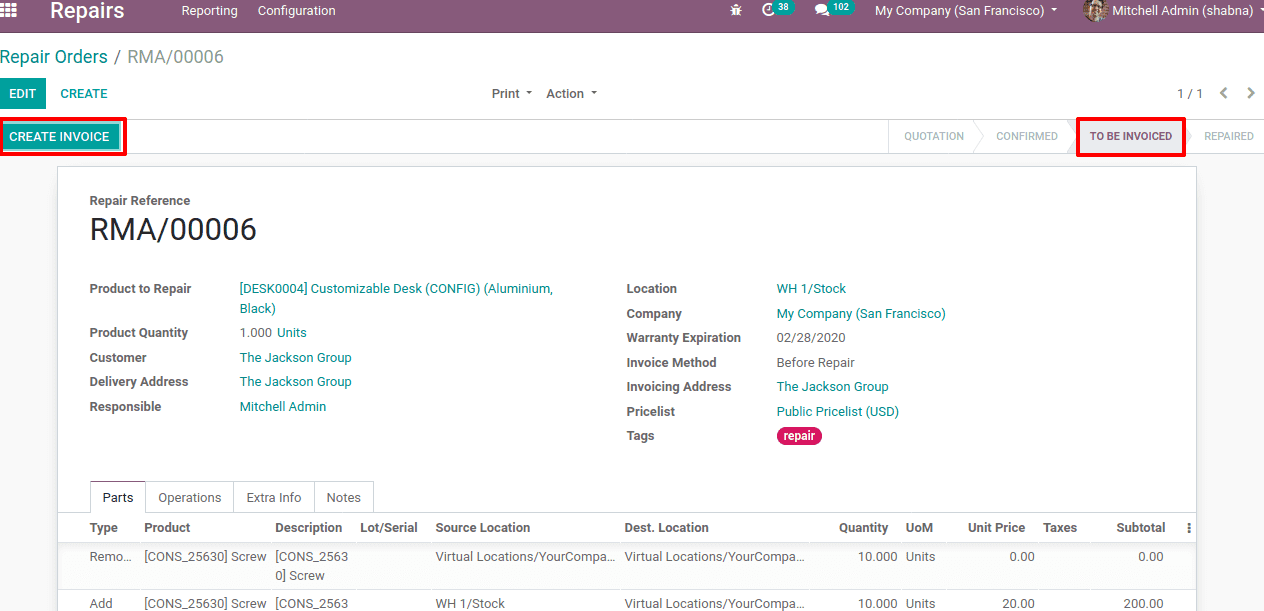
Click on create invoice and thus an invoice is created. You can find a smart tab ‘Invoice’ at the right top corner.
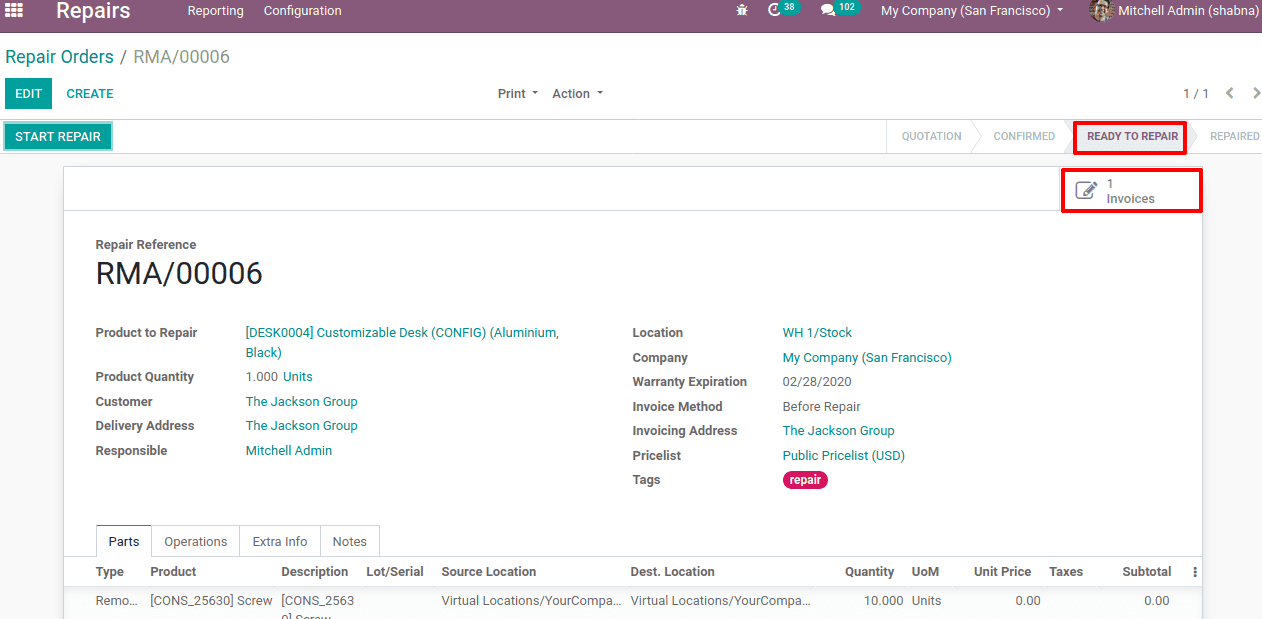
Now the status is ‘READY TO REPAIR’. So in the case of ‘Before repair’ invoicing method, the invoice is created before starting the reparation. At this moment if you are checking extra info tab you can see ‘invoiced’ is enabled automatically.
Now you can start the repair by clicking ‘START REPAIR’. Thus the status correspondingly changed to ‘Under repair’.
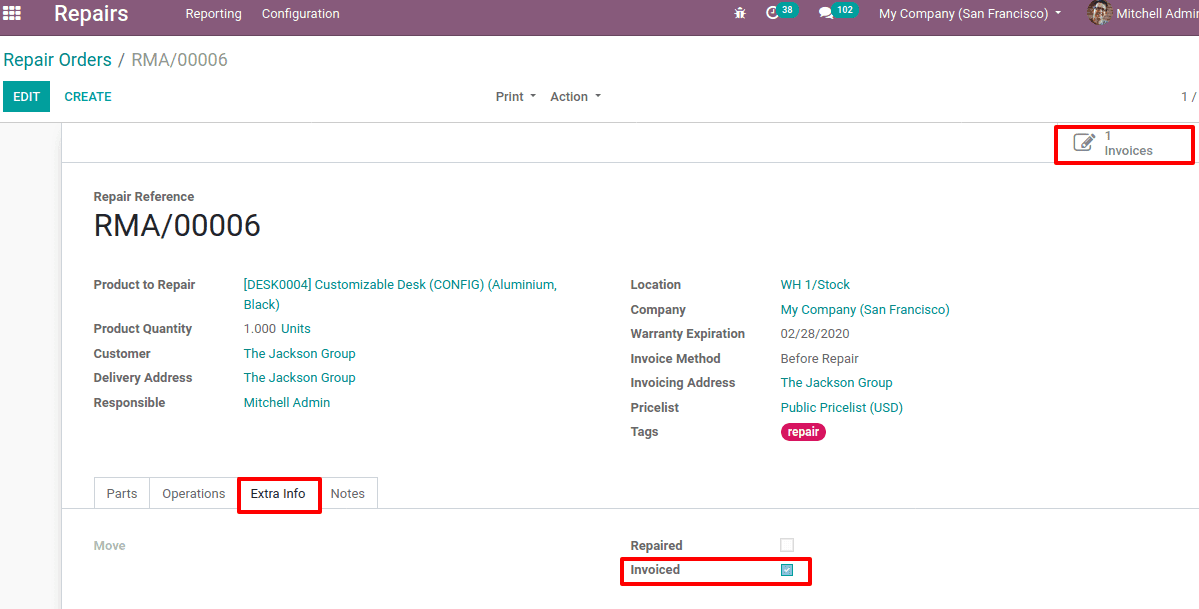
Once the repair is finished, you can click on ‘END REPAIR’. Thus status changed to ‘repaired’. Now check the ‘extra info’ tab, you can view the product moves, ‘repaired’ and ‘invoiced’ are automatically enabled as shown below.

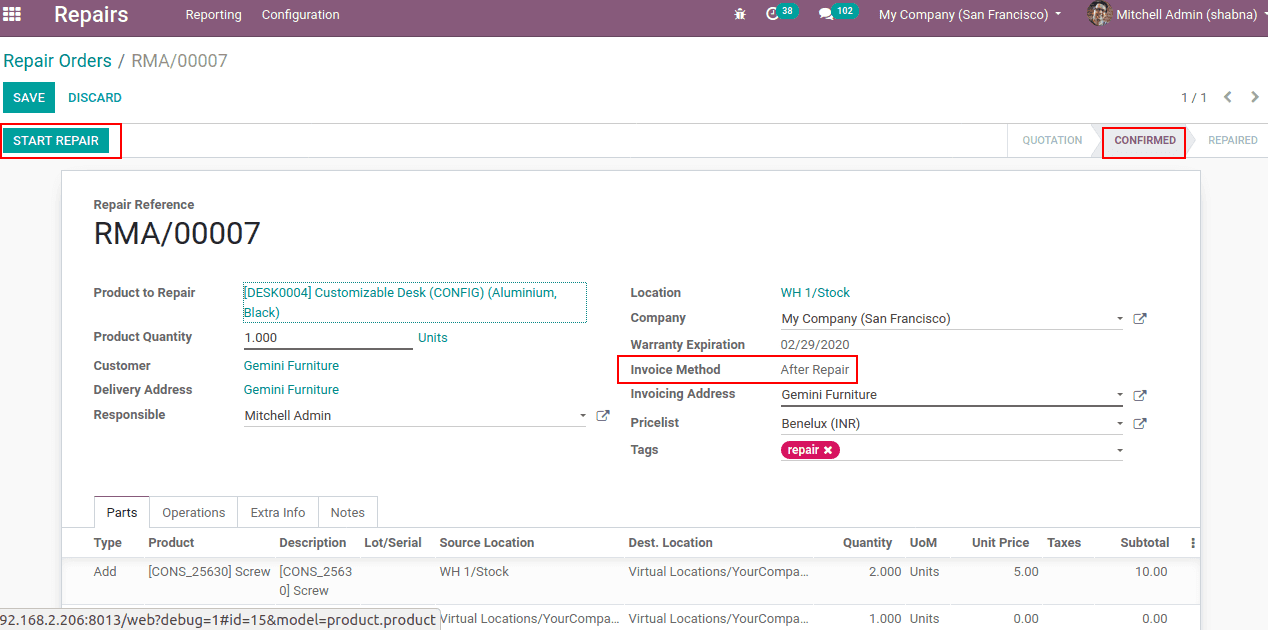
After Repair
The next invoicing method is ‘After repair’. In this case, the invoice for the product parts will be generated after the completion of the repair process. Let’s create a repair order with invoicing method ‘After repair’ and add invoicing address and price list as well. Now confirm the repair request.
In the screenshot below, you can see the details and while you click on ‘START REPAIR’, the reparation gets started. In this case, the invoice will generate on after the repair is completed.
When you click on ‘START REPAIR’ the status changed to ‘under repair’. Once the reparation is successfully completed click on ‘END REPAIR’. So the damage is repaired and hence under ‘extra info’ tab you can find the product move, as well as the ‘repaired’, gets enabled automatically.
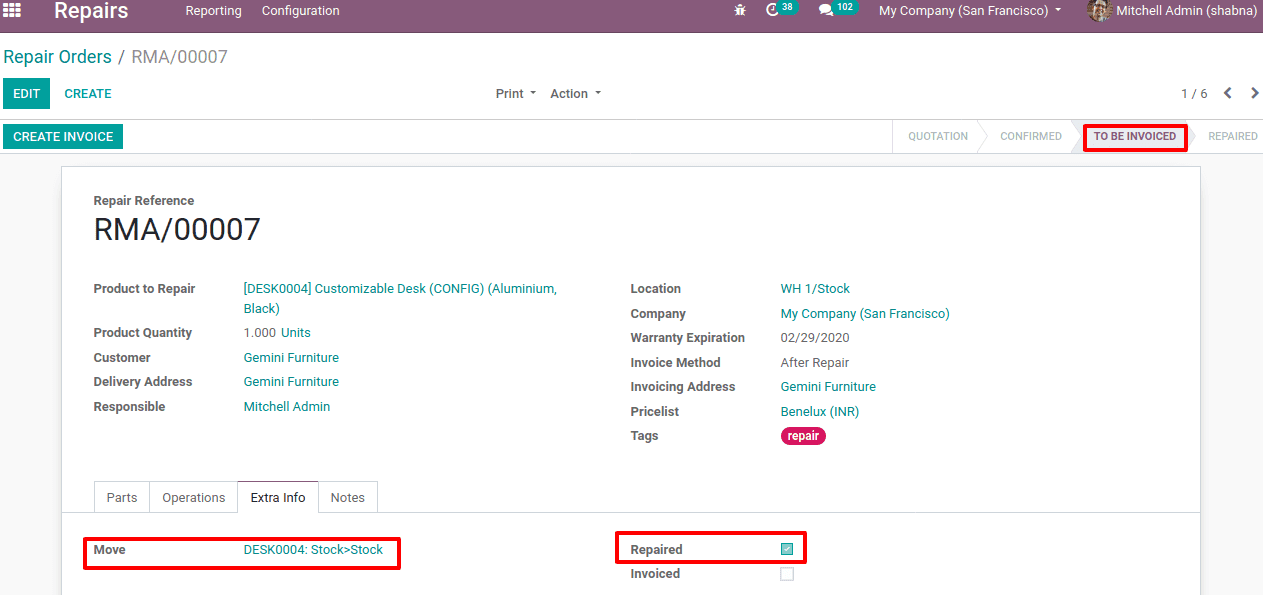
Since reparation completed, now one can see the status as ‘TO BE INVOICED’. That is the invoice is going to generate only after repair. Click on ‘CREATE INVOICE’ to create the invoice.
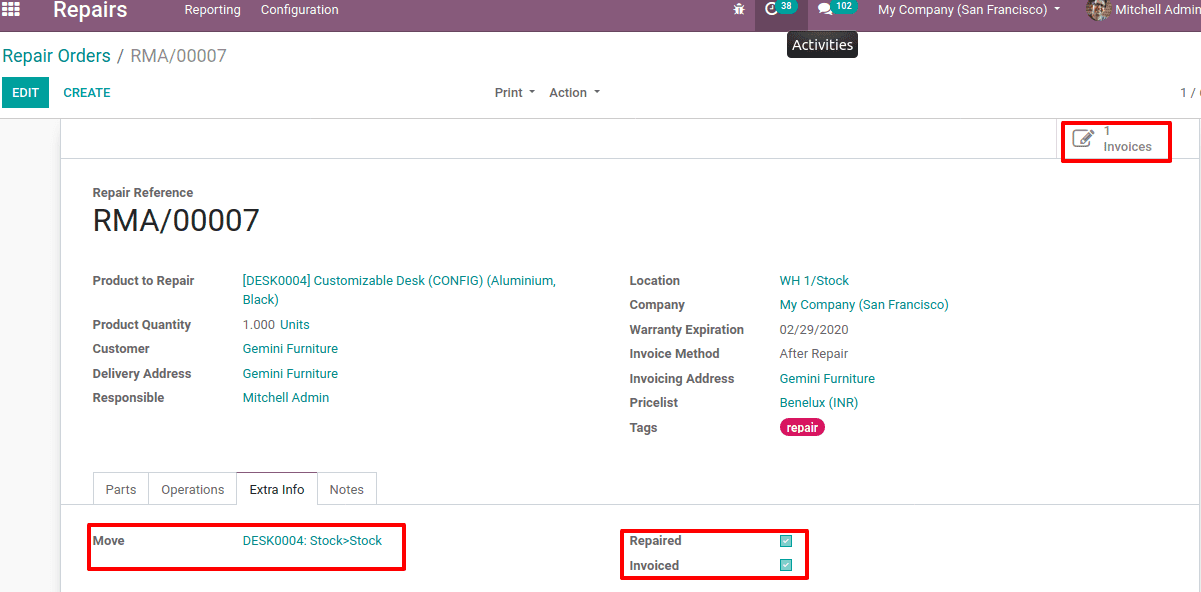
Now you can find the ‘invoiced’ is automatically enabled under the ‘extra info’ tab.
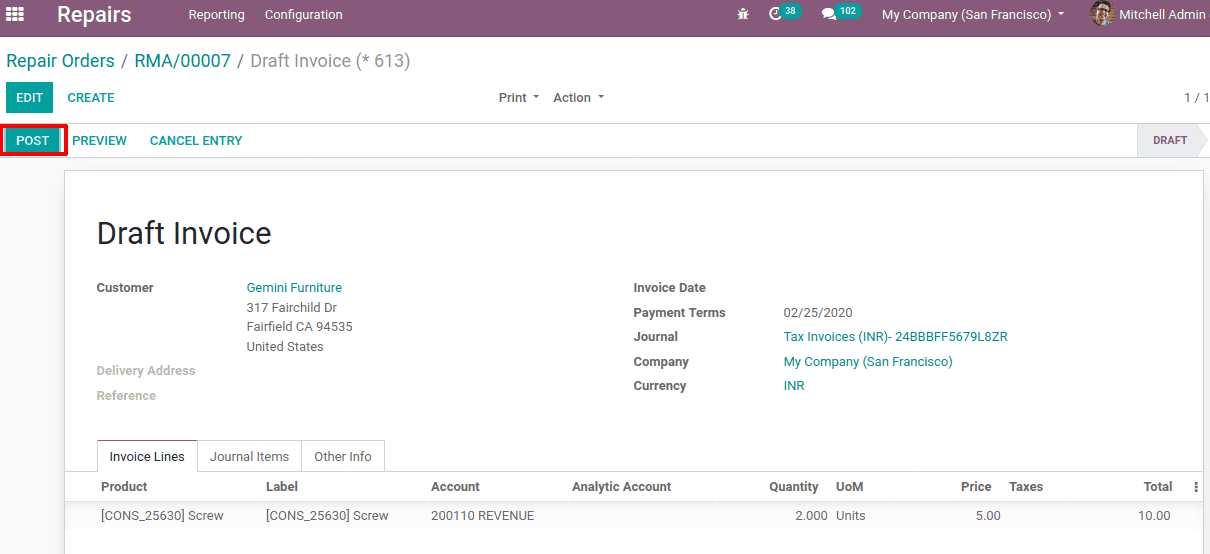
Now you can post the invoice.
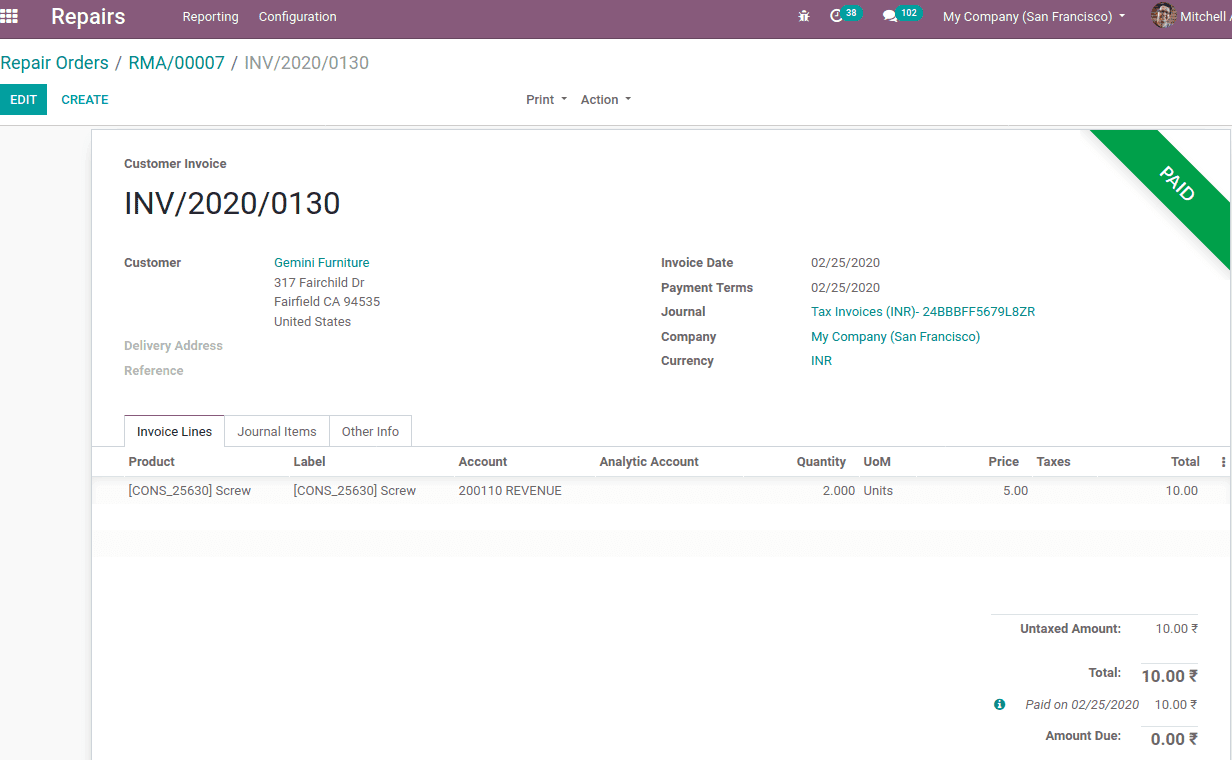
Now register payment for the invoice and validate. So the status of payment changed from posted to paid.
Under the ‘operations’ tab of repair order in the repair module, we can add operations if needed.
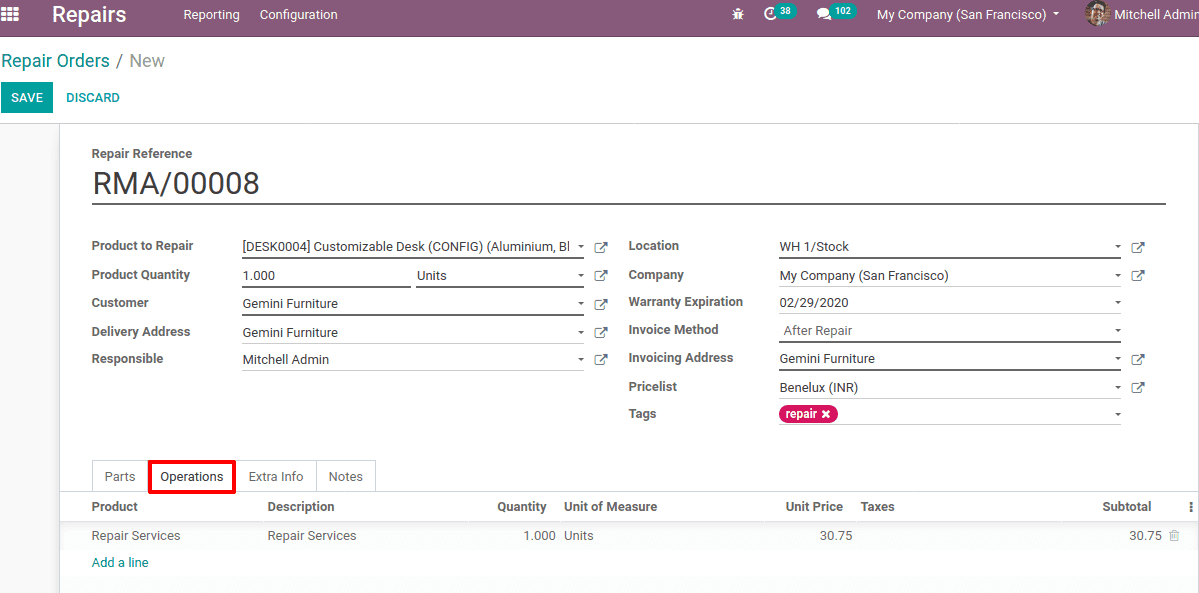
A ‘repair service’ is added to the operations. So the invoice amount for the service product is added up with the product parts price.
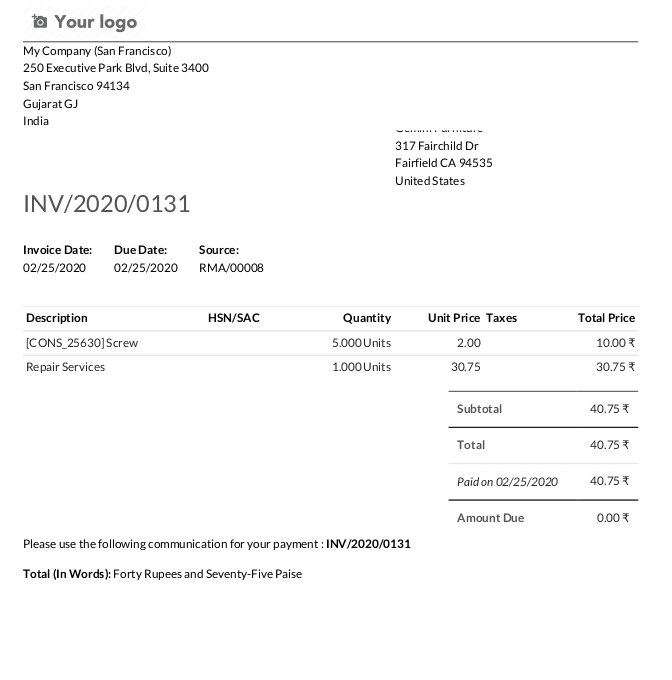
Here you can find the subtotal amount is the cumulative sum of the product part price and repair service, the operation.
This is how the repair module in Odoo 13 creates a repair order and manages them.