The Appointment module in Odoo 18 is a powerful tool for managing and automating schedules in a variety of businesses, with a focus on healthcare services including clinics, hospitals, and private practices. It offers a very user-friendly interface that allows users to make an online appointment with a doctor based on their availability in real-time, eliminating the need for a manual process. In addition to making it easier for people to schedule appointments, this module makes sure that physicians, administrative personnel, and receptionists have a shared view of all the scheduled consultations. For a clinic to run smoothly, it can set up time, slots, appointment durations, buffer times between appointments, and cancellation rules. This blog shows how to set up an appointment for a doctor’s consultation with Odoo 18 Appointment, Website, Calendar and Contacts modules.
Create a New Appointment Type:
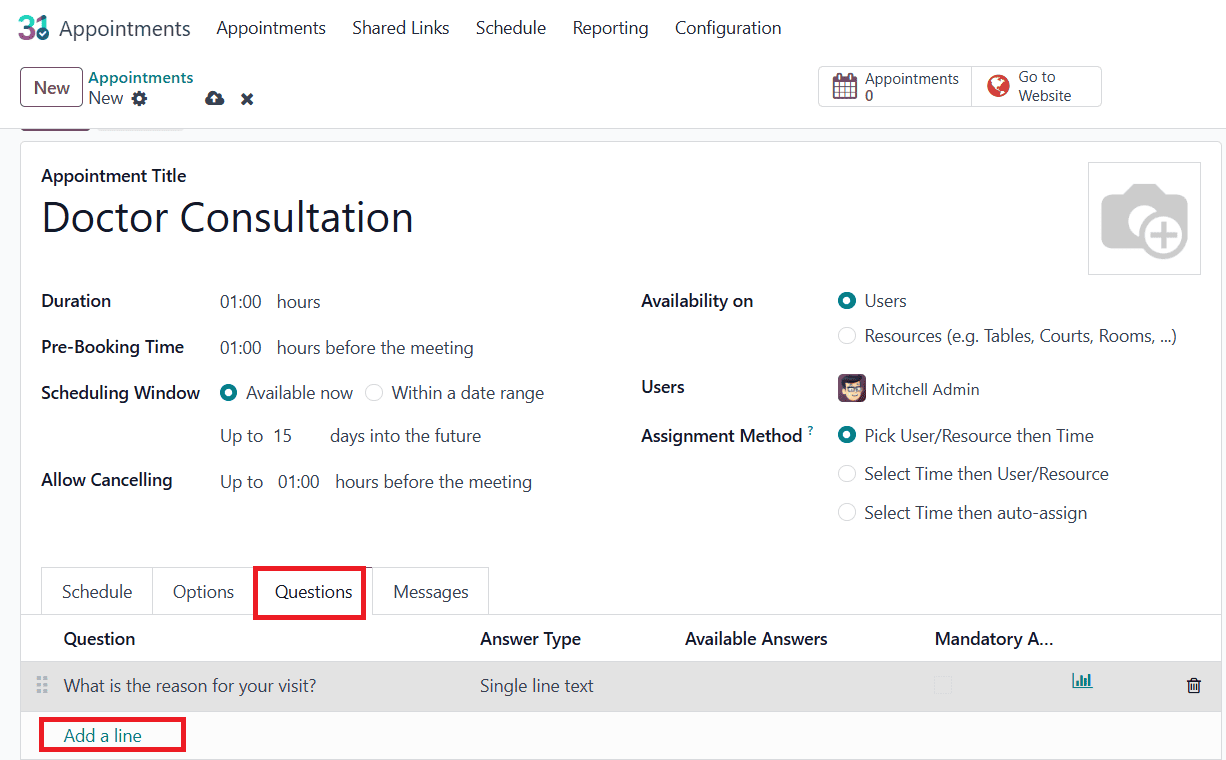
To create a new doctor’s appointment type, go to the Appointment module and then click on the New button, where you can give an Appointment Title as Doctor Consultation. Set the Duration time for how long the appointment will last. Fill the Pre-Booking Time, where people are allowed to book before the appointment. And also set a Schedule Window and Allow Cancellation.
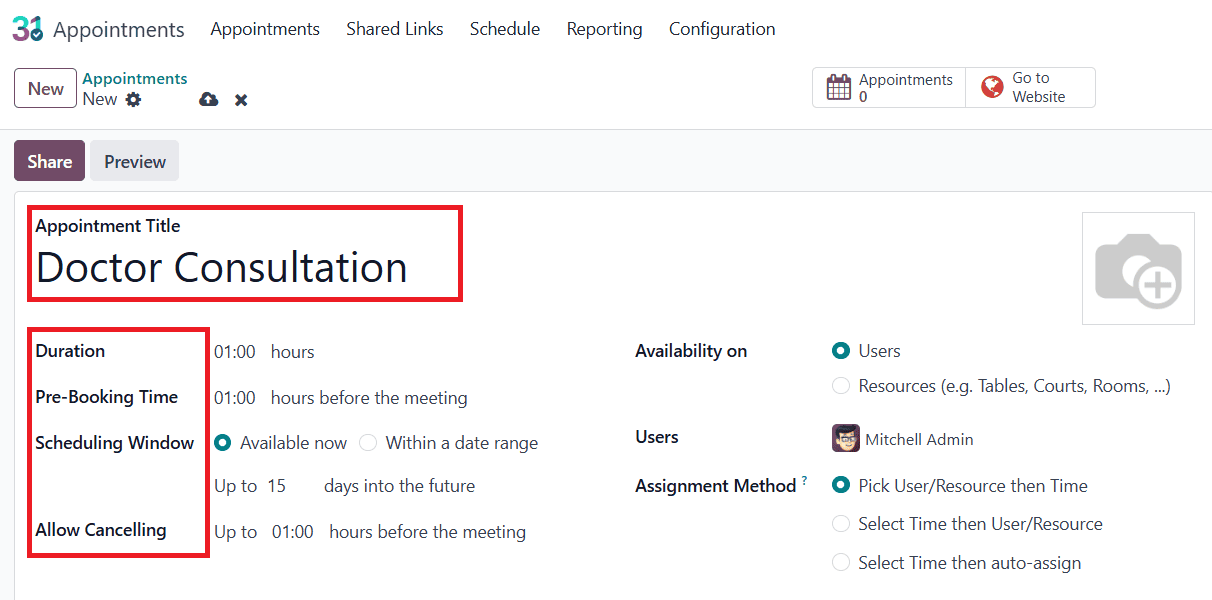
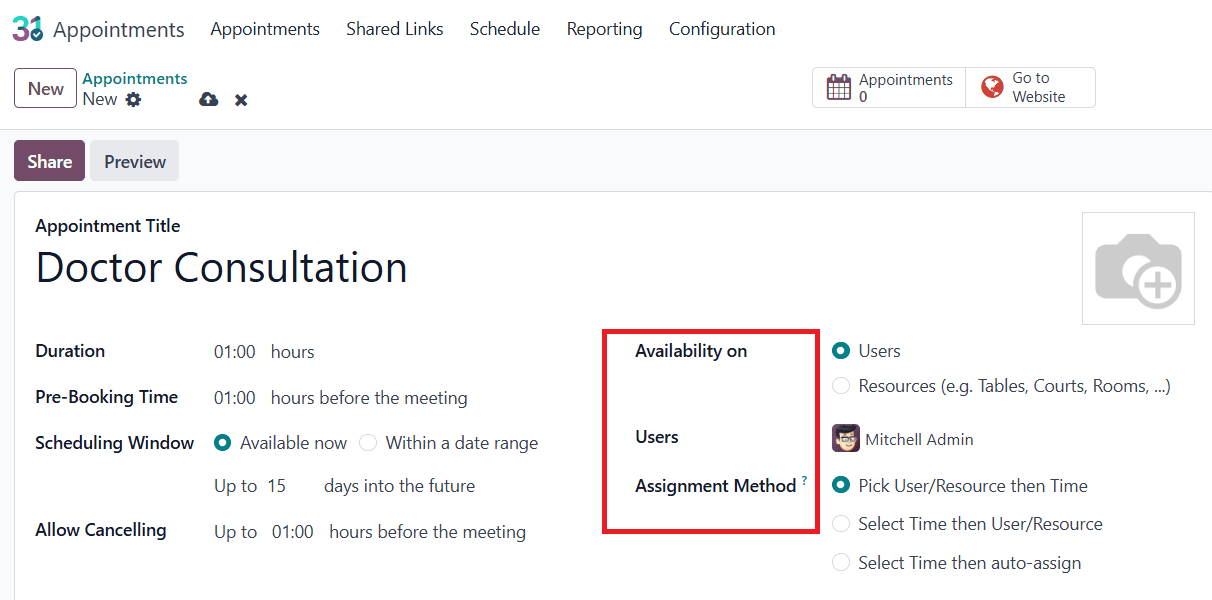
Choose Availability On as Users because doctors are system users. Then select the Assignment Method as Pick User/Resource then time, where patients first choose users(doctor), then time.
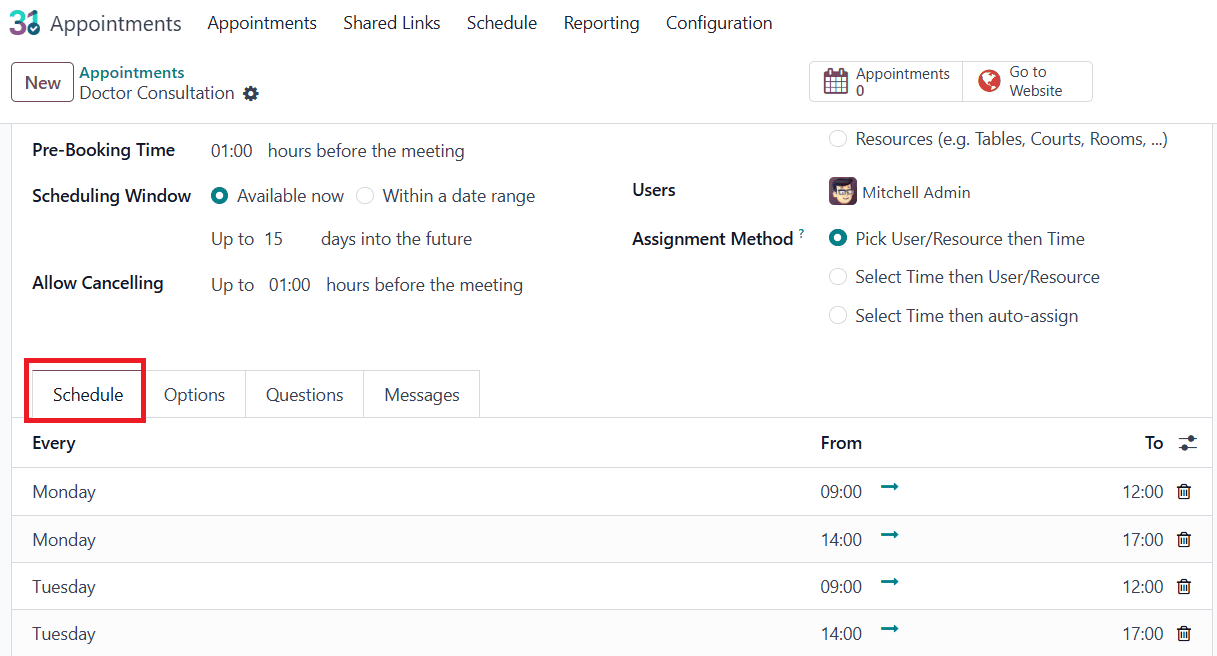
In the Schedule tab, set the doctor’s available days with working hours
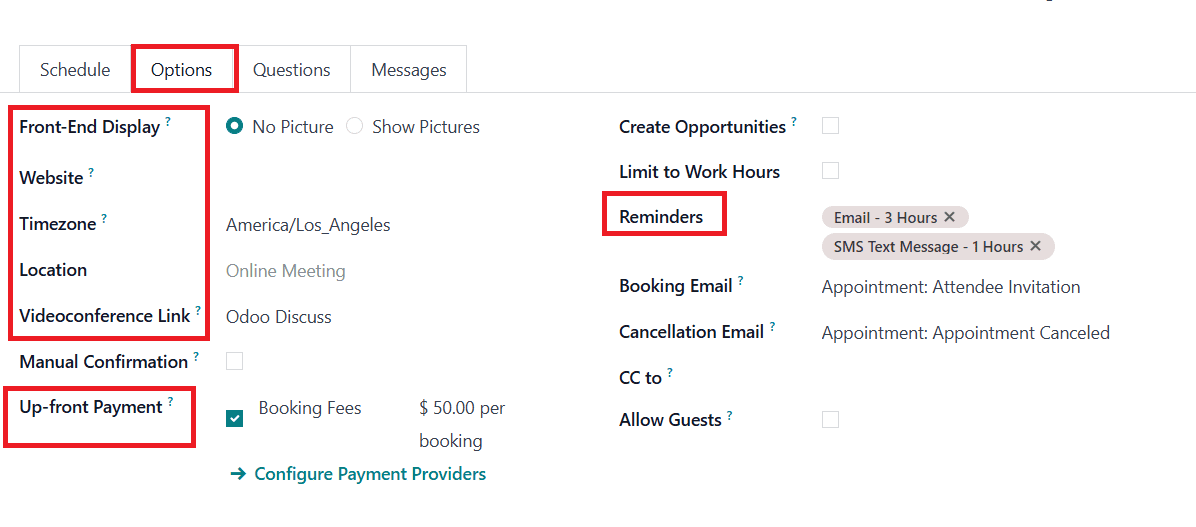
In the Option tab, Front-End Display helps to choose whether to show pictures of the doctor or not on the appointment page. Users can also show Website, Timezone and Location details, and also can add Videoconference Link if there is any. The Reminders helps to set up automated reminders via email or SMS. Up-front Payment helps to charge an amount for booking
In the Question tab, click on Add a line to ask questions to patients about their appointment
In the Messages tab, users can add confirmation or cancellation messages

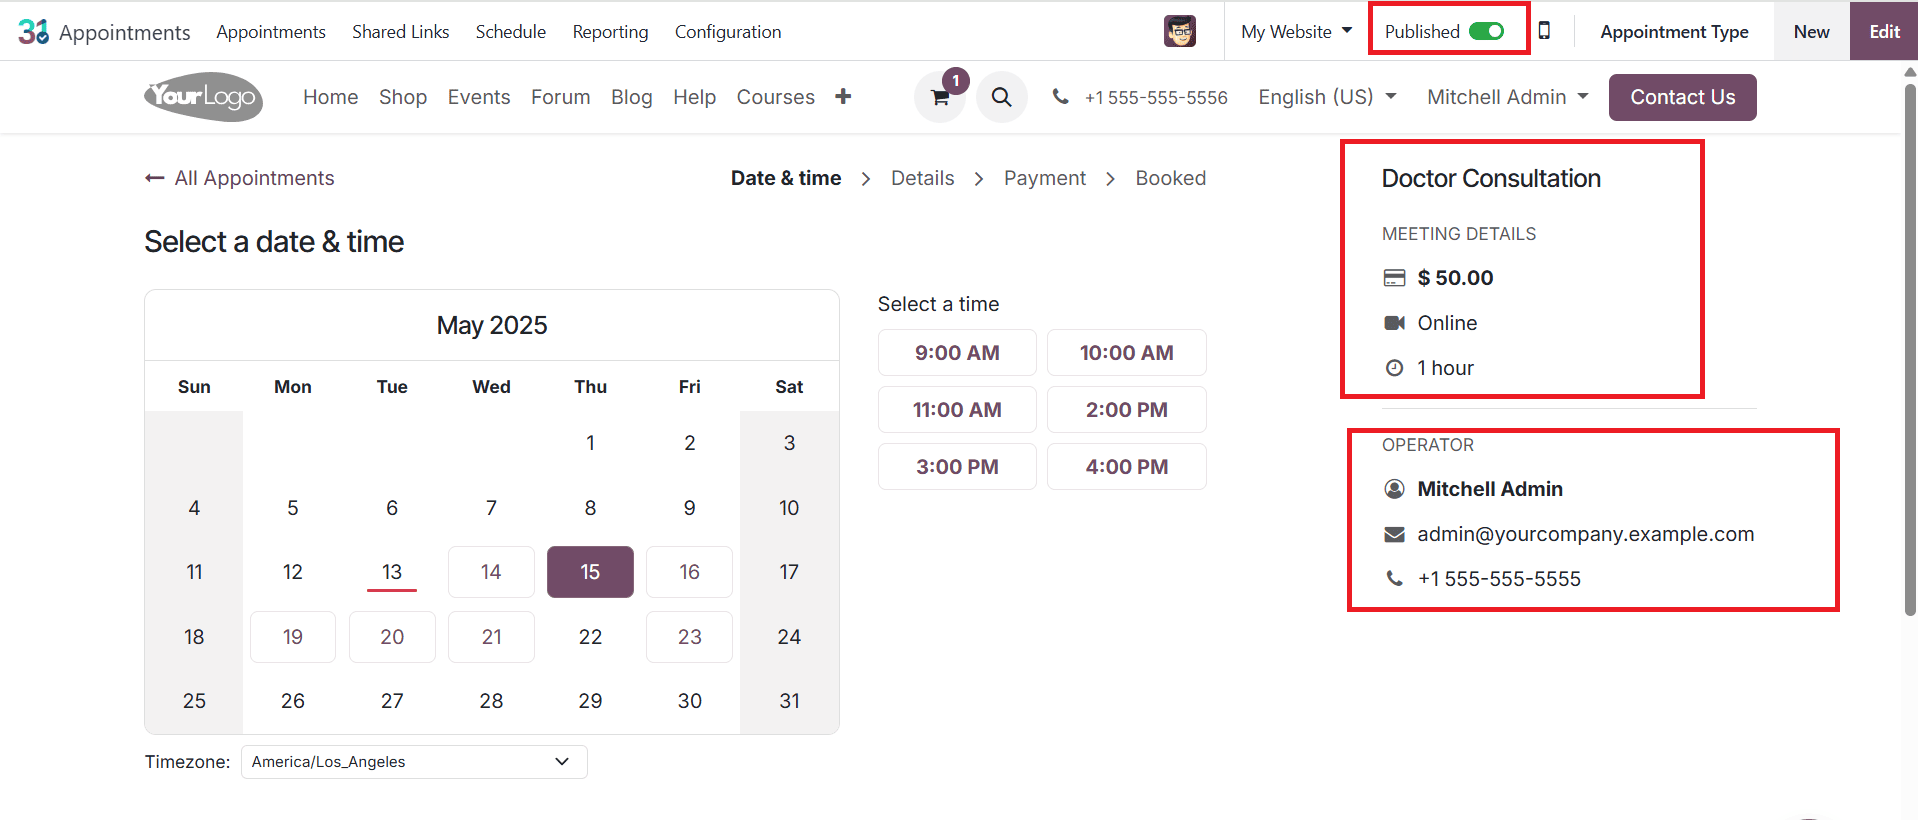
Click on the Go to Website icon and enable Published to publish the appointment. The doctor consultation details and doctor’s details can be seen in the right side of the screen. Then you can select date and time as shown below:
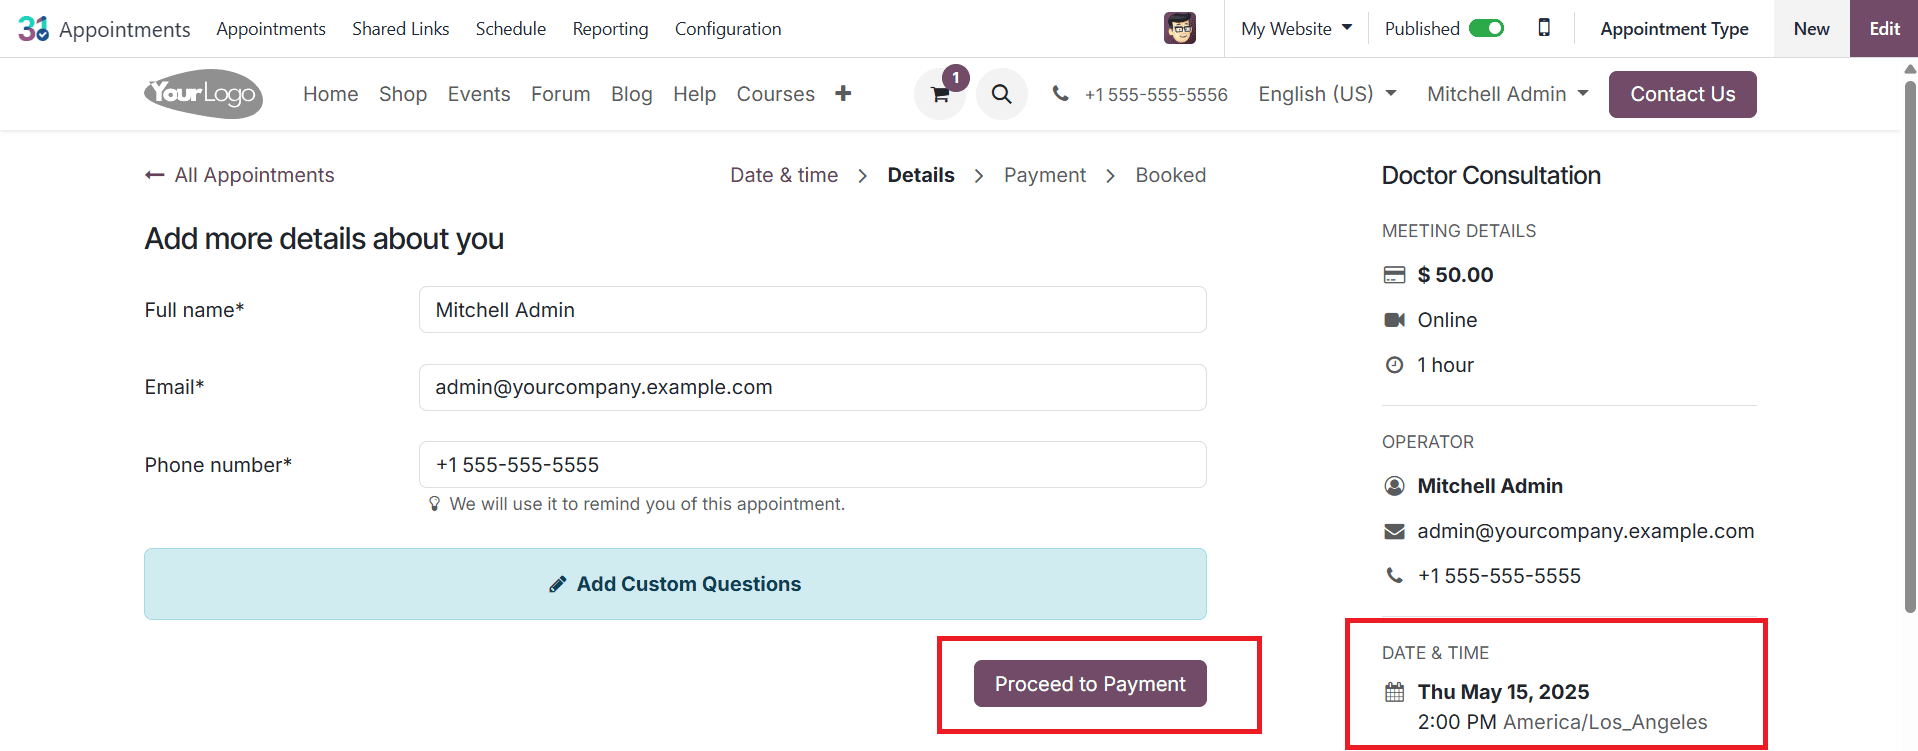
Then you can check the doctor’s details and can add custom questions. The right side of the screen shows the scheduled date and time. Then click on Proceed to Payment as shown below:
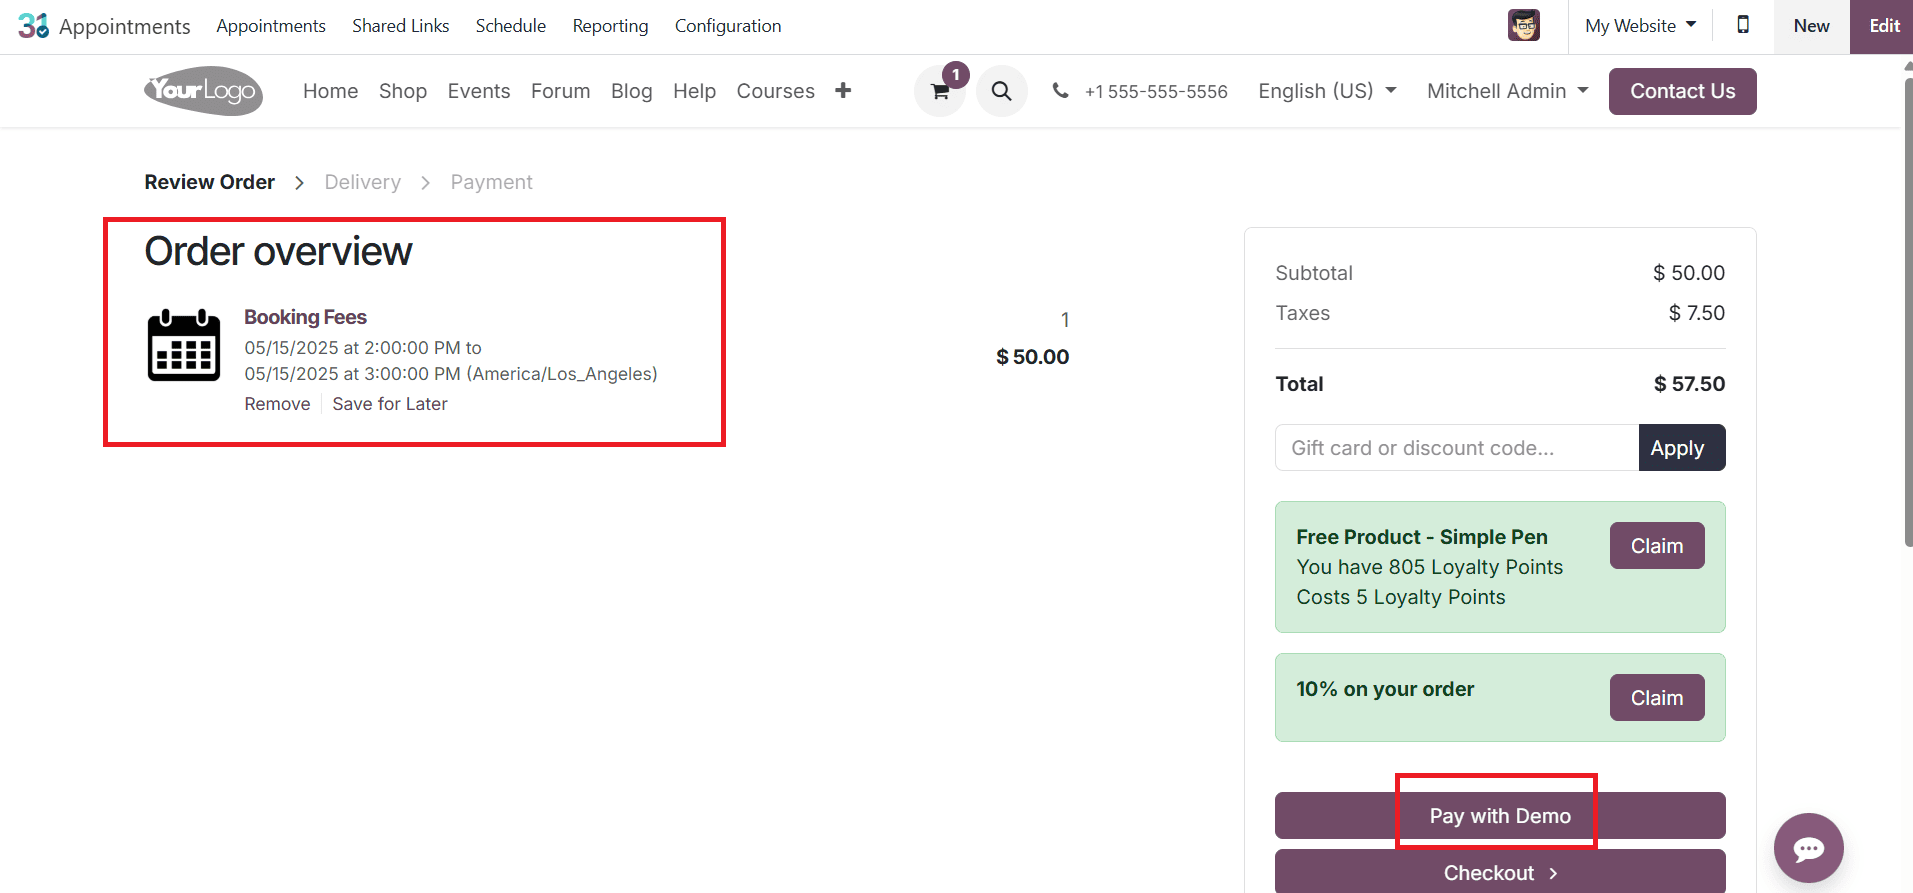
Order overview details can be seen on the screen. For Payment click on the Pay with Demo as shown below:
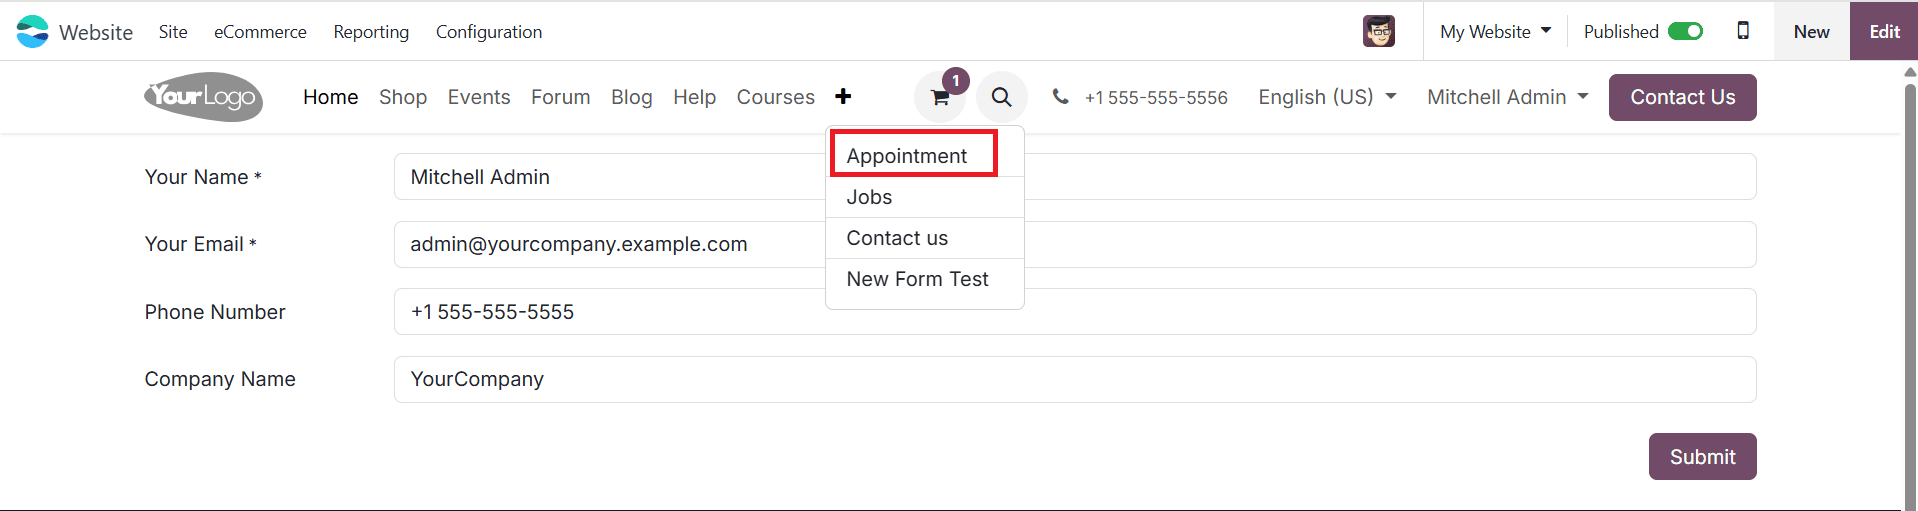
After payment confirmation go to Website module, click on + and select Appointment as shown below:
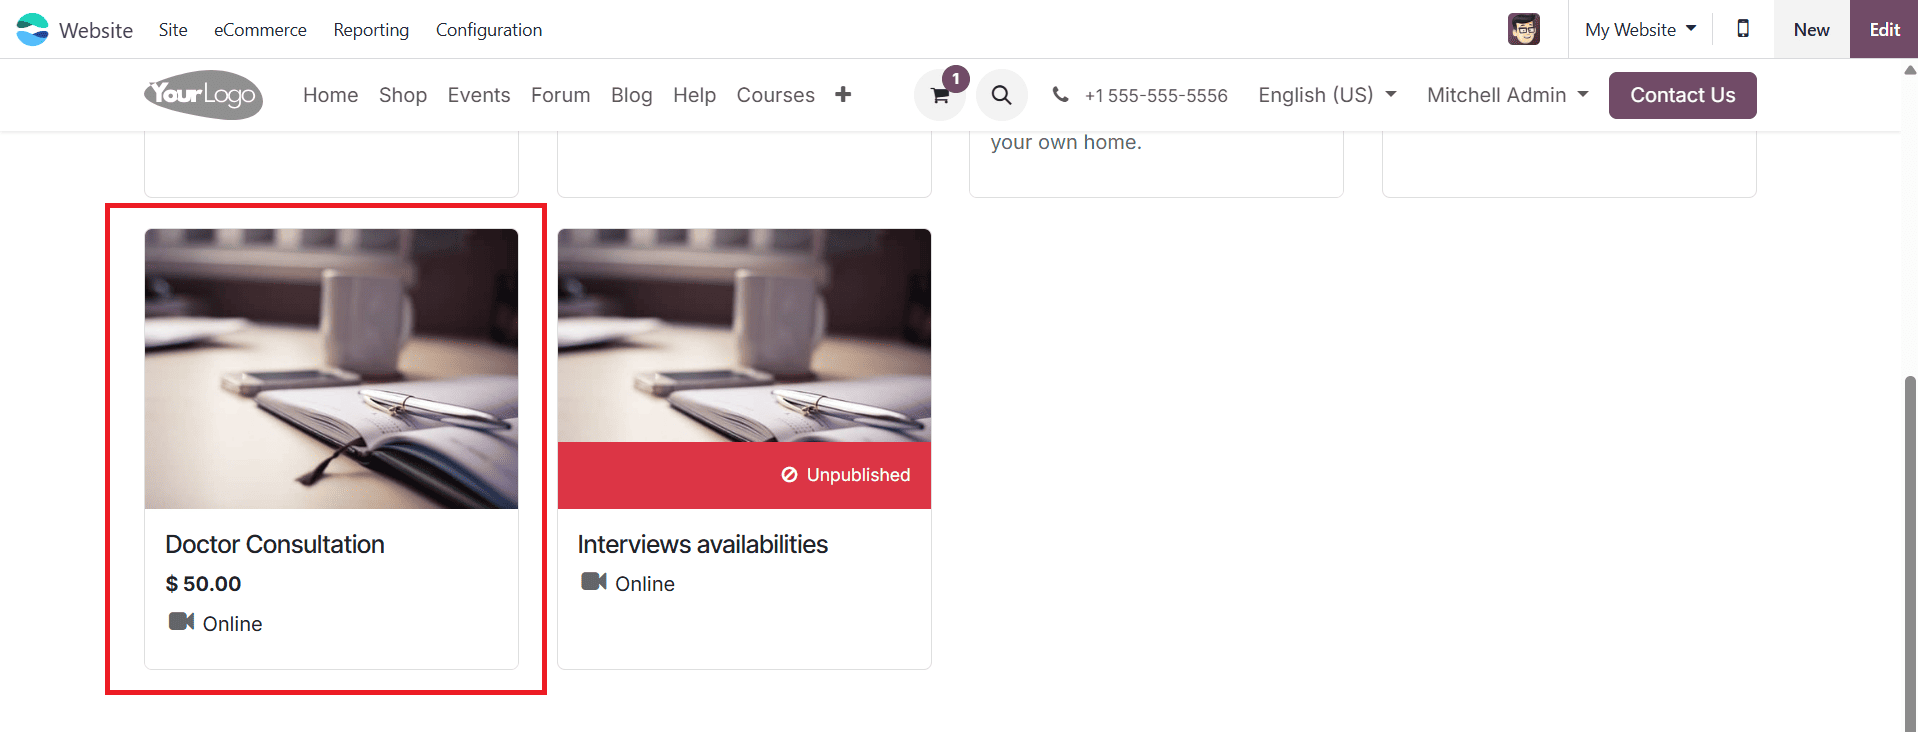
Select the Doctor Consultation from the list of appointments as shown below:
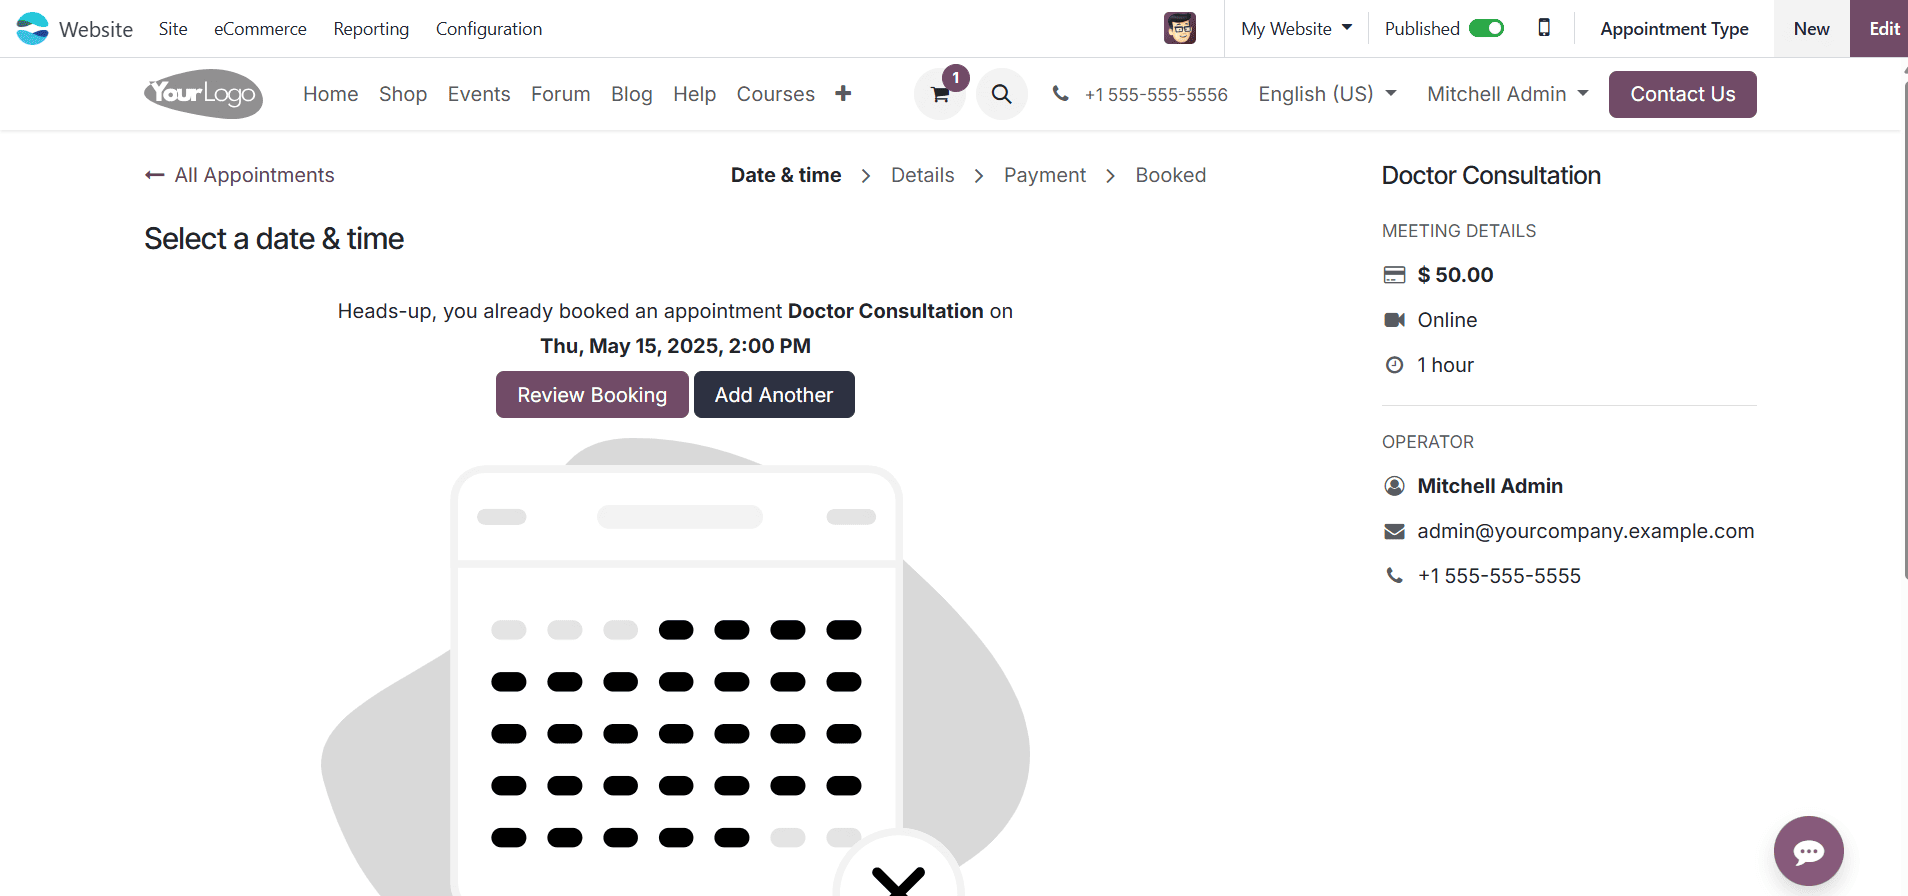
Here you can see the confirmation and details for the Doctor Consultation Appointment
In conclusion, the Odoo 18 Appointment module provides a feature-rich and user-friendly method for scheduling doctor consultations quickly and effectively. It is possible to schedule appointments on their own; types, doctor availability, patient data, reminders, and online payments are all organized under different sections. Giving the system a personal touch can be accomplished from a single, shared location by allowing for different times, cancellation policies, video links, or payment providers. Patients can choose from available time slots, receive timely notifications, and enjoy a simple booking process on the internet. By automating repetitive routine tasks, reducing manual coordination, and simplifying patient communication, the appointment system enhances both the overall patient experience and clinic operations. It is the ideal option for health care providers that wish to reduce the administrative burden of arranging appointments and enhance service quality.
To read more about An Insight into Appointment Management in Odoo 15, refer to our blog An Insight into Appointment Management in Odoo 15.