In today’s digital commerce world, seamless integration between systems is essential for maintaining data accuracy and improving operational efficiency. One powerful method to achieve real-time communication between platforms is through webhooks.
In this post, we’ll explore how to connect WooCommerce and Odoo 18 using webhooks to receive real-time event updates such as product creation or order placement — no polling, no delays.
Why Use Webhooks?
Webhooks are automated messages sent from apps when something happens. They are a push-based mechanism, unlike APIs which rely on frequent polling.
In our case:
* A new product is created in WooCommerce.
* WooCommerce sends an HTTP POST request to a predefined Odoo URL.
* Odoo receives this data and creates the product automatically.
This setup ensures that Odoo is always in sync without manual intervention.
Step 1: Define a Webhook Receiver in Odoo
We begin by creating a custom HTTP controller in Odoo 18 to receive product creation data from WooCommerce.
Python Controller Code
@http.route('/product/create', type='json', auth="none", csrf=False)
    def create_product(self, **kw):
        """
        Handle the Product creation webhook.
        """
        if not kw:
            try:
                # Response of Product
                response = request.get_json_data()
                print(response,"The Product Data")
                _logger.info("PRODUCT CREATE WEBHOOK call for this product: %s",
                             response)
            except Exception as e:
                _logger.error(
                    "Error while processing PRODUCT CREATE WEBHOOK: %s", str(e))
                return True
Security Note: Always use auth='none' with caution. In production, secure the route with tokens or IP whitelisting.
Step 2: Set Up the Webhook in WooCommerce
1. Go to your WooCommerce Admin Panel.
2. Navigate to WooCommerce > Settings > Advanced > Webhooks.
3. Click “Add Webhook”.
4. Fill in the webhook details:
* Name: Product Creation Webhook
* Status: Active
* Topic: Product Created
* Delivery URL: https://your-odoo-domain.com//product/create
* Secret: Secret Key of your WooCommerce Istance
5. Click Save Webhook.
Screenshot of Webhook Saved in WooCommerce
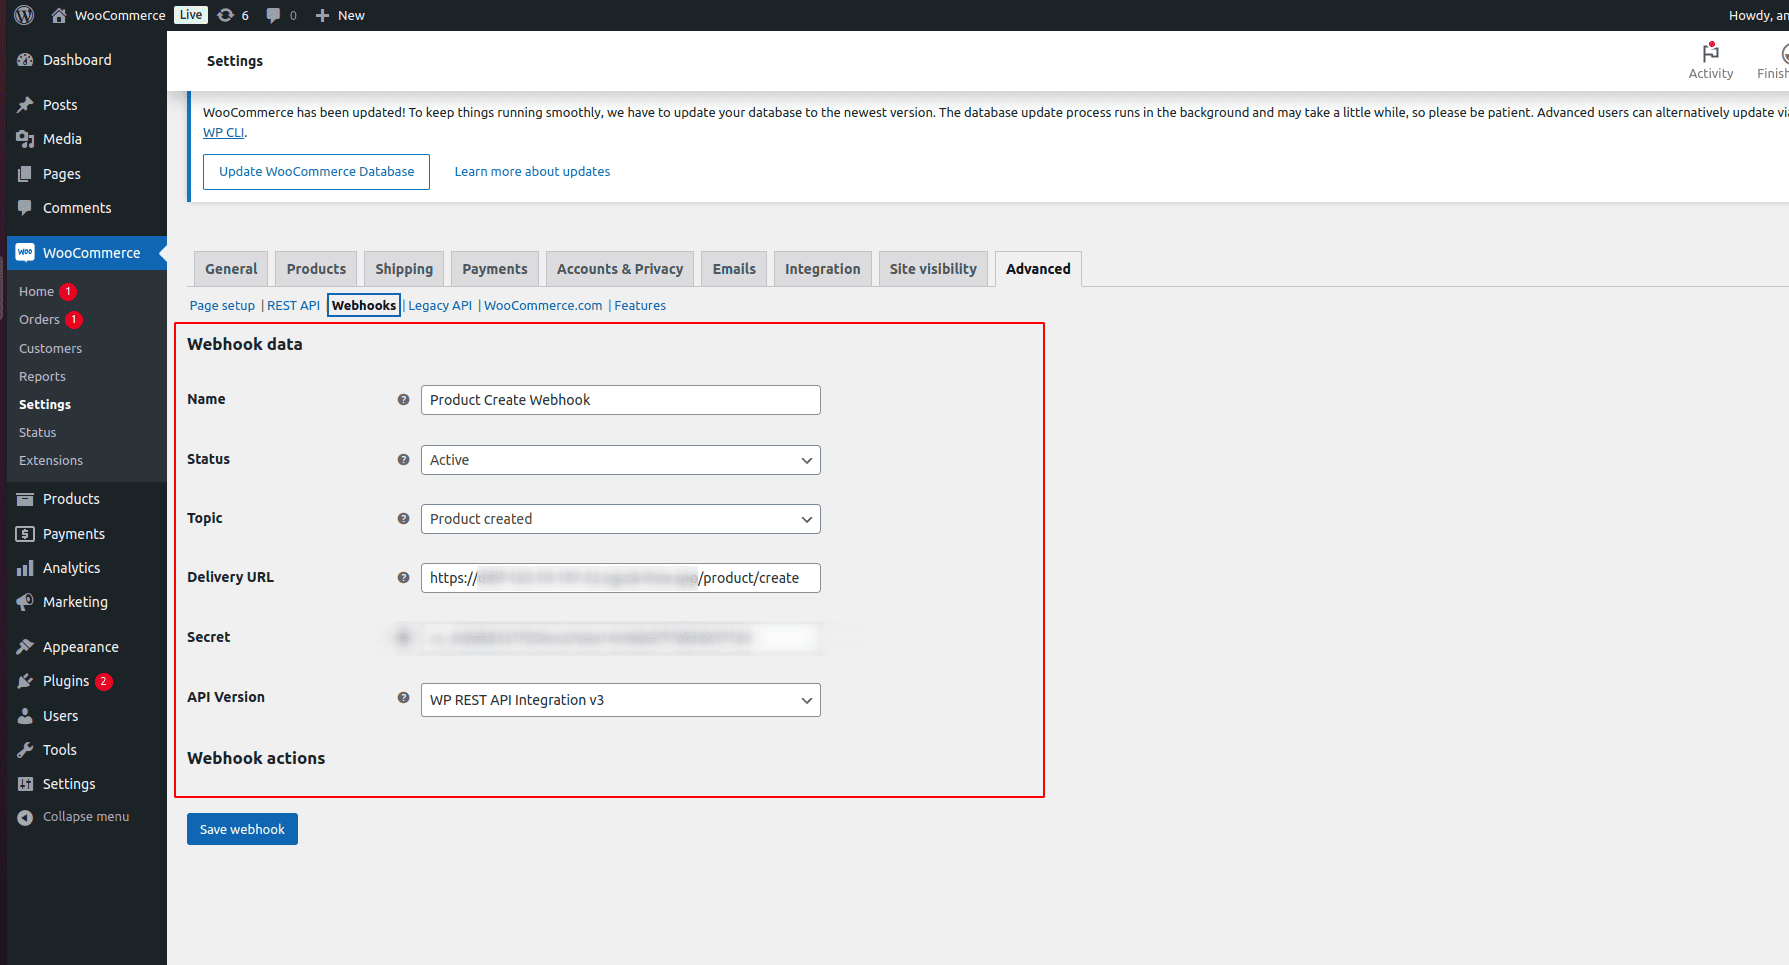
WooCommerce will now trigger the webhook whenever a new product is added.
Step 3: Test the Integration
To test:
To test your integration:
* Go to WooCommerce and create a new product.
* Odoo’s controller URL will be instantly triggered.
* Check your Odoo log (or database) to confirm the product was created.
Sample Webhook Payload from WooCommerce
Here’s a simplified example of what WooCommerce sends:
{
  "id": 1524,
  "name": "Test Product",
  "sku": "TEST-SKU-001",
  "price": "25.00",
  "regular_price": "30.00",
  "type": "simple",
  "categories": [
    {
      "id": 15,
      "name": "Uncategorized"
    }
  ],
  "images": [
    {
      "src": "http://example.com/wp-content/uploads/2025/05/sample.jpg"
    }
  ]
} The Product Data
Important Notes for Webhook Integration
1. Your Odoo Server Must Be Live & HTTPS Enabled
External systems (like WooCommerce, Shopify, Stripe, etc.) require:
* A public, live server (not localhost or private IPs)
* A valid HTTPS endpoint with a proper SSL certificate
i. HTTP or localhost URLs will not be accepted by most webhook providers.
To test locally, use tools like:
* ngrok — create temporary public HTTPS tunnels
2. Secure Your Endpoint
Since this route is public (auth="none"), implement security:
* Add a secret token to the URL or headers
* Validate the signature (if the provider supports it)
* Restrict access via IP whitelisting
3. Add Logging and Error Handling
Always use try/except blocks to catch unexpected errors, and log responses to help with debugging and maintenance.
Conclusion
With Odoo 18 and webhooks, you can automate integrations across your ecosystem without constant API polling. Whether you're connecting WooCommerce, Shopify, Stripe, or a custom system, this approach gives you real-time synchronization, greater reliability, and cleaner architecture.
To read more about How to Use Odoo 17 Webhooks to Connect External Systems, refer to our blog How to Use Odoo 17 Webhooks to Connect External Systems.