Gathering information from customers, employees, vendors, or event attendees is something most businesses need to do on a regular basis. Whether it is a feedback form, a vendor certification test, a live quiz, or a general opinion survey, the process of collecting and making sense of responses can get complicated fast when managed through spreadsheets or third-party tools. Odoo 19 includes a fully built-in Surveys module that covers all of these needs in one place, from creating a simple form to running a live-scored session with participants joining in real time.
This blog covers everything available in the Odoo 19 Surveys module, from the survey list and creation form to the four survey modes, participant tracking, and the Questions & Answers menu.
The Surveys List
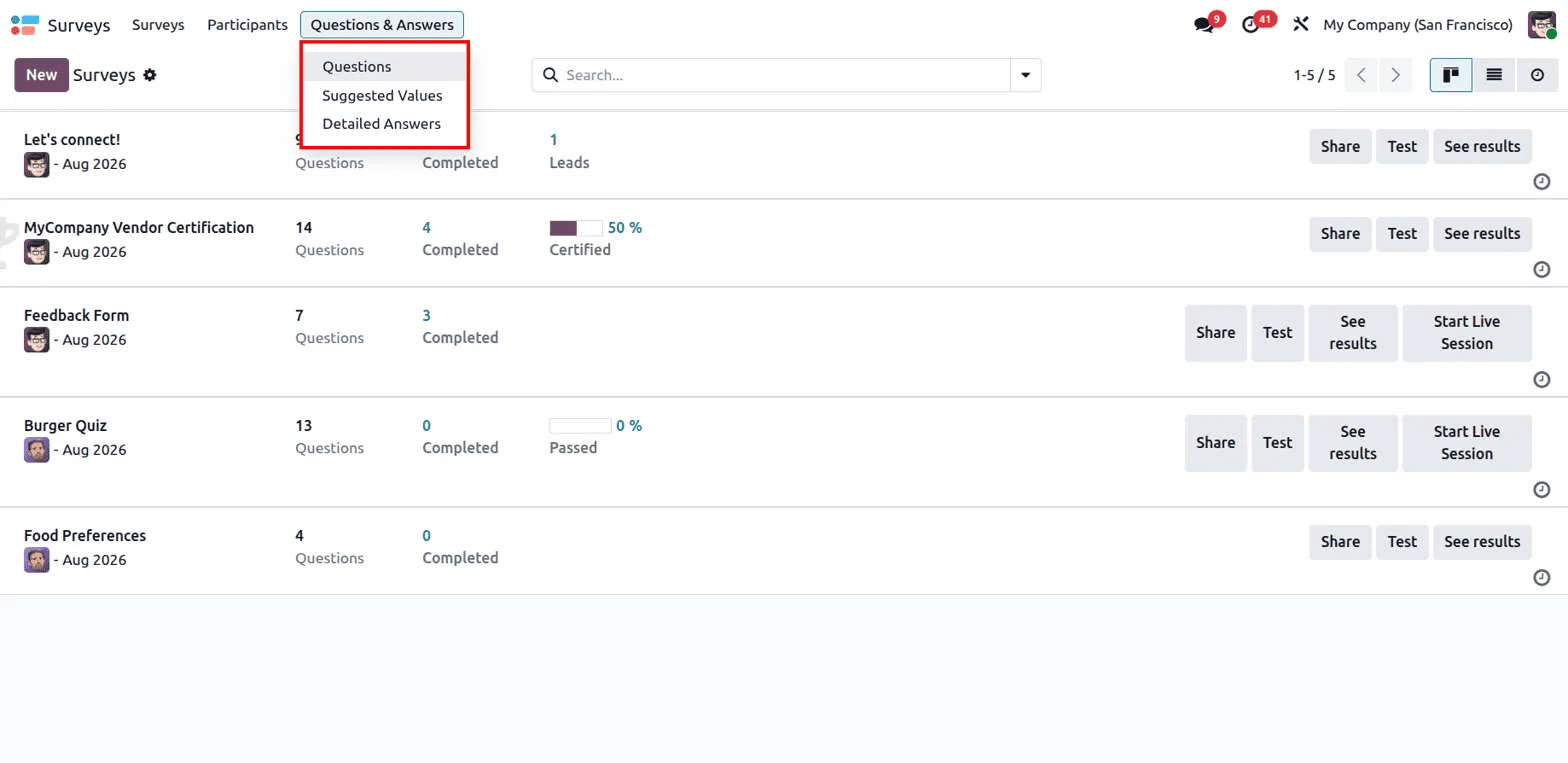
When the Surveys module is opened in Odoo 19, the main page displays all existing surveys in a list view. Each survey shows its name, the responsible person, the date it was created, the number of questions it contains, and the number of completions recorded. Surveys that have scoring enabled also show a progress bar and a certification or pass rate alongside the completion count, making it easy to see at a glance how well participants are performing.
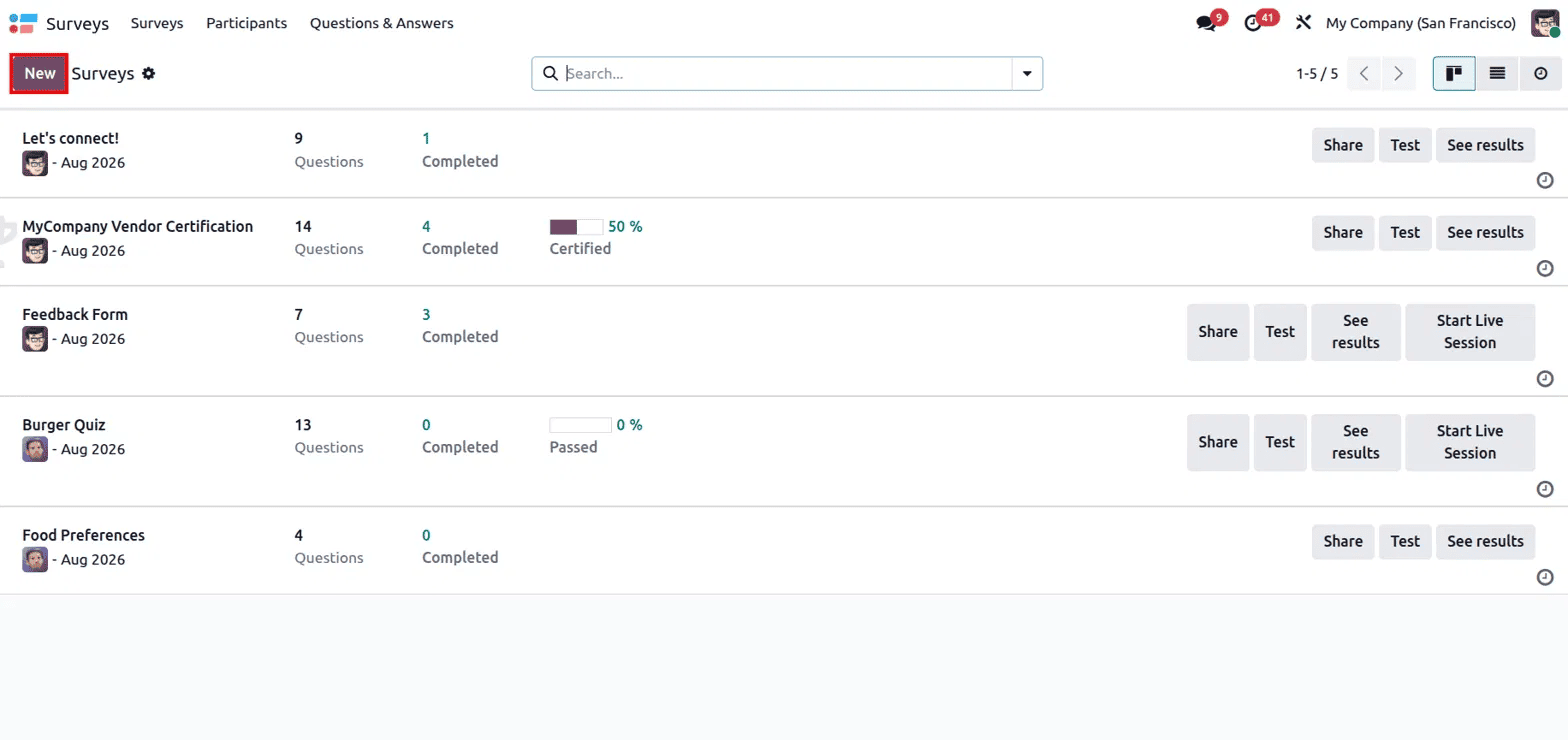
On the right side of each survey row, you can see action buttons: Share, Test, and See results - and for surveys with live session capability, a Start Live Session button also appears. The Share button opens a sharing panel to distribute the survey link. Test lets the survey be previewed and filled in without recording a real entry. See results opens the survey's result summary. Start Live Session begins a real-time interactive session with participants.
Creating a Survey
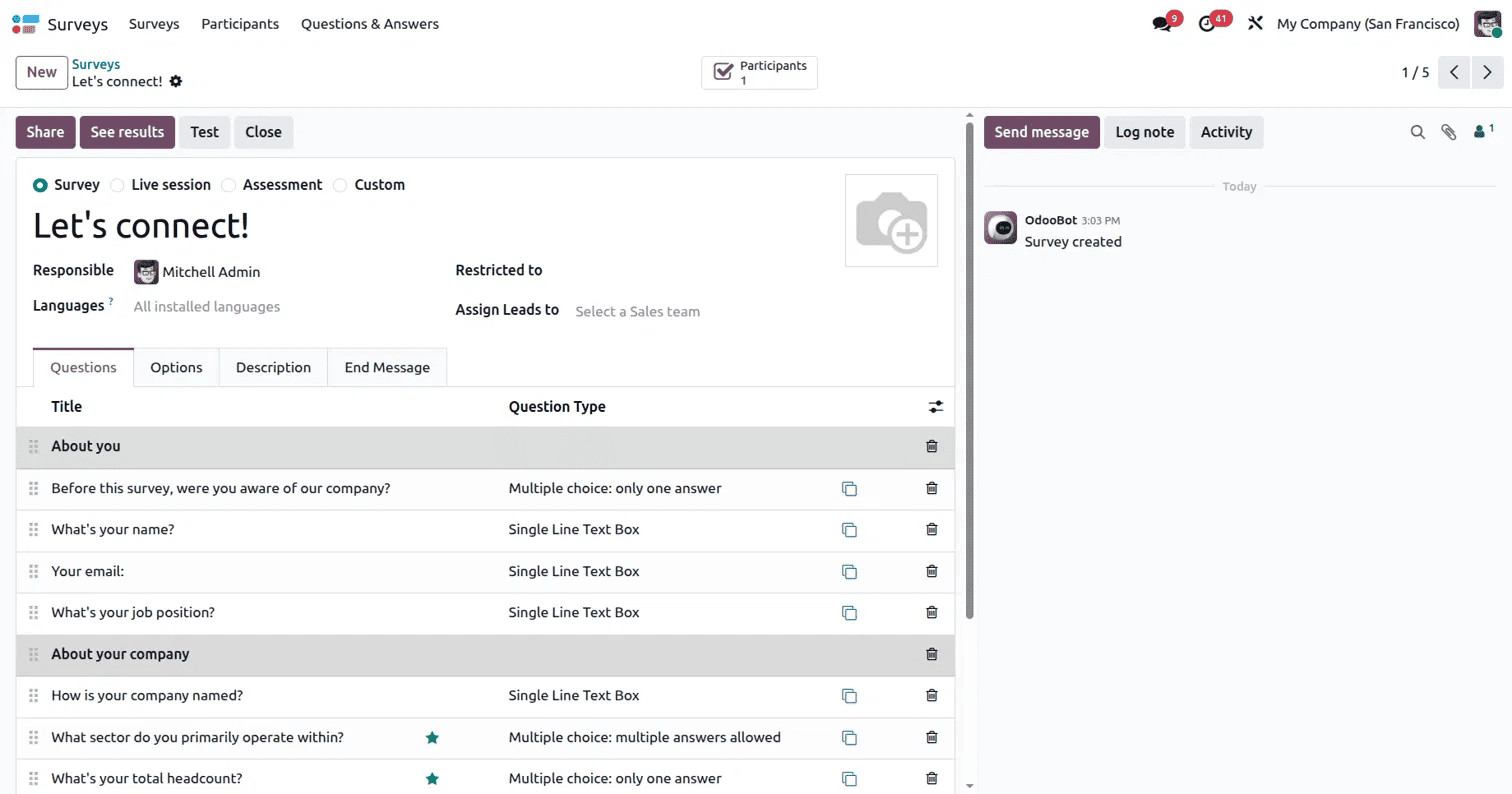
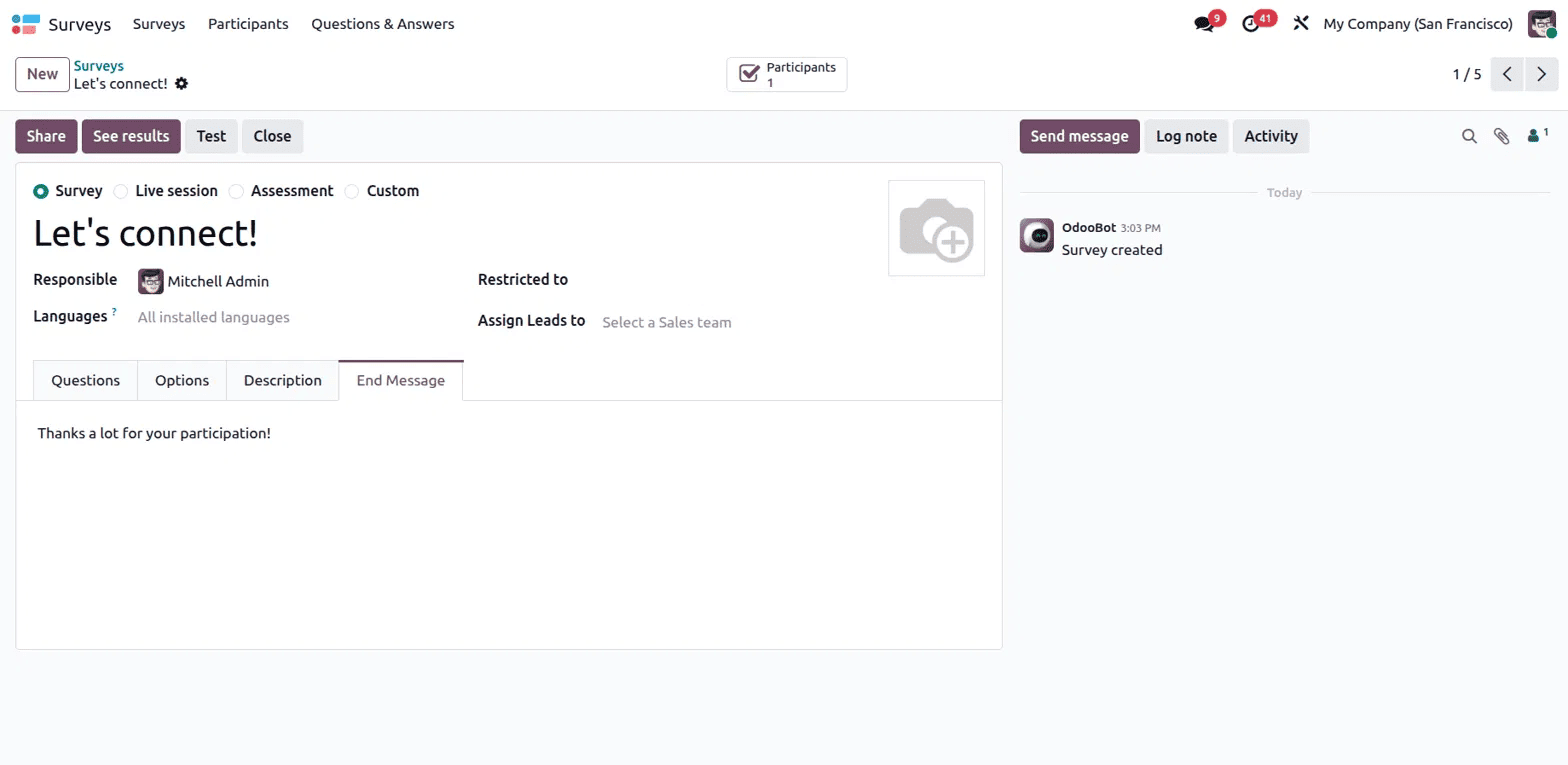
To create a new survey, clicking the New button at the top left opens the survey form. At the very top of the form, there are four mode options: Survey, Live Session, Assessment, and Custom. These are the four types of surveys available in Odoo 19, and each one changes the options and behaviour of the form. The survey name is entered below the mode selector, and fields for Responsible, Languages, Restricted to, and Assign Leads to are available. The Assign Leads to field connects the survey directly to a CRM sales team, meaning responses from the survey can be automatically turned into leads for the selected team.
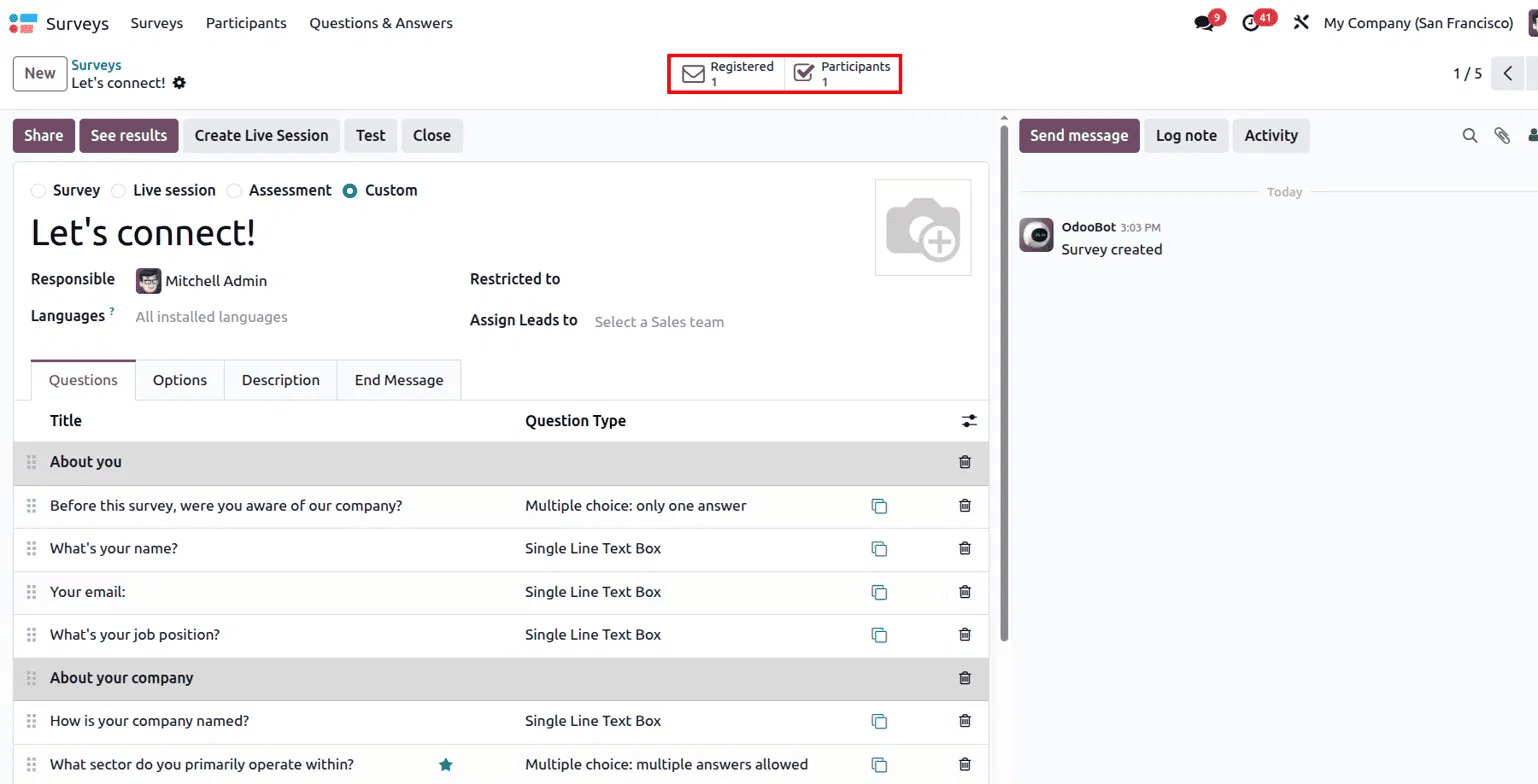
The form has four tabs: Questions, Options, Description, and End Message, and there are also smart buttons at the top for Registered participants and Participants who have completed the survey.
Questions Tab
The Questions tab is where all questions are added and organised. Questions can be grouped into sections, which act as headings that separate different parts of the survey. Each question has a title and a question type. You can choose various question formats, such as single-answer or multiple-answer multiple choice, single-line and multi-line text boxes, numerical value, date, date & time, matrix, and more. Questions can be reordered by dragging and starred to mark them as mandatory. A structured approach helps create surveys that flow smoothly and logically across multiple topics.
Options Tab - Survey Mode
The Options tab contains settings for how the survey behaves and who can take it. In Survey mode, the settings are divided into two sections: Questions and Participants.
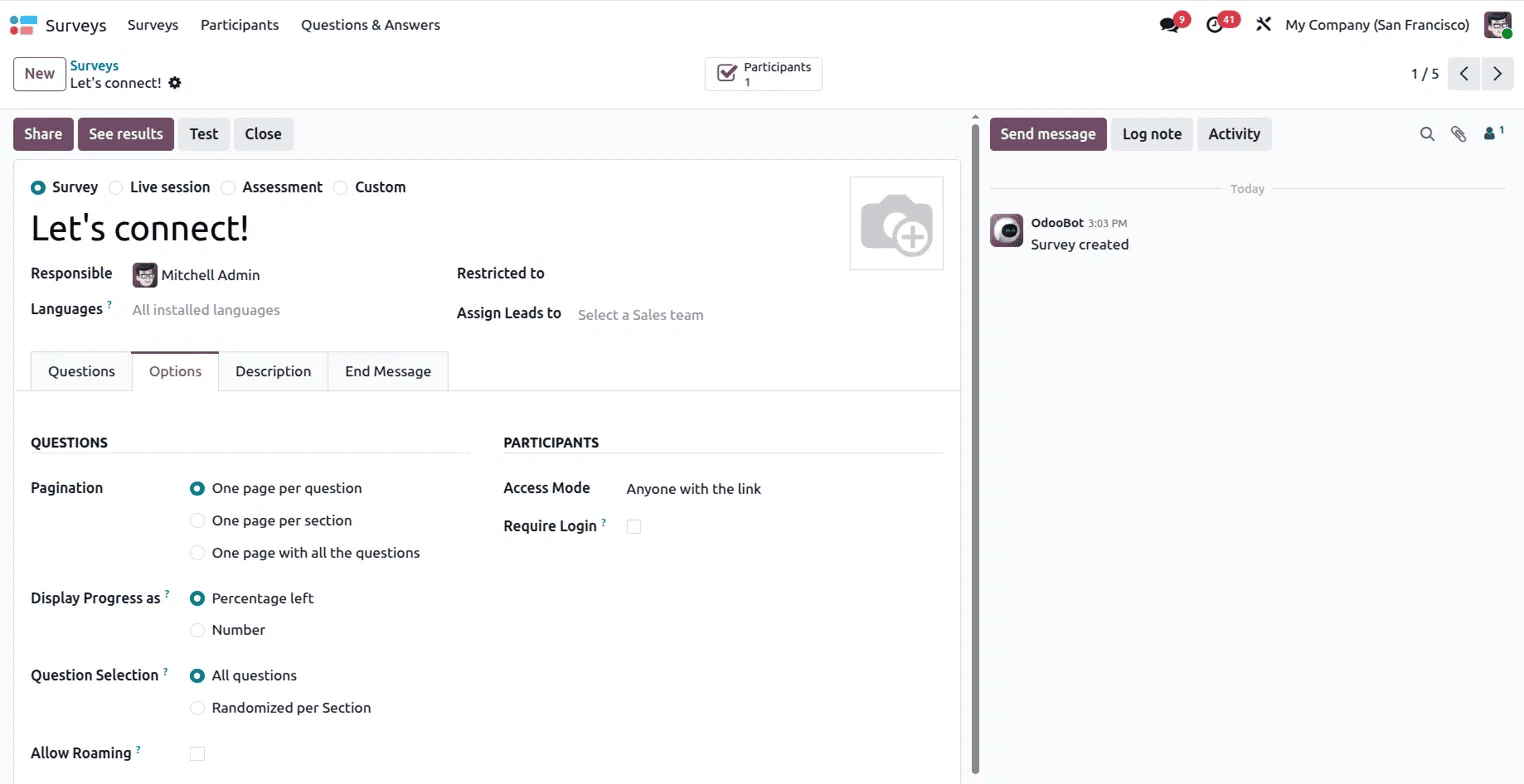
The Pagination setting under Questions lets you choose how questions are displayed: one question per page, one section per page, or all questions on a single page. Display Progress shows either a percentage or a number to let participants know how far through the survey they are. Question Selection offers the choice between showing all questions or randomising them per section. Allow Roaming, when enabled, lets participants go back and change previous answers.
The Access Mode setting under Participants determines survey access, allowing participation from anyone with the link or invited participants only. Require Login can be turned on to make participants log in before they can start.
Description Tab
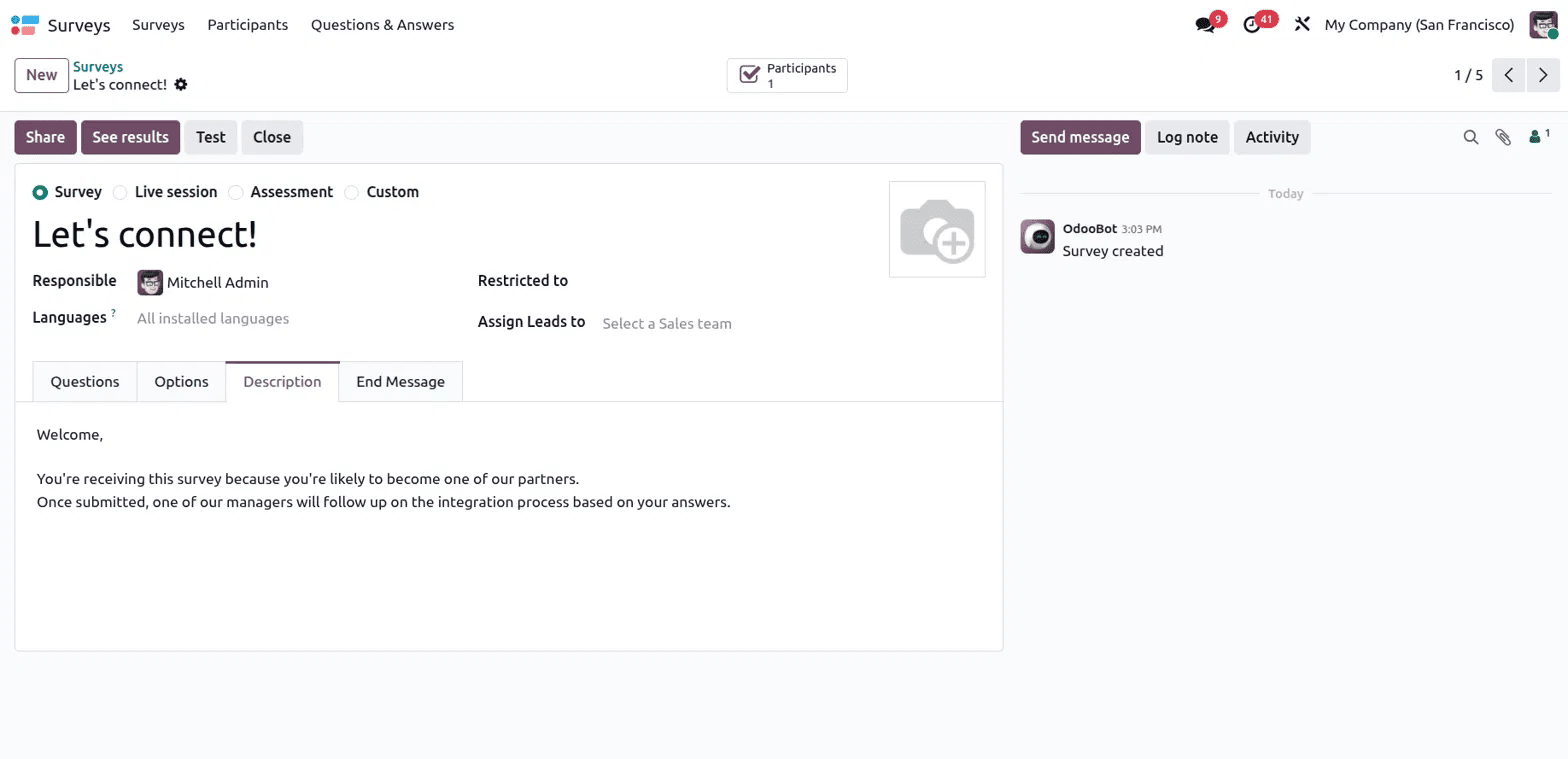
The Description tab contains a free text area where an introductory message can be written. This text is shown to participants before they begin the survey. It is useful for setting context, explaining the purpose of the survey, or giving instructions.
End Message Tab
The End Message tab holds the message that participants see after submitting the survey. In the example shown, the message reads "Thanks a lot for your participation!" This is a simple but important touch that leaves a good impression on the participant and confirms their submission was received.
Live Session Mode
Switching the survey to Live session mode changes how it behaves significantly. In this mode, participants join the session using a Session Code or Session Link that the host shares with them. The session is run in real time, with the host controlling the pace of questions.
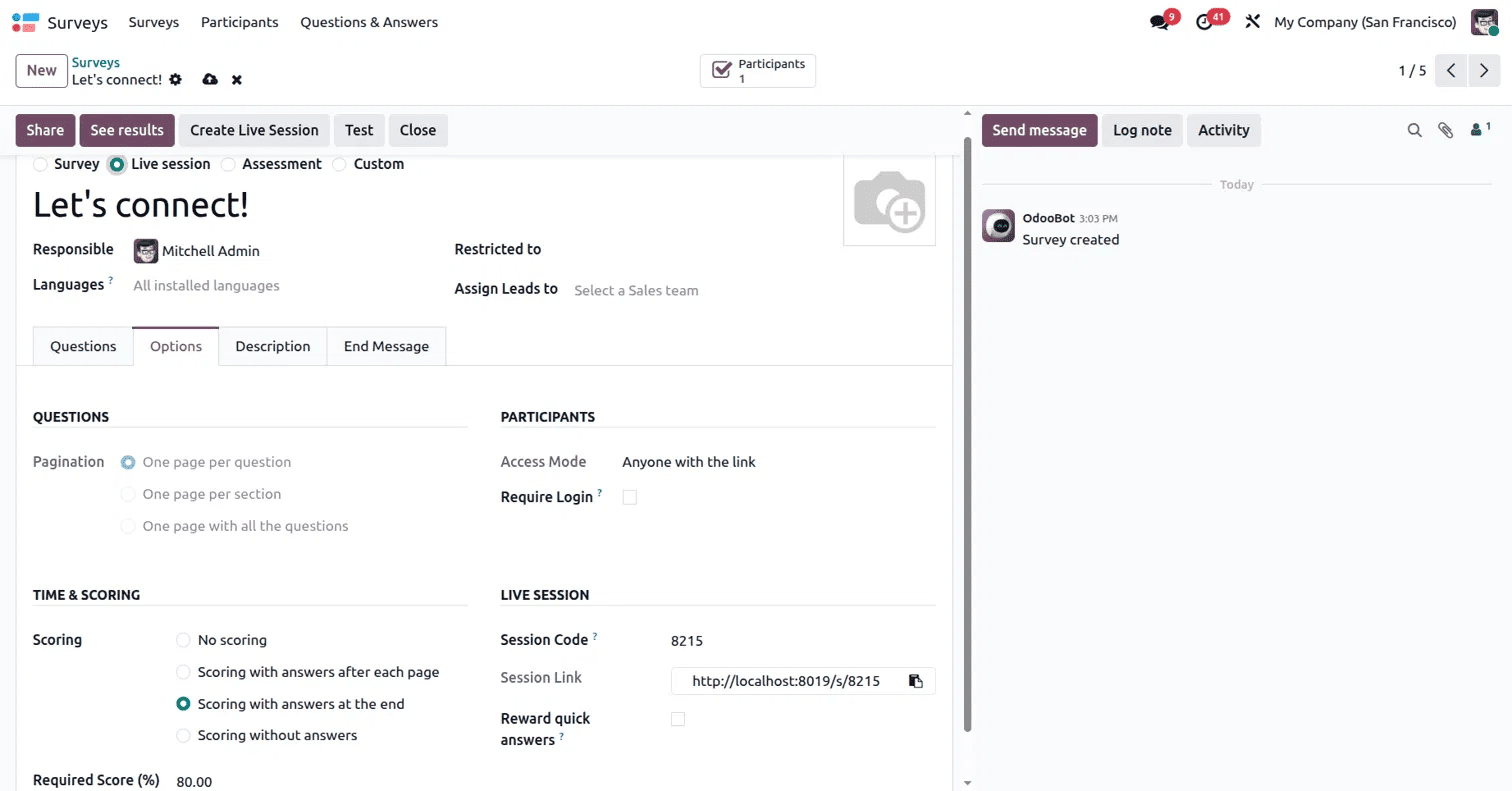
The Options tab in Live session mode shows a Time & Scoring section with Scoring options: No scoring, Scoring with answers after each page, Scoring with answers at the end, and Scoring without answers. A Required Score percentage can be set to define a pass mark. The Live Session section shows the Session Code (in this example 8215) and the Session Link, which participants use to join. A Reward quick answers option can also be enabled to give bonus points to participants who answer faster. The action button on the form changes to Create Live Session, which launches the session when ready.
Assessment Mode
Assessment mode is designed for formal evaluations where access needs to be more controlled. The Access Mode changes to Invited people only by default, which means only specific people who have been sent an invitation can participate.
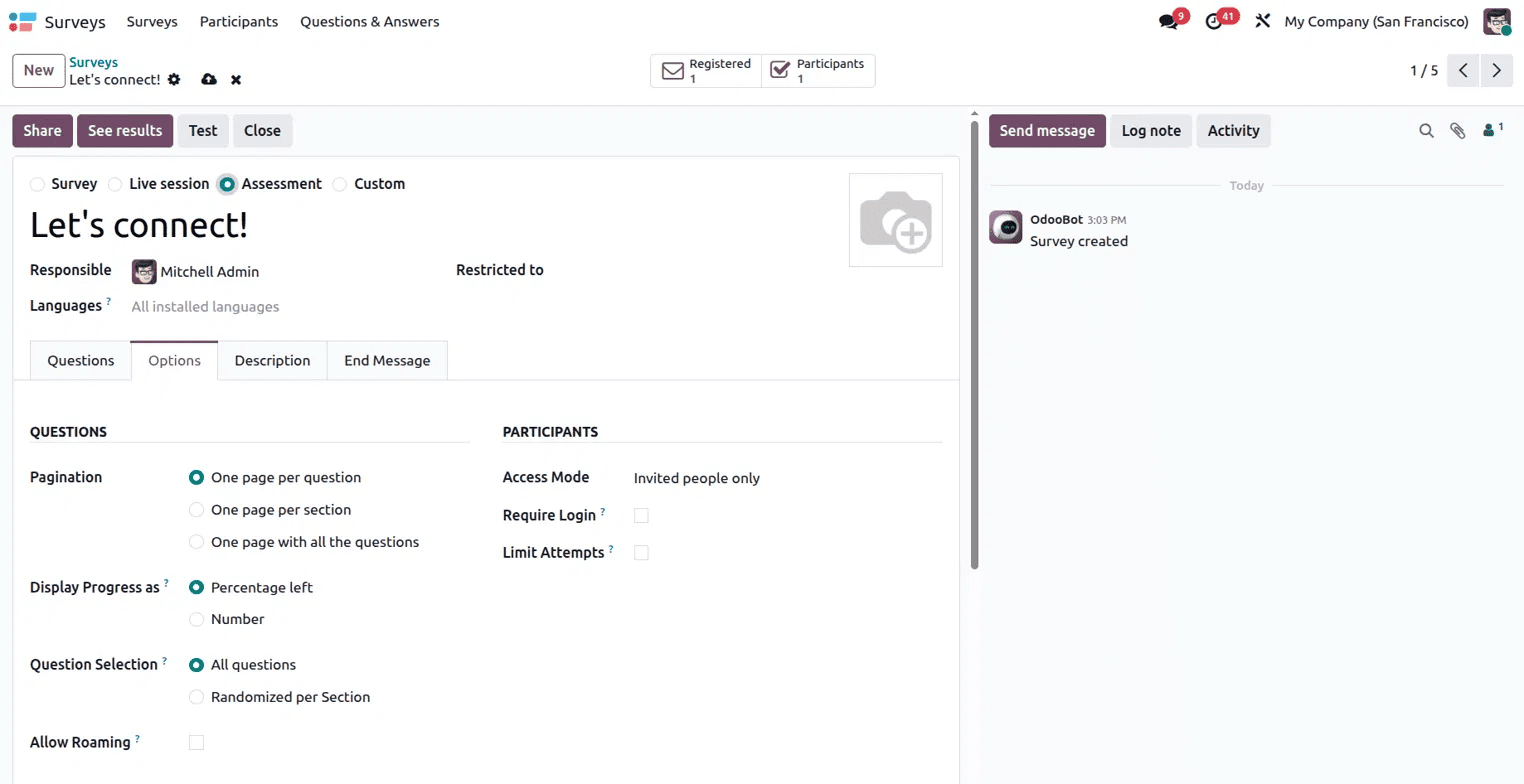
The Options tab also shows a Limit Attempts checkbox, which, when enabled, restricts how many times a participant can take the assessment. The Time & Scoring section includes a Survey Time Limit for timed assessments, Scoring options, a Required Score percentage, and an Is a Certification checkbox.
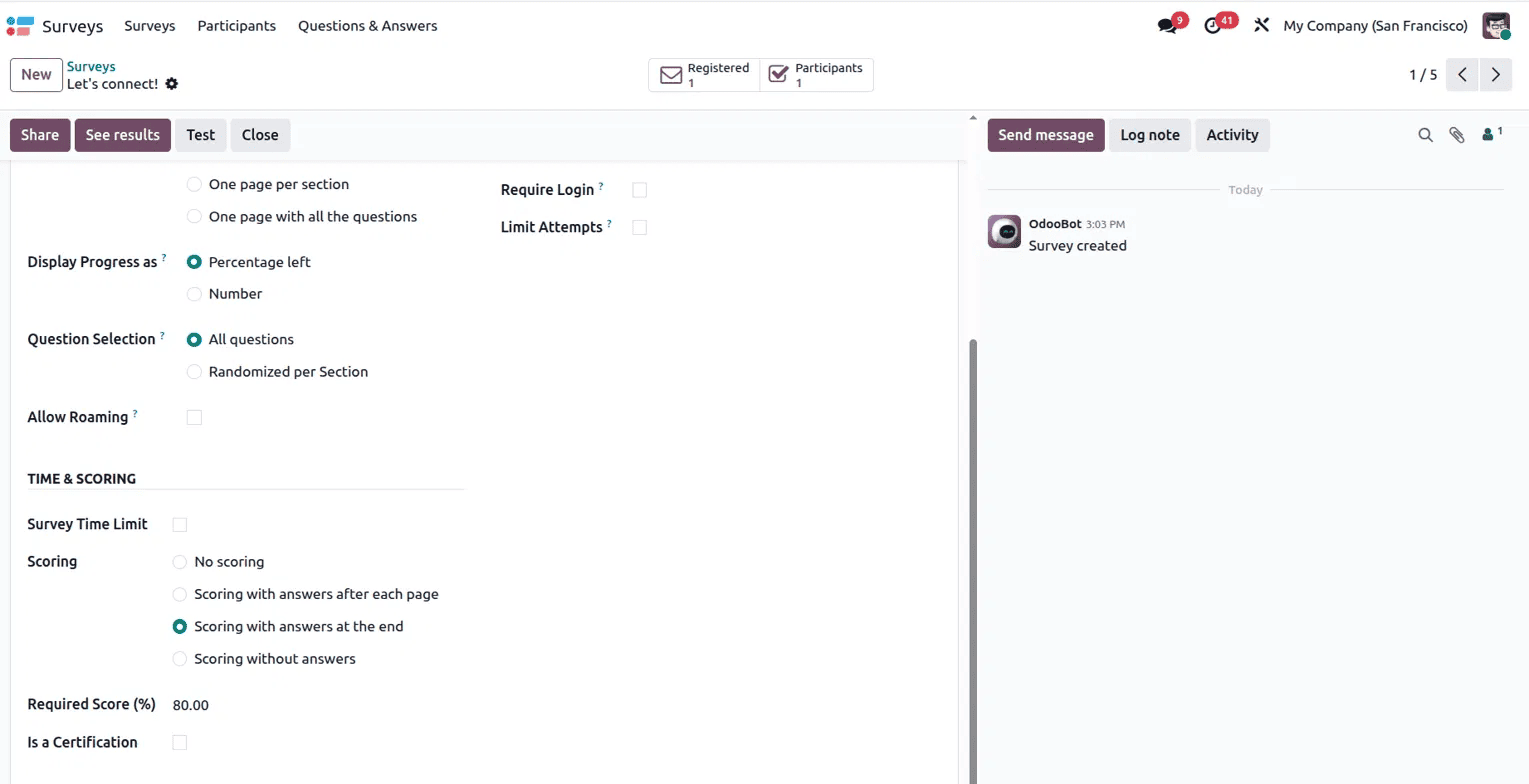
When Is a Certification is enabled, participants who meet the required score receive a certification. The Registered smart button appears on the survey form alongside Participants, showing how many people have been invited and registered to take the assessment.
Custom Mode
Custom mode gives the most flexibility. It combines elements from the other modes and lets settings be configured freely without being locked into the predefined behaviour of Survey, Live session, or Assessment. The Access Mode is set to Invited people only by default, and options like Require Login and Limit Attempts are available just as in Assessment mode.
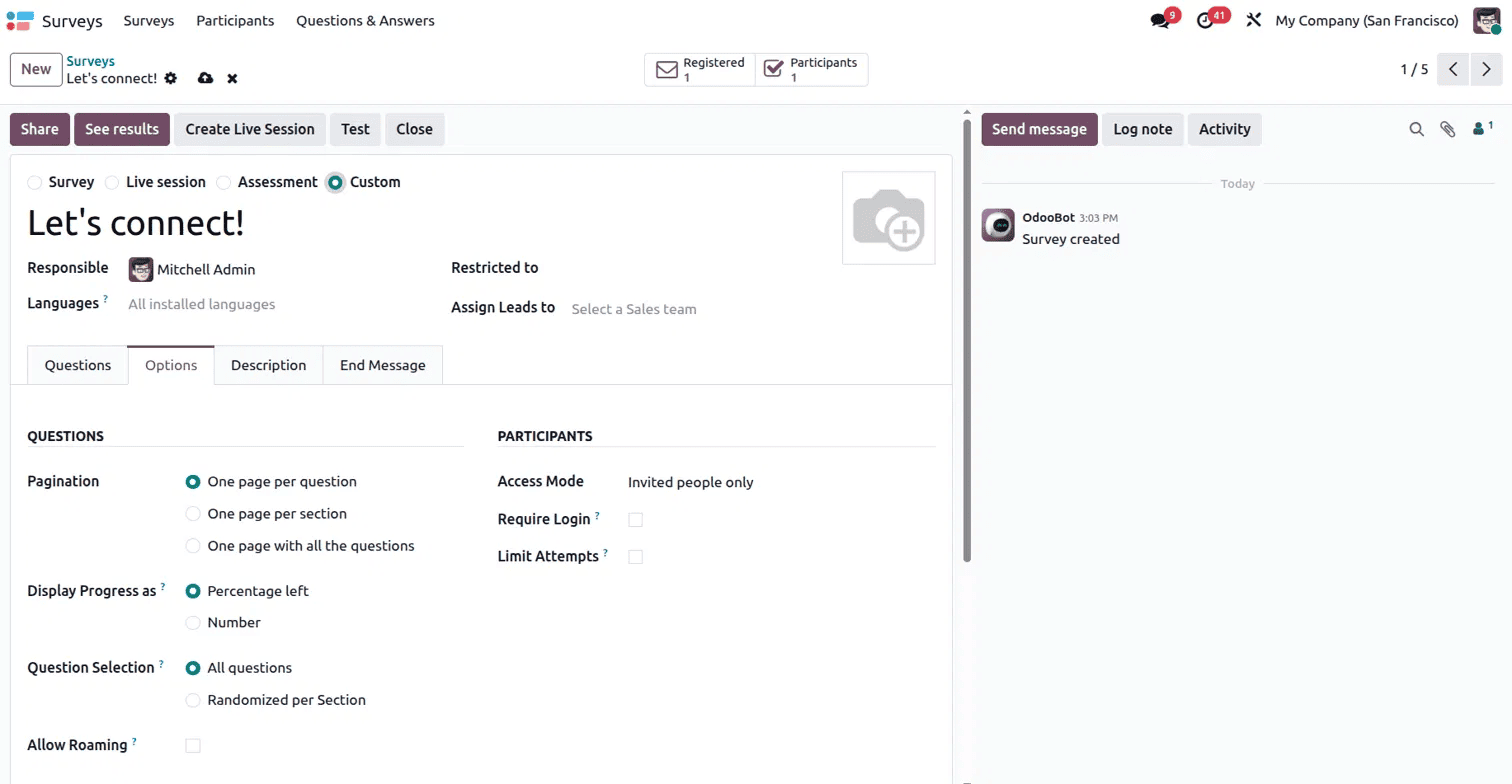
The Create Live Session button is also available in Custom mode, giving the option to run a live session if needed.
Registered and Participants Smart Buttons
At the top of the survey form, smart buttons show the number of Registered participants and completed Participants. These buttons appear once the survey has been shared or participants have been invited, and they link directly to the participant records for that survey.
Participant Records
Each participant who takes a survey has their own record in Odoo. Opening a participant record shows the survey name, when it was created, the contact and email, and the full list of answers submitted, with columns for Question, whether it was Skipped, the Answer given, whether the answer was Correct, and the Score awarded.
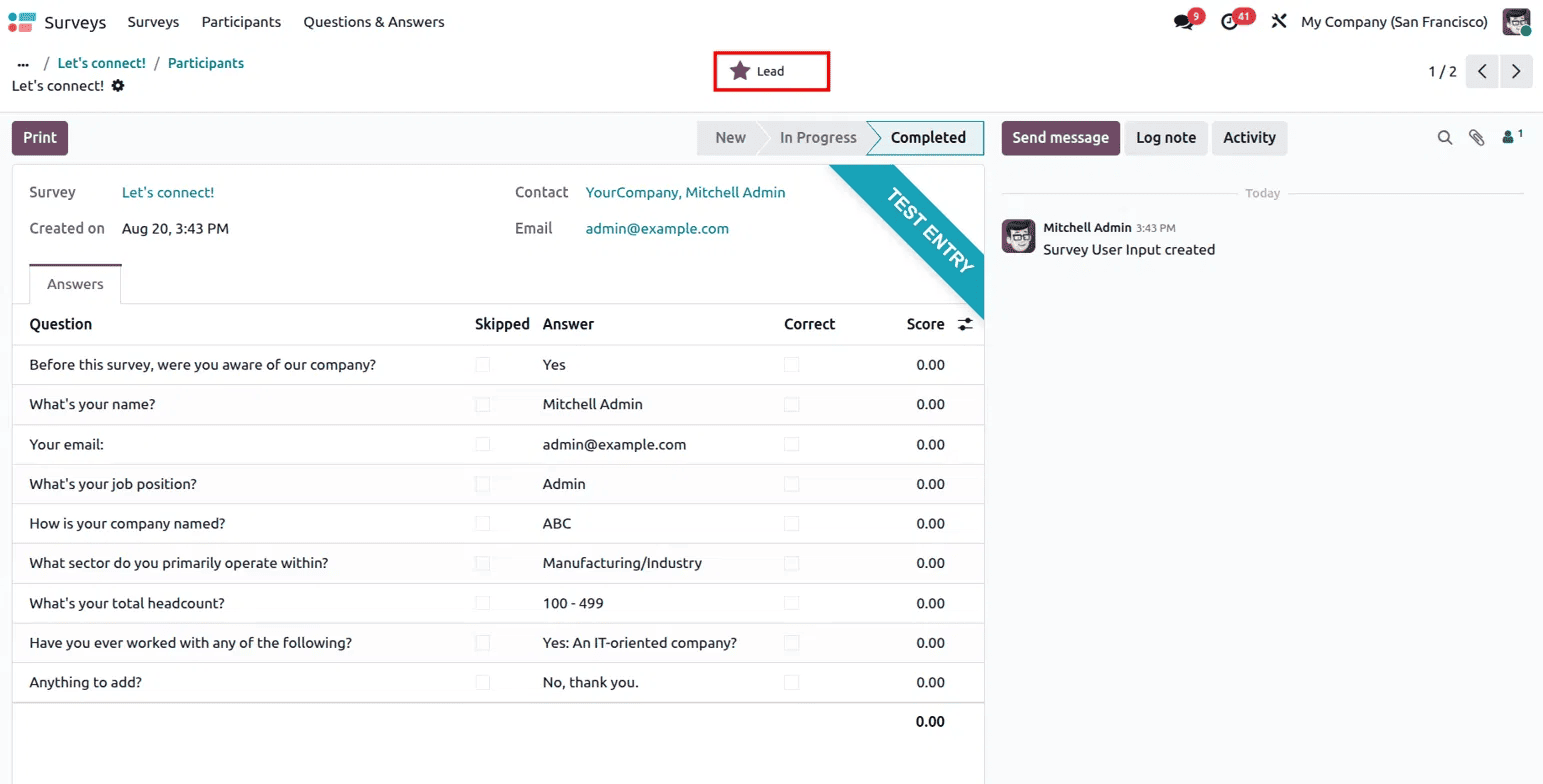
The status bar at the top of the participant record moves through three stages, New, In Progress, and Completed, giving a clear view of where each participant stands. A Lead smart button at the top links the participant's response directly to a CRM lead if the Assign Leads to field was configured on the survey. This is a powerful feature for businesses using surveys as a lead generation or qualification tool.
Participants Menu
The Participants menu in the top navigation bar shows a consolidated list of all participants across all surveys. The columns shown are Created on, Survey, Contact, Email, Attempts, Deadline, Quiz Passed, Score percentage, and Status. Participants are grouped by survey, making it easy to see all submissions for a particular survey at once. Status badges show whether each entry is Completed or In Progress.
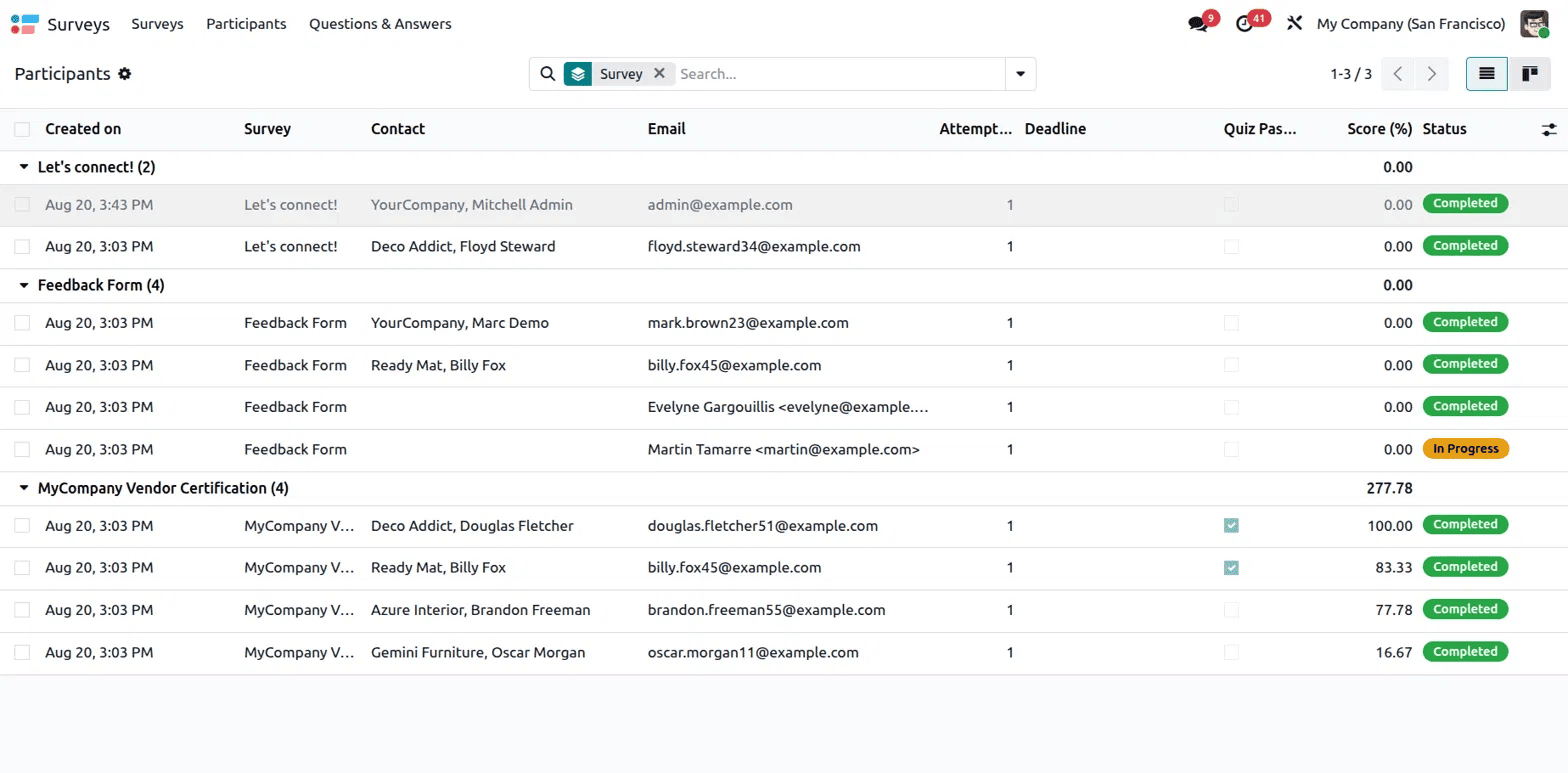
This view is useful for managers who need to monitor participation across multiple surveys without opening each one individually.
Questions & Answers Menu
The Questions & Answers menu in the top navigation bar has three sub-options: Questions, Suggested Values, and Detailed Answers.
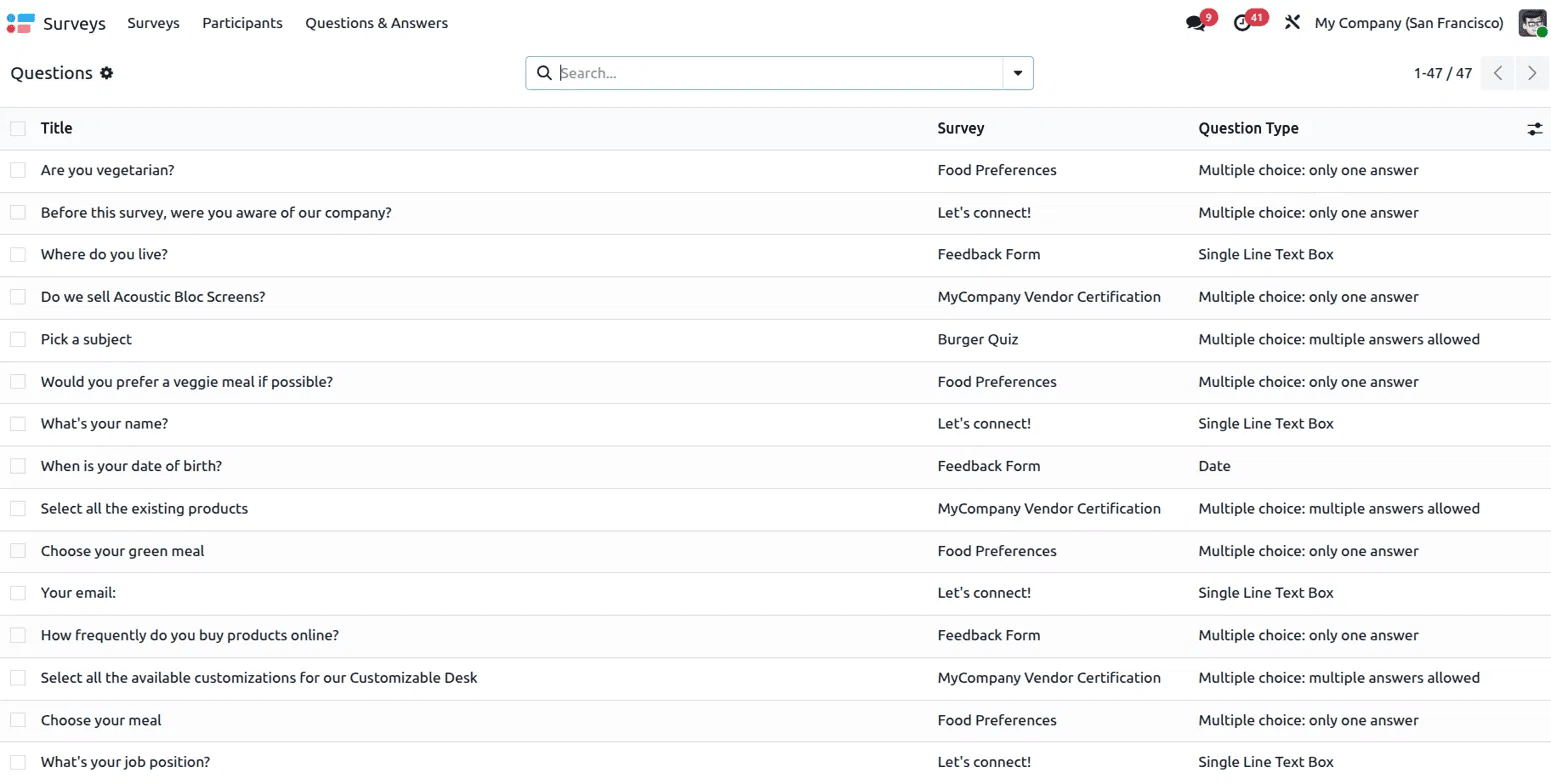
The Questions option opens a list of all questions across all surveys, showing the question Title, which Survey it belongs to, and the Question Type. In this example, there are 47 questions across all five surveys.
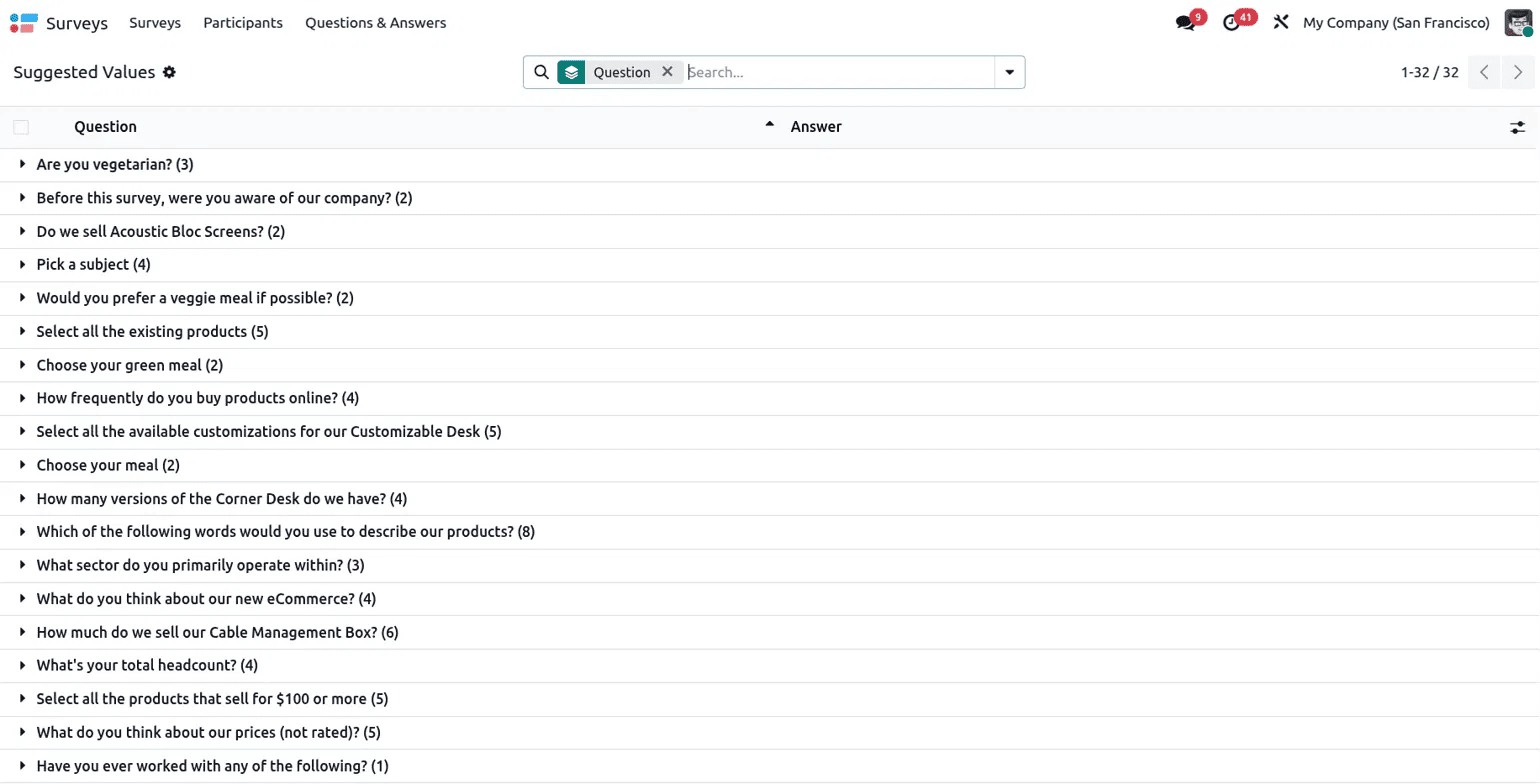
The Suggested Values option shows a list of all predefined answer options for multiple choice questions, grouped by question. Each question shows how many answer options it has in brackets next to the title, giving a complete picture of what choices are available across all surveys.
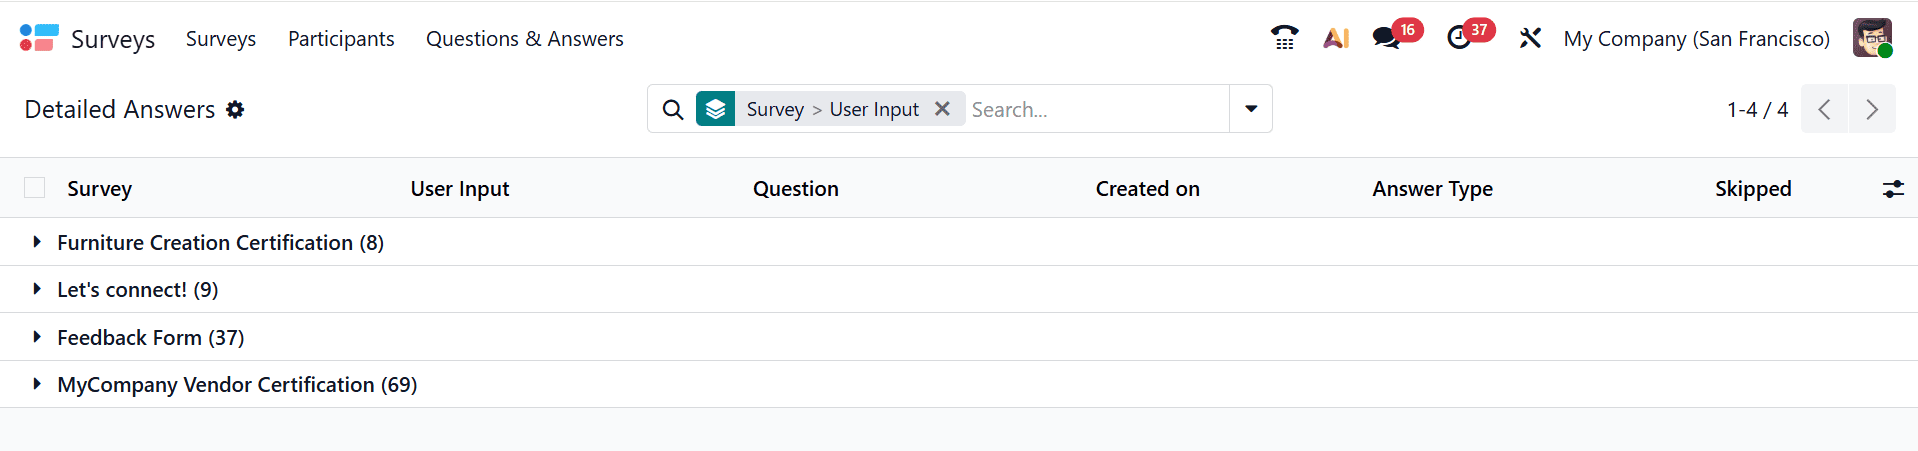
The Detailed Answers option gives a record-by-record breakdown of every answer submitted across all surveys, making it possible to drill down into specific responses for analysis or reporting purposes.
The Surveys module in Odoo 19 is a comprehensive tool that goes well beyond simple form building. With four distinct survey modes: Survey, Live session, Assessment, and Custom, it covers a wide range of use cases from casual feedback collection to formal vendor certifications and real-time interactive quizzes. The participant tracking, lead generation integration, scoring and certification features, and the detailed Questions & Answers menu make it a genuinely powerful platform for gathering and acting on information. For any business already running on Odoo, having all of this built directly into the system means one less tool to manage and one more process that is connected to the rest of the business.
To read more about What are the Features of Odoo 18 Survey Module, refer to our blog What are the Features of Odoo 18 Survey Module.