Odoo 18’s Survey module provides a robust and intuitive framework for designing, administering, and evaluating surveys. Odoo’s survey tool simplifies the entire process, whether it’s for market research, employee assessments, certification tests, or consumer feedback. Numerous question types, editable layouts, scoring settings, and automated email invitations are all supported. For anyone seeking precise and useful survey findings, this platform is essential due to its user-friendly and professional output.
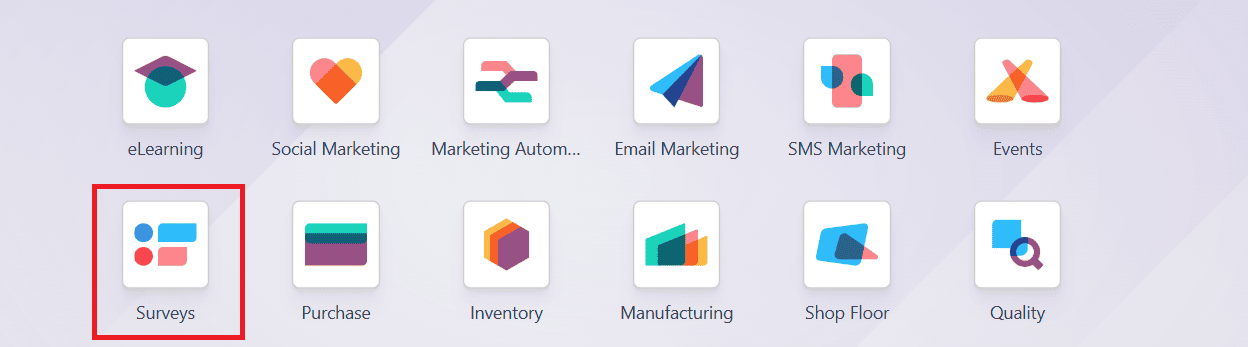
Select the Survey module from the Odoo 18 dashboard.
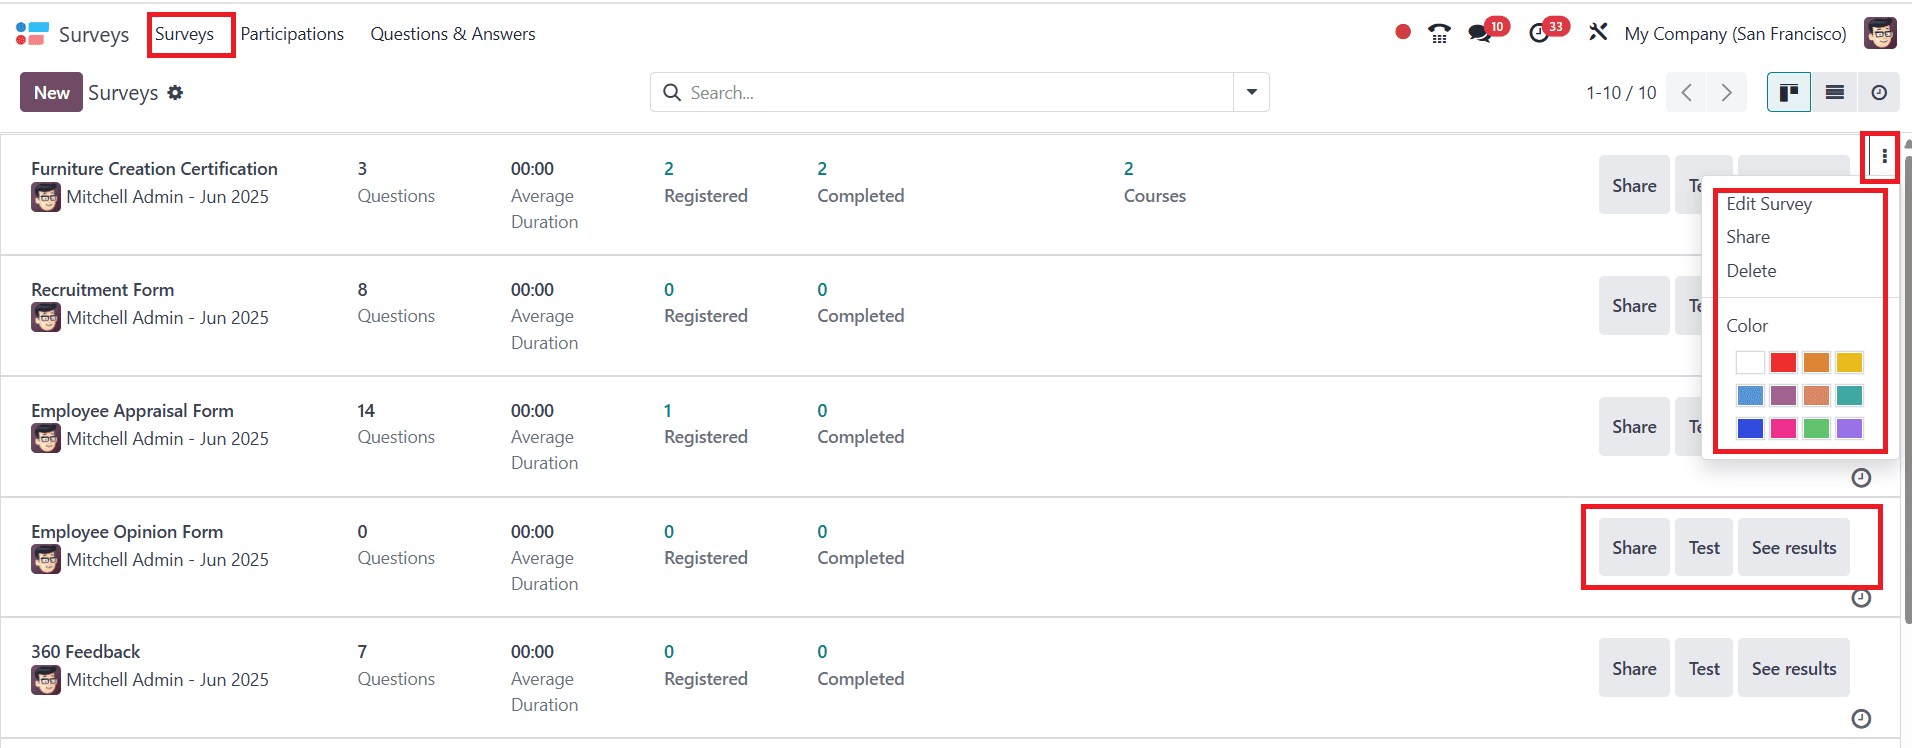
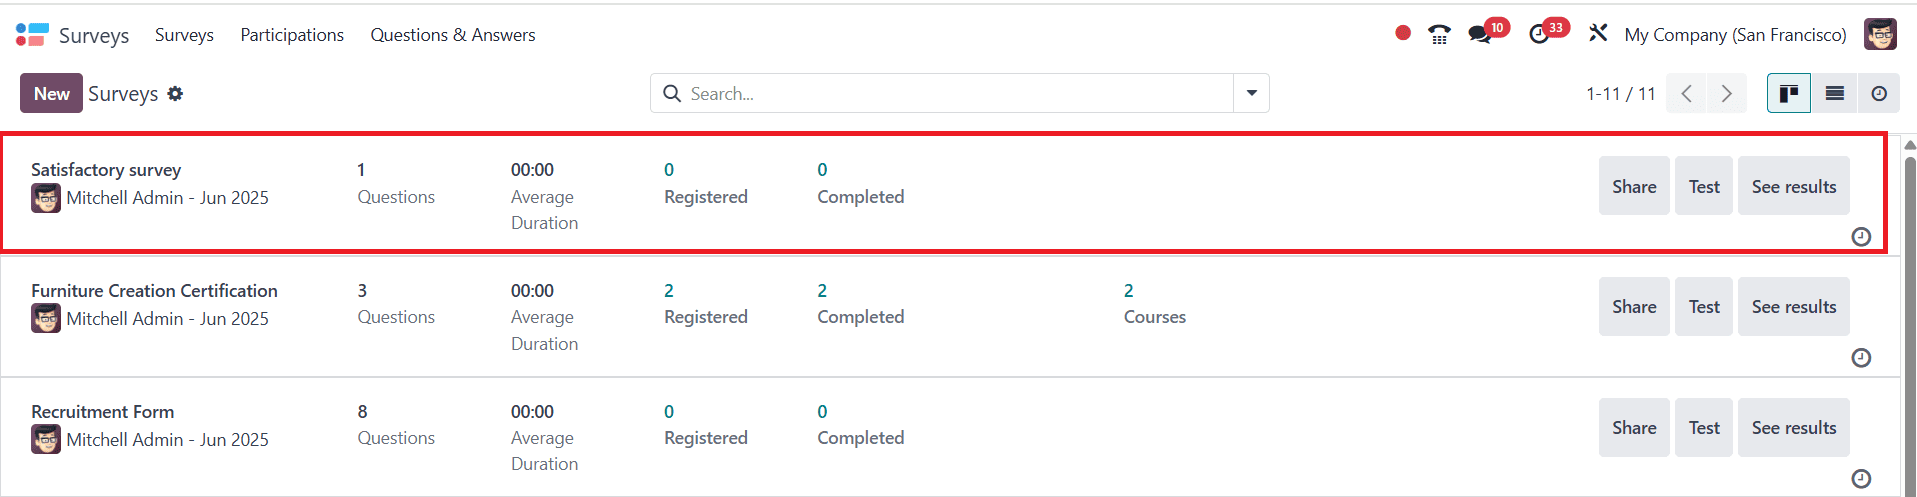
By default, you can see the already created survey forms in the dashboard. You can view the survey details, including Questions, Average Duration, Registered Participants, Completed participants, and the survey status. You can use the Share button to share the survey, the Test button to test the survey, and the See results button to view the results of the study. Access options like Edit Survey, Share, Delete, and Color by clicking the three-dotted menu in the top-right corner of the form. The clock icon helps to schedule activities related to the survey. You can select the survey view as Kanban or List view. To add an activity to the survey, simply click the Activity icon.
Create a New Survey
To start a new survey, click the New button as shown below:

Then choose the survey type from the available options.
Survey: Used for collecting feedback.
Live Sessions: Supports real-time interactions.
Assessment: Used to conduct exams or certifications.
Custom: For unique survey needs.
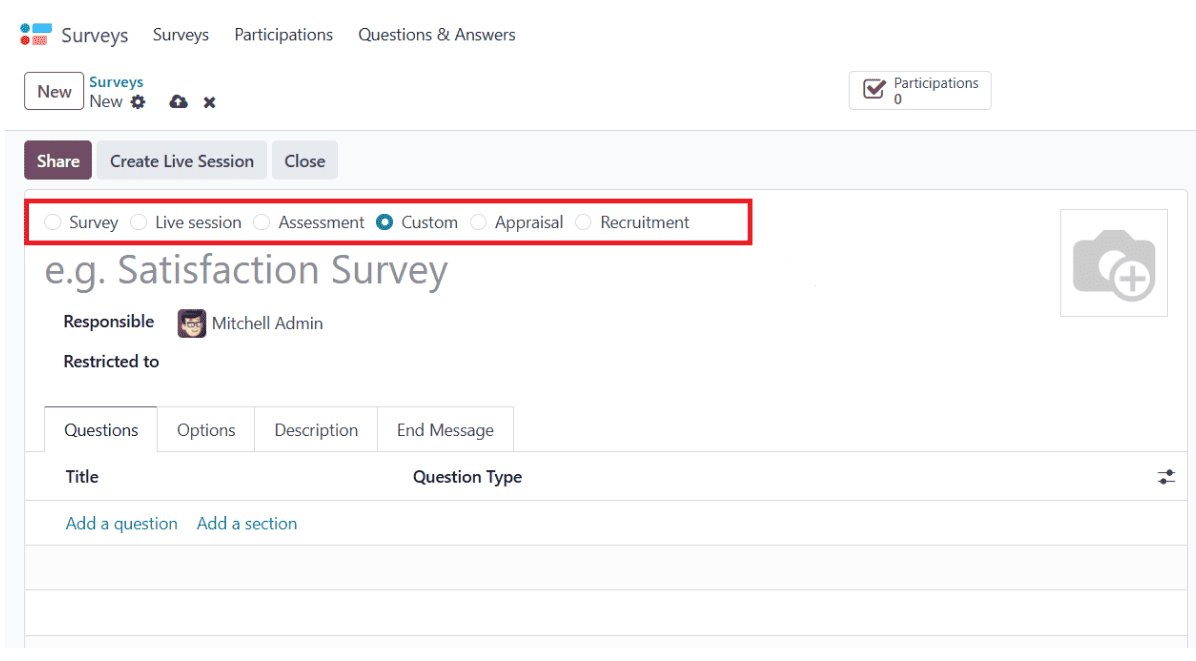
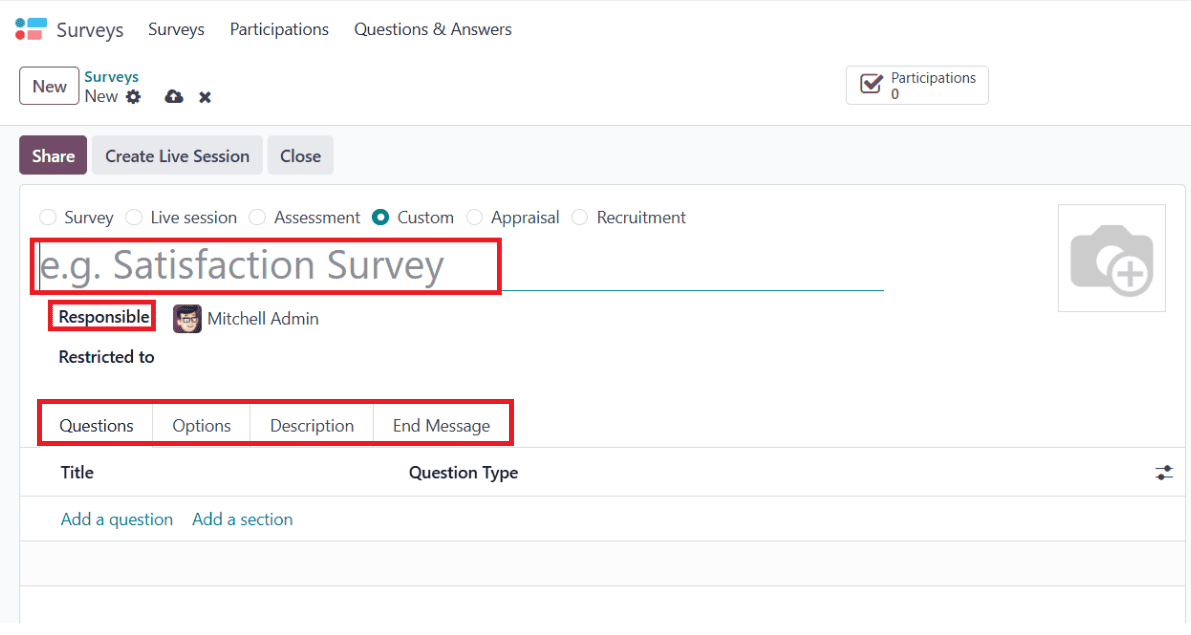
Then, add a title for your survey. The person who is responsible for this survey will be automatically filled under the Responsible option. To restrict this form from any employee, you can add that particular person under the Restricted to option. Here, there are four tabs: Questions, Options, Description, and End Message.
Questions Tab
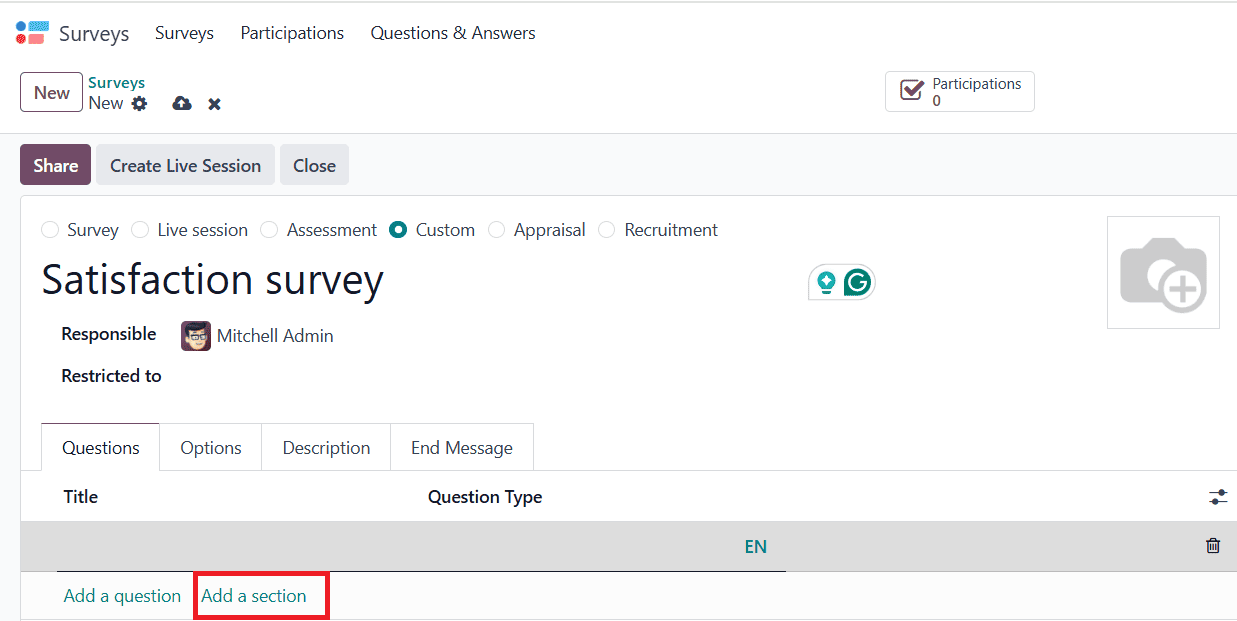
To create a new section for the survey, click on the Add a section option as shown below:
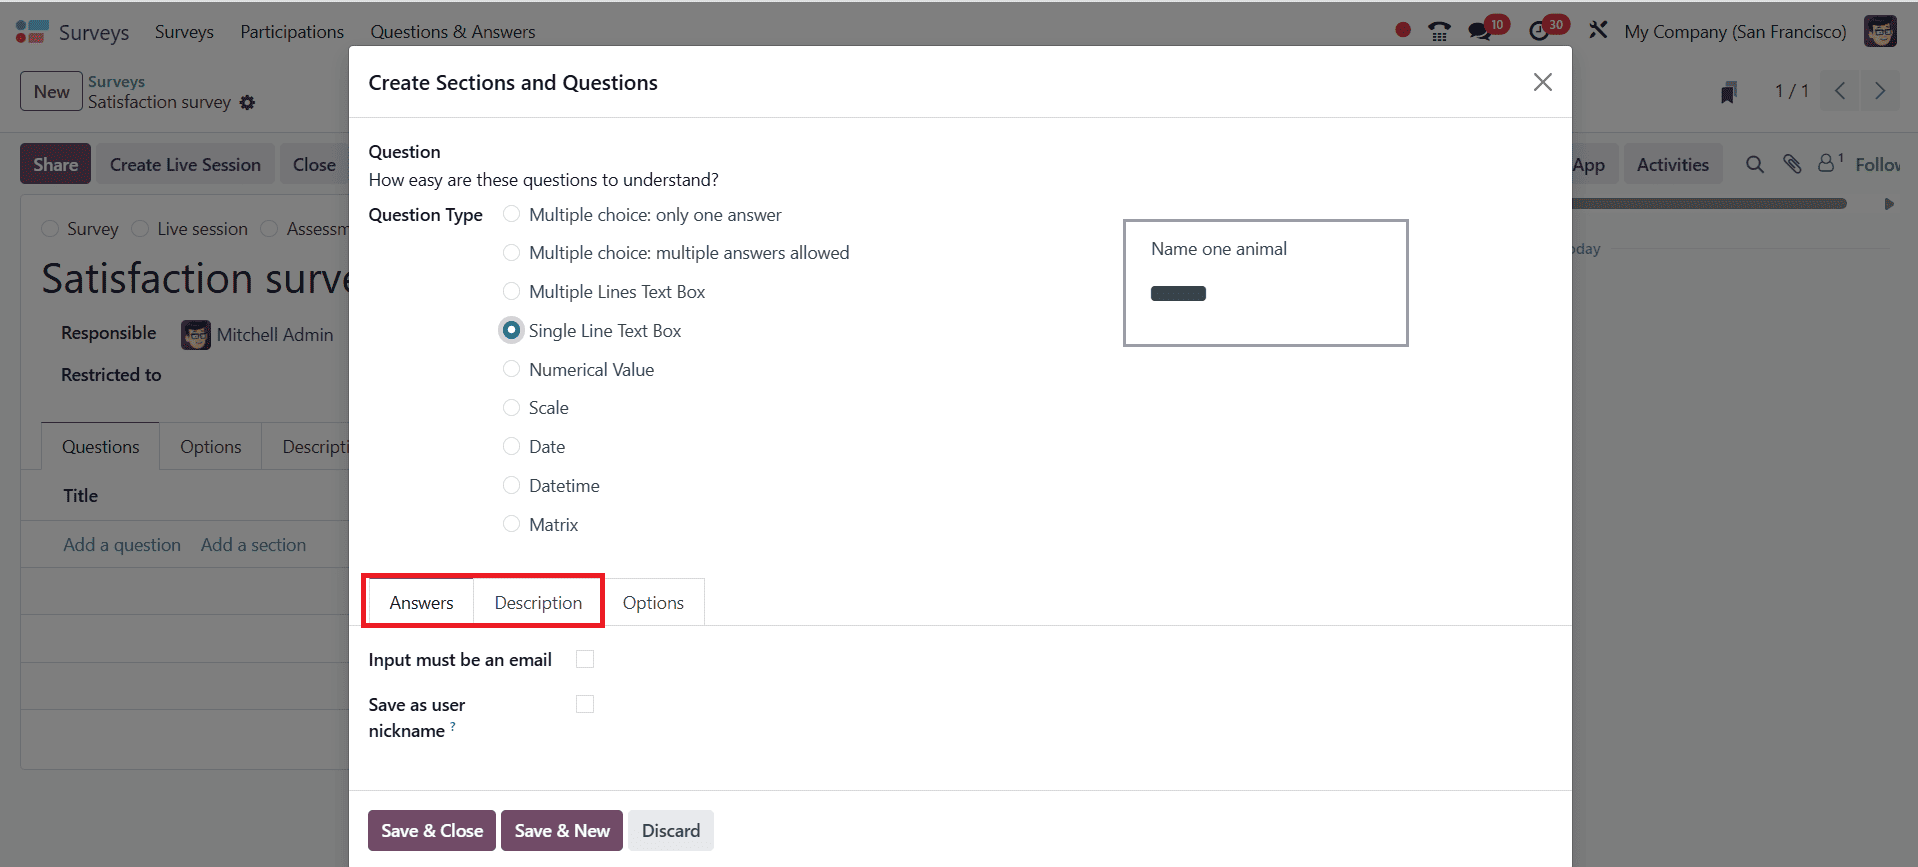
Under the Question tab, click on the Add a question option to add questions. A pop-up window will appear, allowing you to add a question under the Question field. The format of a question can be chosen from the Question Type option, including Multiple choice: only one answer, Multiple choice: multiple answers allowed, Multiple Lines Text Box, Single Line Text Box, Numerical Value, Scale, Date, Datetime, or Matrix. When your question type is in a single-line text box, you can enable the Input must be an email option to send emails to participants directly. You can also enable Save as user nickname to save the user’s answer as its nickname under the Answers section. Under the Description tab, you can add information about the question.
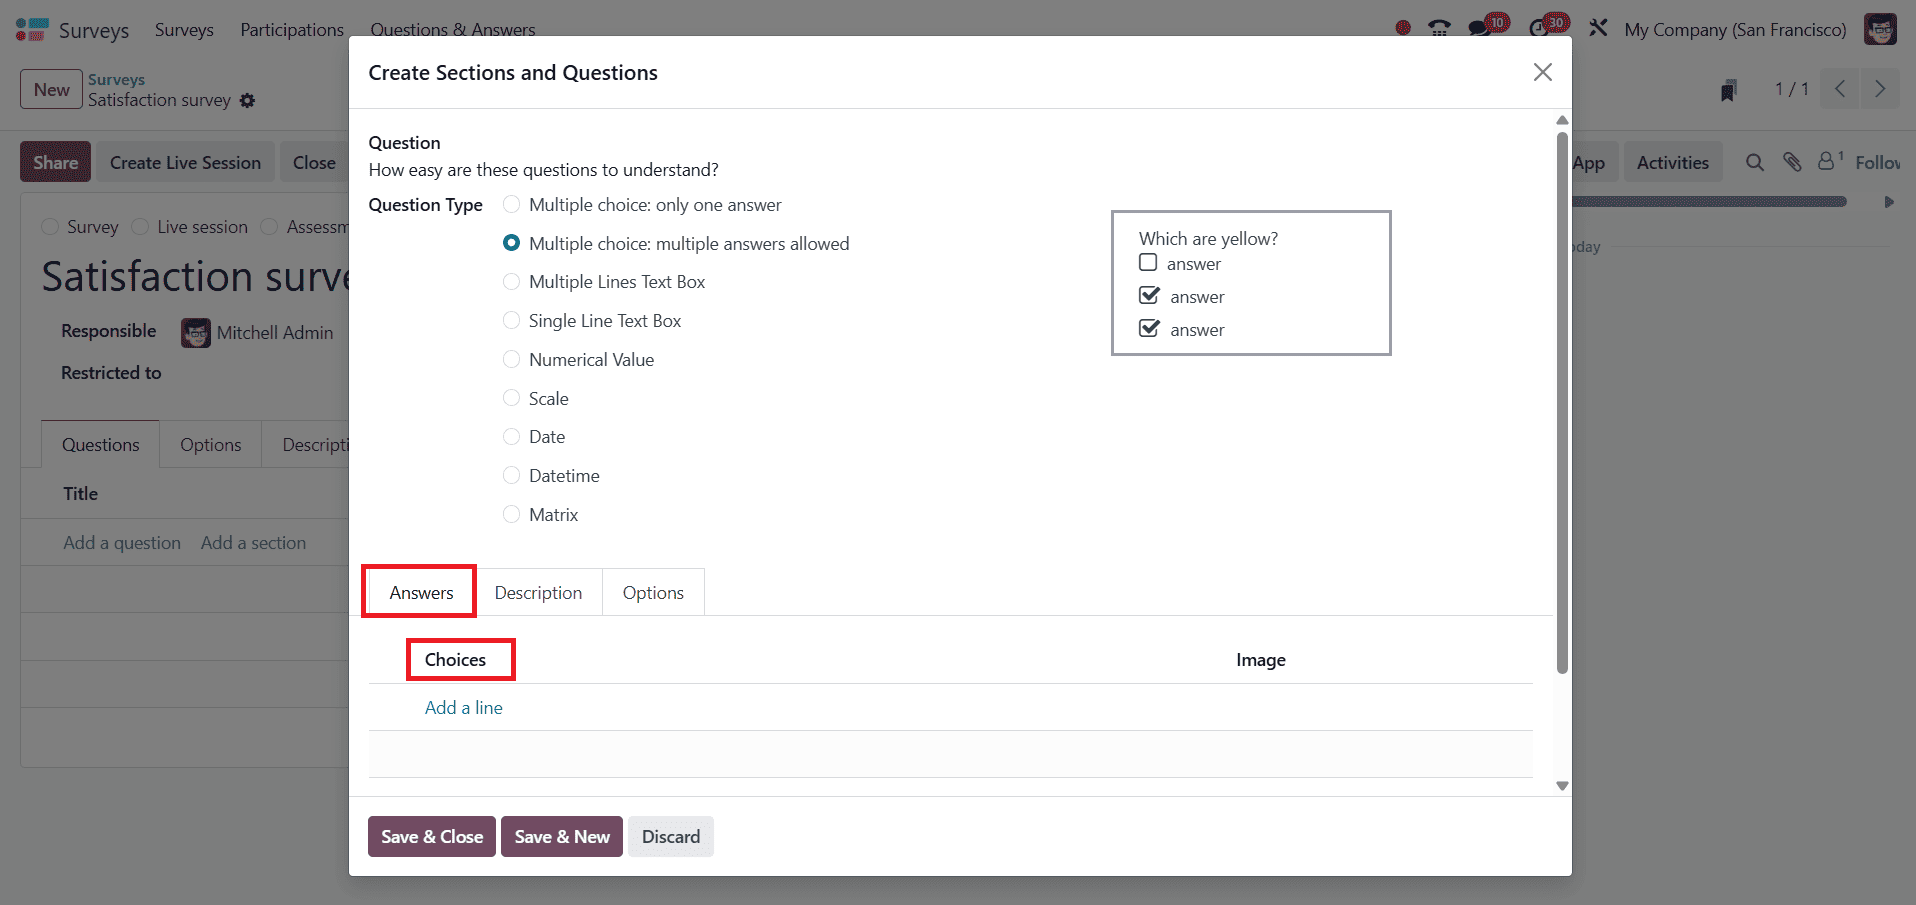
When you select the question type as multiple choice, you can add options in the Choices section by clicking Add a line option under the Answers tab, as shown below:
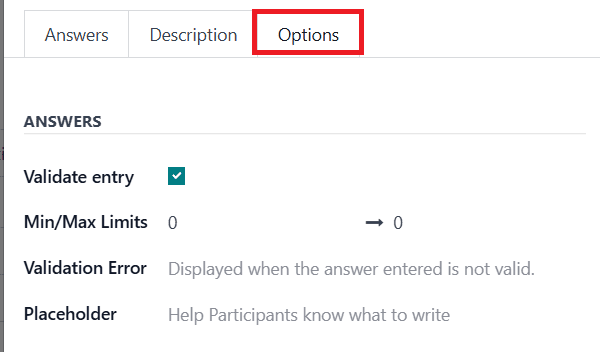
When your question type is in a single-line text box, go to the Answers section under the Options tab and enable Validate entry. In the Min/Max Limits, you can add limits for the particular question. You can add a message under the Validation Error field, which will be displayed when the entered answer is invalid. The Placeholder field helps participants know what to write.
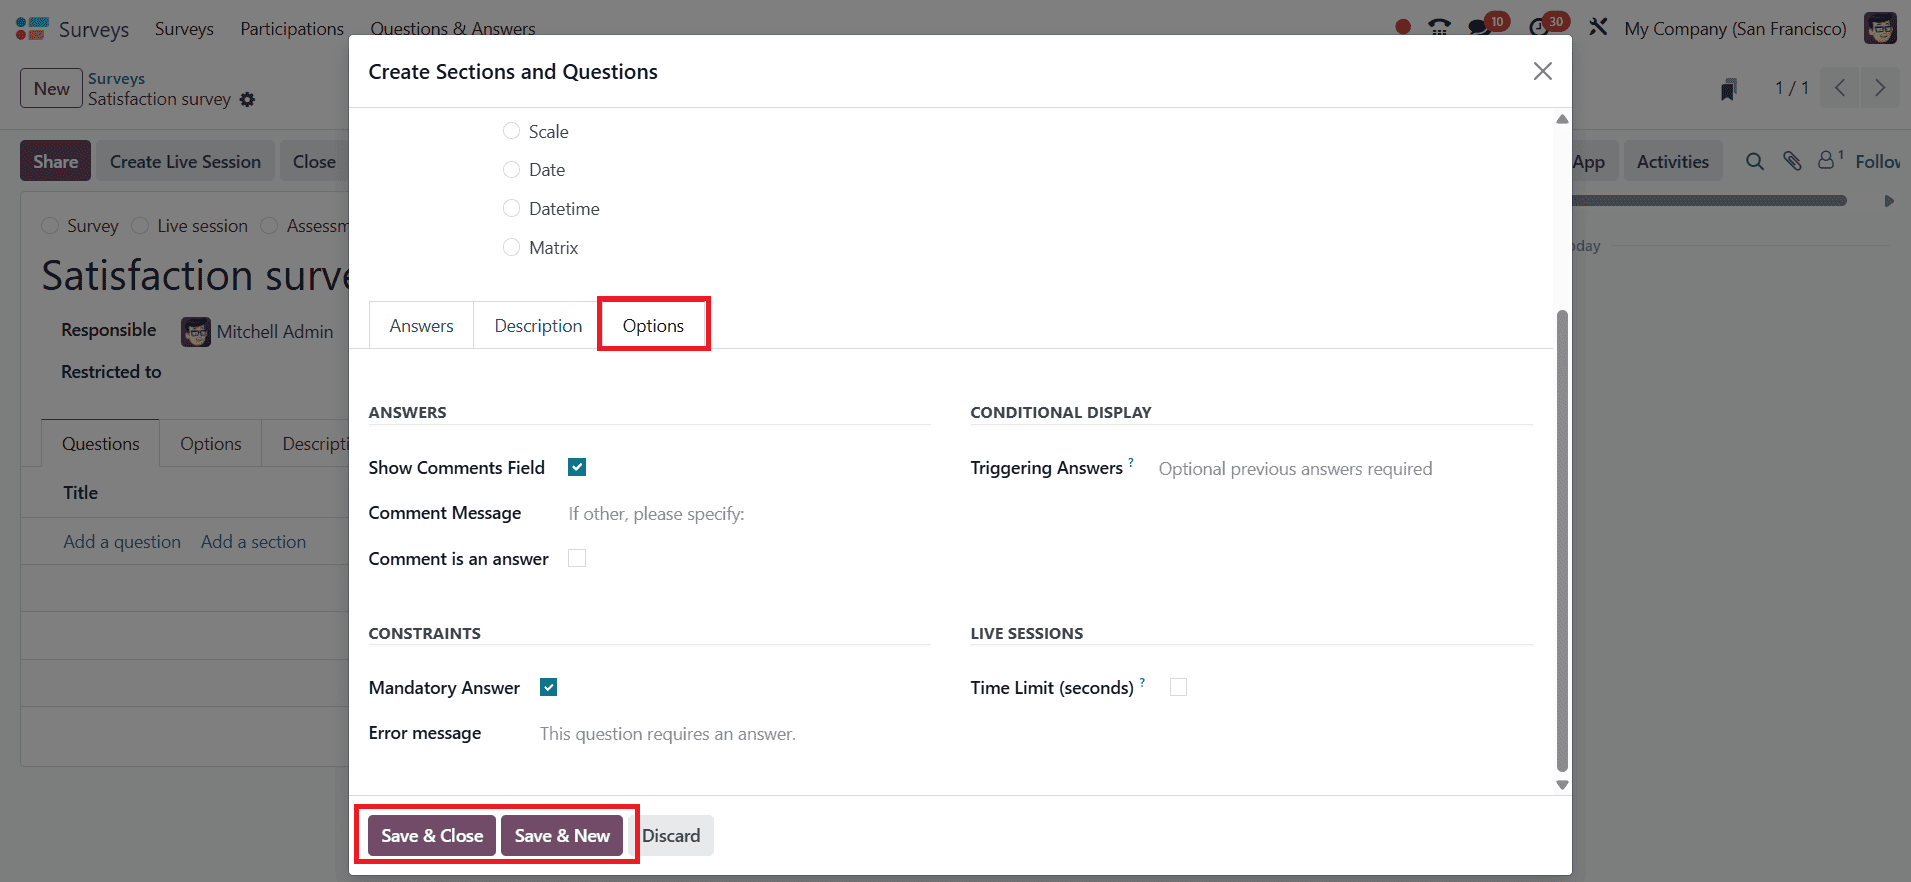
When you select the question type as multiple choice, go to the Answers section under the Options tab, and you can see the Show Comments Field. You can add a message to help the participants answer the question under the Comment Message option. When you enable Comment is an answer, Odoo considers participant comment responses as answers. Then, allow the Mandatory Answer option, which requires participants to provide an answer. You can add an error message prompt under the Error Message option. In the Triggering Answers option, you can add previous responses from questions that would trigger this question. If your survey is a Live Session, you can add a Time Limit for your survey. To create another question, click on the Save & New button. Then, close the section by clicking the Save & Close button.
Options Tab
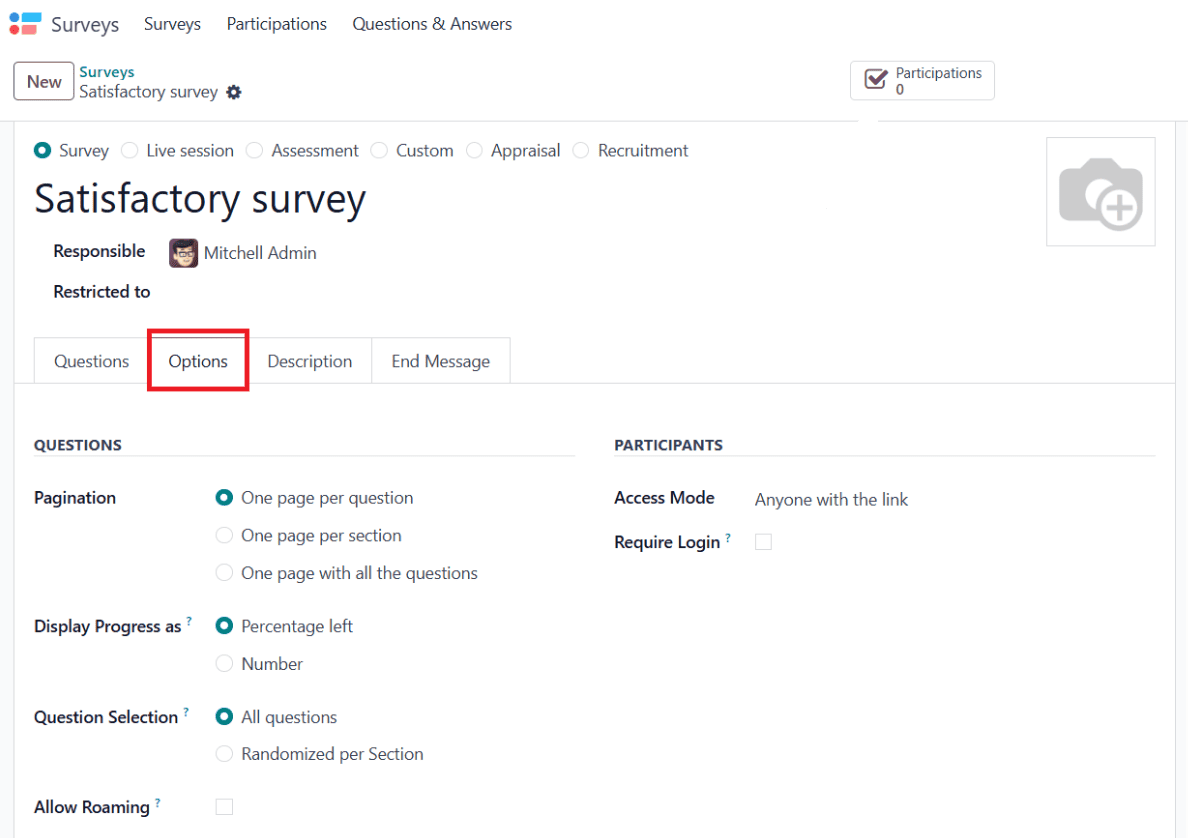
Under the Options tab, you can see four sections: Questions, Participants, Time & Scoring, and Live Sessions. In the Question section, you can customize the layout through the Pagination option by selecting One page per question, One page per section, or One page with all the questions. Select the Display Progress as Percentage left ( shows the remaining participants in percentage) or Number (shows the total number of questions to answer and answered). Select either All questions or Randomized per Section under the Question Selection option. When you select Question Selection as Randomized per Section, a new option appears: Questions Randomly Picked, which helps to choose how many questions can be randomly selected in a section. Then, enable Allow Roaming, which allows participants to return to the previous page. Under the Participants section, select the Access Mode option as Anyone with the link or Invited people only. Next, activate the Require Login option to ensure participants sign in before beginning the survey. You can also enable the Limit Attempts option to define how many times a user is allowed to take the survey.
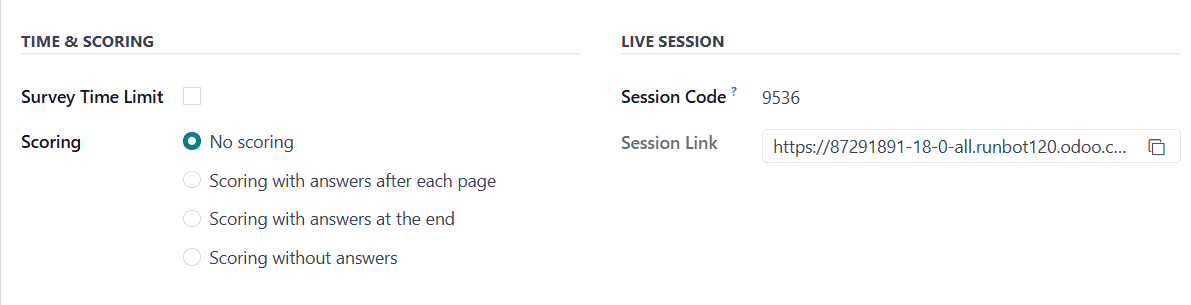
Under the Time & Scoring section, enable Survey Time Limit to set the time limit of the survey. You can choose a scoring method as No scoring, Scoring with answers after each page, Scoring with answers at the end, or Scoring without answers. If the survey is a live session, add the Session Code and the Session Link under the Live Session section.
Descriptions Tab
In the Description tab, you can provide a summary or details about the survey.

End Message Tab
Under the End Message tab, you can add a message to view at the end of the survey.

Sharing and Managing Responses
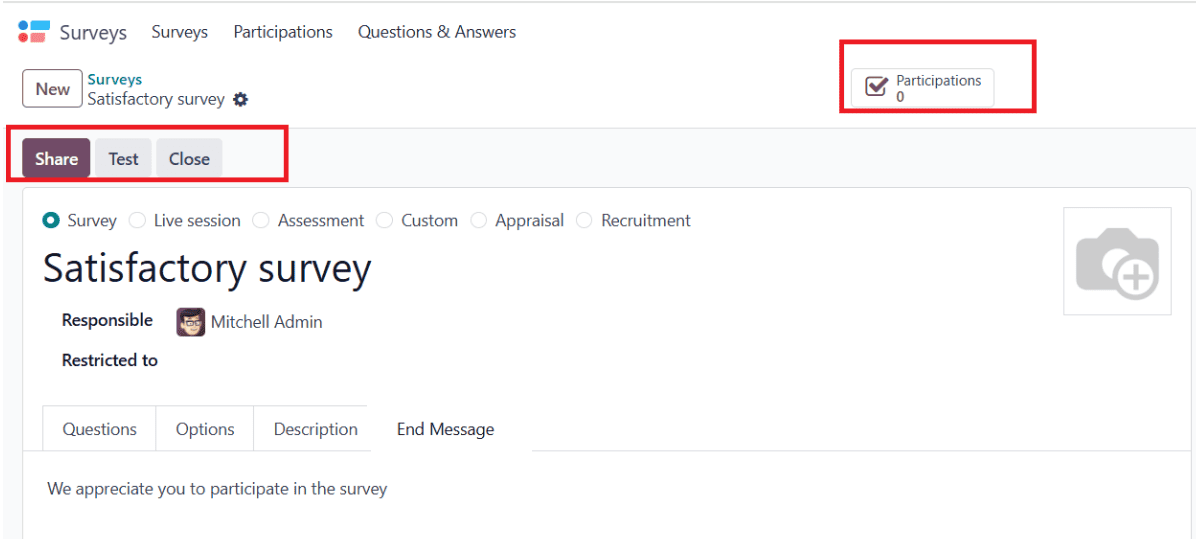
Here, you have three options: Share, Test, and Close. Under the Participations tab, you can see the number of participants who have done the survey.
To share the survey, simply click the Share button. In the pop-up window, you can provide the survey link within the Survey Link option. Then enable Send by Email to share the link through email, and click on the Close button as shown below:

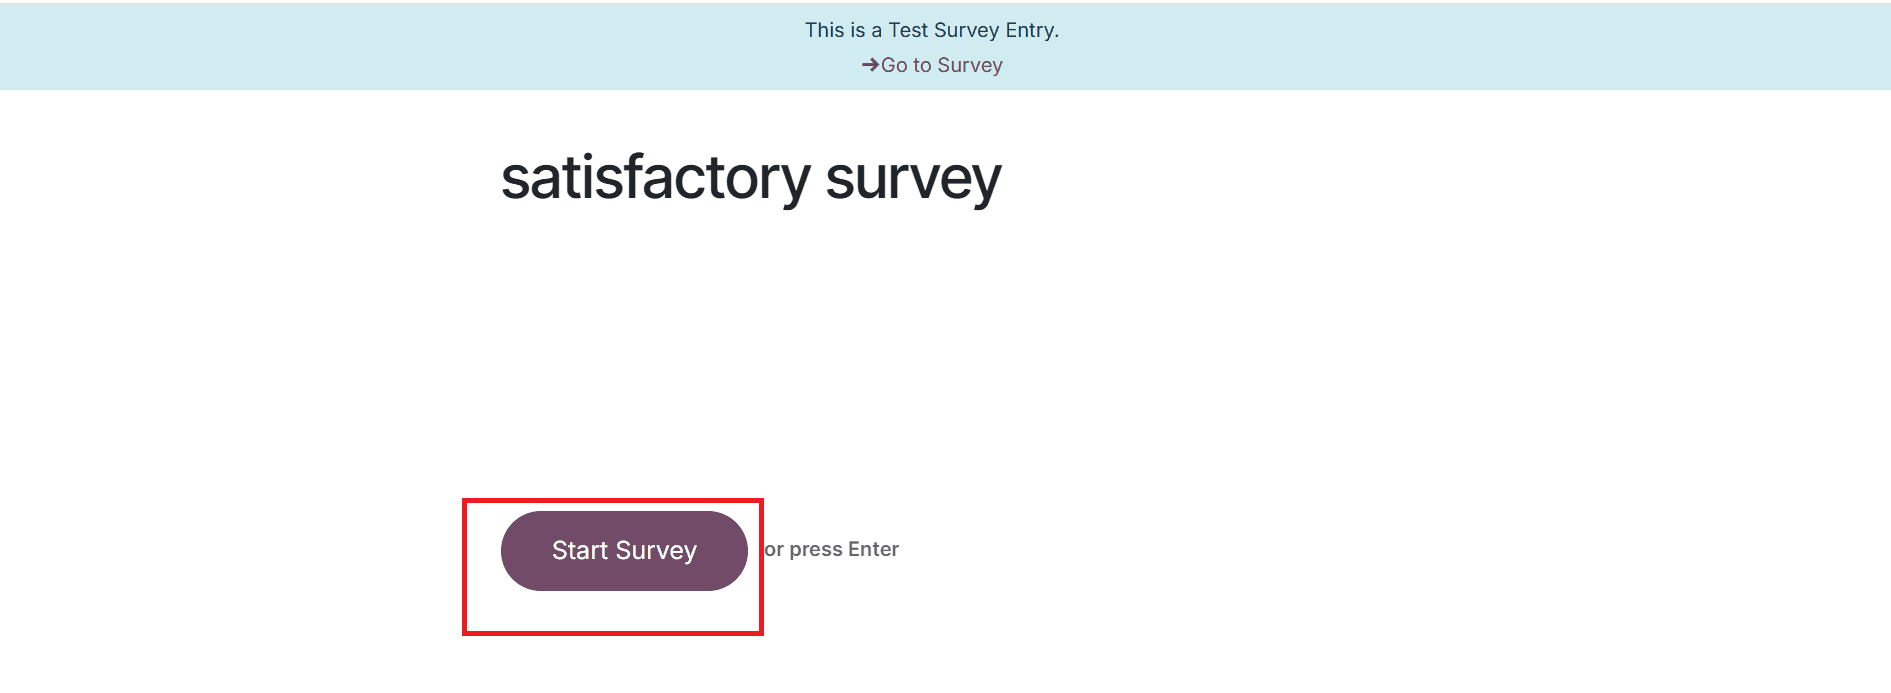
To test the survey, click on the Test button. Then, a window will appear where you click on the Start Survey button to start the survey and complete it.
Here, answer the following question and click the Submit button as shown below:

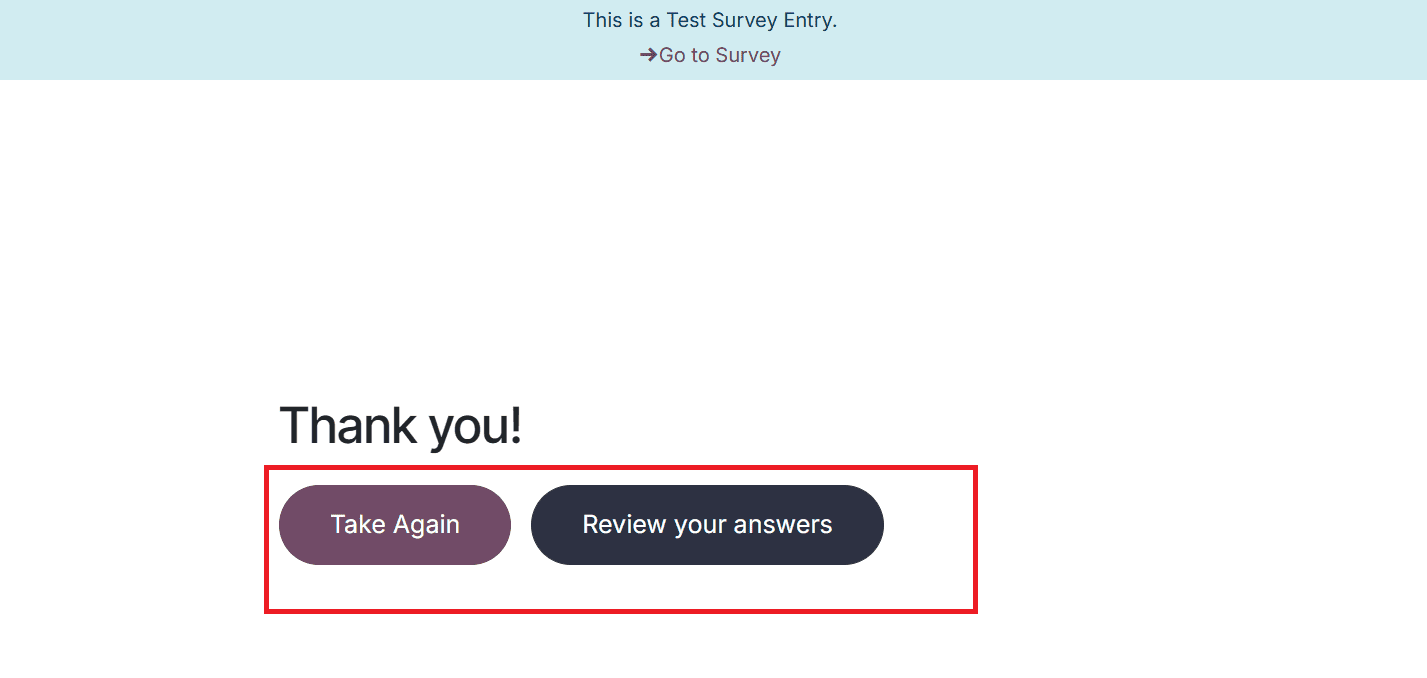
After completing the survey, you go back to the study by clicking on the Take Again option. To review the answer that you have given, click on the Review your answers option.
Viewing Survey Results
This section displays survey details, including the list of Questions, Average Duration, Registered, and Completed. Survey outcomes can be viewed by clicking the See Results button. You can view the results in graph formats such as a bar chart and a pie chart.
Participation Menu
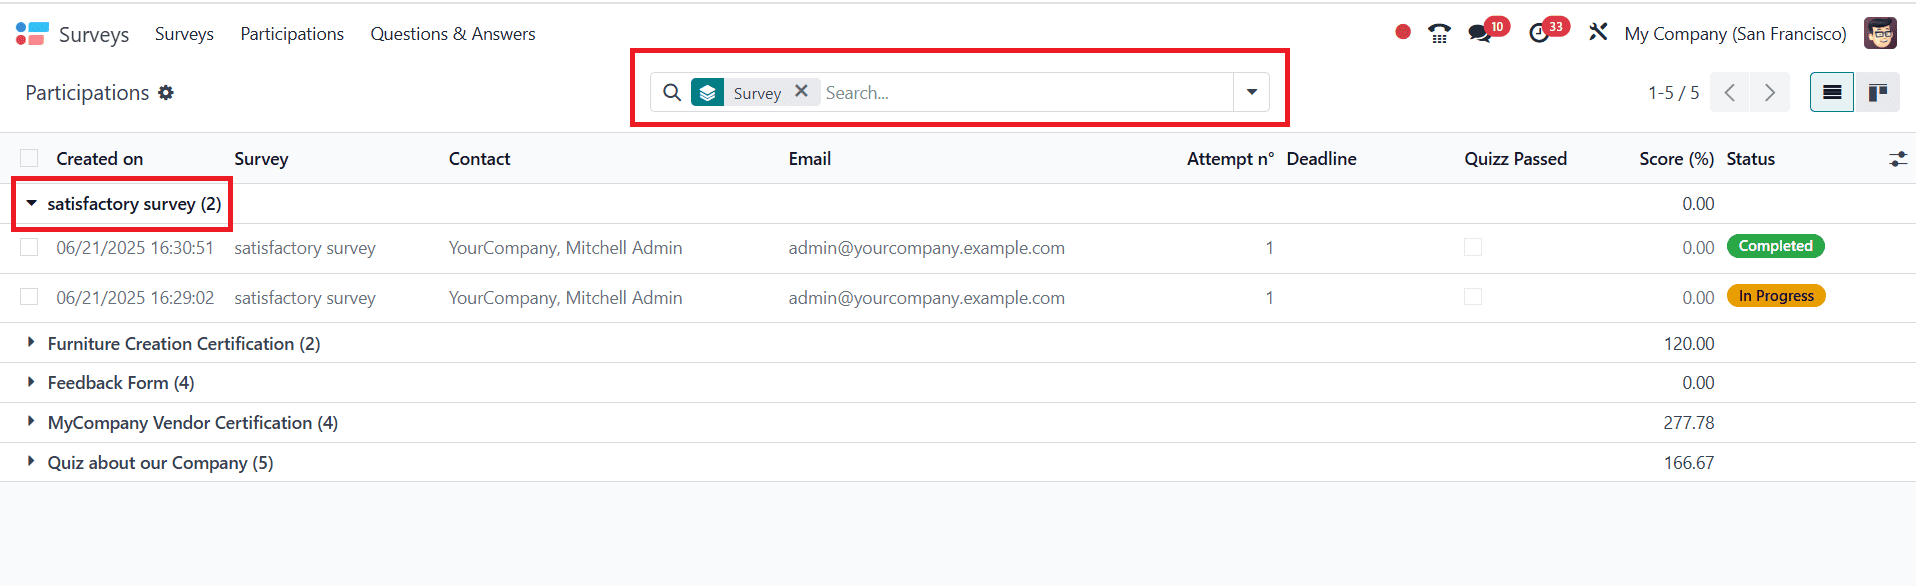
Under the Participation menu, you can manage and view the surveys you have created. Survey information, such as Created on, Survey name, Attempts, Deadline, Quiz Passed, Score, and Status, can be viewed here. You can also view the Participation in Kanban view. Then select any survey from the list and get the details.
Questions & Answers Menu
Within the Questions & Answers menu, you will find three options: Questions, Suggested Values, and Detailed Answers.
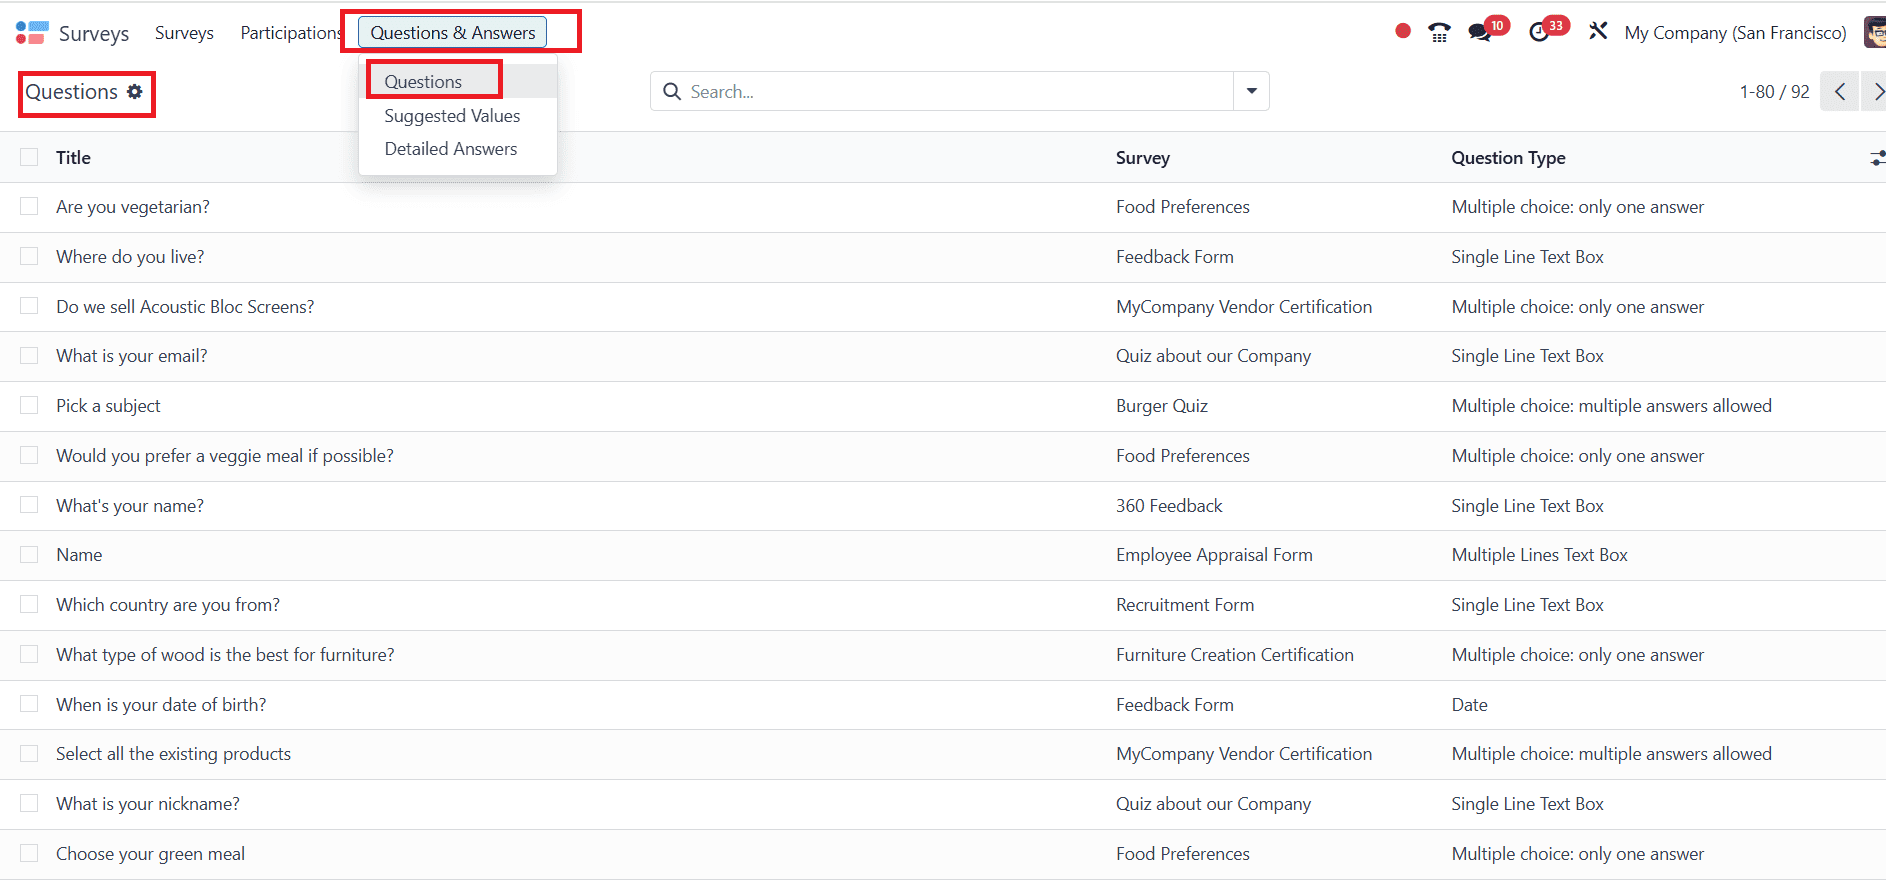
Questions:
Under the Questions option, you can see all the questions that were created in each survey under the Title option. The name of the survey and the question type of each question are categorized under Survey and Question Type.
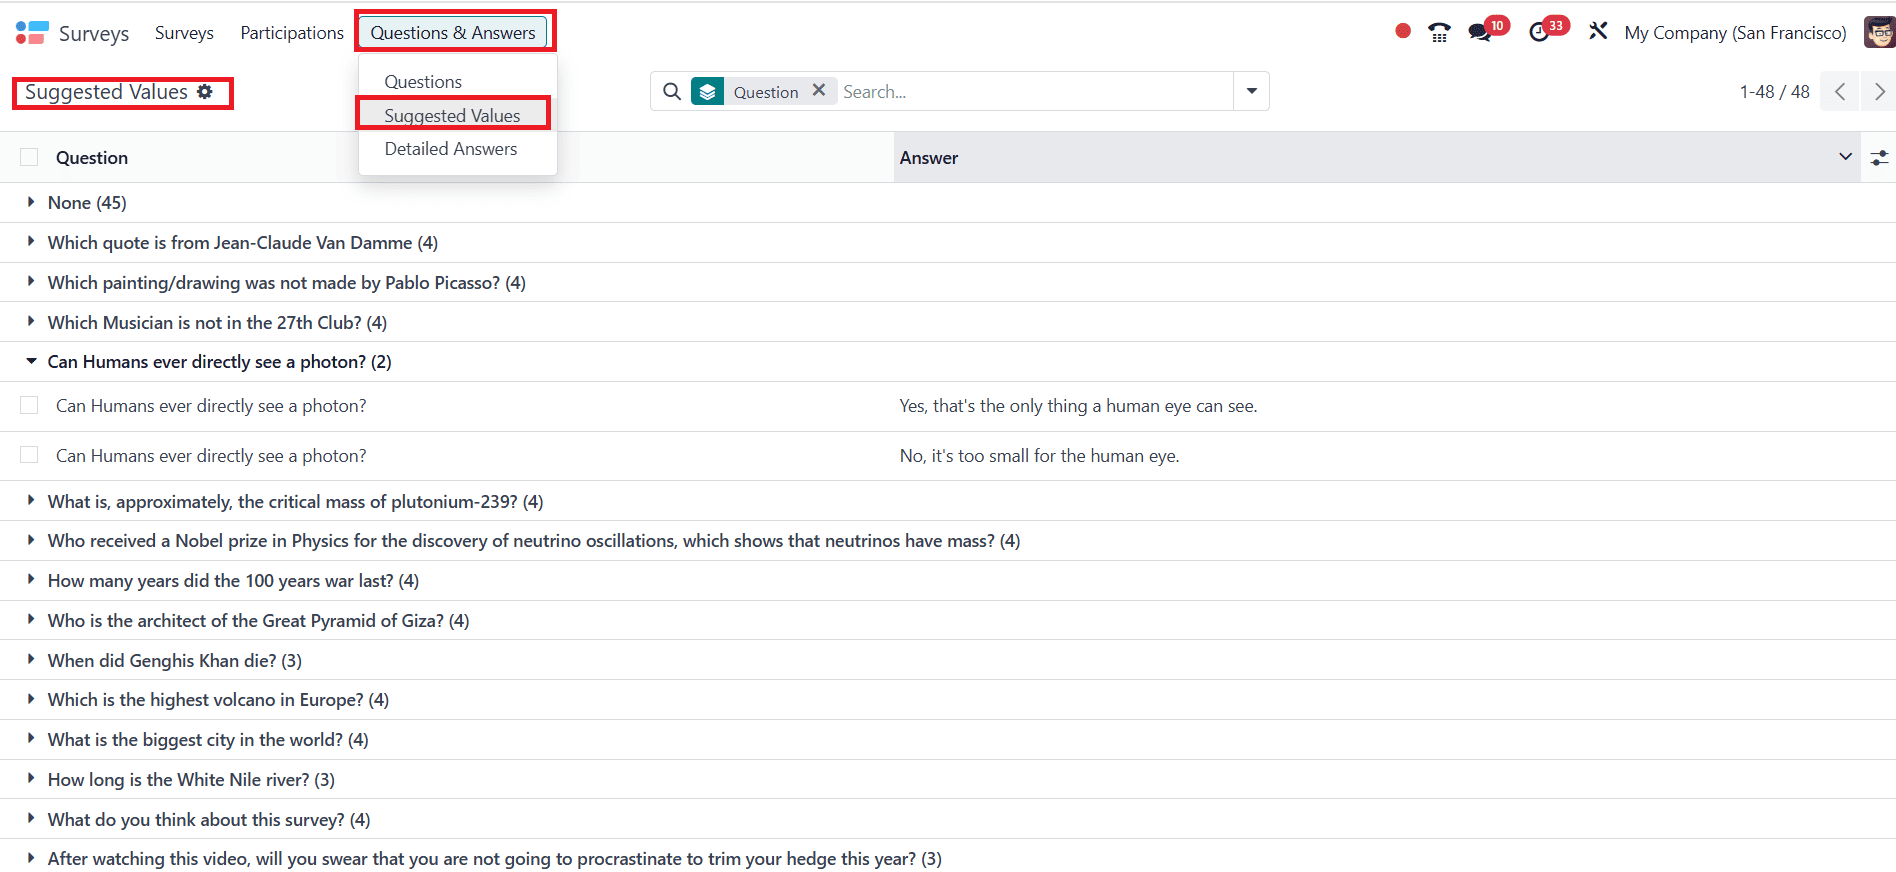
Suggested Values:
When creating survey questions, you can provide participants with suggested answer choices. These predefined responses are available under the Suggested Values option in the Questions & Answers section.
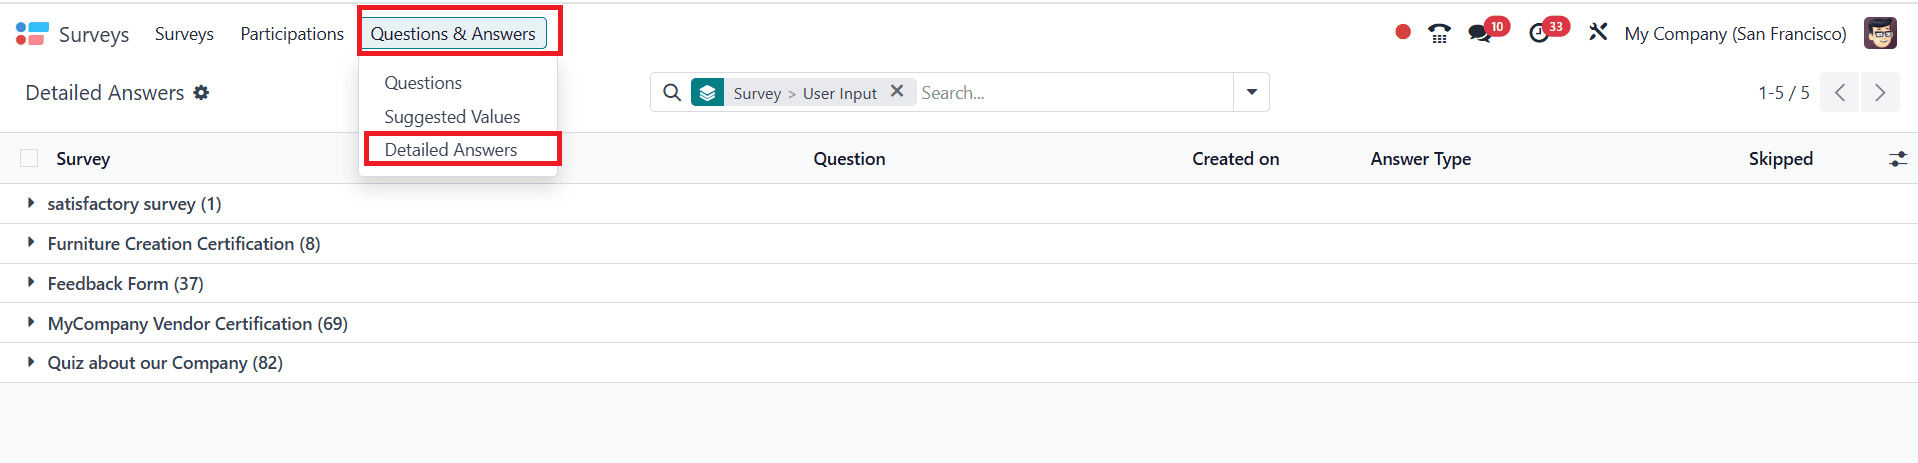
Detailed Answers:
All participant responses from different surveys in Odoo 18 can be viewed under the Detailed Answers option in the Questions & Answers section.
The Survey module in Odoo 18 provides a reliable way to collect responses and transform them into actionable insights. In addition to saving time, its automated distribution tools, variety of question types, and ease of use provide engaging surveys. Using real-time analytics and reports, organizations can make data-driven decisions more efficiently. The module’s smooth interaction with other Odoo apps guarantees that the data gathered is used effectively and boosts productivity. For internal evaluations, customer satisfaction surveys, or market research, Odoo 18 offers the adaptability and effectiveness needed to produce trustworthy outcomes, making it a vital tool for contemporary businesses striving for ongoing development.
To read more about An Overview of Odoo 17 Survey Module, refer to our blog An Overview of Odoo 17 Survey Module