The most recent version of the Odoo 17 accounting management system provides a full suite of features and effective tools to help you proficiently handle all accounting tasks. By utilizing the trustworthy accounting solutions offered by Odoo ERP software, manual labor and mistakes in financial management can be reduced. Your organization's financial management will operate more efficiently if the Accounting module is used properly.
Odoo 17 enables you to interface the Accounting module with other key database modules, like Sales, Purchase, Point of Sale, Payroll, and many more, to facilitate the systematic completion of accounting activities. The system's workflow can continue without interruption thanks to this integration option. Additionally, it will make it easier for the business to administer and carry out various accounting tasks on the same platform.
There are several ways to produce invoices with Odoo 17. You can use the system to automatically or manually create customer invoices. Odoo automates the creation of client invoices based on the module you use and the actions you take. For instance, you will receive a draft client invoice after the sales order is confirmed when you create a sales order in the Sales module. In this instance, all that's required of you is to approve the draft invoice and finish the payment process. Here, as sales orders are being confirmed, invoices will be generated automatically.
Additionally, Odoo offers you the ability to create customer invoices at your convenience manually. All of these invoices will be monitored and documented through the Odoo Accounting module's Invoices menu. You can select the Invoices option from the drop-down menu by clicking on the Customer menu in the Accounting module to access this menu.
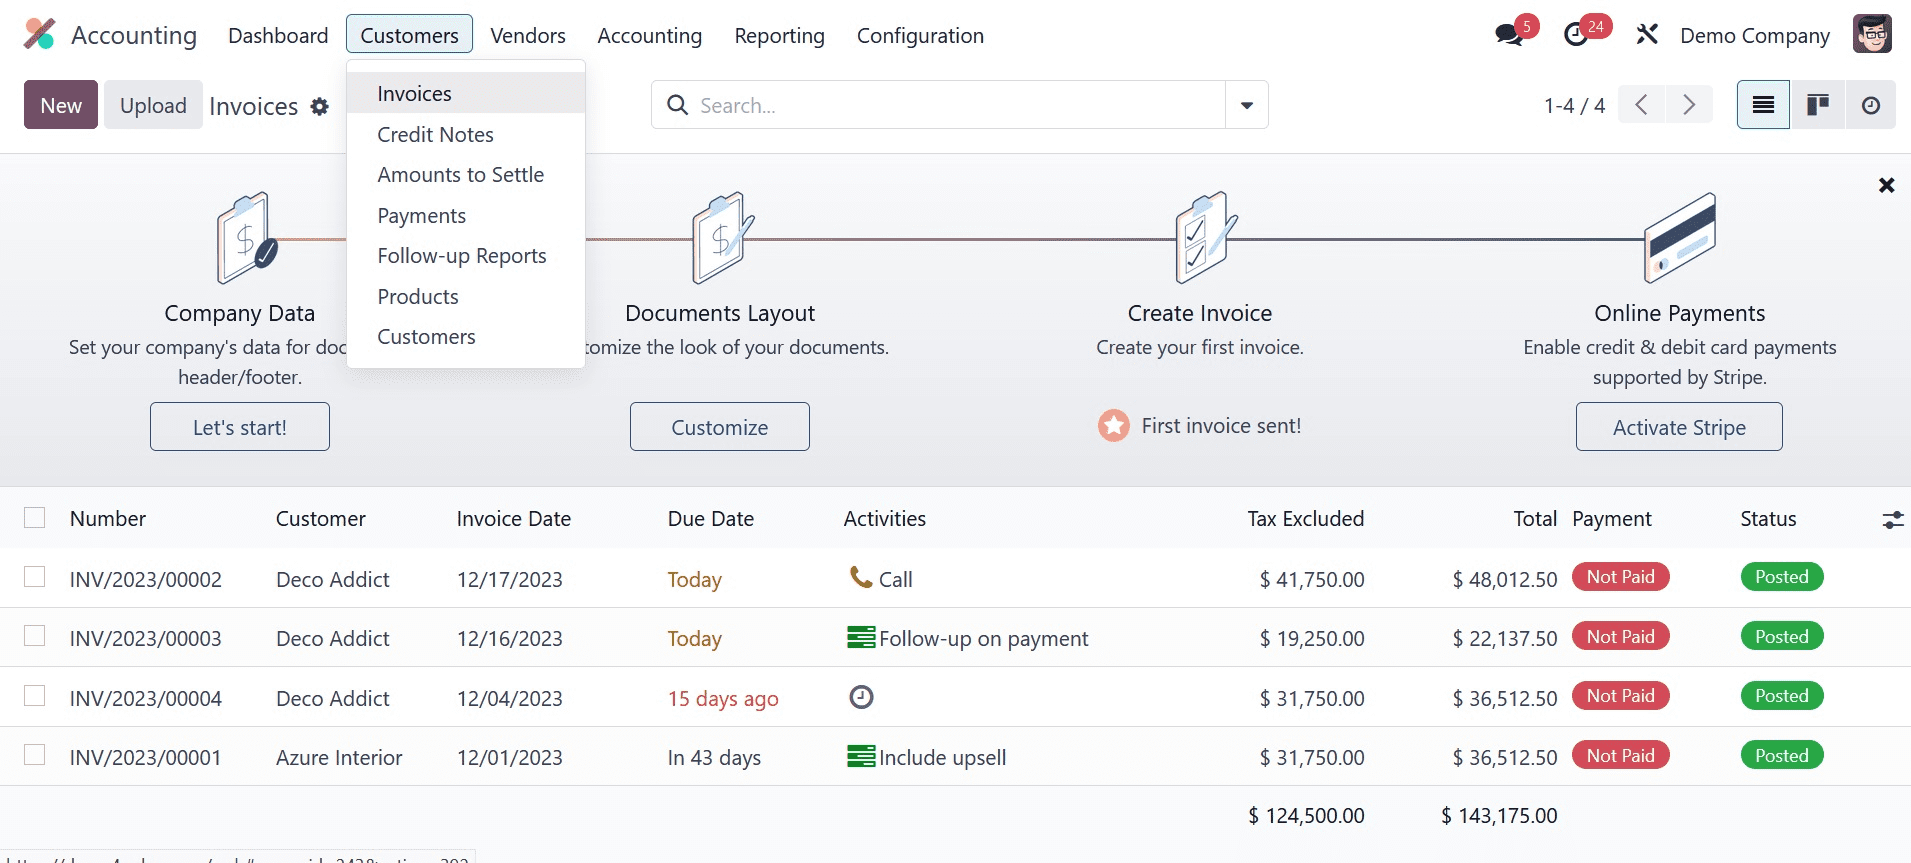
The list of invoices generated for various activities in different modules is seen in the screenshot above. As you can see, each invoice's number, customer, invoice date, due date, activities, tax excluded, total, total in currency, payment status, and status are all displayed in the platform's list view. Use the little icon that is highlighted next to the Status box, as shown below, to add further information about the customer invoice to the list view that is now visible.
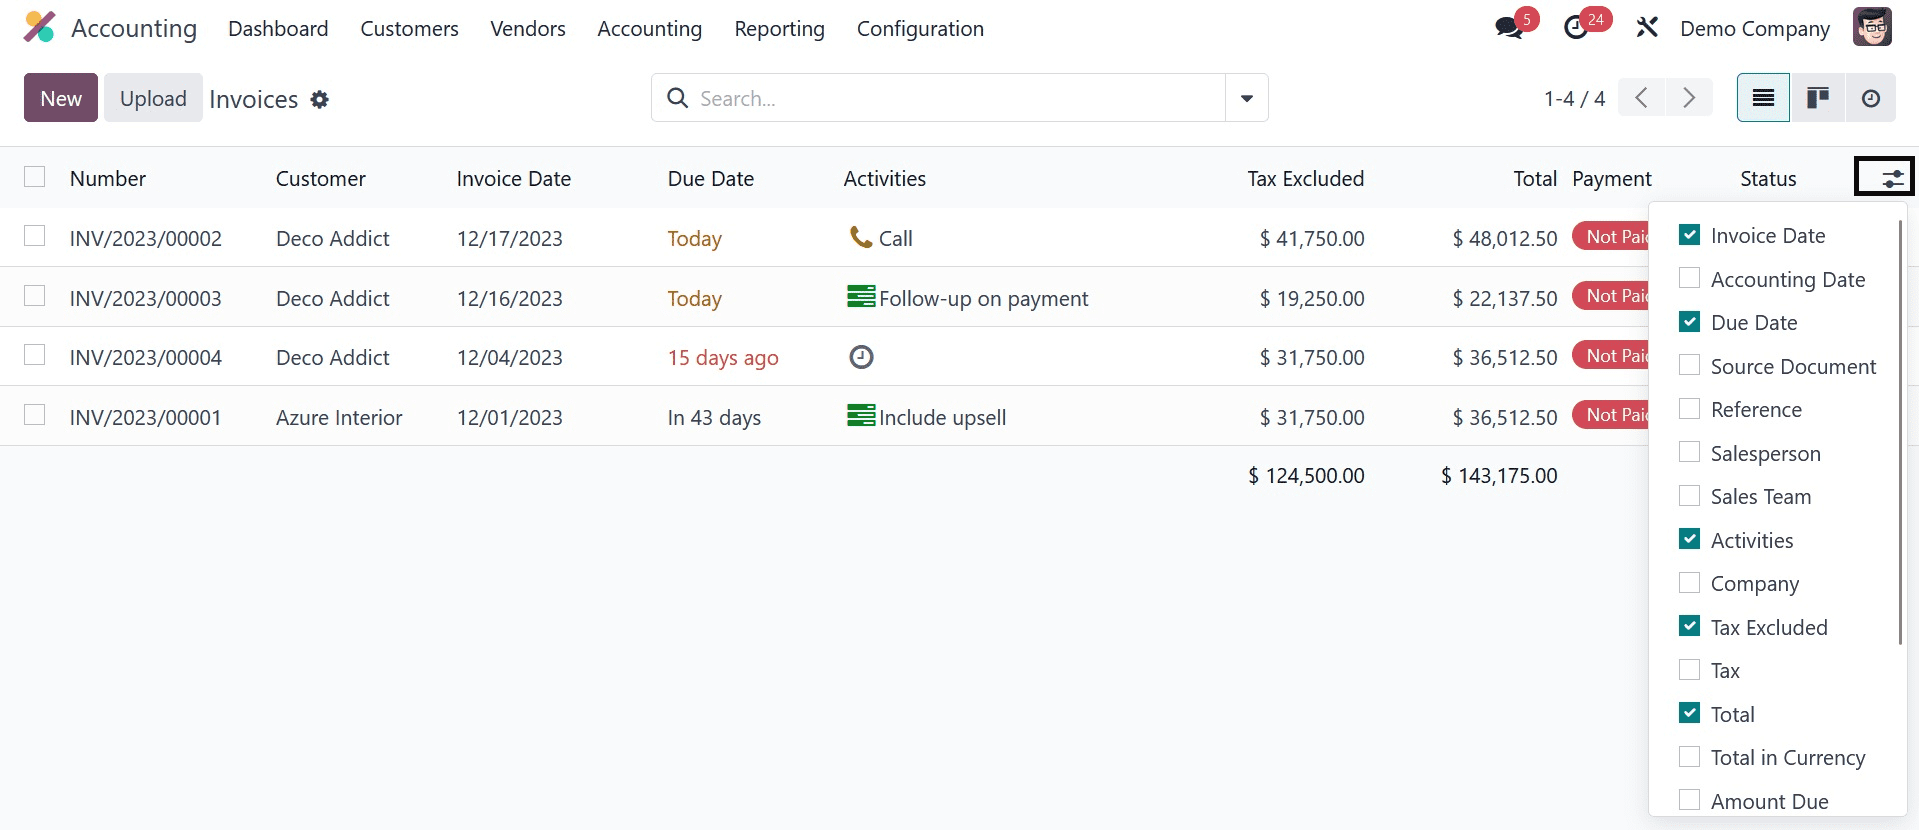
This list, comprises the following fields that you can activate: To Check, Payment Status, Electronic Invoicing, Salesperson, Sales Team, Activities, Company, Tax Excluded, Tax, Total, Total in Currency, Amount Due, Invoice Currency, and Date of Invoice.
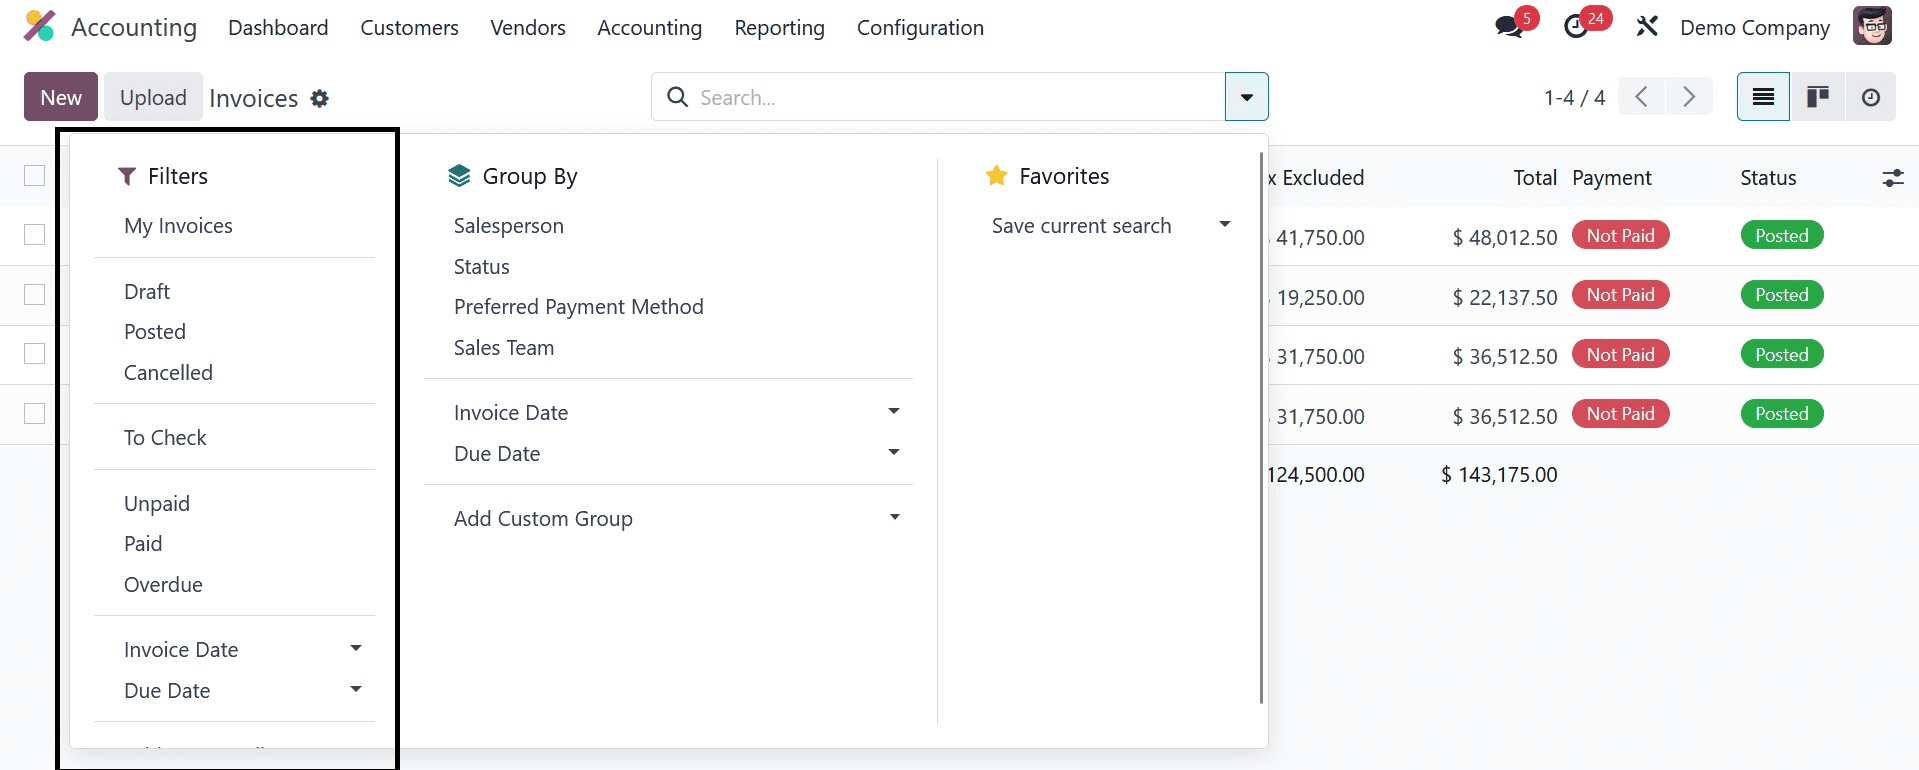
You can filter the bills based on My Bills, Draft, Posted, Cancelled, To Check, Unpaid, Paid, Overdue, Invoice Date, and Due Date with the help of the default Filters. You can use the Add Custom Filter option to build custom invoice filters.
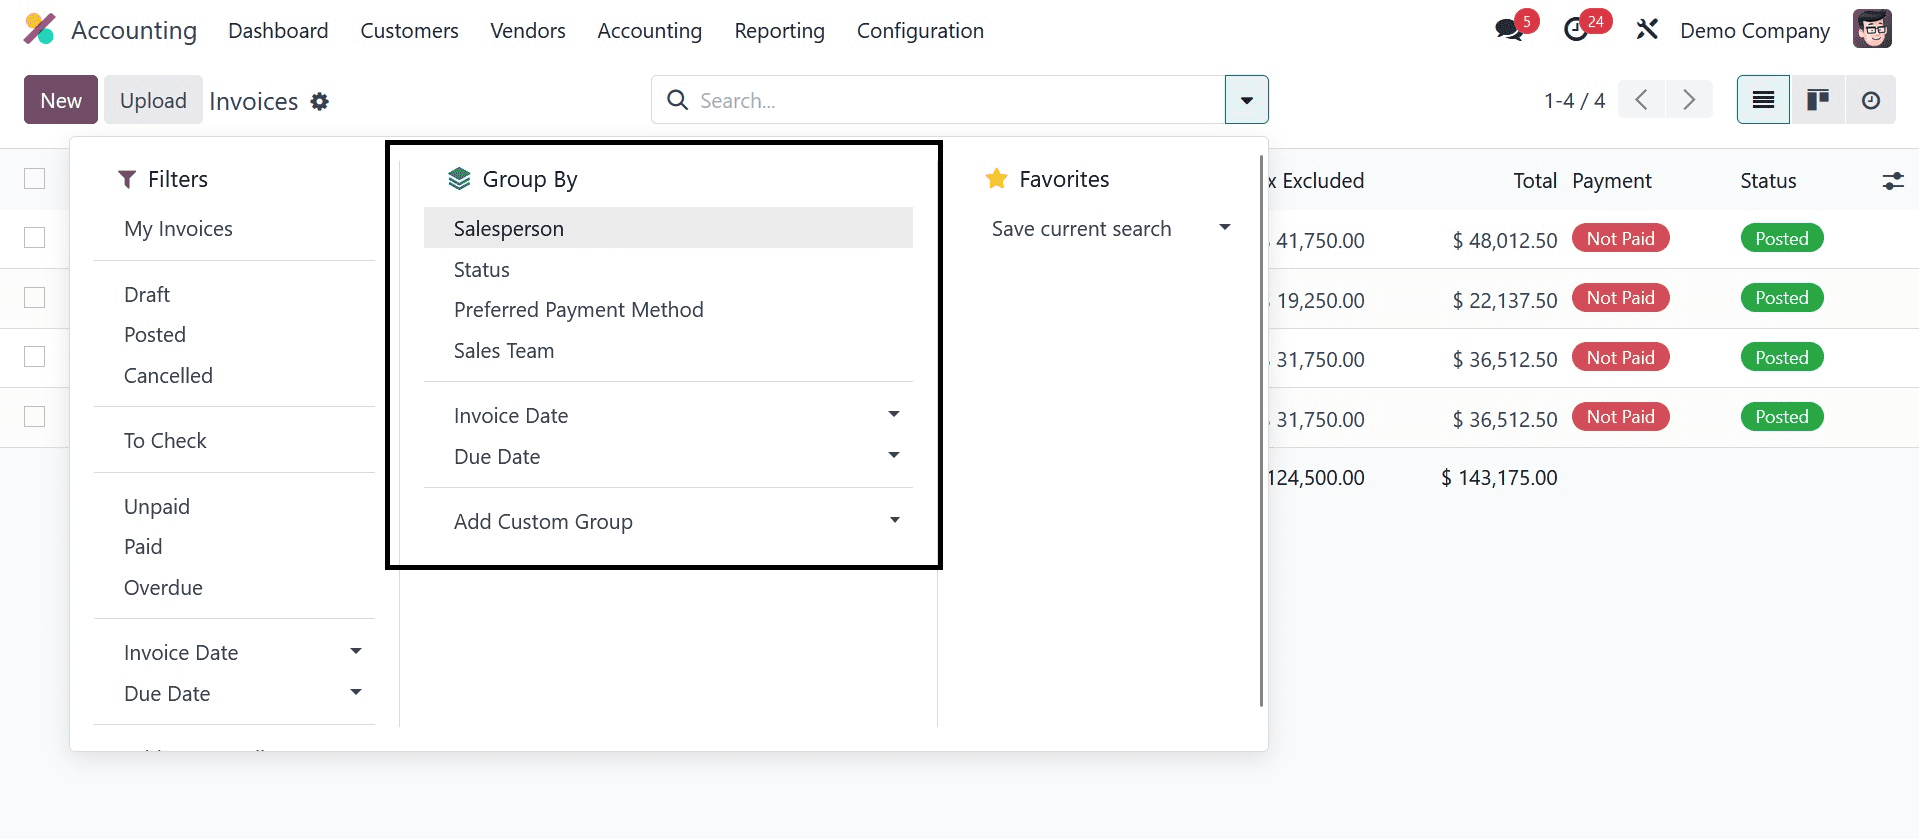
Salesperson, Status, Sales Team, Electronic Invoicing State, Preferred Payment Method, Invoice Date, Due Date, and Referrer are available grouping options under the Group By section. To create custom group choices, click the Add Custom Group button.
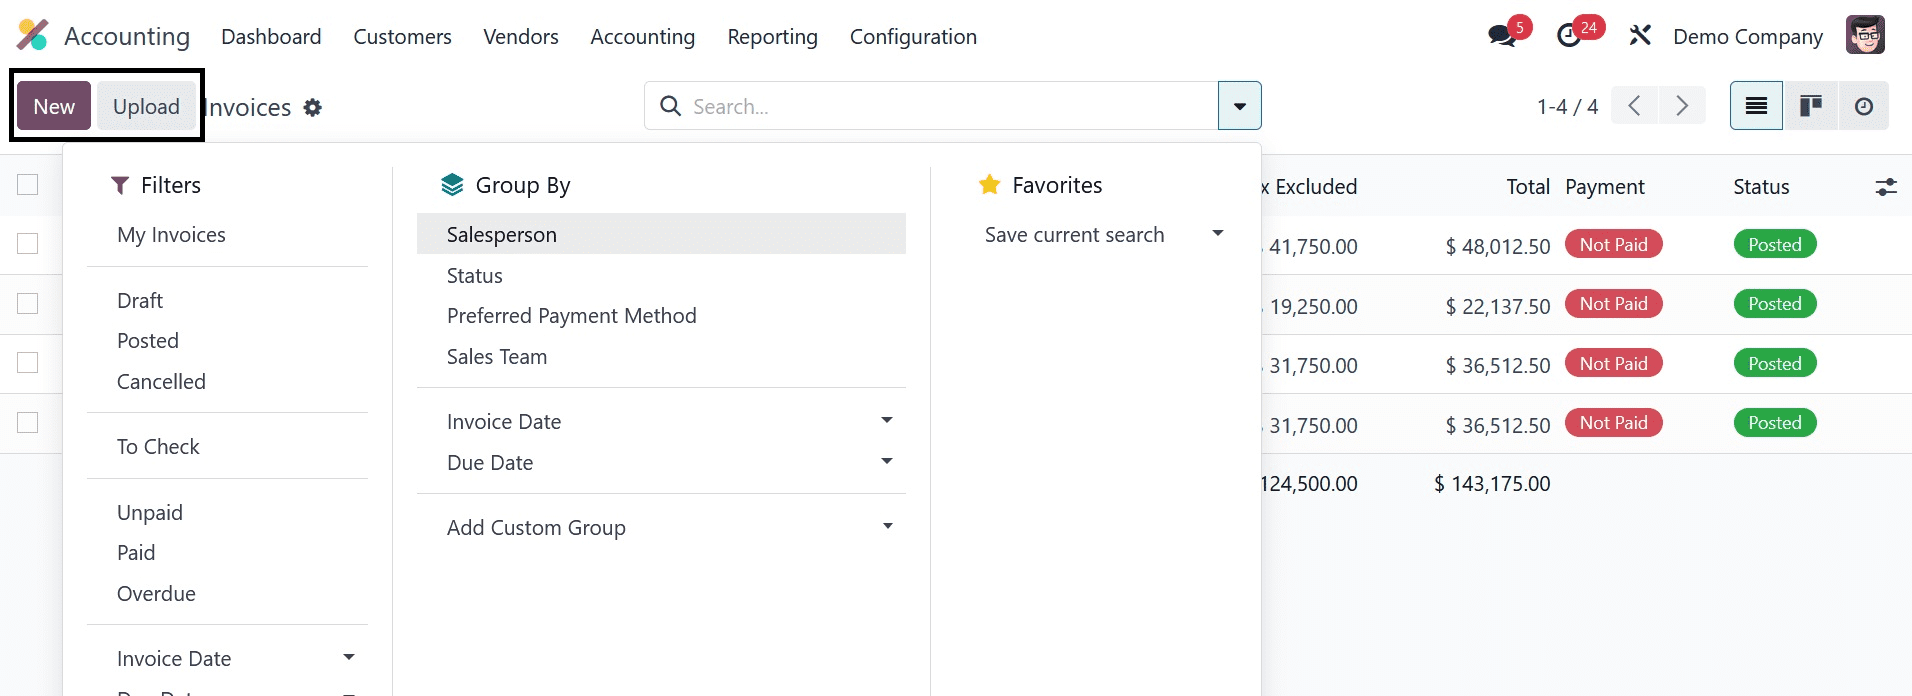
An invoice can be uploaded to the module using the Upload button, as seen in the image. To manually create a new invoice, use the New button. This will take you to the window where you can create invoices, as seen below.
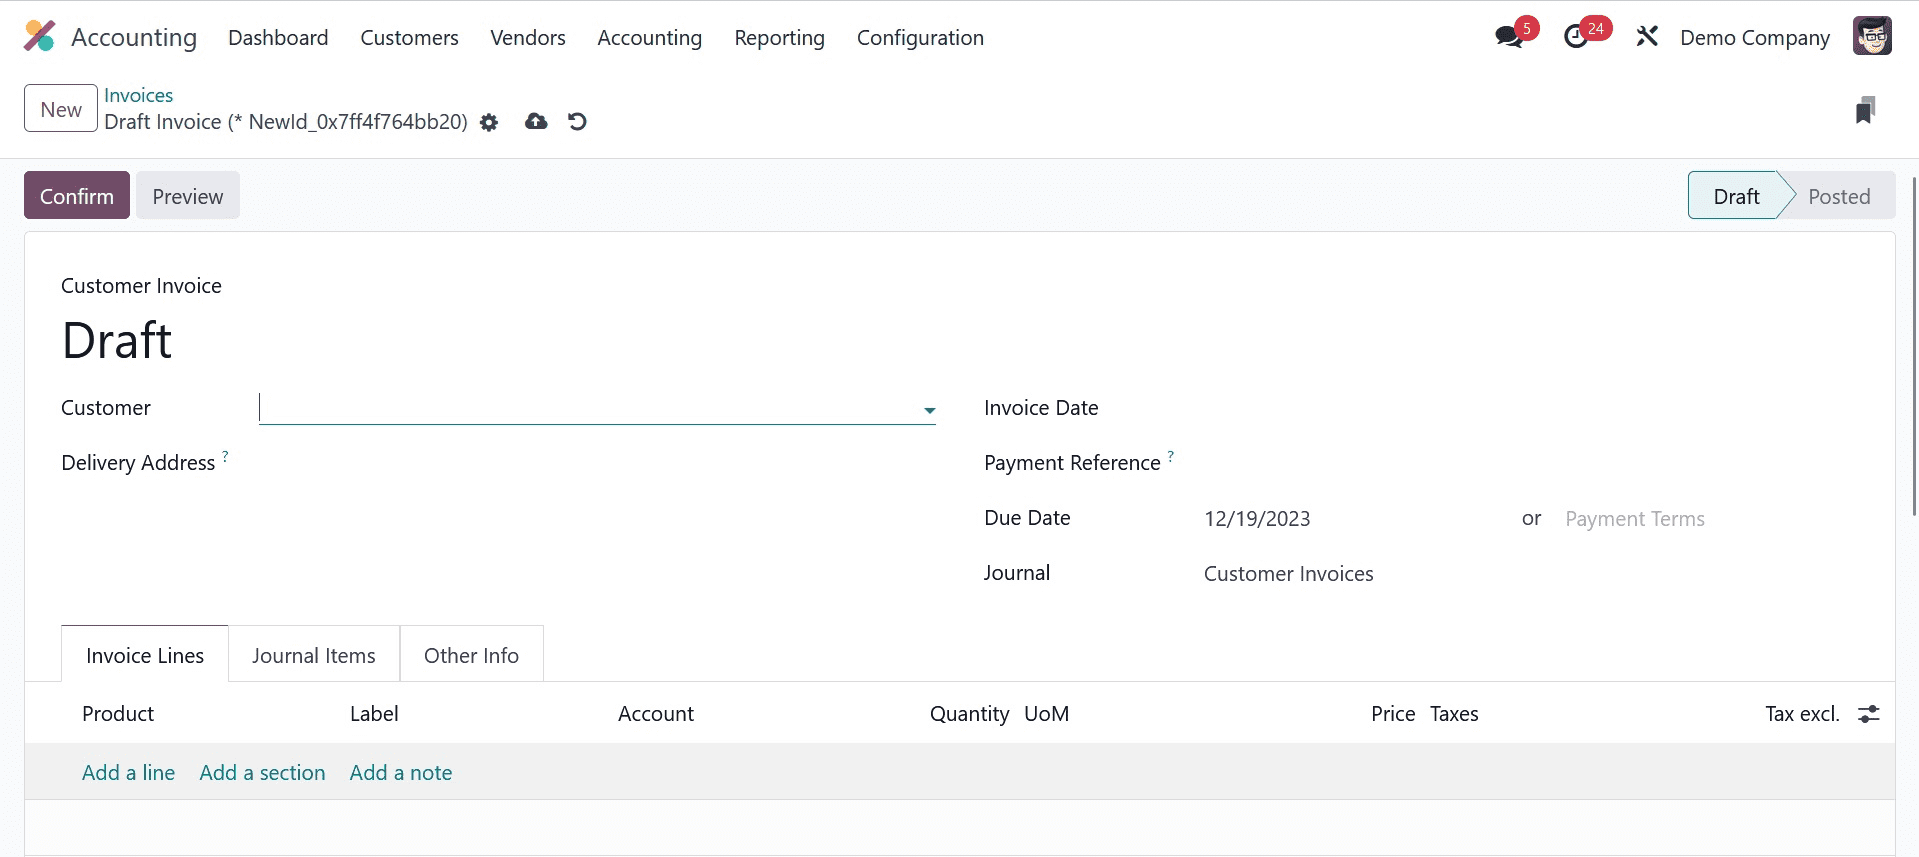
Let's see how to use this window to create a draft invoice. In the Customer and Delivery Address fields, specify the customer's ID and current delivery address, respectively. Setting an invoice date and mentioning the payment reference to be used on journal entries in the appropriate fields is crucial. According to the setting, the relevant Payment Term will show up in the invoice automatically after the client ID is mentioned. If not, you can set an invoice's Due Date, by which the customer must pay the invoice. Choose an appropriate Journal in the corresponding field for the invoice.
Three more tabs, such as Journal Item, Other Info, and Invoice Line, will be included in the window. You can use the Add a Line button under the Invoice Lines tab to mention each product in the list individually. Product, Label, Account, Analytic, Quantity, UoM, Price, Taxes, and Subtotal can all be added here. When invoices are generated automatically from sales orders, the products listed in the sales order's Order Line will be displayed on the Invoice Line.
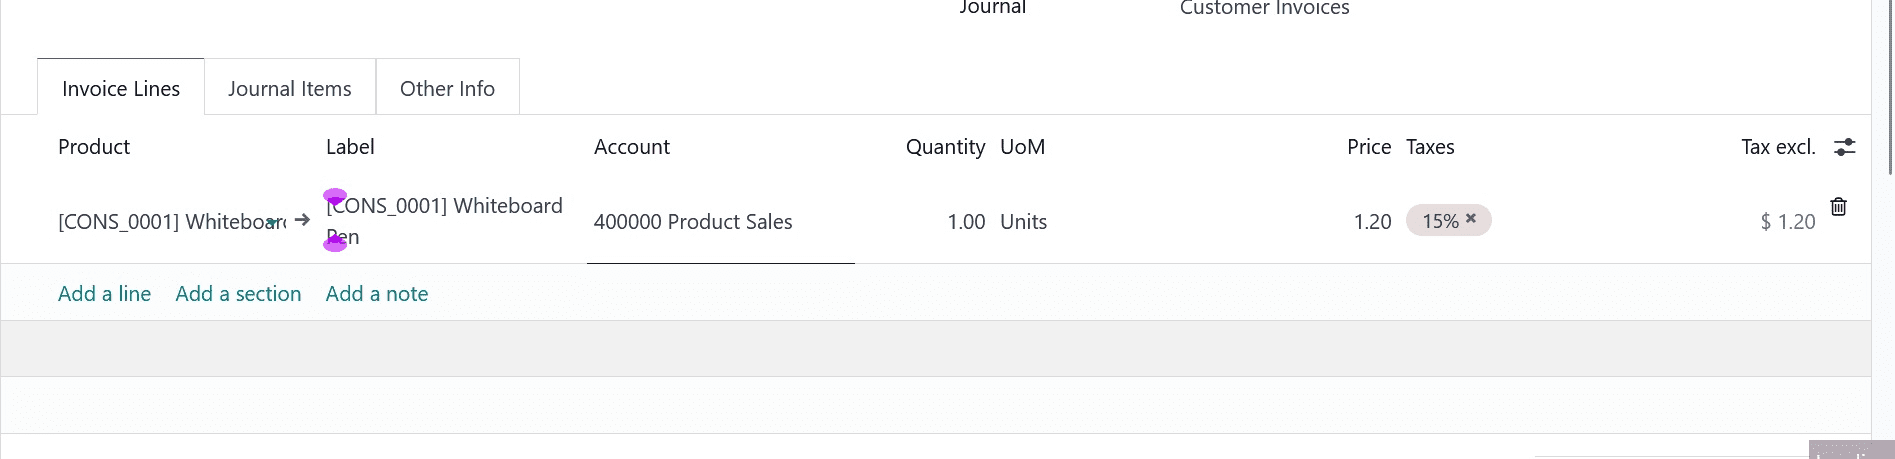
The Untaxed Amount, Taxes, and Total of the invoice can be seen under the Invoice Line once products have been added.
The Journal Items page displays the associated journal items for the products you stated in the invoice line, together with information on the Account, Label, Origin, Reference, Analytic, Debit, Credit, and Tax Grids.
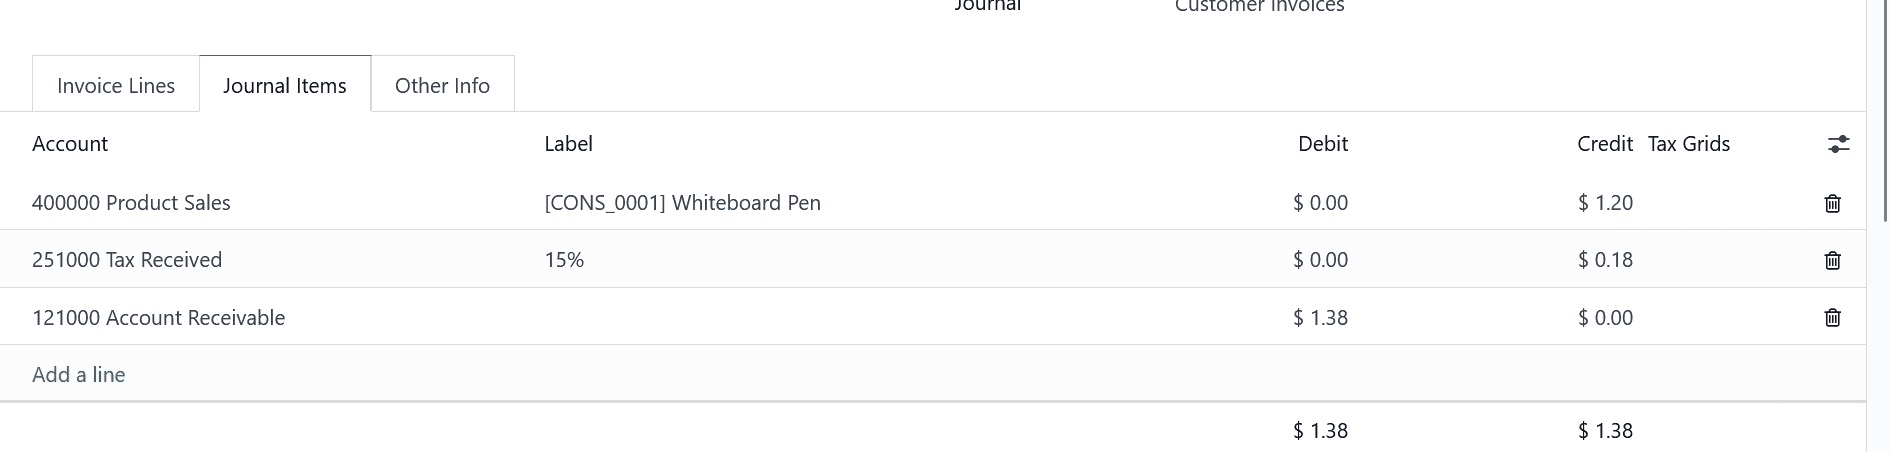
One can be removed from the journal entries by using the delete icon, and a new one can be added by using the Add a Line button.
You can enter the invoice's accounting and invoicing details under the Other Info tab. The Customer Reference can be added in the Invoice field. By entering their IDs in the designated fields, a specific salesperson or sales team can be allocated to this invoice. You can specify the recipient bank account number in the Recipient Bank field, which is where the invoice will be paid. You can enter the referrer's ID in the Referrer section if you have any referrals for this sale.
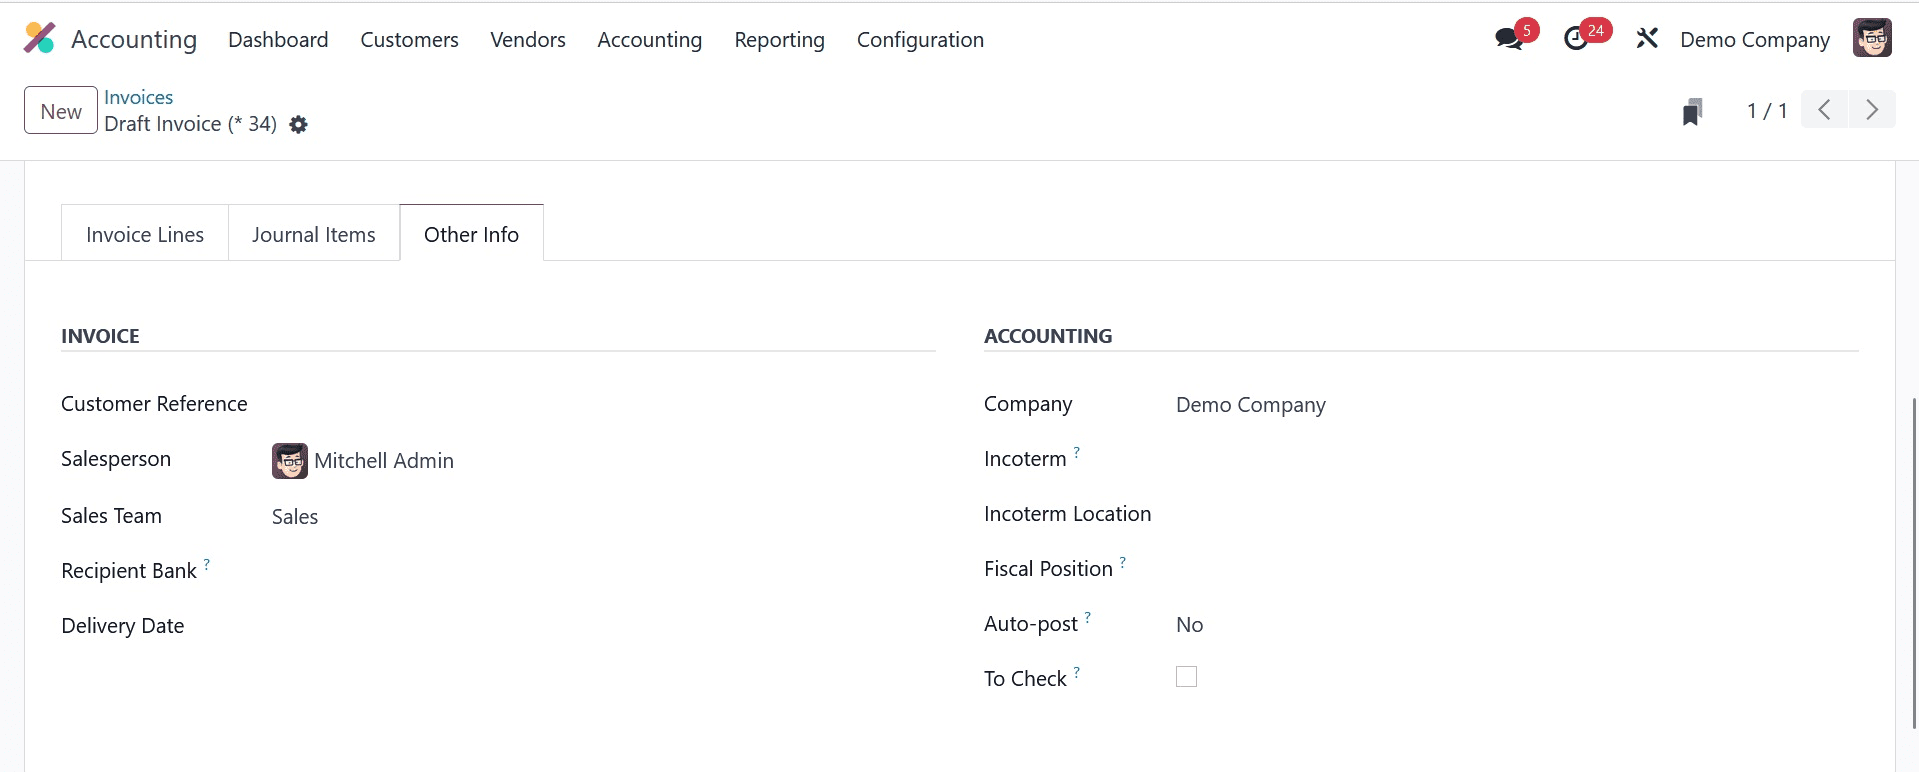
In the Marketing box, include this invoice's Campaign, Medium, and Source. You can indicate your firm ID in the Accounting section's firm field. Indicate in the appropriate areas the Intrastat Country (Arrival Country), Inalterability Hash, Fiscal Position to adjust taxes and accounts for specific clients or sales orders/invoices, and Incoterms used for international transactions. By choosing the time frame from the Auto Post area, you may automatically post this entry. You can specify the date that this recurrent move will be posted in the Auto Post Until area. You can choose the No option from the Auto Post section if you would rather do it by hand.
Activate the To Check field to indicate that the move needs to be checked again.
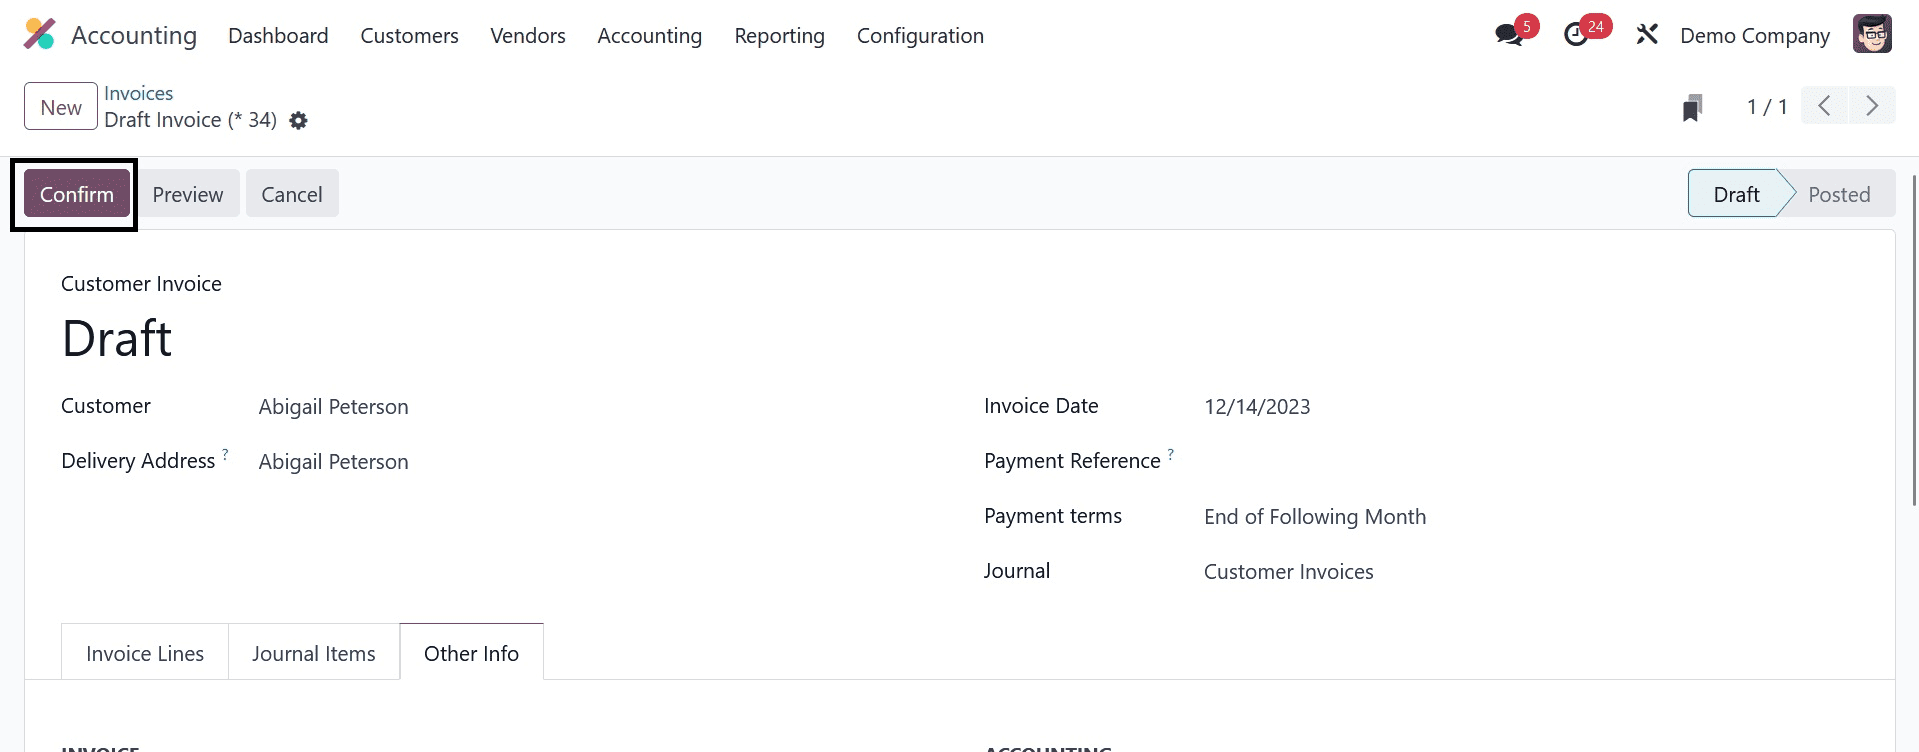
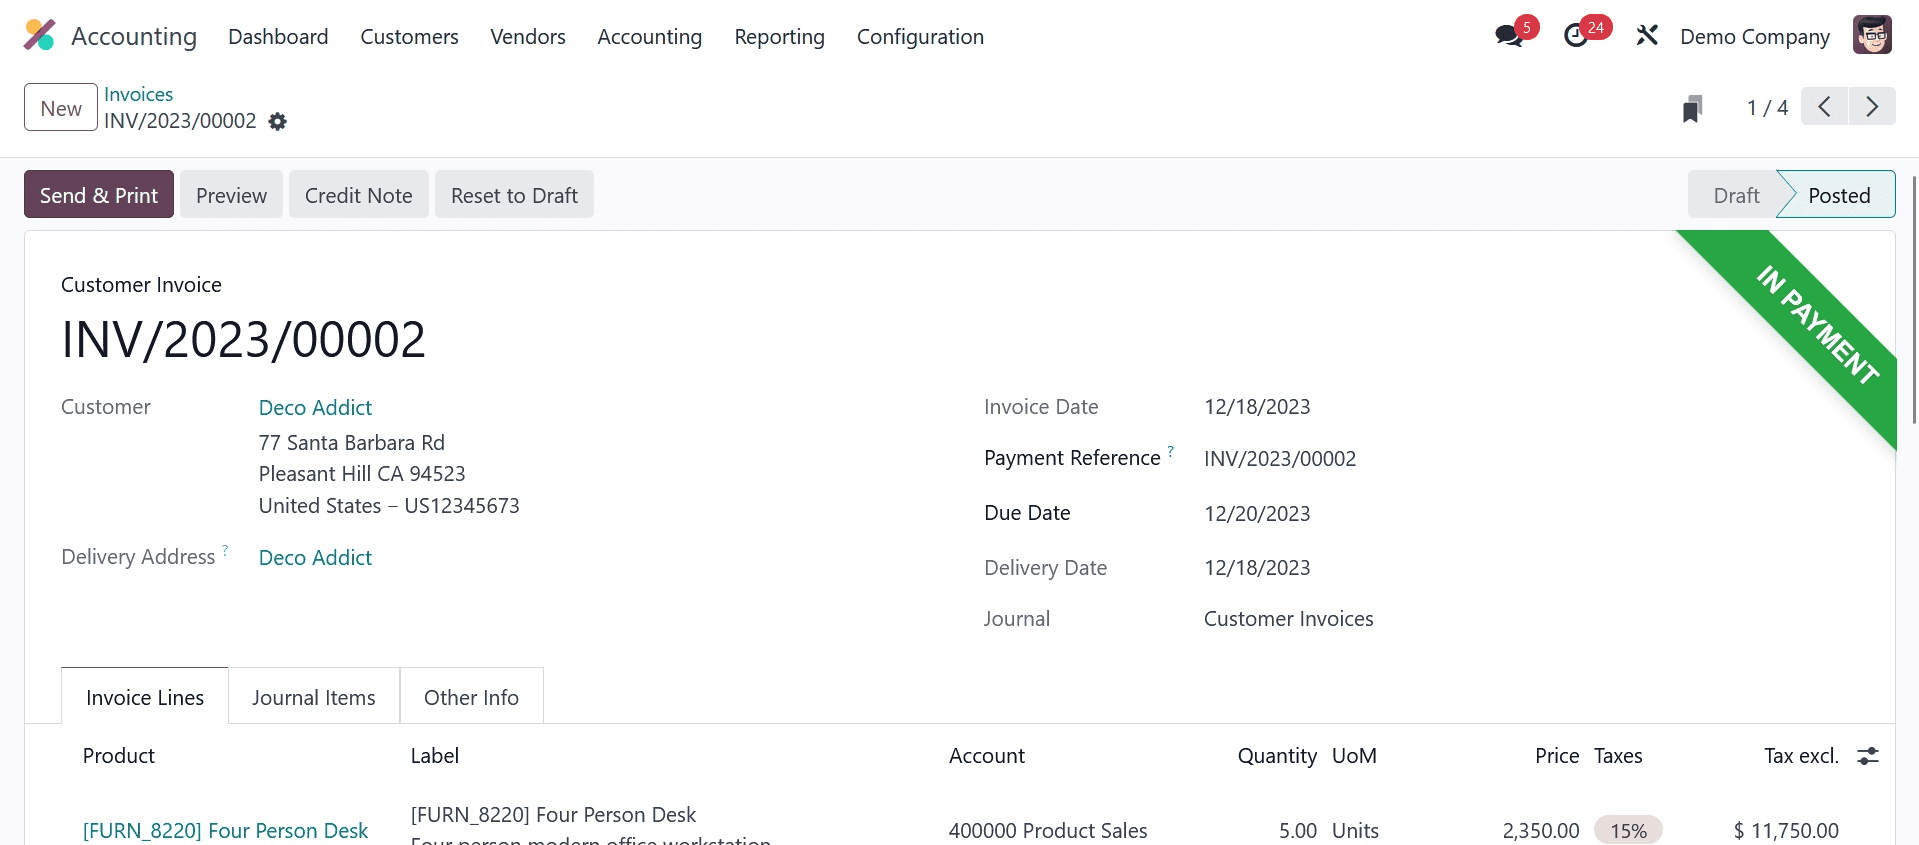
The draft invoice is now complete. Clicking the Confirm button causes the invoice to shift from draft to posted status, indicating that it has been confirmed.
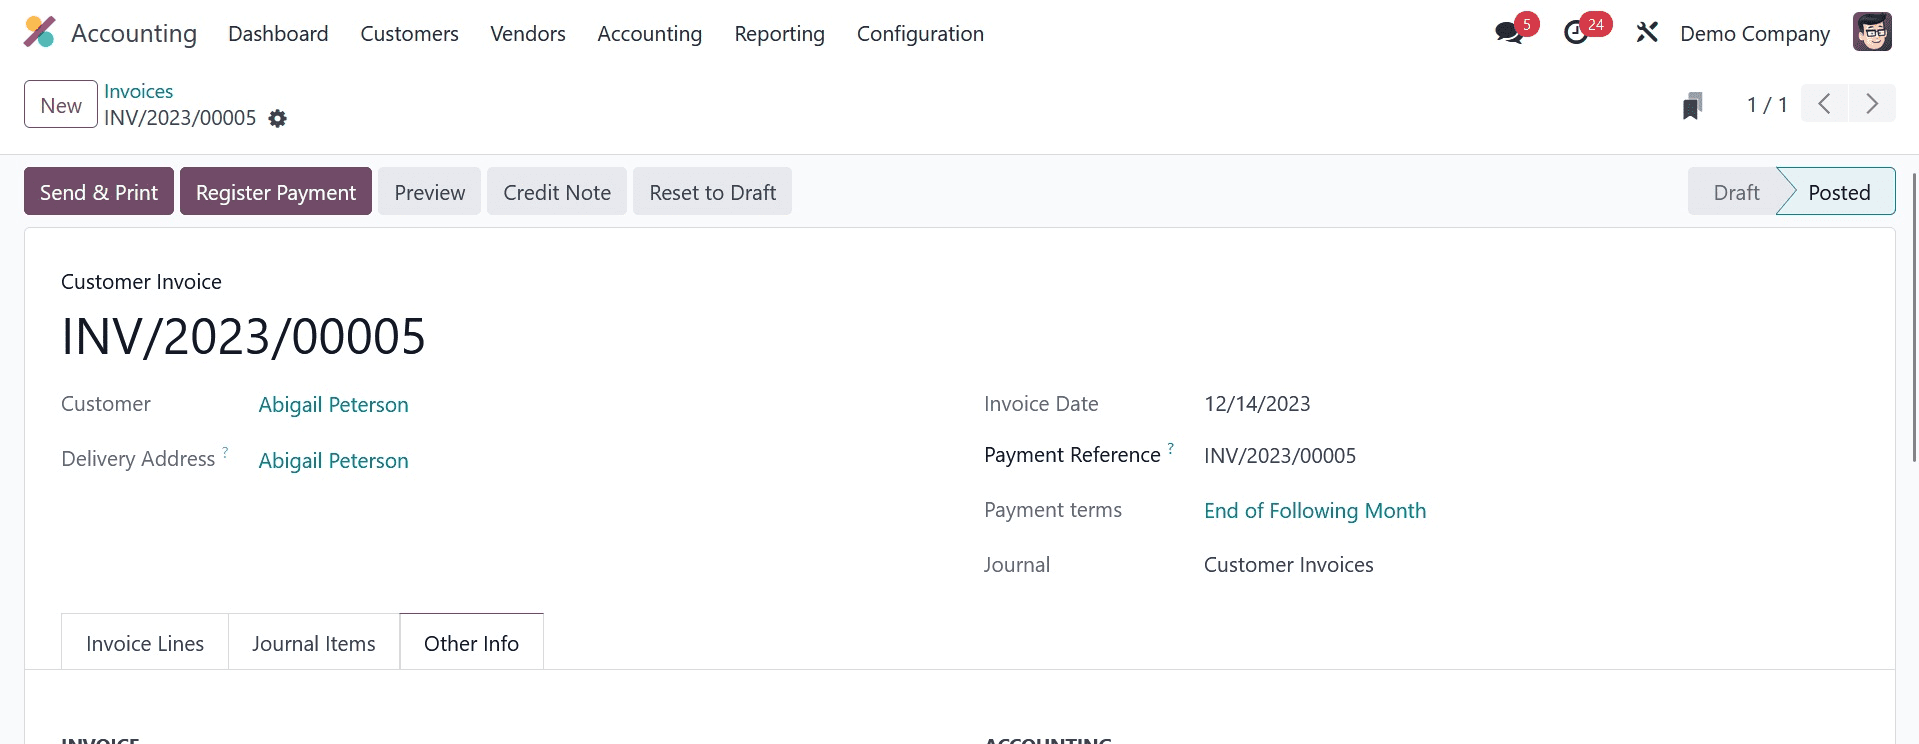
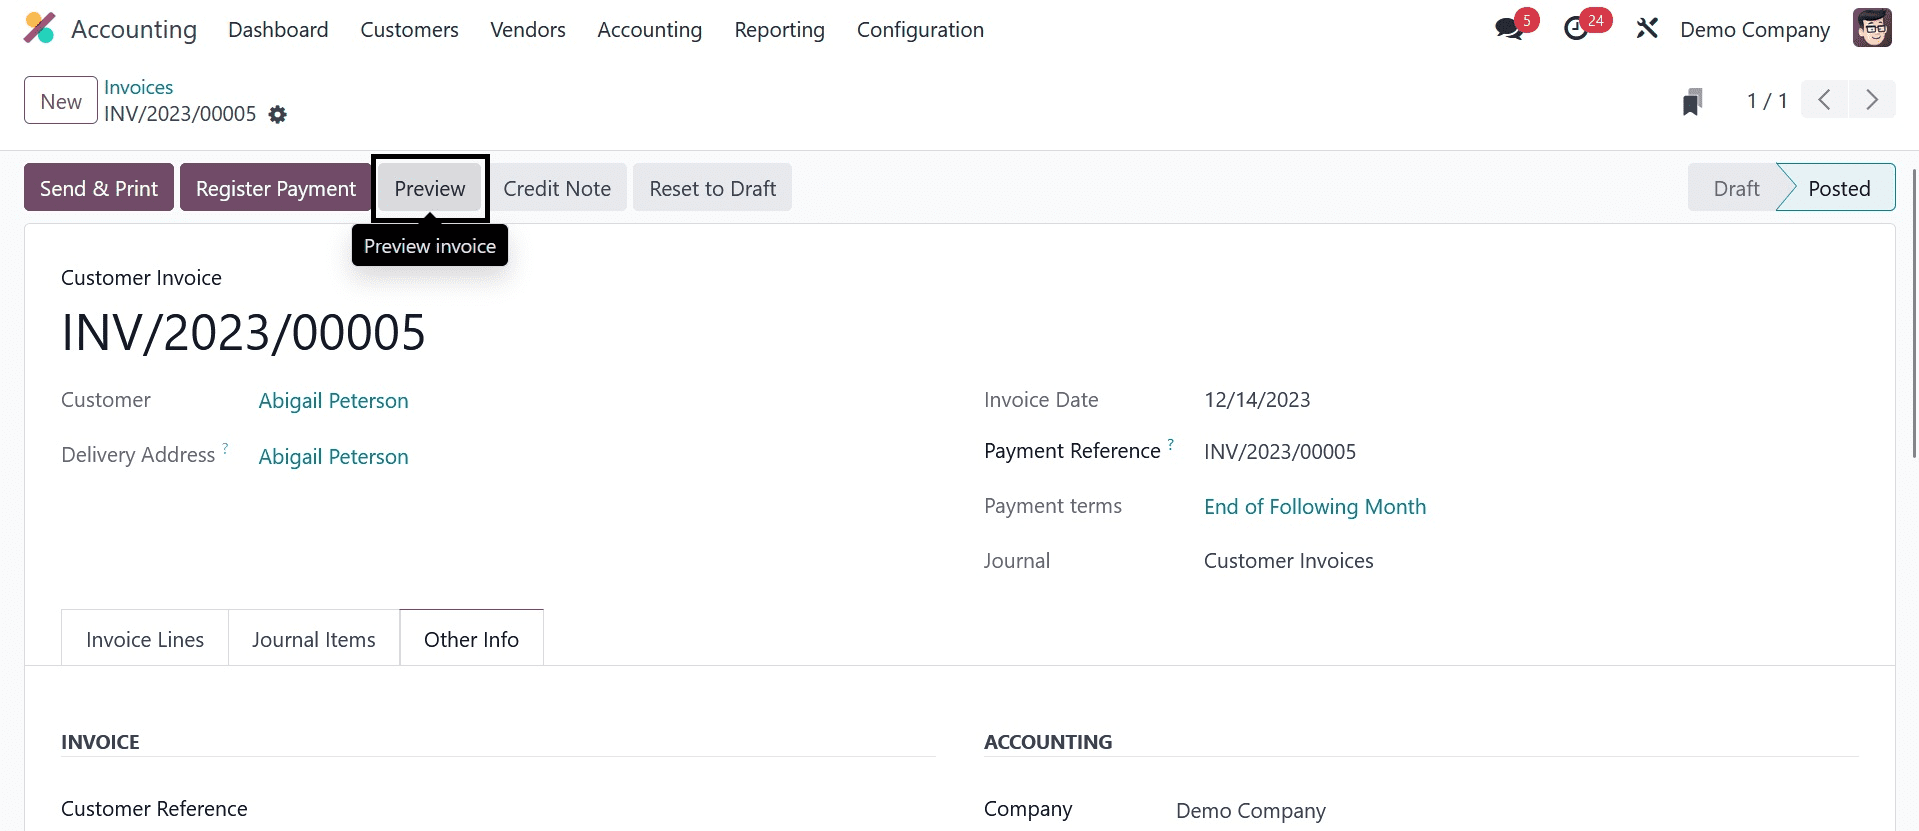
The invoice has now been verified. You can utilize the Reset To Draft button to return a confirmed invoice to draft status. Use the Preview button to view the invoice as if it were a client.
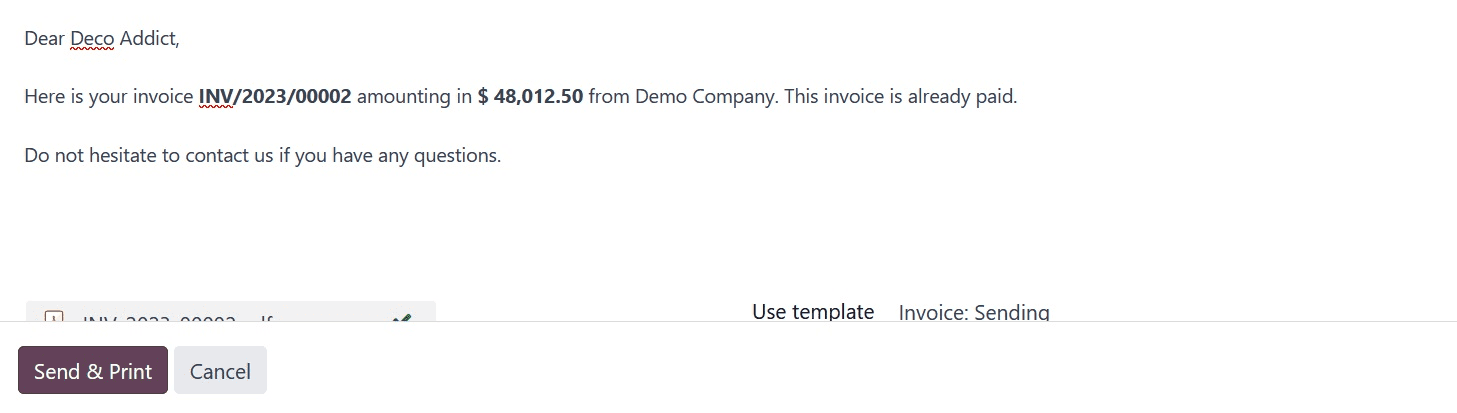
The invoice preview from the customer portal will be displayed on this page, allowing users to study the invoice and select an easy way to pay. You can download, print, and message the relevant salesperson from this page. You can mail the invoice to the customer by clicking the Send & Print option. Upon clicking this button, an automatic email will be generated as indicated below, allowing you to modify the subject line to suit your needs and add recipients to the list.
You can click the Send button after the invoice has been attached to your email. After receiving the mail, the customer can review the information and settle the invoice. The customer's payment can be registered by using the Register Payment button. To verify the payment registration details, Odoo creates a pop-up window.
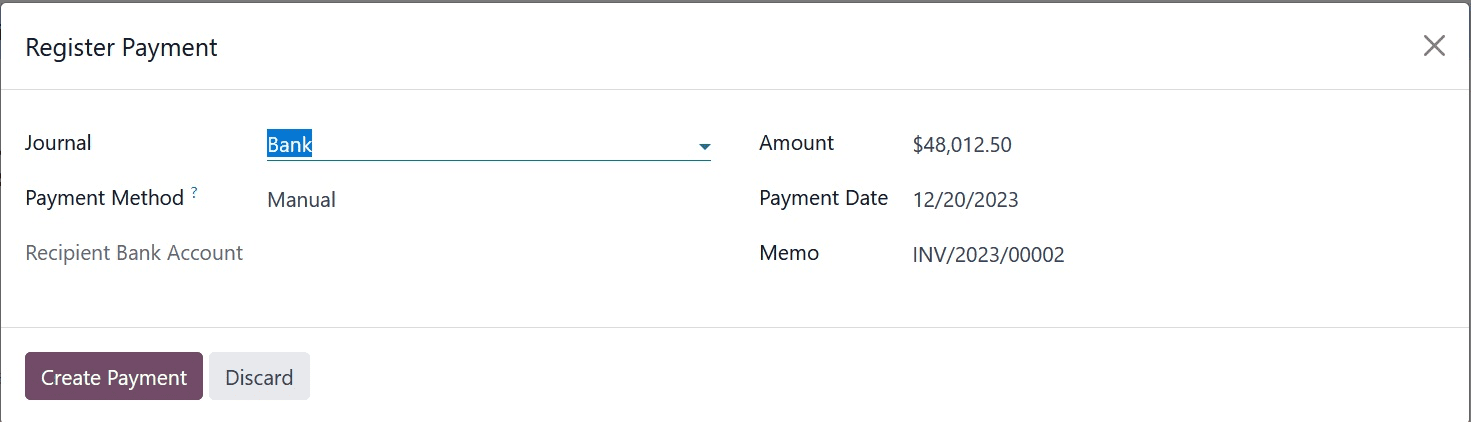
As seen in the above image, the window will display the Journal, Payment Method, Recipient Bank Account, Amount, Payment Date, and Memo. Press the "Create Payment" button. At this point, the payment registration can be finished. The invoice's status becomes Paid as soon as the customer makes payment.
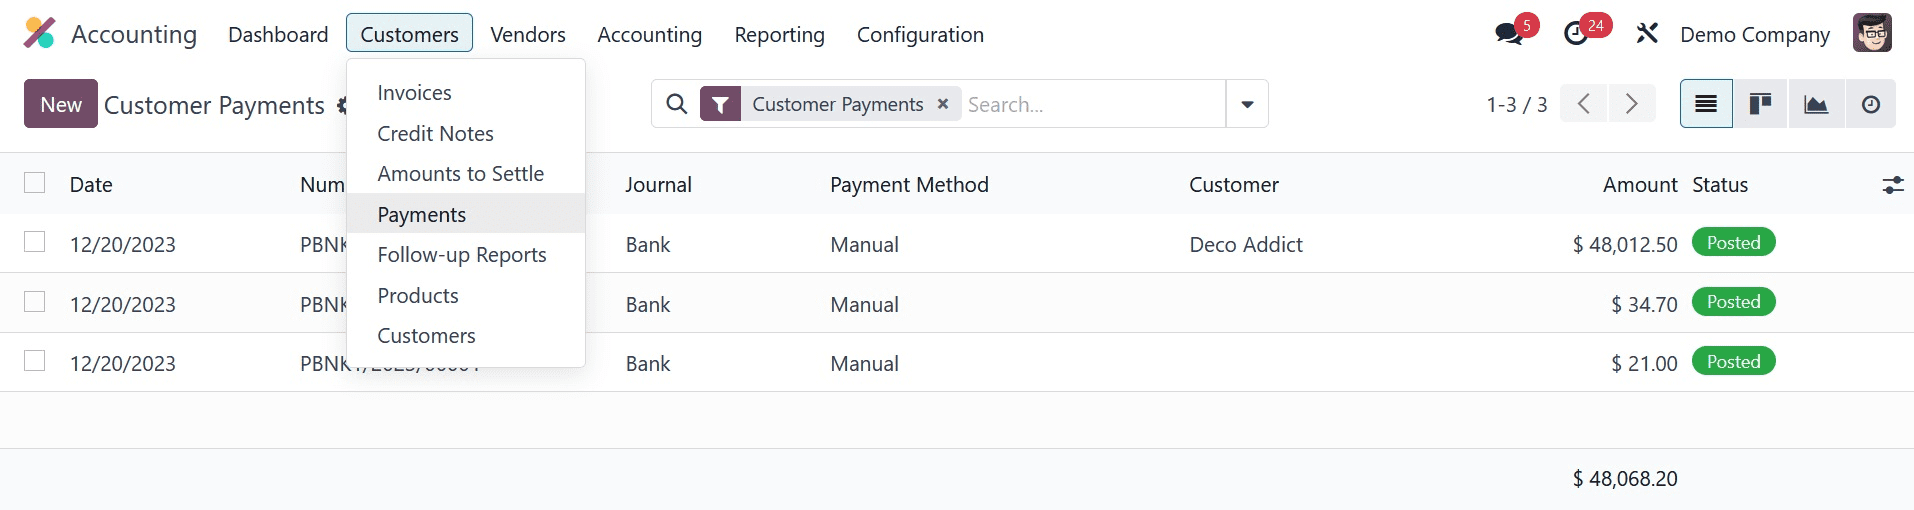
You can view all of the payment history for different customer invoices in the Odoo Accounting module by selecting the Payments option from the Customers menu. Date, Number, Journal, Payment Method, Partner, Batch Payment, Amount, and Status are all included in the preview.
You will have access to List, Kanban, and Graph views, which you can utilise as needed.
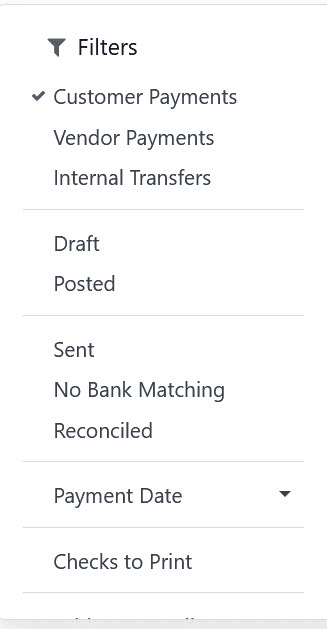
Checks to Print, SDD CORE, SDD B2B, Revoked SDD Mandate, Draft, Posted, Sent, Bank Matched, Reconciled, Not Reconciled, Payment Date, and Vendor and Customer Payments are the default filters that the user will see.
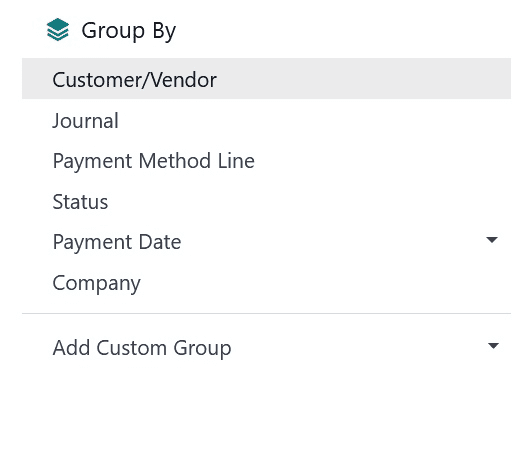
The accessible default grouping options on this platform are Customer/Vendor, Journal, Payment Method Line, Batch Payments, Status, Payment Date, Currency, and Company. To add a new payment record, choose the New button.
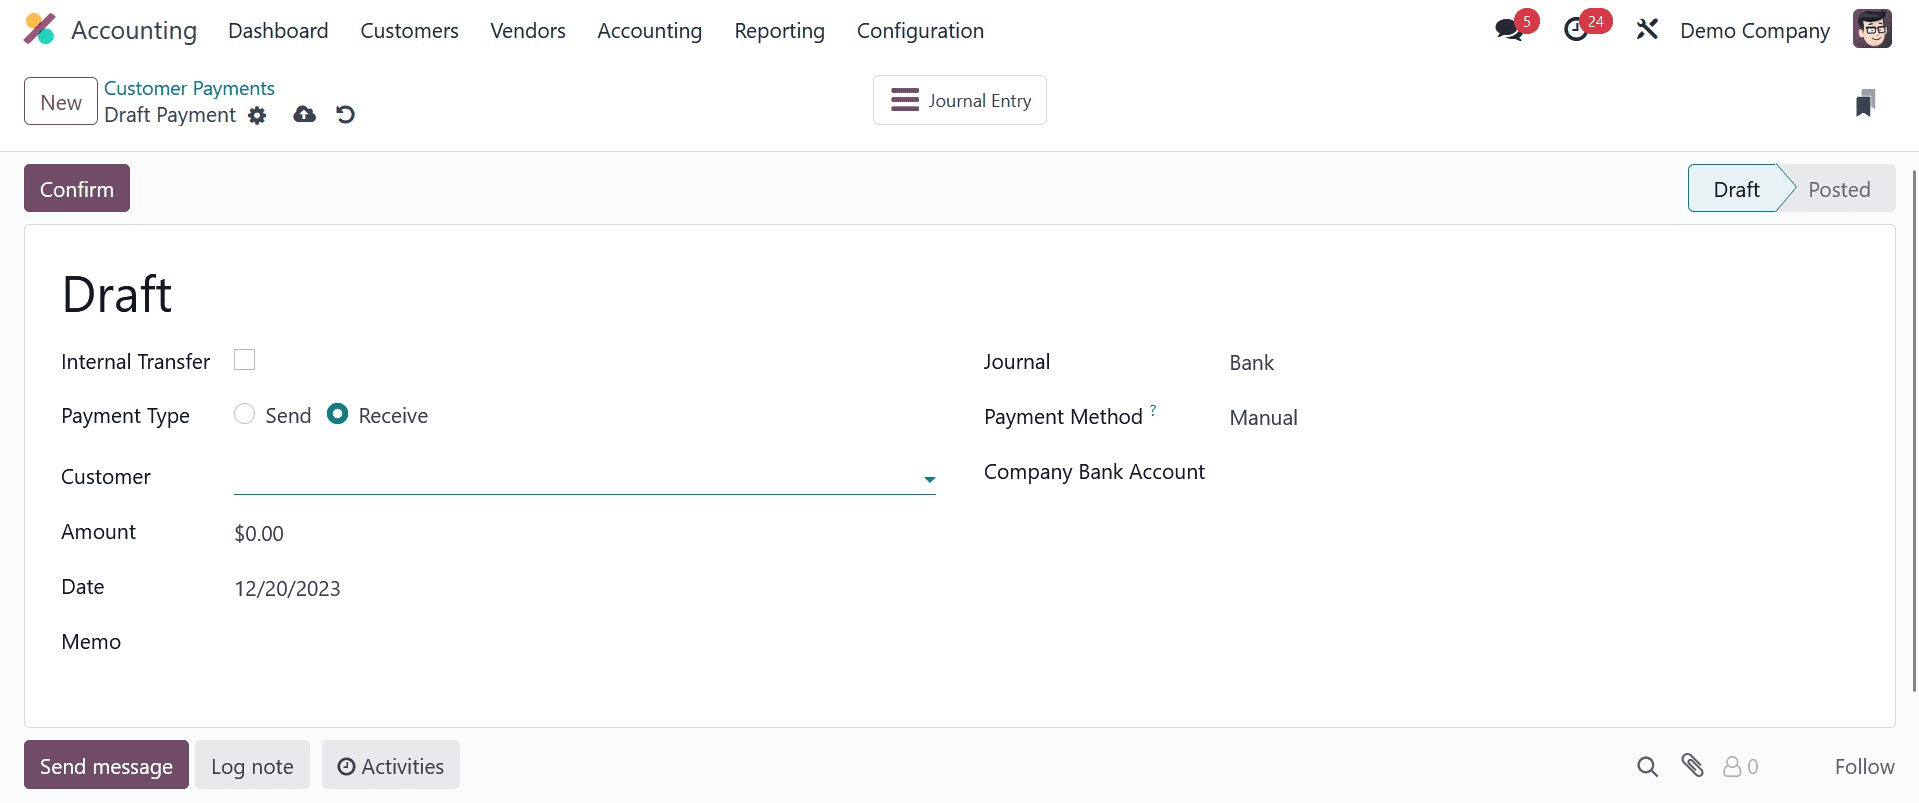
Any internal transfer payment can be made by activating the Internal Transfer field. Fund transfers between accounts within the organization are referred to as internal transfers. You can choose Receive as the Payment Type because this is a customer payment. When paying a seller, the payment type Send is utilized. You can enter the client ID in the designated field. You can enter the following details in the relevant fields: Amount, Date, Payment Memo, Journal to be used to record the payment, Payment Method, and Company Bank Account. The customer has a few options for how to pay: manually, payment providers, cheque, batch deposit, SEPA credit transfer, or SEPA Direct Debit.
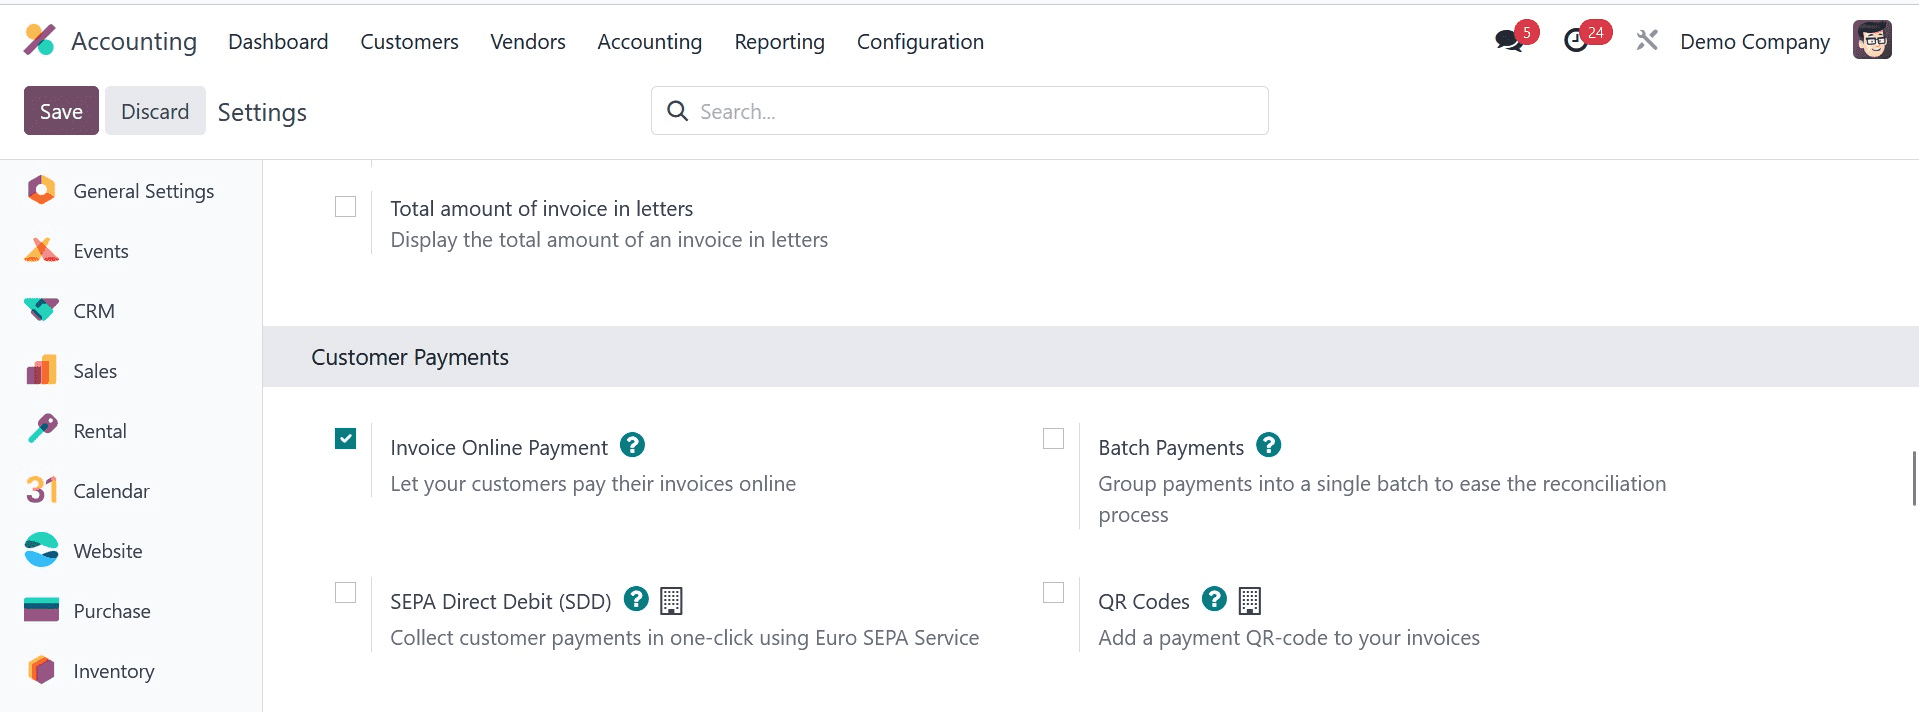
Now, as we are focusing on Online Payment, you have to go to Accounting ? Configuration ? Settings ? Customer Payments, select Invoice Online Payment, and then click Save to activate it, as in the screenshot below.
Once the invoice has been issued, select Send & Print to email the customer the invoice.
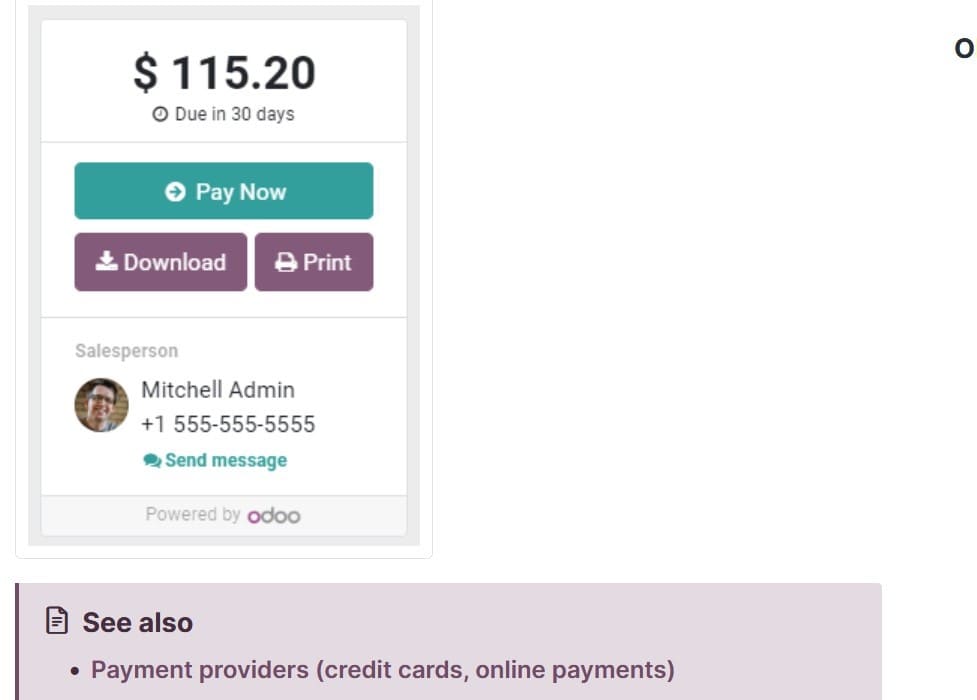
An email containing a link to the invoice on their customer portal will be sent to them, as in the image below.
By selecting Pay Now, they can select the Payment Provider they want to use.
After the consumer completes the payment, you can use the Payment Matching smart button to add this payment to the specific customer's outstanding invoices. This button will show all of that customer's open bills. An invoice with the same amount can be selected from the list and reconciled. The payment can be marked as sent using the Mark as Sent option, and it can be reset to draft using the Reset to Draft button. This is how you will go with the online payment in the Odoo 17 accounting module.