The Odoo 19 Sign Module helps businesses manage electronic document signing in a faster and more organized way. Users can upload documents, add signature fields, send them to recipients, and monitor the signing status directly from Odoo.
With Odoo Sign, organizations can avoid manual processes such as printing, scanning, and physically sharing documents. The module also maintains document security and transparency by recording signing activities and maintaining an audit trail for every action performed.
Using the Sign module helps improve workflow efficiency, reduce paperwork, and speed up approval processes for contracts, agreements, and other important documents.
Documents & Dashboard Menu
When accessing the Odoo 19 Sign Module, users can immediately view all uploaded documents from the dashboard. The module provides multiple viewing options such as Kanban View, List View, and Activity View, making it easier to manage and track documents based on user preference.

Templates Menu
Every uploaded template is displayed in the Templates section. From this section, users can upload new document templates directly from their local system. These templates may include contracts, agreements, application forms, or any reusable PDF document intended for future signature requests
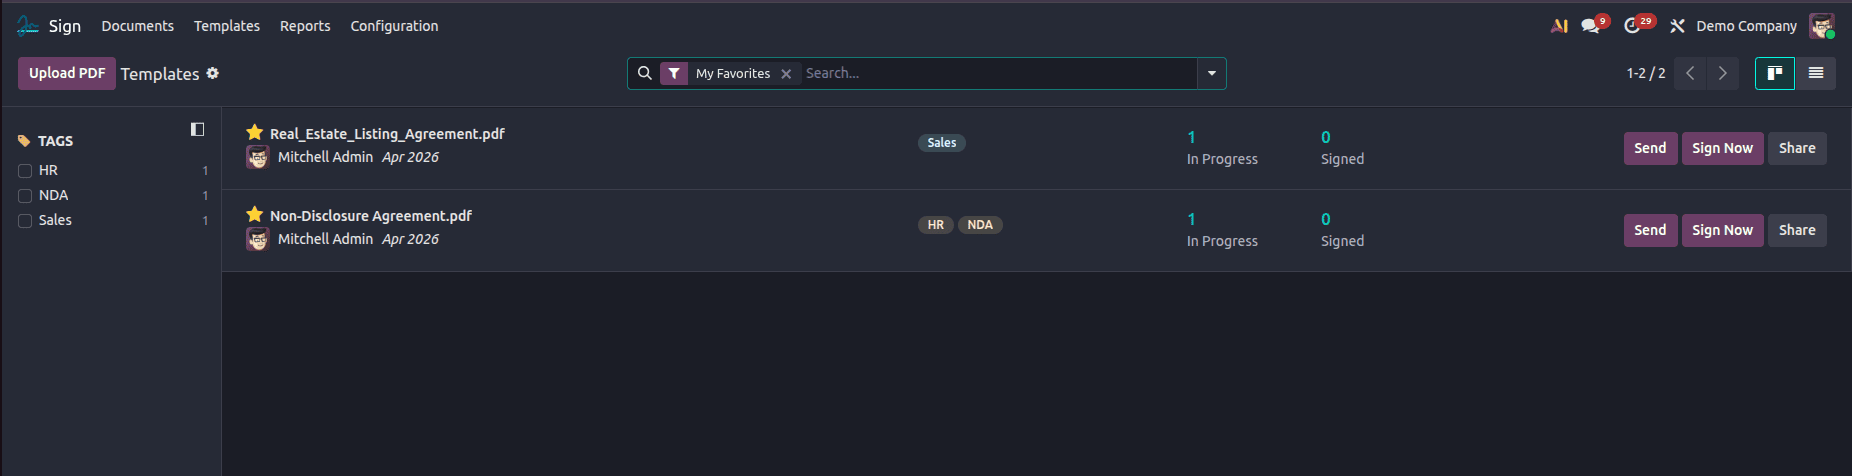
Each template card includes quick-access actions such as Send, Sign Now, and Share. It also displays important information including the document name, assigned tags, and the template creation date, helping users manage documents more efficiently.
Configuration Menu & Field Types
The Configuration menu enables organizations to customize the Sign module according to their business requirements. It includes managing field types, tags, and settings.
What's New for Signers in V19?
In Odoo 19, the dedicated "Roles" configuration menu has been replaced. Instead, Signers (formerly roles) are now managed directly within the Template Editor sidebar. This change streamlines the workflow, allowing you to define who needs to sign while you are preparing the document.
- In-Editor Signer Management: You can add, edit, and color-code signers directly from the "Signers" section in the template sidebar.
- Enhanced Multi-Signer Workflows: You can now define explicit signing orders, ensuring documents are routed to the right participants in a strict sequence (e.g., Employee signs first, Manager approves second).
- Fixed vs. Dynamic Signers: Odoo 19 allows you to assign a "fixed" signer directly to a template (perfect for internal company signatories), or use dynamic assignment based on context (like pulling the salesperson from a CRM record).
- Multi-Document Envelopes: You can group multiple documents into a single "envelope", allowing the signer to review and sign multiple related files in one cohesive transaction.
- Advanced Security: Stricter authentication methods are now supported, including SMS
Managing Signers and Field Types:
Signers define who interacts with the document and how.While creating a template, multiple signers can be added and assigned custom names. This helps organize the signing workflow clearly, especially when documents require signatures from multiple parties. Each signer can have specific authentication methods and permissions assigned to them.
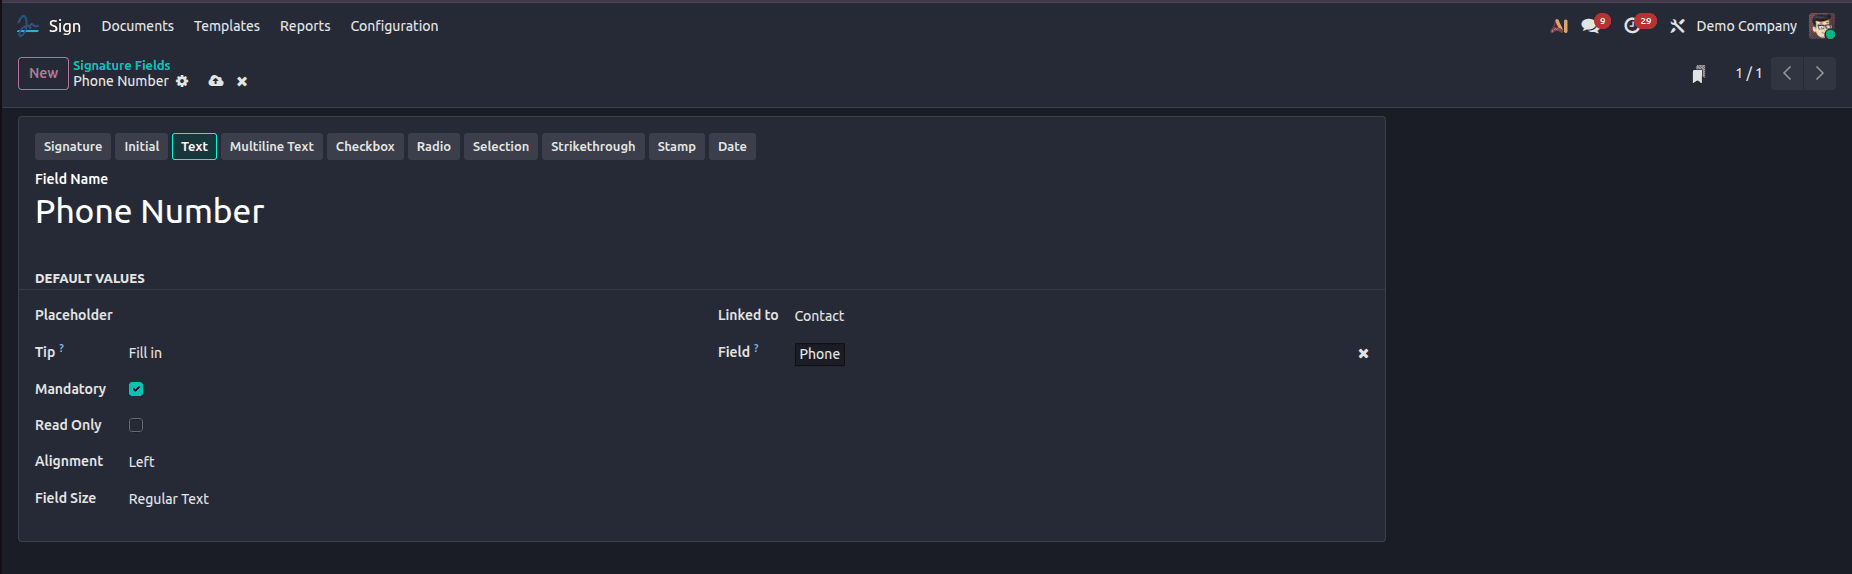
Auto-fill Method Using Field Type Auto Value
The Auto-fill option is available by default in the Odoo Sign module.
To create an auto-fill field, navigate to the Field Types configuration. Here, you can define a new Field Type (e.g., "Customer Phone AutoFill"). By simply filling in the technical name of the field (like phone or email) inside the Auto-field setting of the Field Type configuration, Odoo knows exactly where to pull the data from.
When setting up a template, you assign these field types to specific roles on the document. Because the technical name is defined natively in the field configuration, Odoo will automatically populate these values into the document when initiated from a relevant record!
Workflow in Odoo 19 Sign
The signing process is simple, intuitive, and deeply integrated with Odoo records.
Step 1: Create a Field Type with Auto-fill Value
To enable auto-filling of data, you first need to define a Field Type:
- Go to Sign > Configuration > Field Types
- Click Create
- Enter:
- Field Name: e.g., Customer Phone AutoFill
- Field Type: Text / Char
- Auto-fill (Auto Field): Enter the technical field name
- Save the field
This tells Odoo that whenever this field is used, fetch data from the corresponding record field automatically.
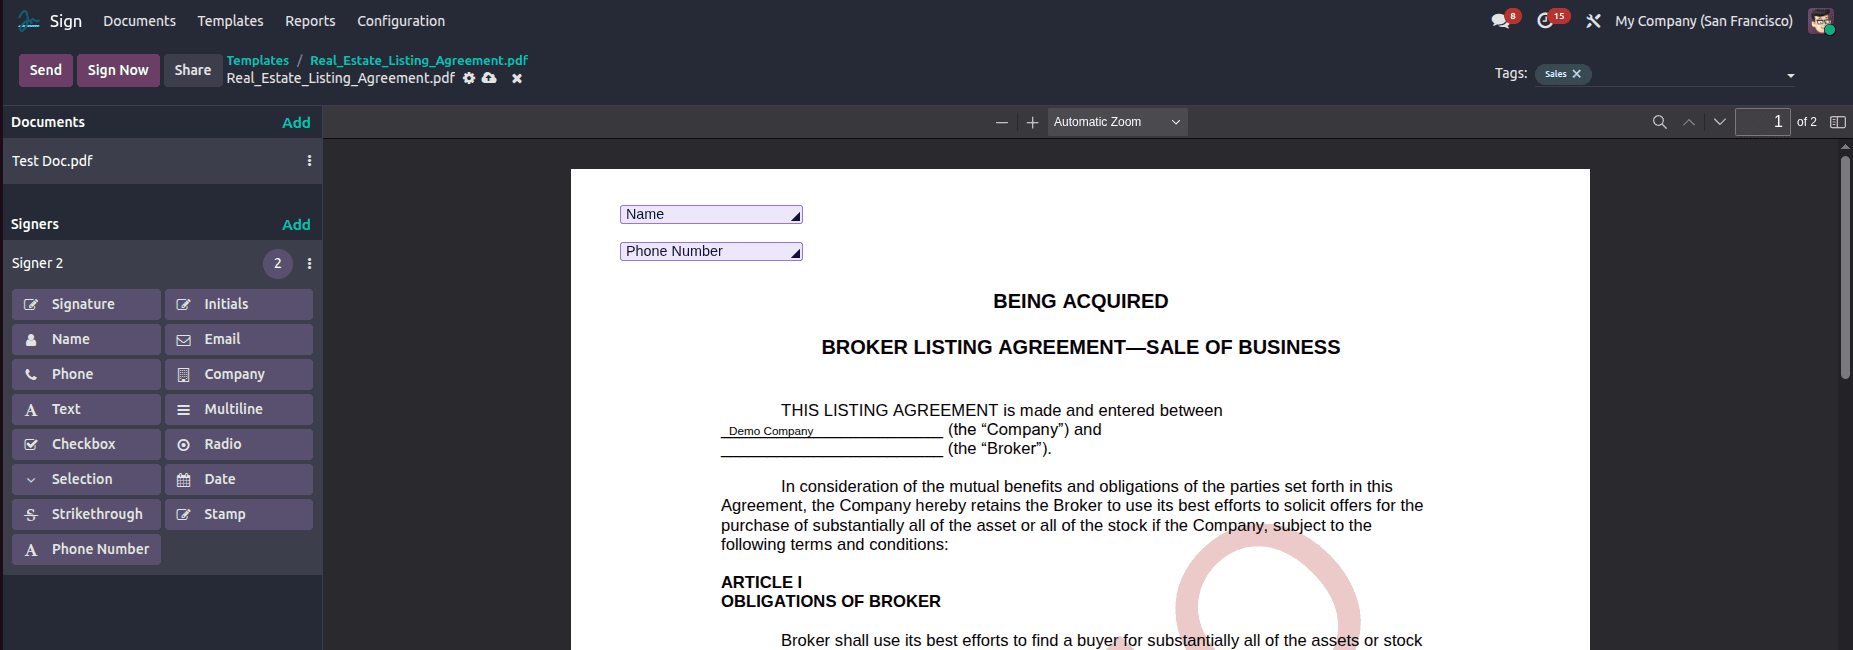
Step 2: Add the Auto-fill Field to a Template
- Go to Sign > Templates
- Open or upload a document (PDF)
- In the Template Editor:
- Add Signers (e.g., Customer, Manager)
- Drag and drop:
- Your newly created Auto-fill field
- Assign the field to a specific signer (e.g., Customer)
Important:
- The auto-fill works based on:
- Record from which document is sent
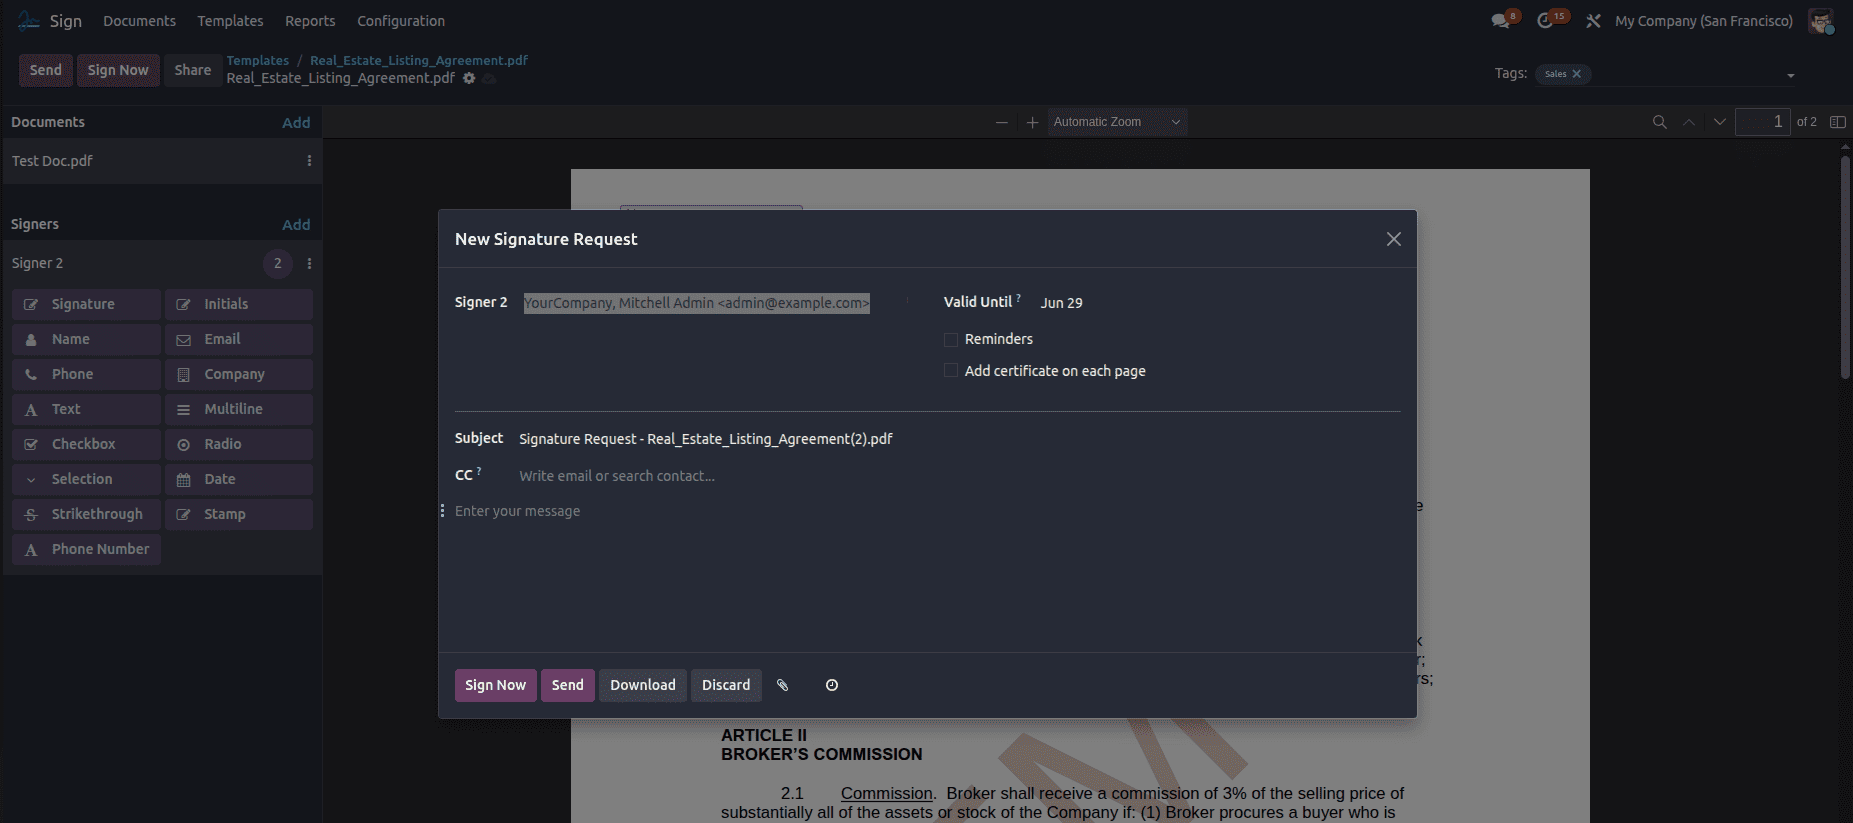
Step 3: Send Document for Signature
You can send the document in two ways:
Option A: From Sign Module
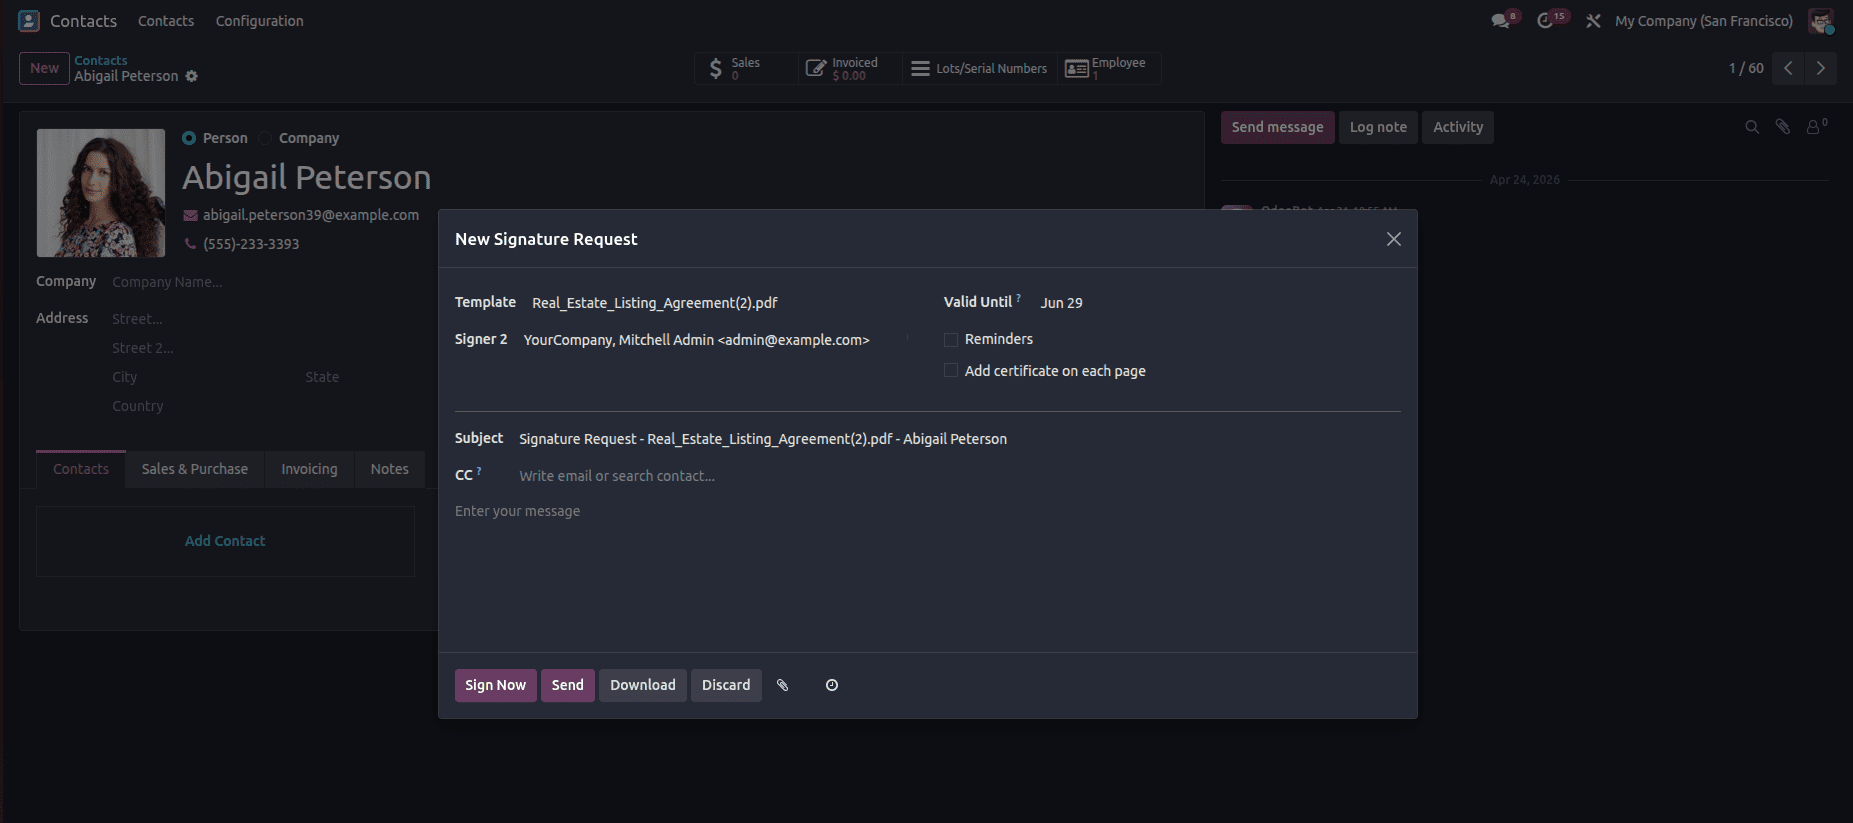
- Click Send
- Select:
- Send via email or link
Option B (Recommended): From a Record
Example:
Contact
- Open a record (e.g., Customer)
- Click the Action button > Request Signature
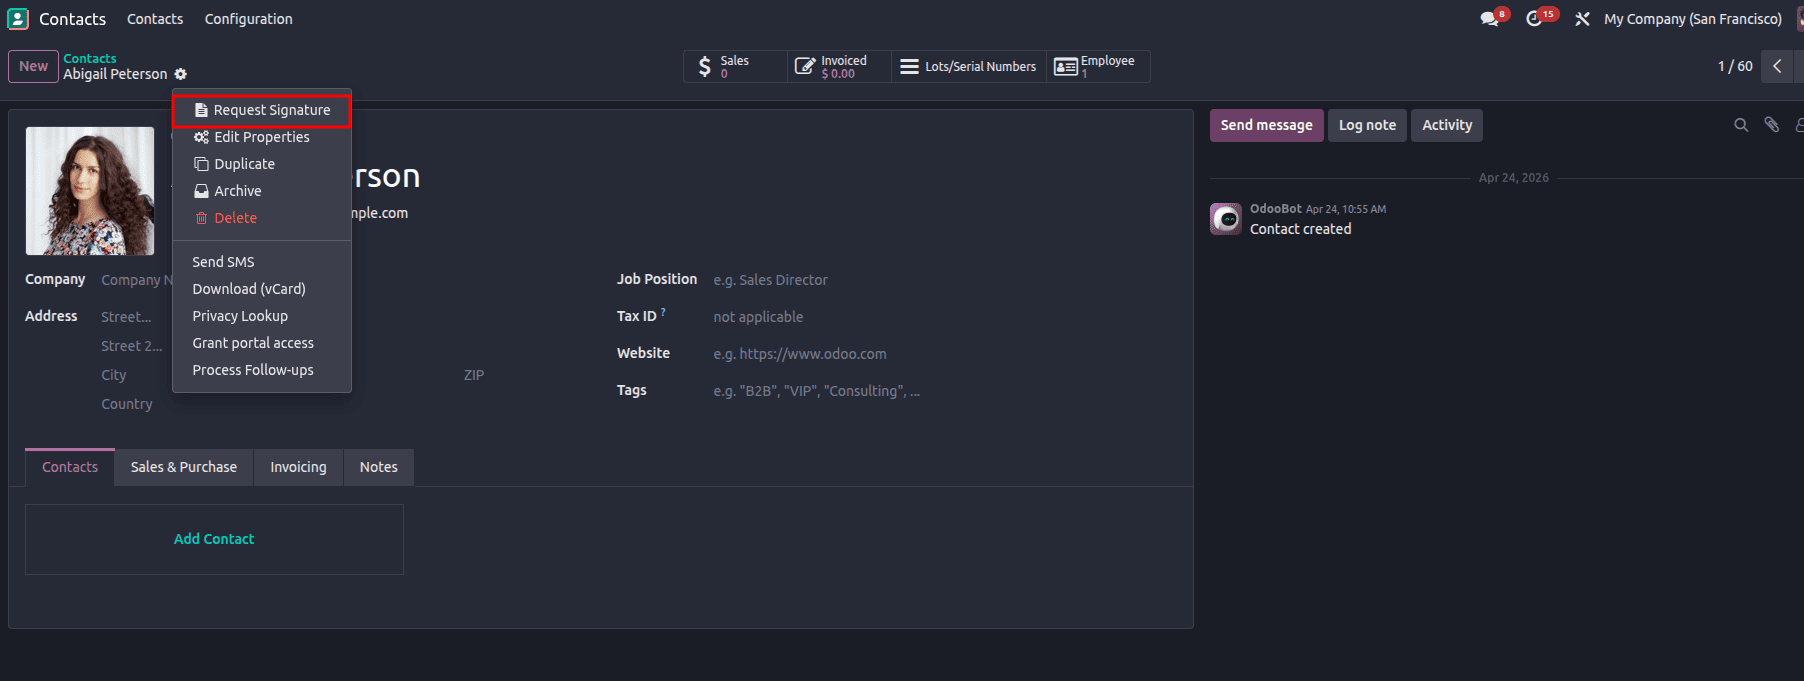
This is crucial for auto-fill because Odoo pulls data from this record
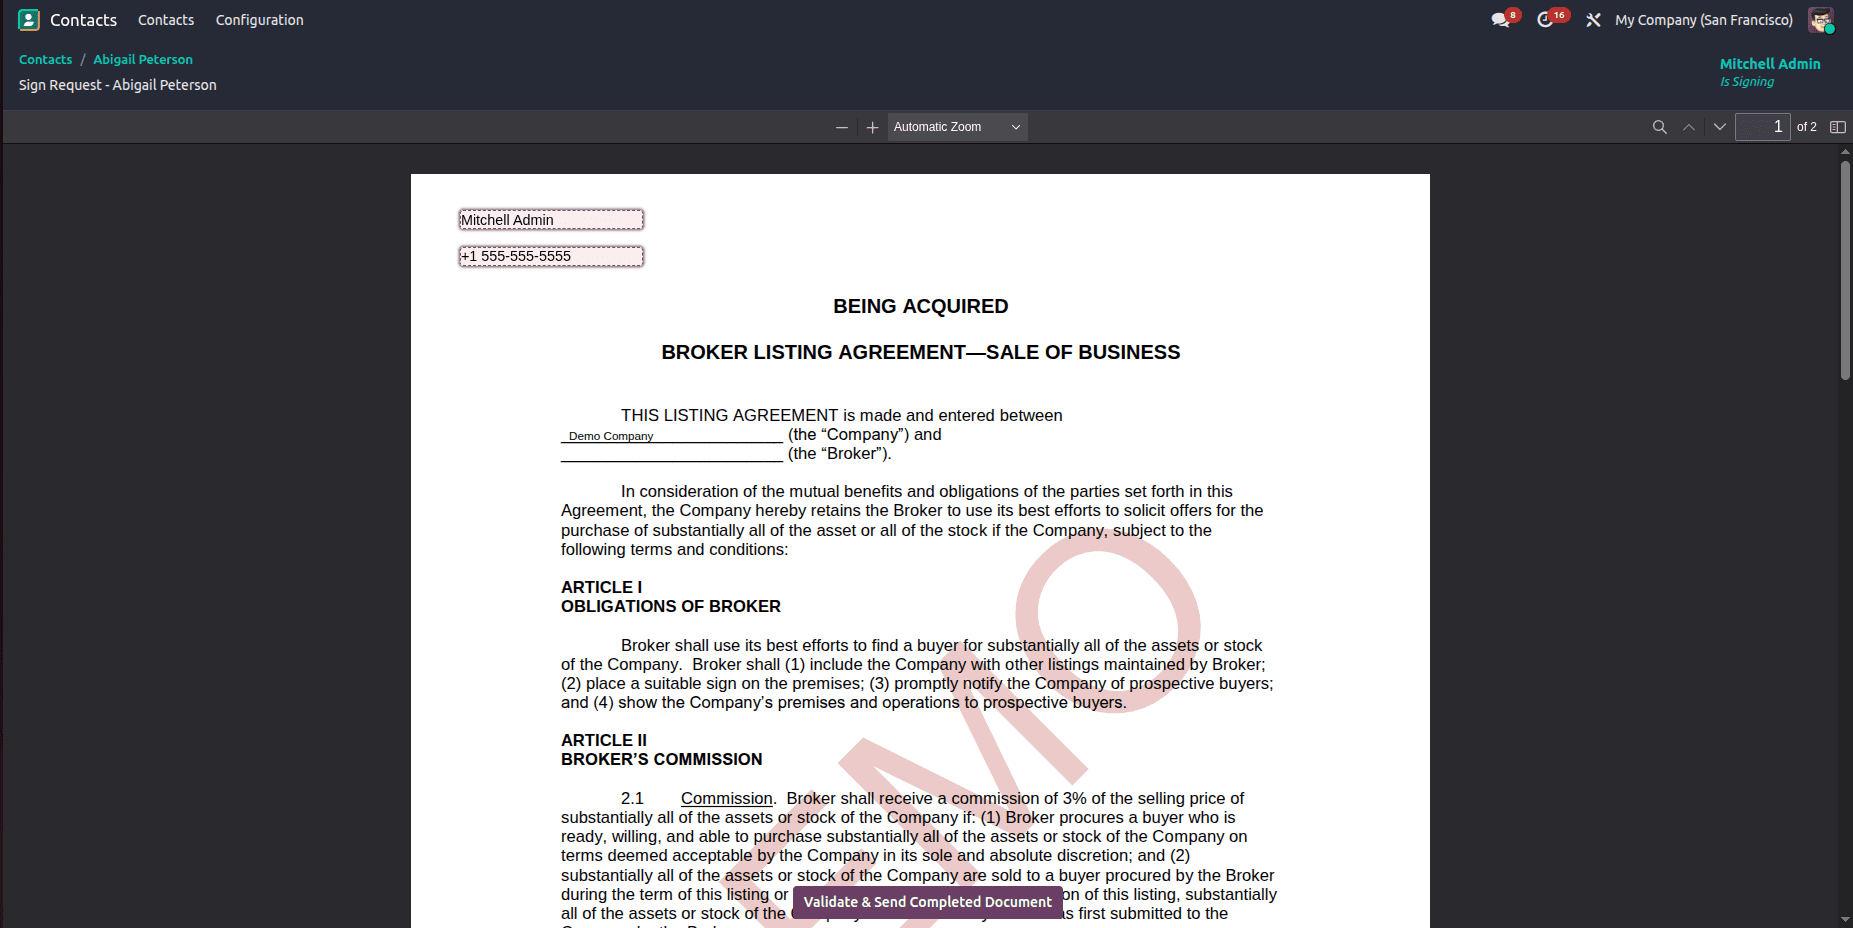
Step 4: Auto-fill During Signing
When the signer opens the document:
- Fields with Auto-fill are already populated
- Example:
- Customer Name > auto-filled
The Odoo 19 Sign Module significantly enhances document management workflows with its robust feature set, particularly focusing on the newly improved Auto-fill capabilities, which save time on data entry.With its easy-to-use dashboard, customizable document templates, secure signing process, and integration with other Odoo applications, the Odoo Sign module helps streamline and automate document-related workflows efficiently.
To read more about Overview of Sign Module in Odoo 18, refer to our blog Overview of Sign Module in Odoo 18.