Expense management is essential for businesses to track and manage corporate spending. Employee expenditures, including lunches with clients, travel expenses, and lodging while on business trips, are typically covered under expense management.
To manage expenditures effectively, organizations need to have accurate insight into how much money is spent, by whom, and on what. Manually controlled systems carry the danger of failing to detect when expenses are out of control or becoming unsustainable since they interact with external or internal data sets seldom or not at all. Businesses may obtain and analyze spending data by automating the expenditure process, which helps them to identify spending trends.
Automating the employee cost reimbursement process with an expense management system saves time, money, and paper while ensuring accuracy. A cost management system provides analytical capabilities to help organizations make informed decisions and maintain compliance and responsibility. Saving time and lowering the likelihood of errors are two benefits of integrating spending management software with an ERP or accounting system. Additionally, after charges have been allowed, it automates payments, which speeds up employee reimbursements.
The expenditure management process is simplified with Odoo 16 Expenses. The management and accounting teams analyze the costs when they are submitted by an employee in Odoo. Following approval, funds can be processed and distributed back to the employee for repayments. We are going to peep into the Module platform to get familiar with its functions, features, and necessity within organizations.
Go to the Odoo 16 Expenses application from the Odoo ERP Package. After opening the module, you can see the “My Expenses” dashboard from the homepage. The “My Expenses” menu contains two menu options such as “My Expenses” and “My Reports.”
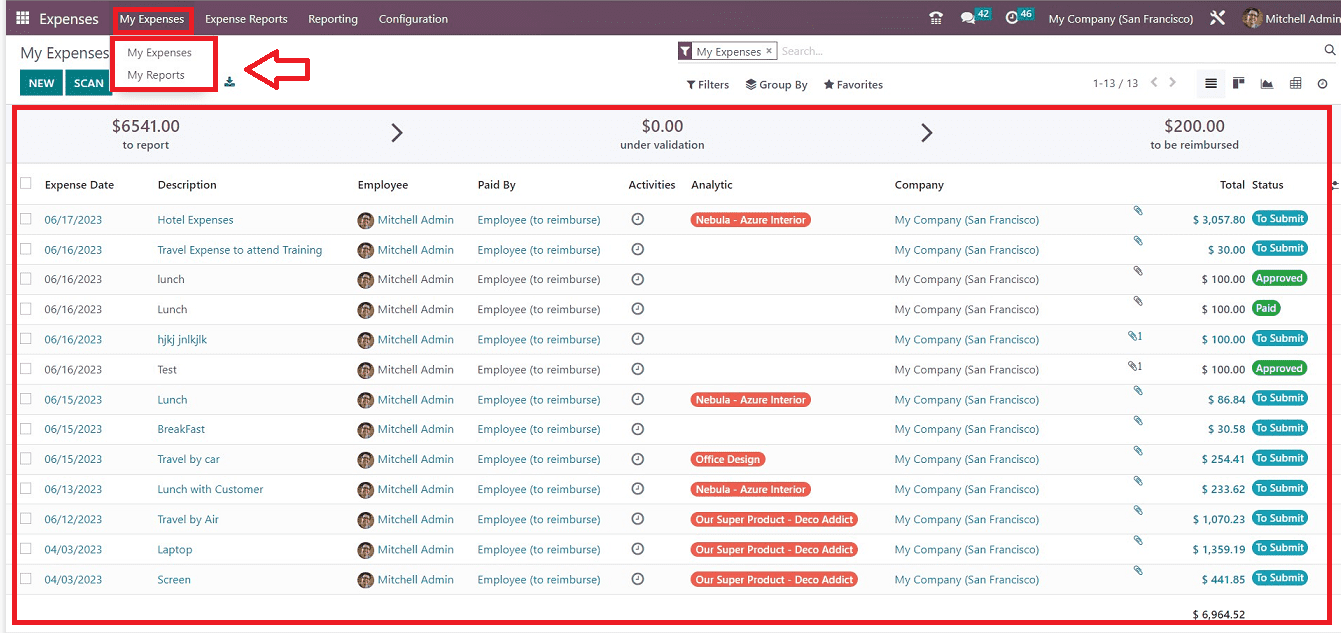
My Expenses
Once you choose the “My Expenses” option from the “My Expenses” menu, you can view the expenditure module's dashboard. The “My Expenses” page allows users to access the history of previously reported expenses. We can find information about costs in the List view, including the “Expense Date,” “Description,” “Employee,” “Paid By,” “Activities, “ “Analysis,” “Company,” “Total,” and “Status.” You will see the reimbursement amount, the cost of validation, and the costs to report at the top of the window. After examining the report, a user will get a clear picture of the state of the expenses.
With the help of the corresponding icons located in the top right corner of the page, you can toggle between the list view and Kanban, Pivot, and different Graphical Views. And also sort out a particular group of data using the “Filter,” “Group by,” and “Favorites” options which also gives the facility to add custom filters using the “Add Custom Filter” option.
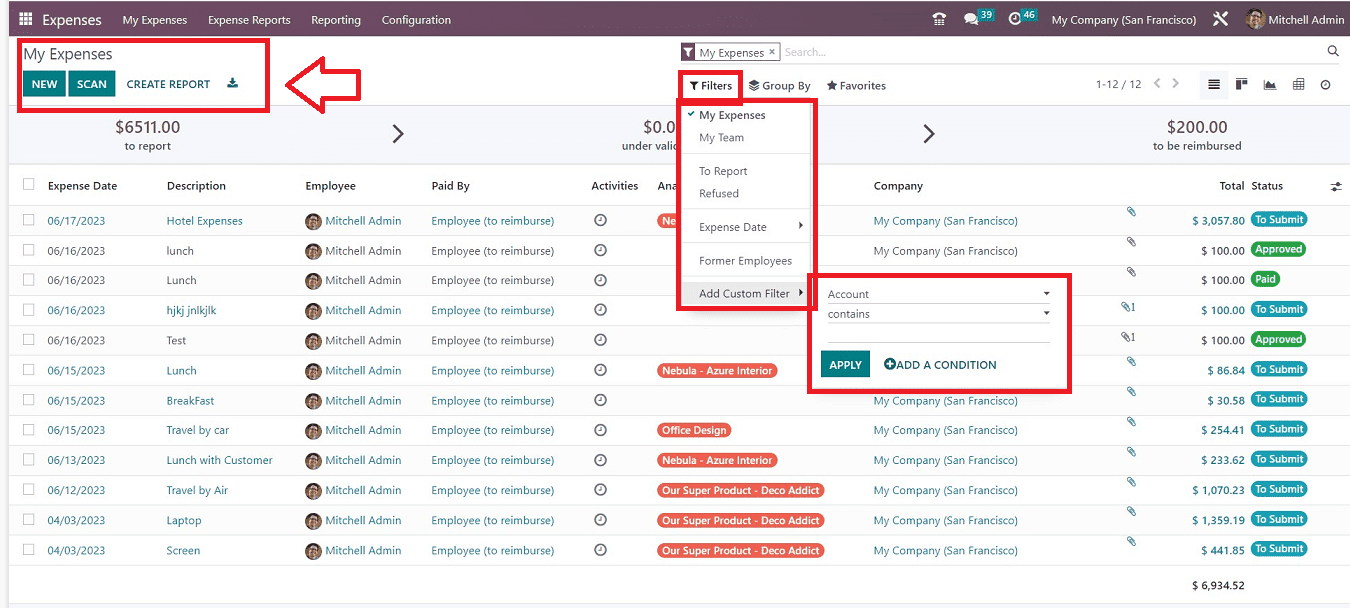
You can upload an expenditure report from your system using the "SCAN" icon. Once you click the "CREATE REPORT" button, you may also create a new report.
Select the "NEW" icon in the My Expenses box to create a new expenditure. This action will open a new configuration from where you can create a new expense request.

First of all, type the expense detail in the “Description” area and select the expense category from the “Category” field. The “Employee” option allows users to select a specific employee, “Paid By” option can be used to select the bill by both the Company or the Employee and include the “Bill Reference” and “Expense Date.” If the employee is paid, the business will reimburse them for any expenses.
The “Account” option allows users to select an expense account, save the details after completing the editing, and you can put the expense request into different categories such as “TO SUBMIT,” “APPROVED,” “REFUSED,” “SUBMITTED,” and “PAID” by selecting the relevant option. Click the “ATTACH RECEIPT” button to upload cost receipts, select the “SPLIT EXPENSE” option to split expenditures, and create a report by selecting the “CREATE REPORT” icon.
My Reports
The “My Reports” menu item is located below the “My Expenses” menu. It displays existing reports such as “Employee,” “Expense Report,” “Company,” “Activities,” “Total Amount,” “Payment Status,” and more. By selecting the “SCAN” button, data can be quickly uploaded to Odoo 16. And we can upload the data using the “Export All” icon.

By selecting the “NEW” icon, a new report can be created using the “My Reports” configuration form, as you can see from the screenshot below.
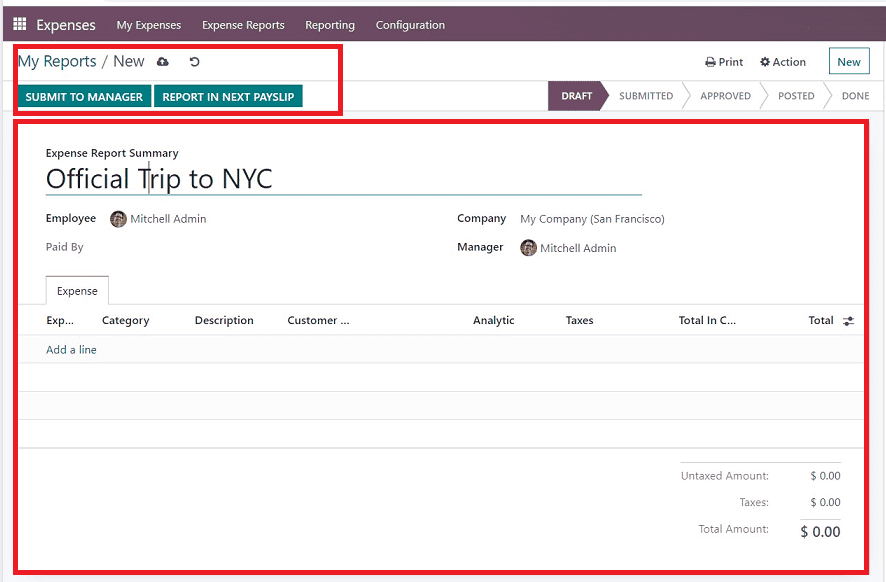
Fill in the “Expense Report Summary” field. And choose the “Company” and “Manager” details.
The user can add expenditure information to the report by selecting “Add a line” from the “Expense” tab. The total untaxed amount is displayed, and the user can submit the report to the management by using the “SUBMIT TO MANAGER” option. The manager can verify the report by clicking the “APPROVE” BUTTON when the stage has changed to “SUBMITTED.”
Expense Reports
The Expense Reports tab provides access to all report information, including Employee, Company, Status, Payment, and more. The reports can be arranged according to categories, status, and employees. Users can add a record by selecting the “SCAN” option or create a new report for an employee by using the “NEW” button.

You can sort the reports as per the status, employee, and company from the sorting section provided on the left side of the page.
Pressing on the “NEW” button will open a form page, as shown below.

The form is also the same as the previous one that we discussed in the “My Reports” section. So you can fill in the details as we have discussed earlier.
Reporting Menu
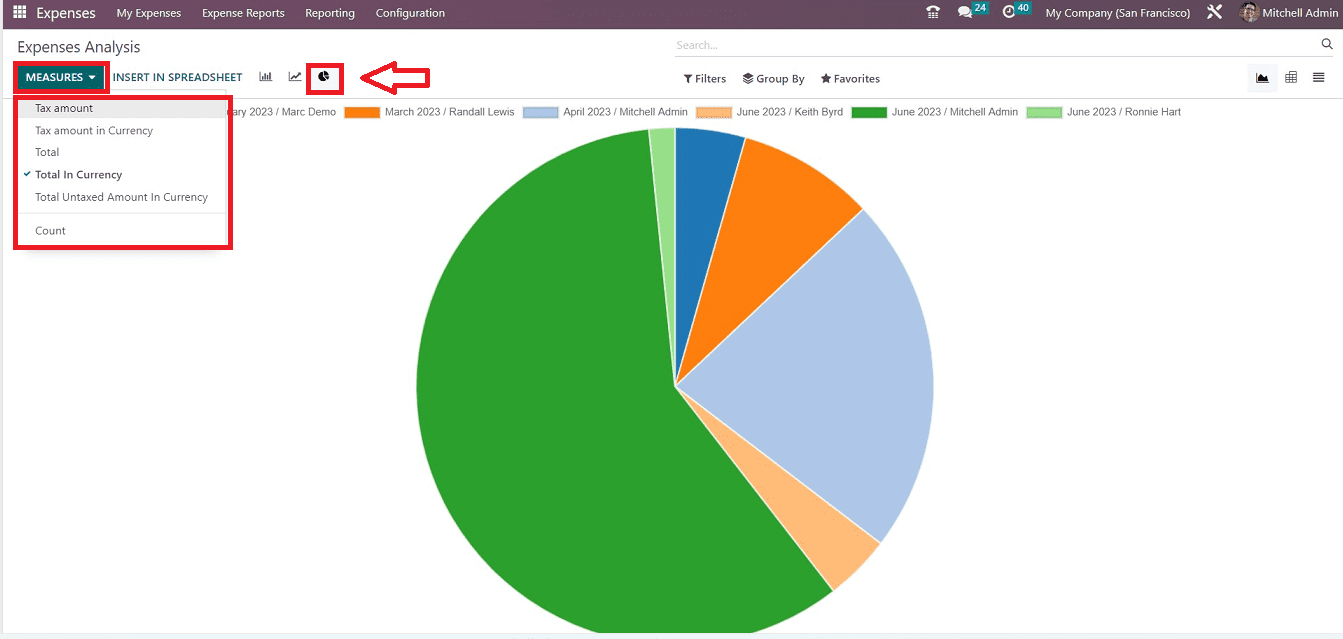
The Odoo 16 Expenses “Reporting” feature allows users to evaluate company expenses. The “Expenses Analysis” menu in Reporting displays a graphical representation with the Expense Date on X-axis and the total expense count on Y-axis.
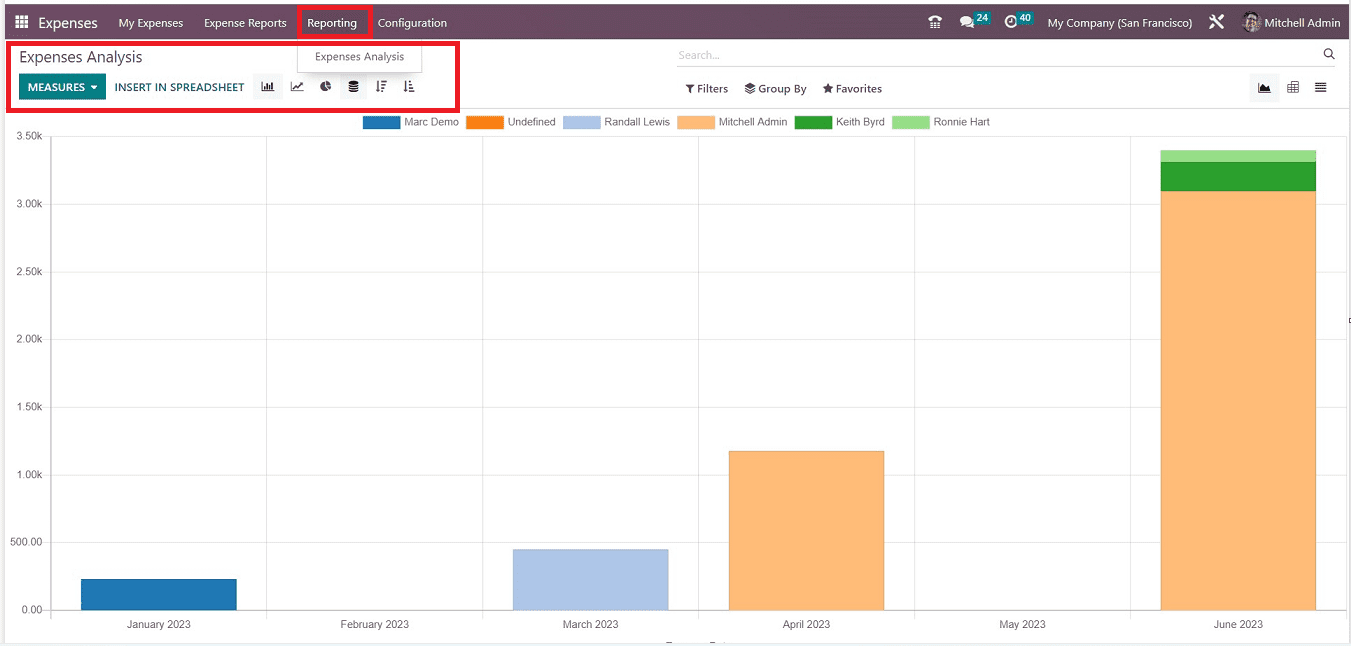
Users can view the expense count of each employee in various colors and apply different values to the graph after clicking on the “MEASURES” section. The “INSERT IN SPREADSHEET” button helps to upload extra Excel file data to get a more exclusive report section. You can change the report view to other visuals using the various icons such as Graphical, Line Chart, Stacked View, Ascending, and Pie Chart, as illustrated in the below screenshot.
Configurations
The “Configuration” menu of the Odoo 16 Expenses Module contains two menu options “Settings” and “Expense Categories.”
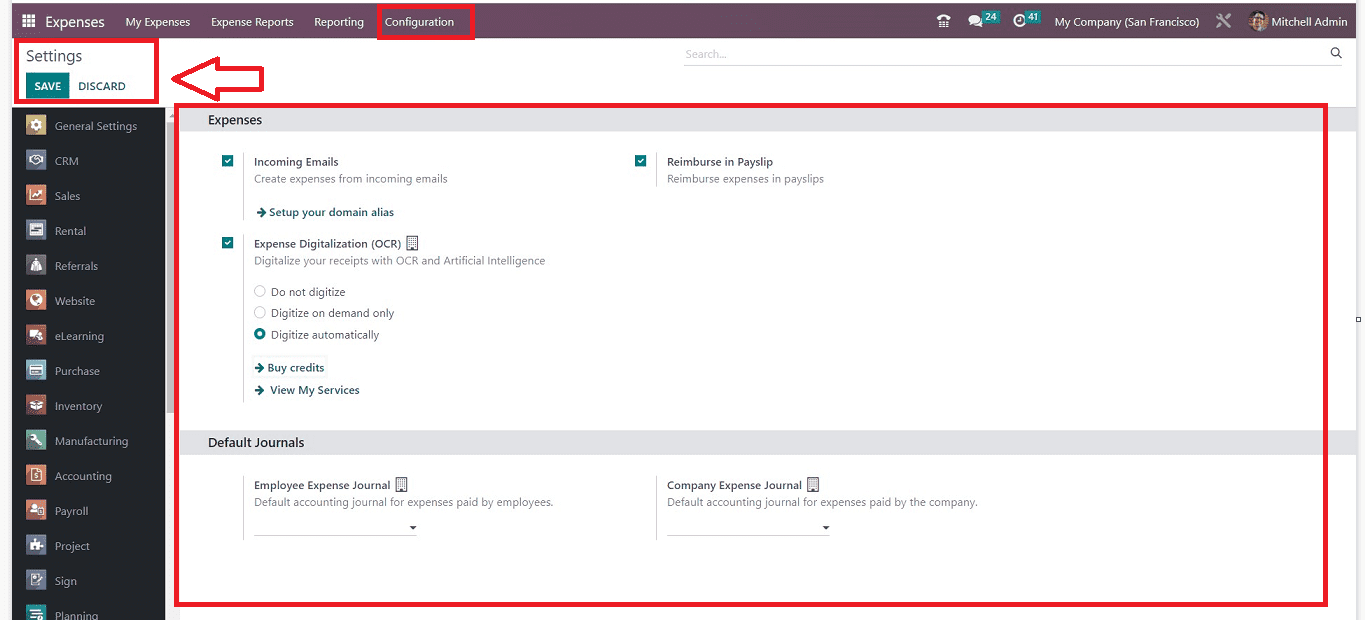
The “Settings” menu in the “Configuration” tab can be used to configure “Expenses” and “Default Journals.”
Expenses Tab: The "Incoming Emails" option on the costs tab allows users to create expenses based on emails they have received. Create a domain alias to forward emails with receipts as attachments. The “Expense Digitization (OCR)” option can be enabled to digitize receipts with artificial intelligence and OCR. You have three options for the fundamental expense digitization process: Do not digitize, Digitise automatically, and Digitise just as needed. Users must enable the "Reimburse in Payslips" option in order to get expenditures in employee payslips.
Default Journals tab: You have to select a default account journal for employee-paid costs in the “Employee Expense Journal” field and the default accounting journals for which the firm pays expenditures in the “Company Expense Journal” column. To enable all necessary features, pop the “SAVE” button.
Expense Categories
Using the "Expense Categories" creation region, we can add new expenditure categories that fall under an organization. The list of all previously generated expenditure categories can be seen on this menu page, like expense category “Name,” “Internal References,” “Internal Note,” etc.
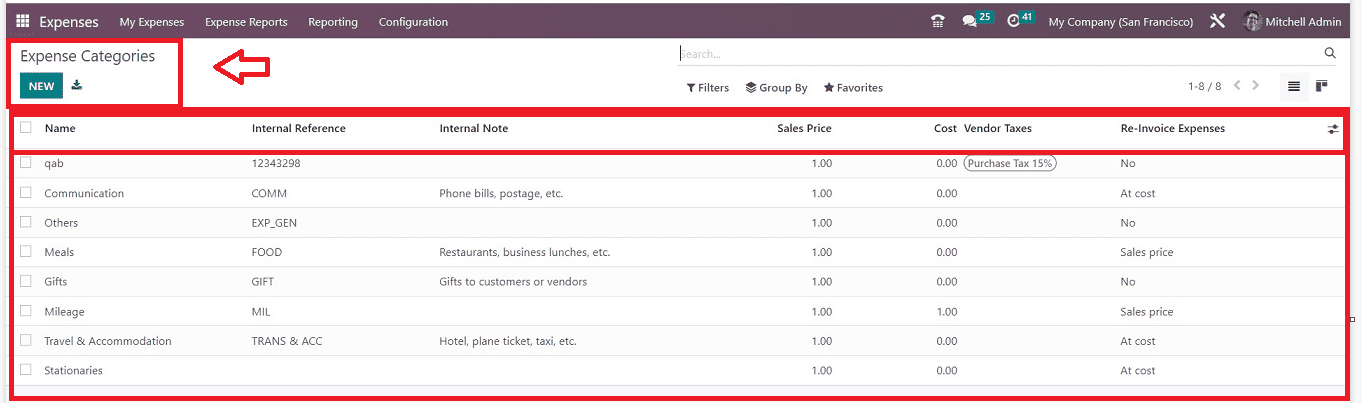
Popping the “NEW” button will open a new “Expense Categories” creation form, as shown below.
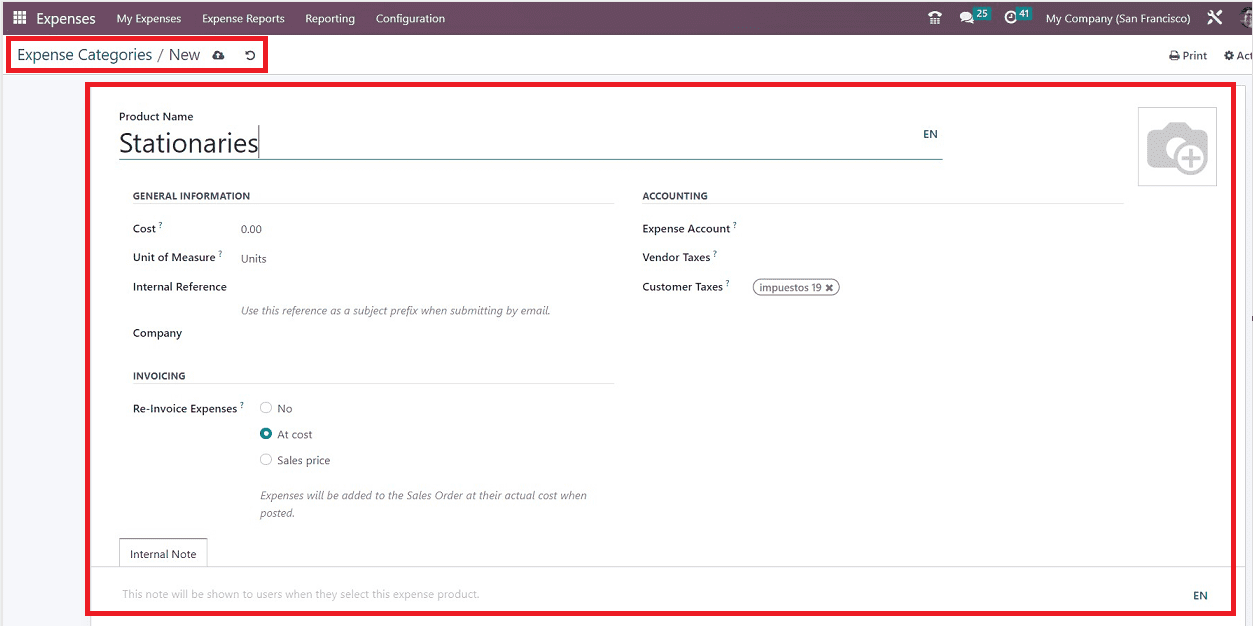
You can fill in the required areas, such as “Cost,” “Unit of Measure,” “Internal Reference,” “Company,” “Expense Account,” “Vendor Taxes,” “Customer Taxes,” and “Re-Invoice Expenses.” Also, you are able to provide any notes or descriptions in the “Internal Notes” area. Always remember to save the details after completing the editing.
You can gain insight into the key aspects of the employee expense management system and get guidance in using the Odoo 16 Expenses Module by reading this blog post.