Tap Payments is recognized as a pioneer payment gateway in the Middle East that allows merchants to receive money through various Payment methods, namely Visa, Mastercard, Mada, KNET, Benefit, Apple Pay, Google Pay, and many more.
Tap payment gateway module of Odoo 17 enables the integration of Tap Payments into the system, thus giving customers the opportunity to pay directly in the store without having to leave their favorite website. After being configured, it automatically synchronizes transactions done through Odoo, thus facilitating cash management.
Key Features
- Safe connection with Tap Payments.
- Includes Test Mode and Live Mode.
- Make secure online payments directly on the Odoo site.
- Secure Tap-hosted payment form.
- Payment transaction synchronization.
- Messages for different status changes.
- Easy setup using credentials.
Prerequisites
Before you start setting up the Tap Payment Gateway, you need to do a few things.
- The first step is to ensure that Odoo 17 is installed.
- You also need to have the Tap Payment Gateway module installed.
- You have to get your Test or Live API Keys from the Tap Developer Dashboard.
Step 1: Get Your Tap API Credentials
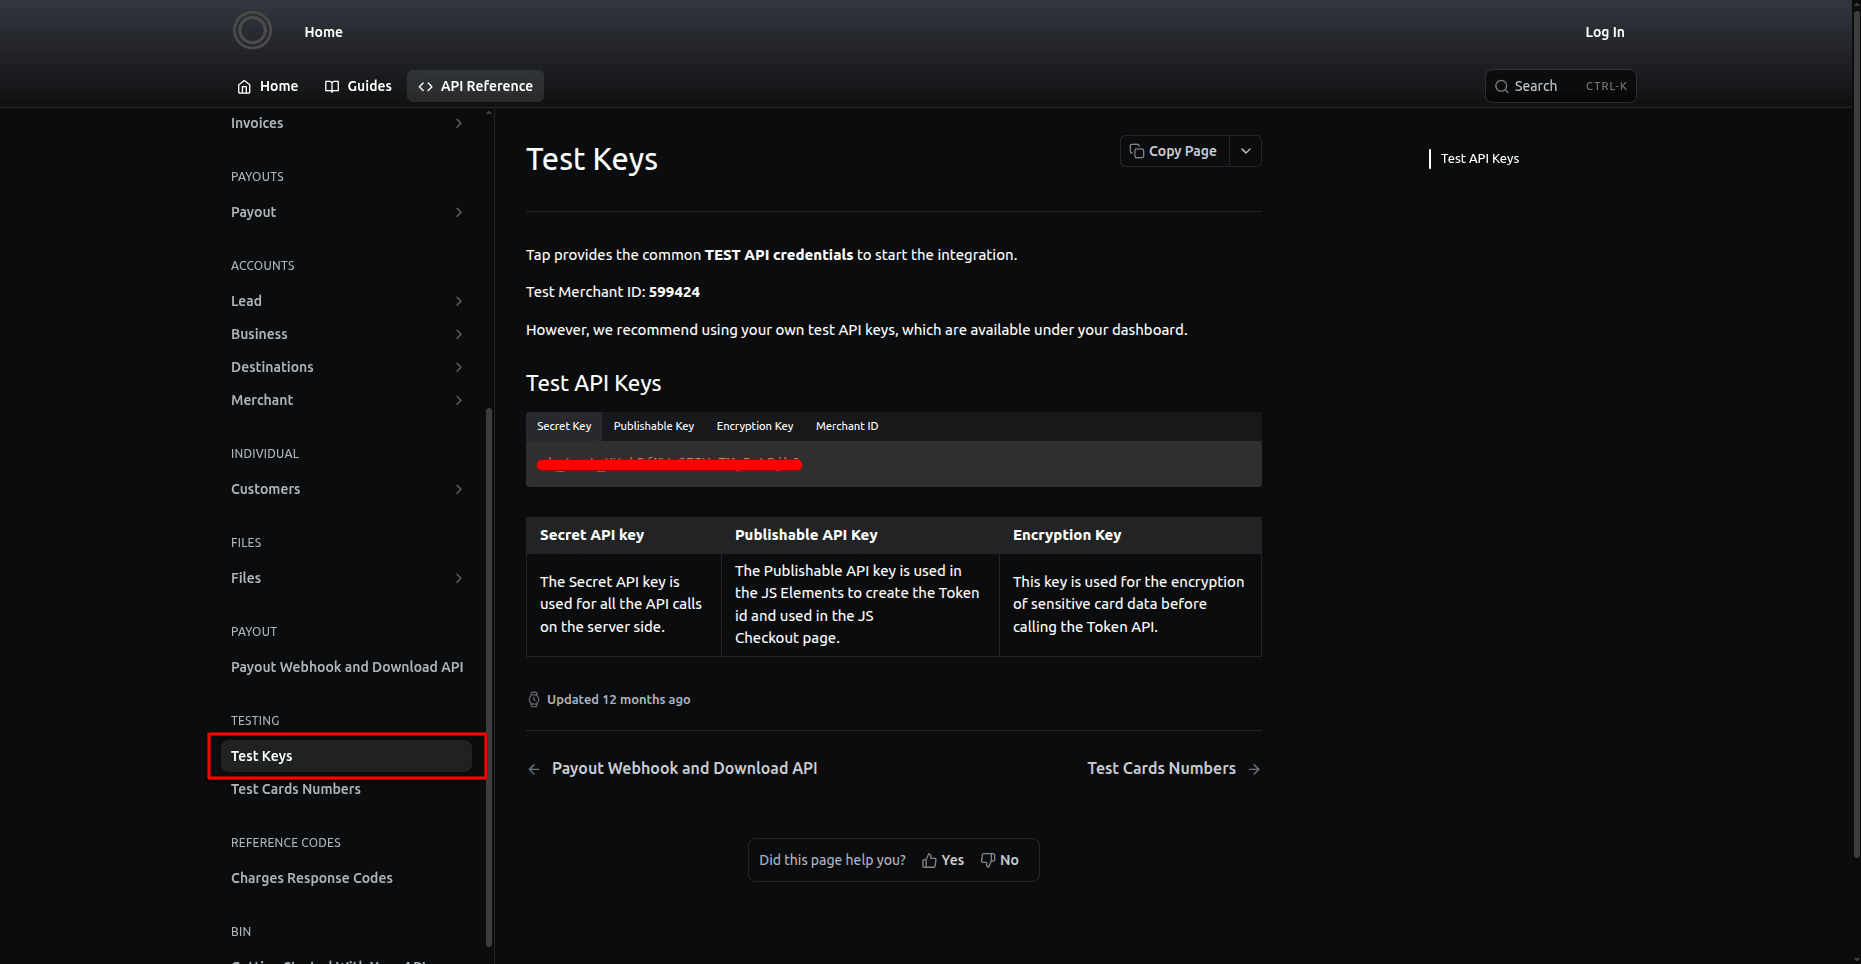
Before you do anything with Odoo, you have to log in to your Tap Developer Dashboard.
For testing, go to Testing > Test Keys.
Here you will find the credentials you need:
- Secret Key
- Publishable Key
You will need these credentials when you are setting up the payment provider in Odoo.
Step 2: Configure the Tap Payment Provider in Odoo
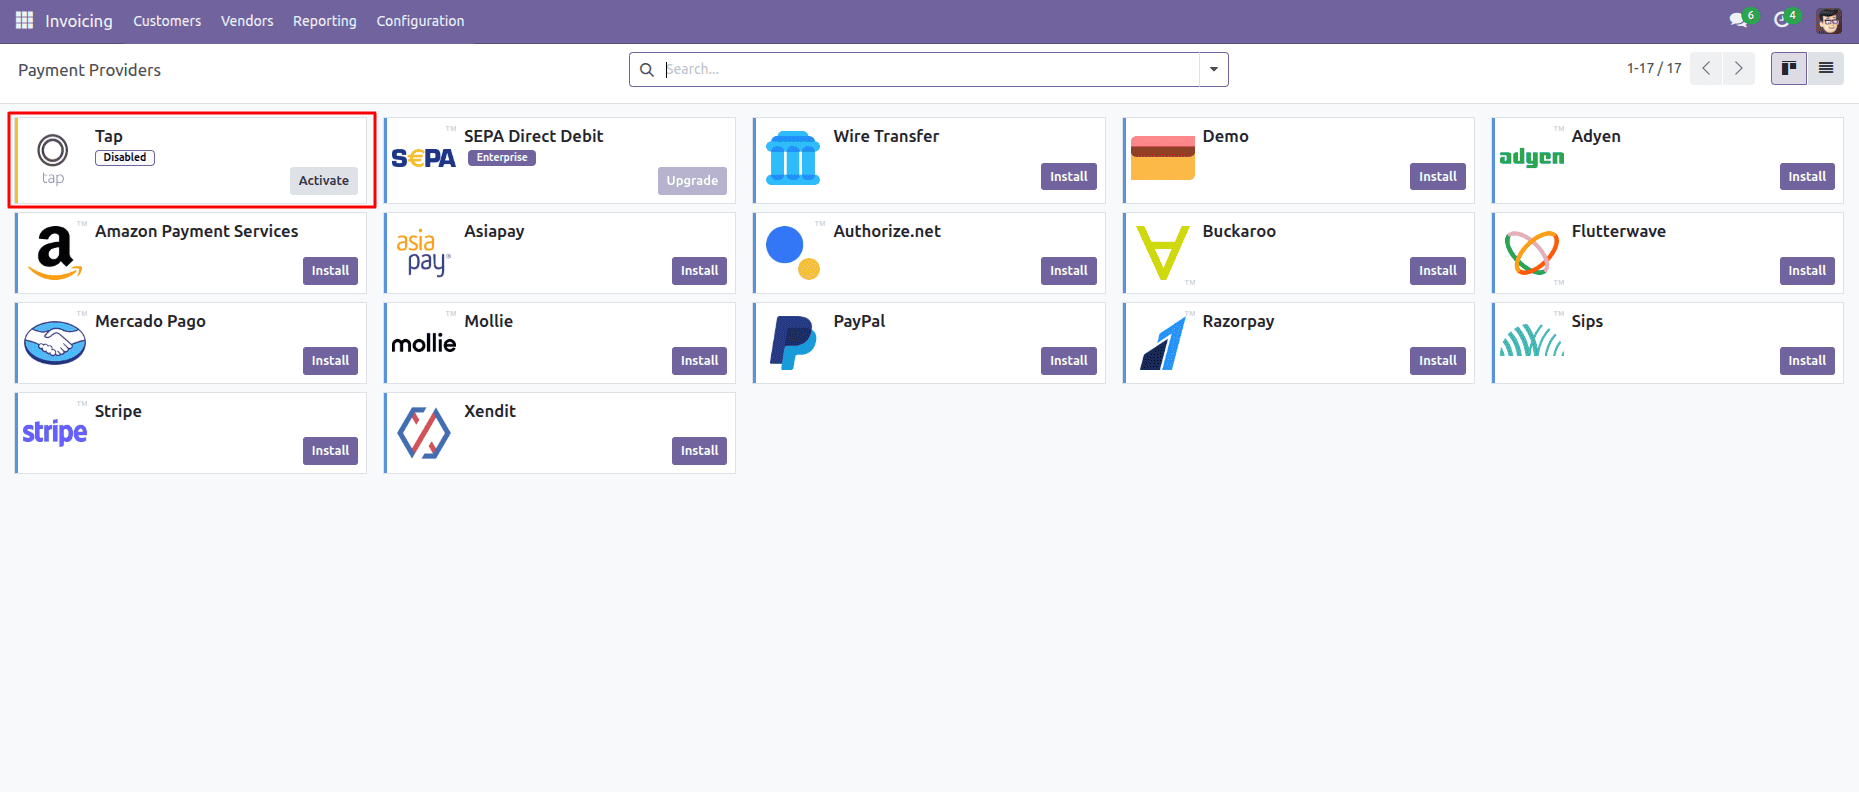
To do this, go to Invoicing > Configuration > Payment Providers.
Then, open the Tap payment provider.
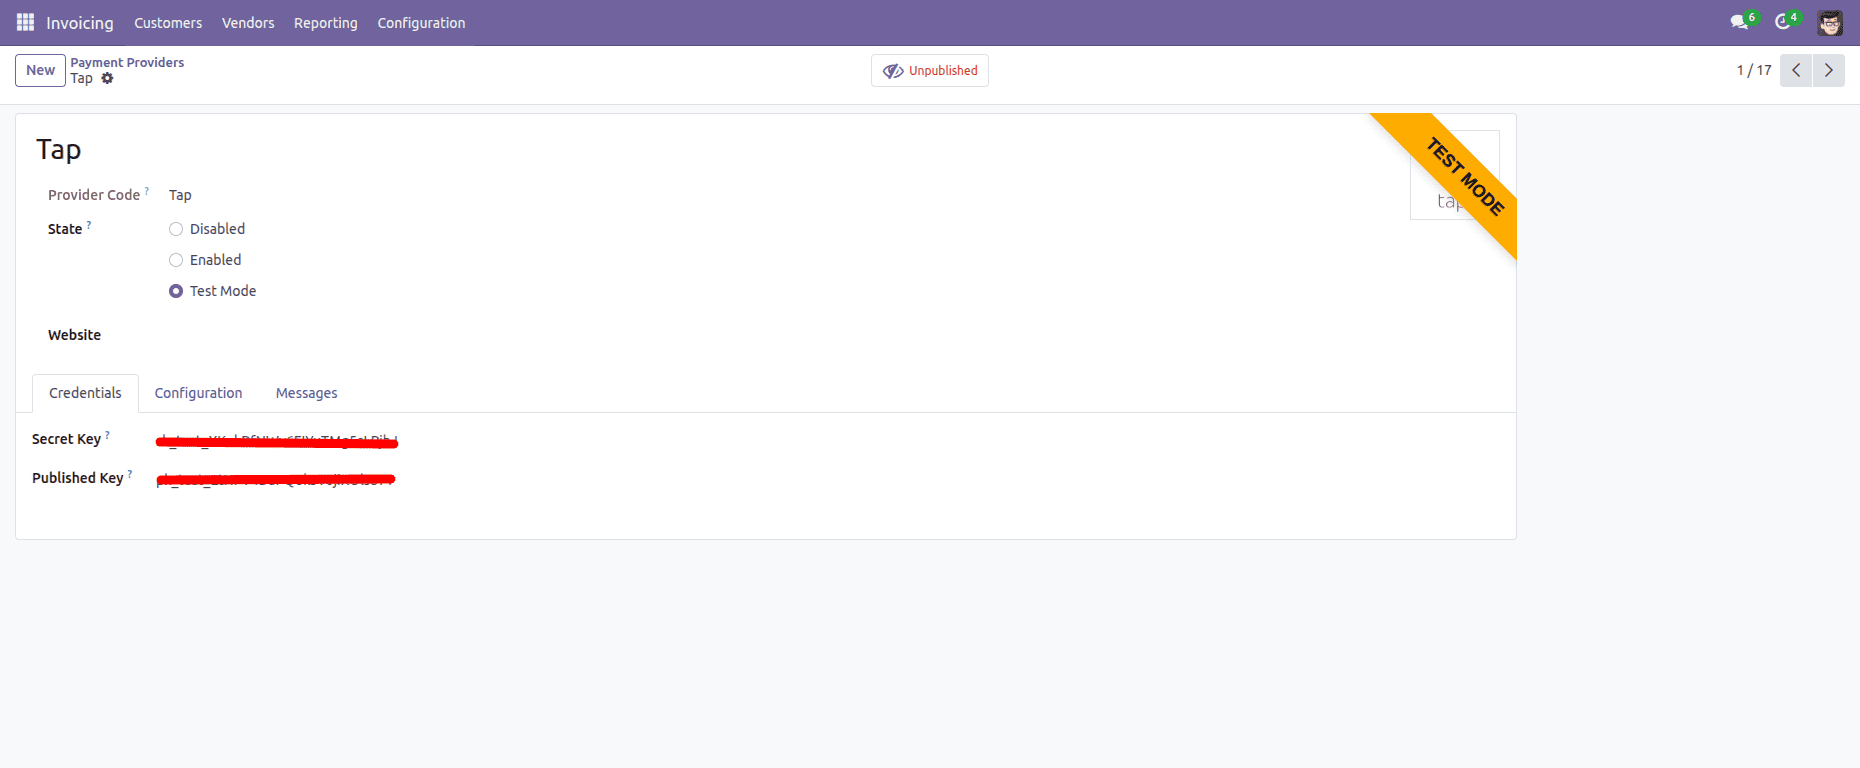
The Tap Payment Provider can be in one of three states:
- Disabled
- Enabled
- Test Mode
When you are testing the Tap Payment Gateway, it is an idea to keep the Tap Payment Provider in Test Mode.
Step 3: Enter the Tap API Credentials
Open the Credentials tab.
Paste the:
- Secret Key
- Publishable Key
These credentials authenticate communication between Odoo and Tap Payments.
After entering the keys, save the configuration.
Step 4: Configure Payment Provider Settings
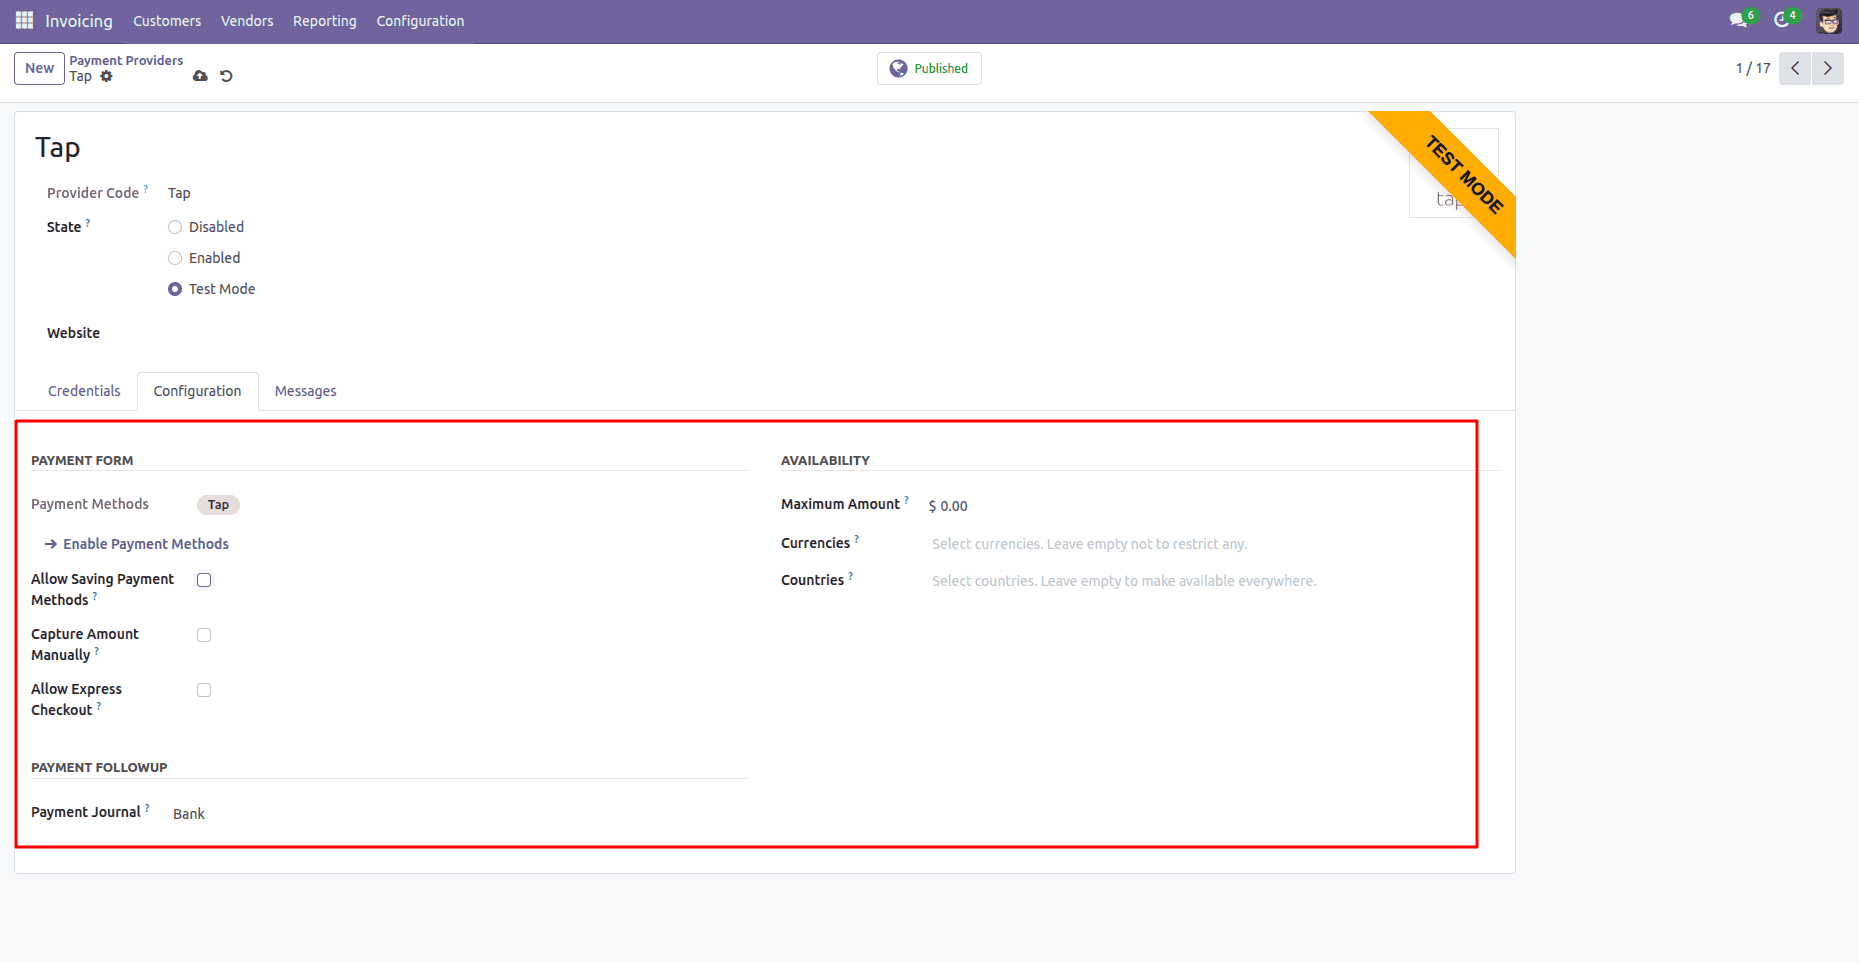
Open the Configuration tab.
Here, you can configure various payment options including:
- Payment Journal
- Available Currencies
- Supported Countries
- Maximum Payment Amount
- Allow Saving Payment Methods
- Manual Capture
- Express Checkout
Select the appropriate options to meet your business requirements.
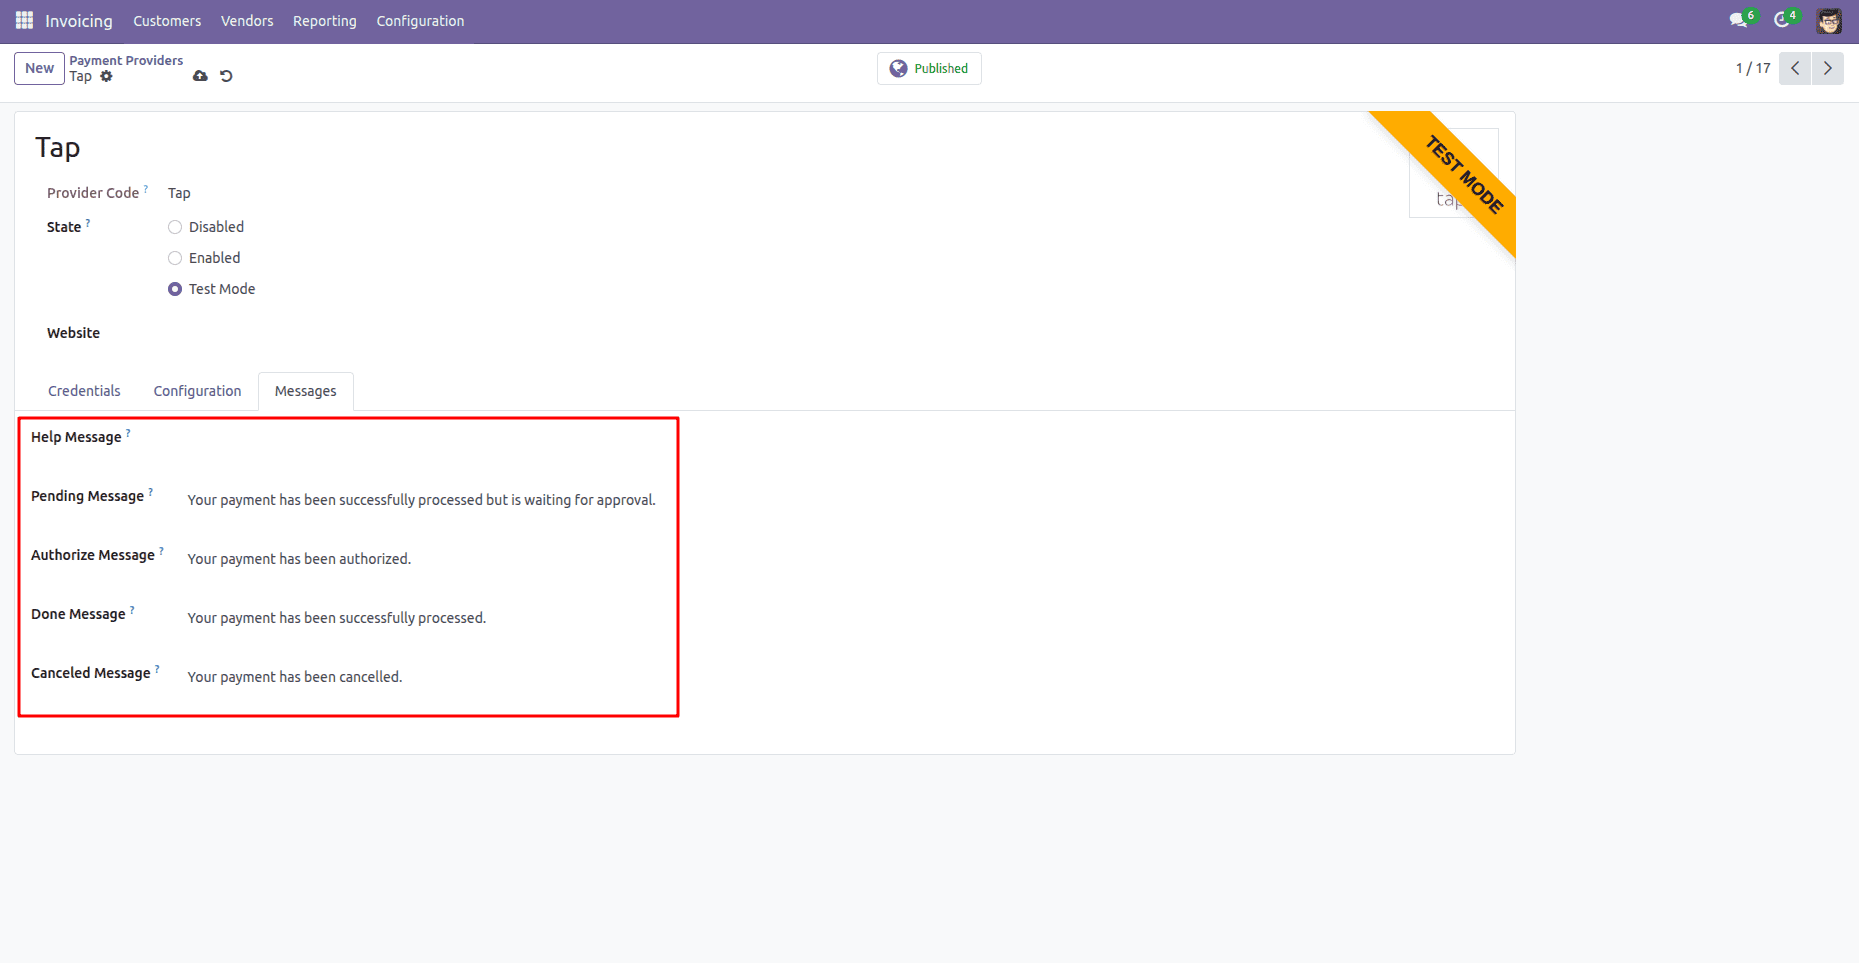
Step 5: Configure Payment Messages
Switch to the Messages tab.
Odoo allows you to customize the messages displayed to customers during different payment states such as:
- Pending
- Authorized
- Successful
- Cancelled
These messages improve customer communication throughout the payment process.
Step 6: Test the Payment Gateway
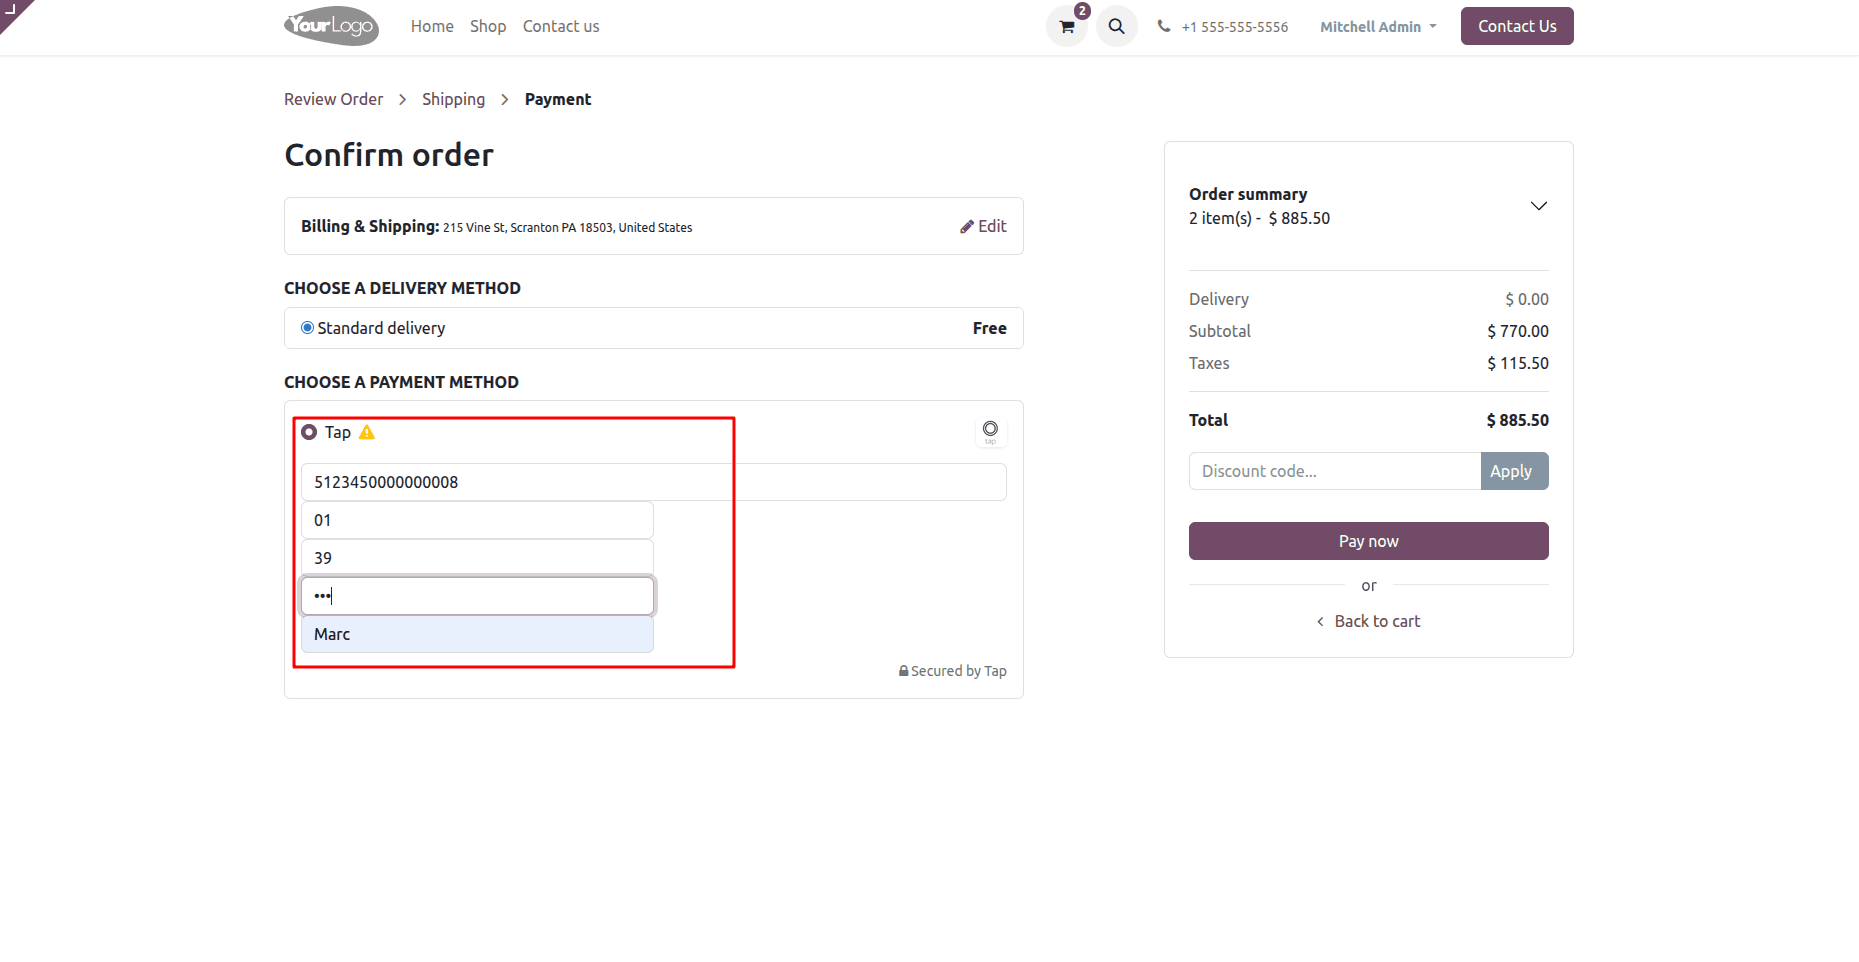
Once the provider is configured, open your Odoo website.
Add the required products to the shopping cart and proceed to checkout.
Choose Tap from the available payment methods.
The secure Tap payment form will open for customers to enter their payment information.
Step 7: Use Tap Test Card Numbers
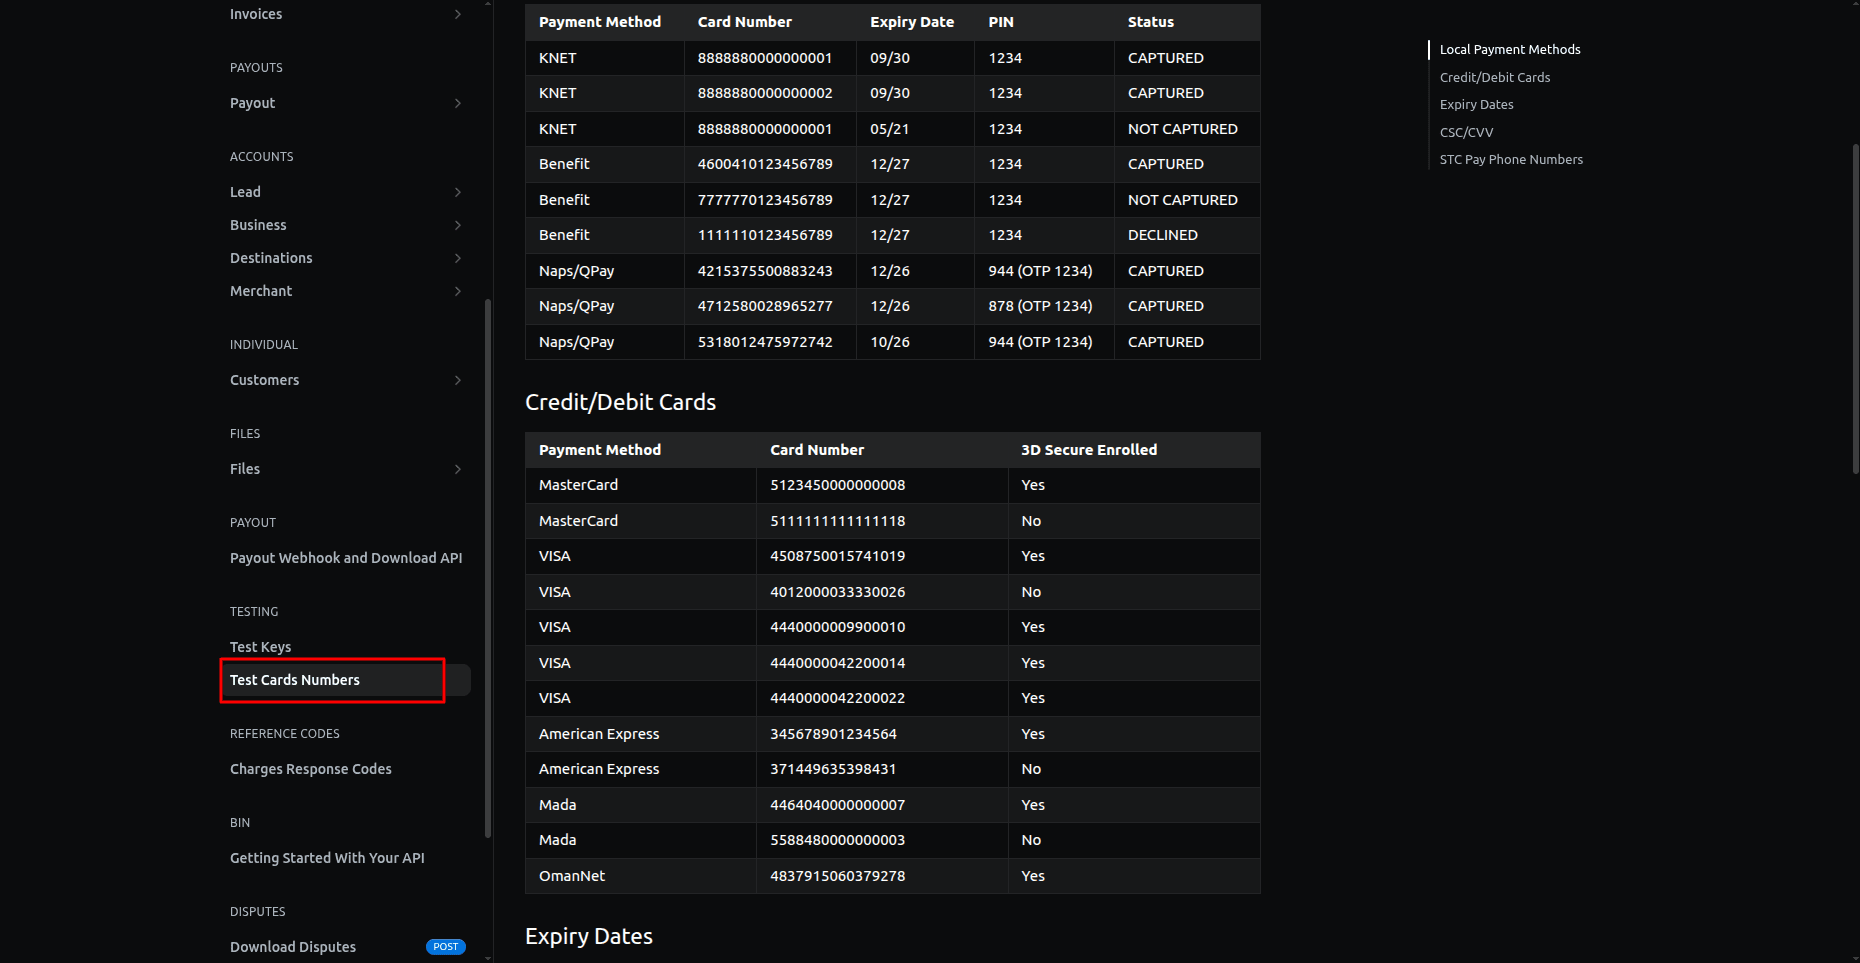
For testing purposes, Tap provides several test card numbers.
Use any supported test card to simulate successful or failed payment scenarios.
This allows developers to verify the payment workflow without processing real transactions.
Step 8: Complete the Payment
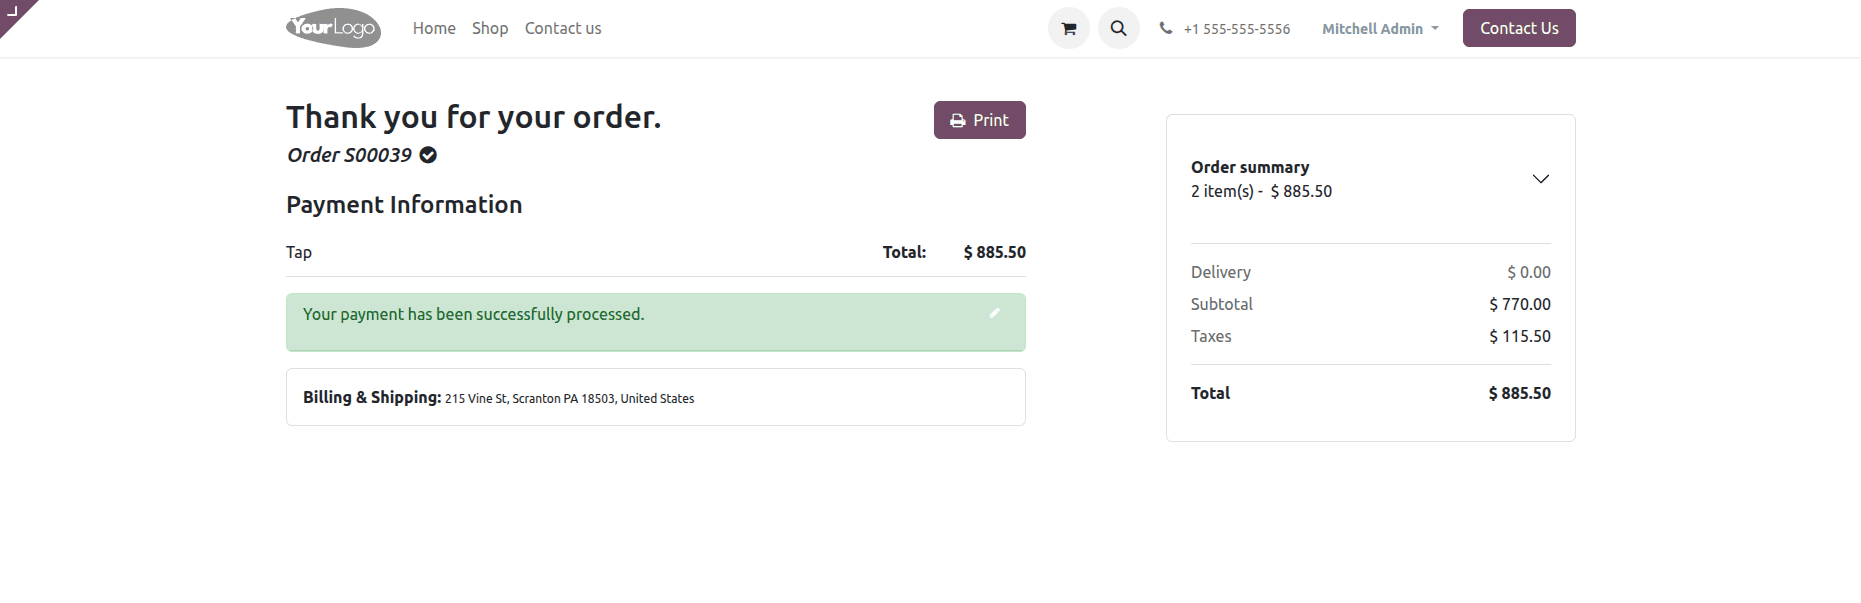
After entering the test card details, click Pay Now.
If the payment is processed successfully, Odoo redirects the customer to the order confirmation page displaying a success message along with the order summary.
This confirms that the payment has been successfully received by Tap and synchronized with Odoo.
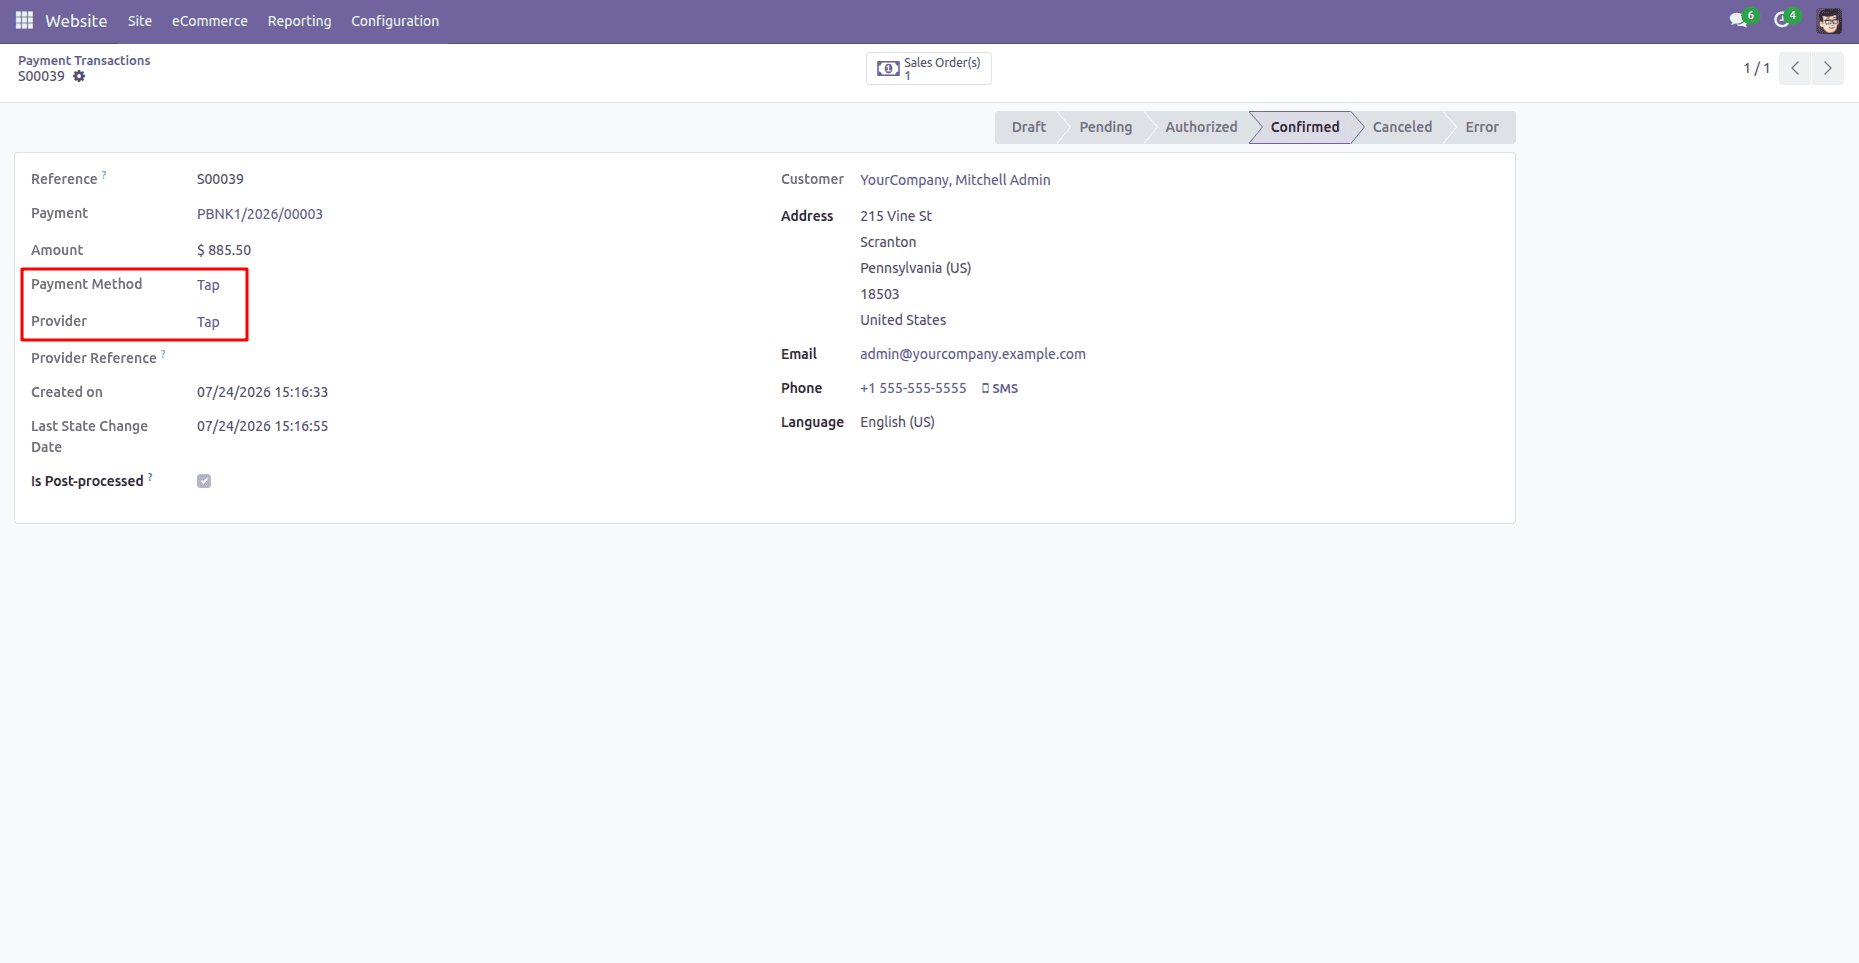
Step 9: Verify the Payment Transaction
After the payment is completed, return to Odoo.
Navigate to:
Website > eCommerce > Payment Transactions
Open the newly created transaction.
You can verify details such as:
- Transaction Reference
- Payment Method
- Provider
- Amount
- Customer
- Transaction Status
A successful transaction will display the Confirmed status.
Step 10: Verify the Sales Order
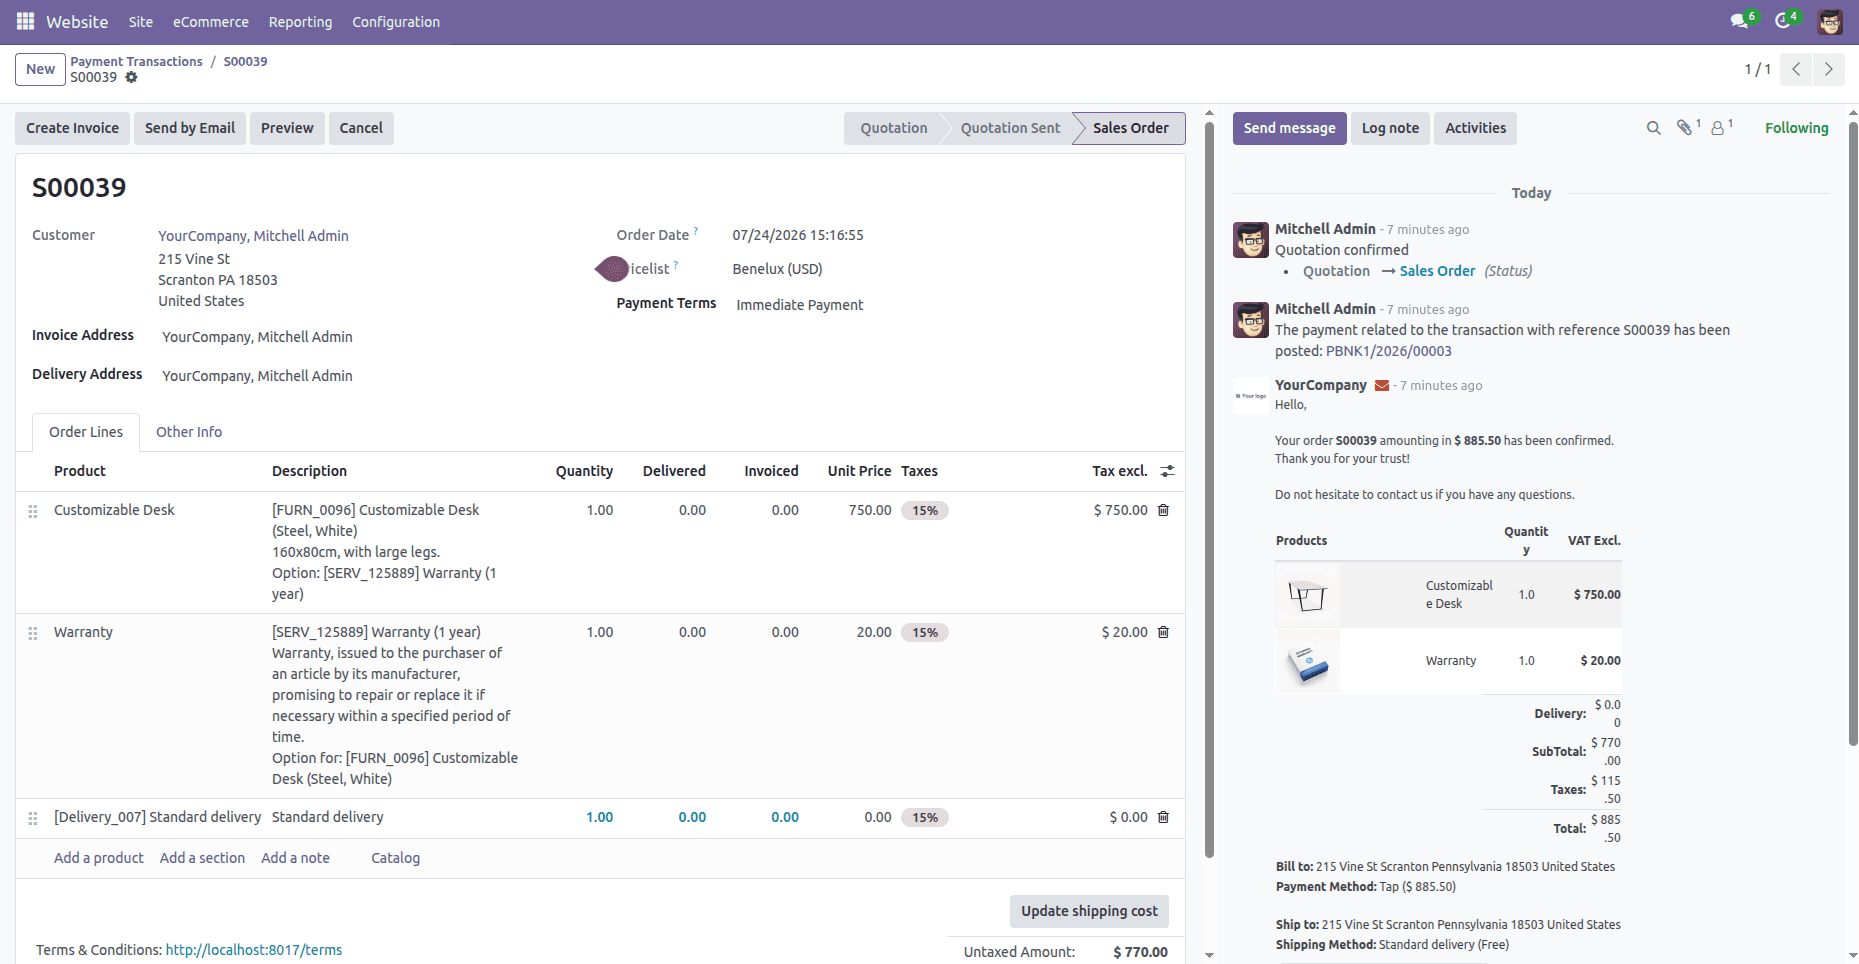
Open the corresponding Sales Order generated from the website purchase.
The chatter records the payment confirmation automatically, providing complete visibility into the transaction history.
You can also proceed with invoicing and delivery as part of the normal Odoo sales workflow.
Step 11: Move to Live Mode and Process a Real Payment
Once you have successfully tested the Tap Payment Gateway with test credentials and test card numbers, you can move to the live environment and start accepting real payments.
1. Get Your Live API Credentials
Log in to your Tap Developer Dashboard and get the API credentials for your live environment.
Ensure that the test credentials are replaced with the Live Secret Key and Live Publishable Key before switching to live mode.
2. Switch the Payment Provider to Live Mode
In Odoo, go to:
Invoicing > Configuration > Payment Providers > Tap
Before enabling live payments, replace the test credentials with your live credentials and review the payment provider settings.
Check the following options:
- Payment Journal
- Available Currencies
- Supported Countries
- Maximum Payment Amount
- Payment Methods
- Manual Capture
- Express Checkout
Once everything looks good, switch the payment provider from Test Mode to the live/production mode.
After this, Tap will be ready to process real customer payments through your Odoo website.
Payment Workflow
The complete payment flow follows these steps:
- The customer adds products to the shopping cart.
- The customer proceeds to the checkout page.
- The customer selects Tap as the payment provider.
- Payment details are securely entered through Tap.
- Tap authorizes and processes the payment.
- Odoo receives the payment confirmation.
- A payment transaction is automatically created.
- The sales order is confirmed.
- Customer receives the payment success page.
- The merchant can continue with invoicing and order fulfillment.
Benefits of Integrating Tap with Odoo 17
Integrating Tap Payments with Odoo provides several benefits for businesses in the Middle East and beyond:
- Secure online payment processing through a reliable payment provider.
- Smooth checkout experience that improves customer satisfaction.
- Automatic synchronization between payment transactions and sales orders.
- Reduced manual payment reconciliation.
- Support for both testing and production environments.
- Flexible payment provider configuration.
- Easy integration with Odoo's native eCommerce workflow.
- Faster order processing through automatic payment confirmation.
The Tap Payment Gateway module for Odoo 17 provides a seamless and secure way to accept online payments directly from your Odoo website. With support for Test Mode, configurable payment options, customizable transaction messages, and automatic synchronization with Odoo Sales, the module simplifies payment management while delivering a smooth checkout experience for customers.
Whether you're launching a new eCommerce store or expanding your payment options, integrating Tap Payments into Odoo helps streamline online transactions, improve operational efficiency, and enhance customer trust.
To read more about How to Configure and Use the Odoo Pipedrive Connector in Odoo 19, refer to our blog How to Configure and Use the Odoo Pipedrive Connector in Odoo 19.