A lead, or prospective client who has expressed interest in your product or service, is the first step in any successful transaction. Tracking the progression from initial contact to a successful sale or estimate is made simpler by Odoo 19 CRM's effective and organised approach to lead management.
Converting a lead into a sales quotation correctly increases the possibility of closing a contract by ensuring that eligible prospects receive timely and precise bids. Including client data, items, price, and communication history in the quotation process, it aids sales teams in maintaining an organised workflow. This reduces human error, speeds up response times, and gives prospective clients a more polished experience. Additionally, an effective lead-to-quotation process improves forecasting, sales monitoring, and overall company success.
Creating Leads in Odoo 19
In Odoo 19 CRM, a lead is an unqualified potential sales inquiry or prospect. It can be produced manually, imported, or automatically from sources like emails, marketing campaigns, and contact forms on websites. Before devoting time to the sales process, leads assist sales teams in gathering and analysing customer data. The salesman can evaluate the prospect's needs, set priorities, and assess the possibility of conversion during the qualification process. A lead can be turned into a chance for additional sales efforts once it is deemed promising.
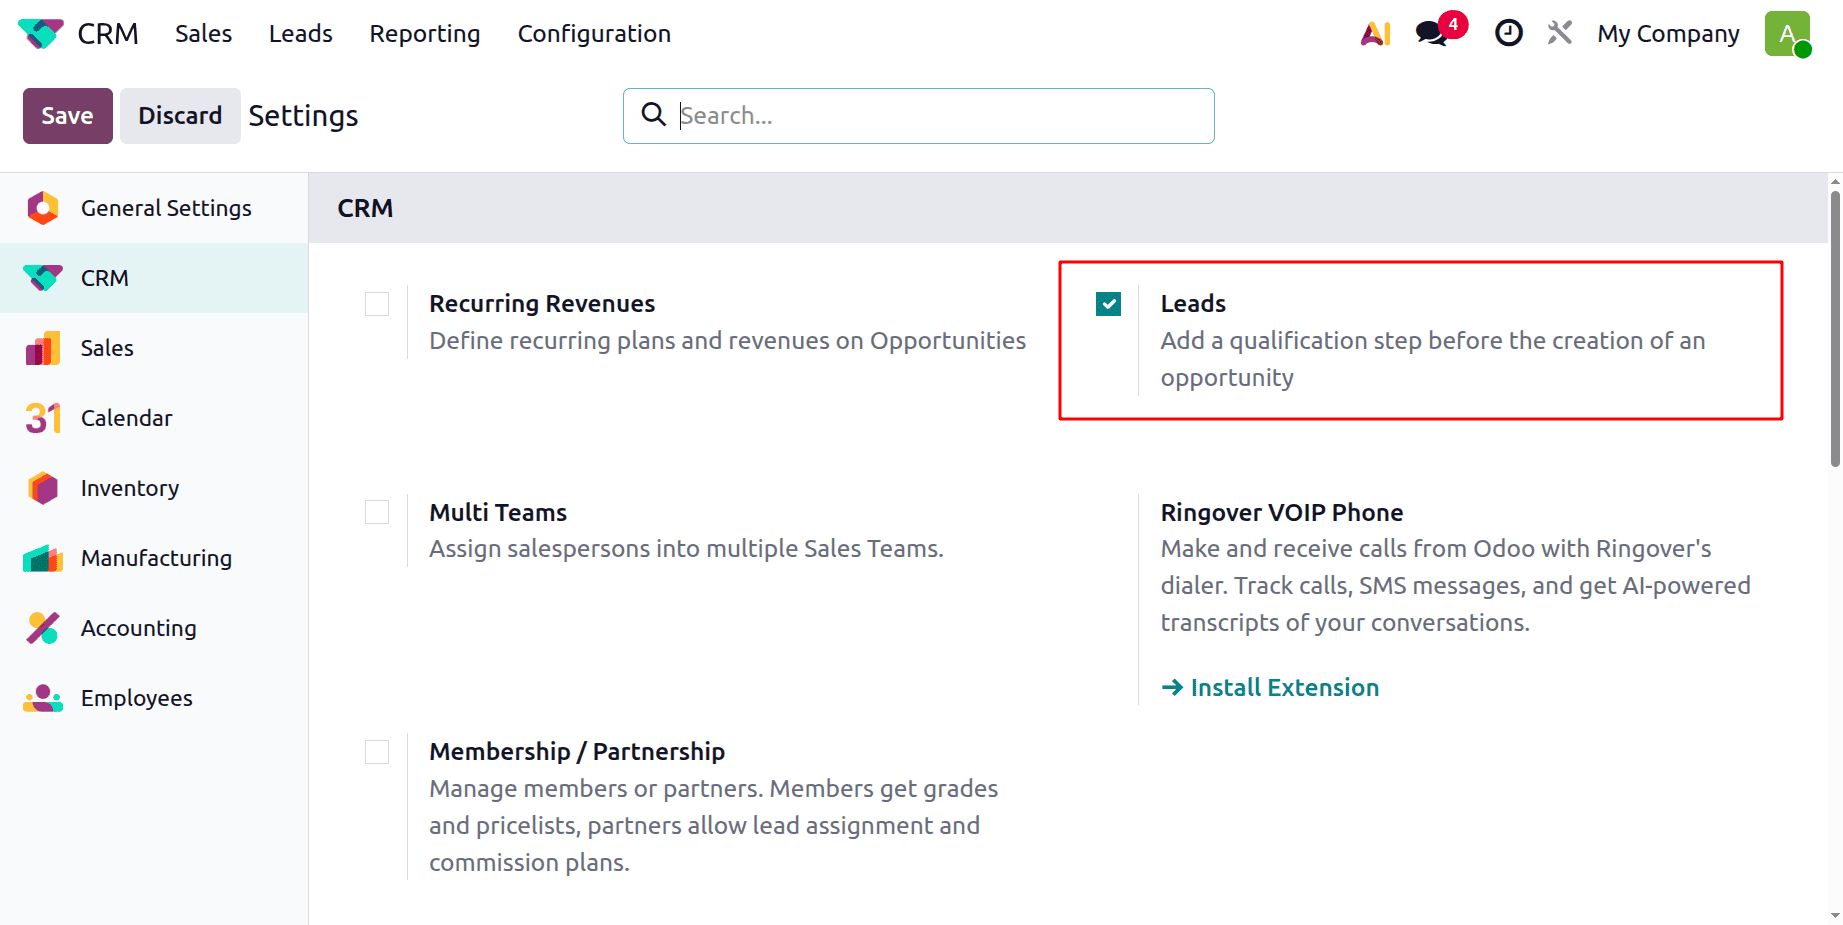
Go to Configuration > Settings > Leads in the CRM module to start using the lead management feature. Once enabled, the top navigation bar will display a new Leads menu.
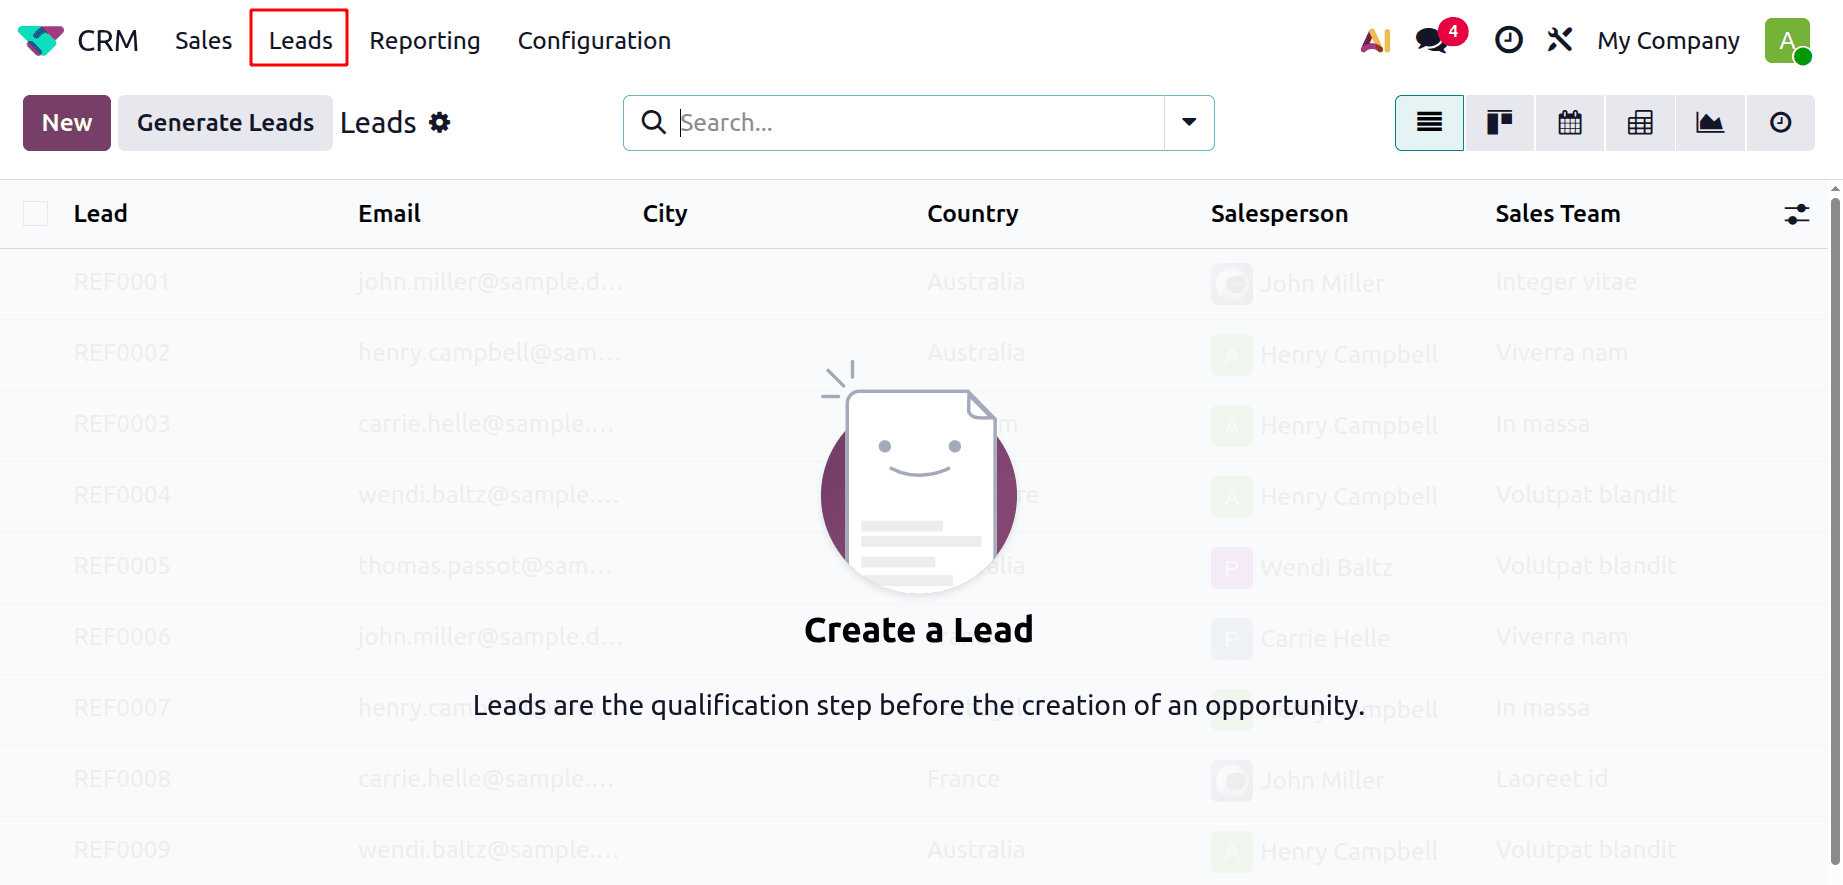
To view current leads or generate a new one by clicking the New button, navigate to the Leads menu. Enter all required information, including contact details, anticipated income, and any further pertinent remarks.
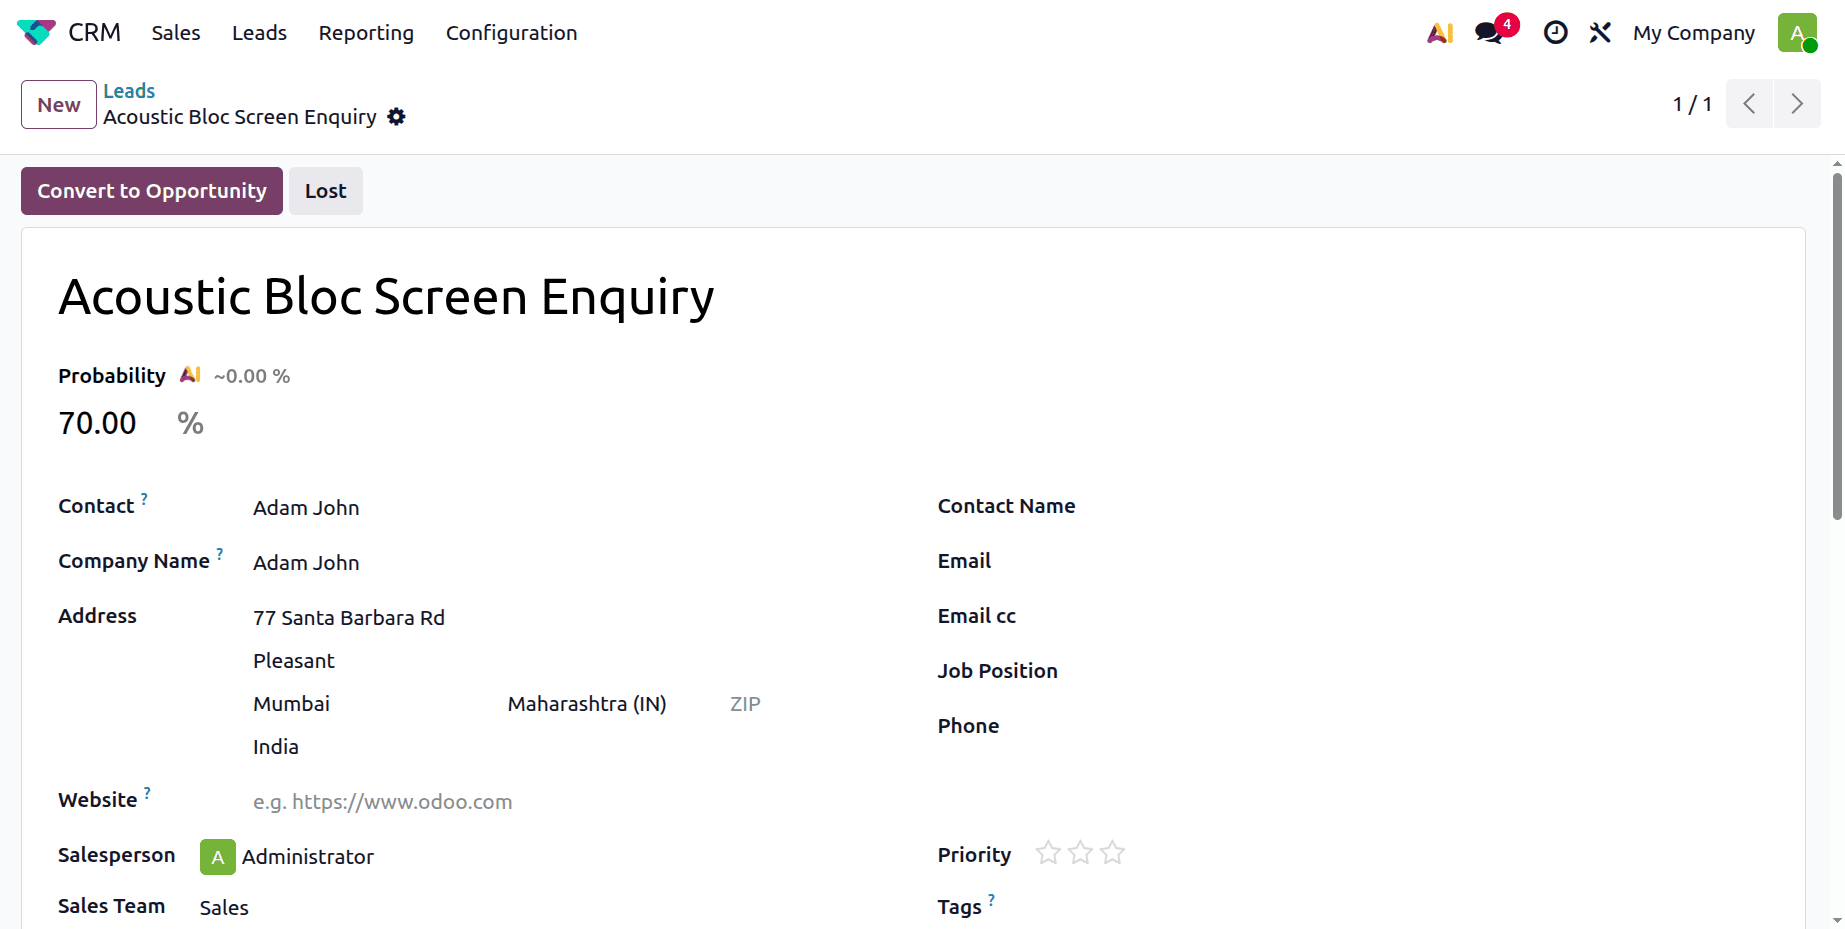
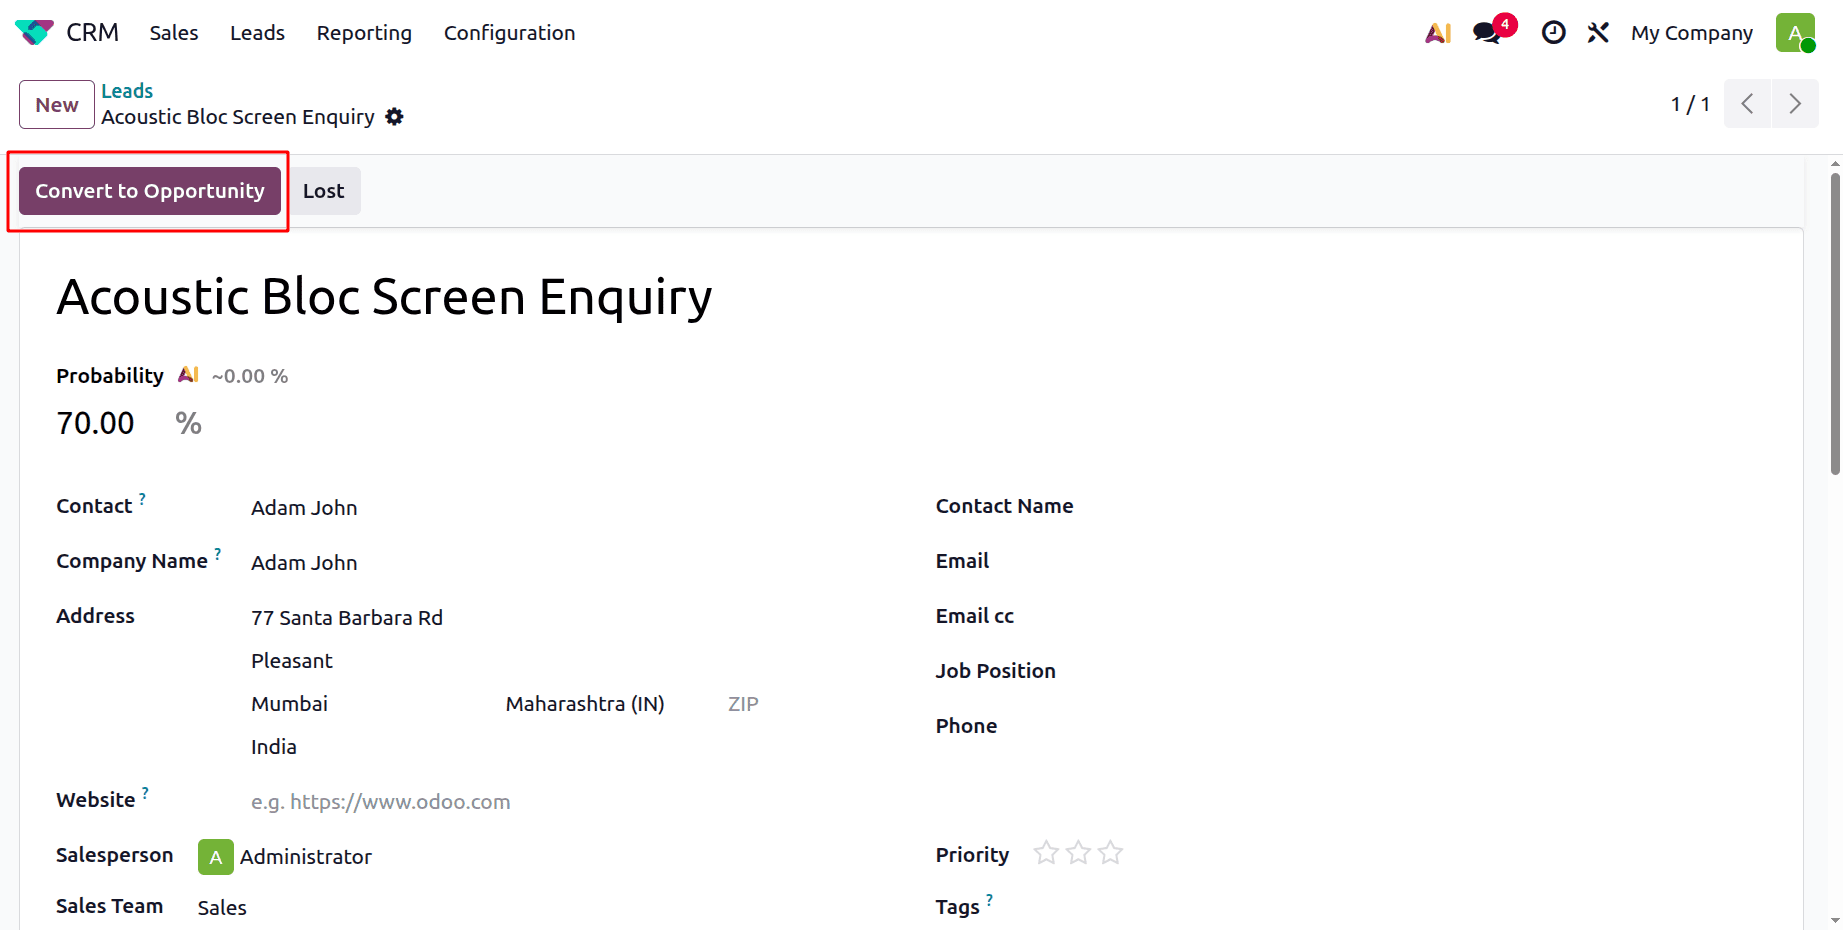
Inside the creation form, first add the description, and mention the probability. Here, probability defines the chance of the lead to win. Then, mention the customer name in the Contact field. Inside the lead, fill up the fields Company Name, Address, Website, Salesperson, Sales Team, Contact Name, Email, Email cc, Job Position, Phone, Tags, and Priority.
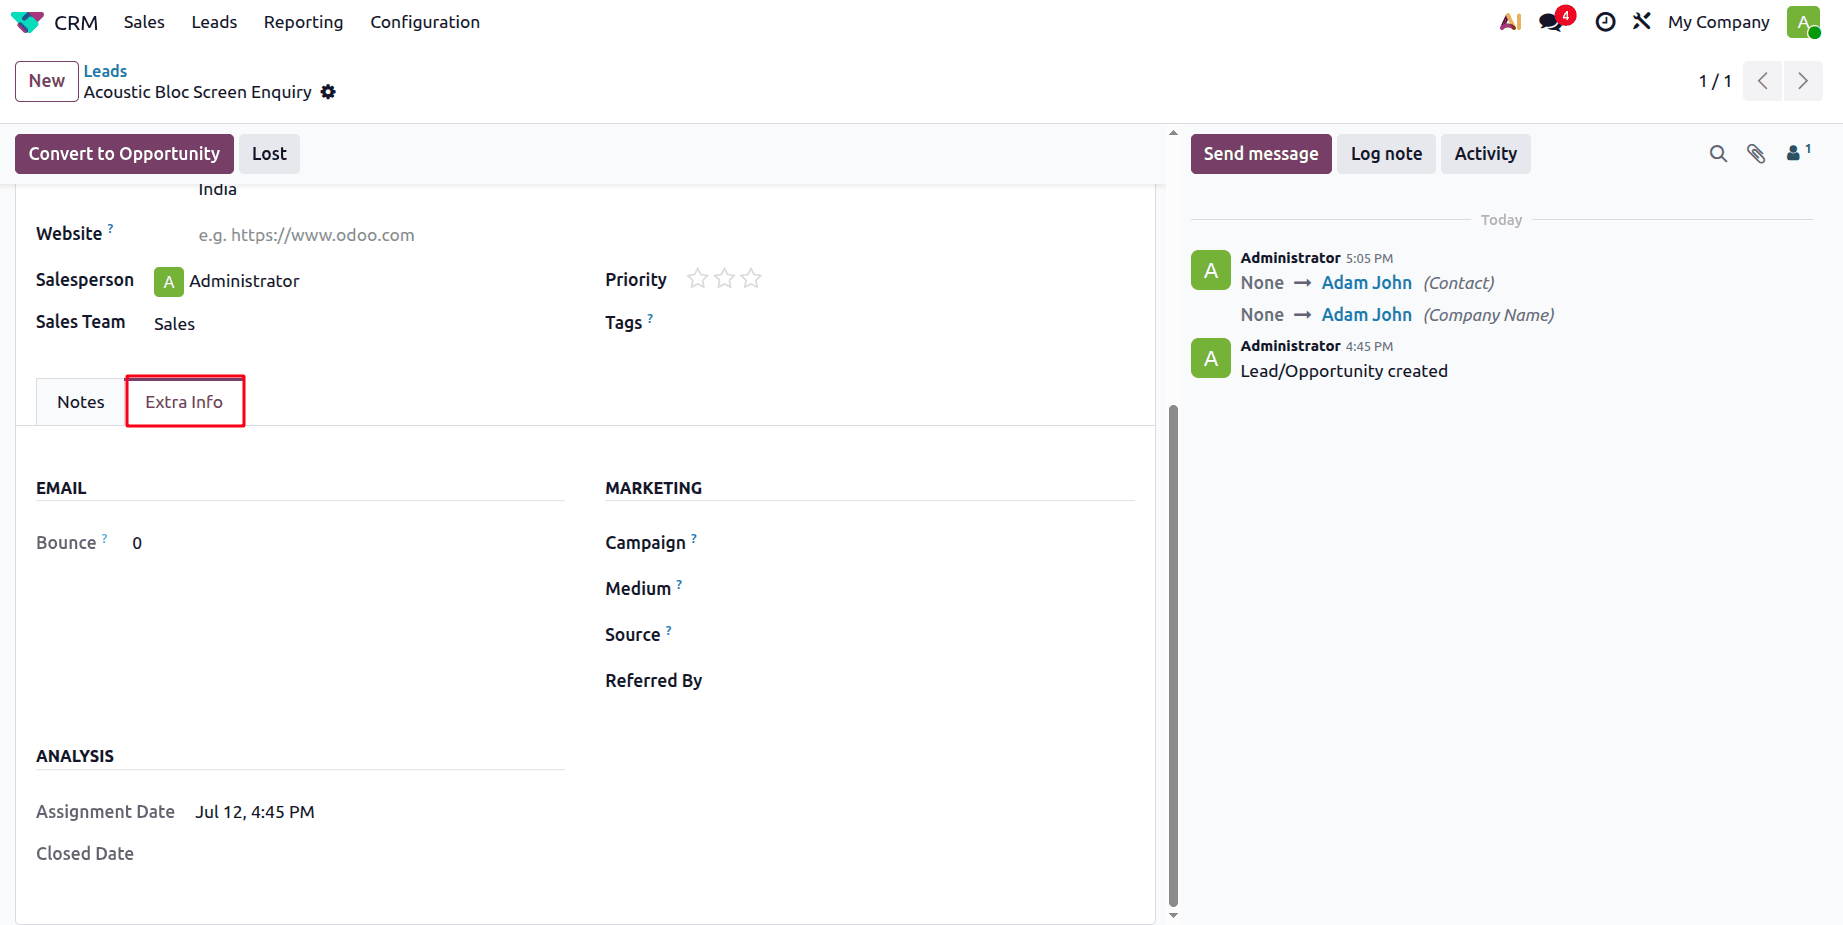
Then, it's possible to add additional Notes, and the users can add additional information about the lead inside the Extra Info tab. After adding all the details, save the lead.
Convert a Lead to Opportunity
A qualified sales prospect with a high chance of becoming a customer is called an opportunity in Odoo 19 CRM. Salespeople monitor every phase of the sales process, from first contact to deal closure, using the CRM pipeline. Opportunities give customers the ability to plan follow-up tasks, document correspondence, generate quotes, and track anticipated income. Sales teams can assess the progress and likelihood of winning deals with the aid of forecasting and reporting capabilities offered by Odoo 19. Businesses can enhance sales performance, boost conversion rates, and preserve stronger client relationships by handling opportunities well.
A lead can be converted to an opportunity simply by clicking on the Convert to Opportunity button.
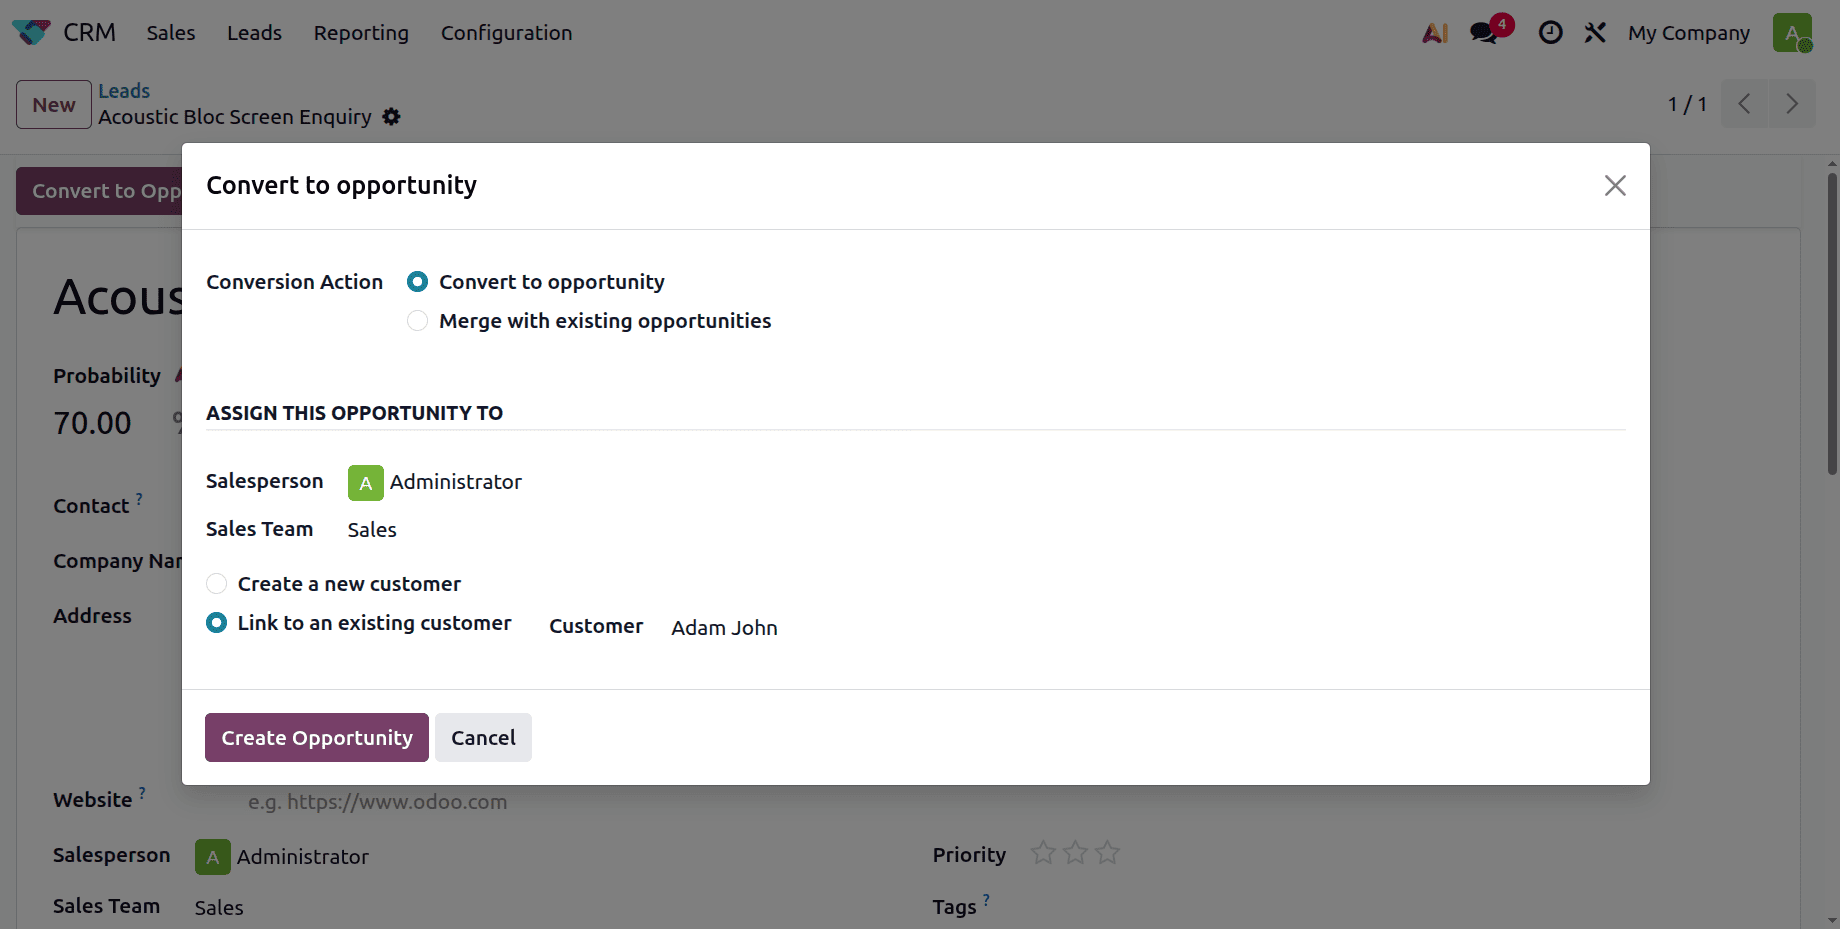
While clicking on the button, which shows a new pop-up window with details like Conversion Actions. Users can either convert this lead to an opportunity or merge with an existing opportunity. Then, if the customer does not exist, the users can create them as a new customer. Click on the Create opportunity button.
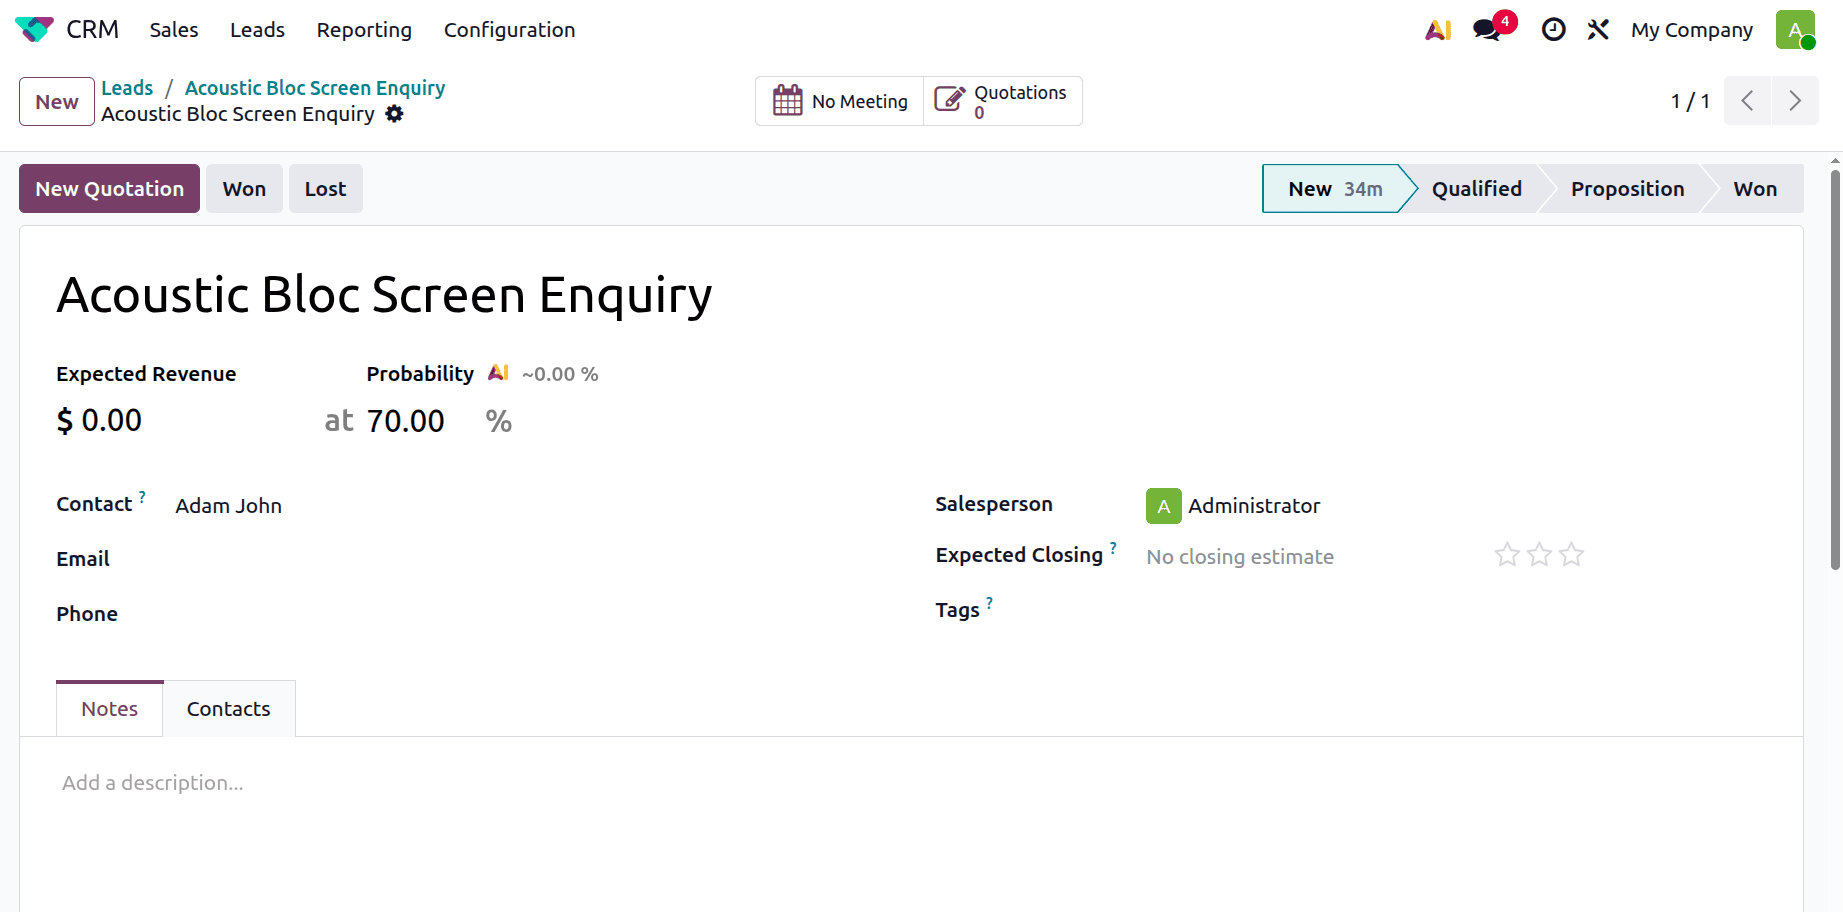
Then, the lead will automatically be converted as a new Opportunity, as shown below.
My Pipeline
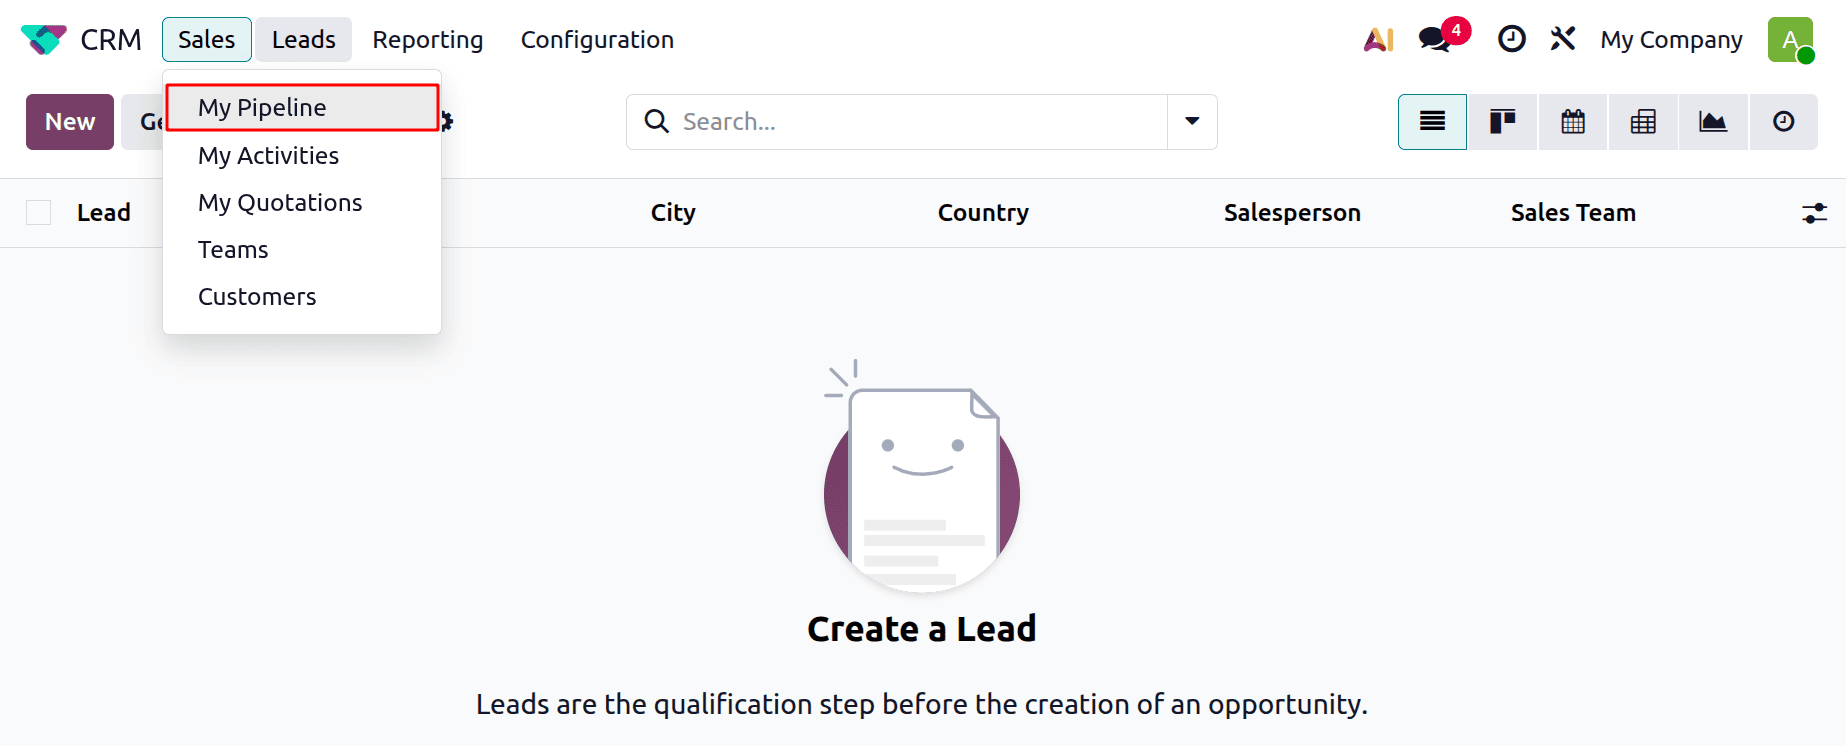
My Pipeline menu is available under the Sales menu.
Monitoring ongoing deals is made simple by My Pipeline in Odoo 19 CRM, which shows all sales prospects assigned to the logged-in salesperson in a Kanban view. It enables users to plan follow-up tasks to guarantee prompt customer involvement, arrange opportunities according to sales stage, and update their progress using drag-and-drop. Salespeople can more effectively manage their sales process, track anticipated revenue, and prioritise assignments with the aid of My Pipeline.
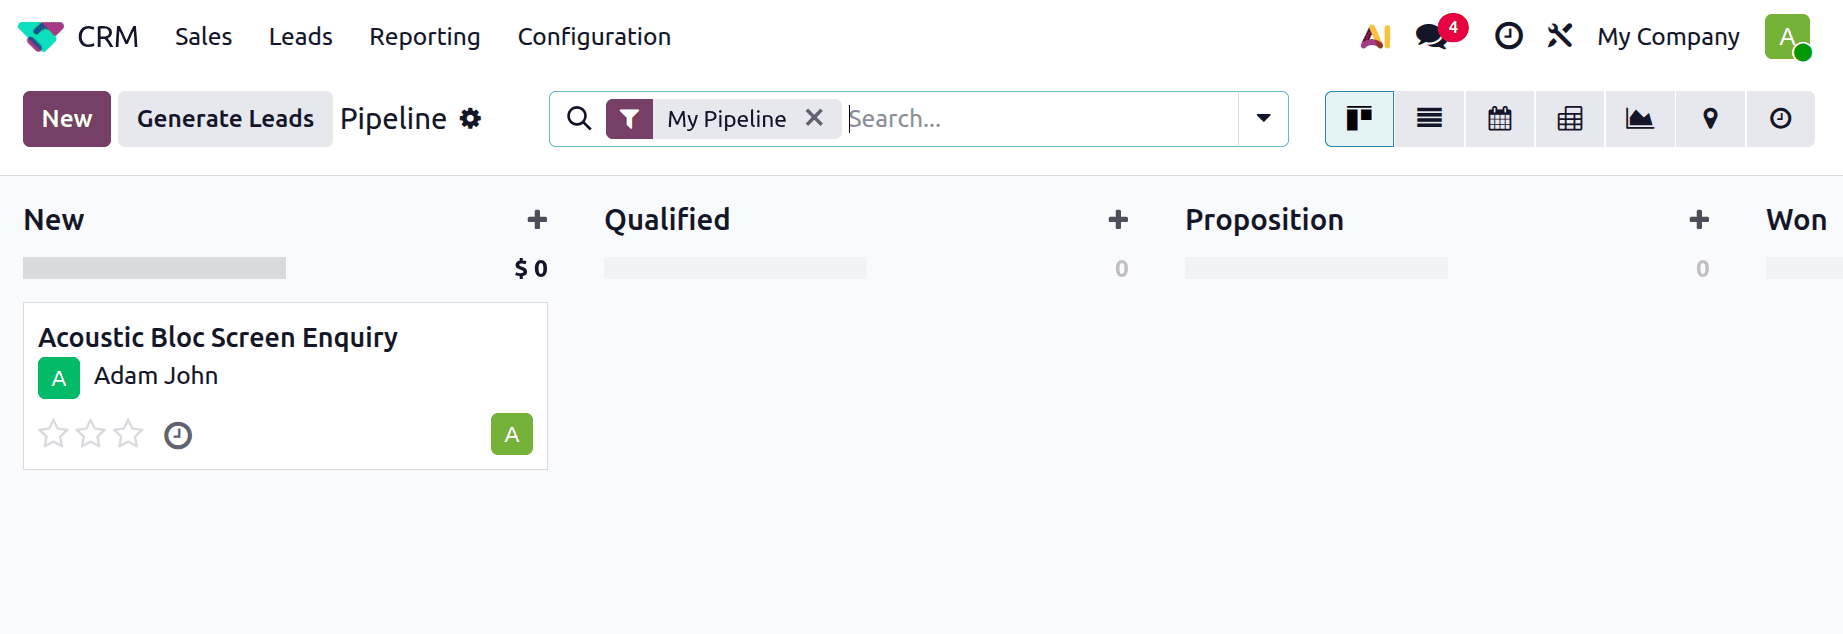
So, here the recently created opportunity is created by the login user, which can be viewed inside the My Pipeline menu as shown below.
Currently, the opportunity is in the first stage, named New. It's also possible to create new opportunities from the pipeline itself by clicking on the New button.
If the user needs to add or edit any data inside the created opportunity, click and open it. Inside the opportunity, users can mention the Executed Revenue, Recurring Revenue, and also the Recurring Plans.
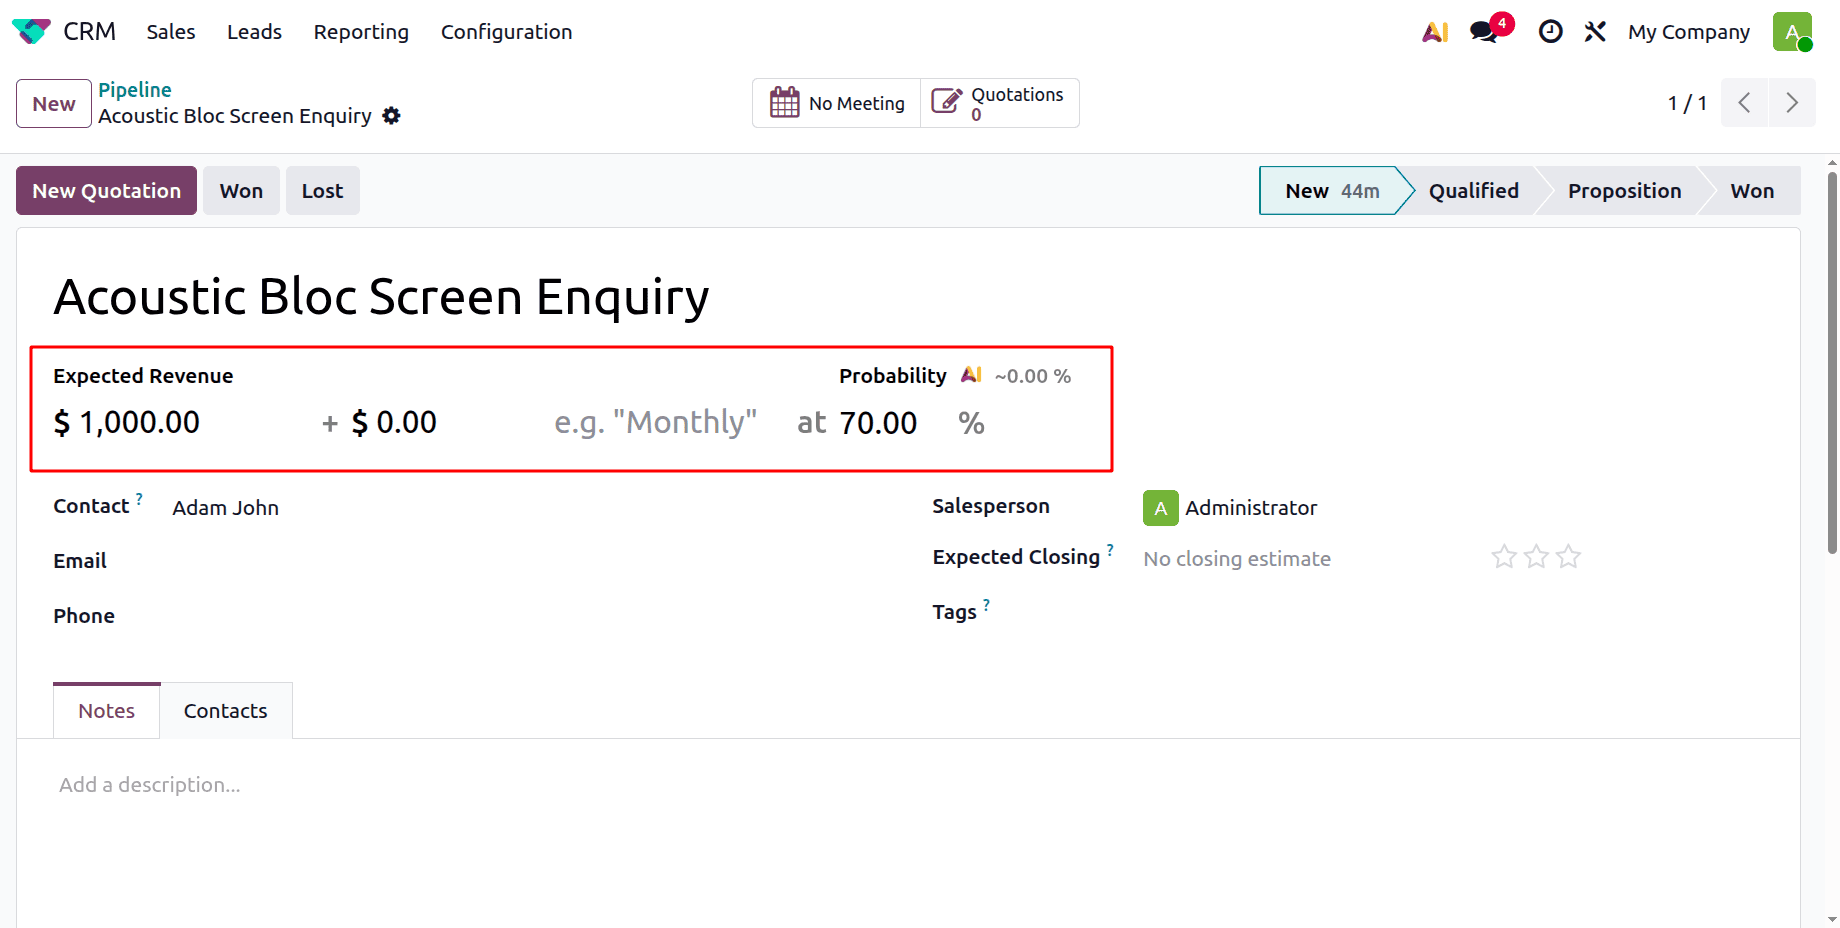
The upper right corner of the screen shows the pipeline stages. The users can change the stages of the opportunity according to the customers interests.
There is a clock icon shown, which helps the users to schedule any activity to the created opportunity.
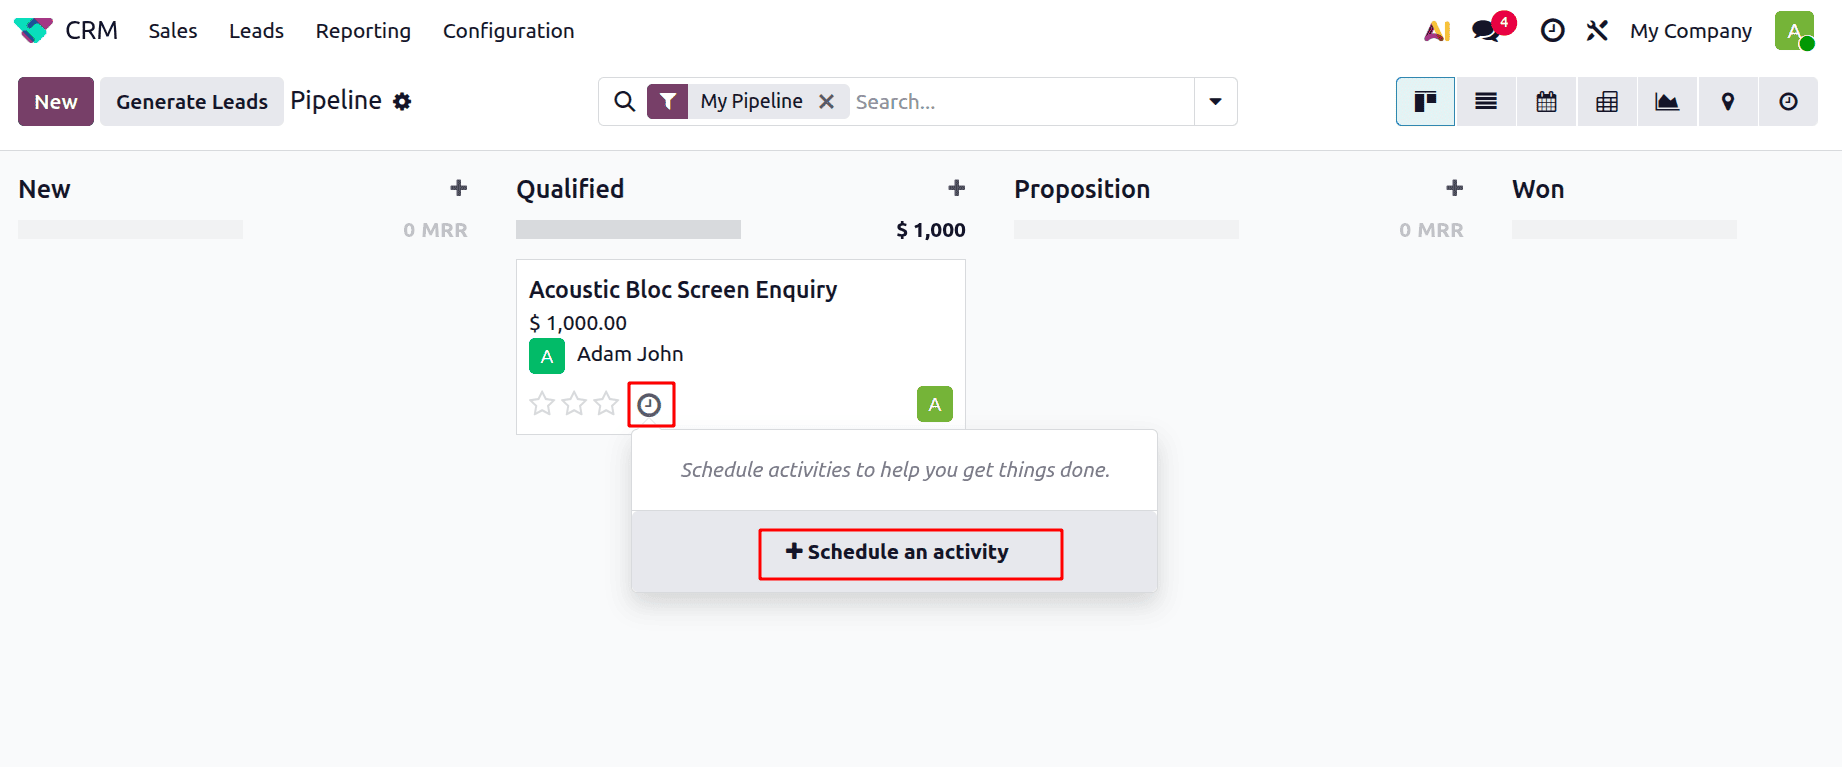
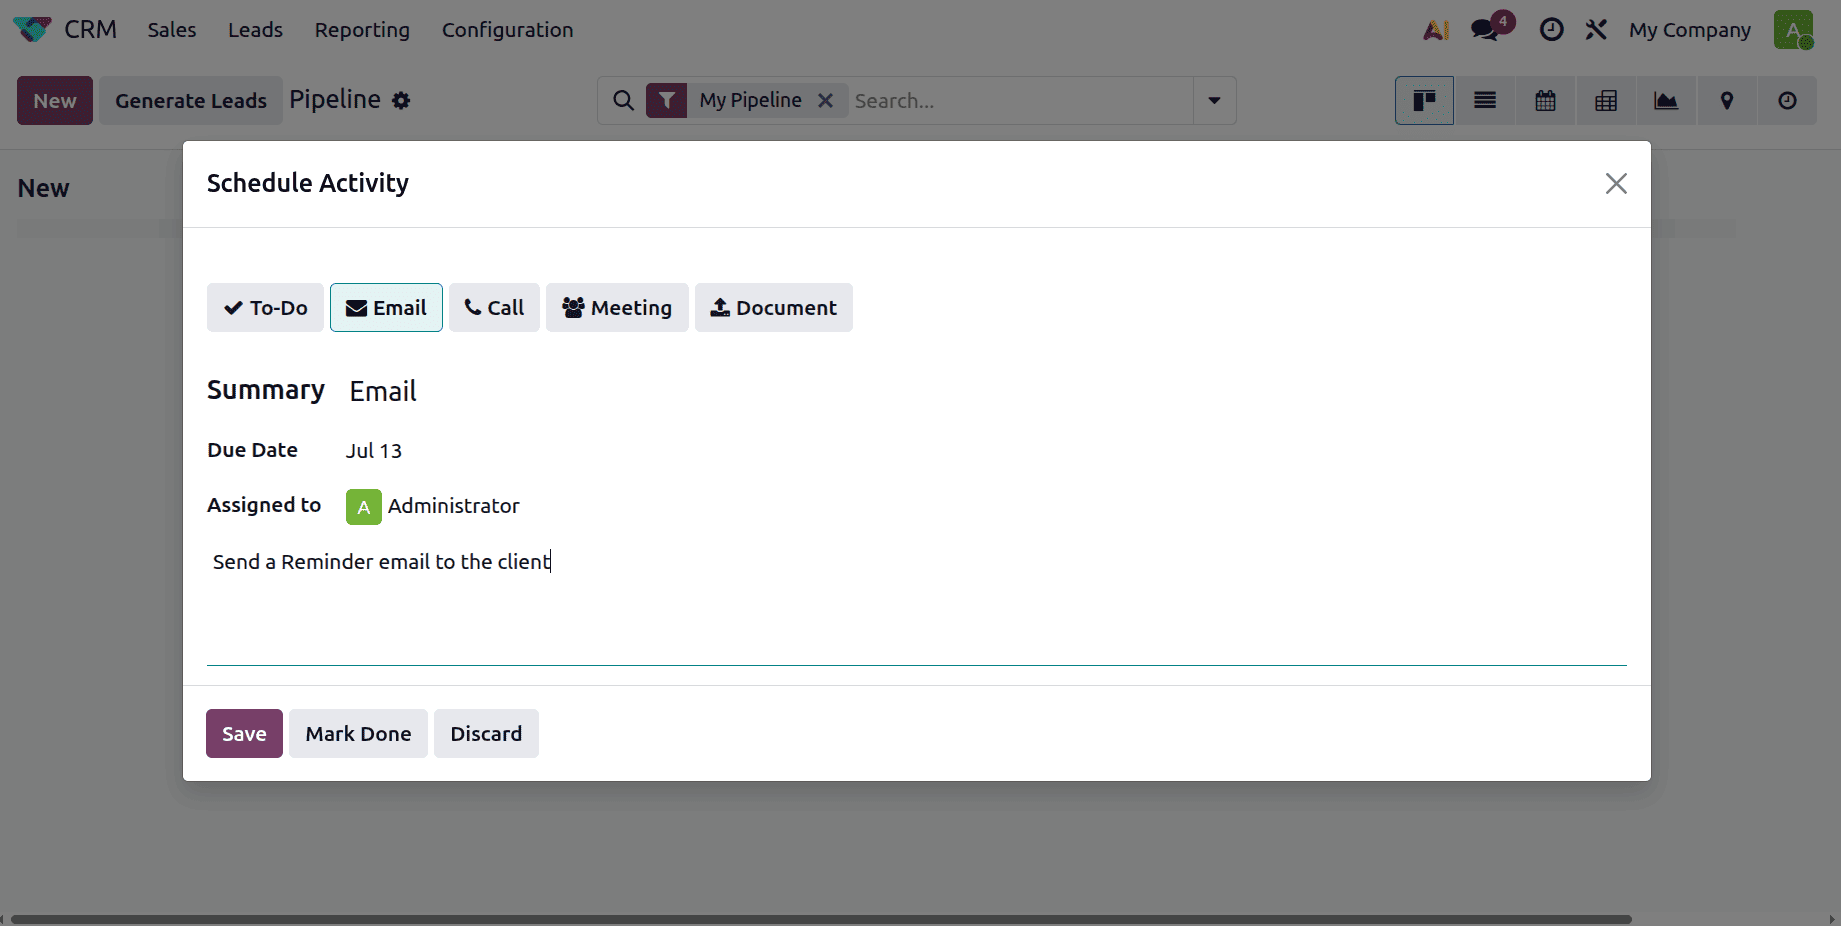
While clicking on the “+Schedule an activity” button, another window will open as shown below. From there, the users can easily schedule any activity like ToDo, Email, Call, Meeting, etc., add the Due Date, and if any Note if needed. Then click on the Save button.
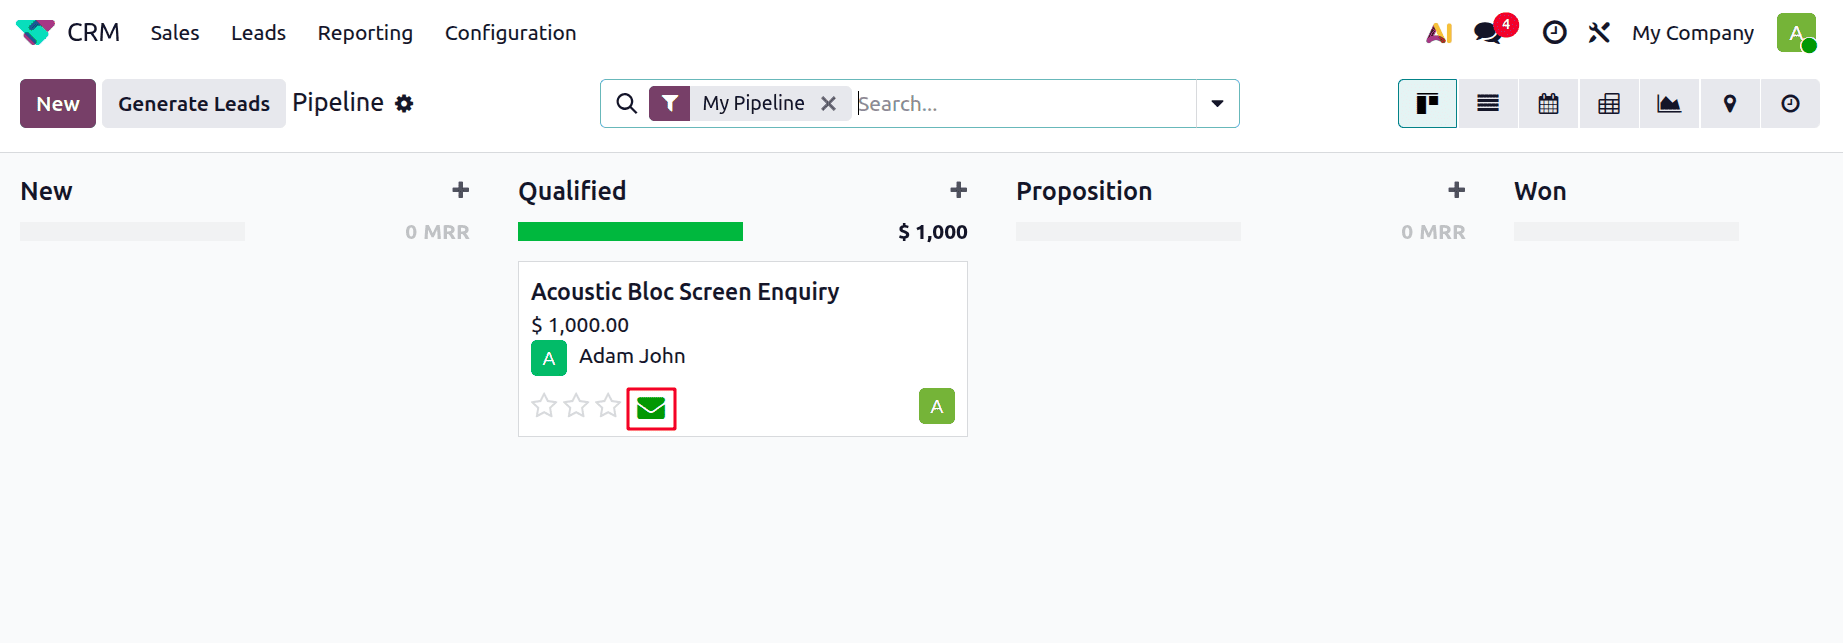
If such an activity is scheduled on an opportunity that will be shown inside the pipeline, as shown below. Here, the Green colour indicates that the activity is scheduled for a future date.
My Activities
There is a My Activities menu available under the Sales menu, as shown below.
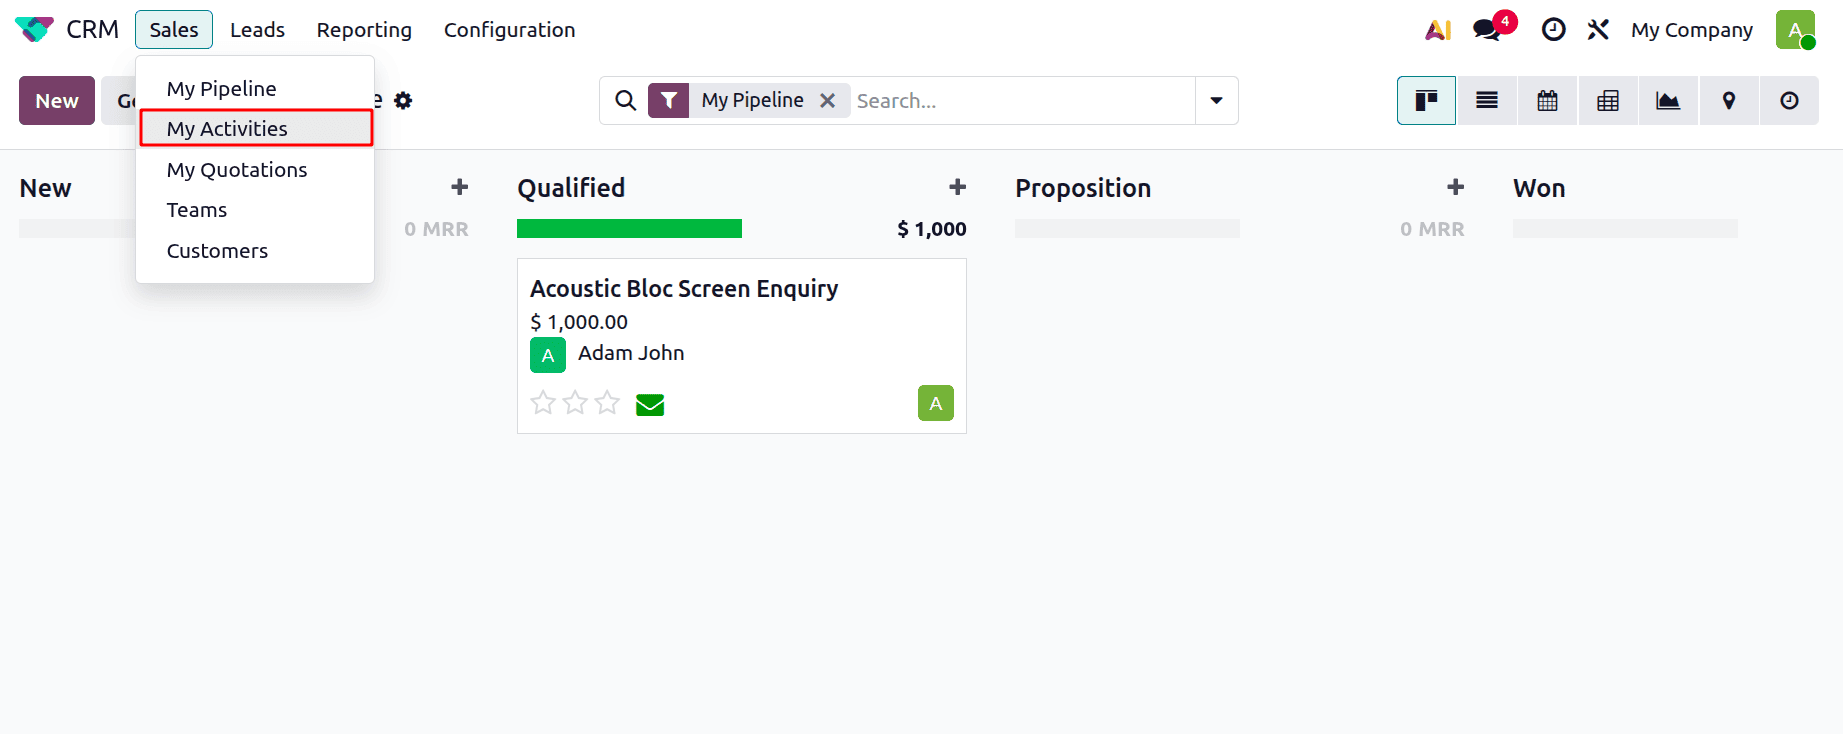
A centralised view of all planned tasks and follow-up actions allocated to the logged-in user is provided by My Activities in Odoo 19 CRM. By showing activities like calls, meetings, emails, and to-dos together with their deadlines and priorities, it aids sales staff in maintaining organization. Users may maintain sales possibilities in the pipeline, guarantee prompt follow-ups, and enhance client communication by managing operations from this view.
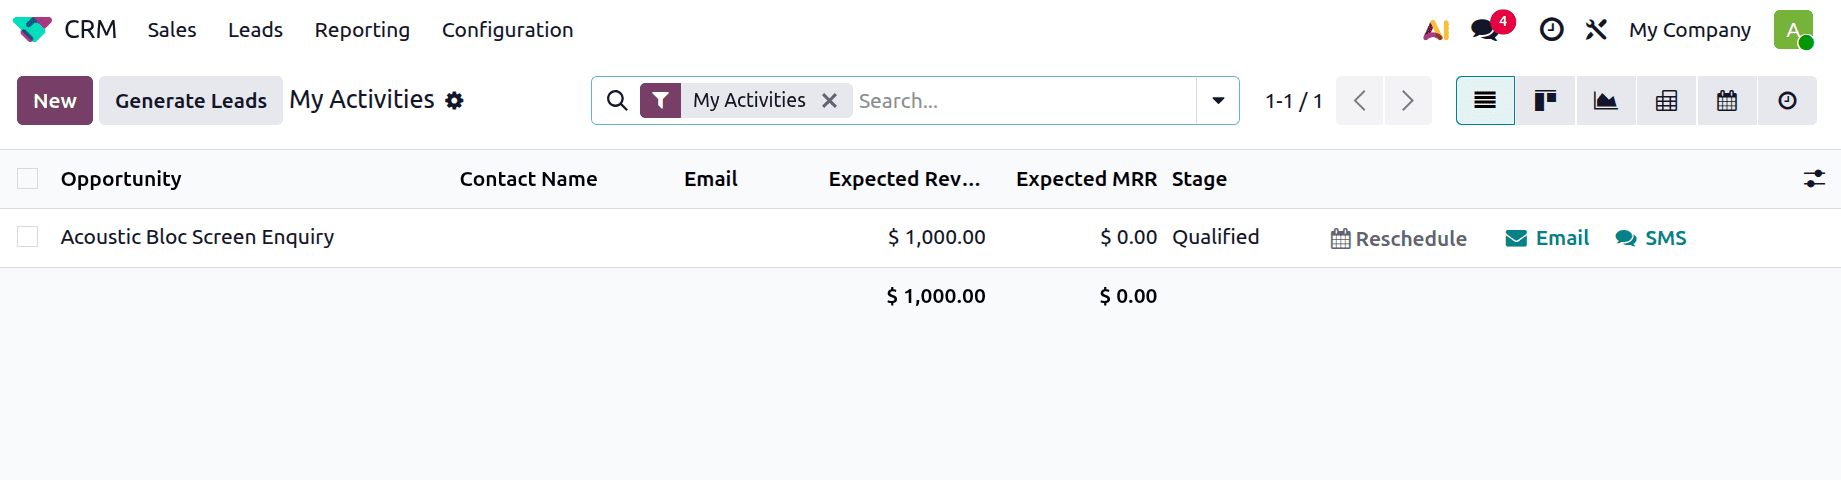
Here, the activities of the scheduled Opportunity can be shown inside the My Activities.
Open the opportunity, where you can see the Planned Activities. After completing the activity, click on the Mark as Done button.
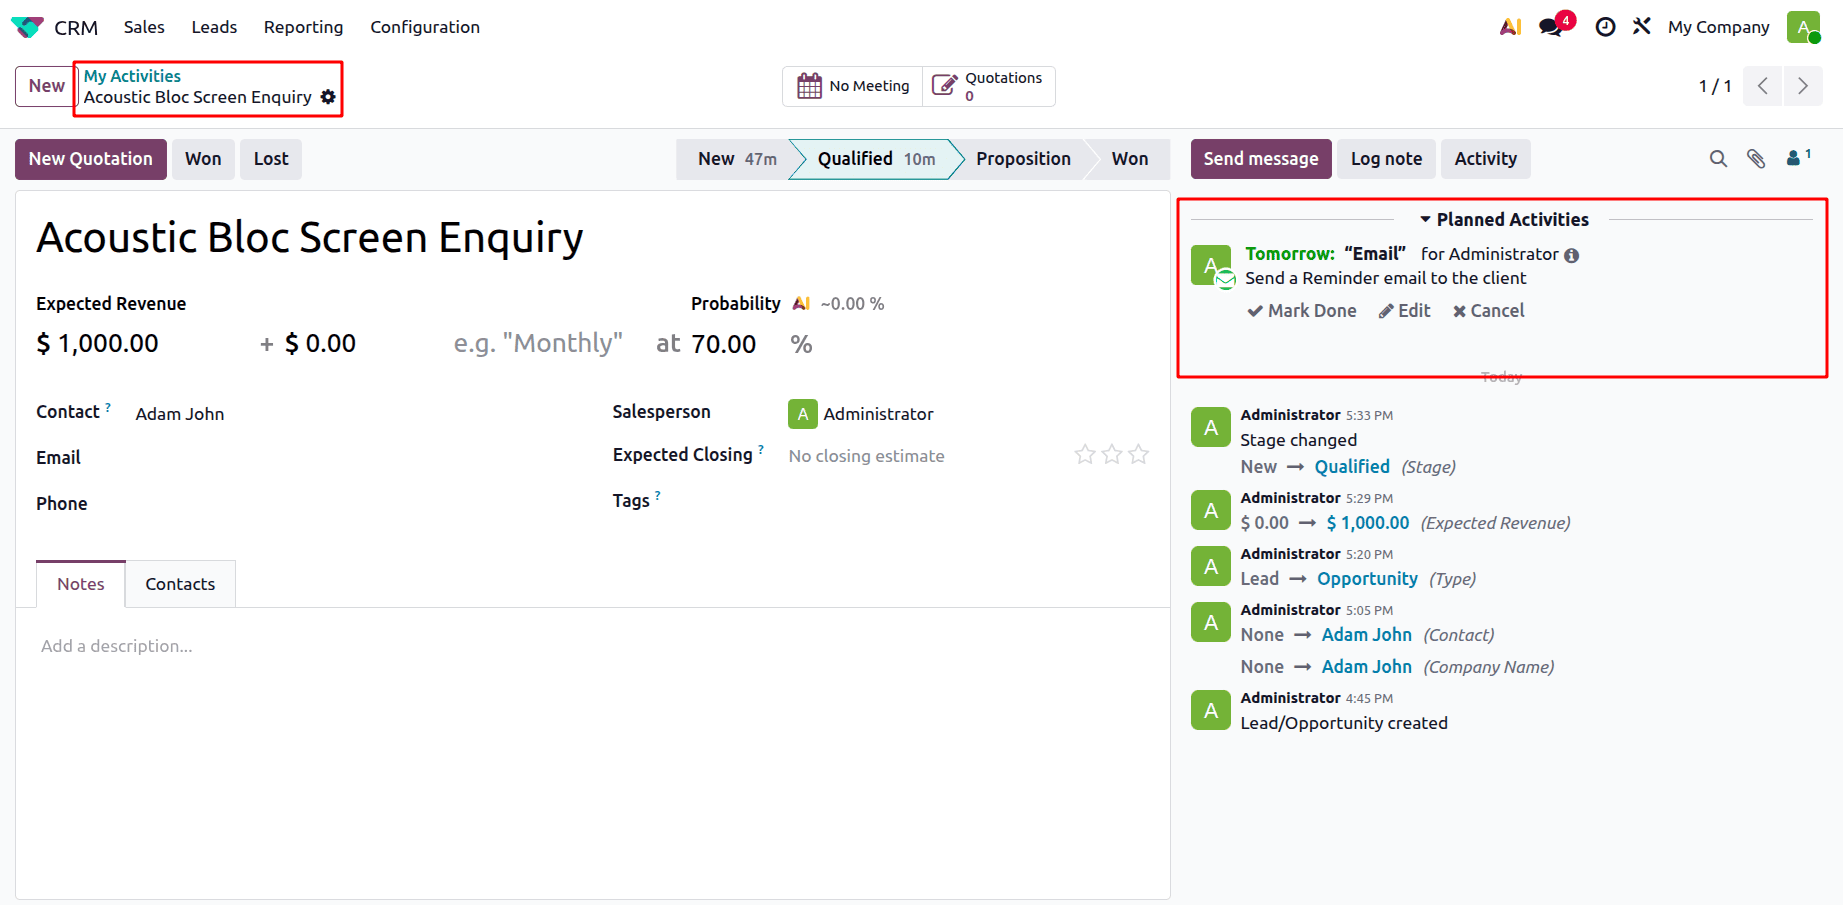
Once the activity is completed, it will automatically be removed from the list.
Convert Opportunity to Quotation
As mentioned above, the users can change the opportunity from one stage to another. Then, if the opportunity turns into a sale, the user should create a new quotation. For that, click on the New Quotation button from there.
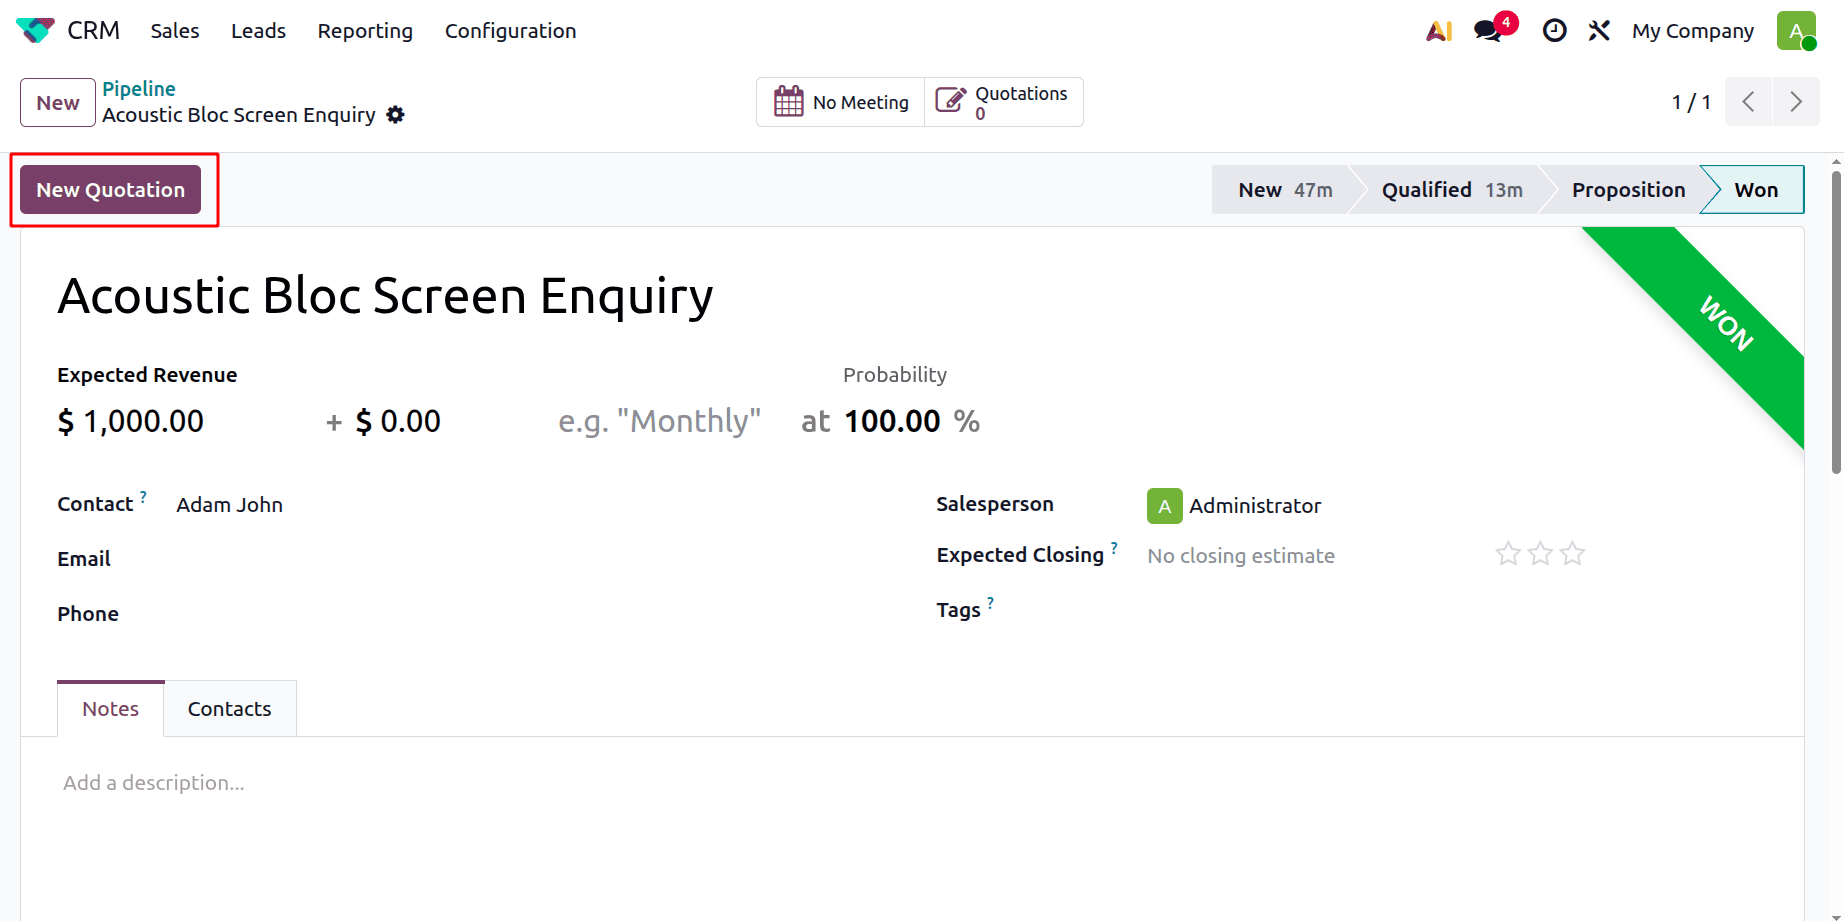
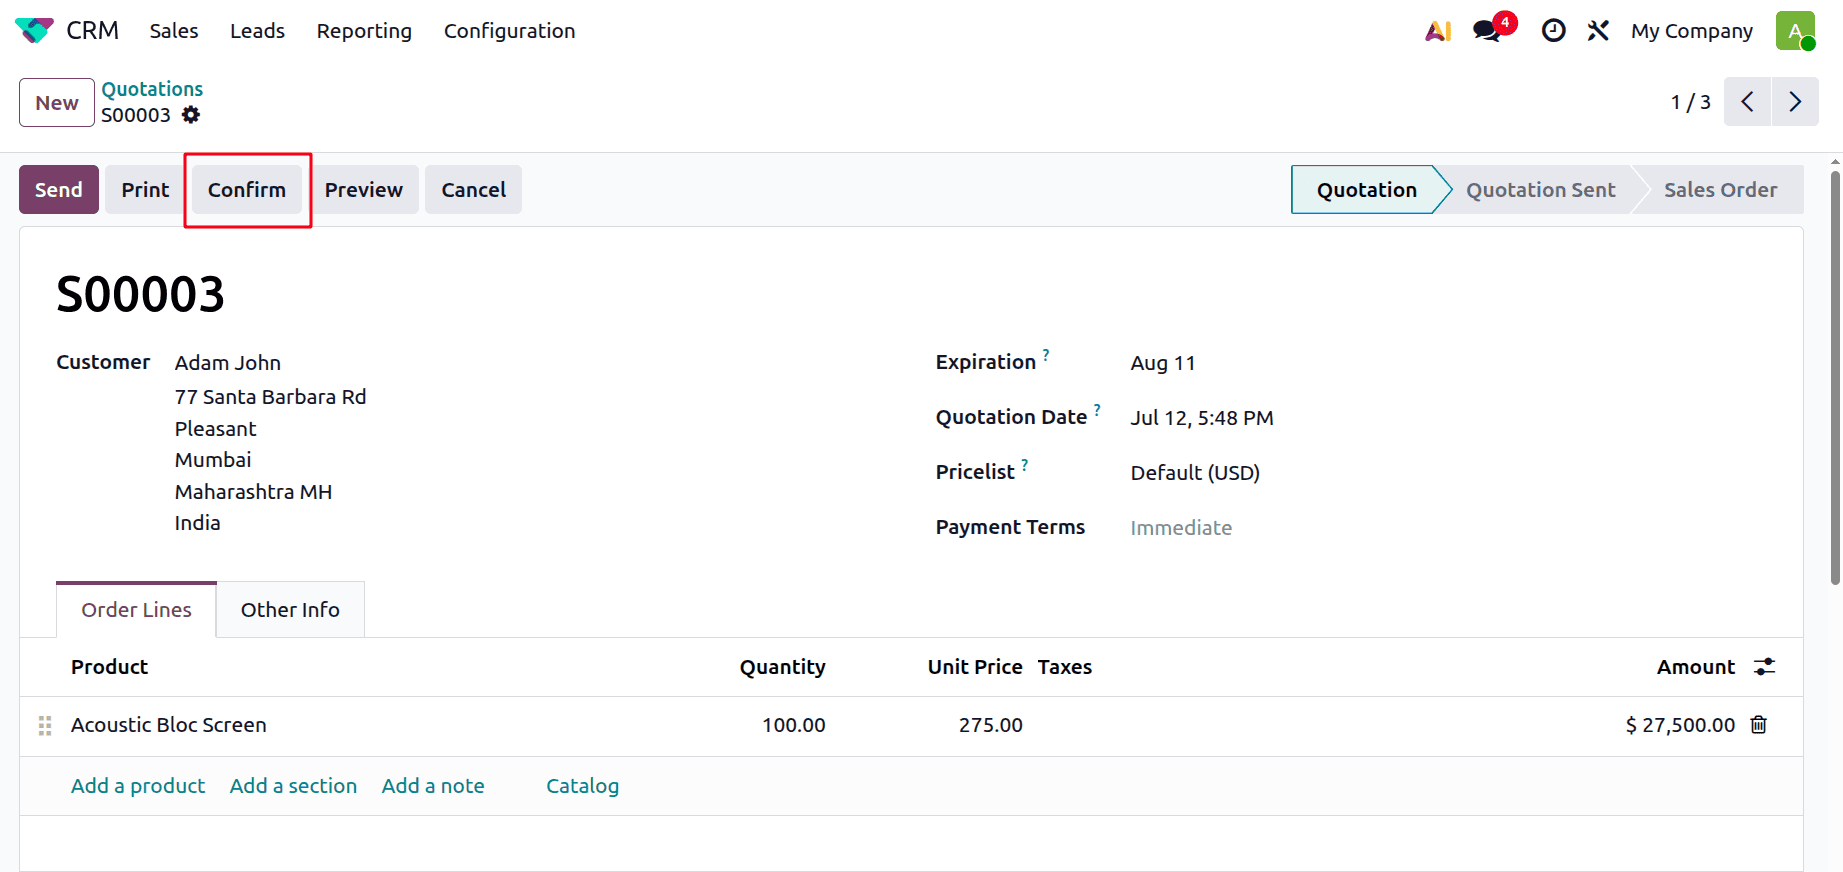
While clicking on the New quotation button, a new quotation will be created as shown below. The created quotation will automatically contain the customer details, because the user already mentioned them inside the lead.
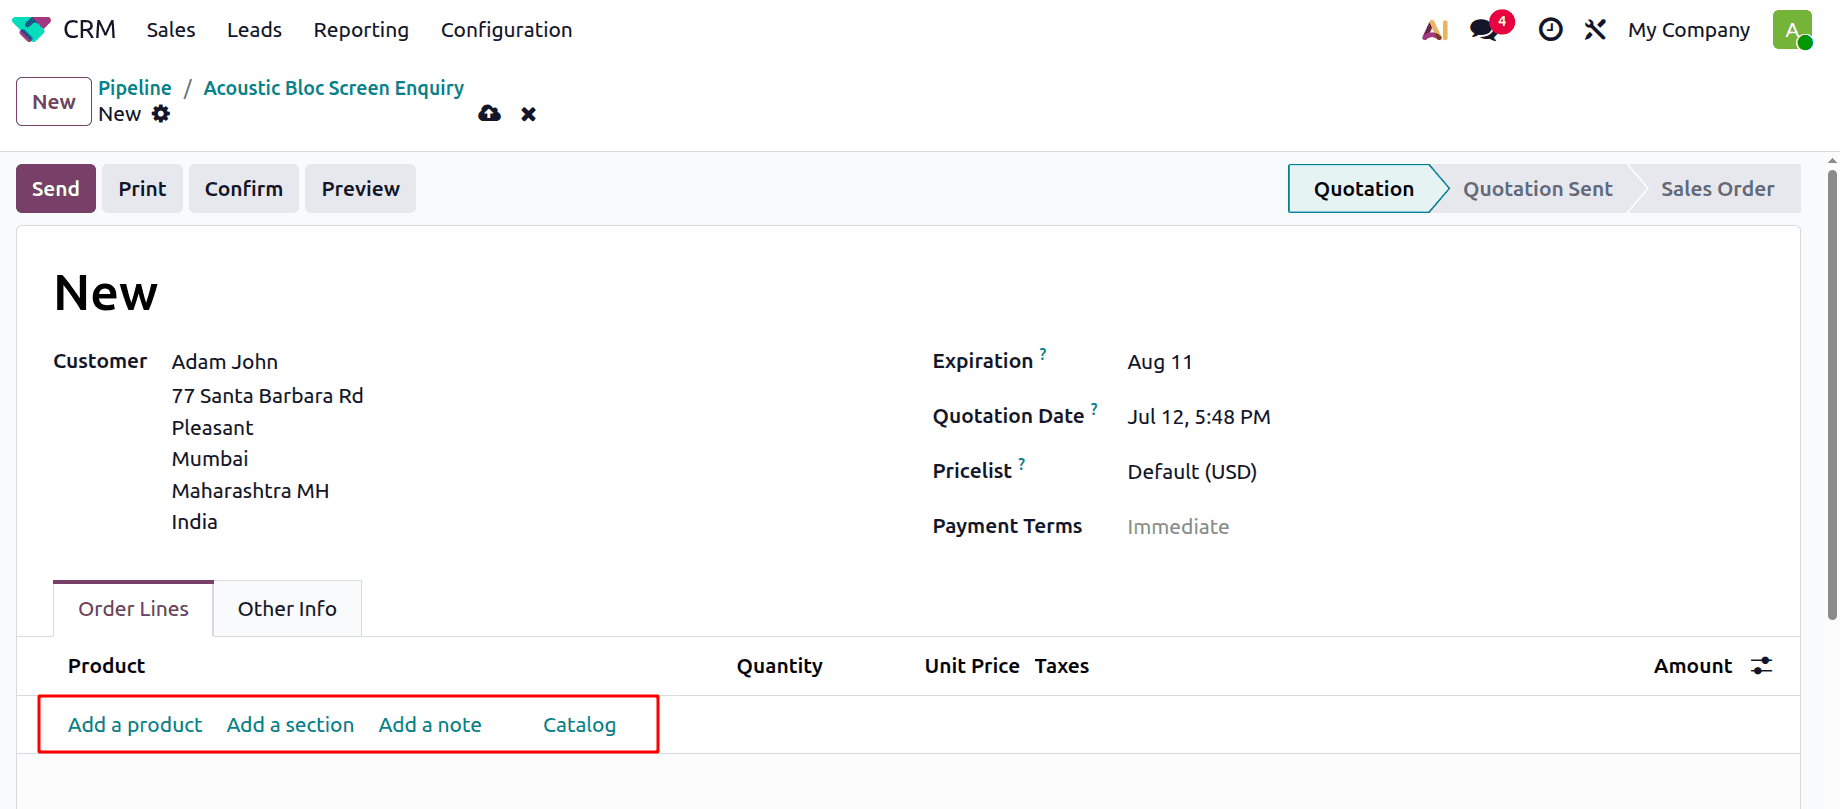
To add the products, click on the Add a product inside the order line. Mention the product with quantity. The sales price updates automatically, and the users can change the sales price manually from the quotation.
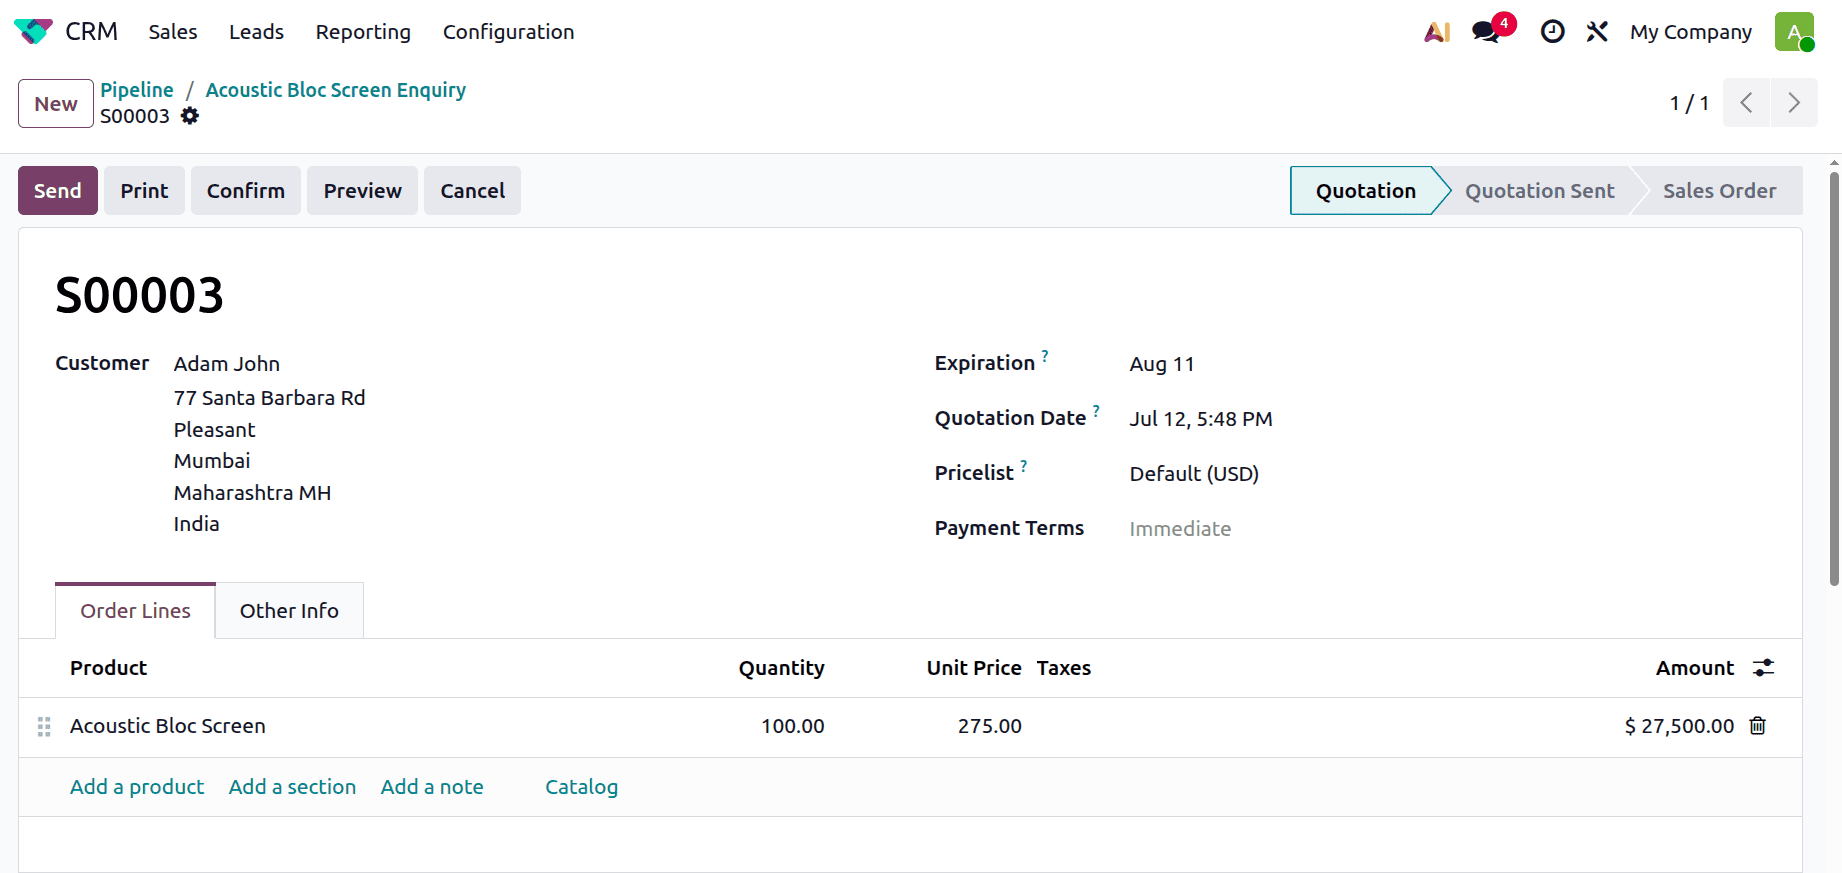
My Quotation
There is a My Quotation menu available under the Sales menu.
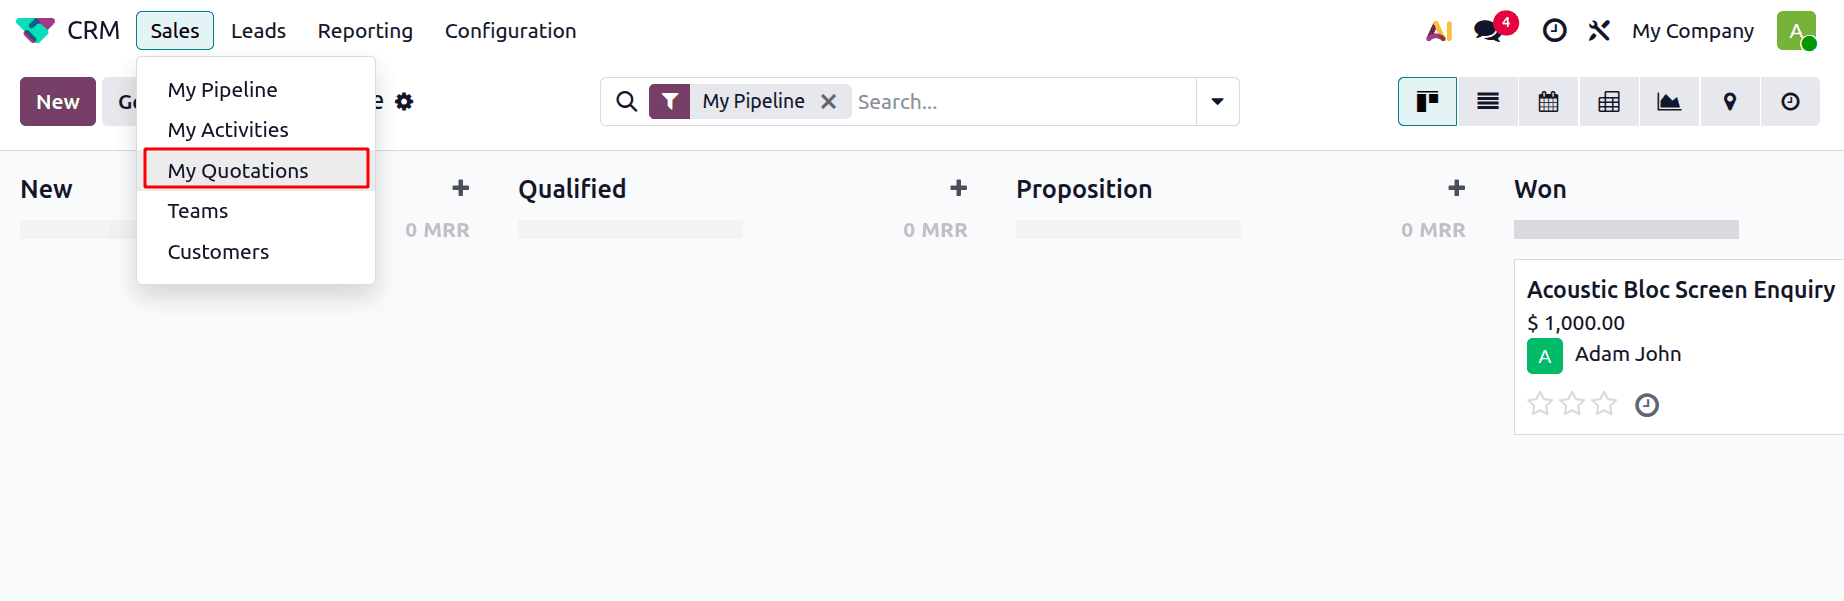
Quick access to active sales proposals is made possible by Odoo 19 CRM's My Quotations feature, which shows all quotations created or assigned to the logged-in salesperson. In addition to sending quotes straight to clients, users can check quotation specifics, monitor their progress, and make changes to pricing or product details. Sales teams may monitor customer replies, handle offers more effectively, and expedite the sales process with the aid of this insight.
The created Quotation is visible there as shown below.
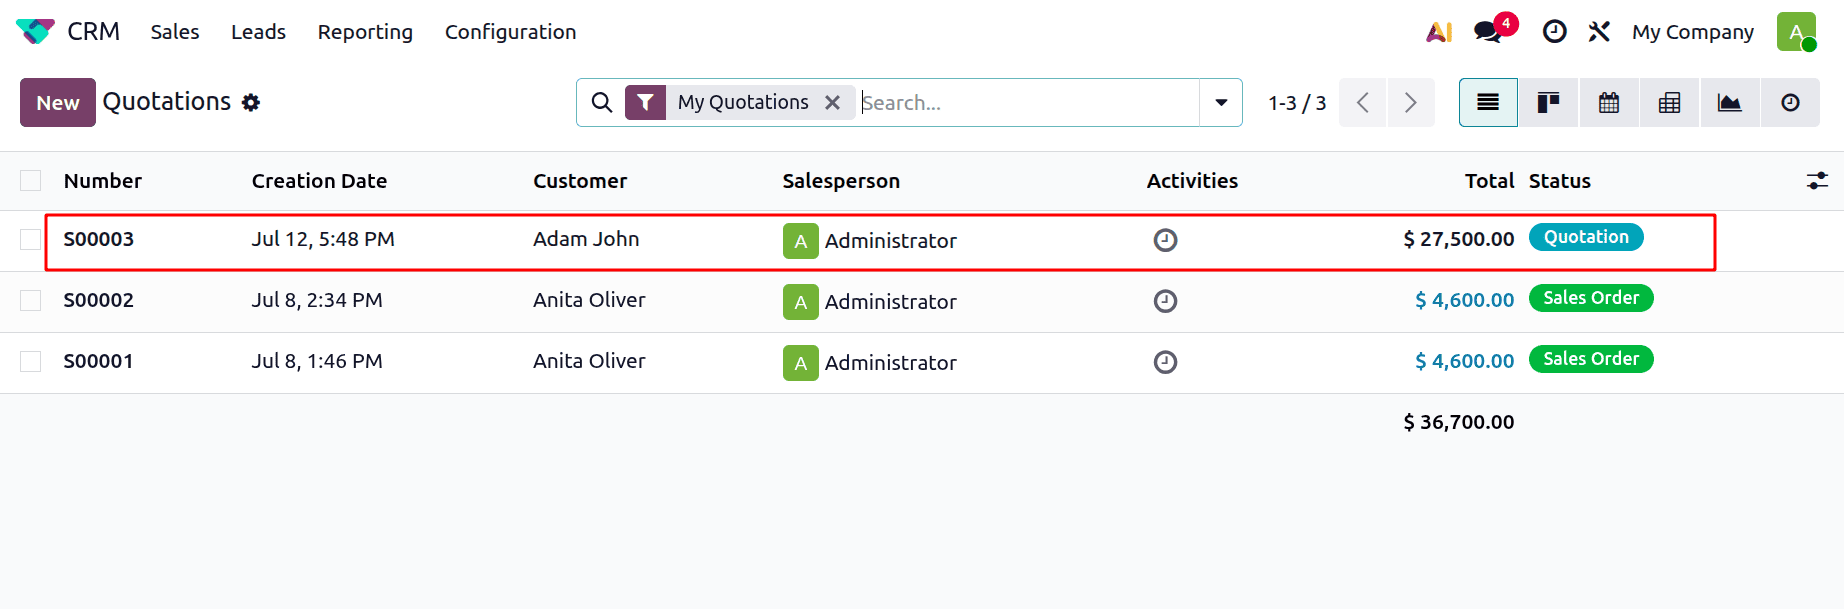
Then, the user can confirm the quotation to convert it to a Sale order.
Odoo 19 CRM's Sales Workflow offers a methodical way to handle every step of the sales process, from generating leads to concluding deals. Leads, Opportunities, My Pipeline, My Activities, and My Quotations are just a few of the features that assist sales teams to stay organised, collaborate better, and follow up with customers consistently. Odoo 19 helps organisations make better decisions and boost conversion rates by automating repetitive operations and providing real-time visibility into the sales pipeline. Organisations can achieve sustainable business growth, improve client connections, and streamline sales processes by putting this workflow into practice.
To read more about How to Manage Sales Visits Linked to Leads in Odoo 19, refer to our blog How to Manage Sales Visits Linked to Leads in Odoo 19.