Odoo 19 Studio lets you easily customize your business workflows without any coding. Its simple interface lets you add new fields, change views, design reports, or even create new apps. This means you can adapt Odoo to fit your business instead of changing your processes to fit the software. Studio gives business users control over customization, so you don’t have to rely on technical experts for everyday changes.
Two of the most useful features in Odoo 19 Studio are Automation Rules and Filter/Saved Search Rules. Automation Rules let Odoo do tasks for you automatically when certain things happen. For example, the system can send reminder emails, schedule tasks, or update fields on its own. This helps you save time and makes sure important steps are not missed.
On the other side, filter or saved-search rules allow you to pre-define default filters, search parameters, or groups of records so that when users open a view, they’re immediately presented with the most relevant documents. By setting these up, teams can reduce unnecessary navigation, maintain consistent data views across the organization, and focus on what matters most.
In this blog, we will dive into both these functionalities—Automated Actions and Filter/Saved Search Rules—within Odoo 19 Studio. We’ll walk you through how to configure each, step by step, with practical examples and screenshots, so you can implement them confidently in your own system.
Creating a New Automation Rule
One of the most powerful advantages of Odoo 19 Studio is that you can configure automated rules without needing to manually update multiple records or write any code. This capability is particularly useful in modules that handle large amounts of data, since it lets the system perform background actions automatically whenever specific conditions are met.
To demonstrate the process, we’ll walk through creating a new automation in the Employees module—when an employee is archived, an email will be sent automatically. In addition, we’ll set up a filter rule to display archived employees by default. You can apply the same approach to any other module according to your needs.
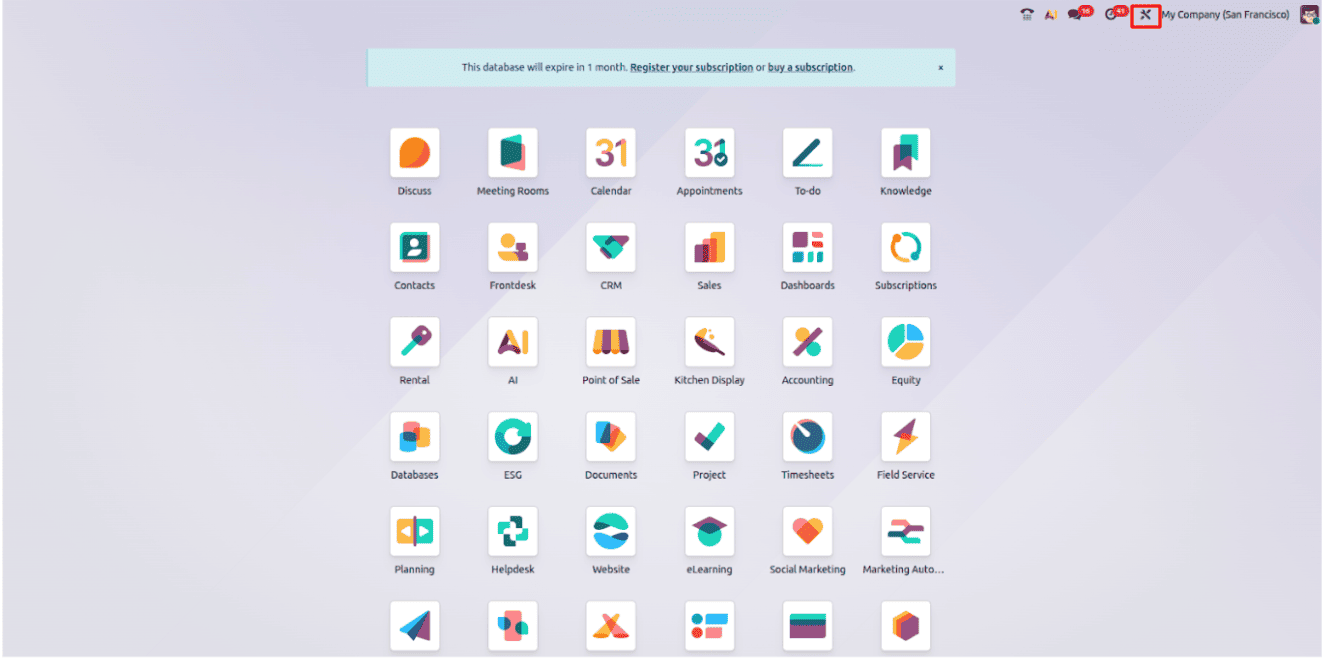
Start by going to your Odoo dashboard and clicking the Toggle Studio icon located in the top-right corner.
When you click the studio button, it opens the studio editing interface, where you create a new module or you can customize an existing one.
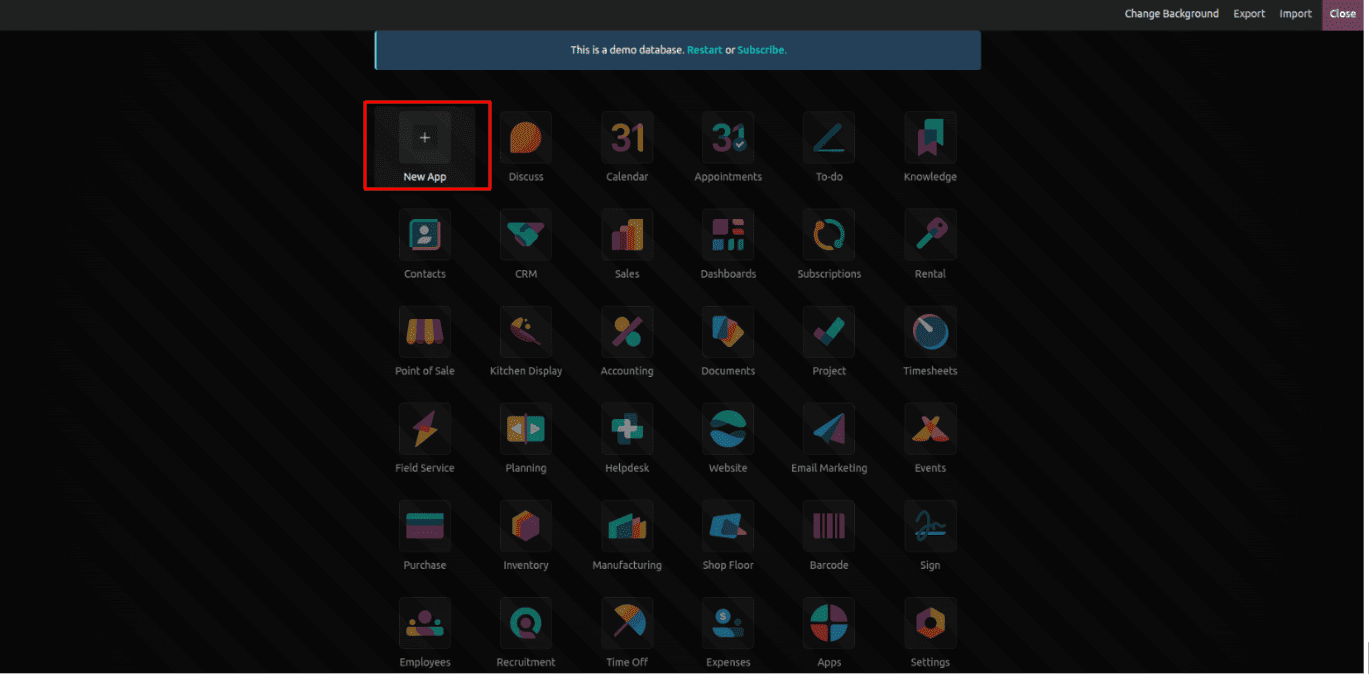
In our blog, we will create a new application to show automation and a filter rule. Once the Studio interface opens, click the “+” button to add a new application.
After clicking the “+” button, you’ll be instructed application creation procedure.
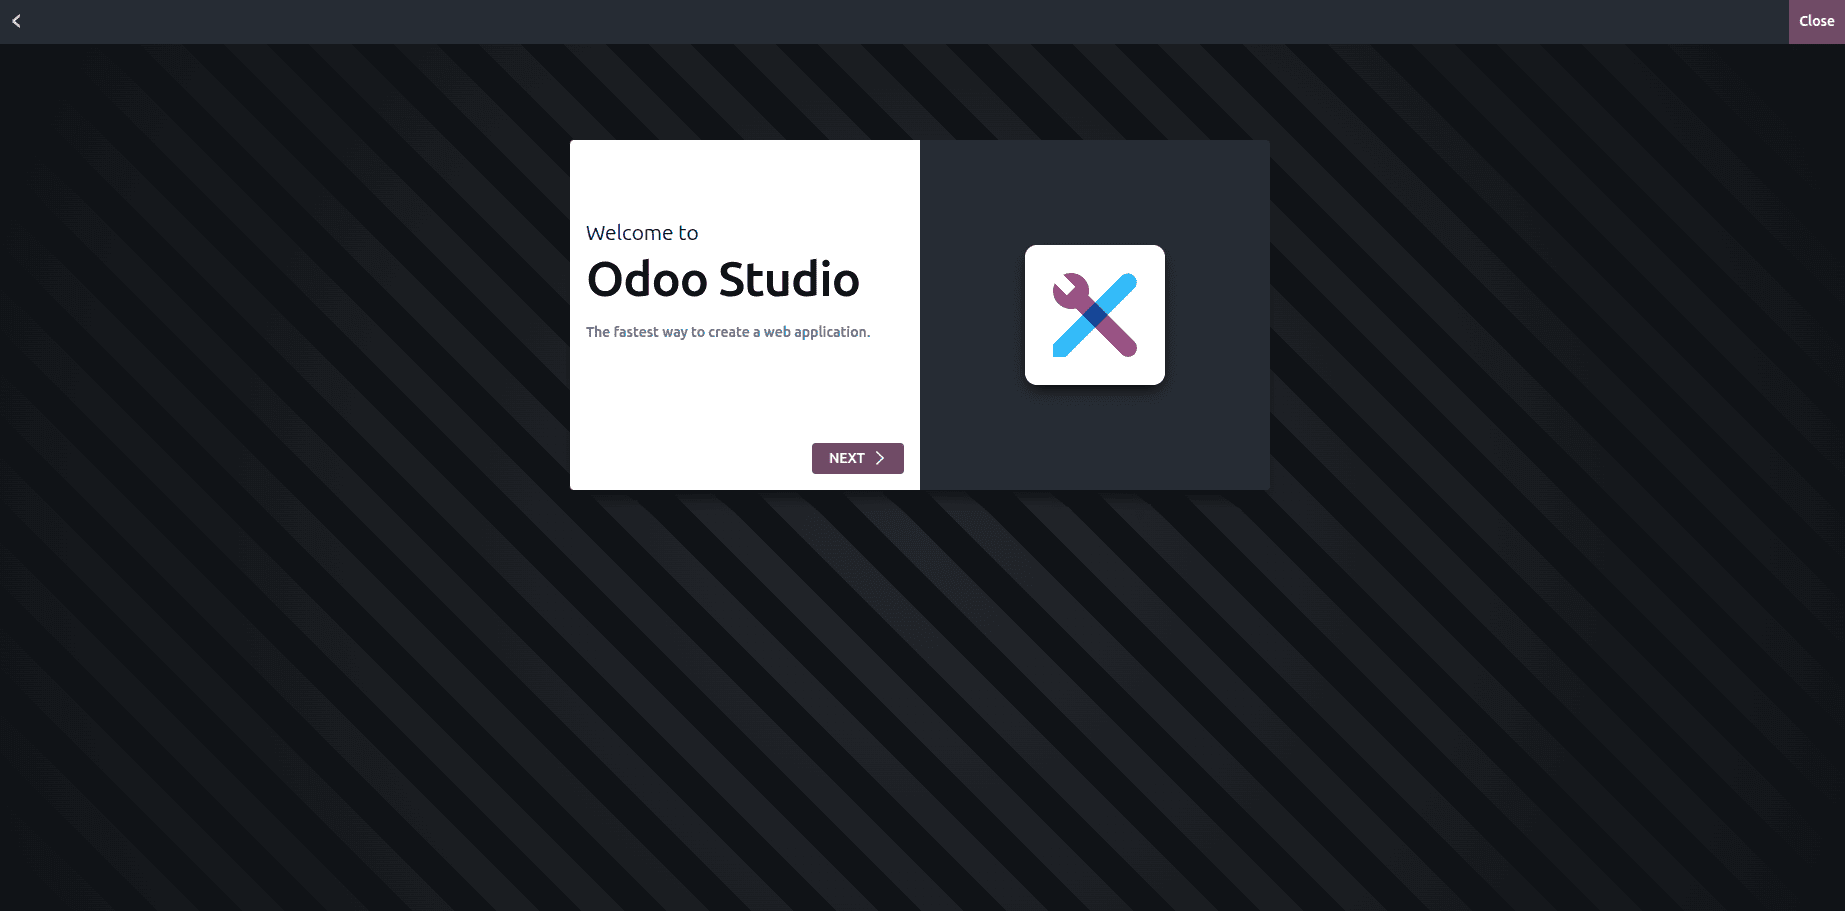
Click Next to proceed
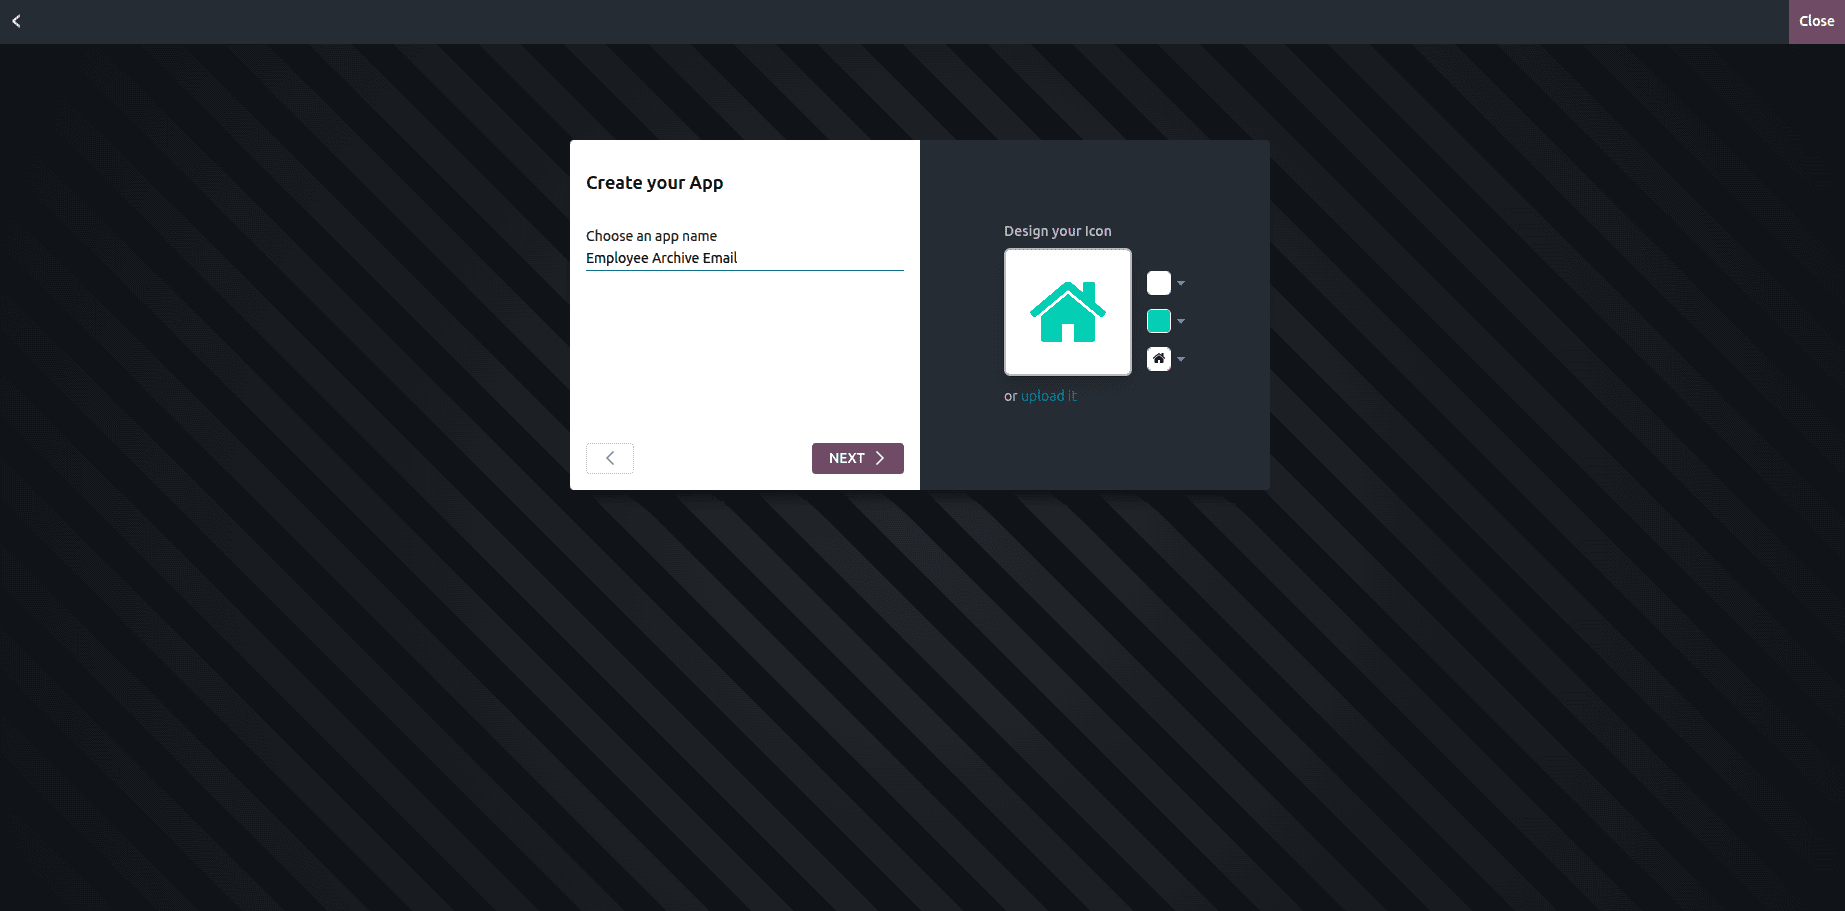
Here you can give the application name and icon.
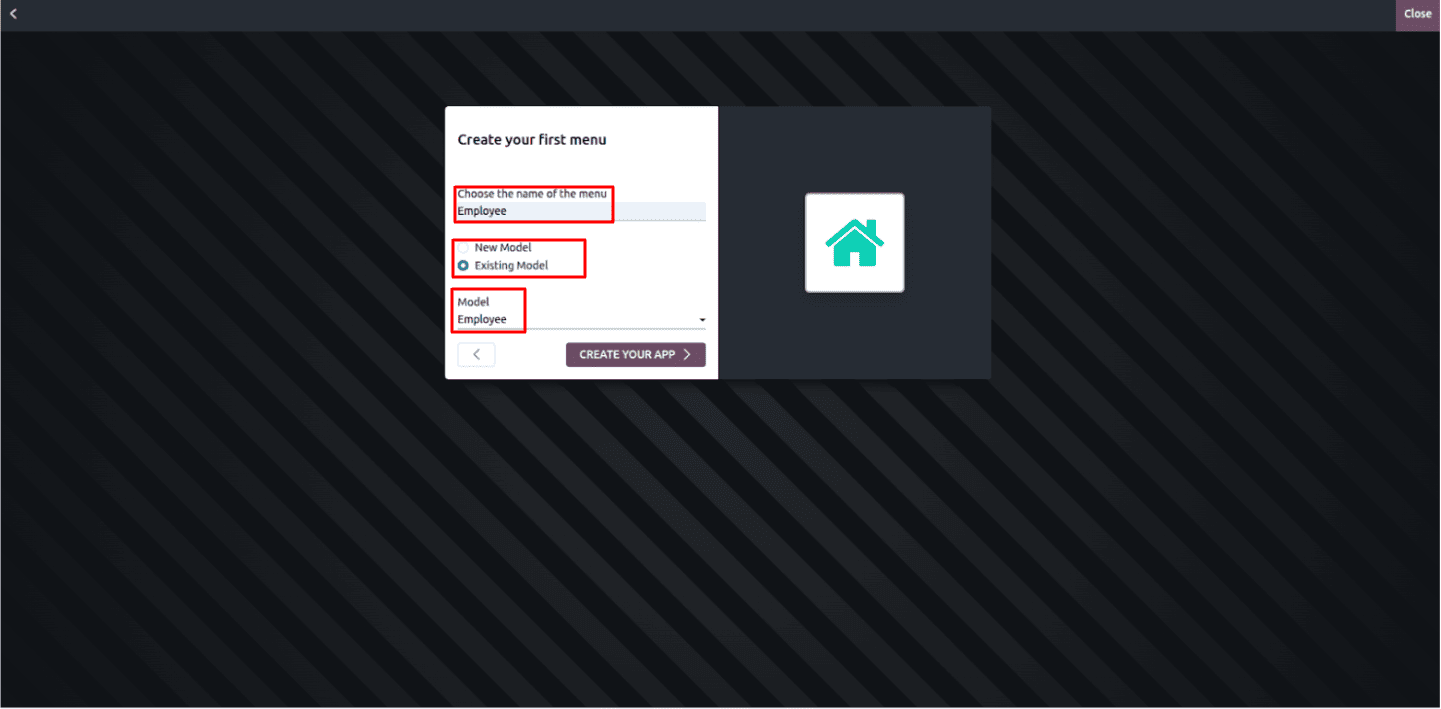
Here, you can give a menu name, and you can select the model (table), or you can create a new model. In our case, we are going through the employee module, so we select the ‘‘Employee’’ model.
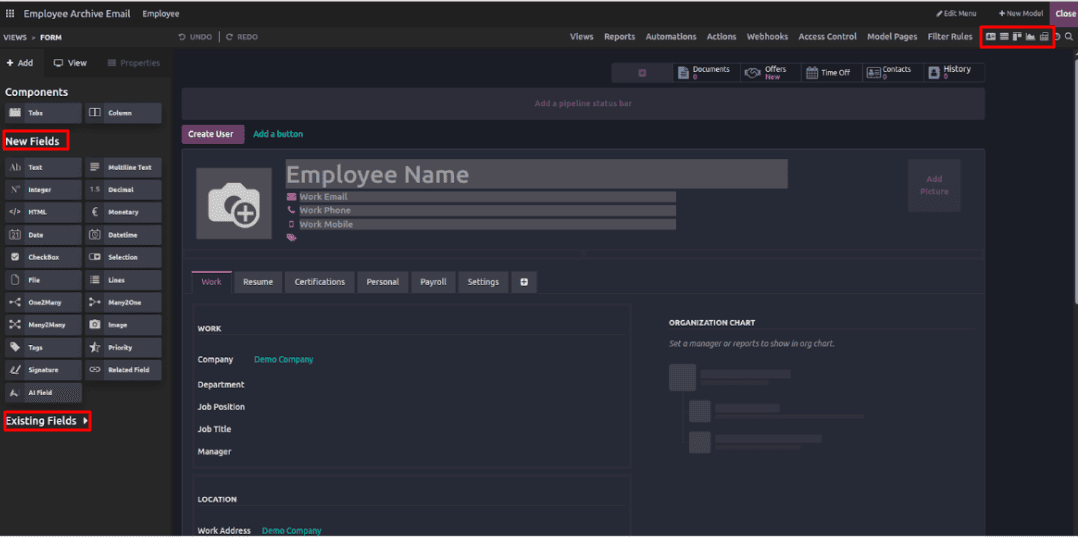
Once you click “CREATE YOUR APP” it will open a form view of the employee module. In the right corner (below the close button), you can select a different view. Here you can see "existing fields" by clicking on them. If you wish to add new fields, you can simply drag and drop them to the form view (possible in any view), and here we have a lot of options to customize our module.
Setting Automation Rules
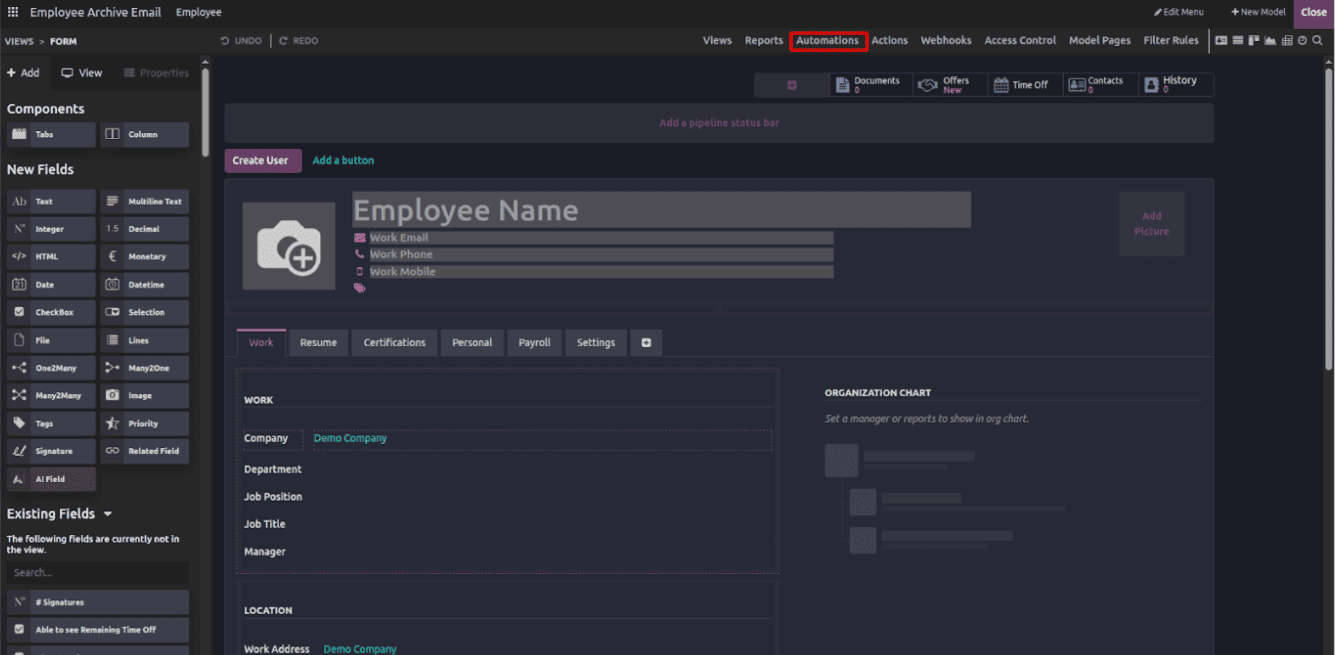
Here you can see the “Automations” click the menu.
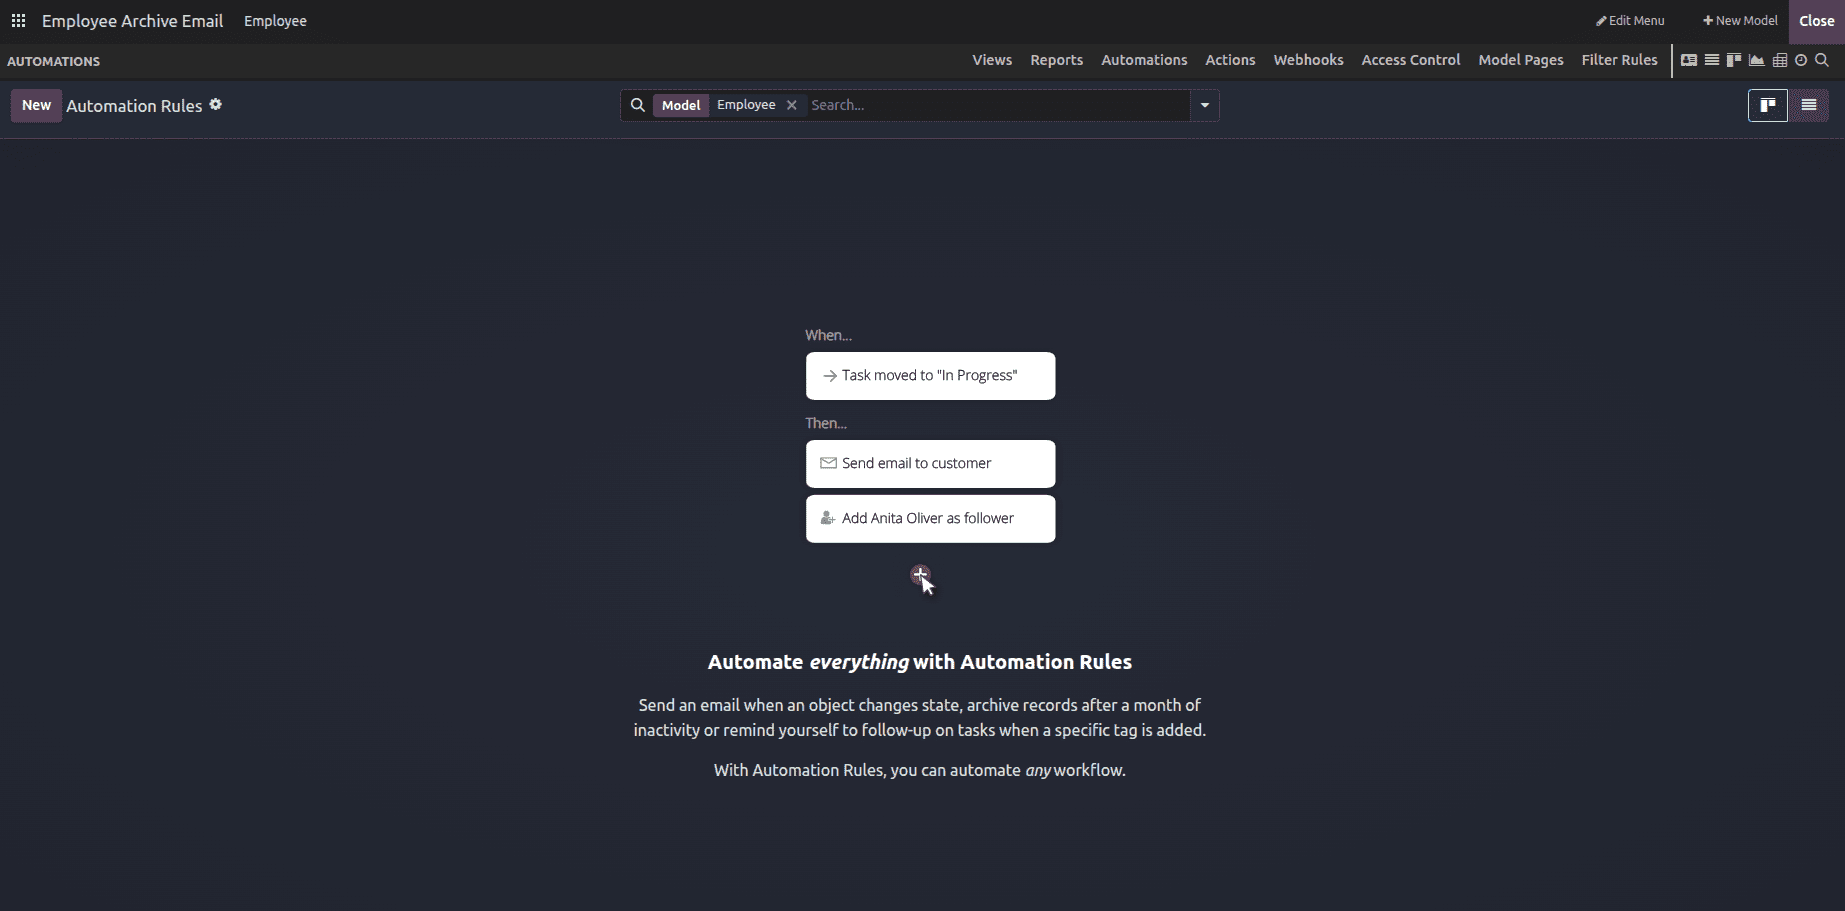
Once you click, this opens the Automated Actions dashboard. Initially, it will be empty. Click New to create a new automation rule.
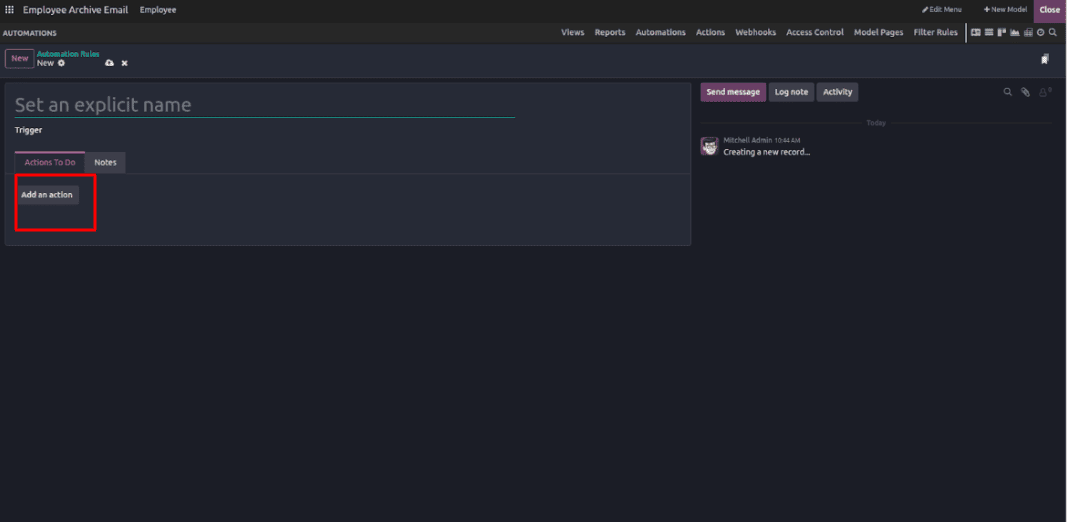
Once you click New, an empty Automation Rules form will open, where you can define the Rule Name, select when to trigger the automation, specify the Action To Do (e.g., send an email), and optionally add notes for reference.
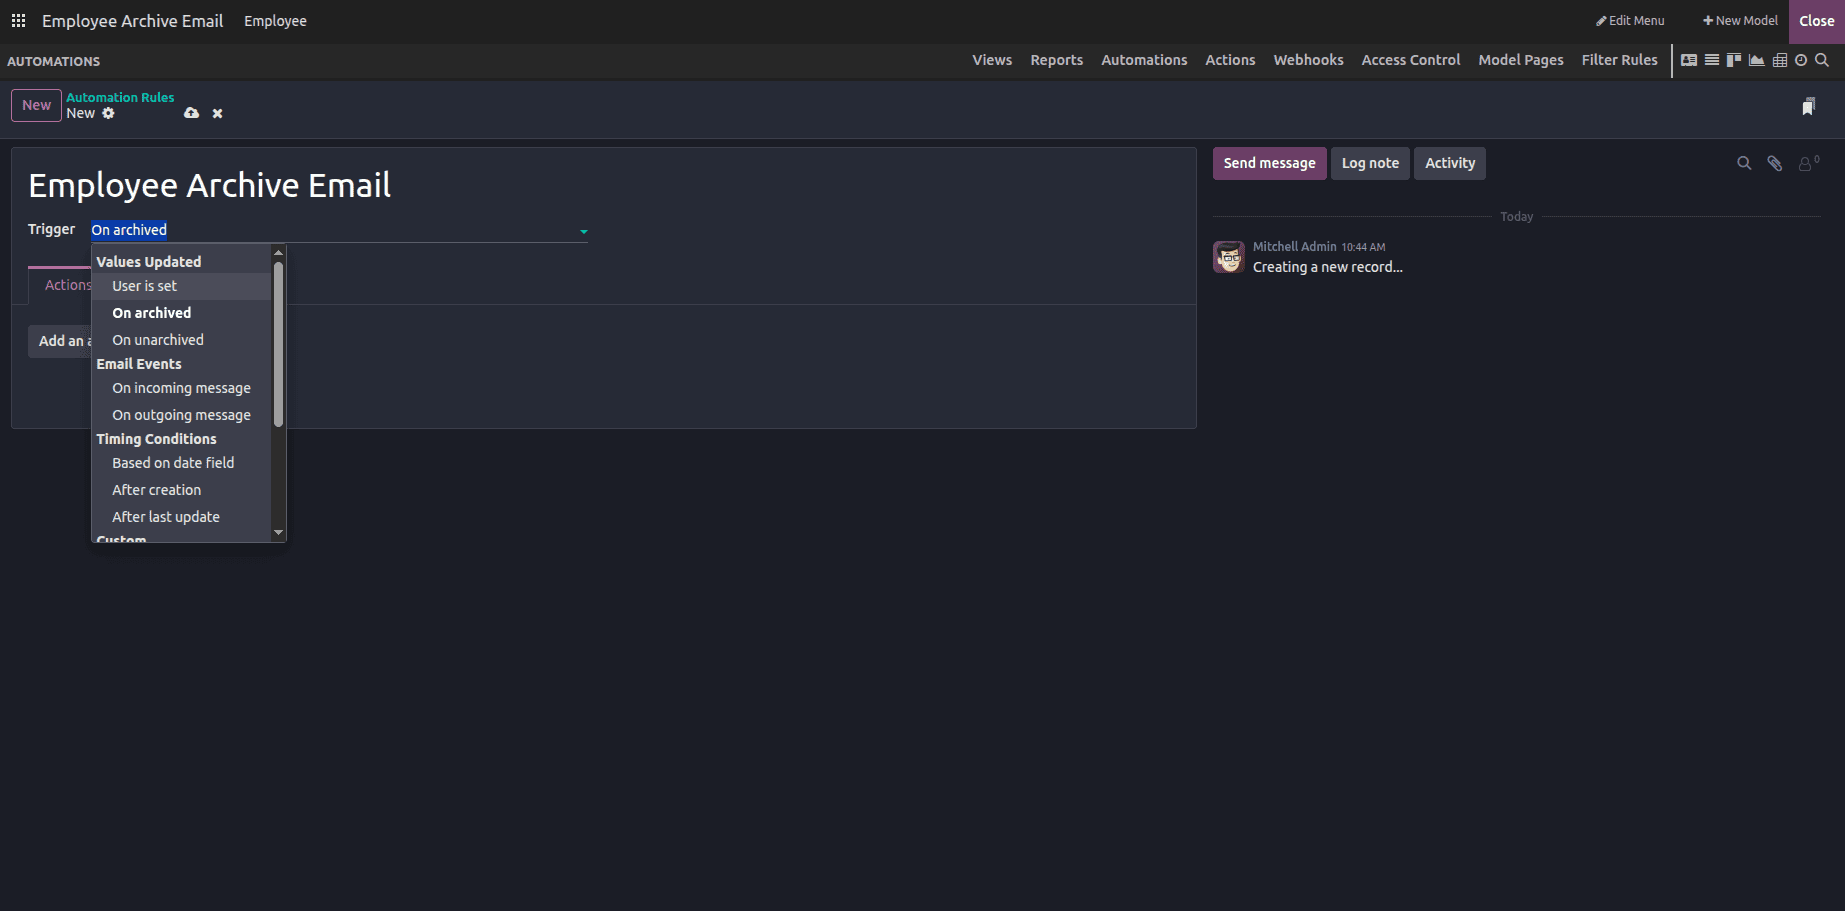
When you click the “Trigger” field, a drop-down list will appear with several options to choose from. Some of the commonly used triggers include:
- User is set
- On archived
- On unarchived
- (and other available options depending on the module)
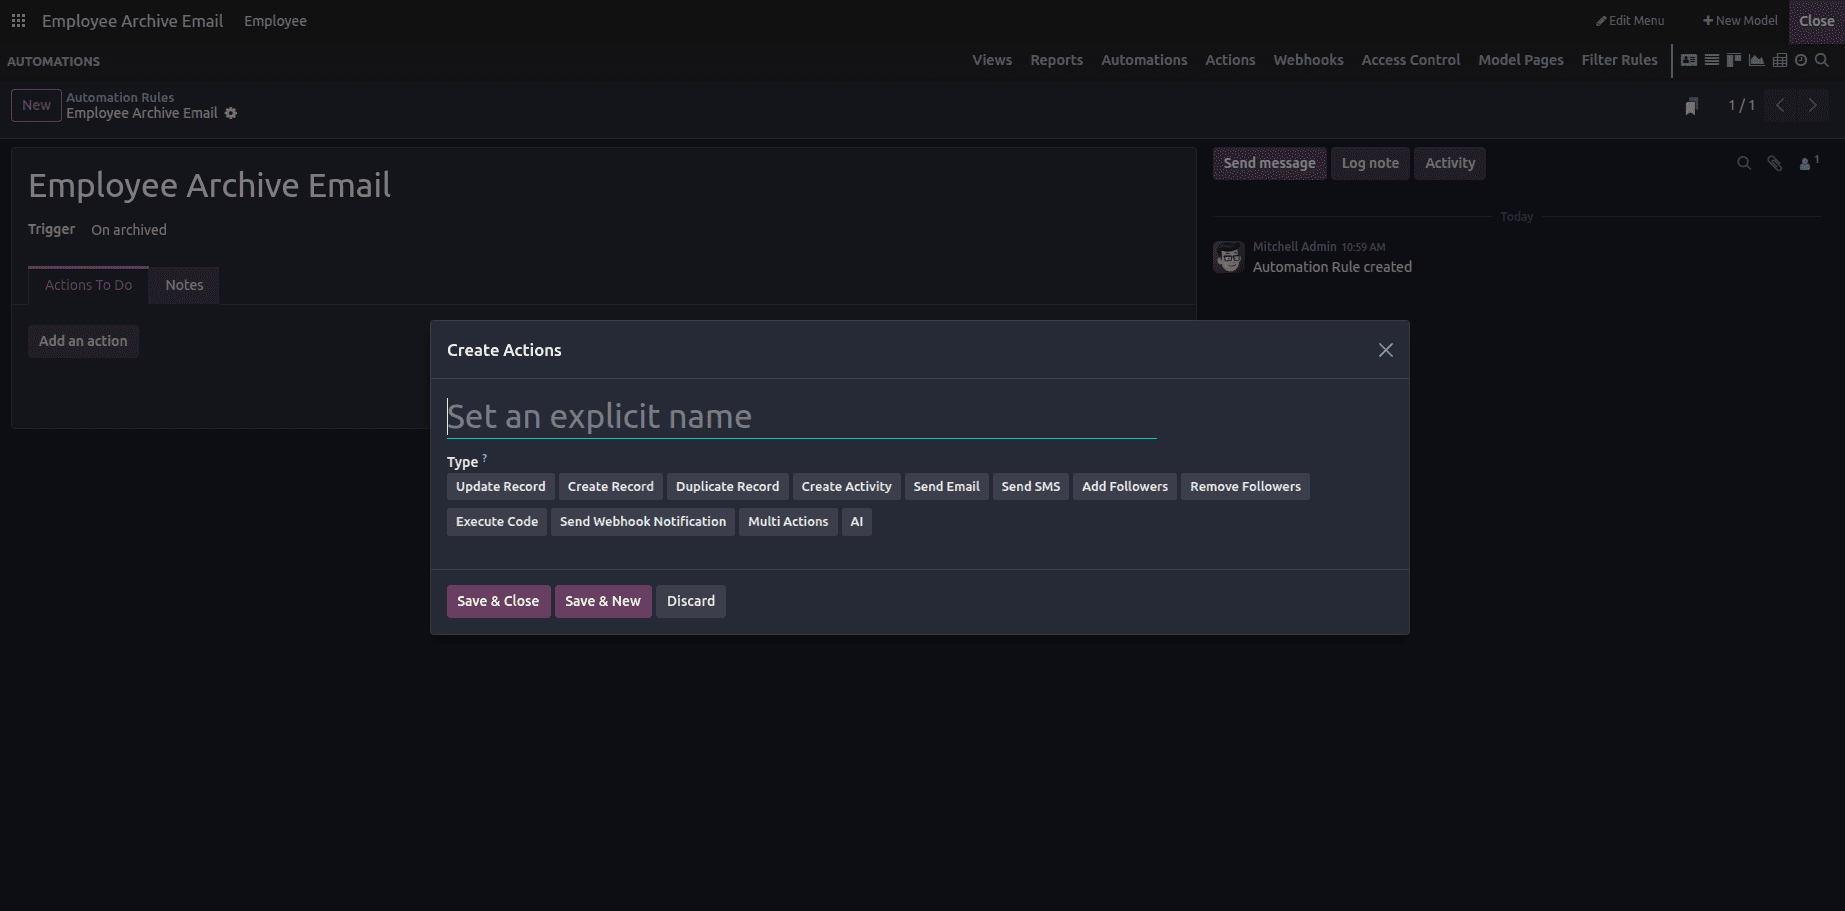
Once you click “Add an Action”, a pop-up window will appear allowing you to select the type of action you want to perform. The available options include:
- Update Record
- Create Record
- Duplicate Record
- (and more depending on your needs)
In our example, we’ll set the Trigger to “On archived” and choose the Action as “Send Email.”
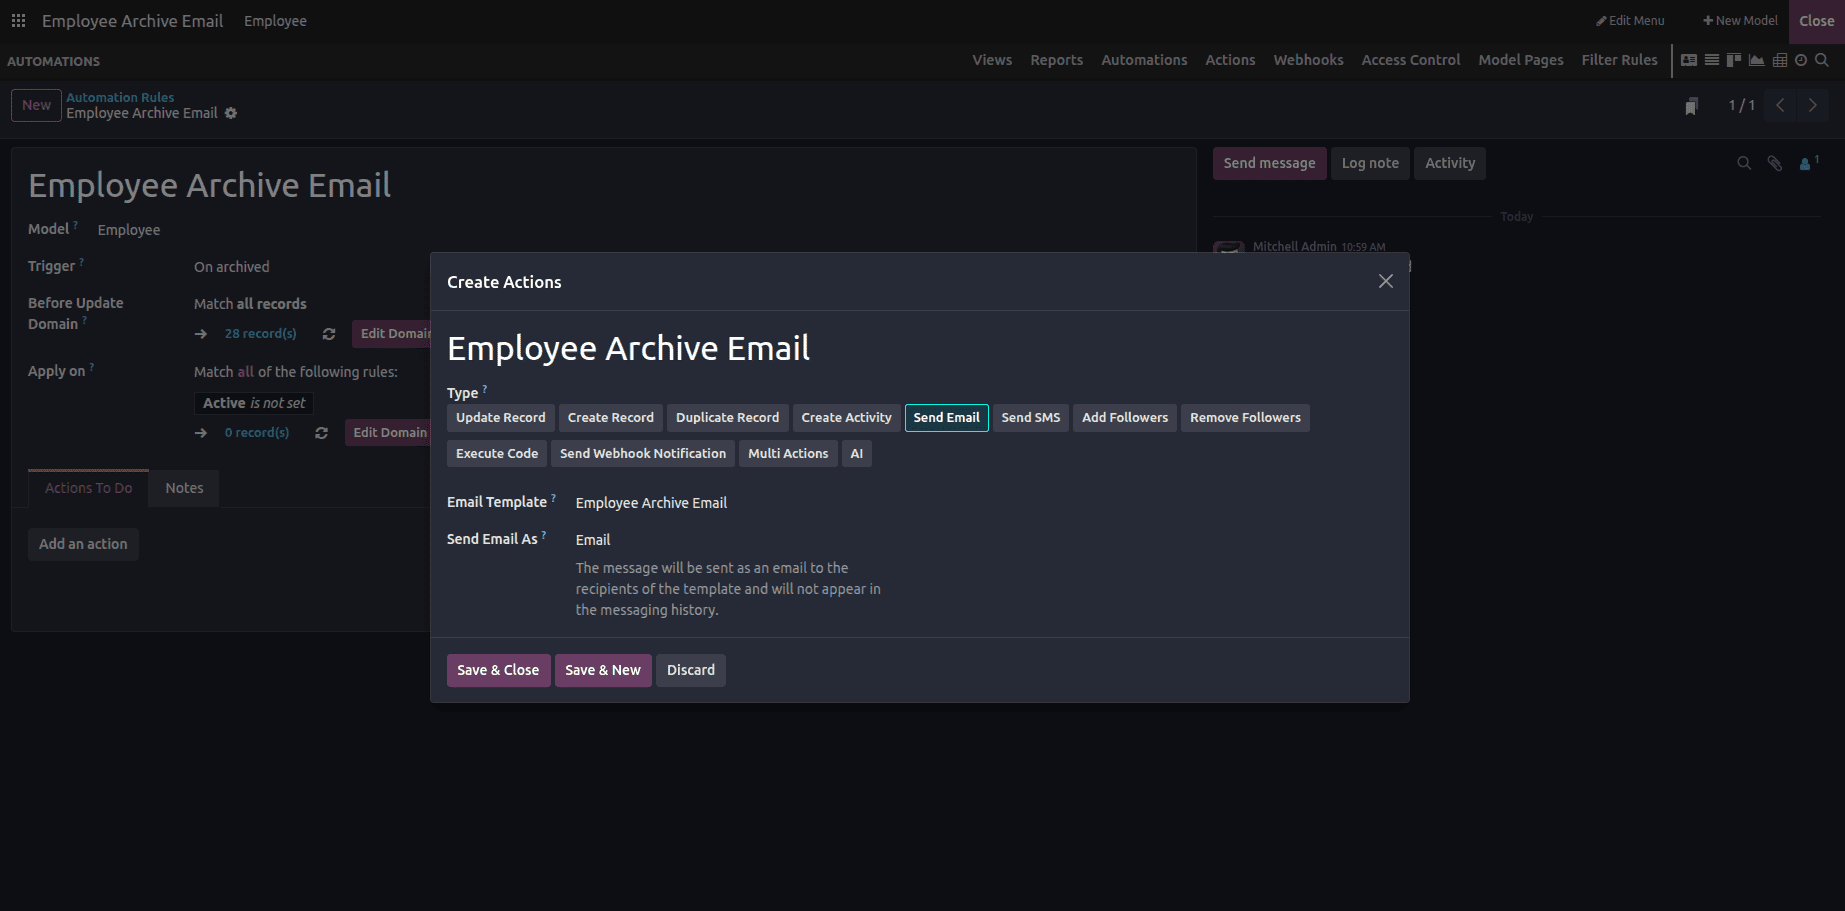
When you select “Send Email”, two additional fields will appear. Here, you can choose an existing Email Template (or create a new one if needed) and specify whether to send the email as a standard email or as an internal message, depending on your requirements. Once everything is set, click Save & Close to finalize the automation rule.

After you click Save & Close, you’ll return to the Automation Rules dashboard. Make sure to save your configuration, then click the Close button in the top-right corner to exit Studio mode.
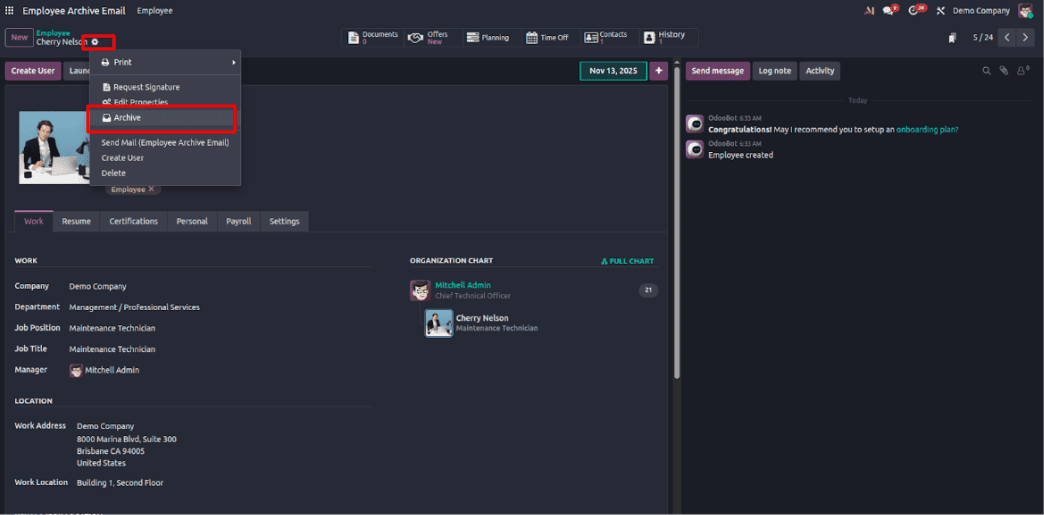
Once Studio is closed, open any Employee record in the form view. In the top-left corner, you’ll see a gear icon—click on it, and you’ll find the option to Archive. Go ahead and click Archive to test the automation.
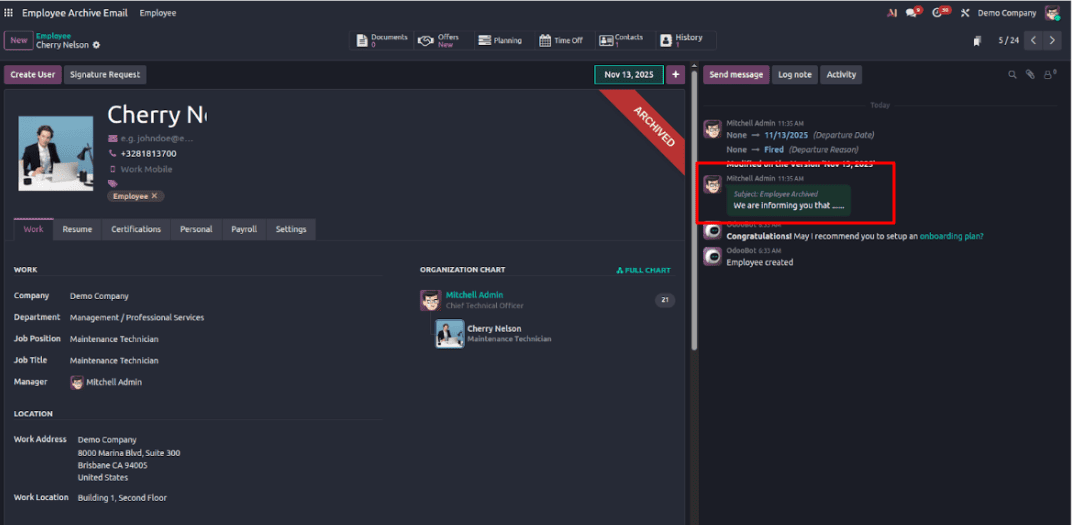
Once the employee is archived, you’ll see that an email has been sent automatically — you can verify this in the Chatter section.
Note: You can create and customize your own email template based on your specific needs before linking it to the automation rule.
Creating and Applying Filter Rules
The Filter Rules feature in Odoo 19 Studio lets you create custom filters for any module. It helps you quickly access specific records based on conditions, without manually applying filters every time.
In this example, we’ll add a Filter Rule to display archived employees. To do this, open the Studio module again, just like we did earlier.
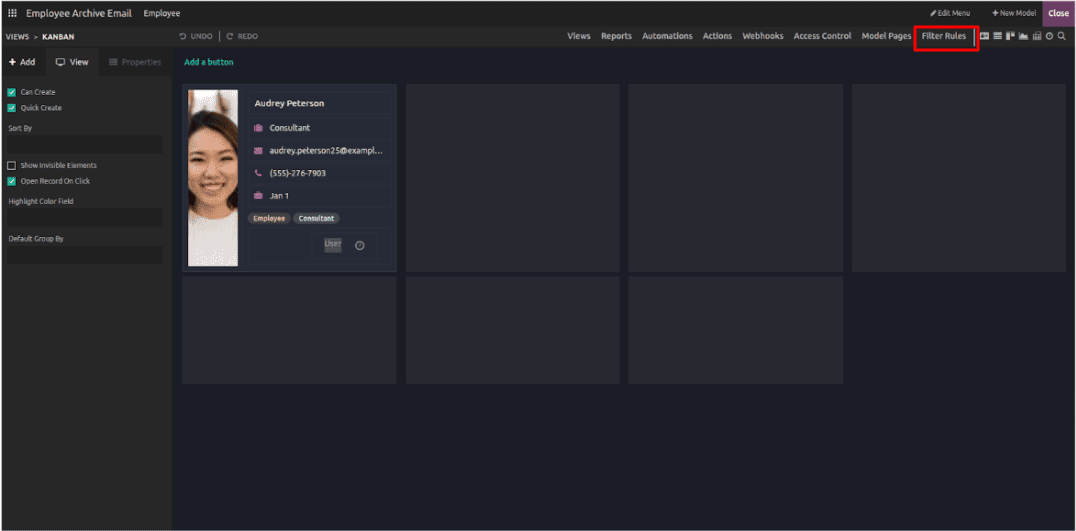
Click the “Filter Rules” tab.
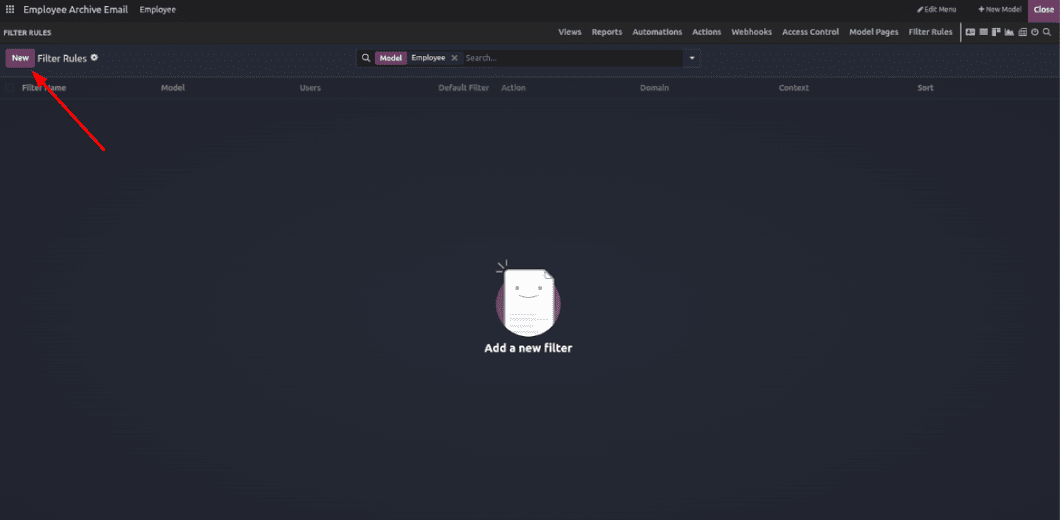
It will open an empty Filter Rules dashboard. Click New to create a new filter rule.
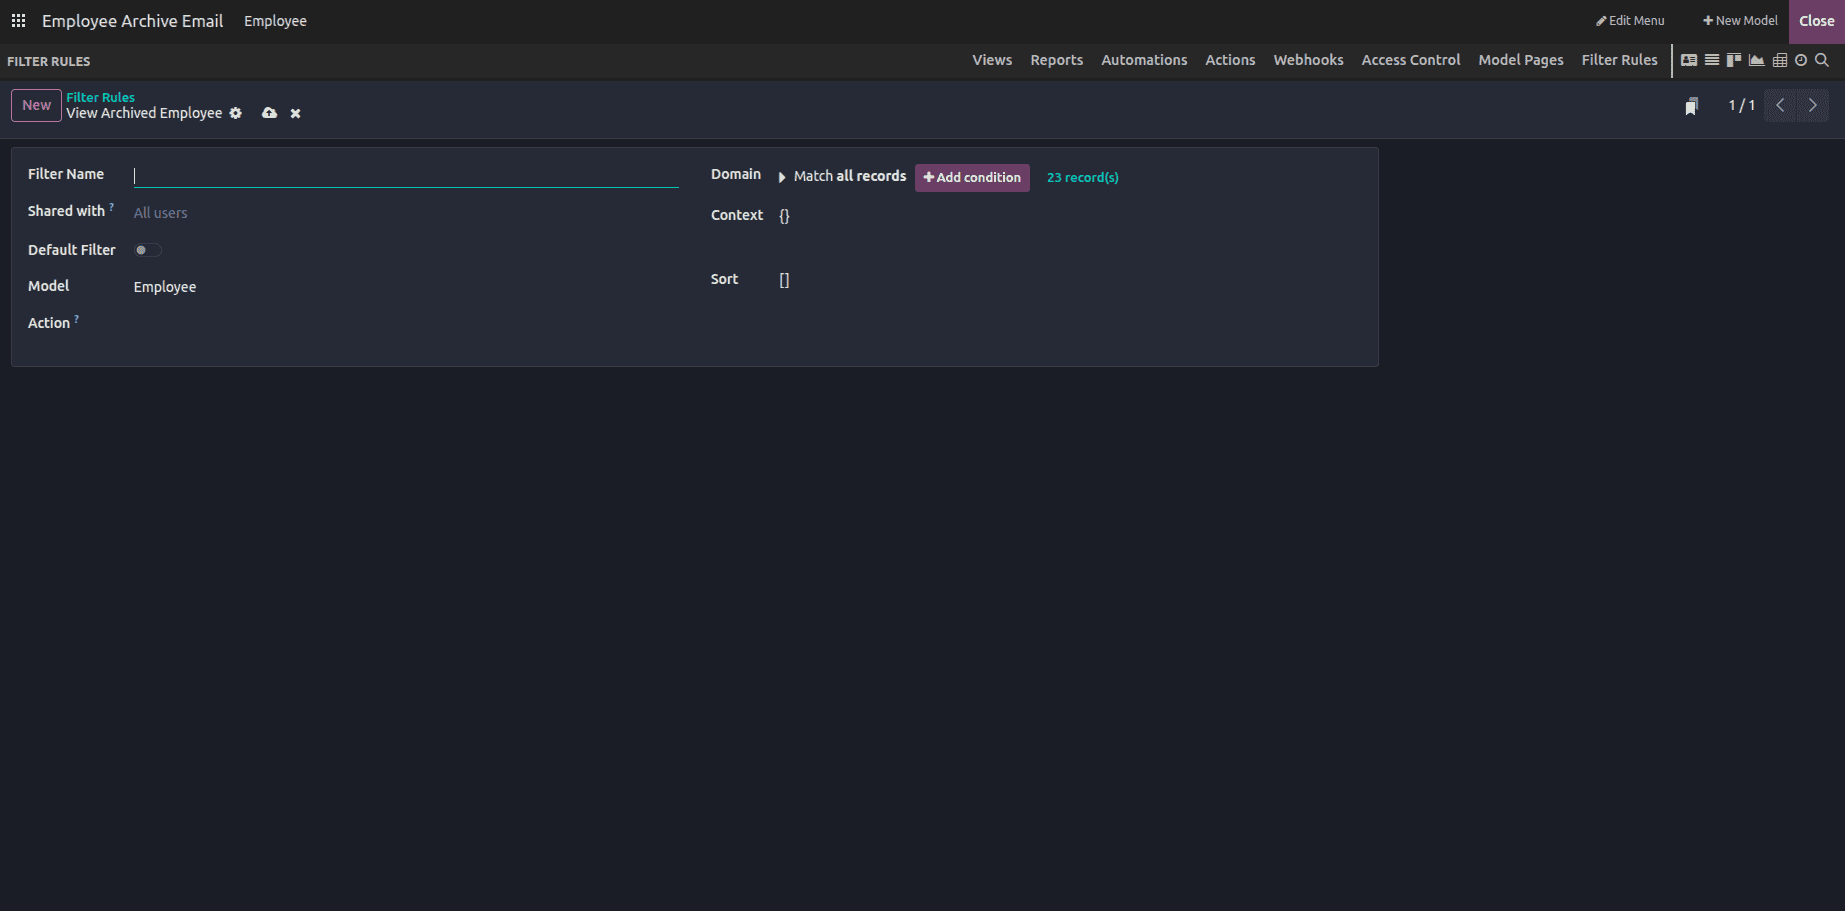
Once you click New, the Filter Rules form view will open. Here, you can configure the following fields:
- Filter Name: Enter a name for your filter.
- Shared With: Select specific users or groups to share the filter with (leave empty to share it with everyone).
- Default Filter: Enable this if you want the filter to load automatically by default.
- Model: Choose the model the filter applies to (e.g., Employee).
- Action: Select the menu action this filter applies to. If left empty, the filter will apply to all menus for the selected model.
- Domain: Set the condition as Active is False — this means the filter will show only archived employees.
- (Other optional settings can be configured as needed.)
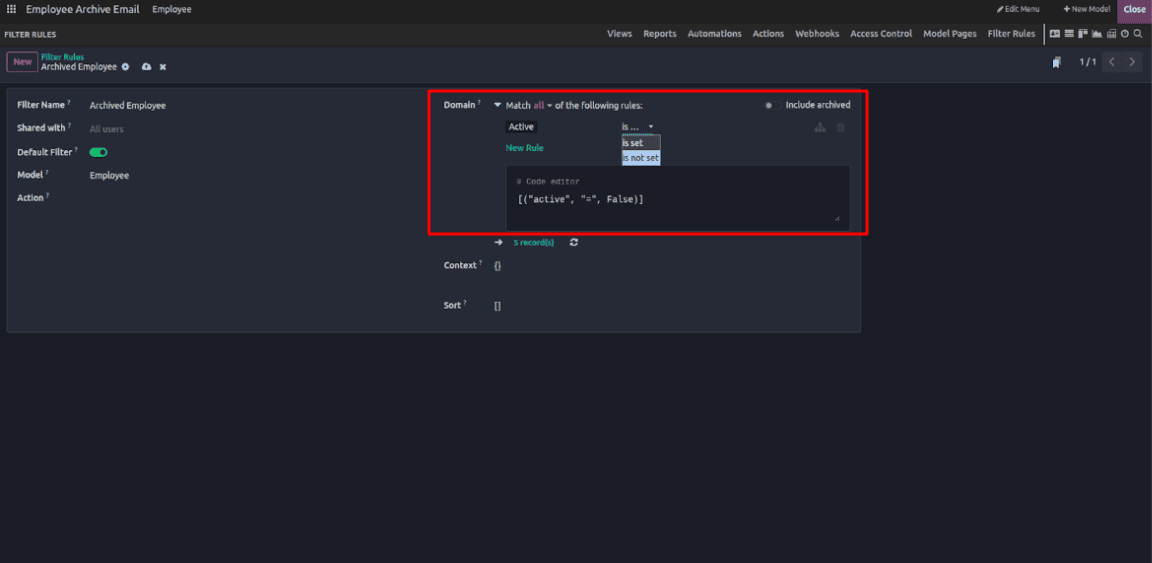
Here I'm setting it as the default filter and save and close.
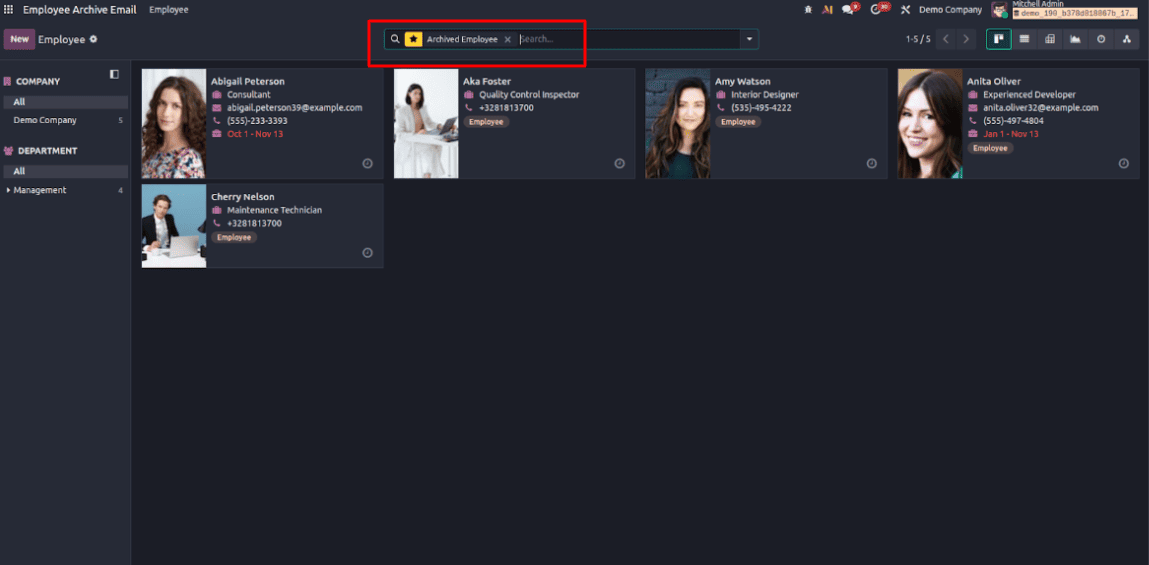
Once you return to the Employee form view, you’ll see that the Archived Employees filter is applied by default, displaying all archived employee records.
Conclusion
The Studio module in Odoo 19 gives businesses even more flexibility to customize their workflows without relying on technical development. With automation rules, you can eliminate repetitive manual tasks and keep key processes running smoothly in the background. At the same time, filter rules make it easy to focus on the data that matters most by automatically displaying the right records when you open a view.
Together, these tools help teams save time, reduce mistakes, and improve overall efficiency. With Odoo 19 Studio, your system adapts to the way you work — not the other way around.
To read more about Overview of Automation and Filter Rules in Odoo 18 Studio Module, refer to our blog, Overview of Automation and Filter Rules in Odoo 18 Studio Module.