Odoo 19 represents the newest release of the all-in-one business management platform, designed with upgraded features and faster performance to help companies run more smoothly. Its modular design allows organizations to choose the apps they need, whether for sales, accounting, CRM, inventory, or e-commerce. The version also brings a refreshed interface, stronger automation tools, and improved scalability, making it well-suited for businesses aiming to boost efficiency and growth.
Email templates in Odoo are reusable message formats saved in the system, enabling teams to send professional and uniform communications quickly. Instead of drafting similar emails repeatedly, users can rely on tailored templates built for specific situations. This ensures consistency in messaging, saves time, and strengthens customer relationships through clear and targeted communication.
Before setting up an email template, you need to confirm that your custom module has the required dependencies. This is done by checking the __manifest__.py file and ensuring that both mail and contacts are listed under the depends section. Adding these dependencies guarantees that your module can use the core messaging features provided by Odoo’s mail framework.
'depends': ['mail', 'contacts']
Email Template Creation
In Odoo, email templates are built by combining XML for structure, Jinja2 for dynamic placeholders, and Python for backend logic. To create one, you define a new record inside an XML file, specifying the key attributes such as the template name, model, subject, and body content. These templates can then be reused across different workflows to send automated or manual emails.
Xml code:
<?xml version="1.0" encoding="utf-8"?>
<odoo>
    <!-- Email Template to send Purchase Order email to the Vendor -->
    <record id="mail_template_purchase_order" model="mail.template">
        <field name="name">Purchase Order Email Demo Template</field>
        <field name="model_id" ref="purchase.model_purchase_order"/>
        <field name="email_from">{{ object.company_id.email }}</field>
        <field name="email_to">{{ object.partner_id.email }}</field>
        <field name="subject">Your Purchase Order {{ object.name }}</field>
        <field name="body_html" type="html">
            <div style="font-family: Arial, sans-serif; font-size: 14px; color: #333;">
                <p>Dear
                    <strong>
                        <t t-out="object.partner_id.name"/>
                    </strong>,
                </p>
                <p>
                    We are pleased to confirm our purchase order. Please find the details below:
                </p>
                <table style="border: 1px solid #ddd; border-collapse: collapse; width: 100%; margin-top: 10px;">
                    <thead>
                        <tr style="background-color: #f2f2f2; text-align: left;">
                            <th style="border: 1px solid #ddd; padding: 8px;">Product</th>
                            <th style="border: 1px solid #ddd; padding: 8px;">Quantity</th>
                            <th style="border: 1px solid #ddd; padding: 8px;">Unit Price</th>
                            <th style="border: 1px solid #ddd; padding: 8px;">Subtotal</th>
                        </tr>
                    </thead>
                    <tbody>
                        <t t-foreach="object.order_line" t-as="line">
                            <tr>
                                <td style="border: 1px solid #ddd; padding: 8px;">
                                    <t t-out="line.product_id.display_name"/>
                                </td>
                                <td style="border: 1px solid #ddd; padding: 8px;">
                                    <t t-out="line.product_qty"/>
                                </td>
                                <td style="border: 1px solid #ddd; padding: 8px;">
                                    <t t-out="line.price_unit"/>
                                </td>
                                <td style="border: 1px solid #ddd; padding: 8px;">
                                    <t t-out="line.price_subtotal"/>
                                </td>
                            </tr>
                        </t>
                    </tbody>
                </table>
                <p style="margin-top: 20px;">
                    <strong>Total Amount:</strong>
                    <t t-out="object.amount_total"/>
                </p>
                <p>
                    Kindly confirm receipt of this order and provide the expected delivery schedule.
                </p>
                <p>Best Regards,</p>
                <p>
                    <strong>
                        <t t-out="object.company_id.name"/>
                    </strong>
                </p>
            </div>
        </field>
    </record>
</odoo>
Understanding the Key Fields in Email Templates
- id: A unique external identifier is required for each email template record in Odoo.
- model: Defines the model associated with the email template, ensuring it is applied consistently.
- name: Provides a clear and descriptive name for the email template to make it easily recognizable.
- ref: Points to fields in the connected model to use within the email template.
- email_from: Specifies the email address from which the message will be sent.
- email_to: Indicates the email address of the message recipient.
- subject: Defines the email’s subject line.
- body_html: Contains the body of the email, using Jinja2 templates for dynamic content.
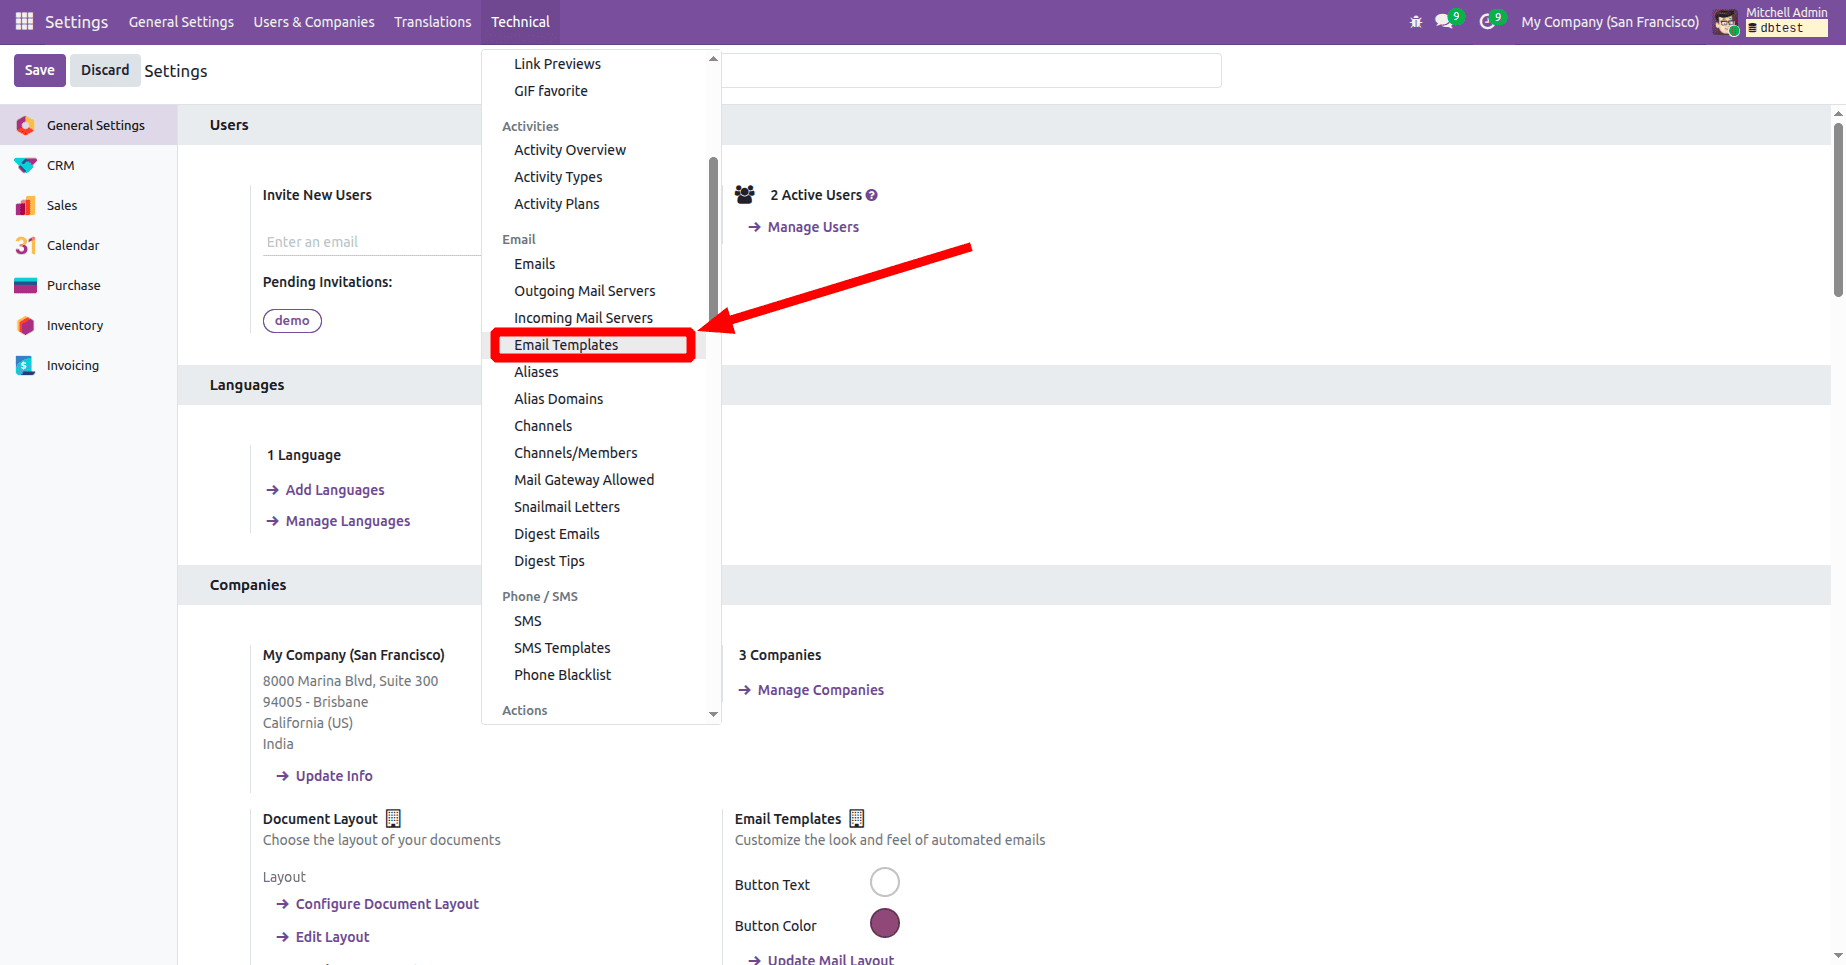
Once the XML file for the email template is created and your custom module is installed, activate Developer Mode to access advanced features. Then go to Technical > Email Templates, locate your customized template, and open it for review or further configuration.
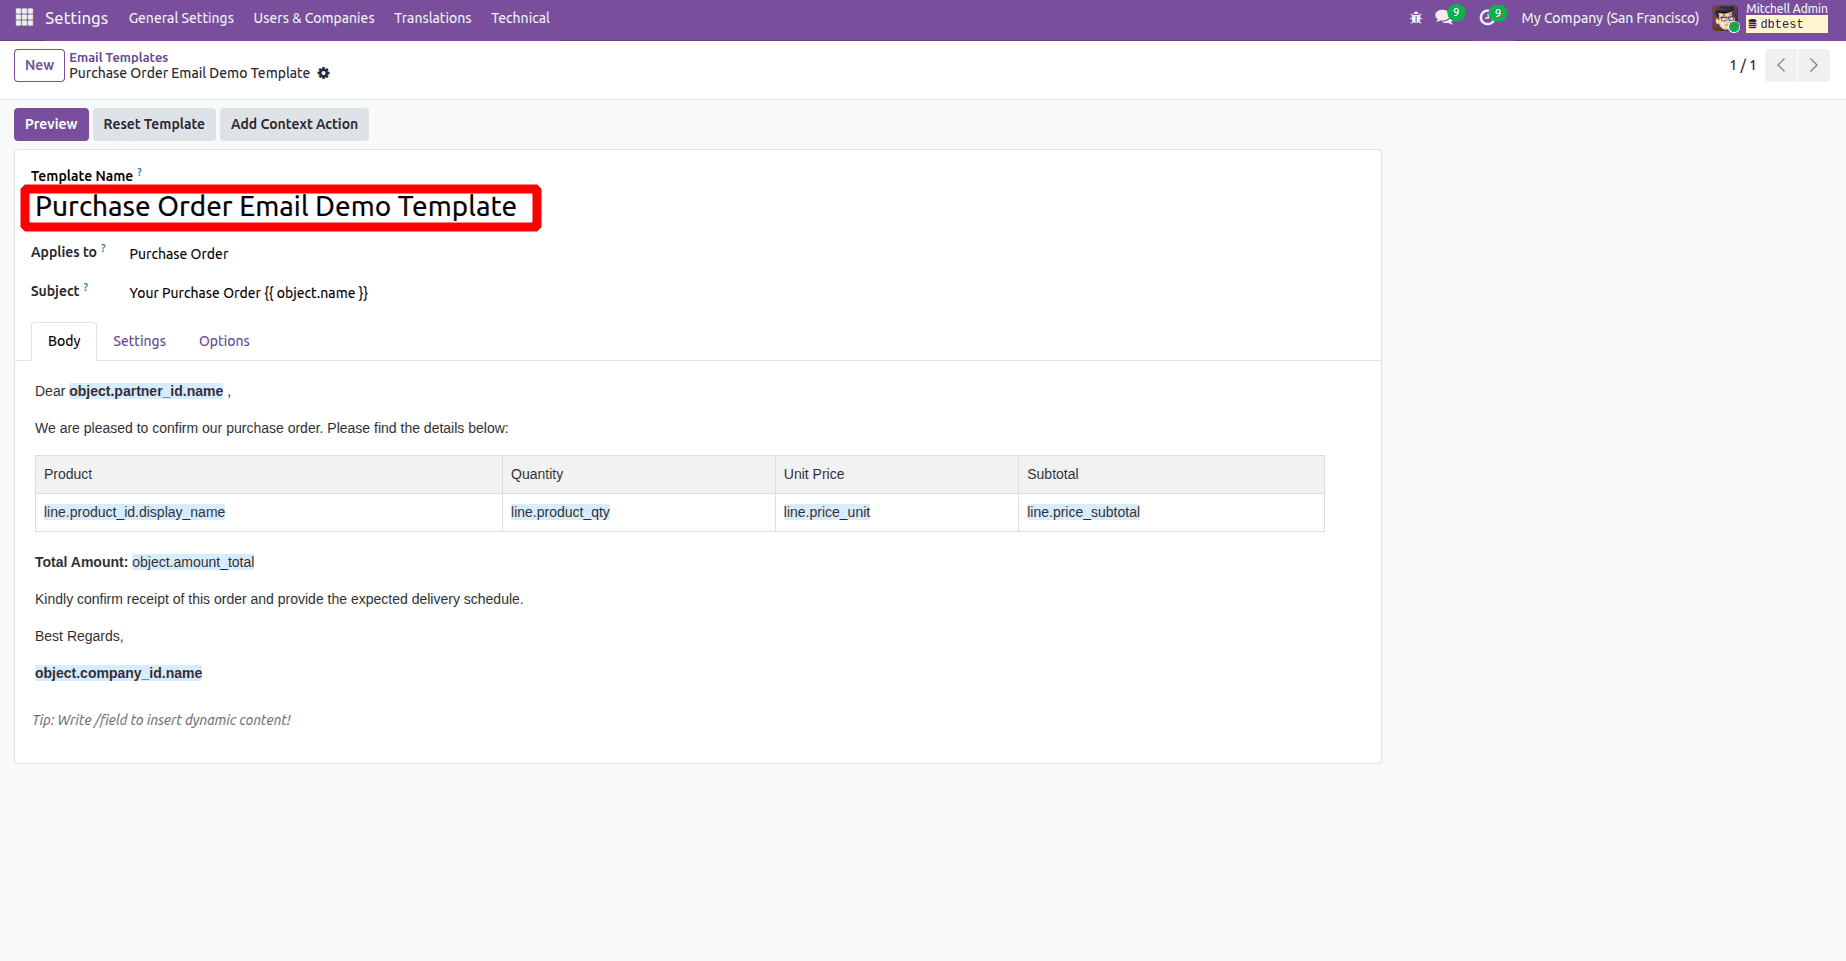
The template layout will be displayed, allowing you to modify different sections of the email according to your needs. You can also attach relevant reports - such as purchase orders, sale orders, invoices, or quotations to the email. Additionally, auto-delete settings can be configured to remove outdated or unnecessary attachments after sending, helping to manage storage efficiently and maintain email performance.
Python Function for Sending Emails
To utilize the email template, create a Python function that triggers it. Begin by adding a button to the target model and connecting it to a corresponding action. Within this function, the email template can be called using code similar to the following:
Xml code:
<?xml version="1.0" encoding="utf-8"?>
<odoo>
    <record id="purchase_order_form" model="ir.ui.view">
        <field name="name">purchase.order.form.view.custom</field>
        <field name="model">purchase.order</field>
        <field name="inherit_id" ref="purchase.purchase_order_form"/>
        <field name="arch" type="xml">
            <xpath expr="//button[@name='button_confirm']" position="after">
                <button name="send_mail" type="object" string="Send Mail Test" class="oe_stat_button"/>
            </xpath>
        </field>
    </record>
</odoo>
Python code:
from odoo import models
from odoo.exceptions import UserError
class PurchaseOrder(models.Model):
    _inherit = 'purchase.order'
    def send_mail(self):
        # Fetch the purchase order email template
        template = self.env['mail.template'].browse(
            self.env.ref('custom_module_name.mail_template_purchase_order').id
        )
        # Ensure the template exists
        if template:
            # Send the email using the template
            template.send_mail(self.id, force_send=True)
        else:
            raise UserError("Mail Template not found. Please check the template.")
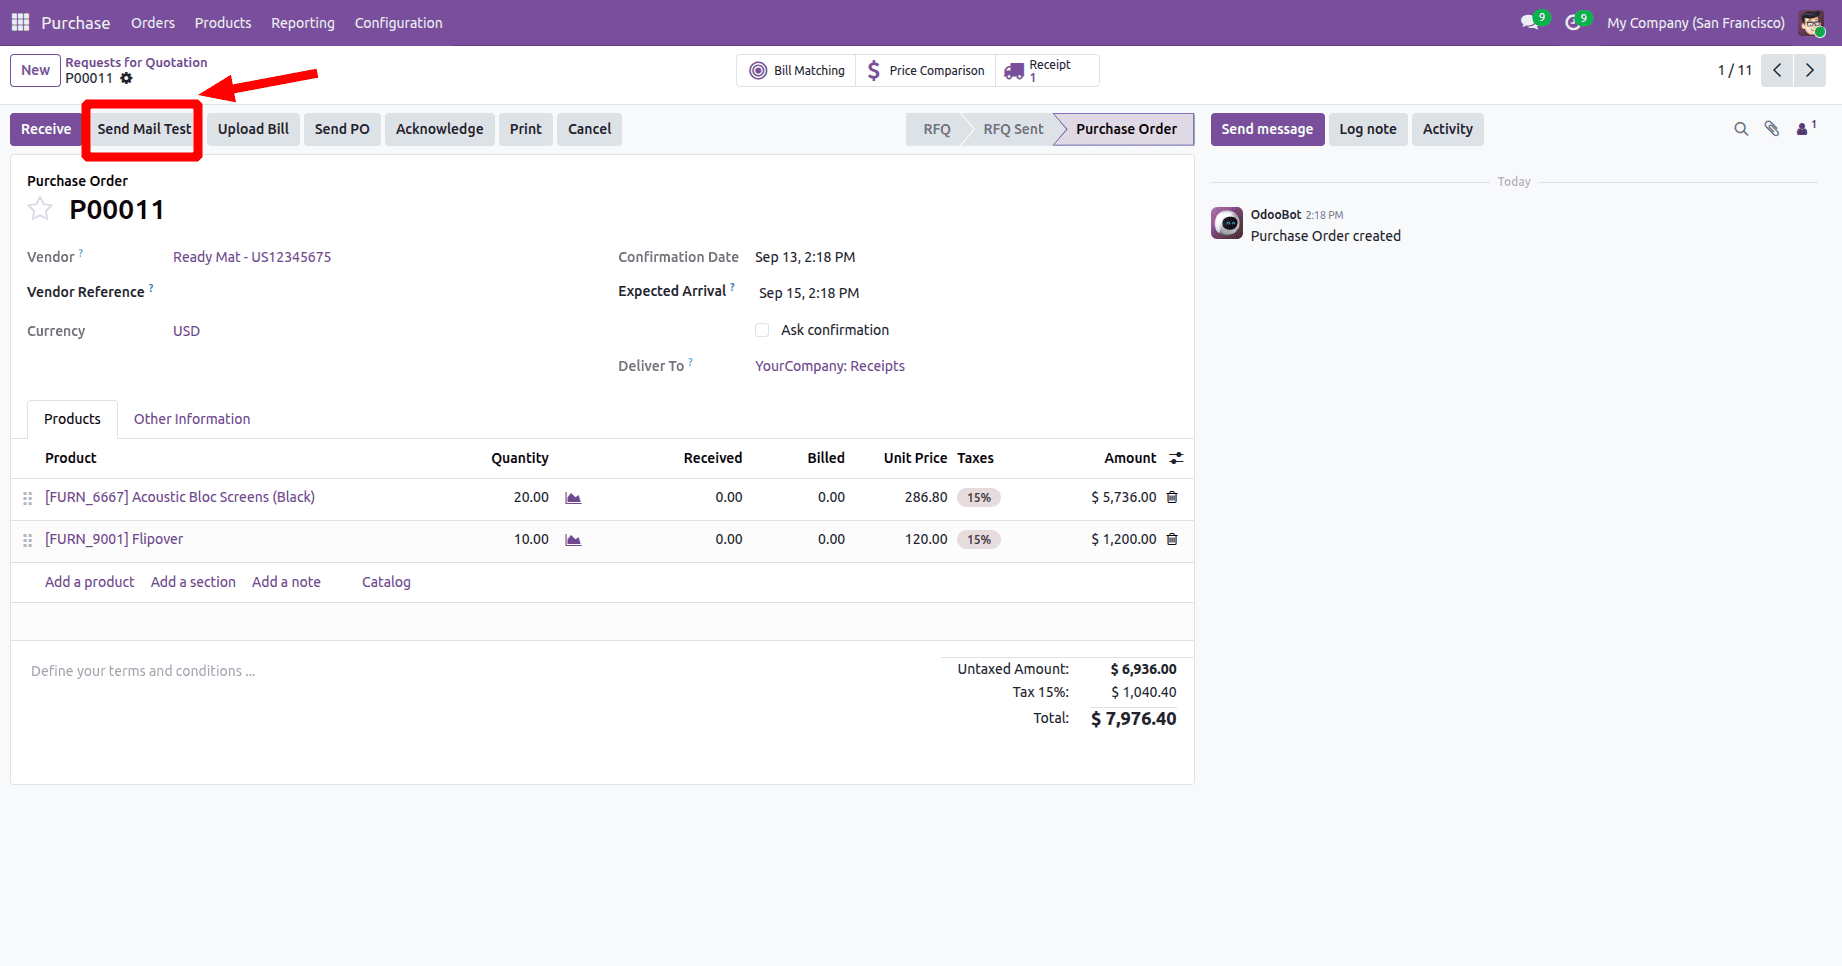
Once the changes are installed, a new button will appear on the Purchase Order form. Clicking this button will automatically send an email to the associated customer, containing the relevant purchase order details based on the customization. The image below illustrates the “Send Mail Test” button on the Purchase Order view.
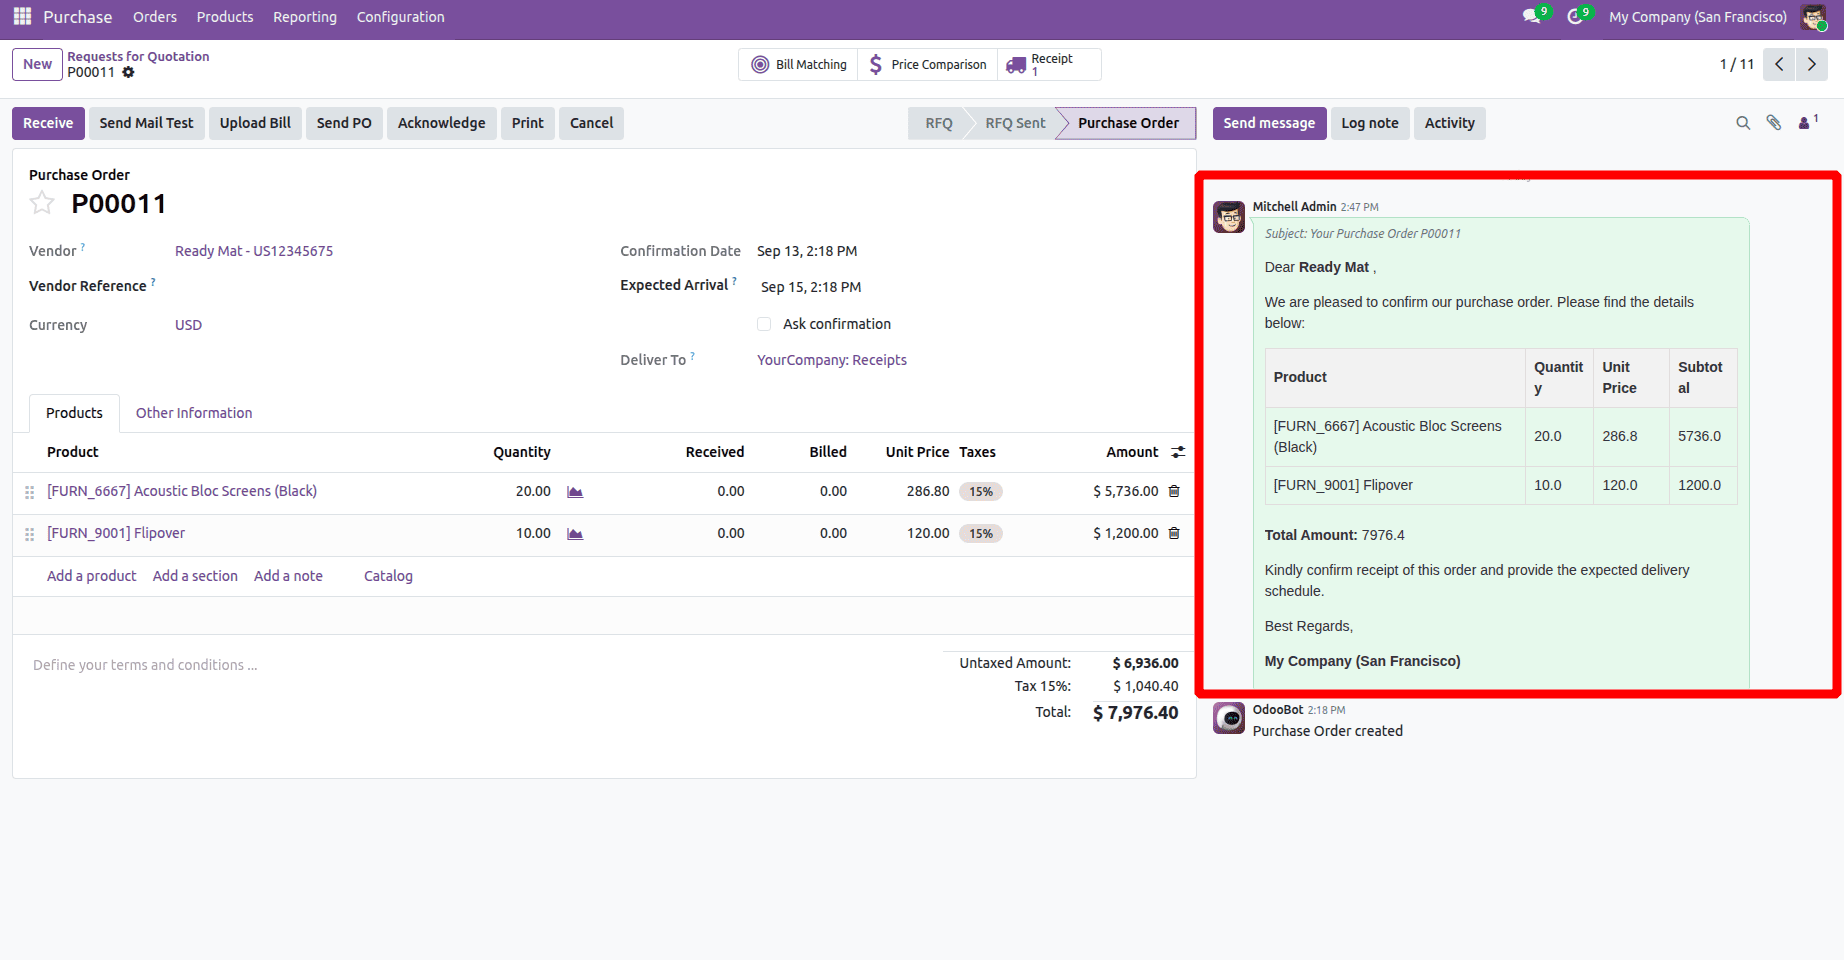
The image below displays the purchase order log note, indicating that the email has been successfully sent to the vendor. The email body includes the purchase order details according to your customization, and it will be delivered to the respective vendor.
In Odoo 19, email templates streamline communication by automating the delivery of customized and dynamic messages. Using XML and Jinja2 for structure and formatting, along with Python for integration, businesses can create templates that fit their specific requirements. Linking these templates to buttons or automated actions allows emails to be sent quickly and effortlessly. Features such as attaching reports and automatically removing outdated attachments help optimize storage and improve efficiency. Overall, email templates in Odoo 19 save time, ensure consistent messaging, and boost productivity by simplifying routine communication tasks.
To read more about How to Create Email Template in Odoo 18, refer to our blog How to Create Email Template in Odoo 18