In the upper-right part of the Odoo backend, right next to the user's avatar, there is a narrow strip of icons called systray. You have already noticed its use in Odoo's messaging and activity menus - both of these have a counter bubble that counts up or down when anything changes. However, what Odoo does not let you do is import your own business counters. Thus, a sales manager who only wants a total amount of confirmed orders has to open up the Sales app and apply the same filter again, since the number is updated only when you refresh the webpage.
We're going to create a customized system tray counter that functions in the same way as a conventional one. The OWL component will show the order count with a badge, and we will employ Odoo's bus system to ensure real-time updating, so the badge will refresh within seconds of the action that took place in the system, whether it is creating, confirming, or canceling an order. However, it is useful to know the difference between the two types of Odoo's buses. The client-side bus (env.bus, which is accessed through the useBus hook) communicates only between components in one tab, while the server-side bus (the bus.bus model) sends the notifications from the Python back end through the active websocket connection to all users.
In the eyes of everyone, it doesn't matter who caused the update because no matter who initiated it, the server-side bus.bus is responsible for making it possible to have a counter that counts the updates in real time. Additionally, the sales order counter is just an example and the same can be done with any model, such as open helpdesk tickets, unpaid invoices, or pending deliveries, etc.
Creating the Systray Component in OWL
In this module, we will create a small component using OWL. When the component starts up, it retrieves a count and subscribes to the bus channel, and this count is renewed every time a notification arrives on this channel. First, create the file static/src/systray/systray_counters.js, and don’t forget the accompanying SCSS and XML files. Last, add everything to the assets_backend bundle in your module’s manifest and determine that web, sale_management, and bus are module dependencies.
JS Code:
/** @odoo-module **/
import { registry } from "@web/core/registry";
import { useService } from "@web/core/utils/hooks";
import { Component, onWillStart, useState } from "@odoo/owl";
export class SystrayCounters extends Component {
    static template = "systray_counters.SystrayCounters";
    setup() {
        this.orm = useService("orm");
        this.action = useService("action");
        this.busService = this.env.services.bus_service;
        this.state = useState({ saleCount: 0 });
        onWillStart(async () => {
            await this._fetchCounts();
        });
        this.busService.addChannel("systray_counters");
        this.busService.subscribe("systray_counters_update", () => {
            this._fetchCounts();
        });
    }
    async _fetchCounts() {
        this.state.saleCount = await this.orm.searchCount("sale.order", [
            ["state", "=", "sale"],
        ]);
    }
    openSaleOrders() {
        this.action.doAction({
            type: "ir.actions.act_window",
            name: "Sales Orders",
            res_model: "sale.order",
            views: [[false, "list"], [false, "form"]],
            domain: [["state", "=", "sale"]],
            target: "current",
        });
    }
}
registry.category("systray").add(
    "systray_counters.SystrayCounters",
    { Component: SystrayCounters },
    { sequence: 26 }
);
Inside setup(), three services are included. The action service is responsible for opening the filtered view when the icon is clicked. The bus service creates a communication channel to the server-side. The orm service is responsible for the searchCount RPC, which counts the confirmed sales orders. The badge is dynamic due to the fact that the count is stored in useState, enabling it to be updated as new sales orders arrive. OWL automatically updates the template when the value is changed; thus, there is no direct DOM manipulation necessary.
Two lines form the static counter. addChannel("systray_counters") informs the websocket connection that the user looks to listen on the systray_counters channel, and subscribe("systray_counters_update") links a callback that is triggered whenever messages of that type are received. Notice the callback simply calls _fetchCounts() without caring about what is contained in the payload - in that way, the badge displays the accurate number from the database. The record rules remain in place, as there is no need to violate the rule that allows users to see only the orders they are permitted to see.
Ultimately, the component is placed in the registry under the Systray category. The sequence value determines the position of the icon with respect to other systray elements, thus it can be adjusted accordingly to position the icon behind or in front of the messaging and activity icons.
Designing the Template and Badge
Much like the main message menu icon, this template also shows the icon with a bubble in the upper corner. The next thing to do is create a file called static/src/systray/systray_counters.xml.
xml code:
<?xml version="1.0" encoding="UTF-8"?>
<templates xml:space="preserve">
    <t t-name="systray_counters.SystrayCounters">
        <div class="o_systray_counter_item d-flex align-items-center justify-content-center cursor-pointer"
             t-on-click="openSaleOrders" title="Sales Orders" role="button">
            <span class="position-relative d-inline-flex">
                <i class="fa fa-shopping-cart" role="img" aria-label="Sales Orders"/>
                <span t-if="state.saleCount > 0"
                      class="o_systray_counter_badge badge rounded-pill position-absolute top-0 start-100 translate-middle"
                      t-esc="state.saleCount"/>
            </span>
        </div>
    </t>
</templates>
The fascinating part of the situation is how the badge is placed. A position-relative span wraps around the icon, and the badge itself is located using Bootstrap utility classes position-absolute, top-0, start-100, and translate-middle. Since positioning is done relative to the icon rather than the navbar container, its position will not change - regardless of the navbar's height and padding. With the combination of those classes, the badge will be placed at the location of the center of the icon's top-right corner - same as the default counters do. The t-if hides the bubble until there's at least one confirmed order, while t-esc fetches the count from state.
Styling the Counter with SCSS
Make a new file static/src/systray/systray_counters.scss to make adjustments to the style of the icons and badges as per systray’s style regulations.
.o_systray_counter_item {
    height: 100%;
    padding: 0 12px;
    i.fa {
        color: #ffffff !important;
        font-size: 1.15rem;
        line-height: 1;
        opacity: 0.9;
    }
    &:hover i.fa {
        opacity: 1;
    }
    .o_systray_counter_badge {
        color: #ffffff !important;
        --bs-badge-color: #ffffff;
        background-color: #00a55b;
        font-size: 0.72rem;
        font-weight: 500;
        line-height: 1;
        padding: 0.18rem 0.32rem;
        min-width: 1.05rem;
        width: max-content;
        max-width: none;
        white-space: nowrap;
        overflow: visible;
        text-align: center;
    }
}
There are two minor features that would save you considerable debugging time in the future. First, white text is forced on the green pill through important declaration of both the color and variable. This is of great importance because the Bootstrap badge class has its own CSS variable --bs-badge-color that would silently override the plain color rule.
Second, width: max-content and white-space: nowrap combination enables the pill to stretch appropriately to accommodate multi-digit counts whereas without those, a count of 12 turns into an unrecognizable “1..”. The icon is colored white so that it is in line with the default icons representing messages and activities in the navbar.
Pushing Realtime Notifications from the Backend
So far, whatever was created only gets the count of the sales back when the web client is initially loaded. The actual real-time activity is from the Python side, where whenever a sale order is actually updated, we send a notification to the bus. Create the file models/sale_order.py.
from odoo import api, models

class SaleOrder(models.Model):
    _inherit = 'sale.order'
    def _notify_systray_counter(self):
        self.env['bus.bus']._sendone(
            'systray_counters', 'systray_counters_update', {})
    @api.model_create_multi
    def create(self, vals_list):
        records = super().create(vals_list)
        records._notify_systray_counter()
        return records
    def write(self, vals):
        res = super().write(vals)
        if 'state' in vals:
            self._notify_systray_counter()
        return res
    def unlink(self):
        self._notify_systray_counter()
        return super().unlink()
The helper function `_notify_systray_counter()` consists of only one call to `bus.bus._sendone(channel, notification_type, message)`. The name of the channel is `systray_counters` - the one that is created by the component in JS, and the notification type is `systray_counters_update`, a callback that was subscribed to by that component before. An empty payload is being sent since the client will re-fetch the count anyway, thus keeping the message small and making it impossible to leak any data.
From that point, three entry points of ORM are being overridden. create() sends the notification only in case of new orders being created, write() only in case of the field state being changed (which is the only field that counts), and unlink() is also called just before deleting. So let's say a salesperson confirms a quote: write to state calls _sendone, websocket delivers the message to all the PCs with opened browser subscribed to the channel, particular components call searchCount again, and count on the badges gets updated without a page reload.
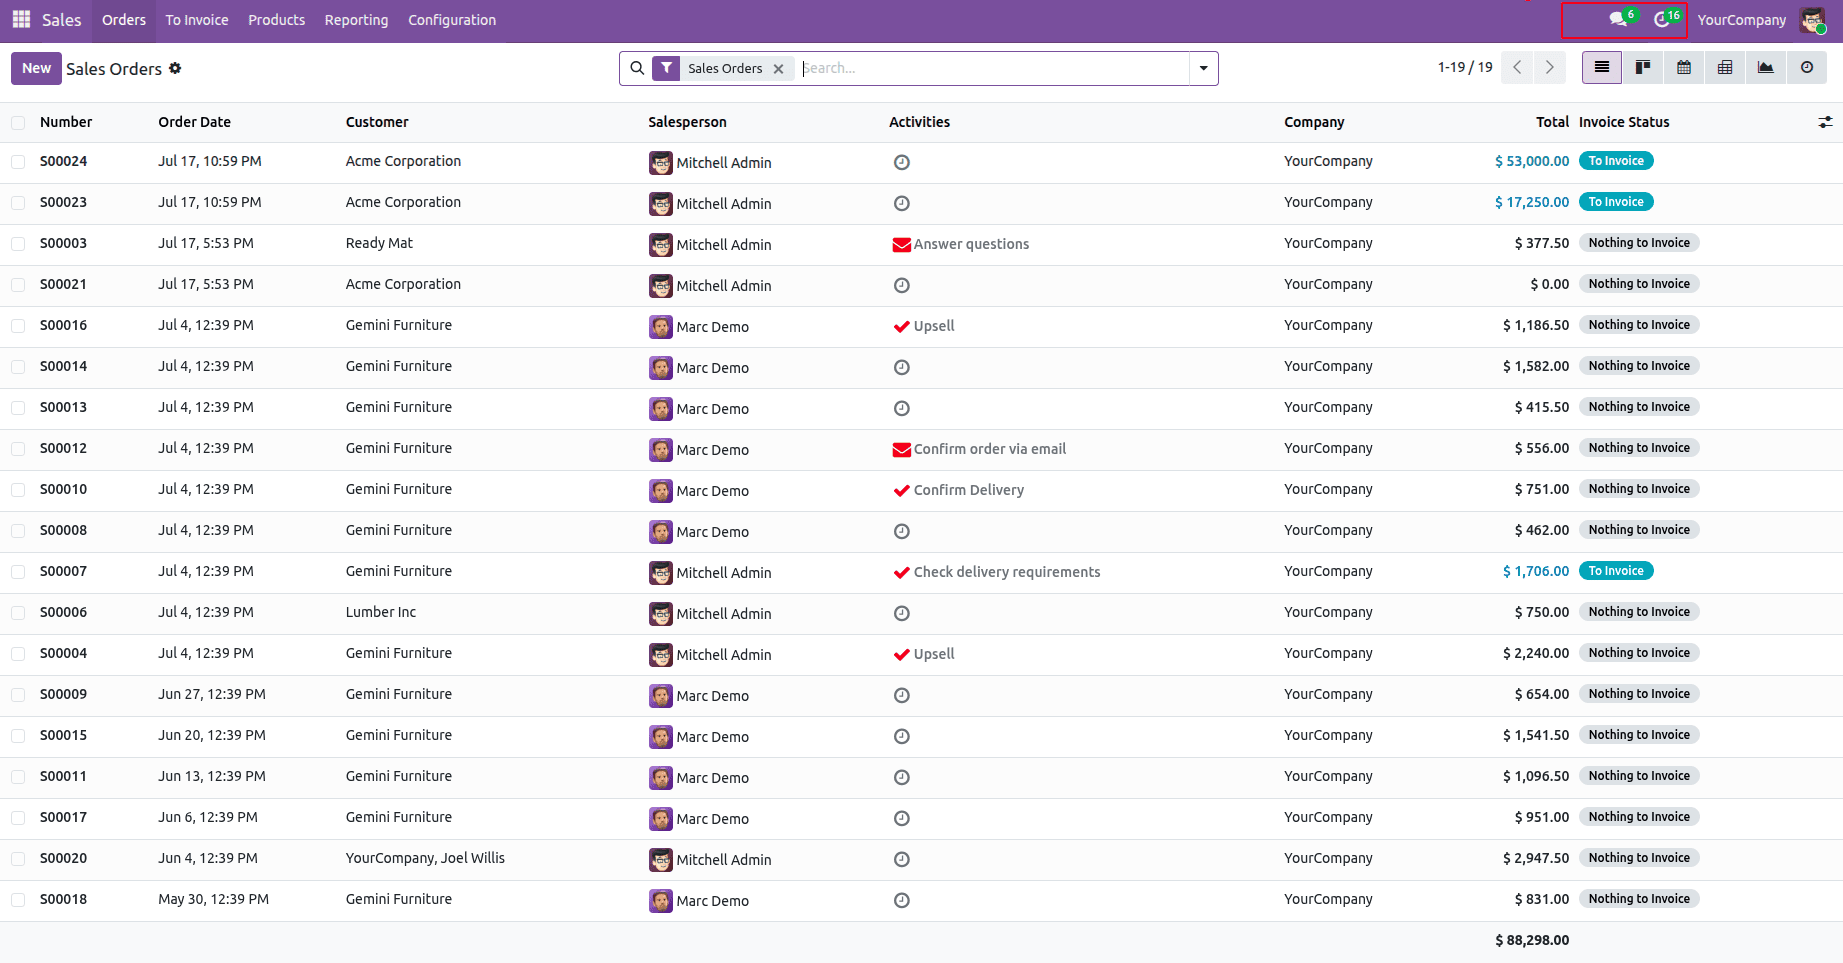
The Systray View before customisation:
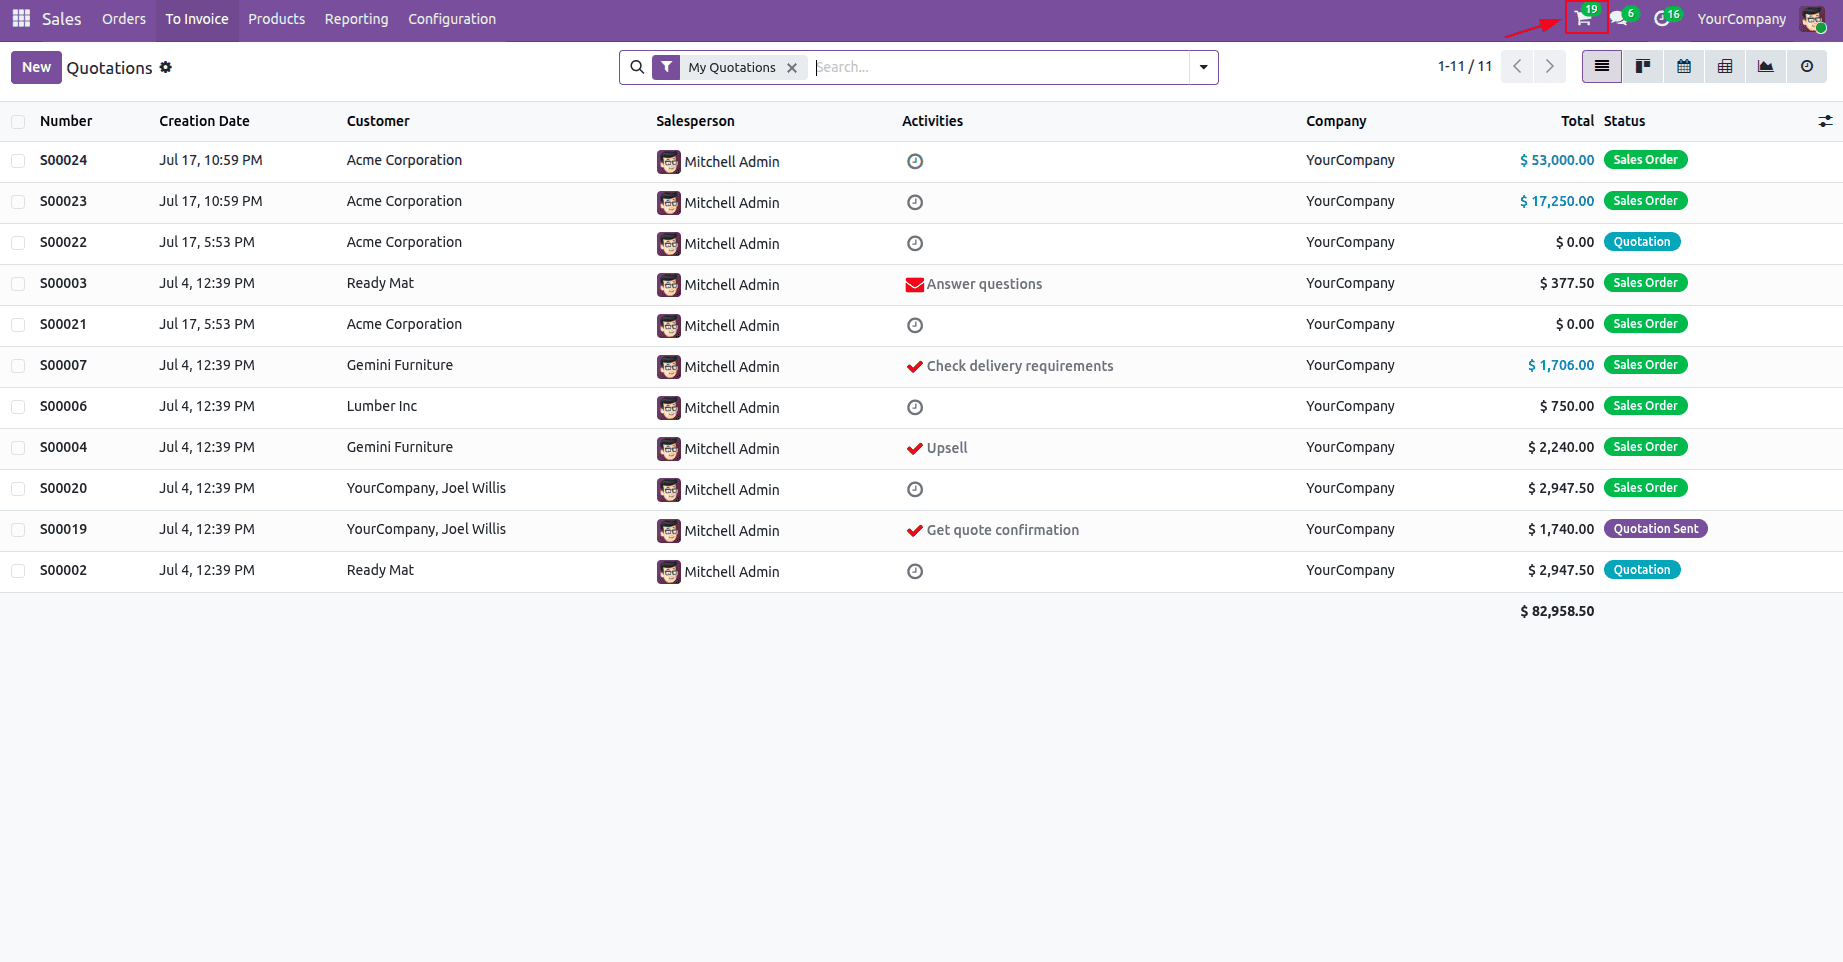
The Systray View after customisation with sales counter:
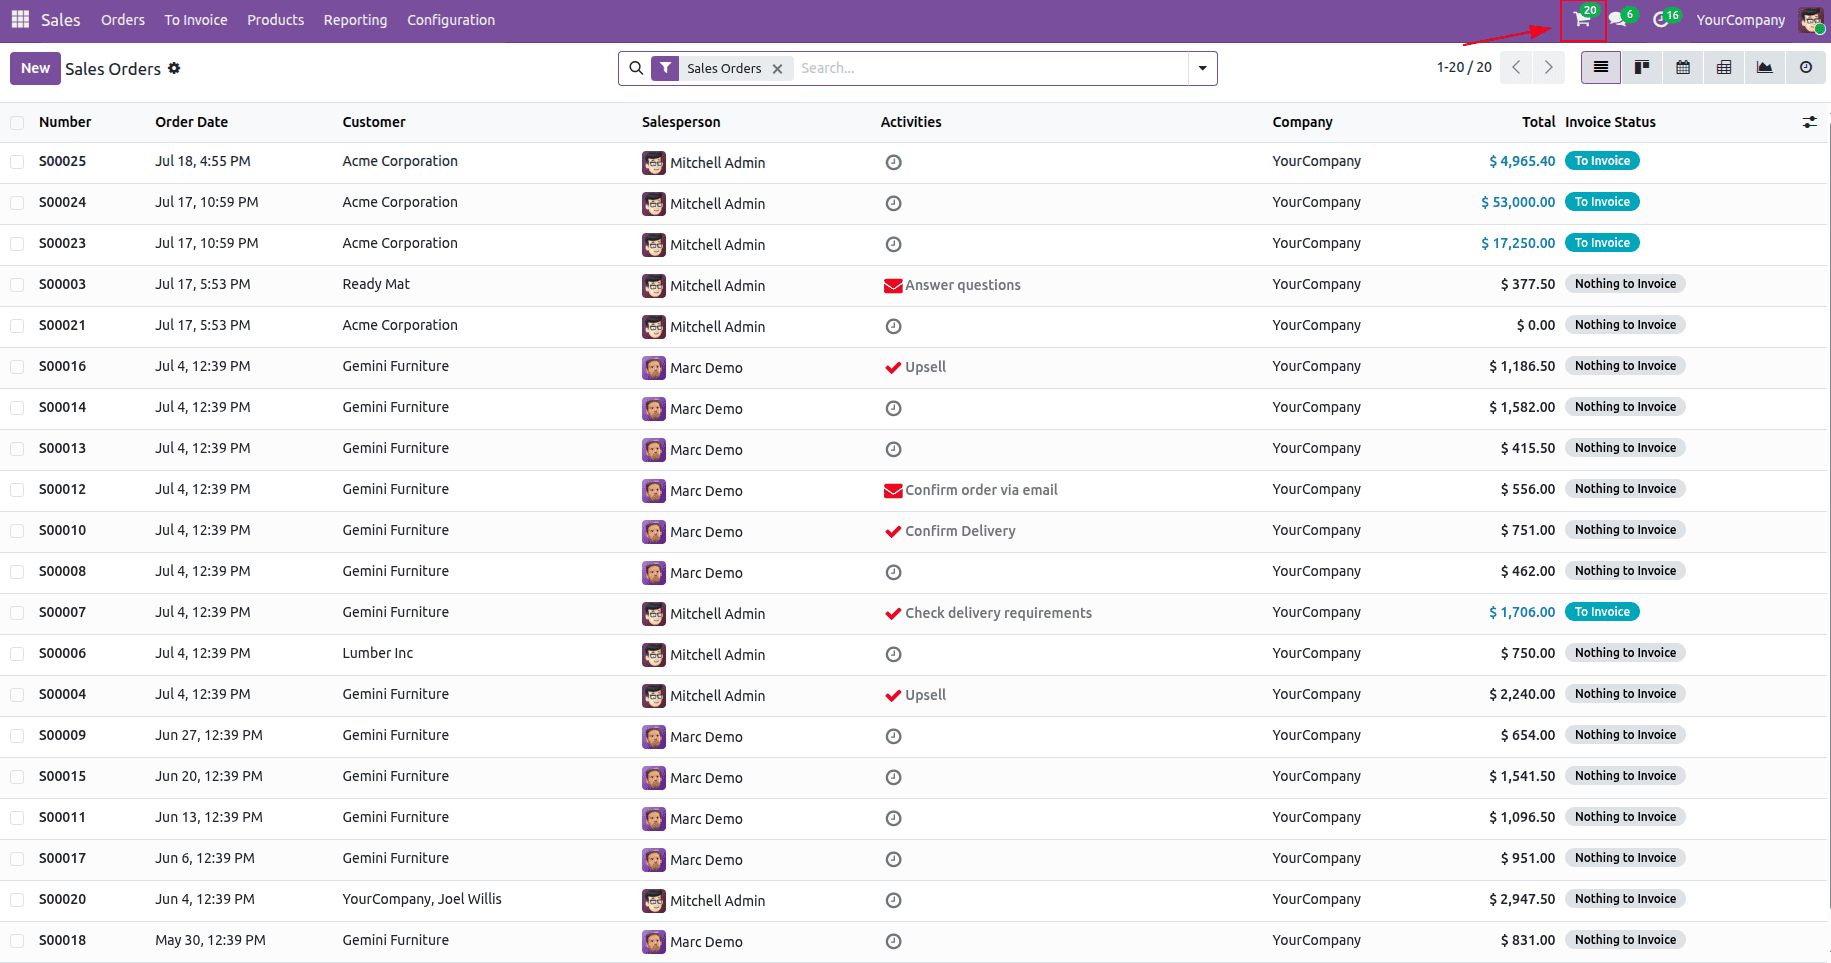
The Systray View after customisation with sales counter - View After Creating an Additional Sales Order:
In this article, we discussed the development of a systray counter in Odoo Gen 19 by linking an OWL component to the server-side bus. The component is a part of the Systray registry and gets its count via the ORM service. The overrides on the sale order model send a bus.bus message every time the order is created or its status is changed, or it is deleted, which makes the badge visible to users.
The counter used for orders is only one particular instance. You can change the model, domain, and triggering conditions and still be able to create a counter using the three aforementioned layers - ORM overrides for the model, bus channel, and OWL component.
To read more about How to Use the useBus Hook with OWL Components in Odoo 18, refer to our blog How to Use the useBus Hook with OWL Components in Odoo 18.