There are various forms on the Odoo website that users can fill out to provide information. End users can enter the data based on the fields listed in a web form.
Here the <input>element with the type=”file” attribute represents the input field. The class=”oe_import_file get_attach” allows Odoo to handle the file import functionality. The multiple=”true” attribute allows multiple files to be selected at once. The accept=”image/*, application/pdf, video/*” attribute restricts the file types that can be selected to images, PDFs, and videos. The required=”1” attribute makes the file input field required, ensuring that the user selects a file before submitting the form.
The form also includes a submit button (<button type=”submit”>Upload</button>) to trigger the form submission. When the form is submitted, the selected file(s) will be sent to the server using the HTTP POST form submission mechanism in Odoo.
Make a web form first with a file input area.
<div class=”form-group”>
      <div class=”col-lg-7 col-md-8”>
     <input type=”file” class=”oe_import_file get_attach” multiple=”true” accept=”image/*, application/pdf,video/*” required=”1”>
      </div>
</div>
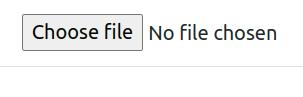
This is how the web form for uploading files looks.
_onsubmit: function () {
        var file = document.getElementsByClassName(‘get_attach’)
        const data_array = [ ]
        var count = 0;
              for (var i = 0; i < file.length; i++) {
                  var SelectedFile = new FileReader();
                  var data = SelectedFile.readAsDataURL( file [ i ] . files [ 0] );
                  SelectedFile.addEventListener(‘load’, (e) => {
                  count++;
                  const data = e.target.result;
                 data_array.push(data)
                       if(count===(file.length)) {
                         this._rpc({
                         route : ‘web/attachment’,
                         params: {
                         ‘data’ :data_array
                                        },
                                       });
                       });
                 }
 }
When the content of the file is accessible using the readAsDataURL method of the FileReader object, the load event listener is triggered. Inside the event listener, the count variable is incremented to keep track of the number of files that have been processed.
The e.target.result property contains the data of the file that was read, in this case, it will be a data URL representing the file content. The data variable is assigned this value.
The data is then added to the data_array using the push method. This array will store the data of all the files selected by the user.
After processing all the files in the loop, the condition if(count === file.length) checks if all the files have been processed. If this condition is true, it means that all files have been read, and their data has been added to the data_array.
Finally, this._rpc function is called with the route ‘web/attachment’ and the data_array as a parameter. This suggests that the data array is sent to the server for further processing, possibly to save the file attachments in the ir.attachments model.
These values are passed to a Python function. This value and the file name have been provided to a Python function.
@http.route([‘/web/attachment’], type=’json’, auth=’public’)
def create_attachment(self, **dat):
      data_list = [ ]
      for data in dat[‘data’]:
           data = data.split(‘base64’)[1] if data else False
           data_list.append(( 0, 0, {‘attachments’ : data }))
      request.env[‘ir.attachment’].sudo().create(
                                 {
                                   ‘name’ : dat[name],
                 ‘type’ : ‘binary’,
                                   ‘datas’: ‘data’
                                  }
This code defines a route /web/attachment that accepts JSON requests and allows public authentication.The function arguments (**dat), which are passed as a dictionary. Inside the function, an empty list data_list is initialized.
This list will store attachment data. The code then iterates over the data values in the dat[‘data’] list. For each data value, it checks if it exists (data) and splits it by the string ‘base64’.If it exists, the second part of the split (data.split(‘base64’)[1]) is assigned to data; otherwise, false is assigned to data.
The modified data is then added as a dictionary with the key ‘attachments’ to the data_list.
After the loop finishes, the code creates an ir.attachment record by calling the create method on the request.env[‘ir.attachment’].sudo() object.