Automated actions trigger result actions. They are based on conditions that take place in addition to the standard business logic of Odoo. By utilizing automation, business apps offer rapid and effective customer activities. Customers may buy goods by paying for them, and companies can thank them by giving out contact information, sending an SMS, or sending an email.
These automated processes allow rapid access to deals and discounts for particular goods in a store. Access Control Lists may be used to access and change private databases that are only accessible by employees and are common in businesses. Users can utilize filter options and make modifications to the database by setting filter rules. Daily company activities depend on automated processes; currently, all corporate resources use computerized procedures. For instance, the Odoo platform has many automated tasks and features, which makes it a useful tool for organizations.
In this blog session, we will discuss the two functionalities, "Automated Actions” and “Filter Rules,” available in the Odoo 16 Studio Module. The “Filter Rules” menu will help add additional features to the Filtering sections of the different menus of the applications through the Odoo 16 Studio platform.
Creating a New Automation Rule
Creating various Automation Rules can be done easily and quickly using the Odoo 16 Studio Module. There is no need to manually update each and every field of your application platform, which contains a large amount of data fields because you can put the automatic rules anywhere in your application's fields.
You can open the Studio editing section of any Module to check out the process and functions involved in the creation of a new automated rule. In this segment, we're going to learn how to properly set up new automation and filter rules for the expenses module.
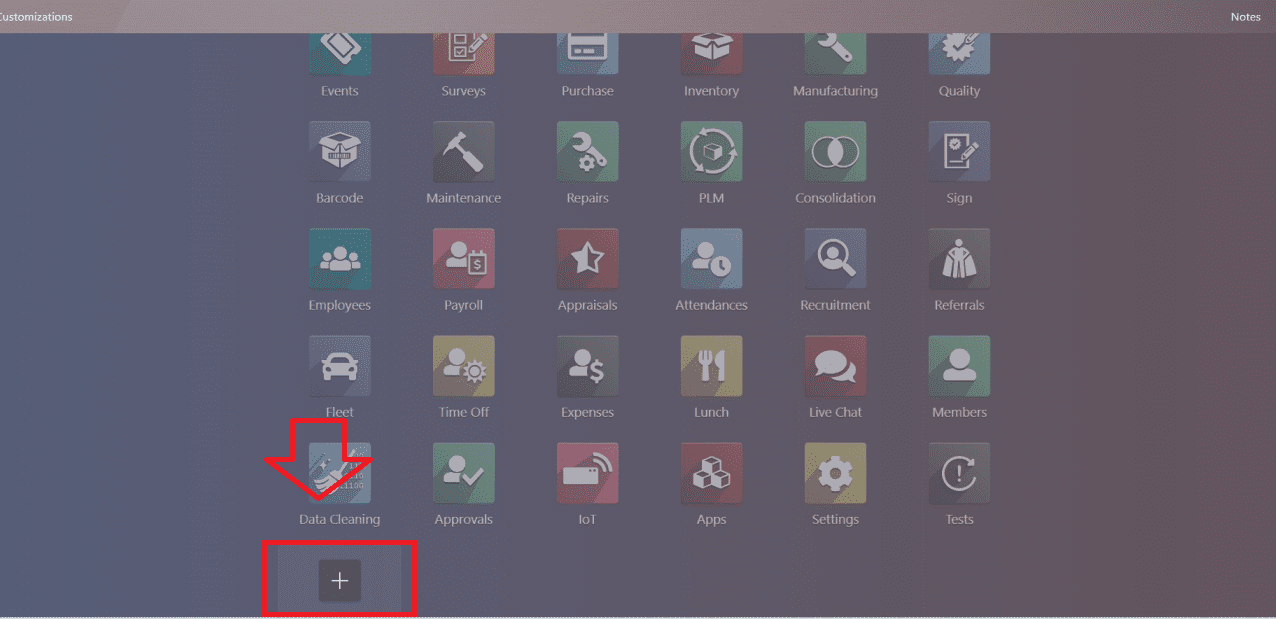
Here, I am creating a new application using the Studio Module to demonstrate the functionality. After installing the Studio Module, you will see a "Toggle Studio" icon on your Odoo Platform menu. Click on this icon to create a new application, modify existing ones, or add a new one by clicking the "+" button.
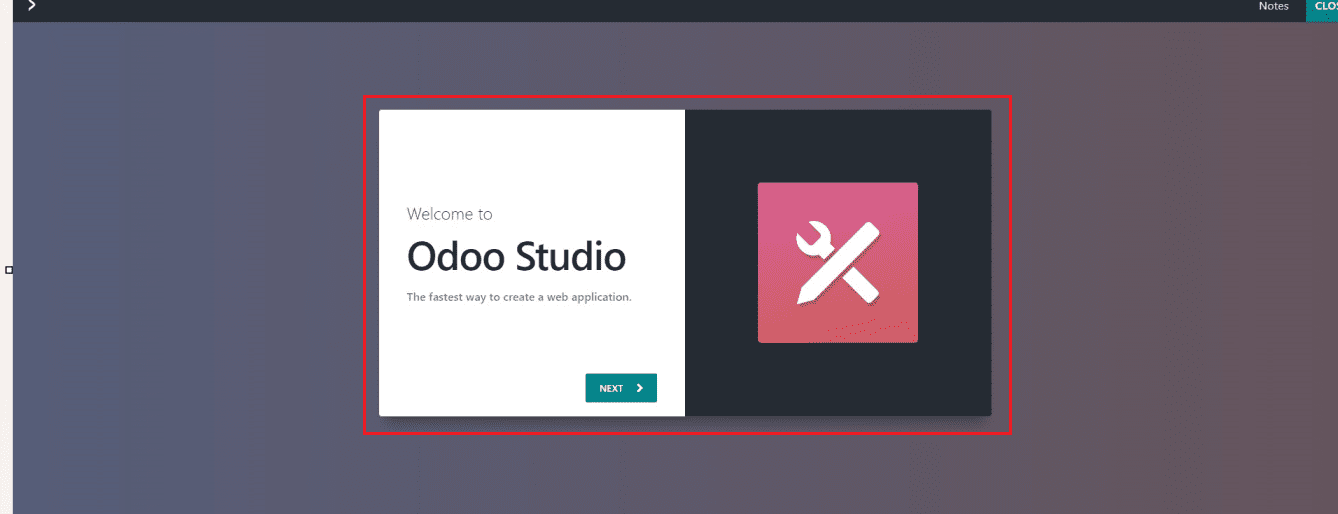
After pressing the “+” icon, you can start editing the Application by proceeding with the “Next” button.
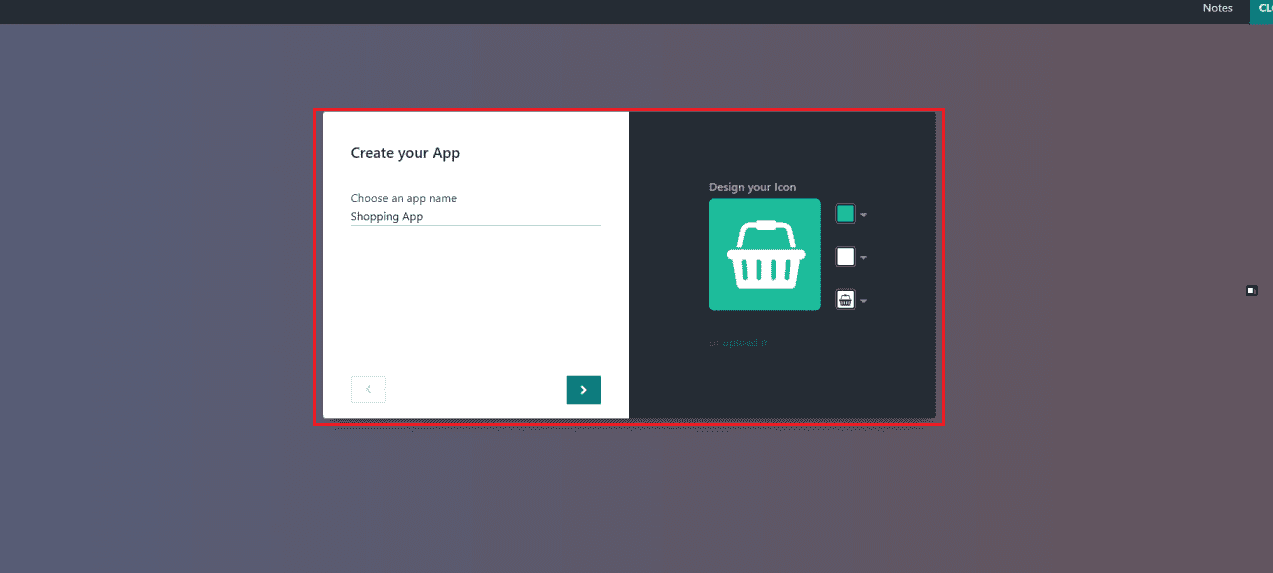
Then, start providing the Application Name, Icon design specifics, etc.
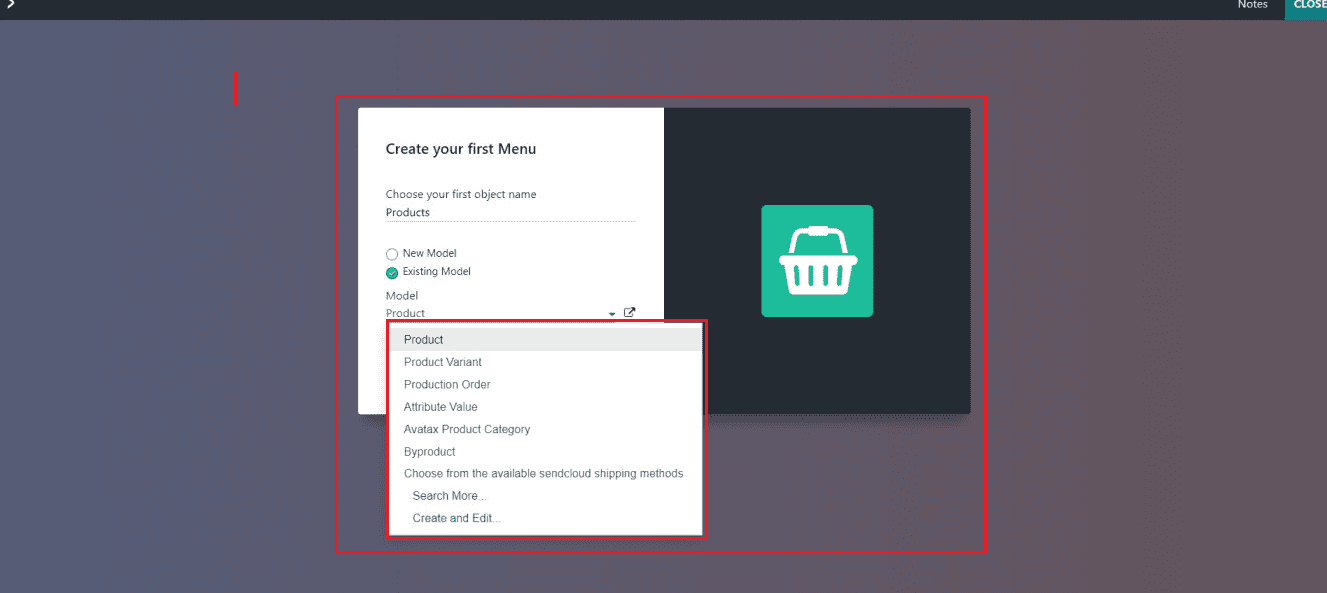
Decide the first and main menu of the application and select the Application Model from the window. Provide the "first object name" and specify if it's a new or existing model before creating an application model. To modify or customize the specifications of your model, use the interlink option.
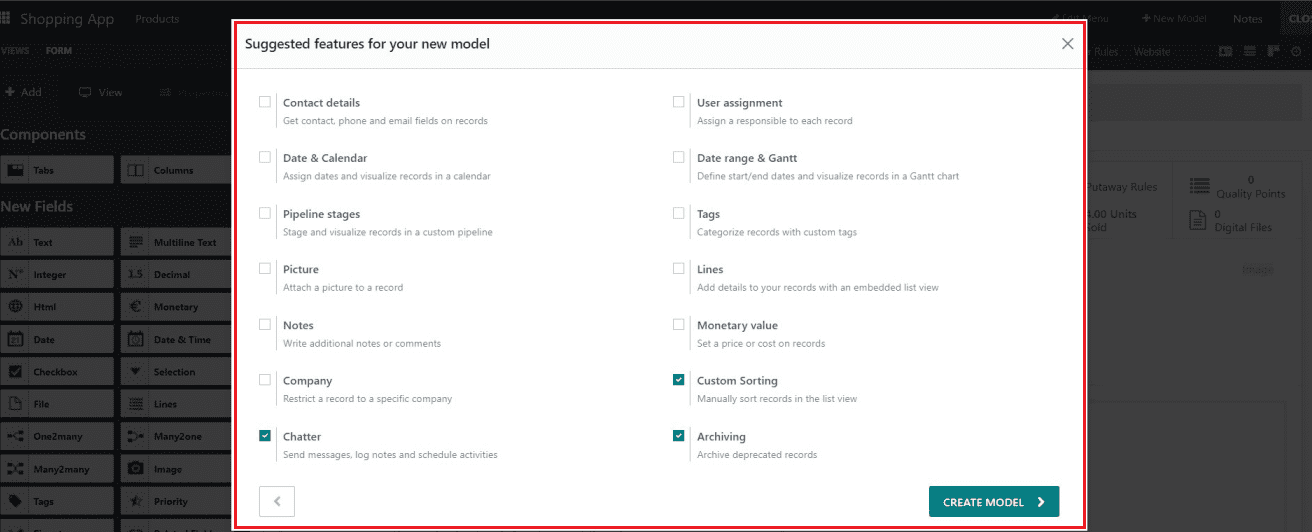
If you select the first object name as “New Menu” you will be able to select the features for the new model from a pop-up window, as shown below.
Completing these basic steps will save the Model data and create the application platform with the provided data as shown below.
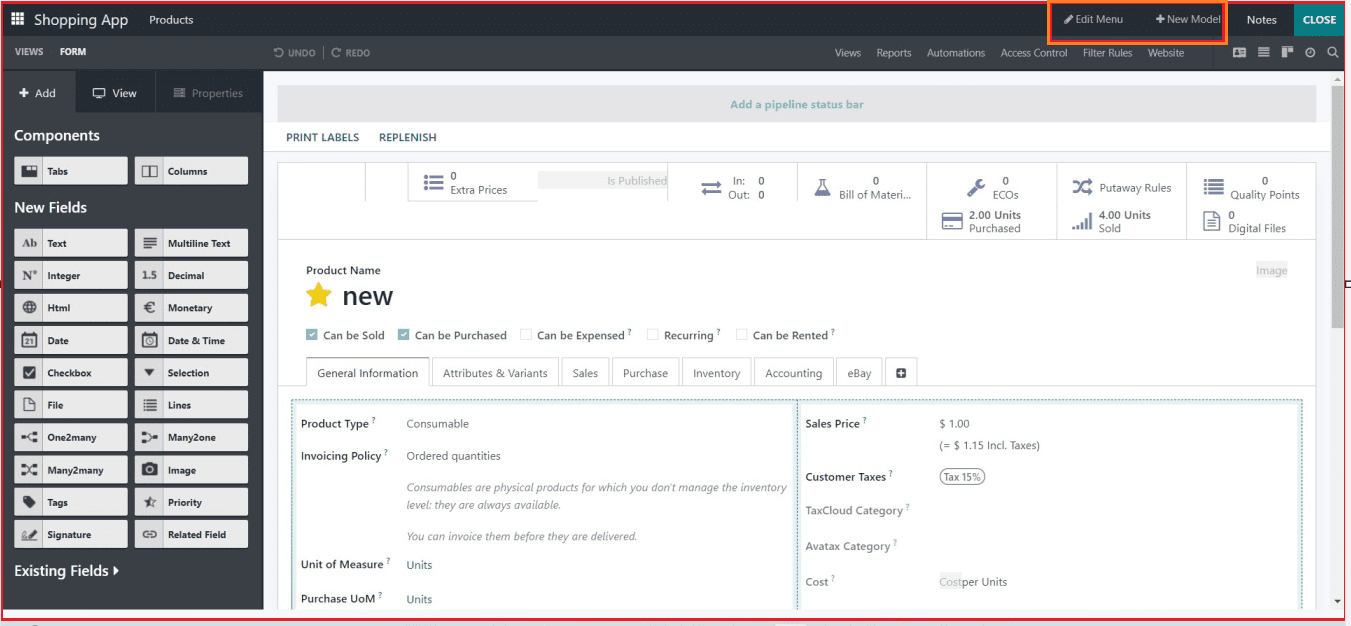
This is the first form view of the application form view that we have created. Now, we can add more menu items, sub-menu, and form features from this interface itself.
You can see the application has only one menu currently. So we can create more menus using the “+New menu” button available at the top right corner of the menu bar. To learn more about creating an application using the Studio Module, you can refer to the l provided below.
Creating Pipeline Stages and Applying Automation
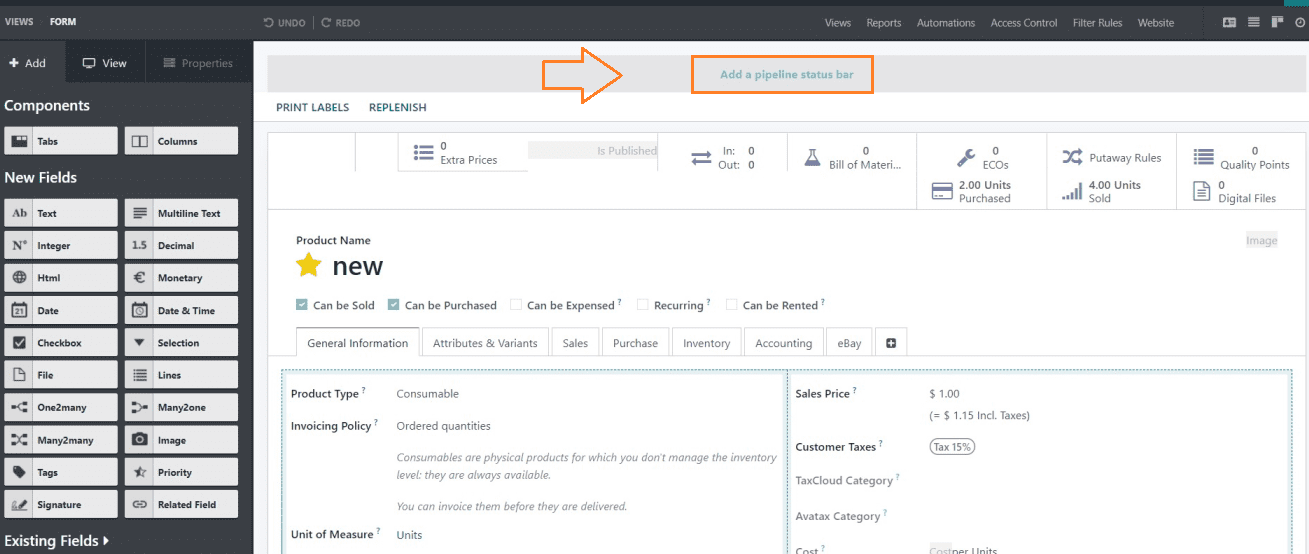
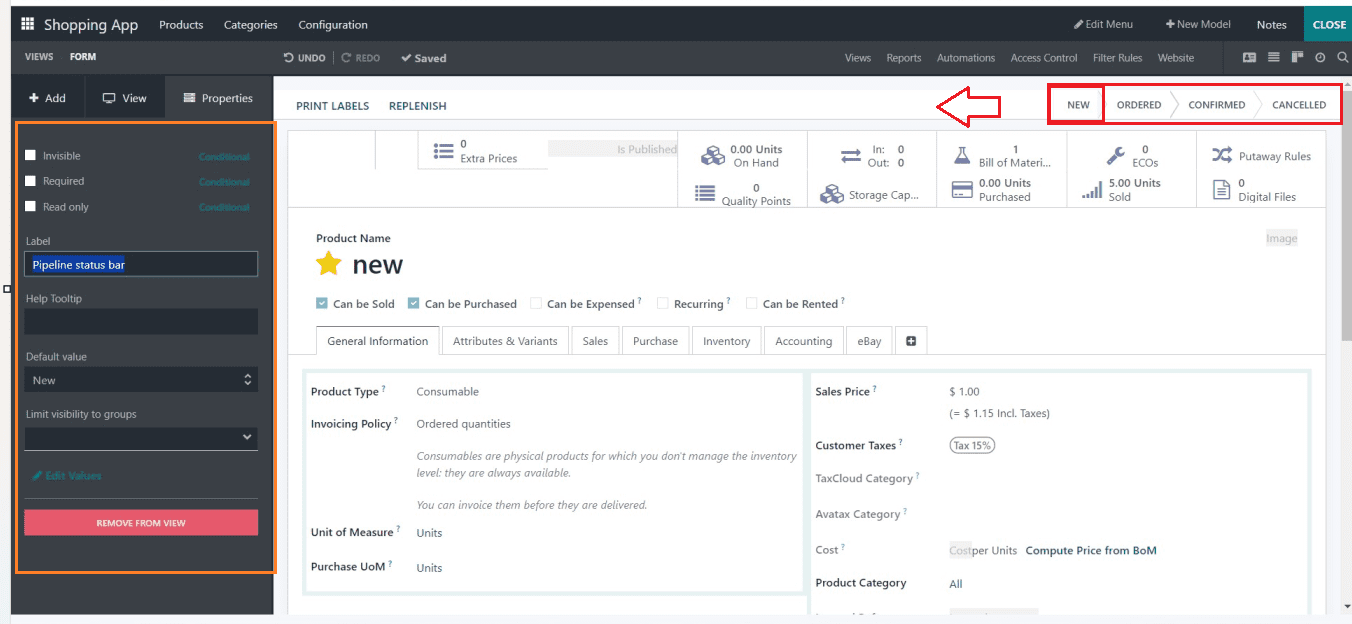
In this blog session, we are going to create some pipeline stages and apply automation activity for the different stages. So, Let's create some Pipeline Stages such as “New,” “Confirmed,” “Ordered,” and “Cancelled.” We can click on the “Add a pipeline status bar’ button available at the top of the form.
You can just type the required pipeline stages inside the pop-up “Field Properties” window displayed as shown below.
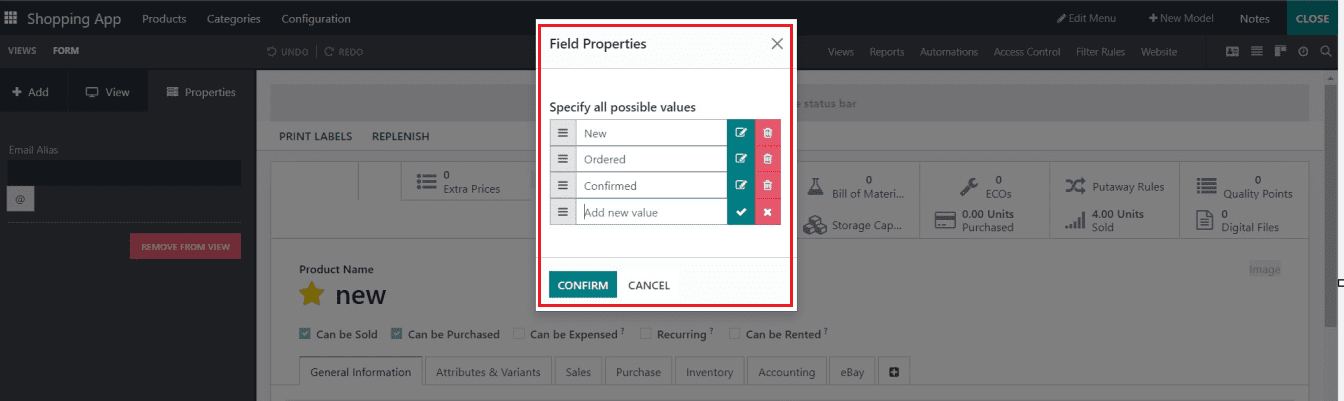
Just click on the edit icon and type the stage name. Additional stage fields can be added by clicking on the “Add new value” button. Here, I have created some stages named ‘New,” “Ordered,” “Confirmed,’ and “Cancelled.” Then save your stages using the “CONFIRM” button and go to the form view. You can see the stages have been added to the pipeline section of the form view, as depicted below.
Setting Automation
Using the Automation property, you may create automation for any field anywhere in the Odoo application. But for now, we're looking at how to automate certain pipeline phases to update the stages of an activity. After establishing an automated action based on certain conditions, these stages will be automatically updated.
After editing the stages, you can simply click on a particular stage field so its editing area will be displayed on the left side of the window. Now, we can configure automation for the stage. To add a new automation rule, select the "Automation" option. This operation will expose a dashboard of different "Automated Actions" that now seems to be empty, as seen below.
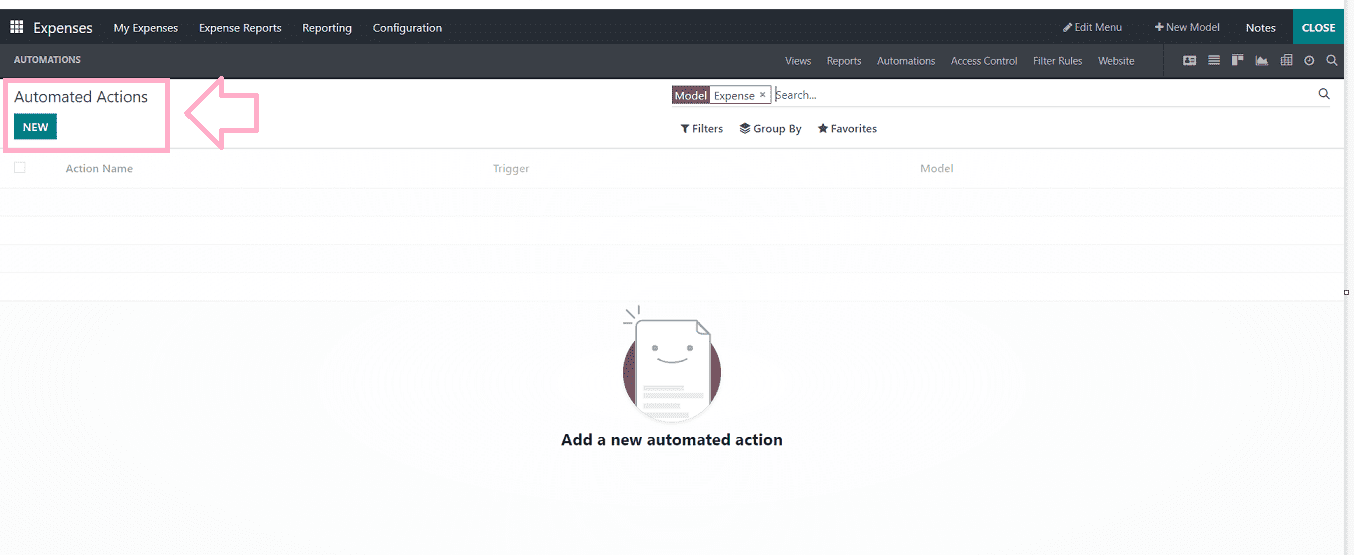
Click on the “NEW” button to open the automated rule creation window.
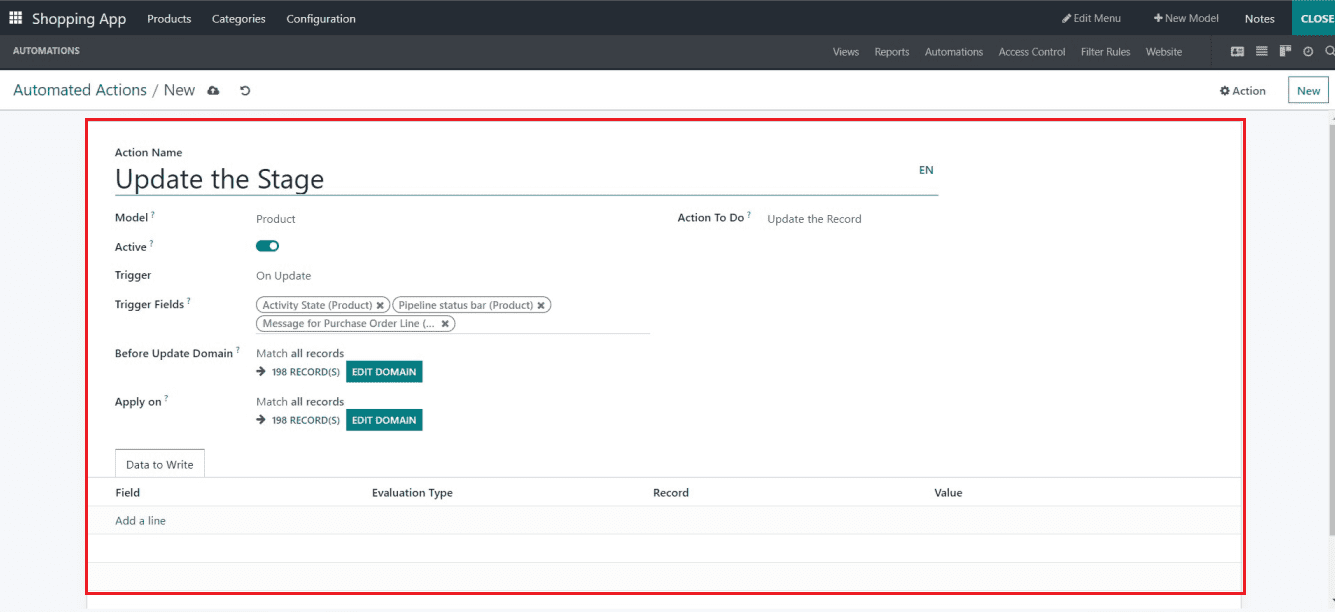
You can update your automated action name in the "Action Name" field of the displayed form window, which has numerous fields accessible. It will automatically display the "Model" of the automated action, and the “Active” button can be turned on or off to activate or deactivate the automated action. Then you have to fill the exact ‘Trigger,” “Action To Do,” “Trigger Fields,” “Before Update Domain,” and “Apply On” fields, respectively. Let's check out each field's detailed description.
Triggers
Choosing the trigger action from the "Trigger" field is the most important step in implementing an automated action. There are possibilities in this section so that you can choose the trigger based on the perspective of the automated action.
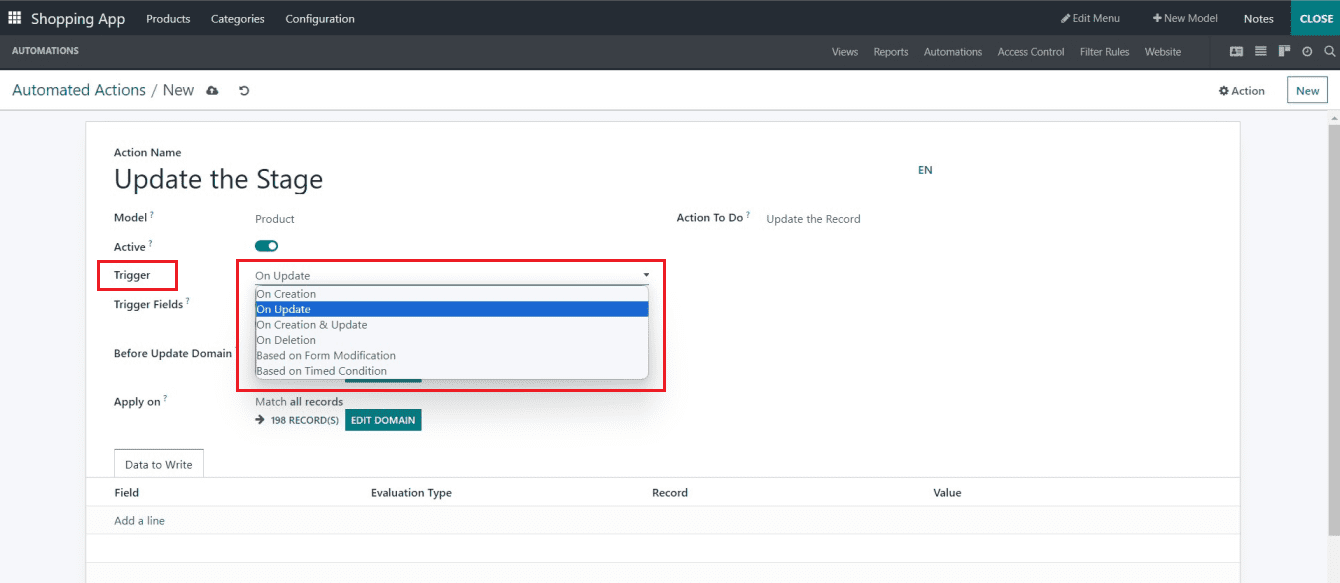
On Creation: When a record is generated and subsequently saved, the action is initiated.
On Updation: When a record that has already been saved is modified and then saved, the activity is initiated.
On Creation & Update: When a record is generated, saved, or later modified and saved, the activity is initiated.
On Deletion: On the removal of a record, this trigger will be activated.
Based on Form Modification: When a user modifies the value of a trigger field on the Form view, even before saving the record, the action is initiated. This action just affects the user interface; it won't take effect if the field is altered by another action. (Development is necessary since this trigger can only be utilized with the Execute Python Code action.)
Based on Timed Condition: When the date or date and time value in a trigger field is reached, the action is initiated.
Action To Do
The “Action To Do” field is the section where we are defining or setting the result action of the triggered action. The tasks that need to be completed when the Automated Action is triggered to begin working are listed in the Action To-Do. There are several "Action To Do" alternatives to choose from, as illustrated in the screenshot below.
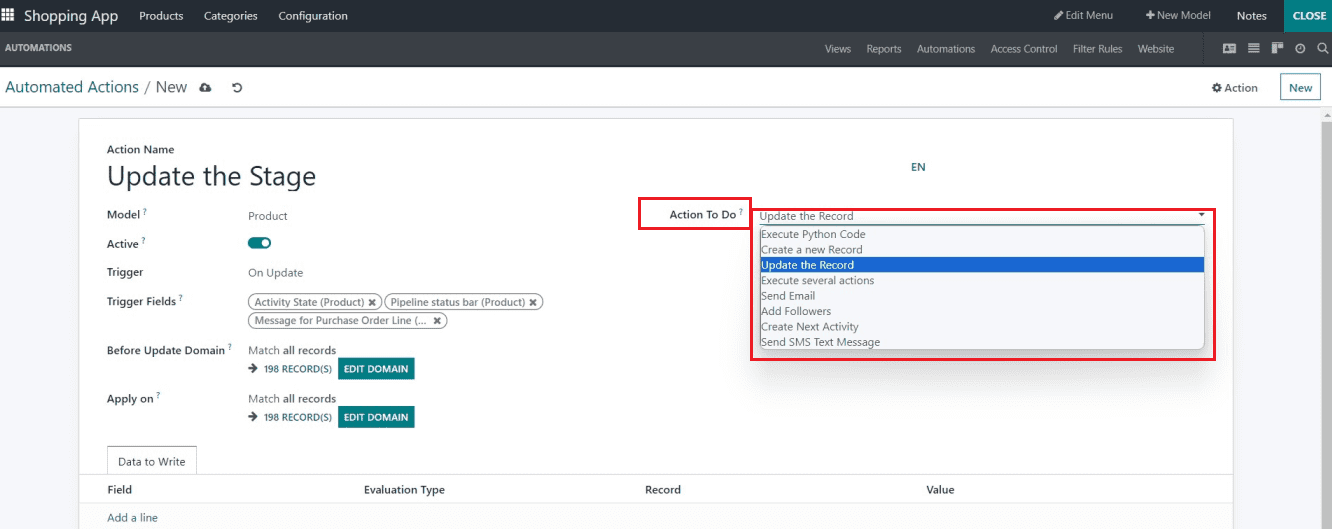
Execute Python Code: This procedure is used for executing any specific Python code as a result of a trigger.
Create a new Record: A new record can be made on any model with the action.
Update the Record: This action adds an update to an existing record or field.
Execute Several Actions: Multiple actions are triggered simultaneously by the action. To do this, select “Add a line” from the Actions menu.
Send Email: The action is used to email a contact who is associated with a certain record. After choosing this option in the form, you have the ability to choose or create an email template.
Add Followers: Existing contacts are subscribed to the record using the action.
Create Next Activity: A new activity associated with the record is scheduled using the action.
Send SMS Text Messages: An SMS is sent to a contact associated with the record using the action. You can choose or create an SMS Template to accomplish this.
Trigger Fields
The “Trigger Fields” area can be used to mention the trigger fields that affect the automated action. You can select any exact appropriate field from the dropdown list provided under the field.
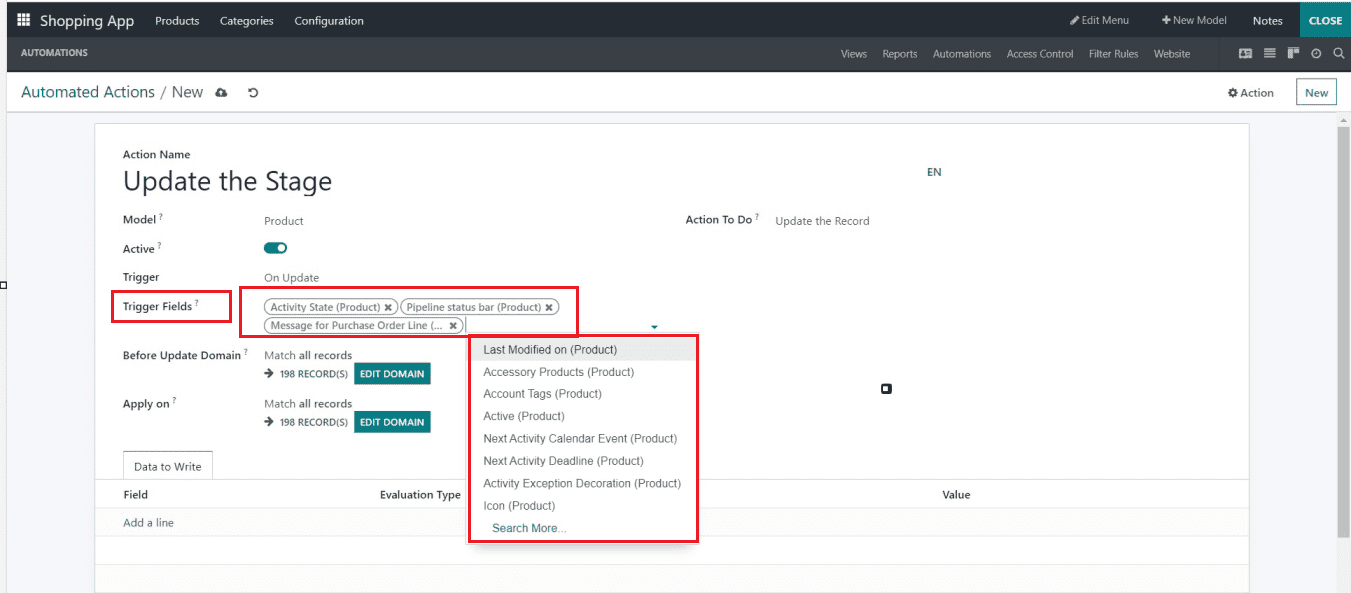
In this instance, I've chosen the “Purchase Description (Product)” and “Next Activity Deadline” as the trigger field; thus, updating any data on this trigger field will cause the updation of the product stages inside the stages field.
When a record transitions from one state to another, the "Before Update Domain" field is used to track the change. You will be able to notice when a record switches from one state to another using this. You can also set conditional filters using the “EDIT DOMAIN” button. This button will open a domain editing window, as shown below.
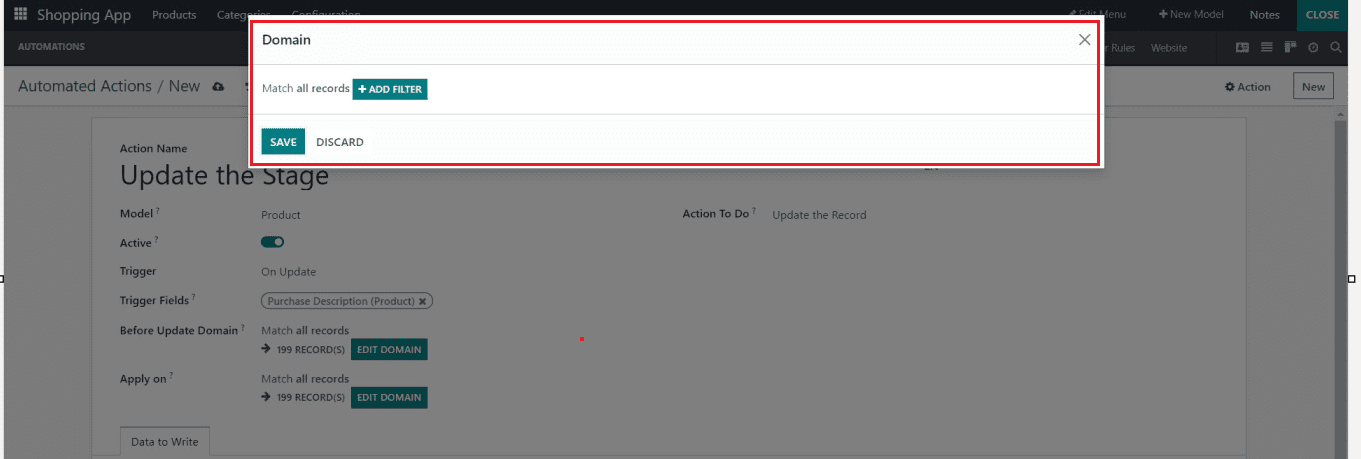
Click on the “ADD FILTER” button to edit a filter rule and provide the condition inside the relevant fields, as shown below.
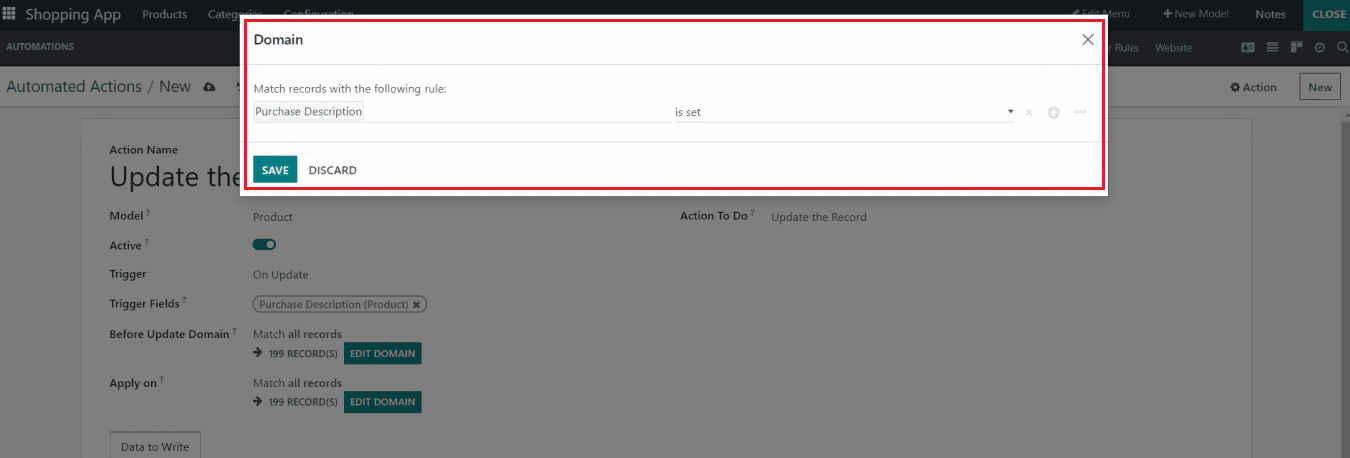
After setting the condition, you can save the details using the “SAVE” button and come back to the form view.
The “Apply On” field on the configuration form determines which model records should receive the automatic action. It functions in the same way as applying filters to a model operates. Edit domains and showing matched records based on chosen domains are both possible using the “Apply On” option.
Data to Write Tab
New record values are specified on the “Data to Write” tab. Firstly, Pick a field by clicking on the “Add a line” option, then select the “Evaluation Type.” While “Records” adds internal ID to the “Value” field, Value only offers raw value in the “Value” column.
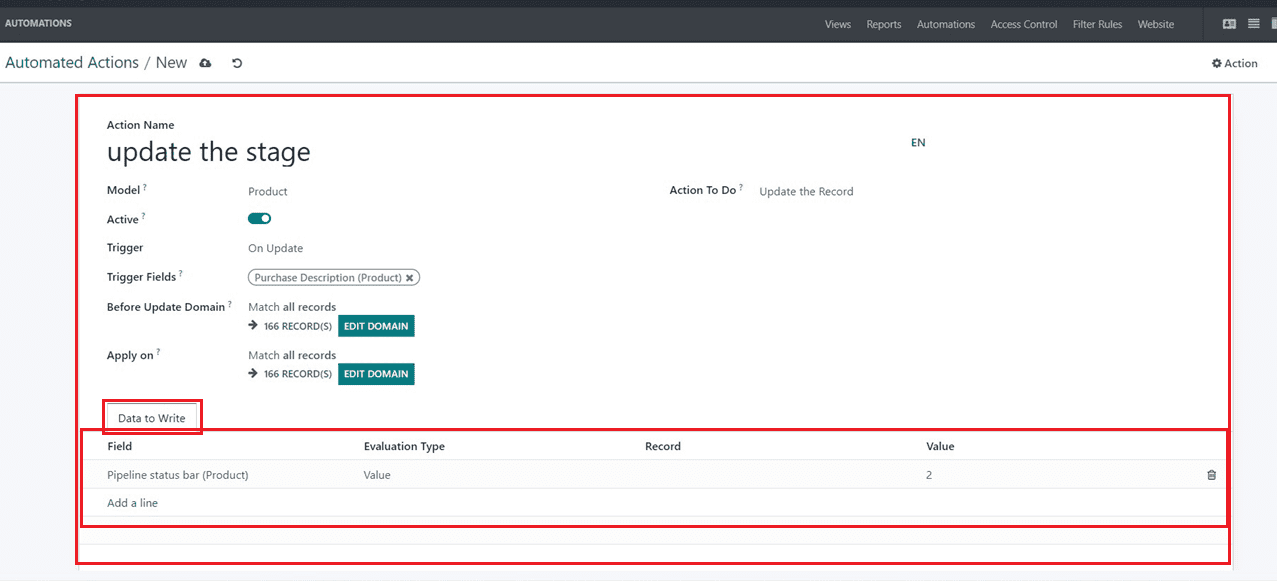
Save the Automated action details using the “Save” icon. The status of the product stage will be automatically changed from “New” to “Ordered” if the user does an updation in the “Purchase Description(Product)” field, and the updation will take place in the “Pipeline Status Bar(Product)” Field.
You can turn on any automatic activity in your application using the same technique. The selection of the proper Action To Do, Triggers, and Trigger Fields is all that has to be kept in mind. After saving automations, close the studio editing area and return to the application platform to experiment with the automation feature by altering trigger fields within a form view, as shown below.

This feature inside the Odoo Studio Module allows you to automate any field or stage inside the form view.
Next, we are going to check about the process of applying various Filter Rules inside the Studio platform.
Creating Filter Rules
One unique tool for configuring apps on the platform is the Filter Rules menu, which is accessible in the Odoo Studio module. Furthermore, this menu will assist in bringing extensive characteristics to the Filtering components of the various menus of the applications that are being created using the Odoo Studio module.
The filtering components needed for various data management can be specified in the “Filter Rules” and maintained using the Odoo 16 Studio module. You can turn these features on or off. The Odoo platform establishes the default filter components. To create a new Filter Rule, go to the “Filter Rules” menu available inside the Studio Editing section of any module. Here, we can see how to apply filter rules inside the Odoo 16 Expense Module itself.
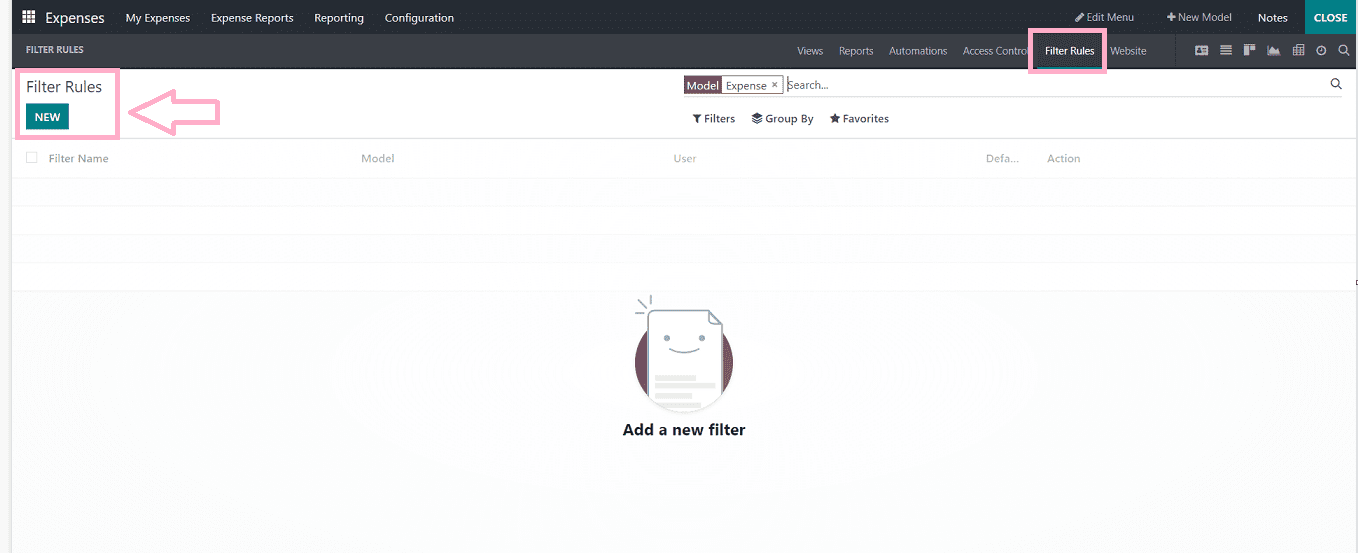
You will be provided with a Filter Rules Dashboard that contains “Filter Name,” “Model,” “User,” “Default Filter,’ and “Action.” Since there are no Filter Rules in this situation, we can create a new one by clicking the "NEW" button.
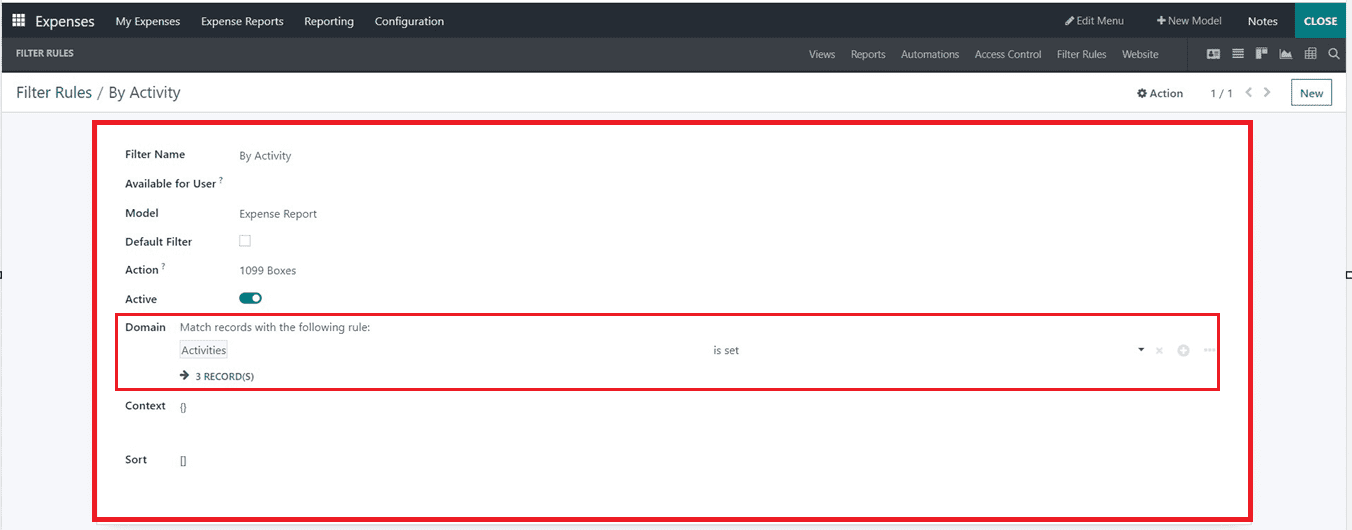
You must enter the “Filter Name,” and If necessary, you can set the filter rule for only a particular user inside the “Available User’ field. The “Model” of the Filter Rule will be auto-updated as per the currently used Application. You can set this filter as a default filter by choosing the “Default Filter” checkbox.
The “Action” field can be used to set an appropriate menu that this filter will apply on, and “Active” can be defined by turning it on in accordance with filter functionality. You can apply filters in the “Domain” field based on the website's web pages. The “Context” is sorted by naming the appropriate “Domain.” The “Save” icon will then need to be clicked. It will be at the top of the Filter rules, as seen in the image above. Now, your new filter rules will be activated inside your application platform.
Here, I have created a simple filter rule to filter the records based on “Activity” inside the “Expense Report” Model. In the “Domain” area, edited the customized filter rule such as “Activities - is set.” You can click on the “RECORDS” button in the filter rule configuration form to see the available records. This filter will show the records with entries in their "Activities" section, as shown below.
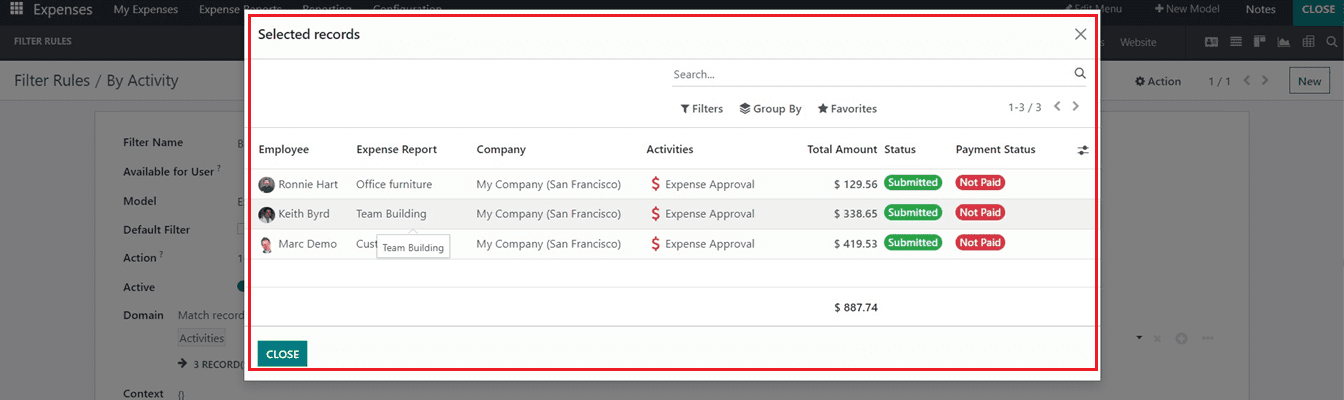
Once the filter criteria have been saved, these records can be accessed from the the “Expense Reports” menu of the Expenses Module.
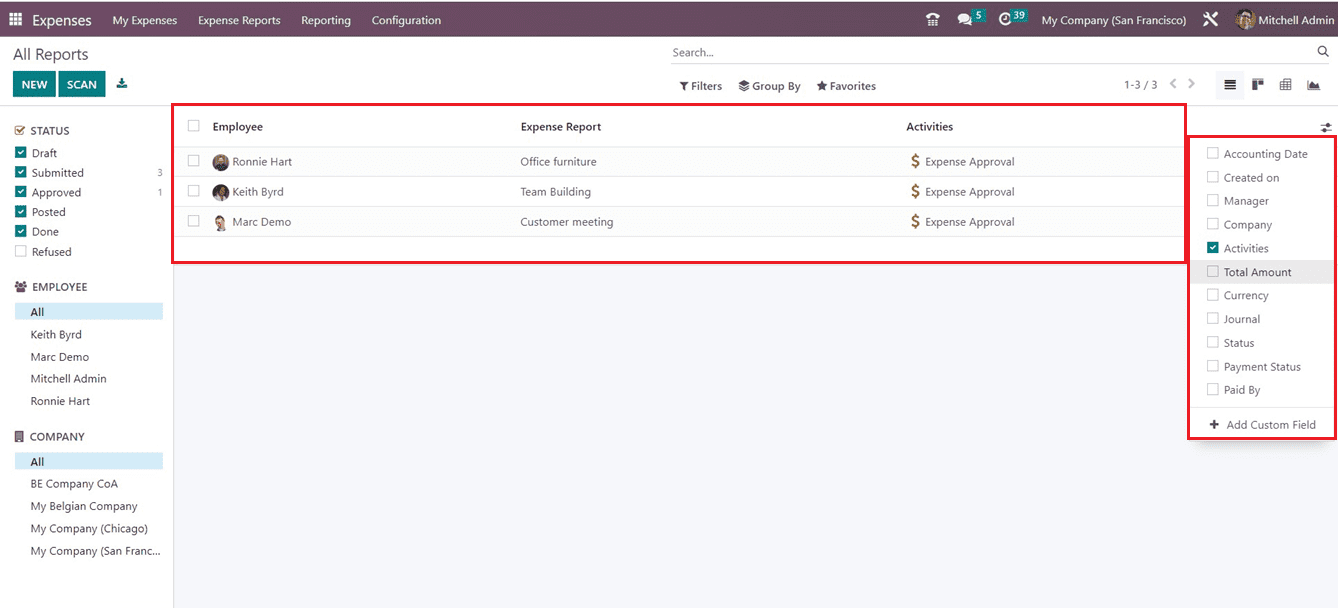
The right-side filter icon provided in the dashboard allows you to select from a variety of previously set filter rules, such as "Accounting Done," "Created On," "Manager," "Company," "Currency," and so on. Additionally, clicking on the “+Add Custom Field” button will immediately open the studio editing interface, where you can also edit the required dashboard fields or any additional App specifics.
The Odoo 16 Studio Package's Filter Rule functionality makes it simple for users to design unique filter rules for their specific tasks.