Data is the backbone of every application, and ensuring its safety is critical for uninterrupted business operations. In Easy Instance, automatic database backup plays a vital role in protecting your system from data loss caused by server failures, accidental deletions, or unexpected crashes.
This blog explores how Easy Instance simplifies database backup management by offering multiple reliable and secure storage options. By providing support for popular backup options such as FTP, SFTP, Google Drive, Nextcloud, Dropbox, and Amazon S3, you can find the most suitable option for your needs. All these backups will run in the background without requiring any effort on your part, and your data will be safe and recoverable at all times.
FTP:
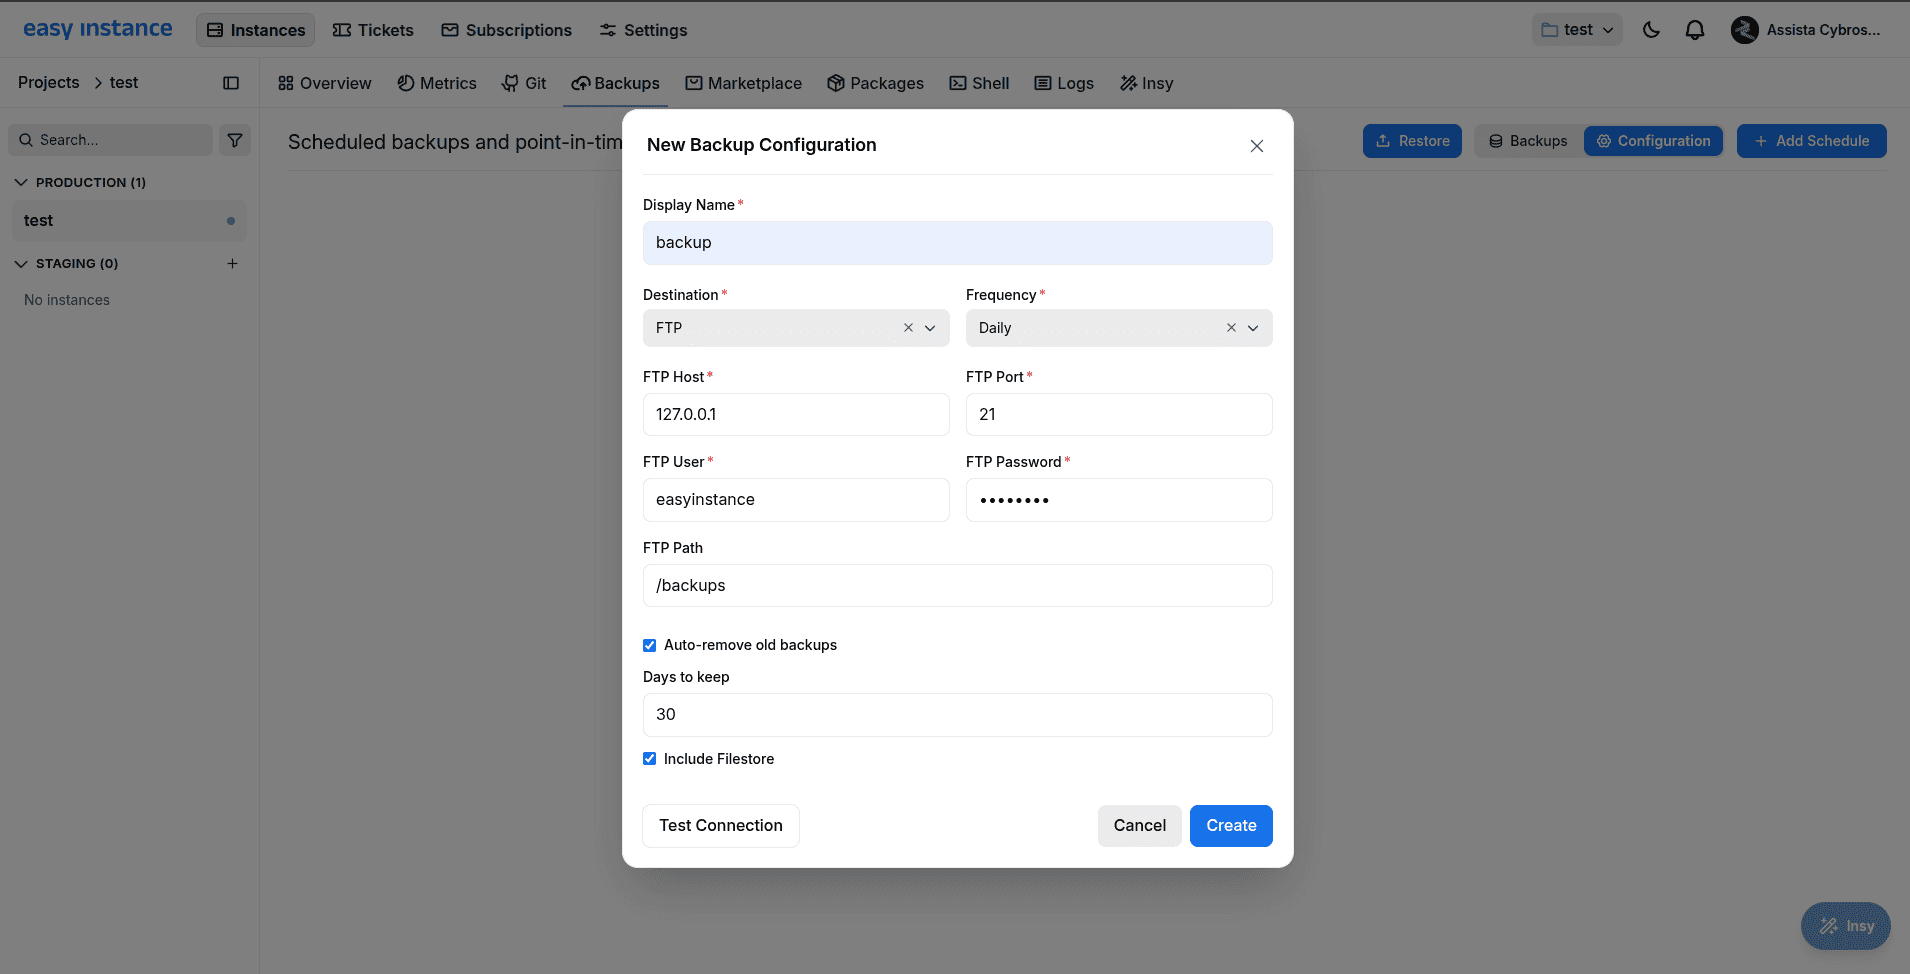
Before setting up FTP backups, ensure that an FTP service is installed and running on the destination server (domain machine).
- Choose the FTP location as the backup destination.
- Provide FTP Host, Port, User Name, and Password.
- Enter the FTP Path for saving backup files.
- Perform testing to verify all credentials and paths.
SFTP:
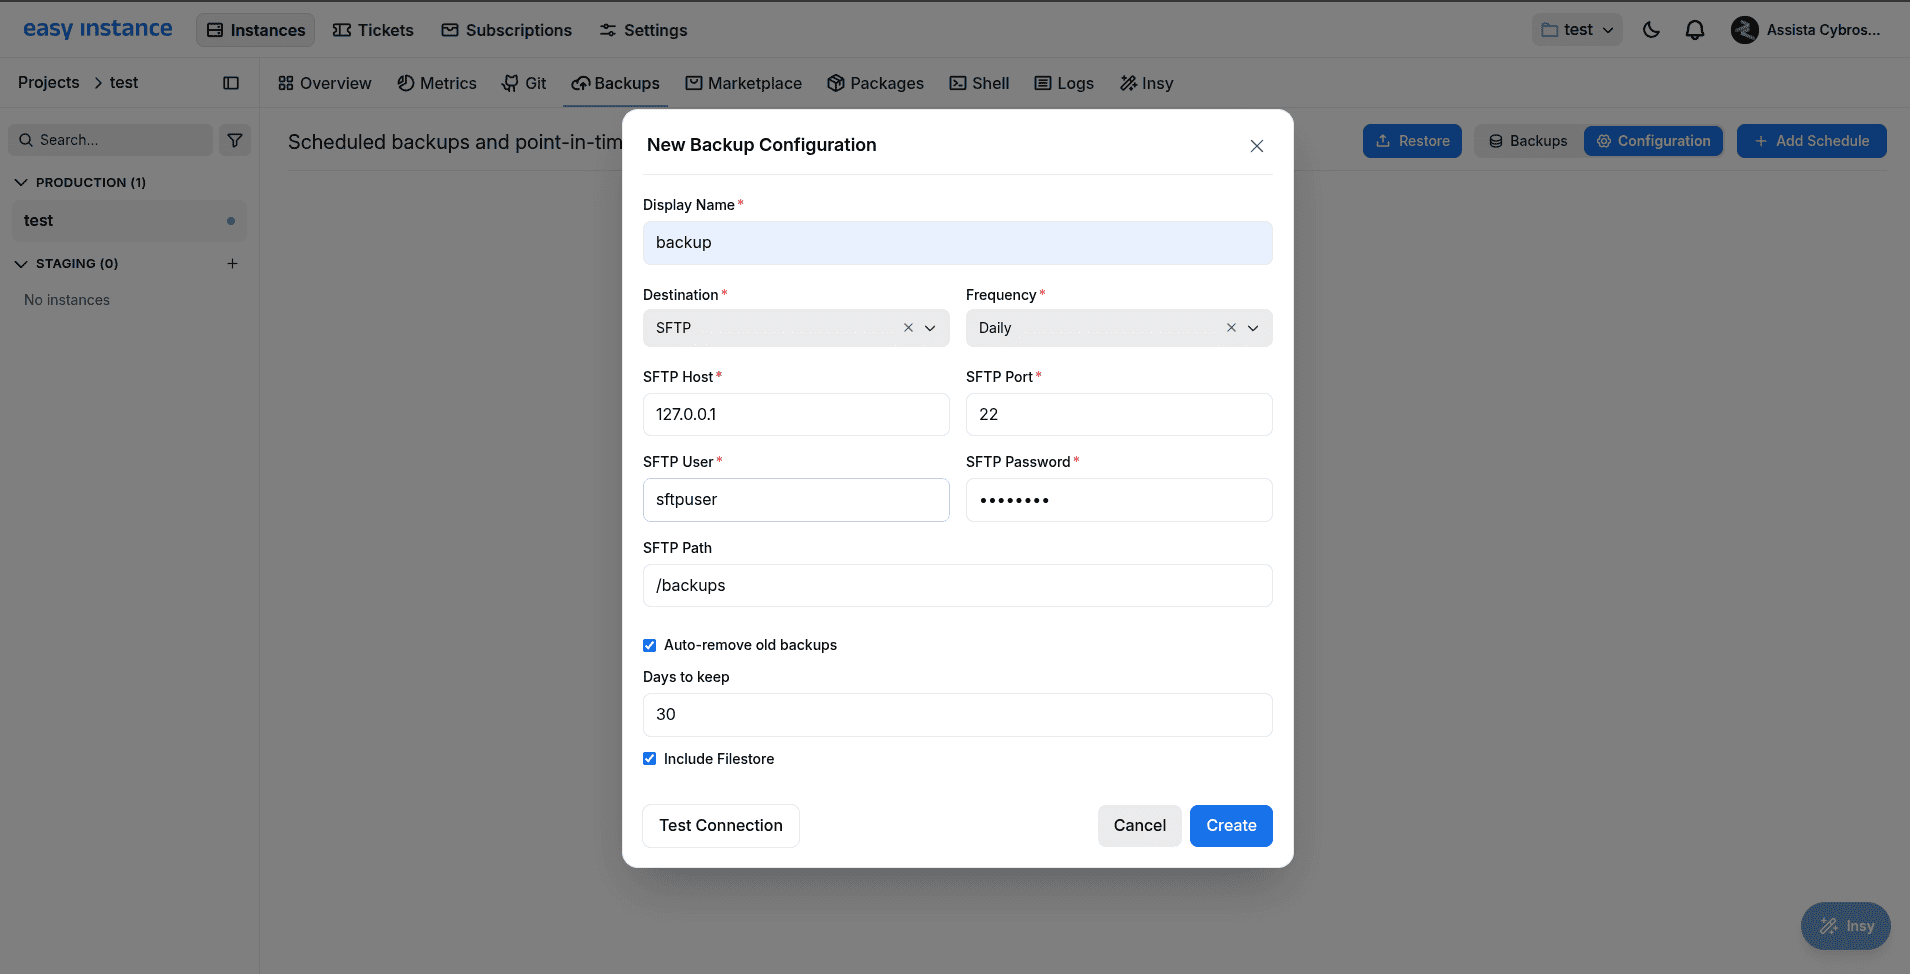
Before configuring SFTP backups, ensure that the SSH/SFTP service is installed and running on the destination server (domain machine).
- Select SFTP as your backup destination.
- Provide the SFTP Hostname, Port, Username, and Password.
- Provide the SFTP Destination Directory path for storing backup files.
- Verify the connection to ensure proper credentials and access to the directory.
Google Drive:
Configuration for backup to Google Drive:
Step 1: Set up a Google API project
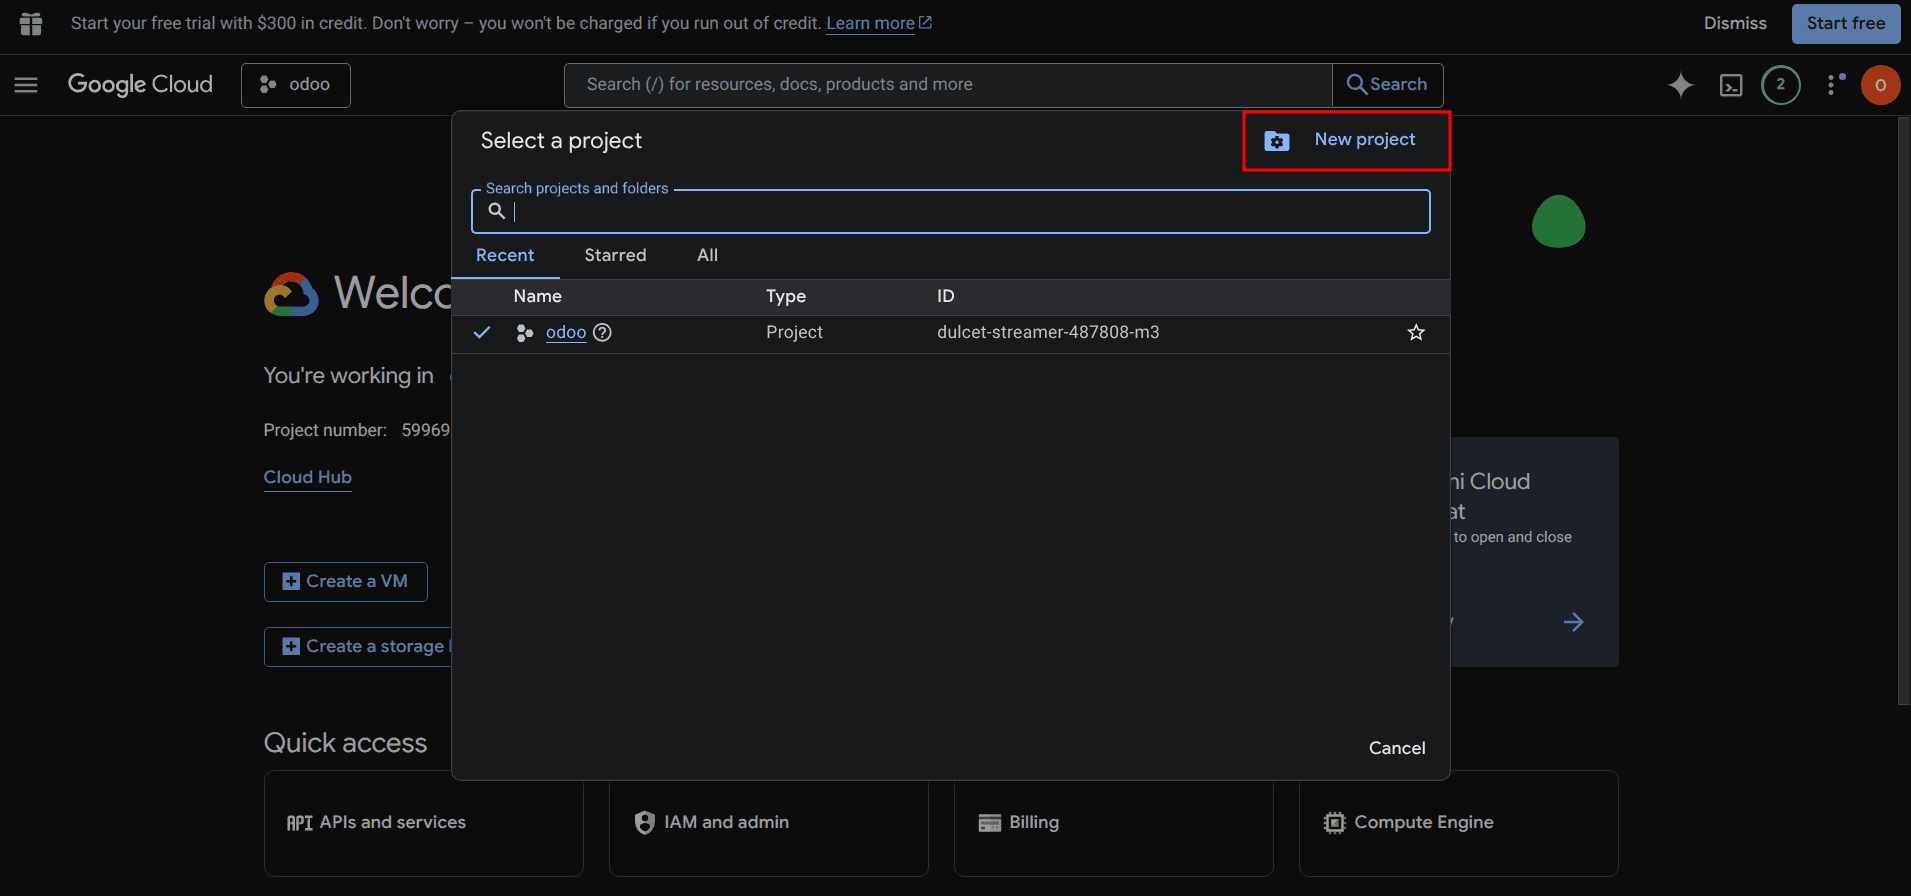
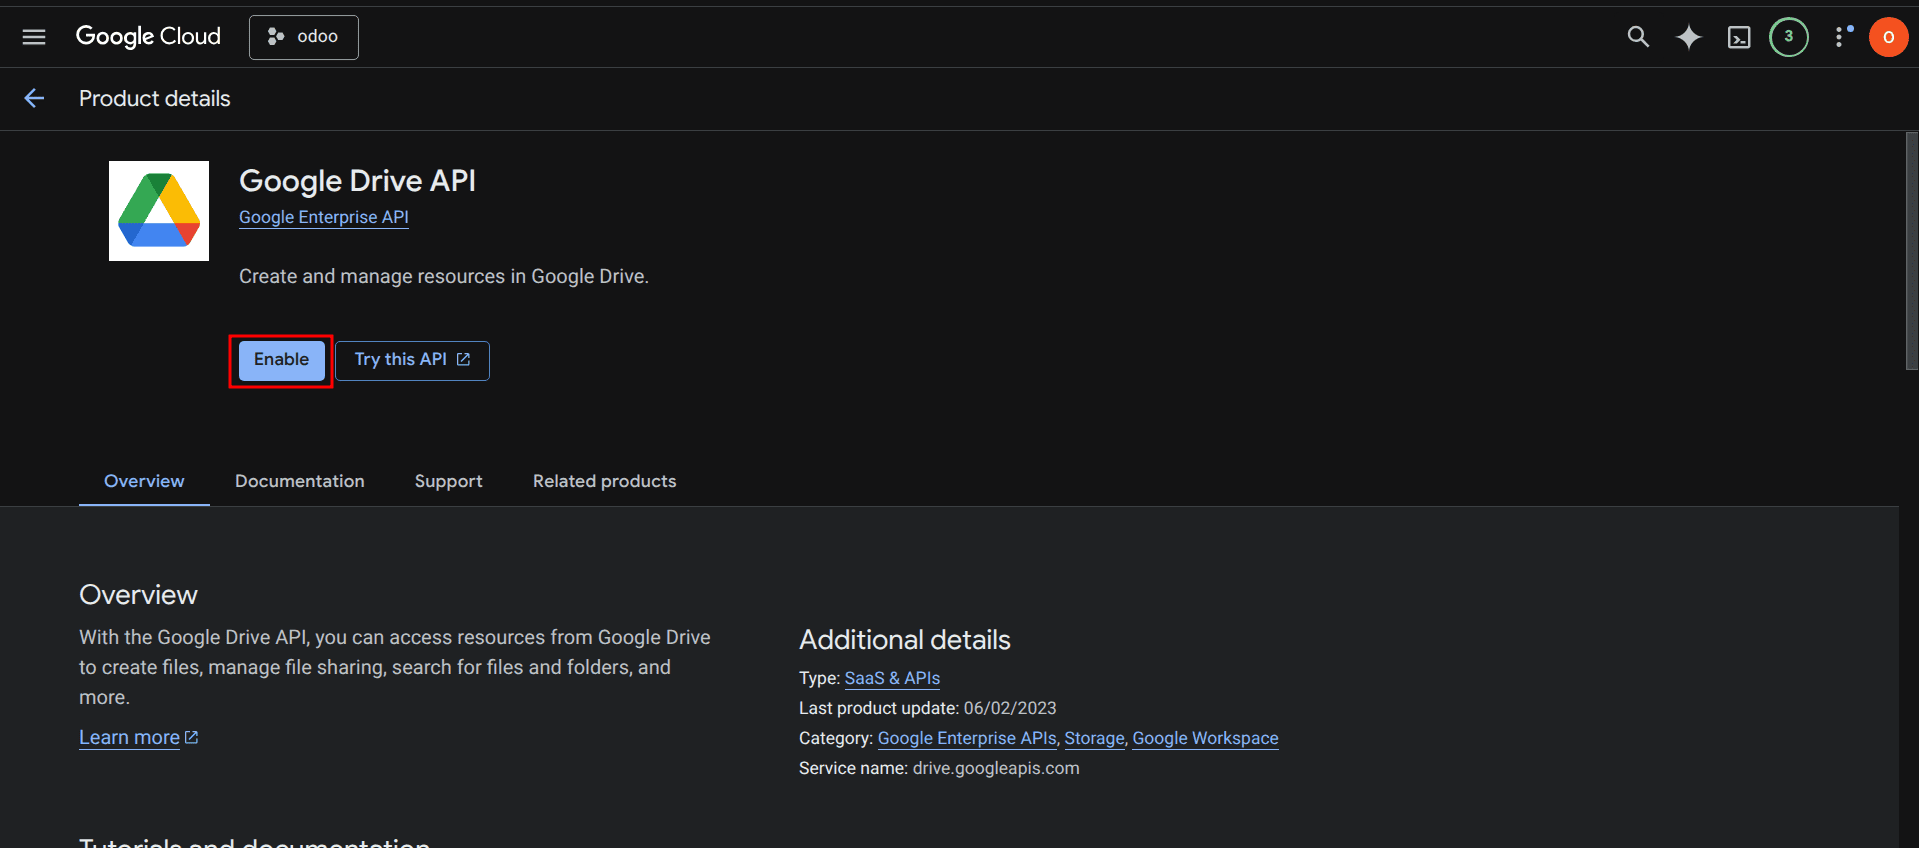
- Under the left navigation menu, select API & Services, then enable Google Drive API.
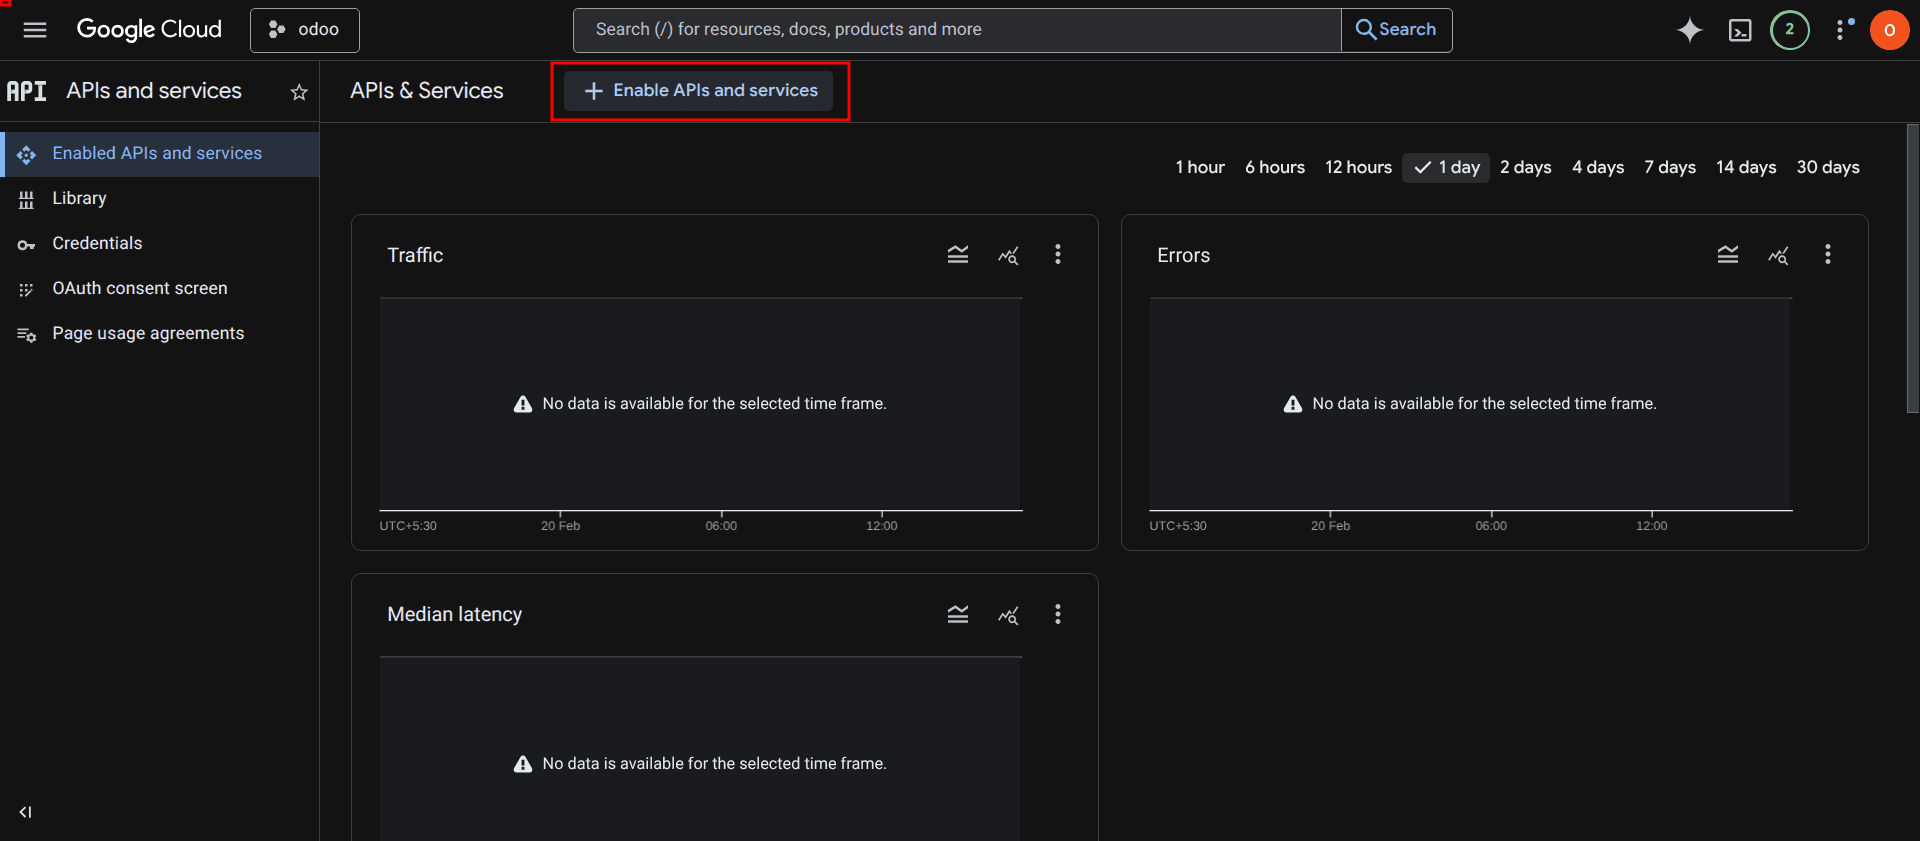
- Search for Google Drive API and enable it.
Step 2: Create Credentials
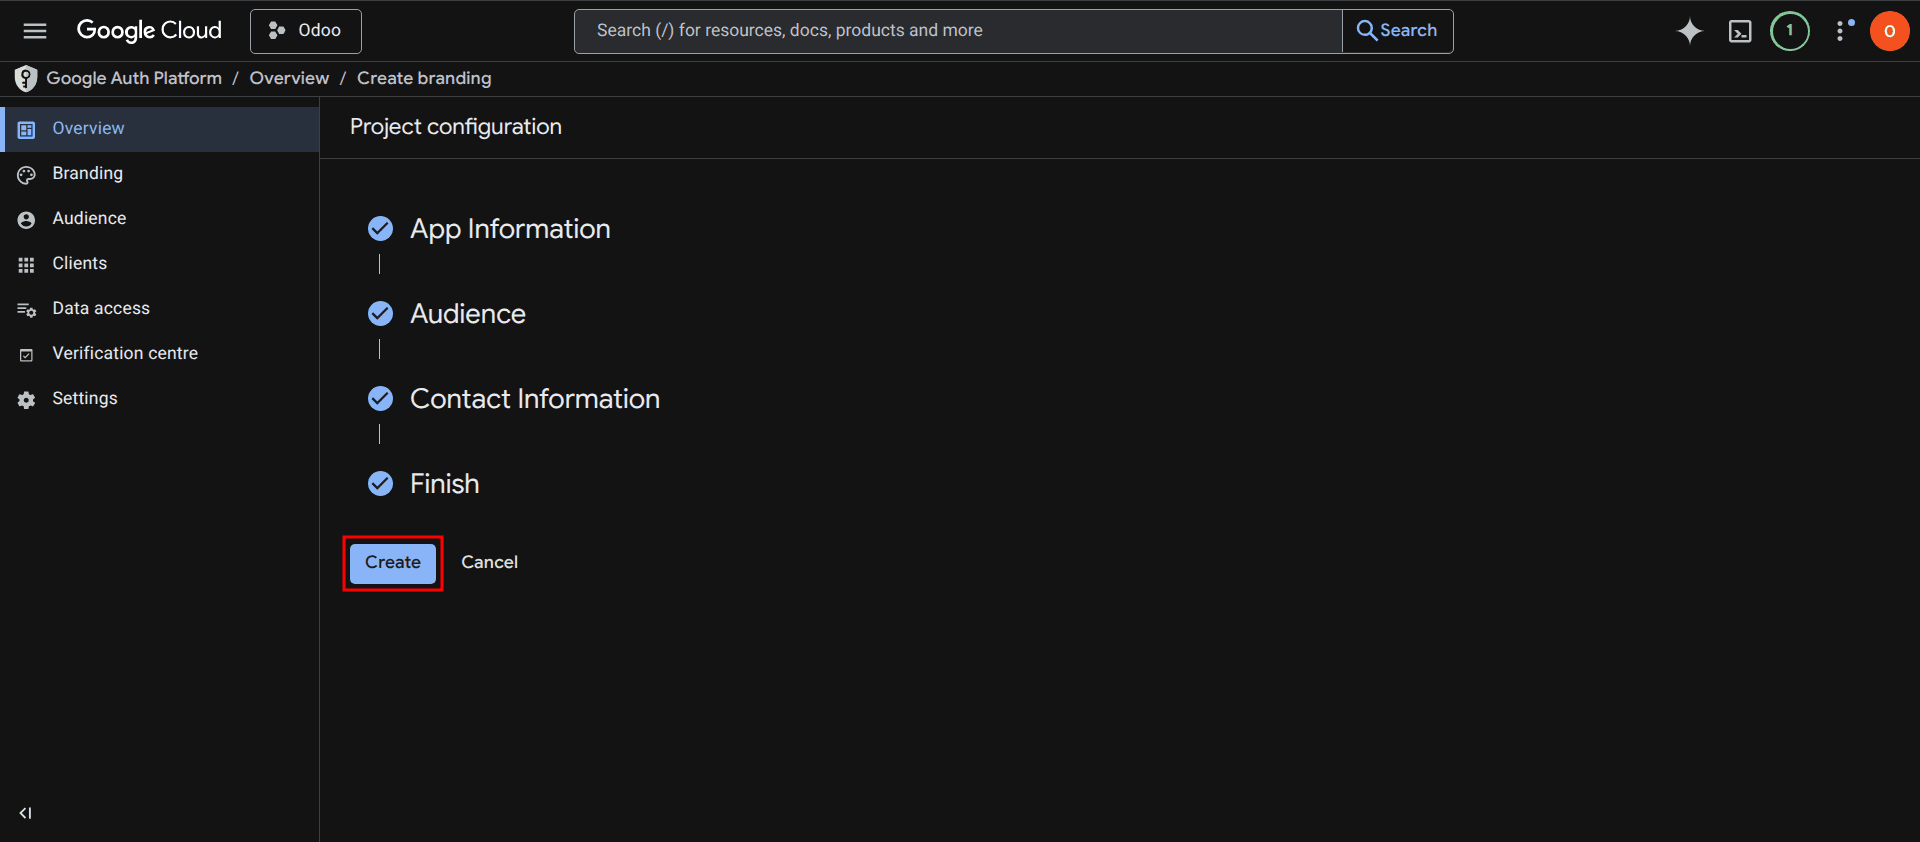
- Go to the OAuth consent screen and create a project configuration by clicking Get Started.
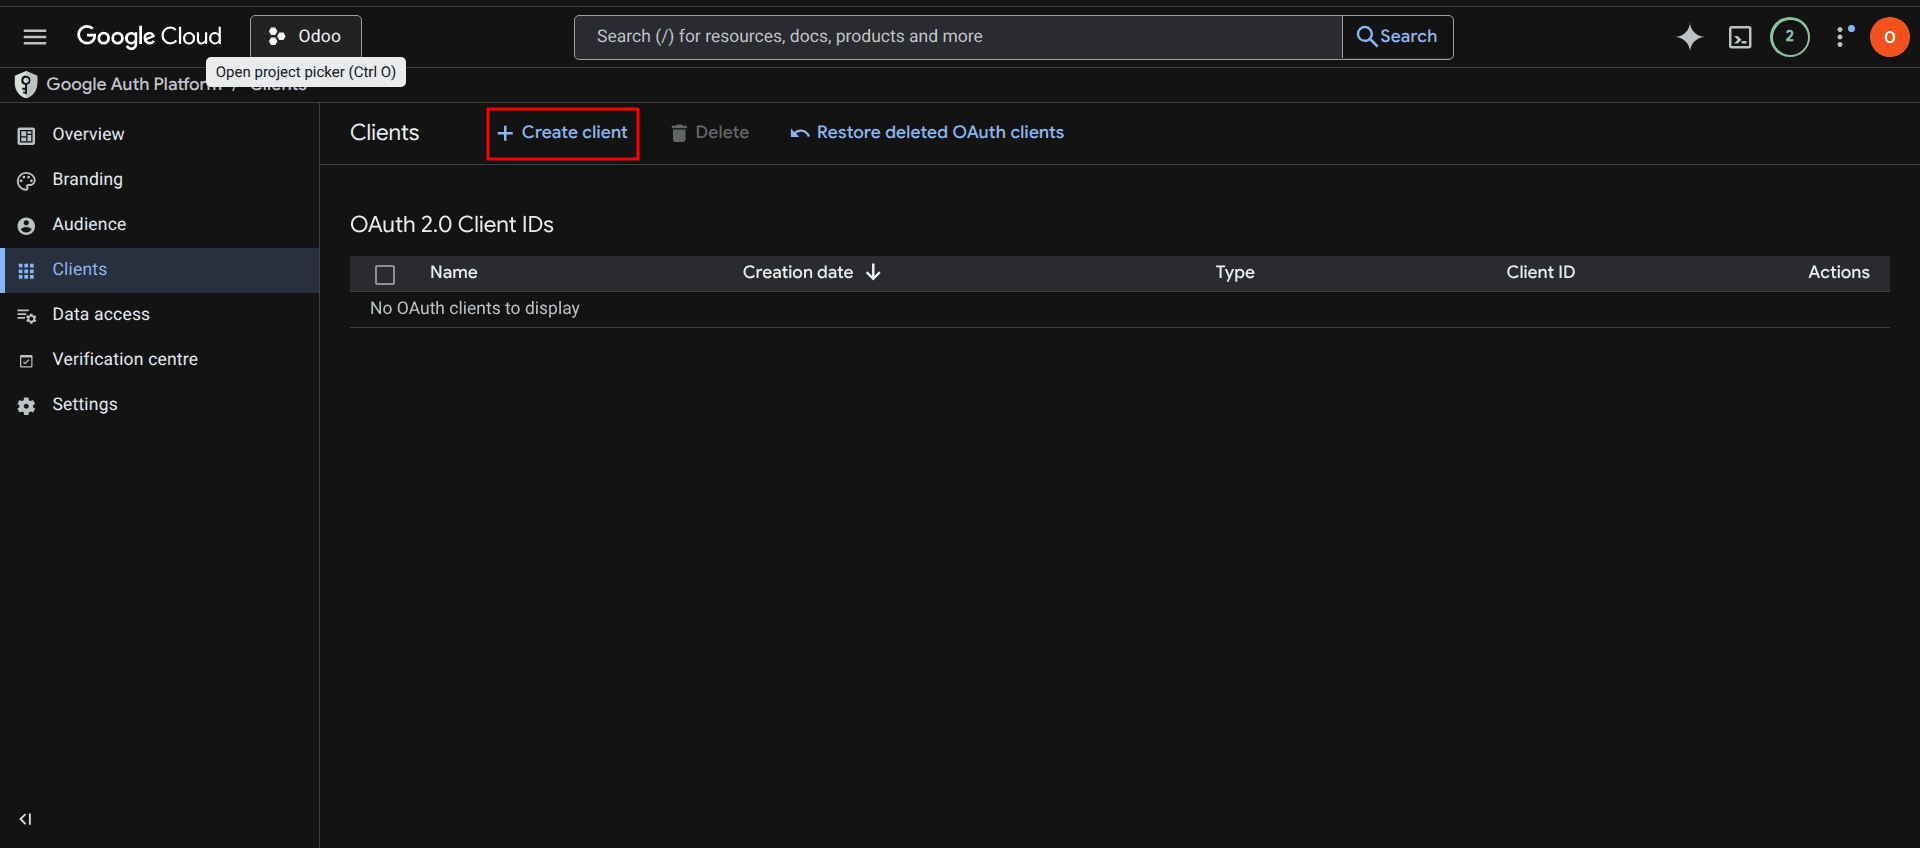
- Go to Clients and create a new Client by selecting OAuth Client ID.
Step 3: Configure Authorized Redirect URI
- Application Type must be selected as Web Application.
- In Authorized JavaScript Origins, enter the Odoo URL of your company.
- Enter the redirect URI of your company in the Authorized Redirect URIs field.
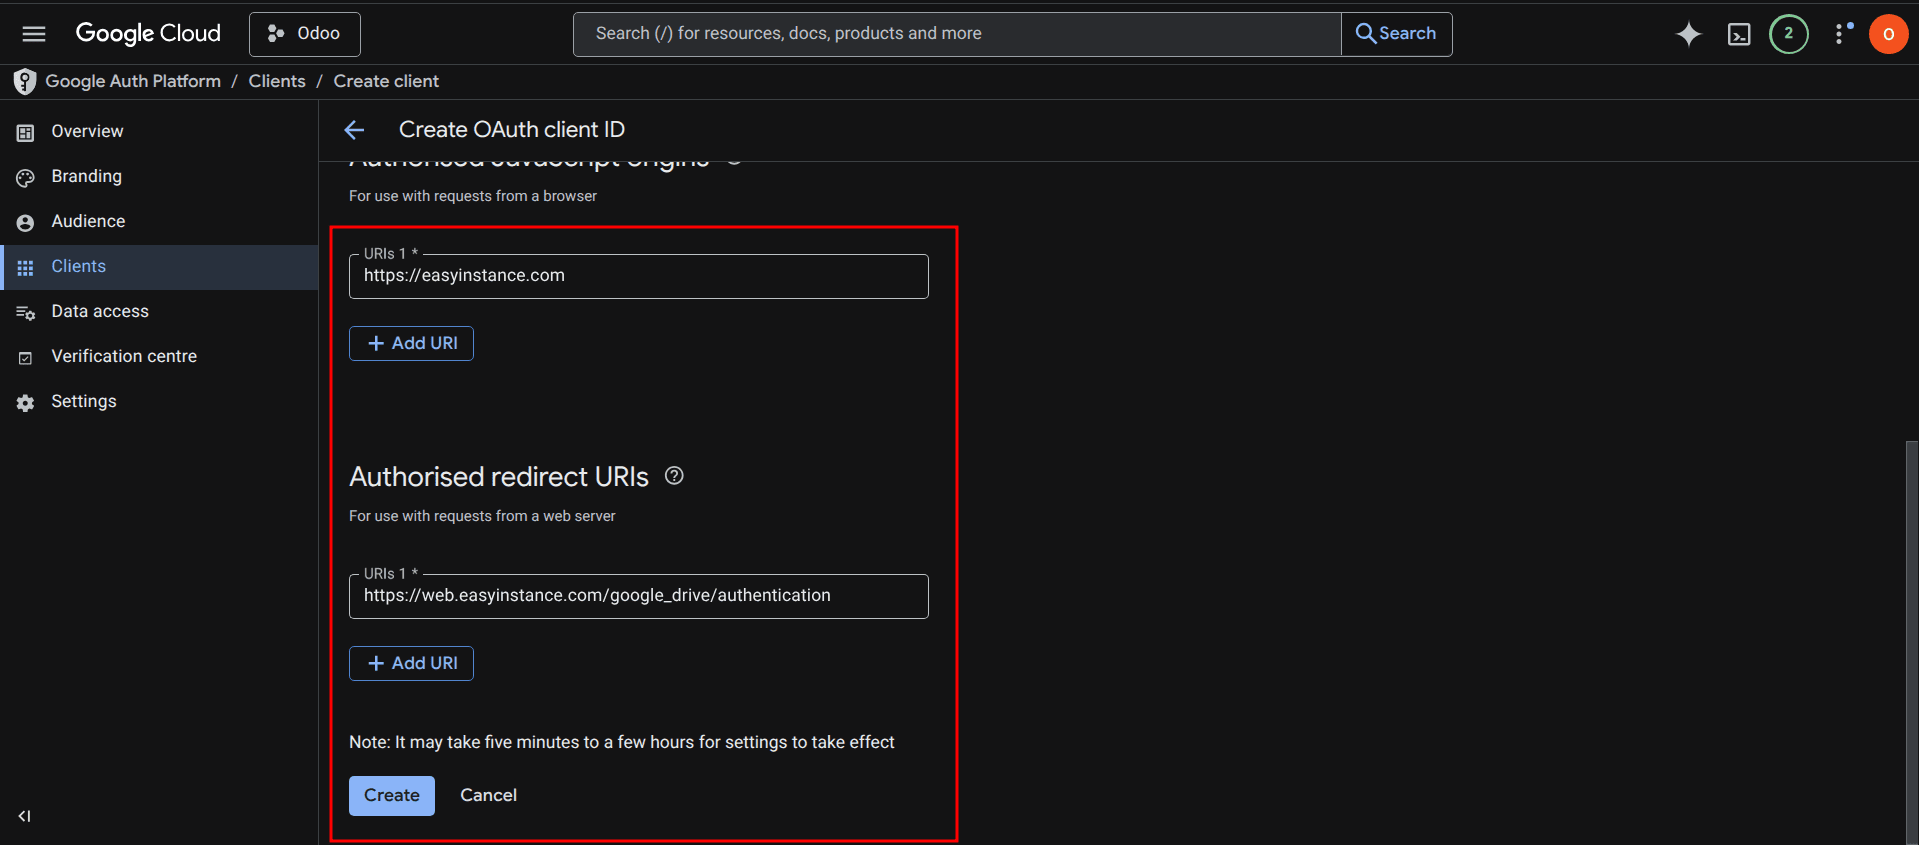
- When done with the steps above, click the “Create” button, and you will get your Client ID and Client Secret. Copy these credentials.
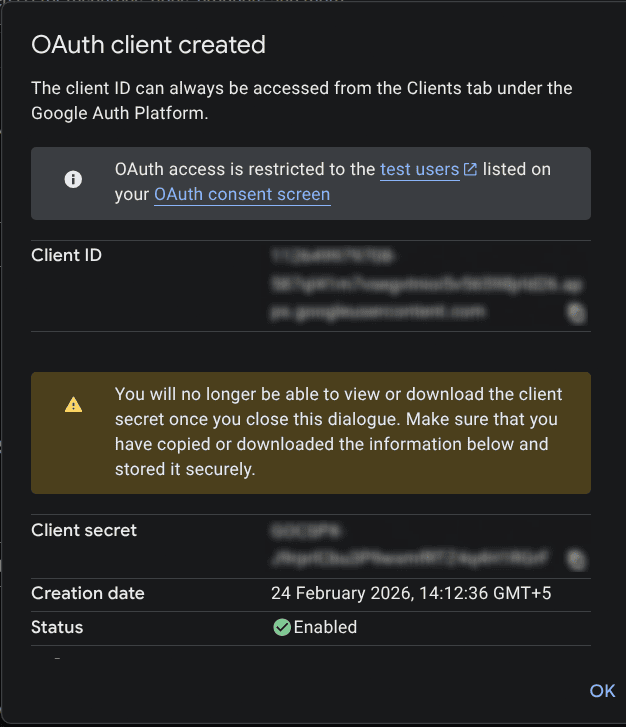
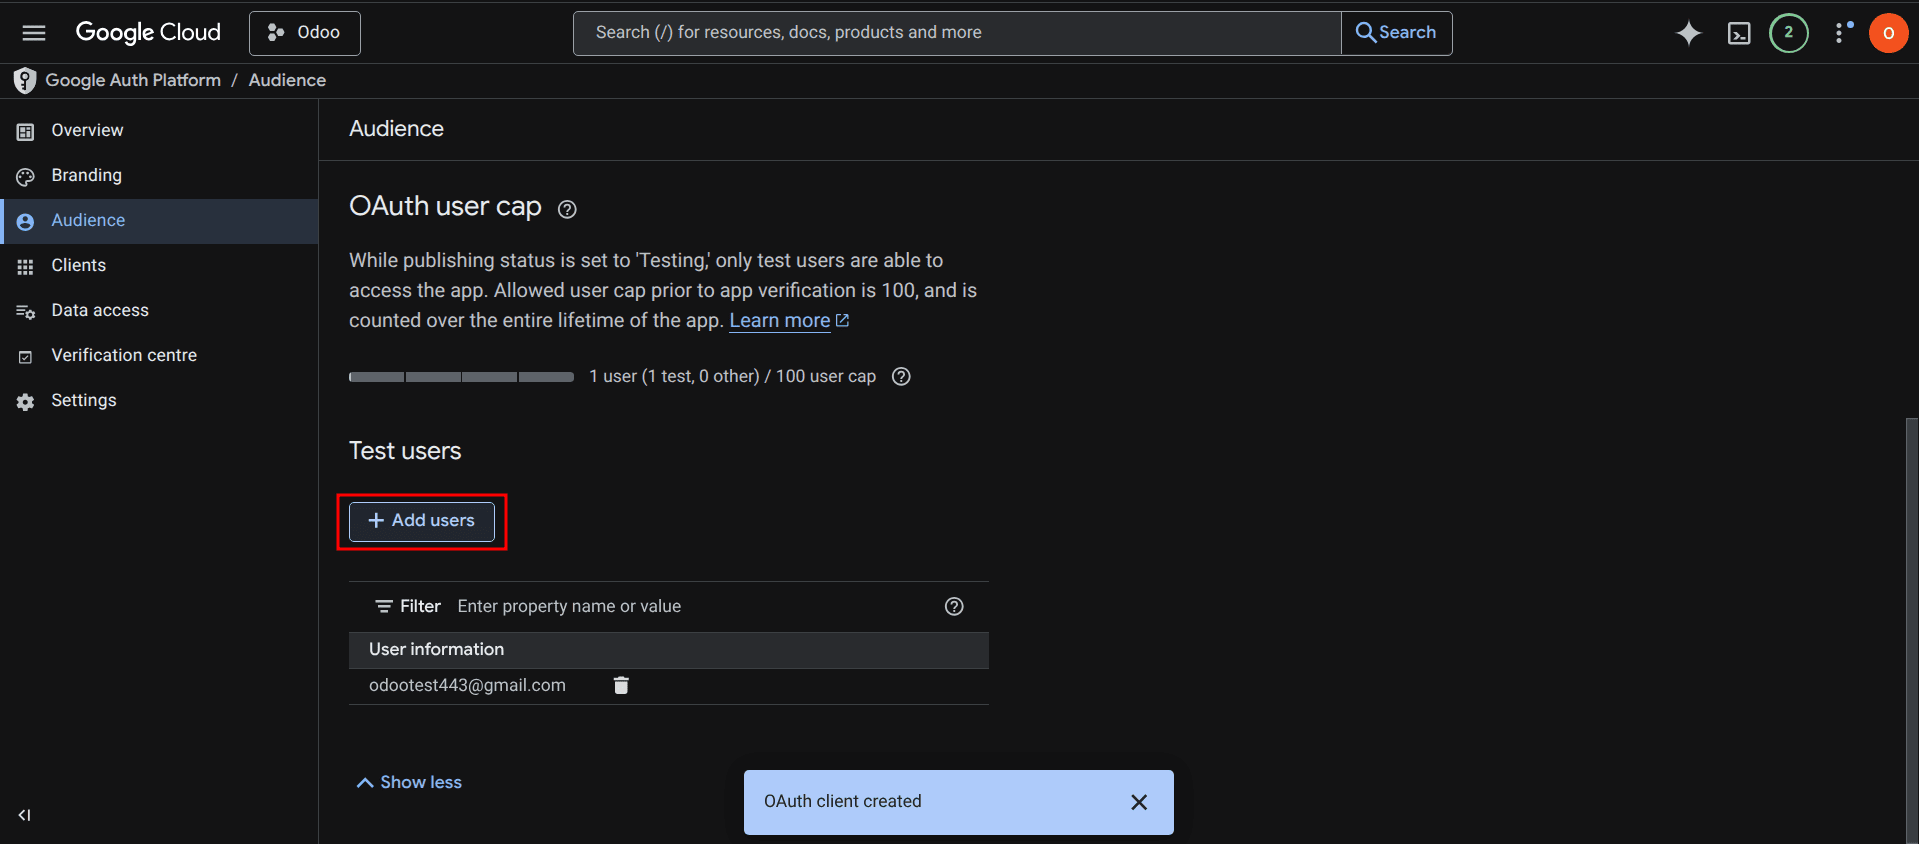
- Next, open the OAuth Consent Screen and under the Audience section, add your login email as a test user to be able to access the app, or proceed with the app publishing process.
Step 4: Configure Odoo Backup Settings
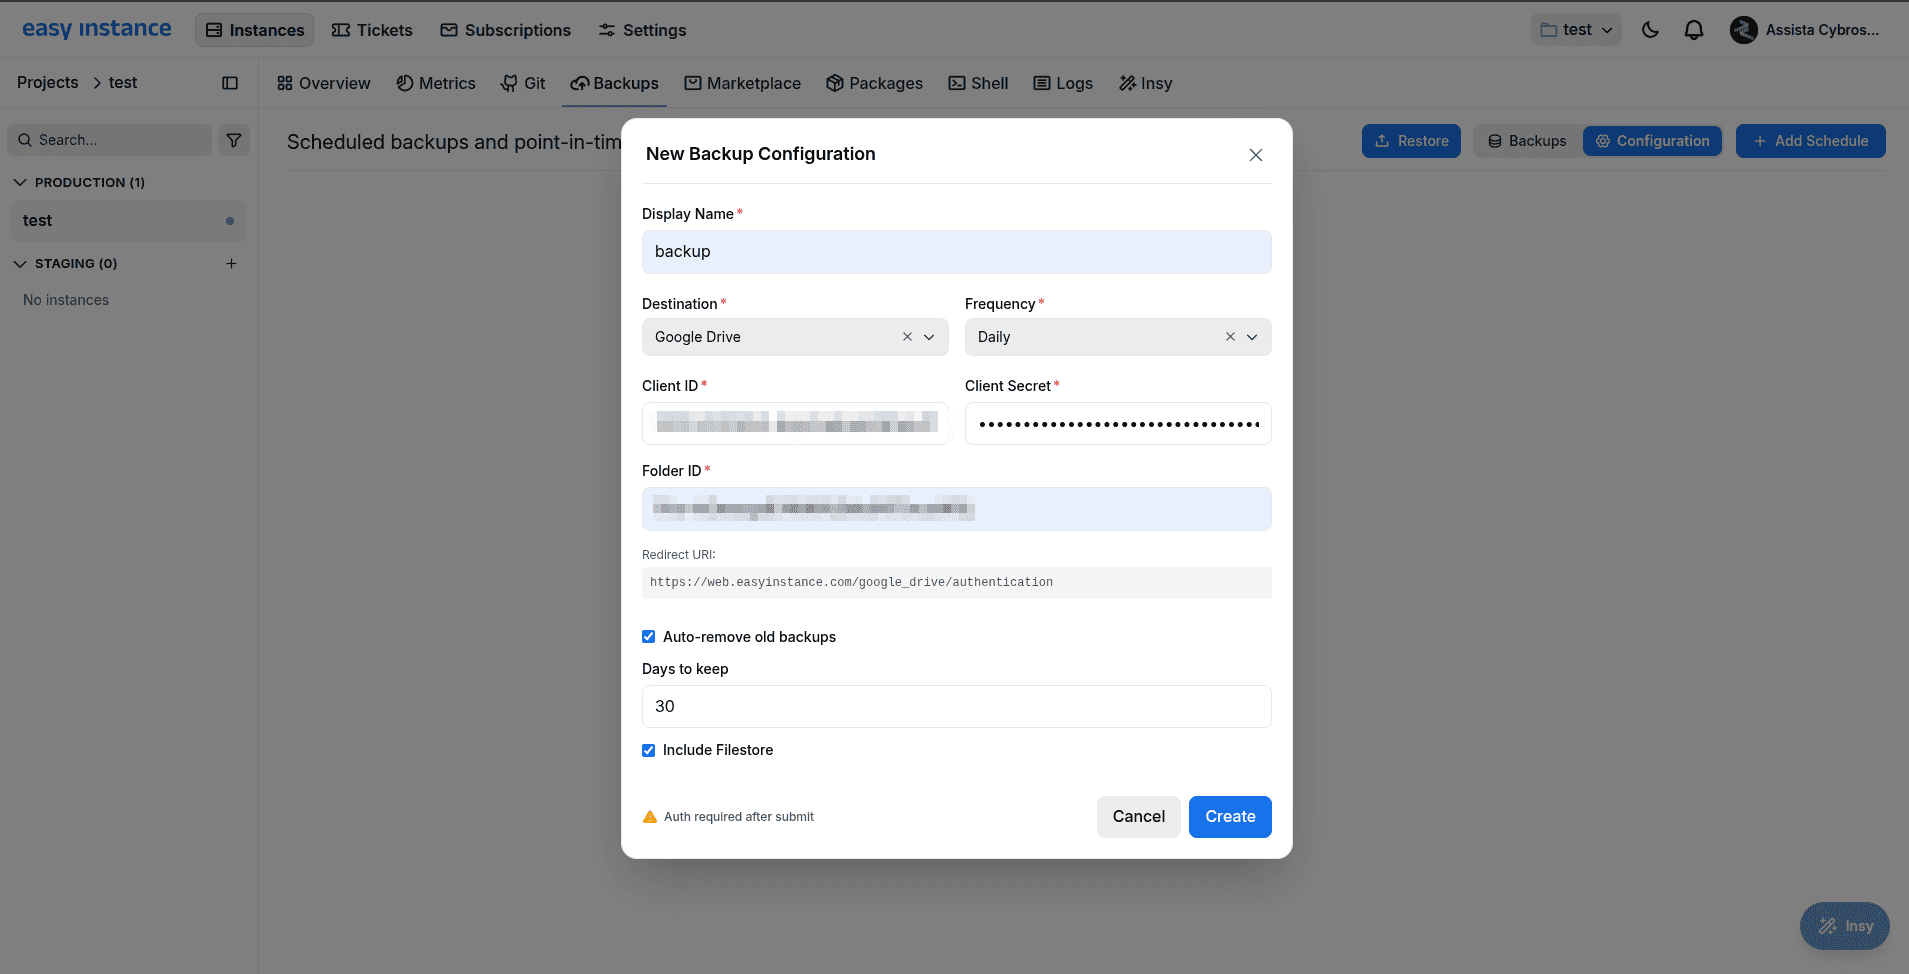
- Input your Client ID and Client Secret into the corresponding fields of the Odoo Backup Configuration.
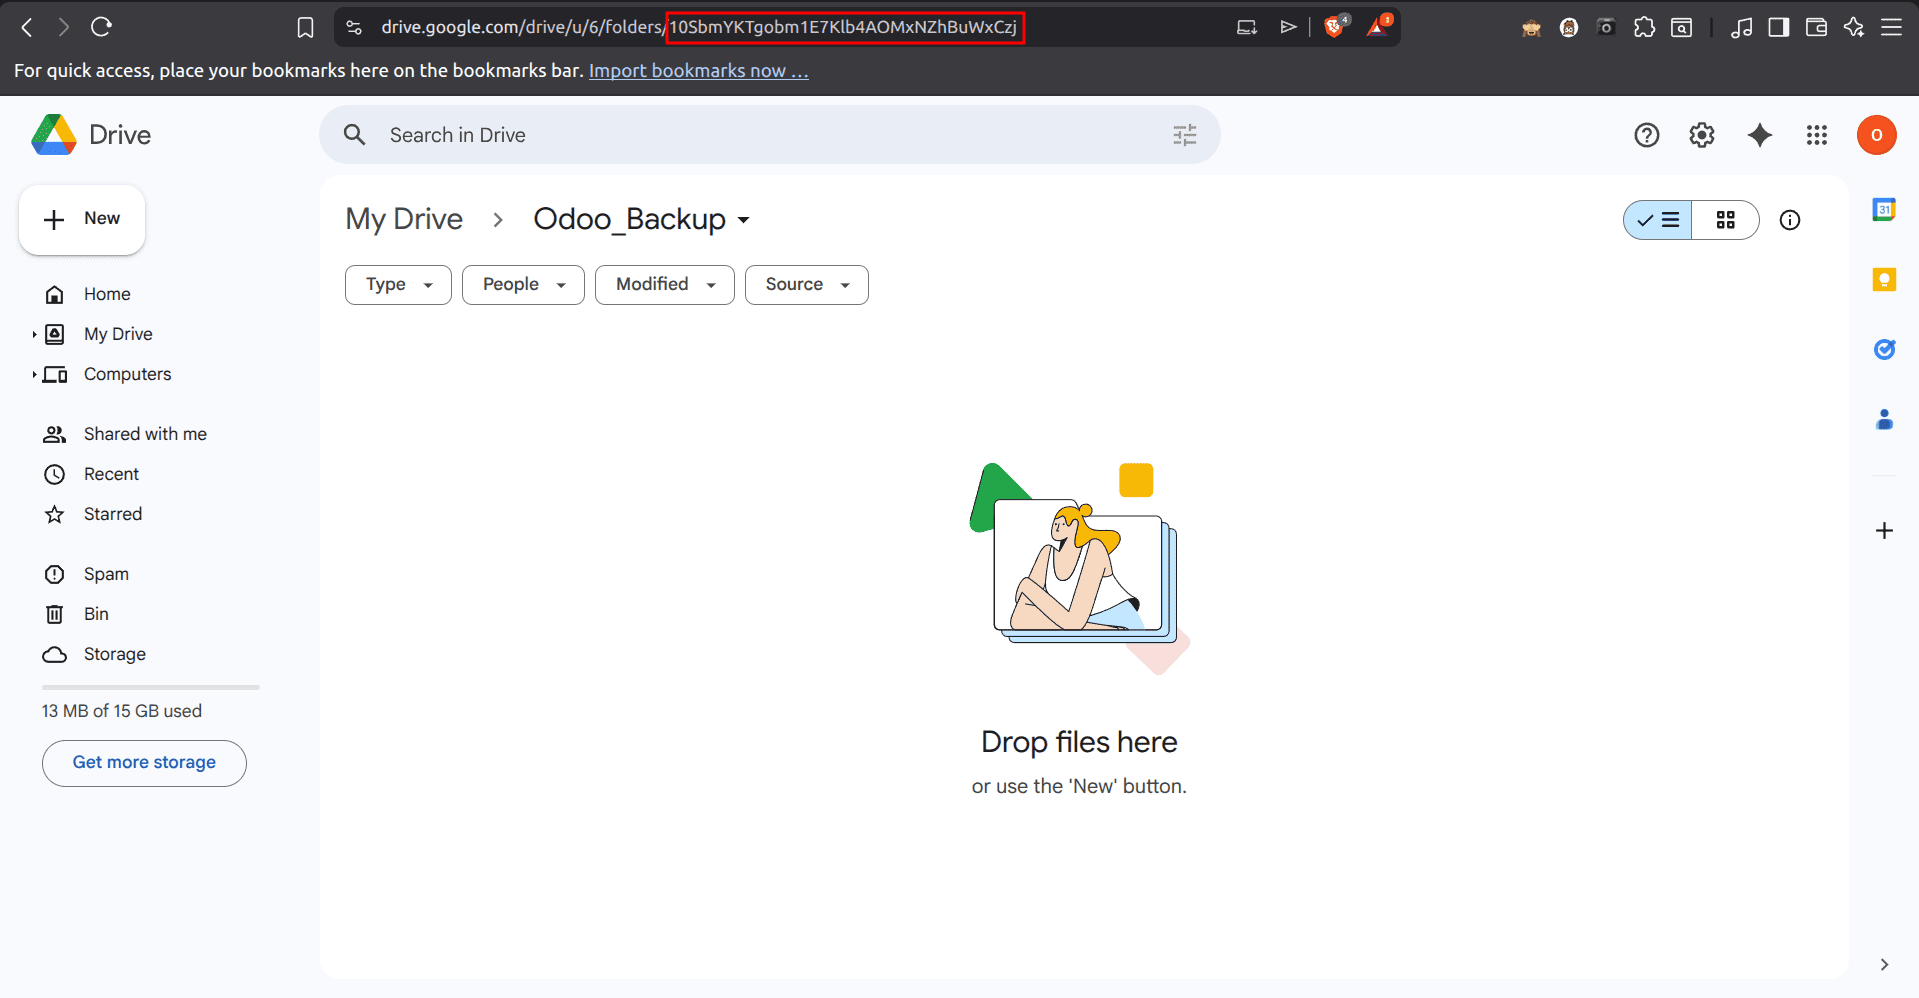
- Provide your Drive folder ID from the folder URL.
- After setting up, click on Setup OAuth Token to be redirected to the authorization page.
- Give access and proceed further.
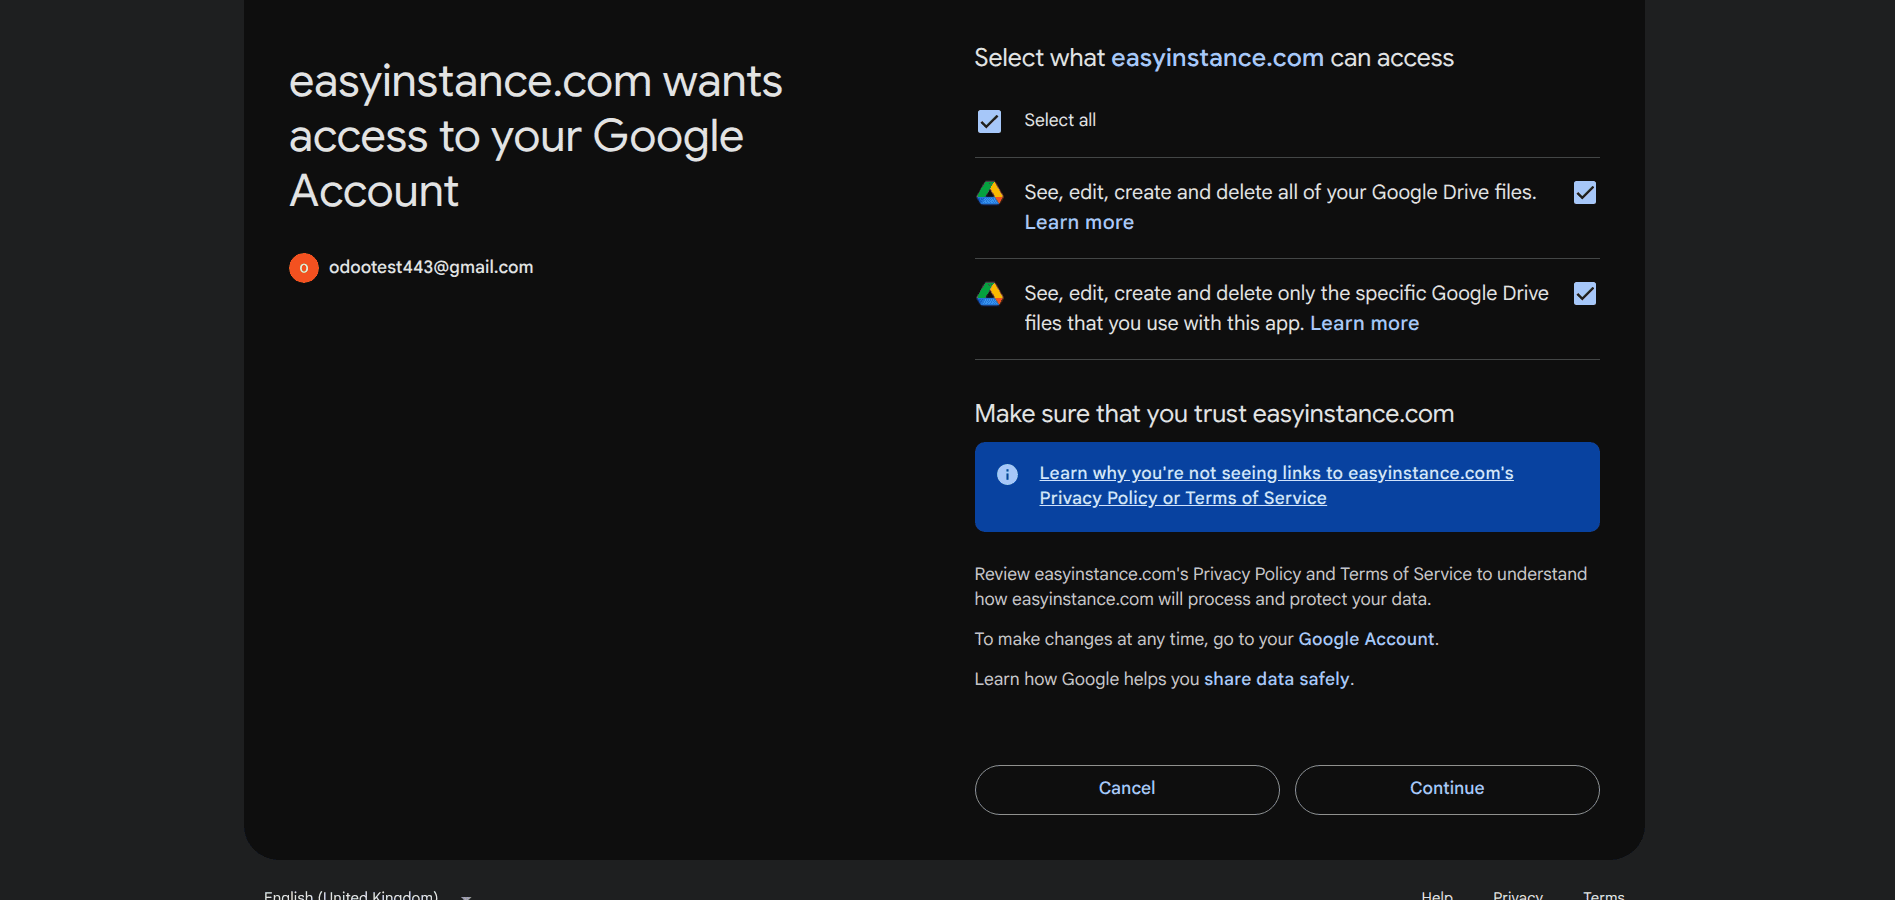
- The backup will be done according to the schedule once you generate the token.
- If you want to make a backup right away, then click on "backup now".
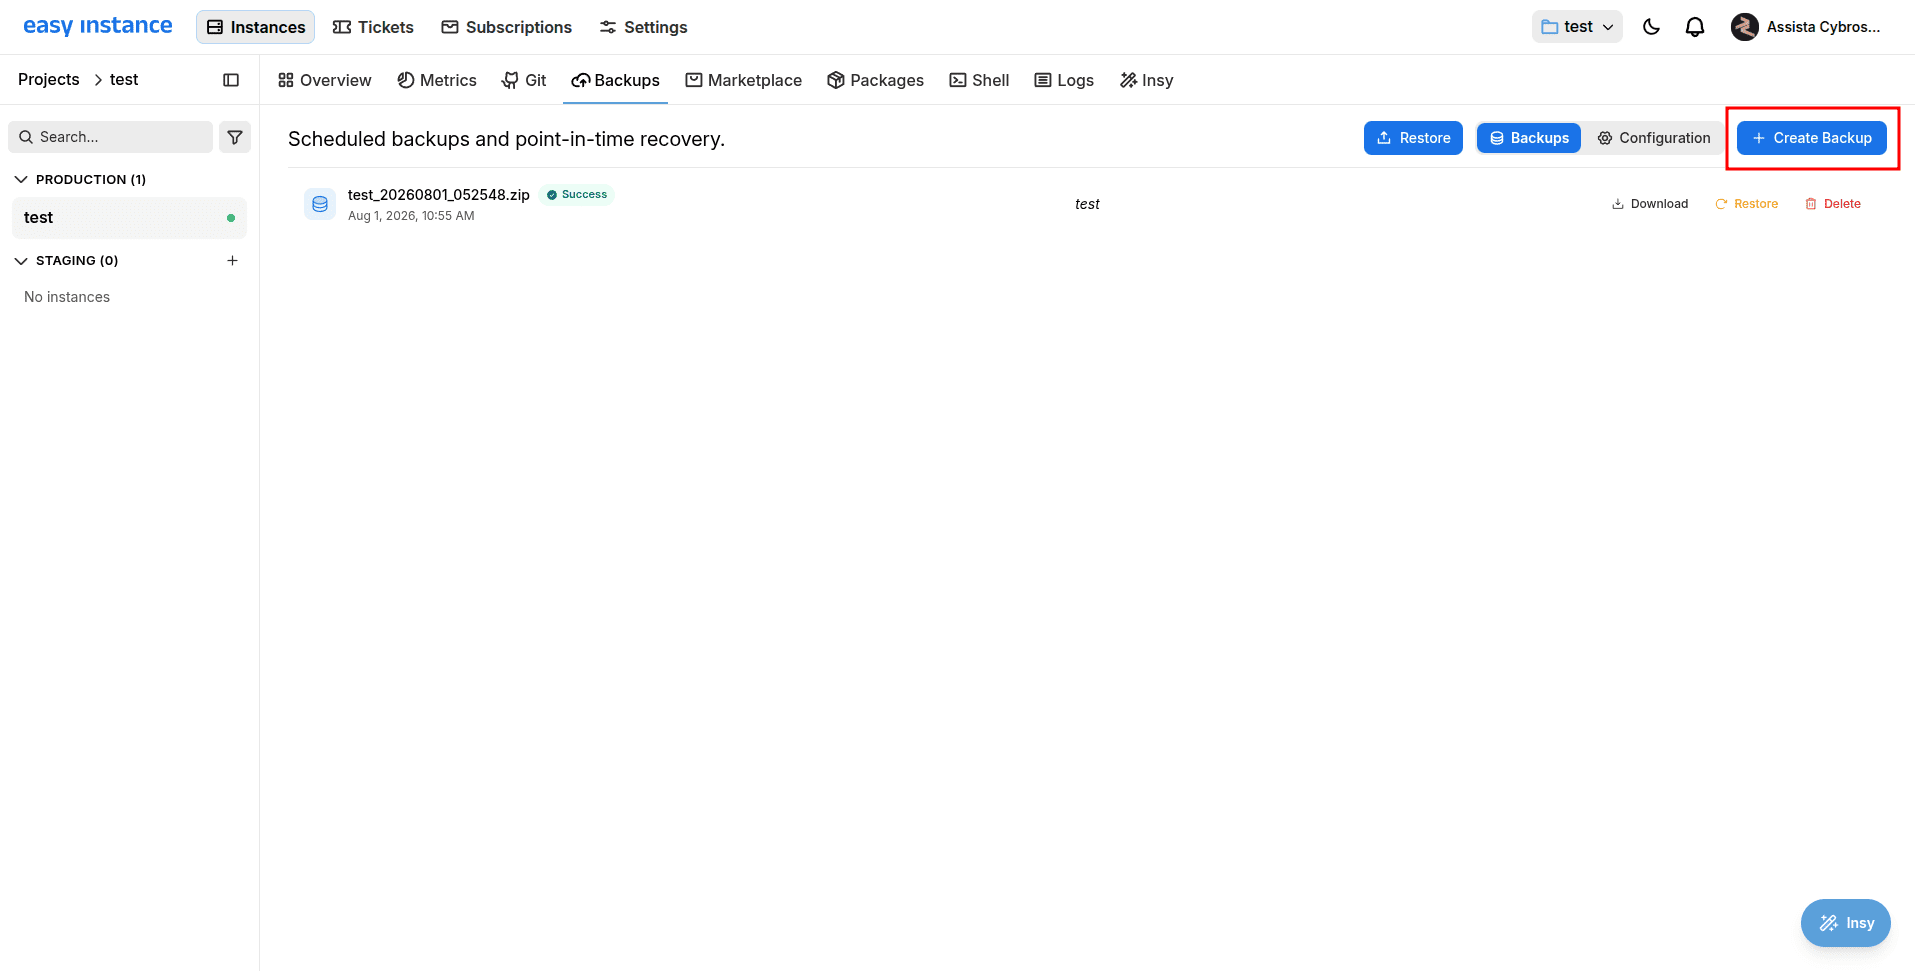
- The backups will be made to the folder based on the backup frequency.
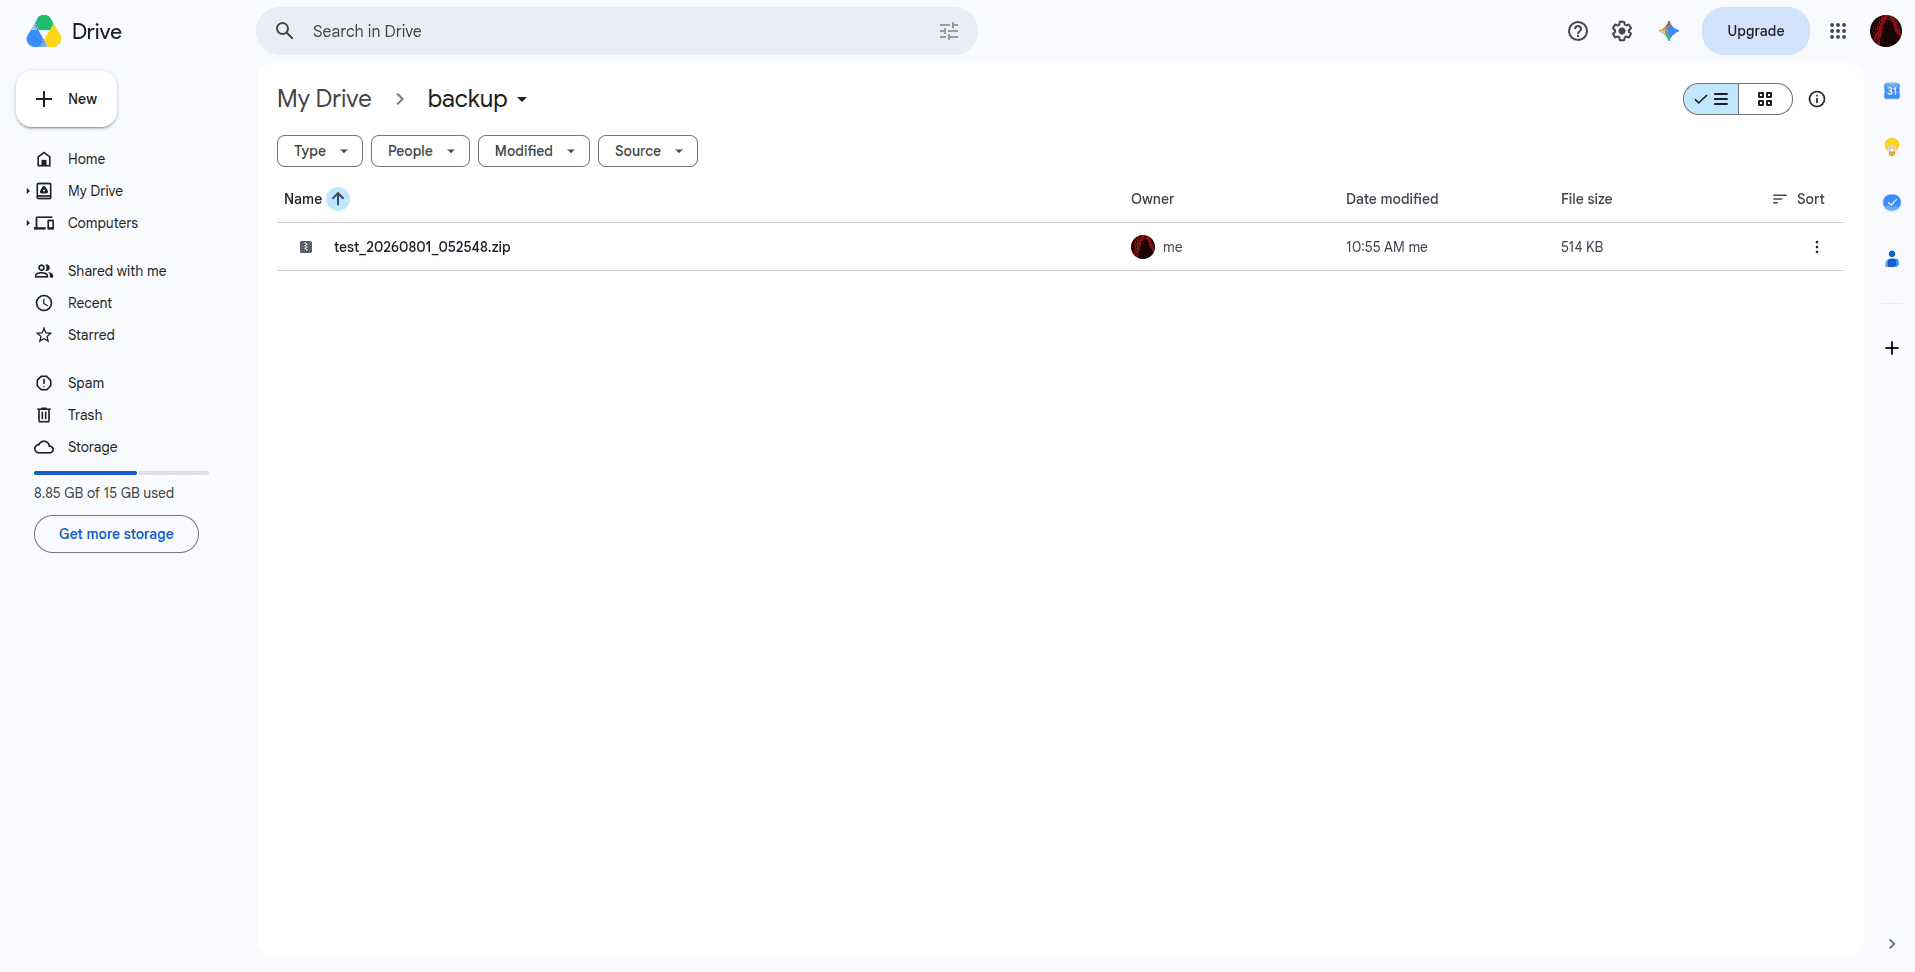
Dropbox:
Step 1: Create a New App
Go to the Dropbox Developers App Console and create a new app:
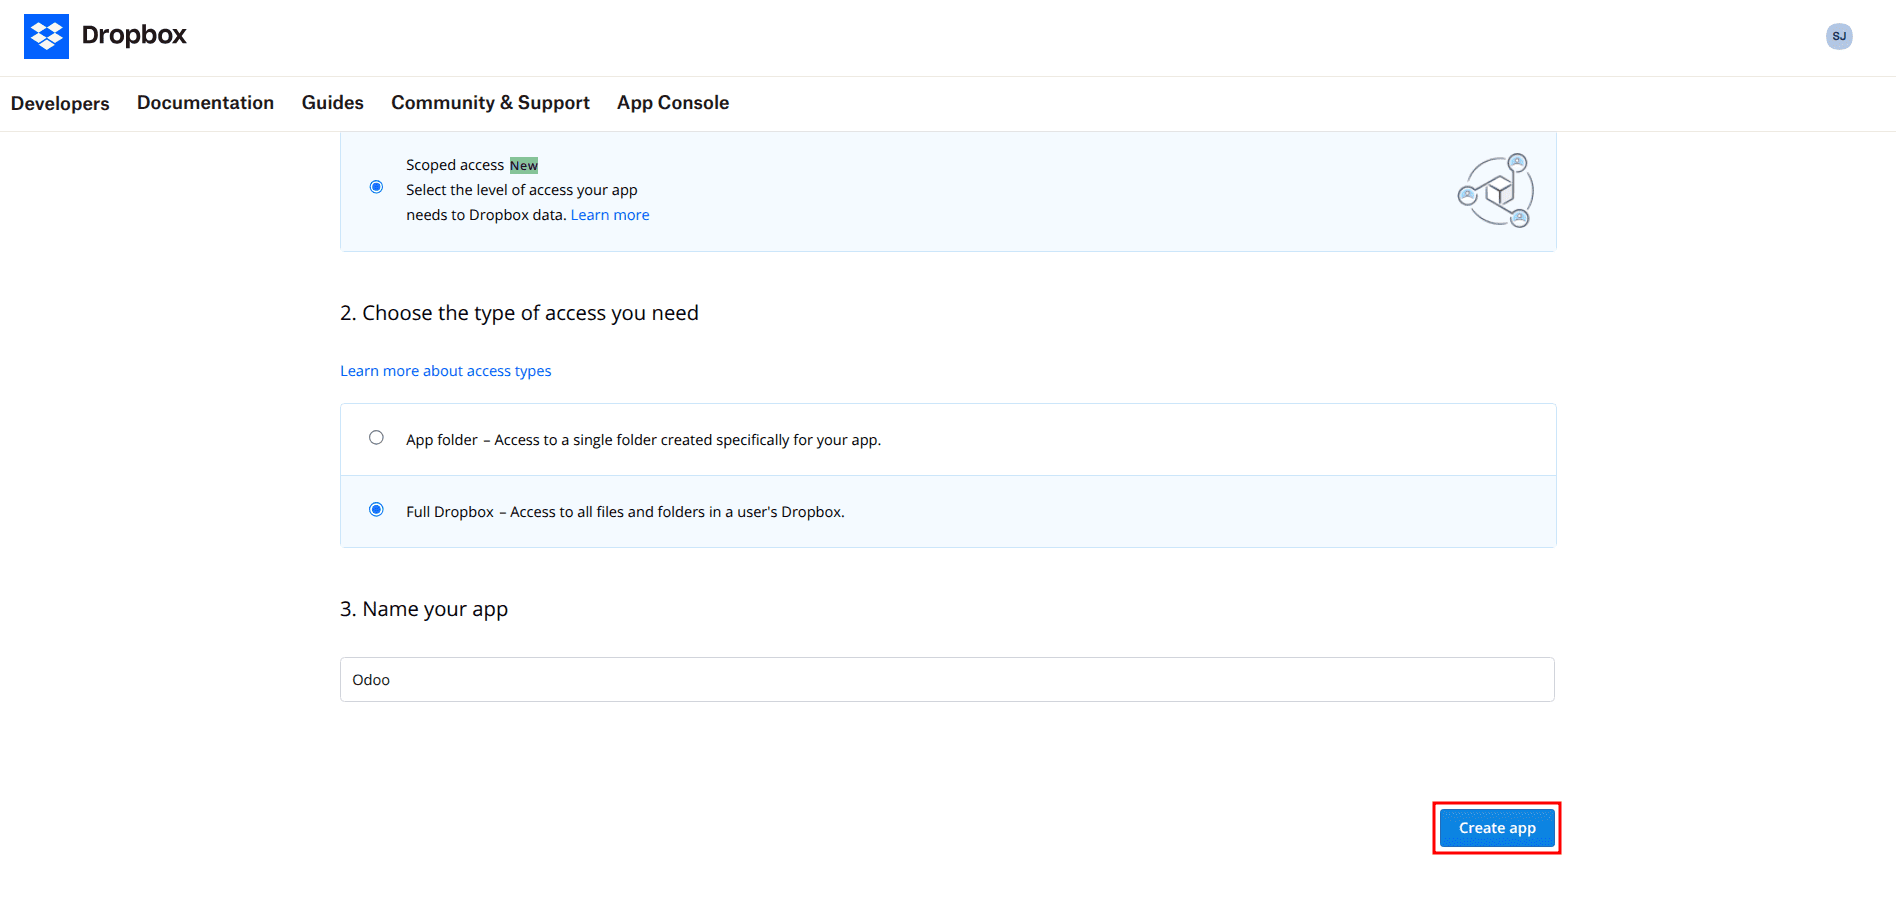
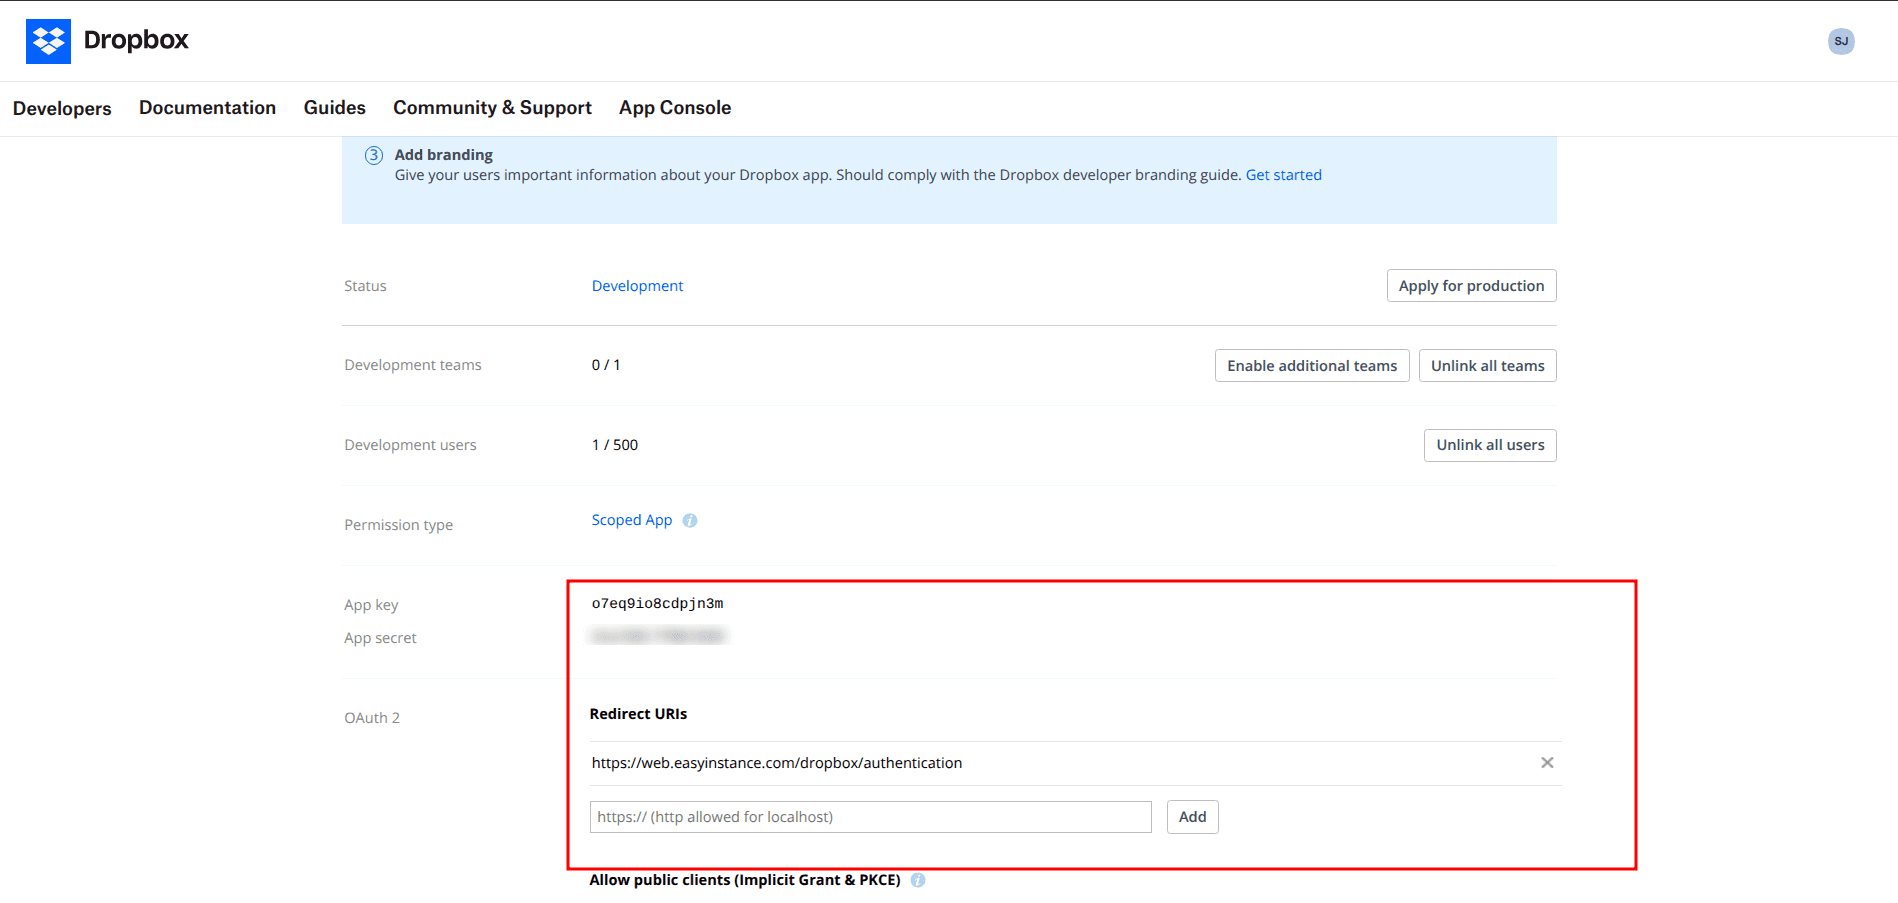
Step 2: Get App Key and Secret.
As soon as you create the app, you get your App Key and App Secret. Also include the redirect URIs as per the screenshot below.
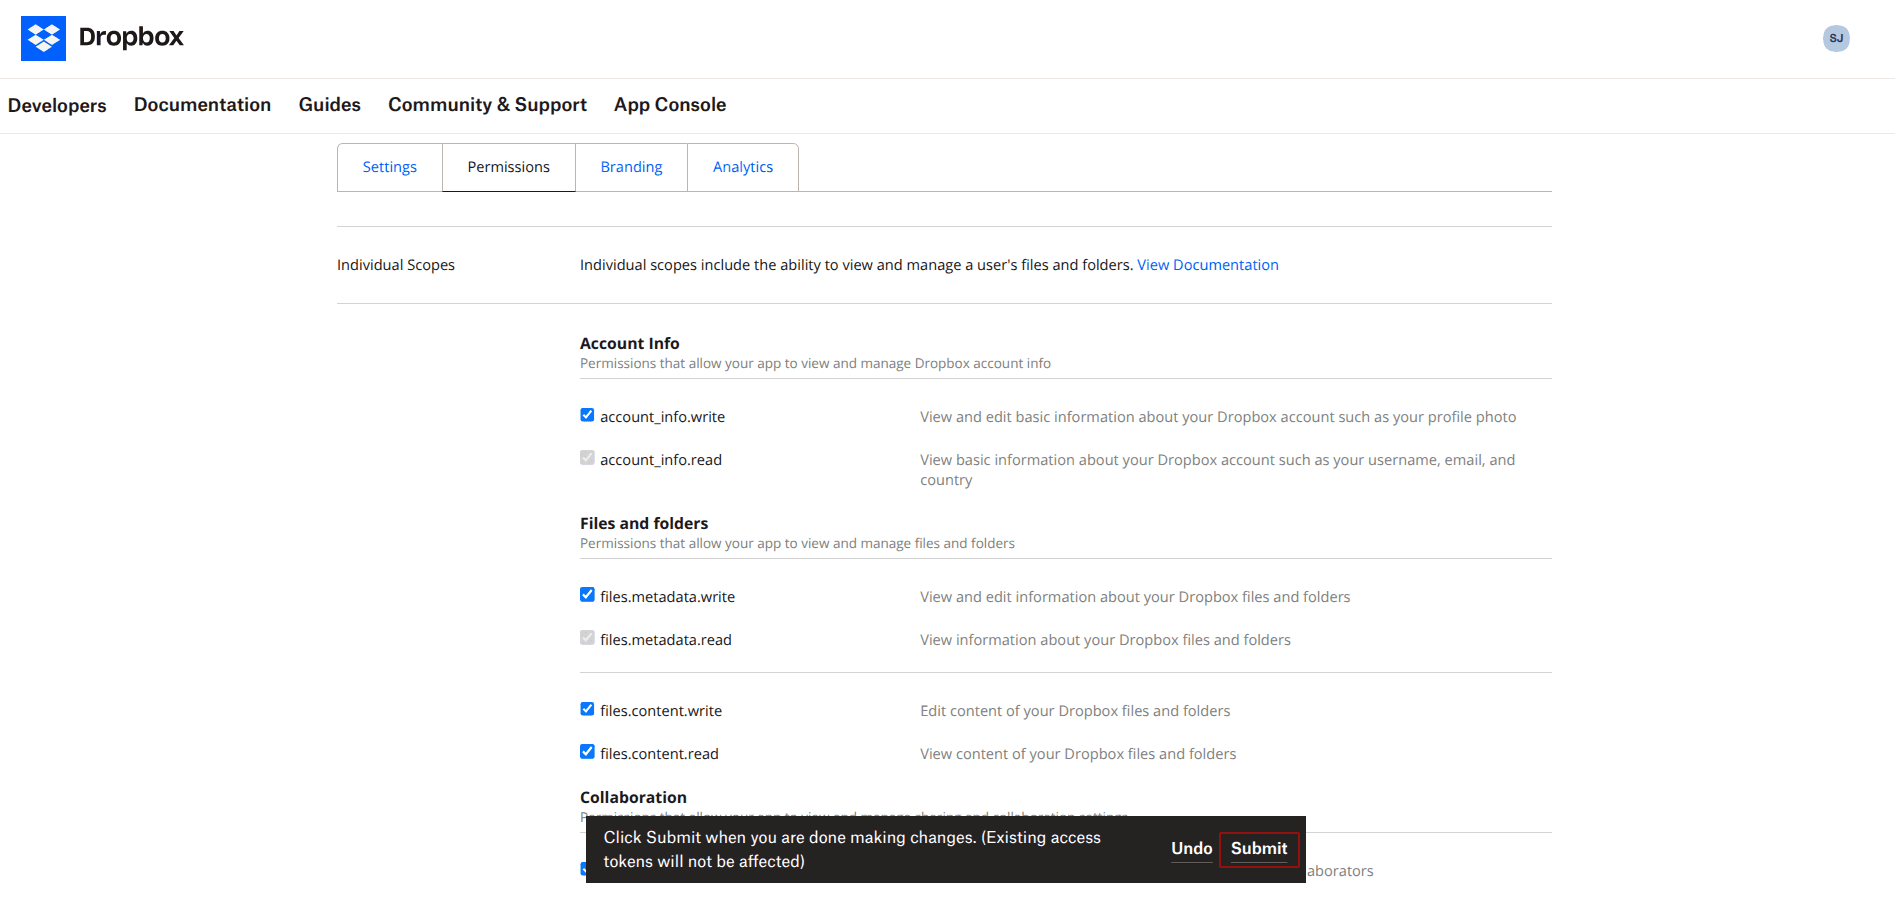
Step 3: Set Permissions.
Select the required permissions for the application and click on submit.
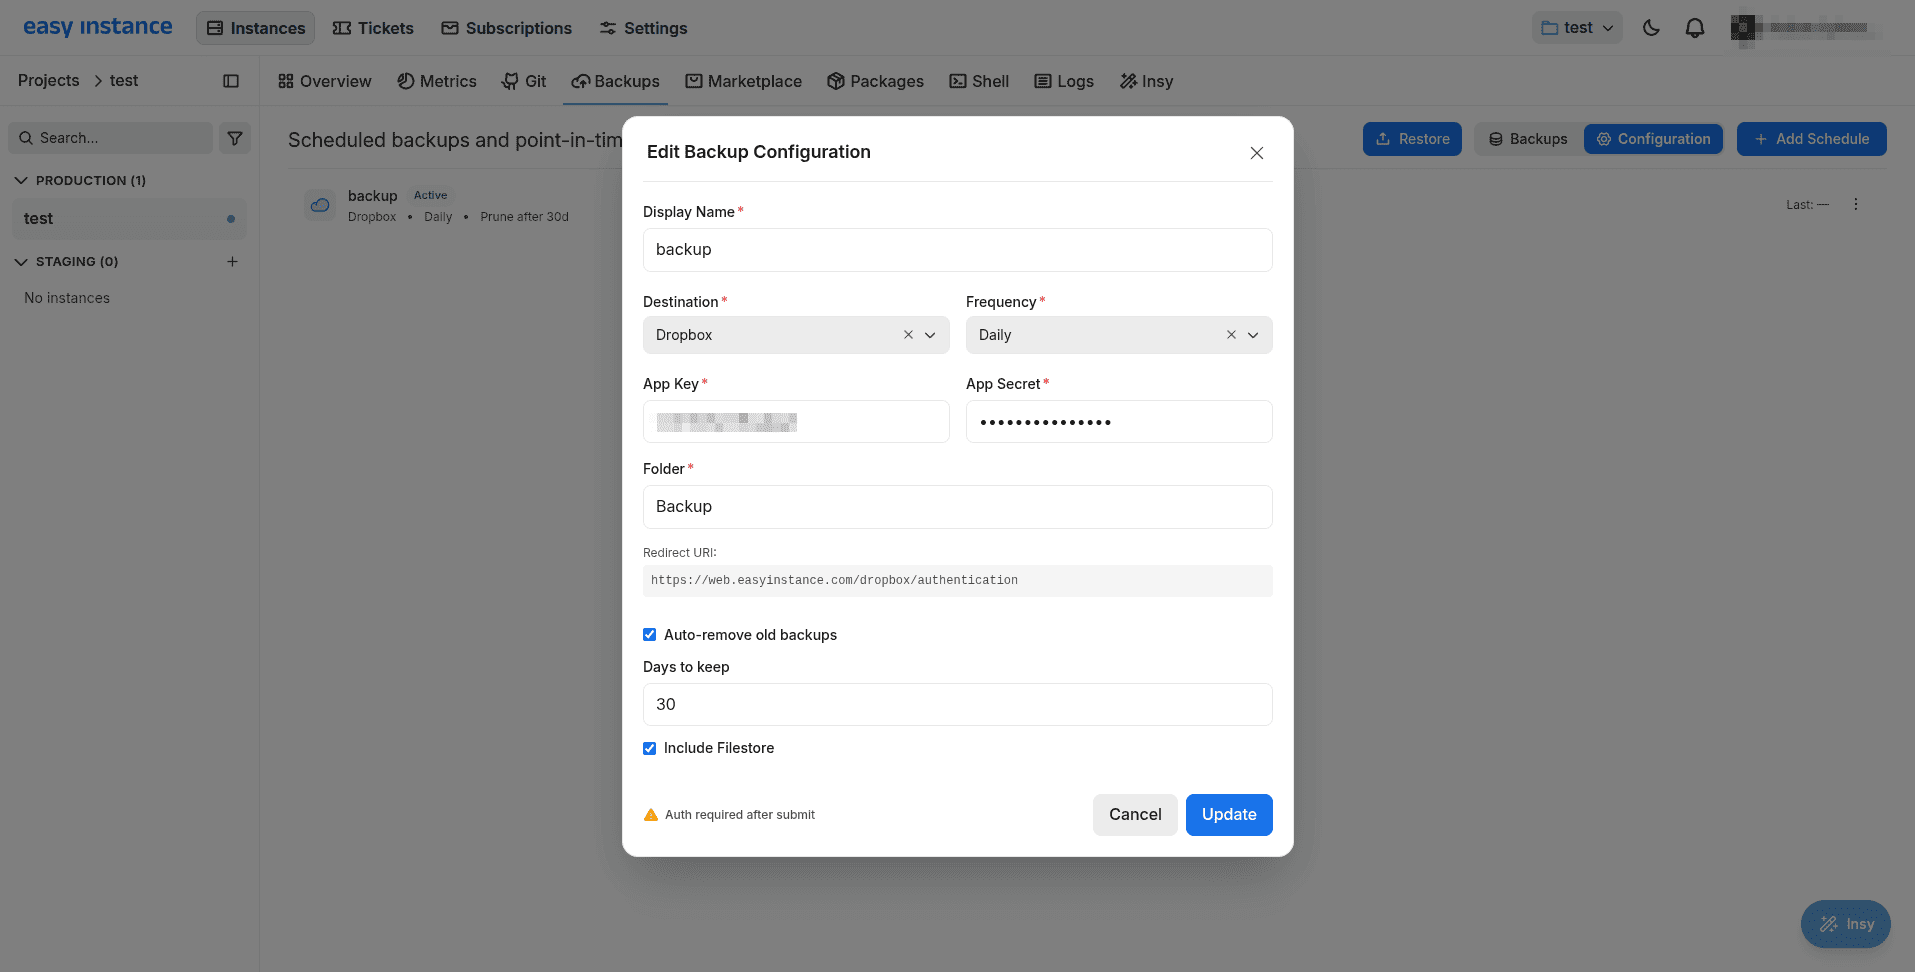
Step 4: Set up backup in Odoo.
- Open the Backup configuration inside Odoo and select Dropbox as the destination for backup.
- Input the app key, App secret, and Dropbox Folder Name (as per the folder name in Dropbox).
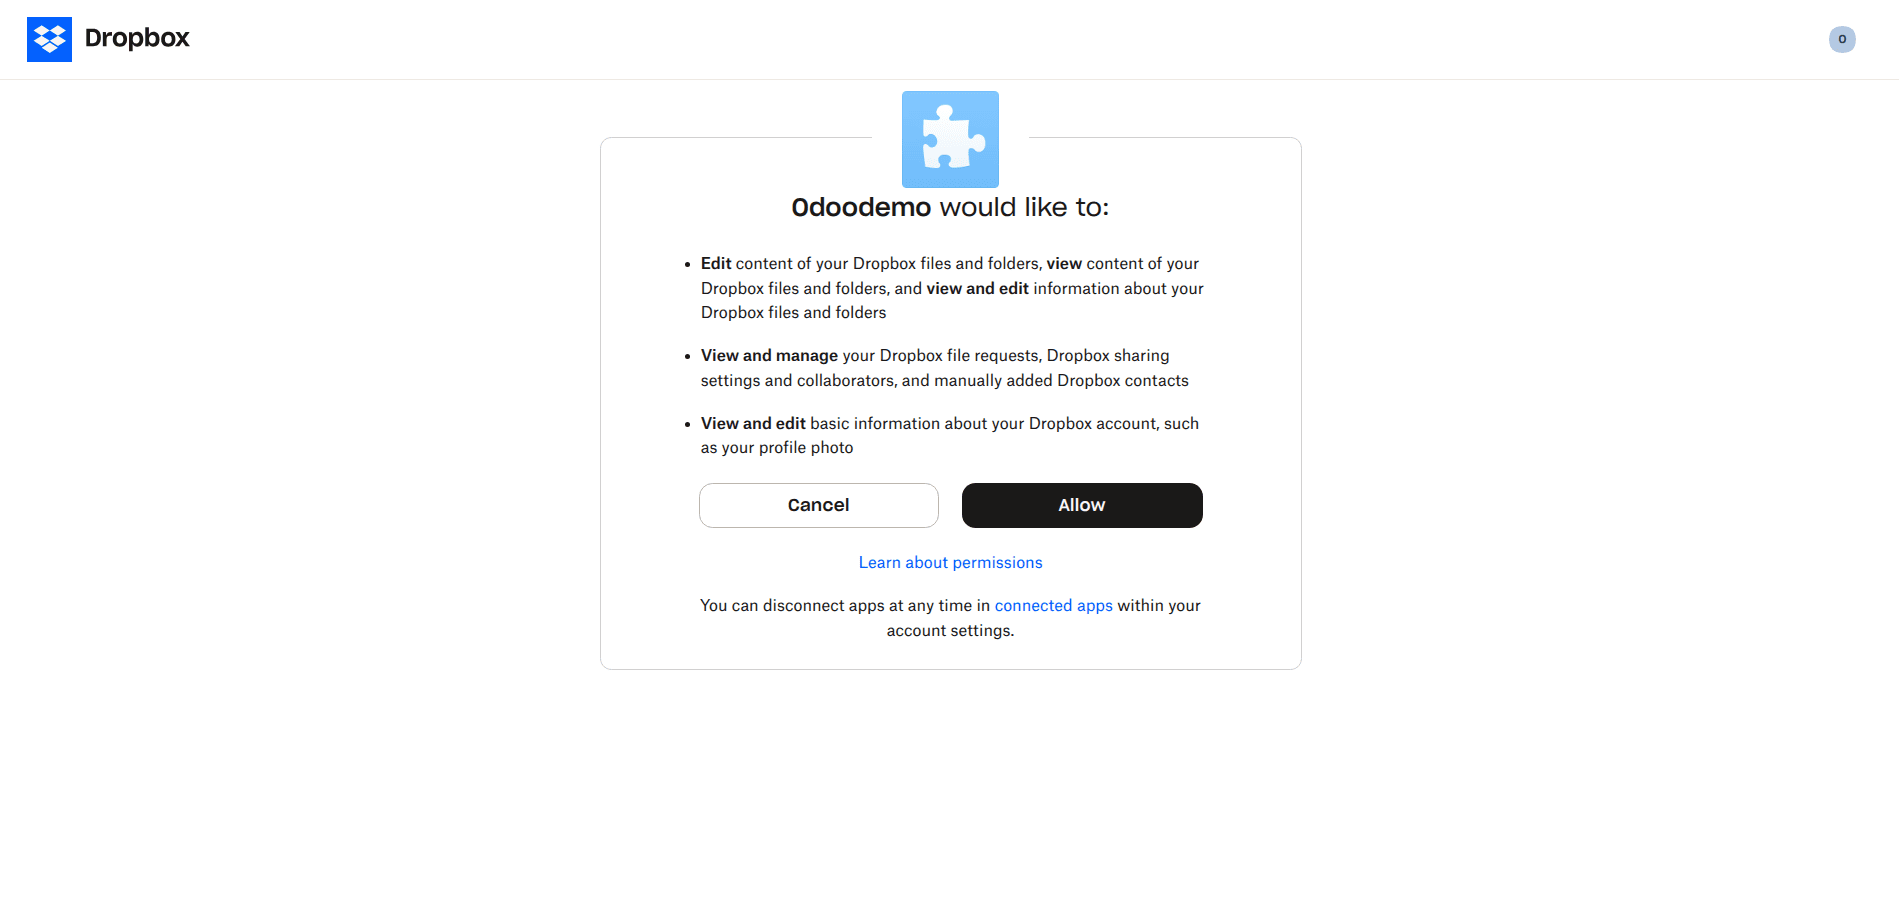
- Click on "Set up OAuth token".
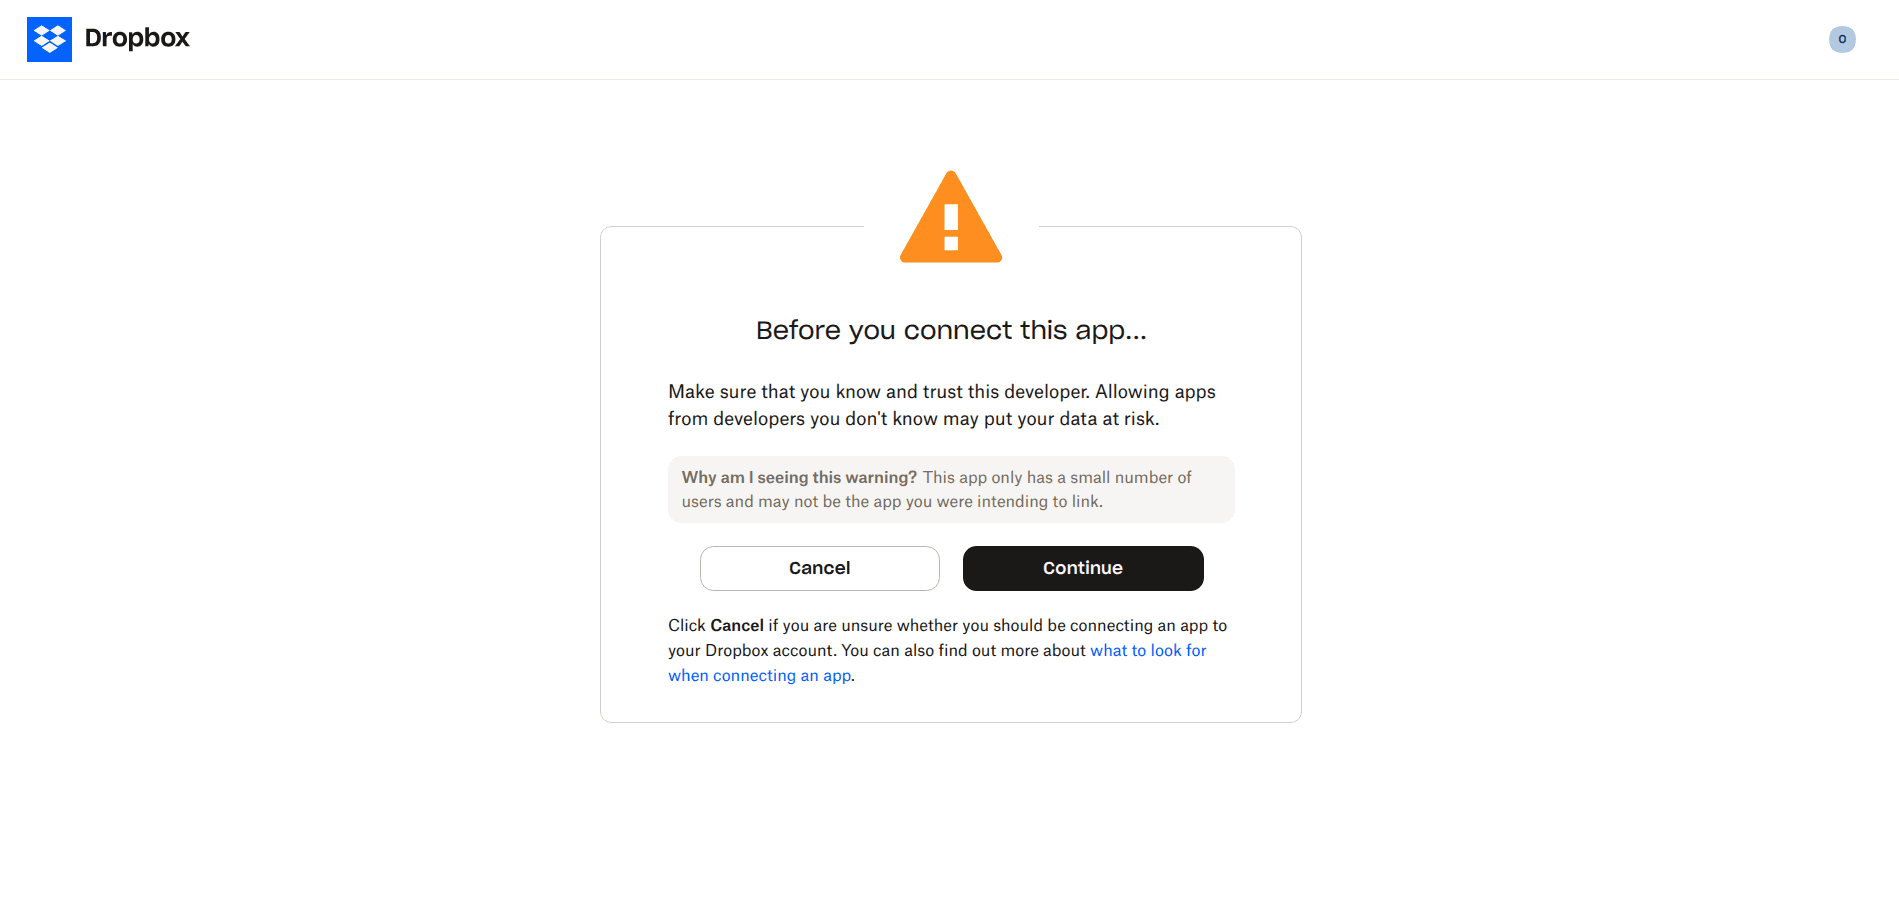
- Click on "continue" once the token is generated.
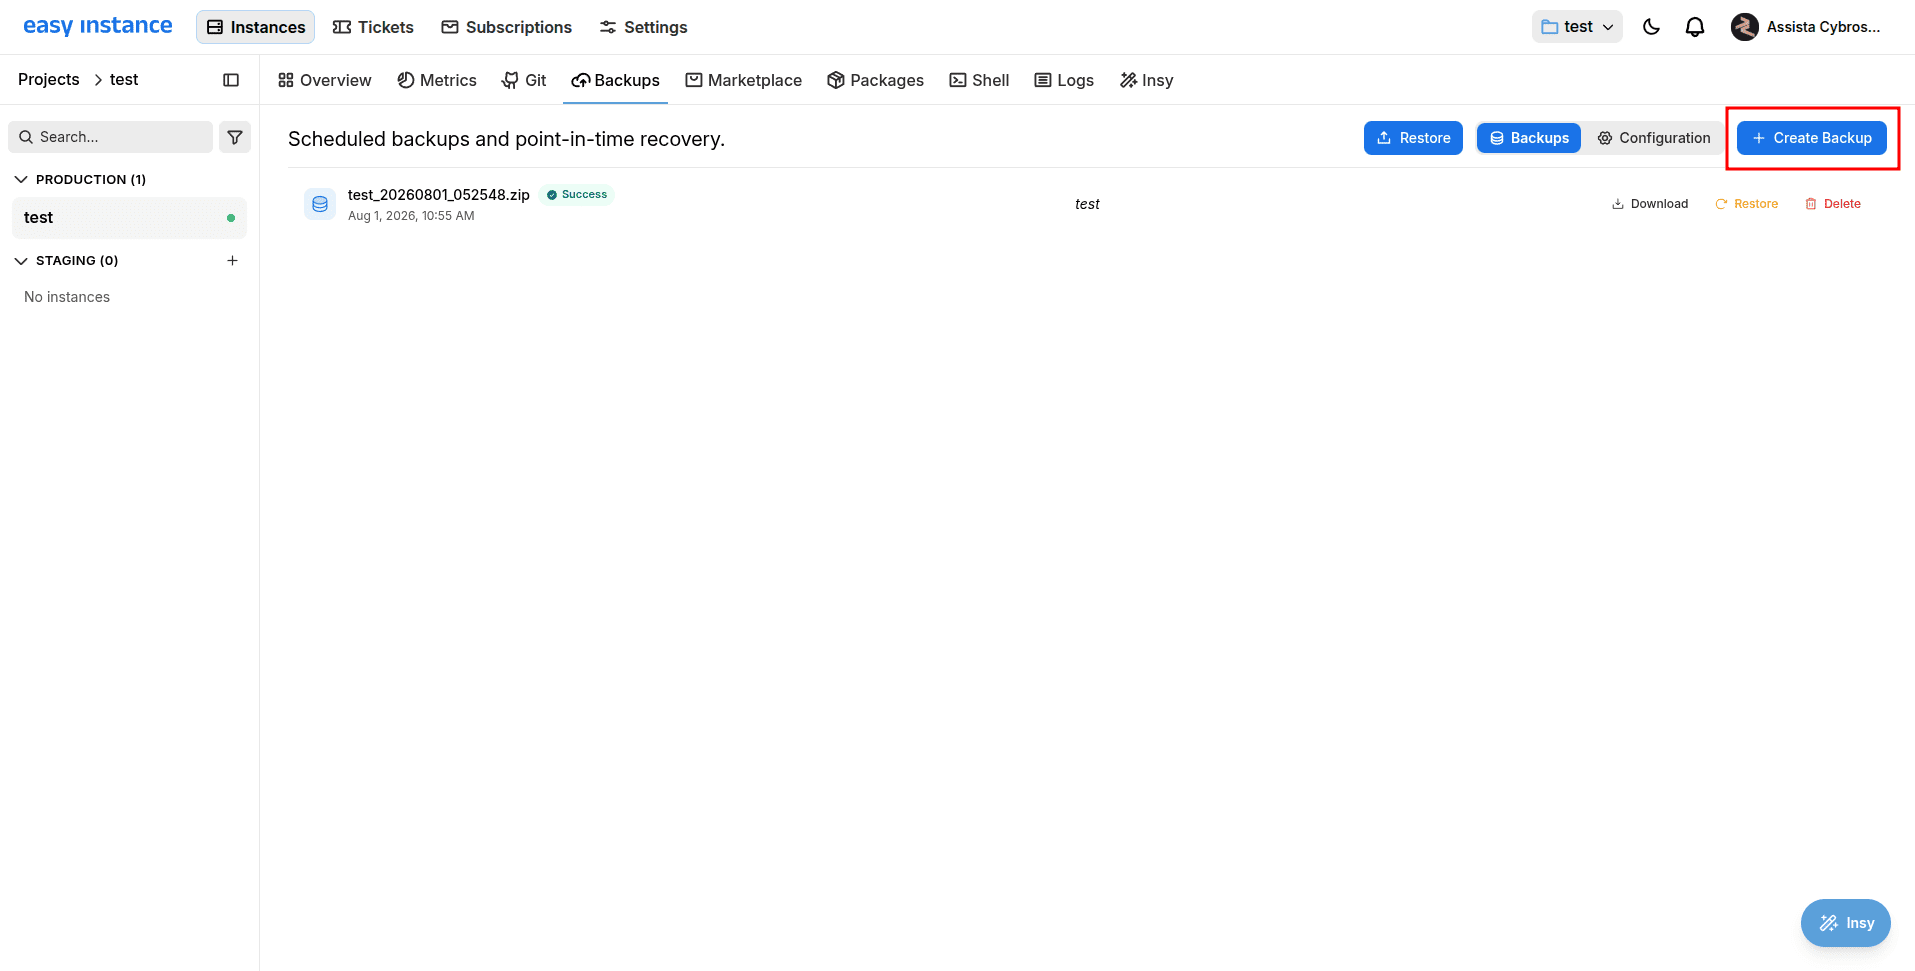
- Backups will be taken to Dropbox according to your schedule.
- If you wish to do so now, you may click on the 'backup now' button. Backups will be taken to Dropbox according to your schedule.
- If you wish to do so now, you may click on the 'backup now' button.
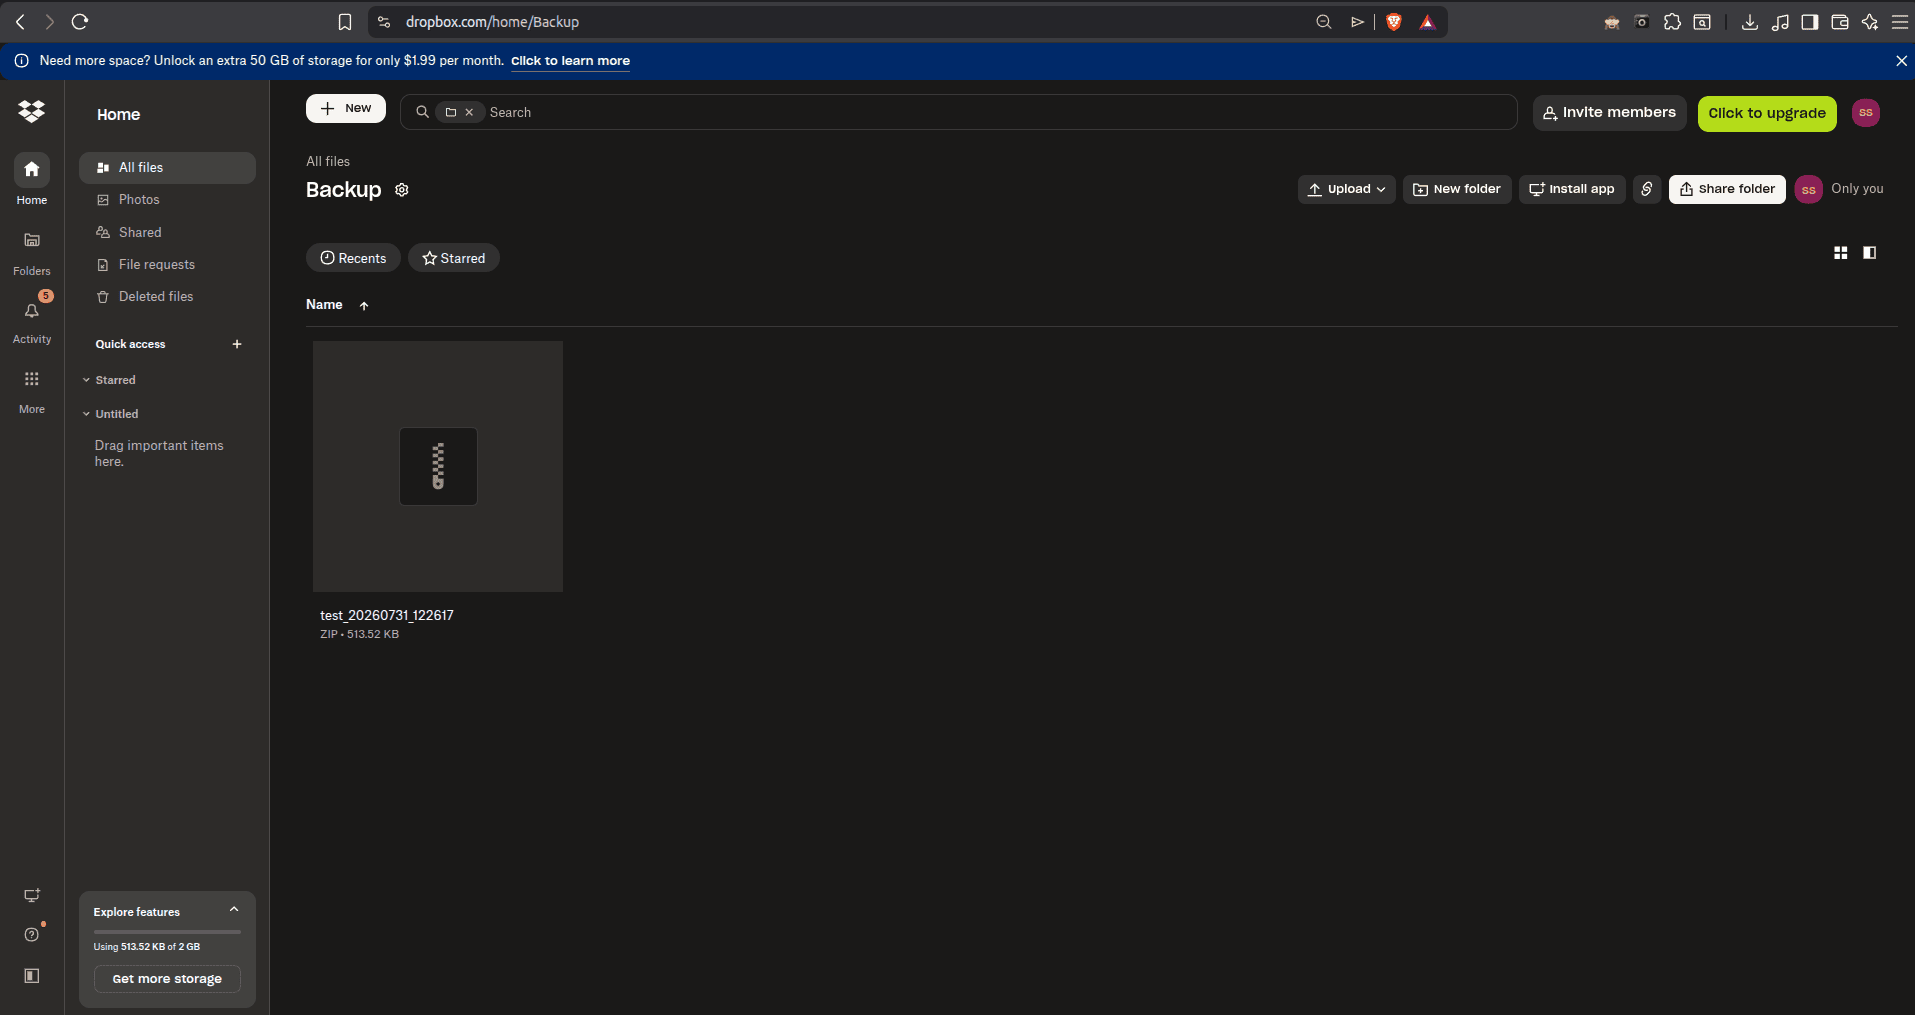
- Go to the home page and check the folder for backup.
Nextcloud
To set up Odoo backups to save files on NextCloud:
Step 1: Set up a NextCloud Account:
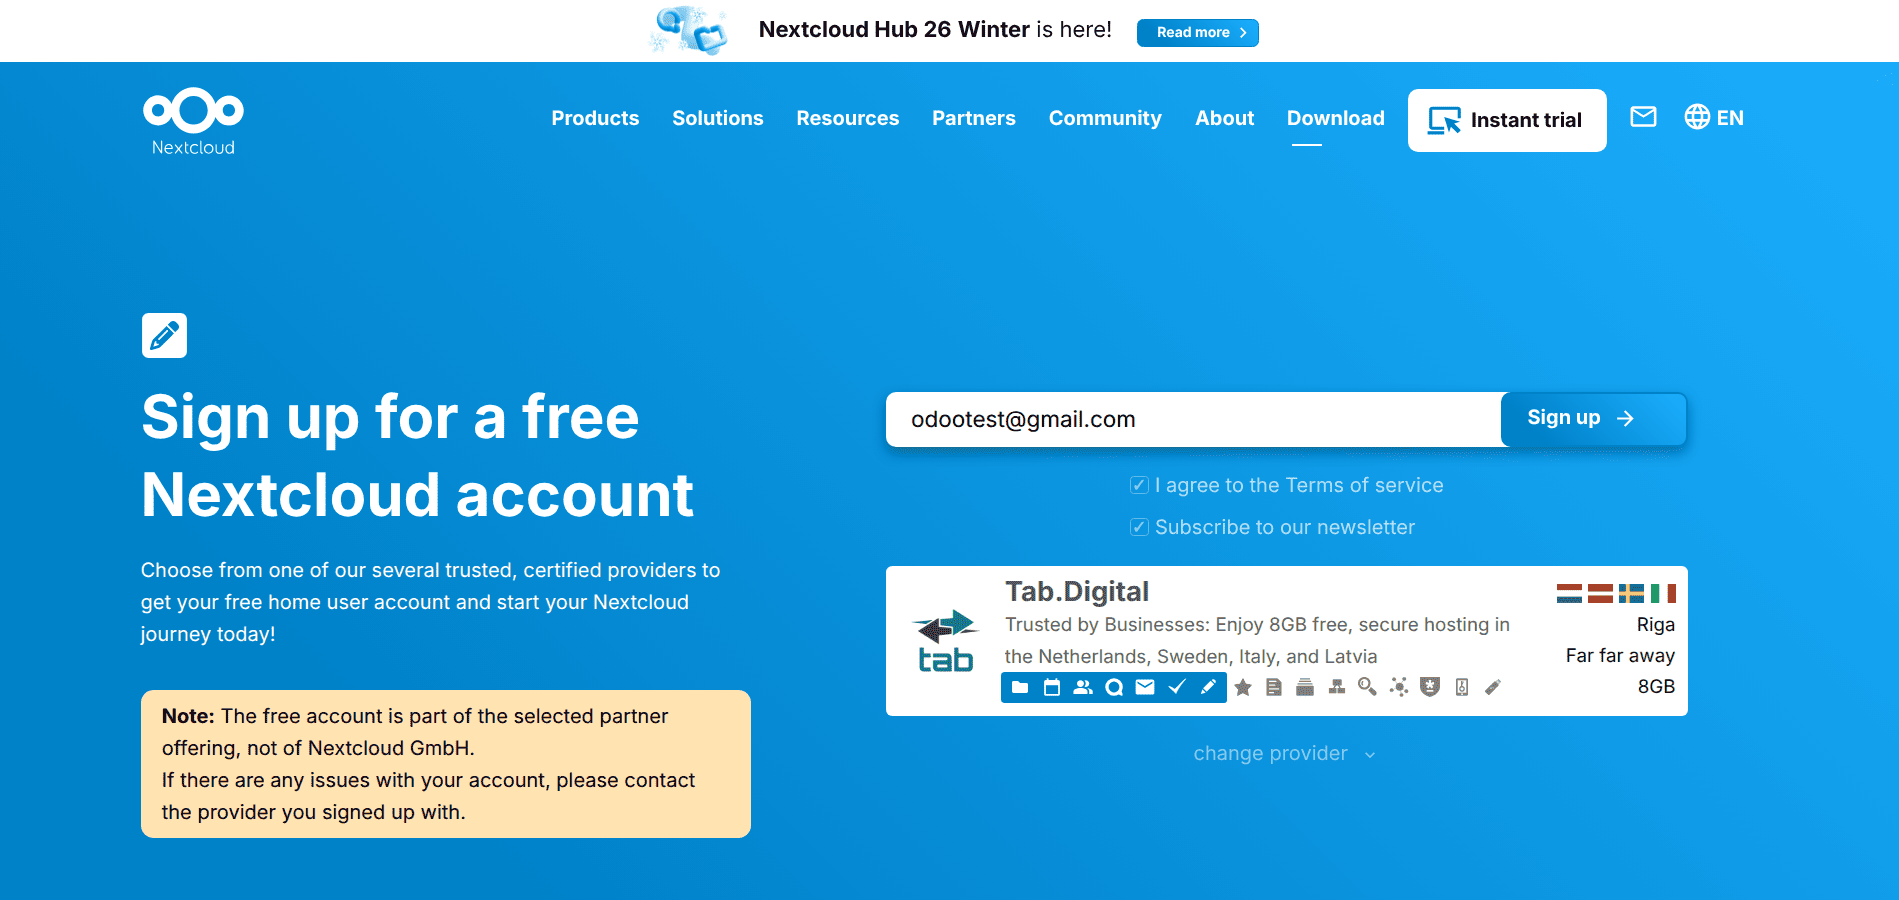
Step 2: Log in to NextCloud
- After signing up, you will be taken to the login page.
- Enter your email address and password to log in to your account.
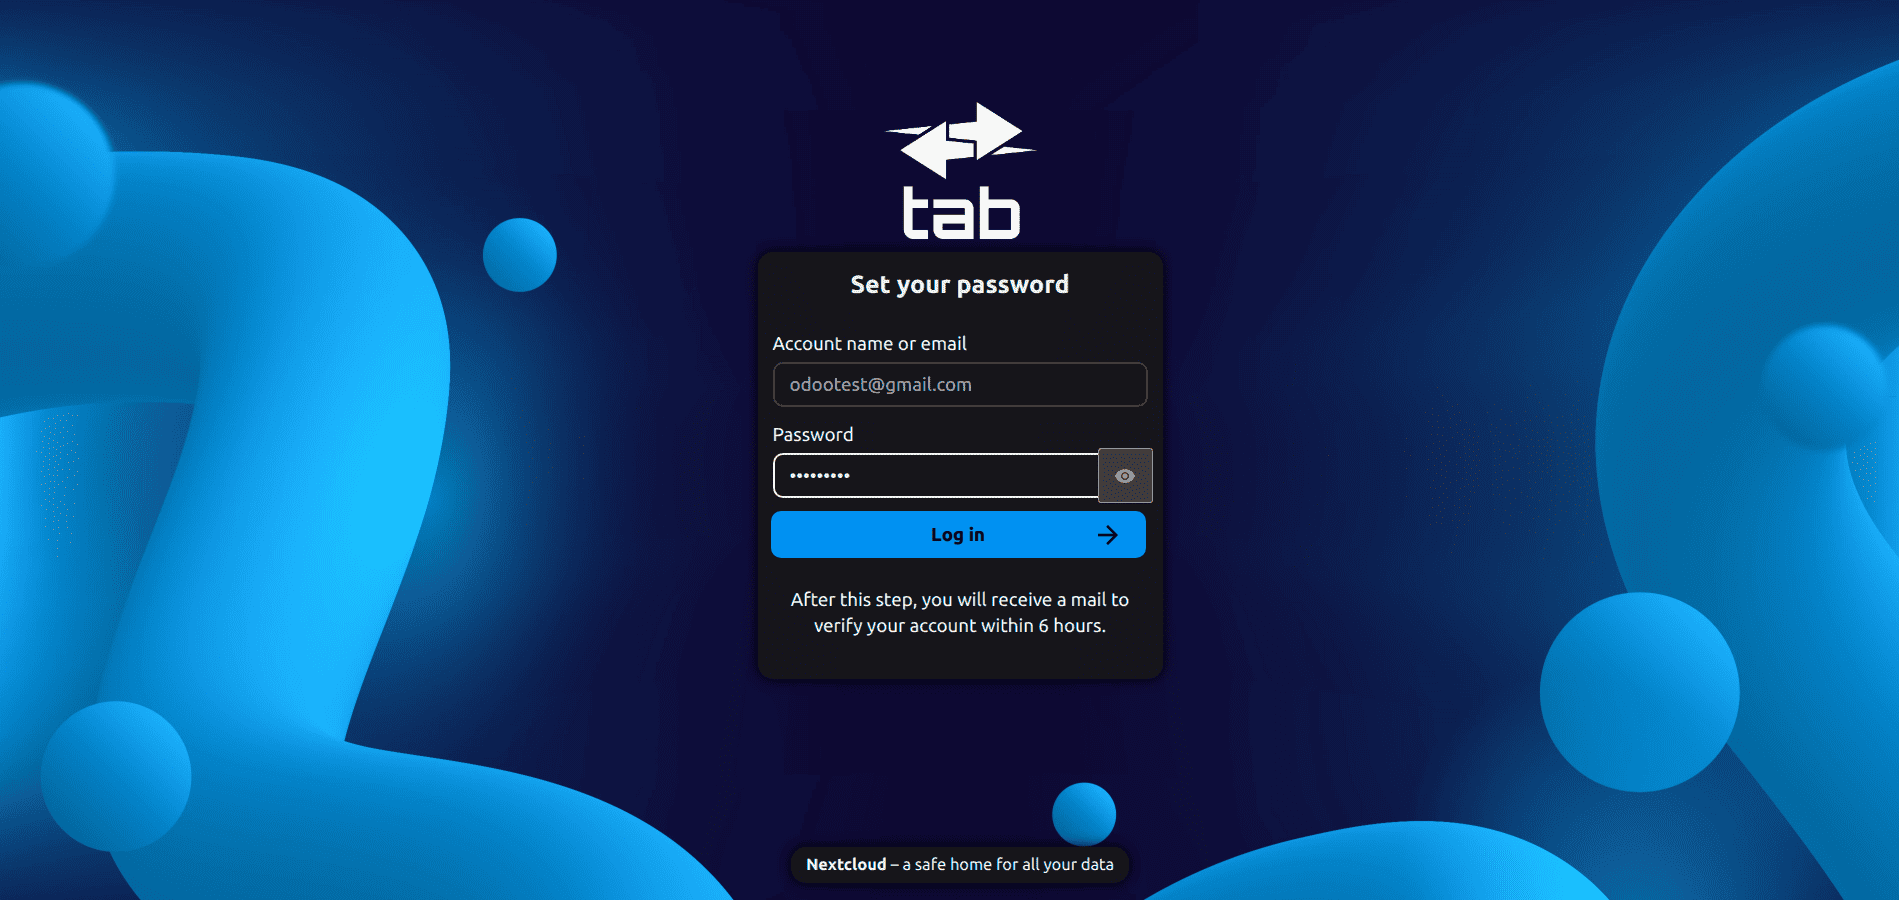
Step 3: Configuring the Backup in Odoo
- Choose NextCloud for the backup location.
- Fill in the following information:
- Folder Name (for the backup location)
- The domain name can be obtained from the URL.
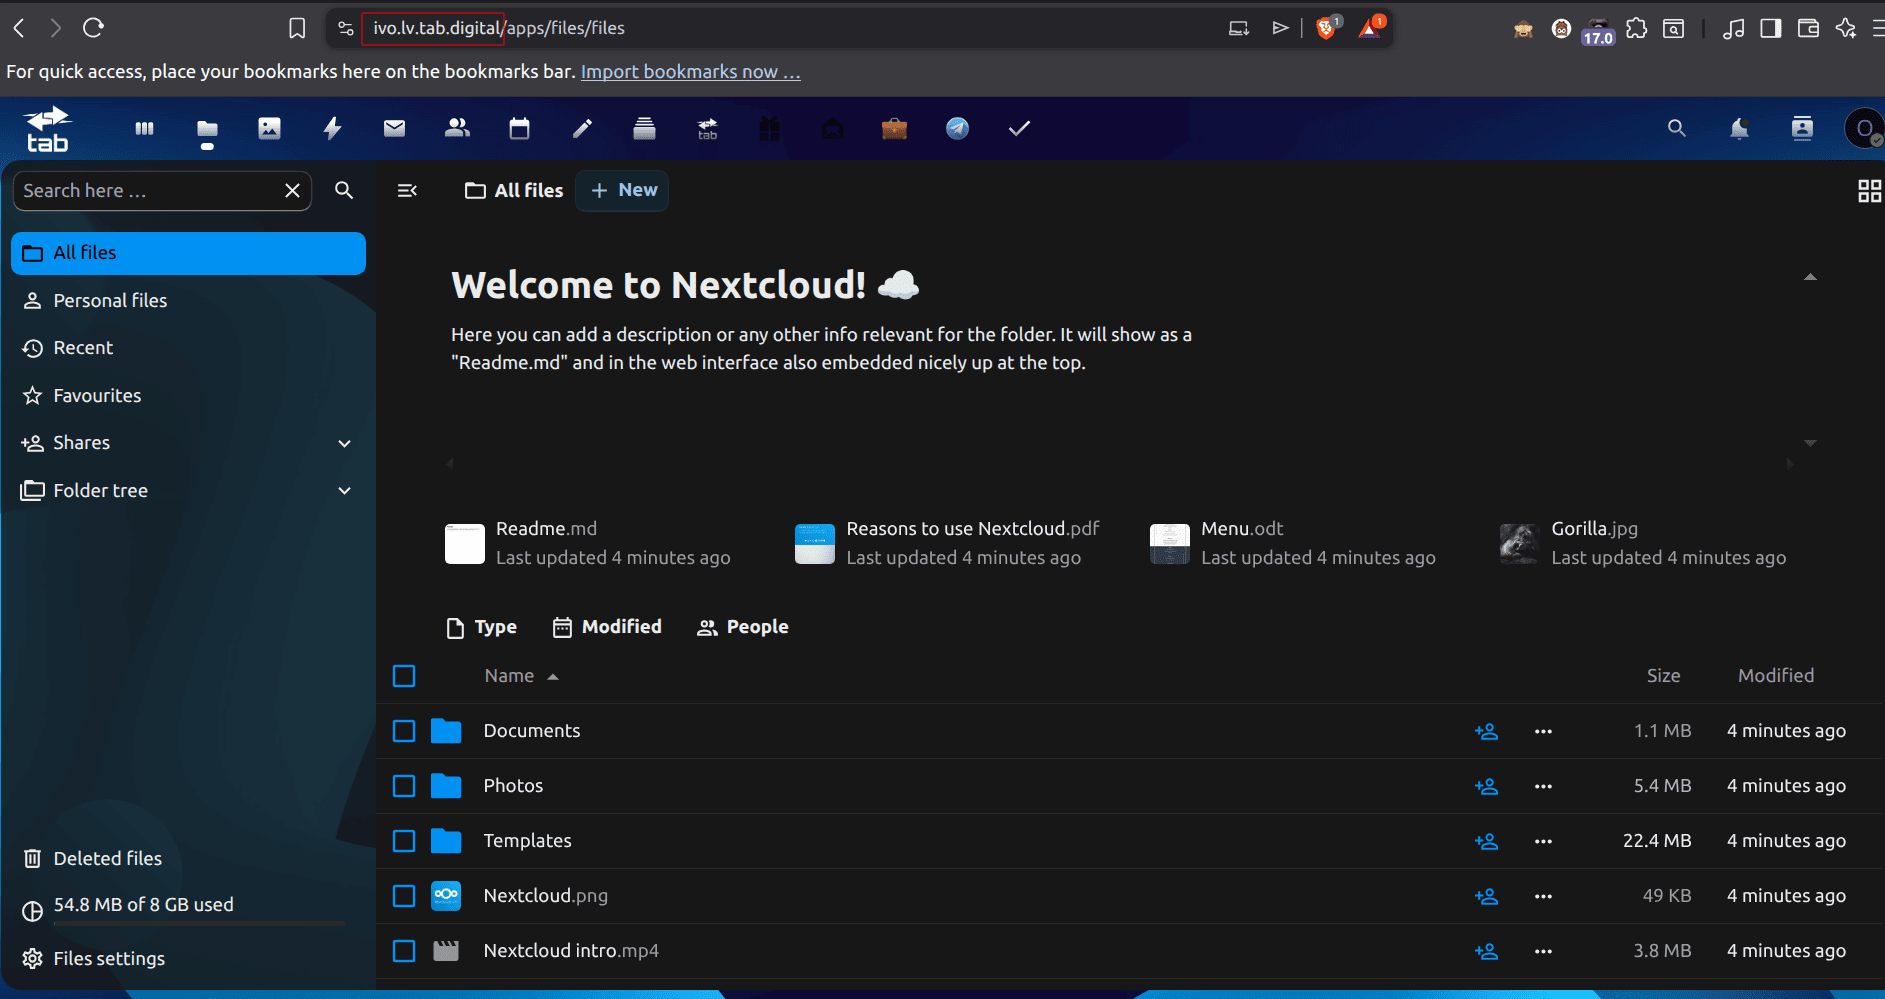
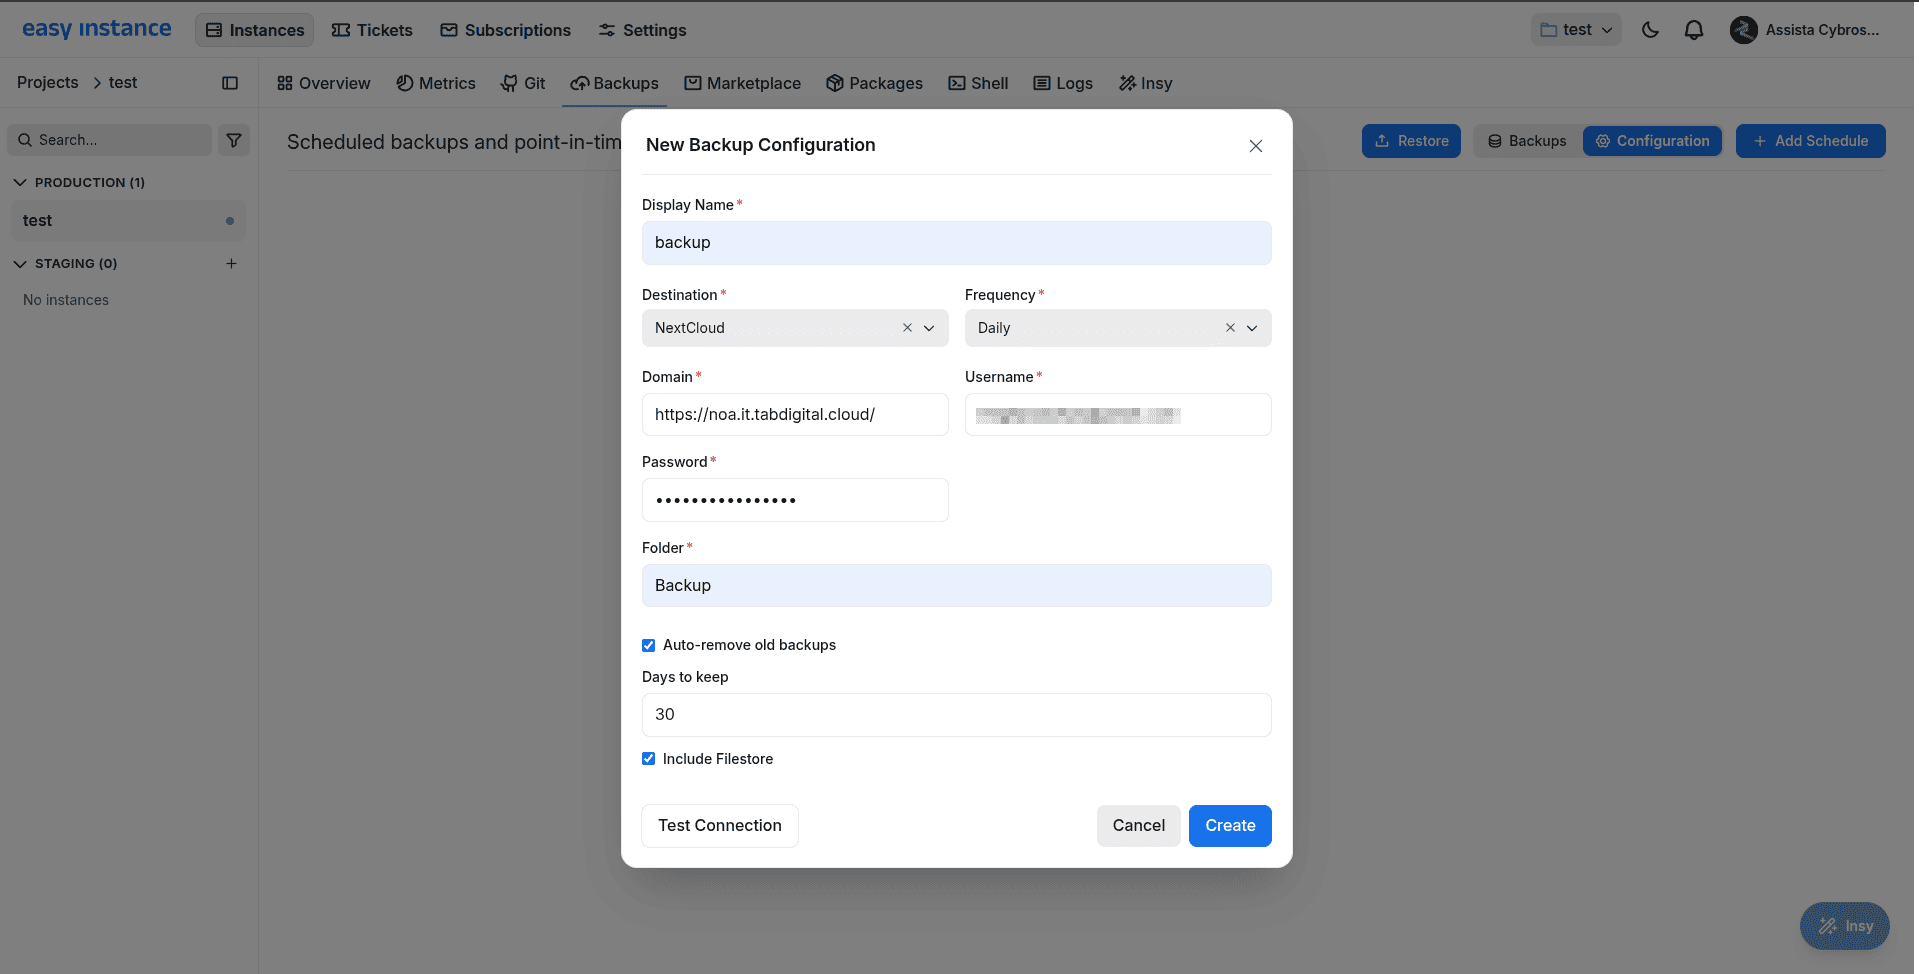
- Backup will be taken in the specified folder at the desired interval.
Amazon S3:
To set up Amazon S3 for backup purposes, you have to do the following steps:
Step 1: Make an Account in Amazon S3:
- Sign in to Amazon S3
- Enter your email address and follow the steps to sign up.
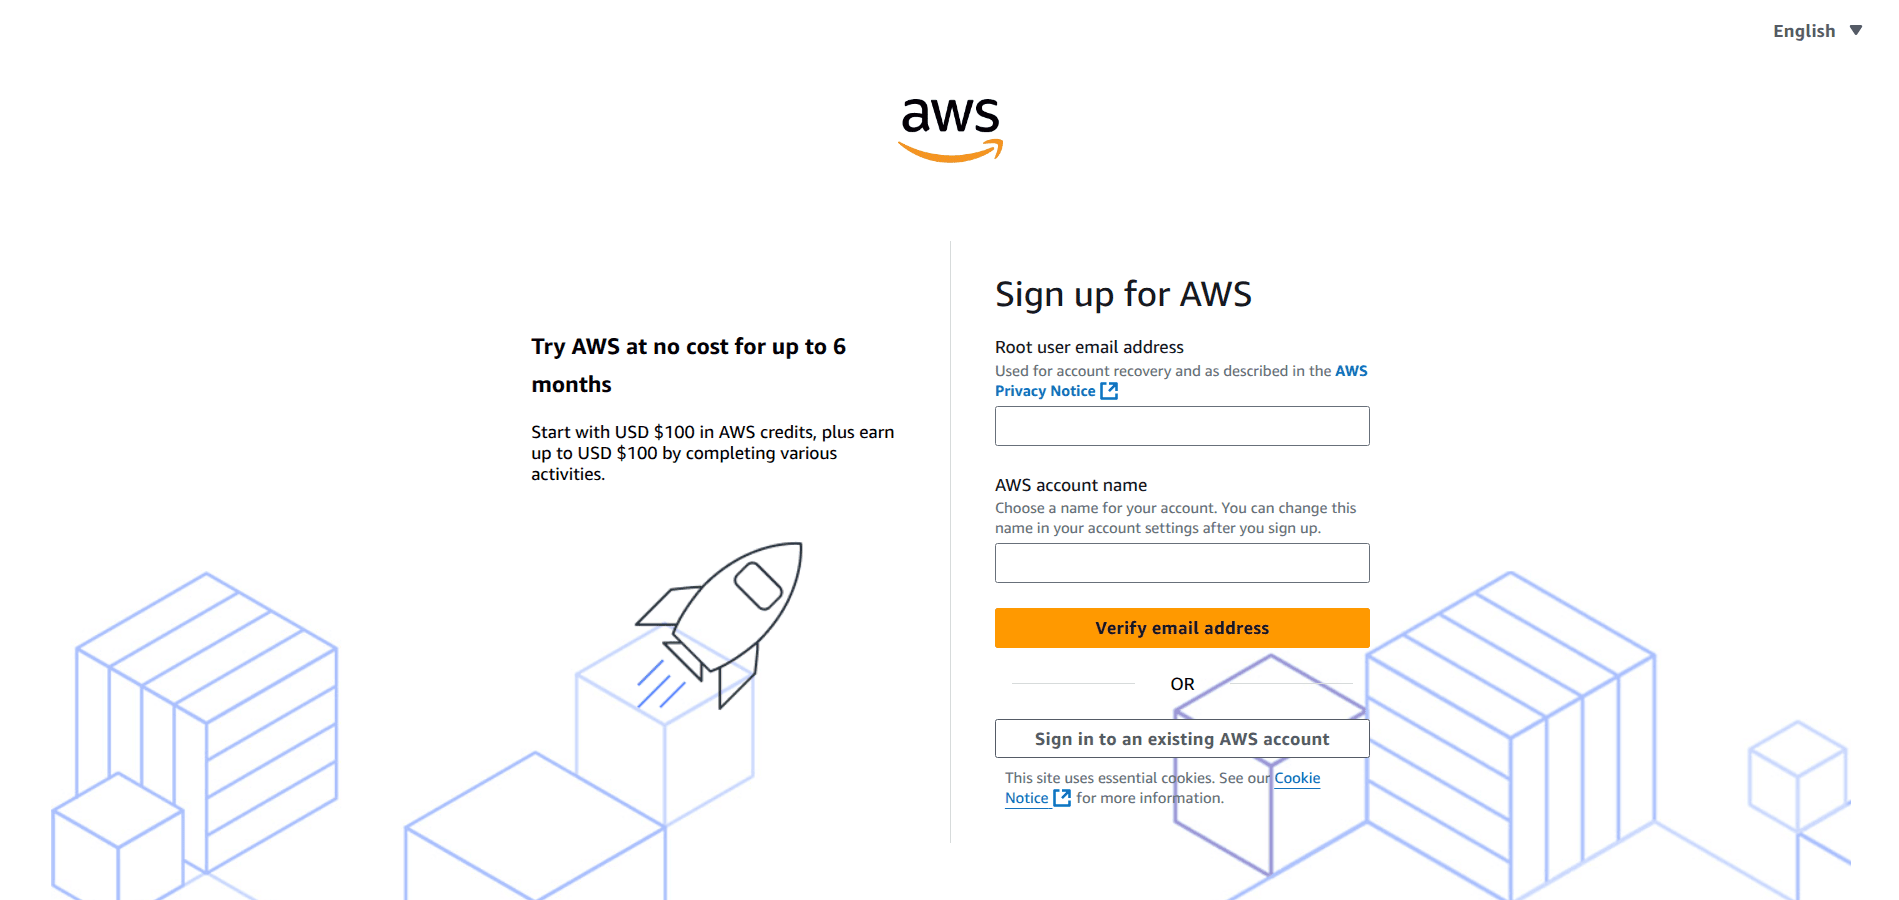
Step 2: Generate Access Keys
- Now that you have created your account, go to Account Security Credentials.
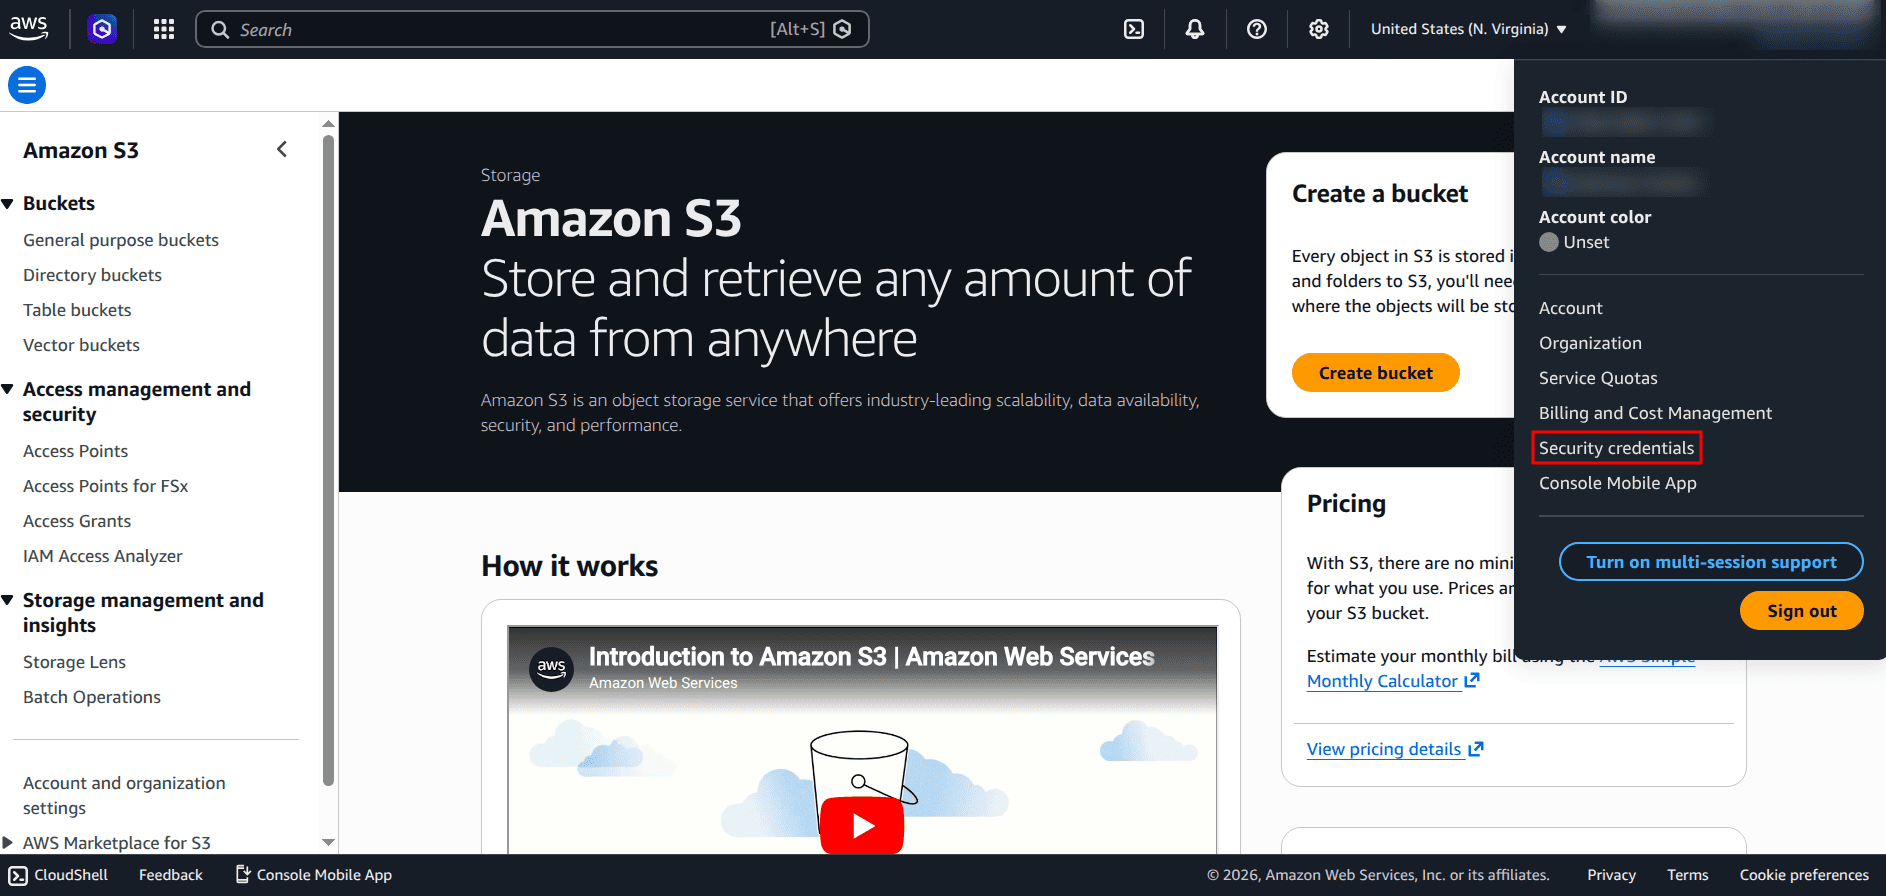
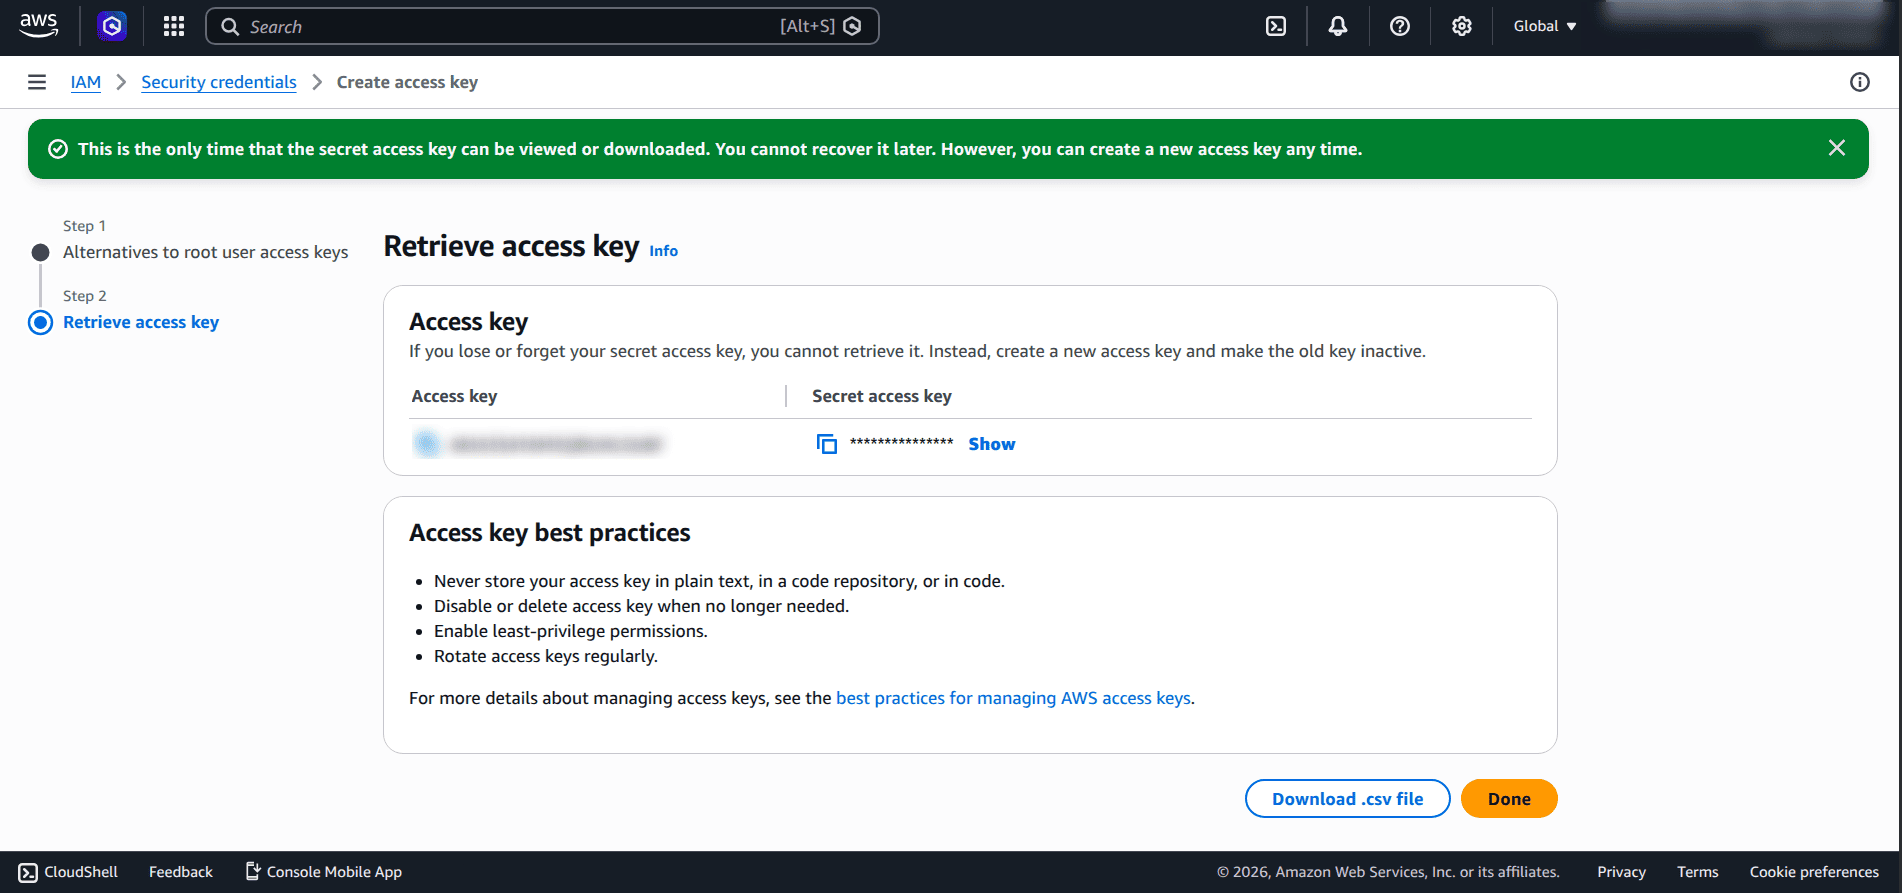
- Generate a new access key under Access Keys.

- Copy Access Key and Secret Key for future references.
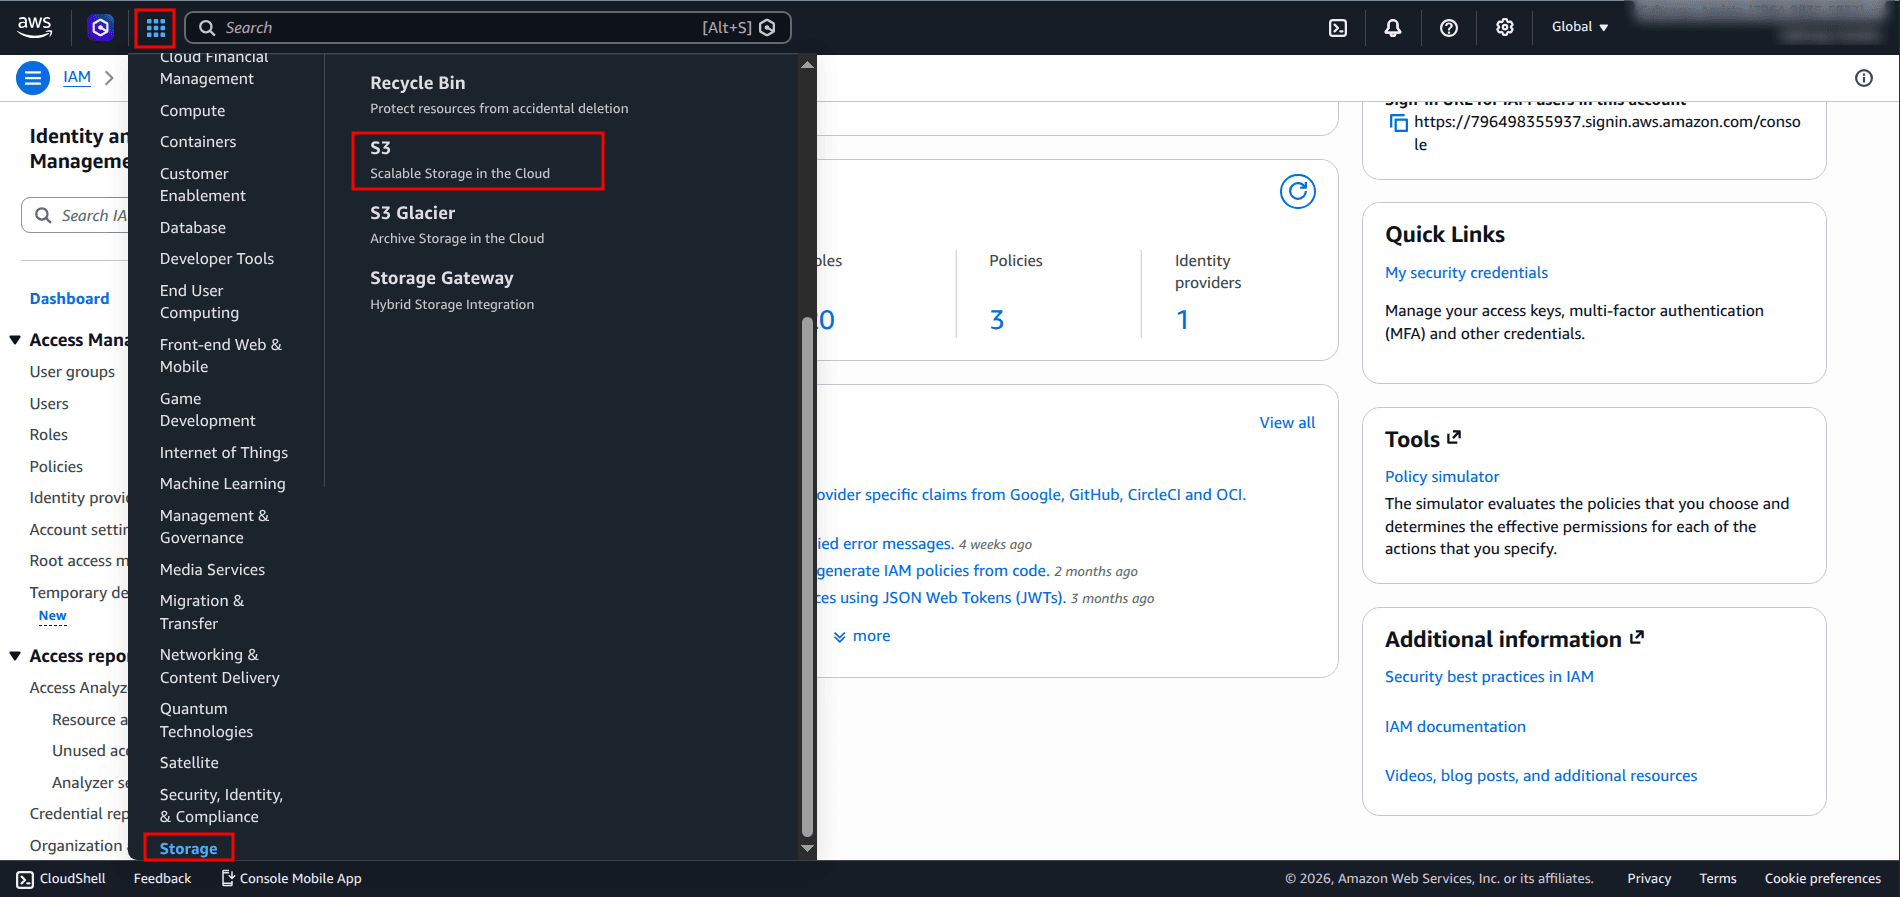
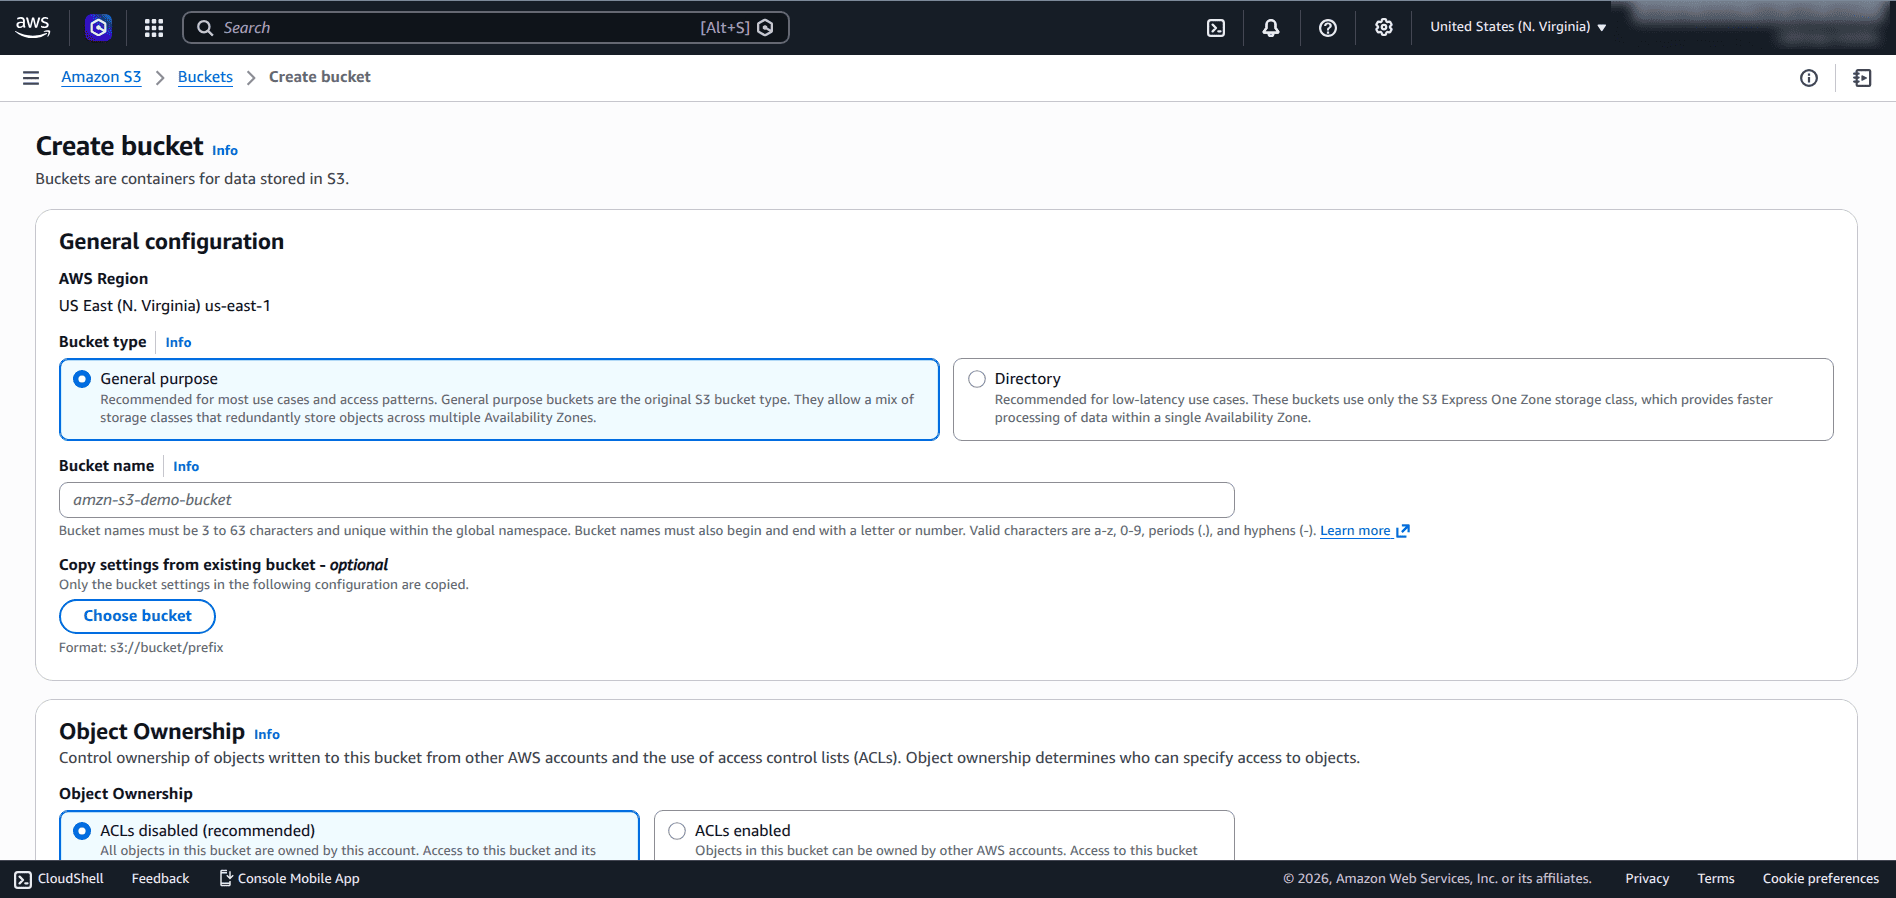
Step 3: Create an S3 Bucket
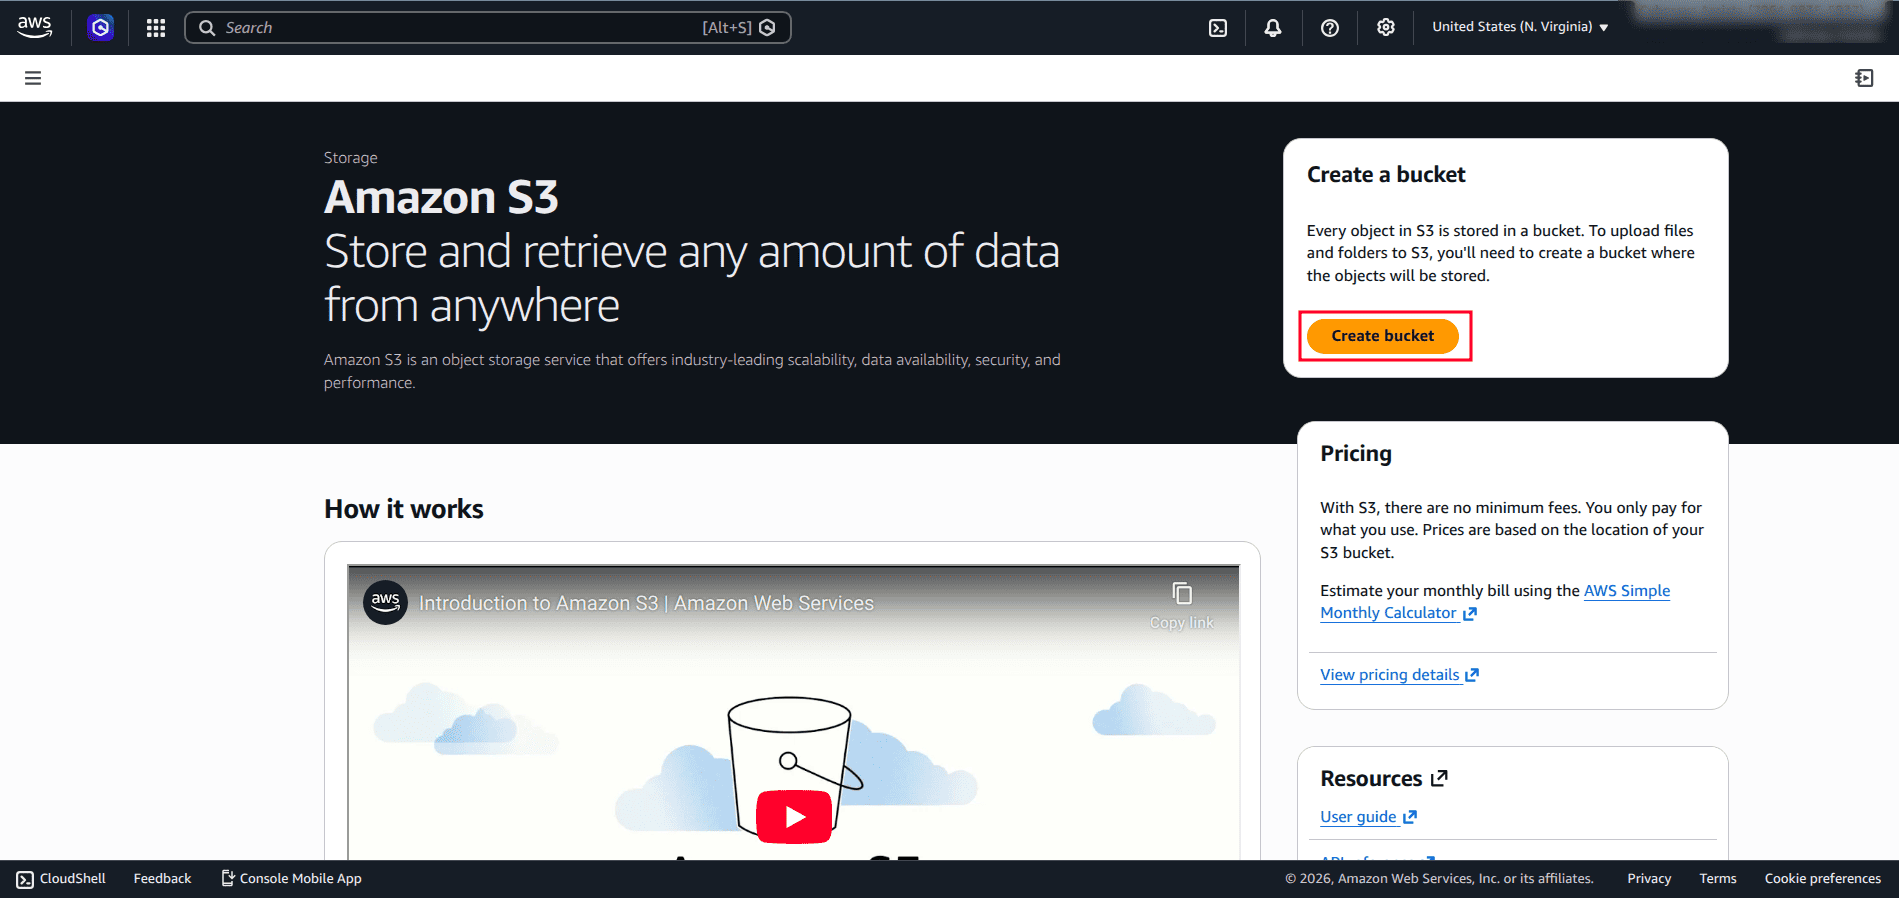
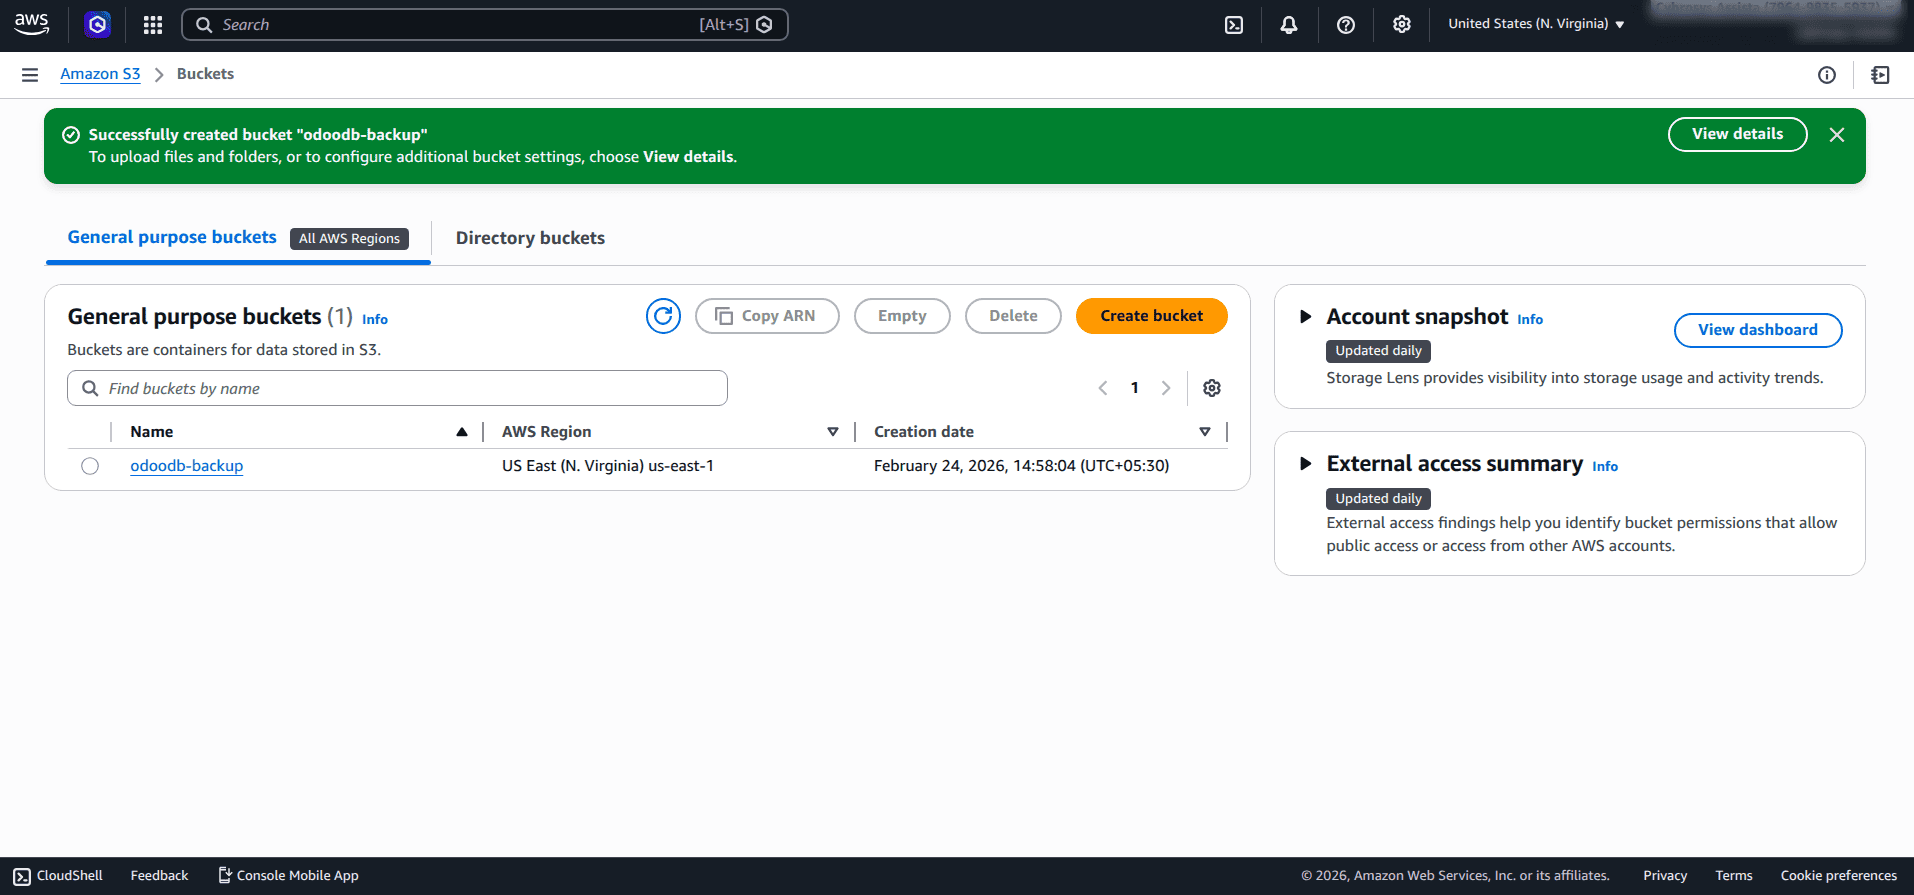
- Make sure that the name follows the naming conventions and click on Create Bucket to proceed. You will see the Bucket Folder, as shown below in the screenshot.
Step 4: Configuring Backup in Odoo
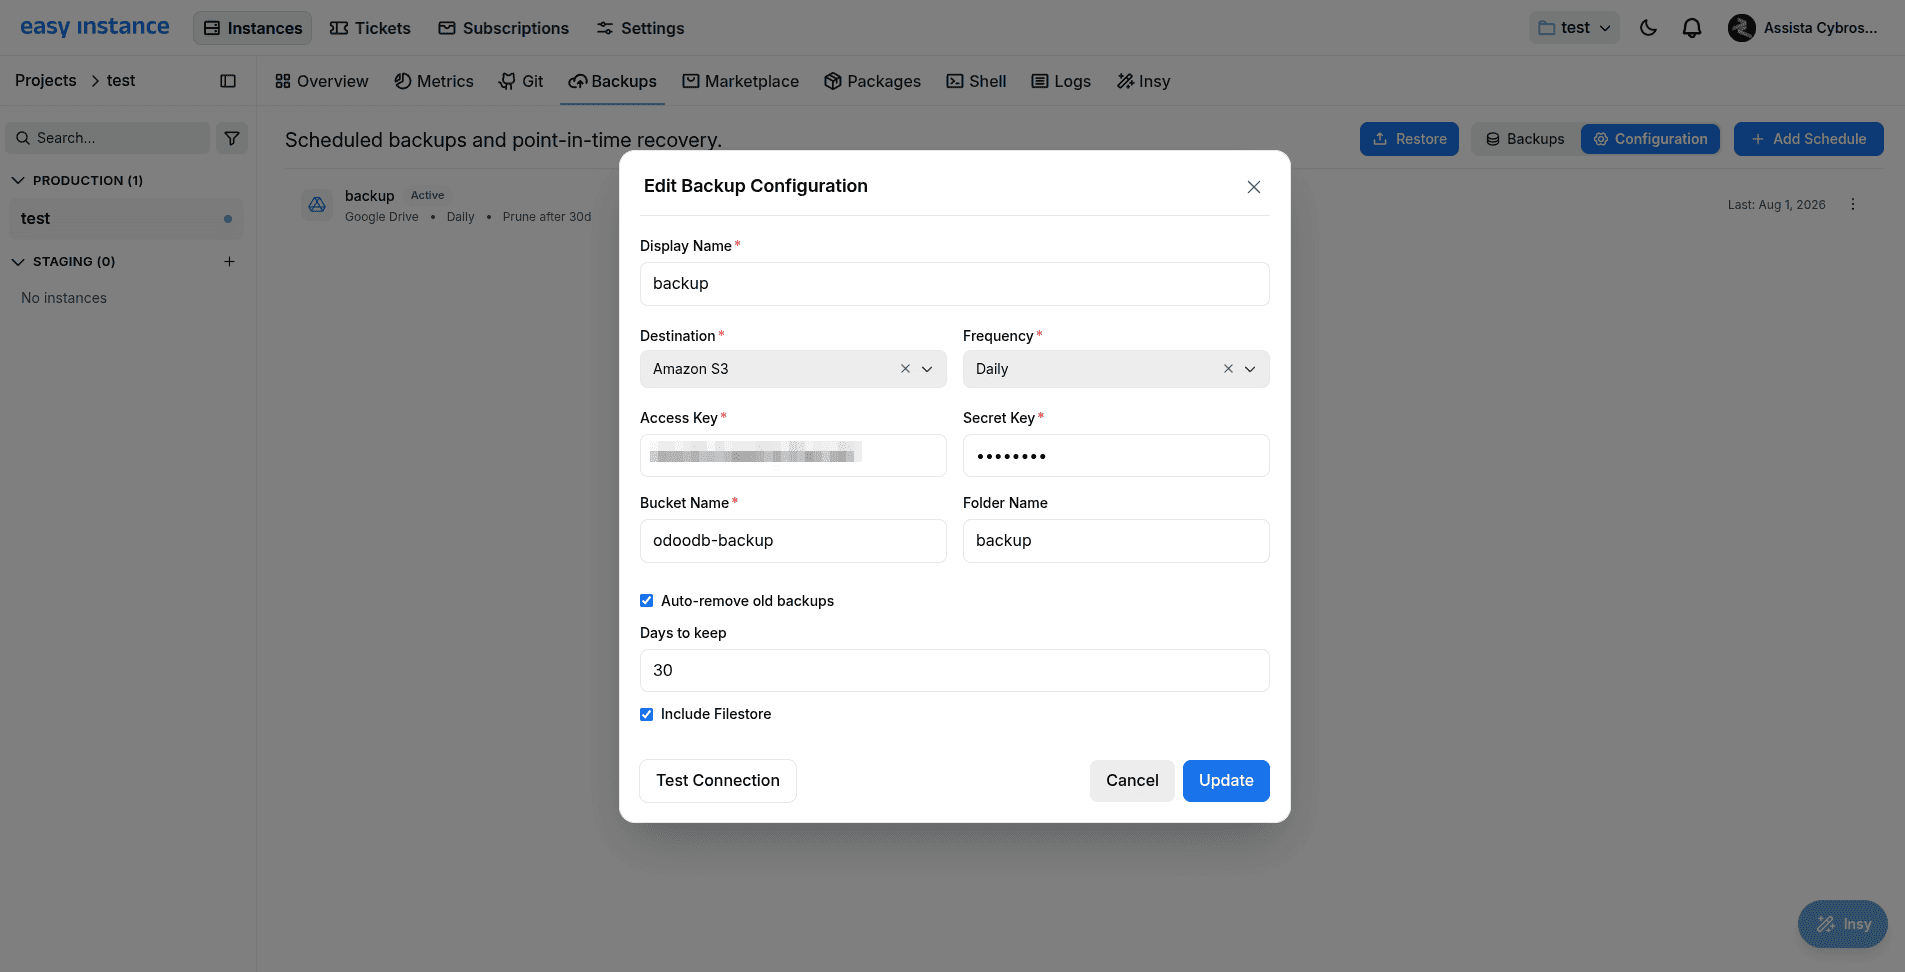
- Choose Amazon S3 for Backup Configuration.
- Fill in the following information:
- Bucket Name (the one you created in step 3)
- File Name (the folder in which the backup file will be stored in the bucket)
- Press the “Test Connection” button.
The file will be stored in the bucket)
- Press the “Test Connection” button.
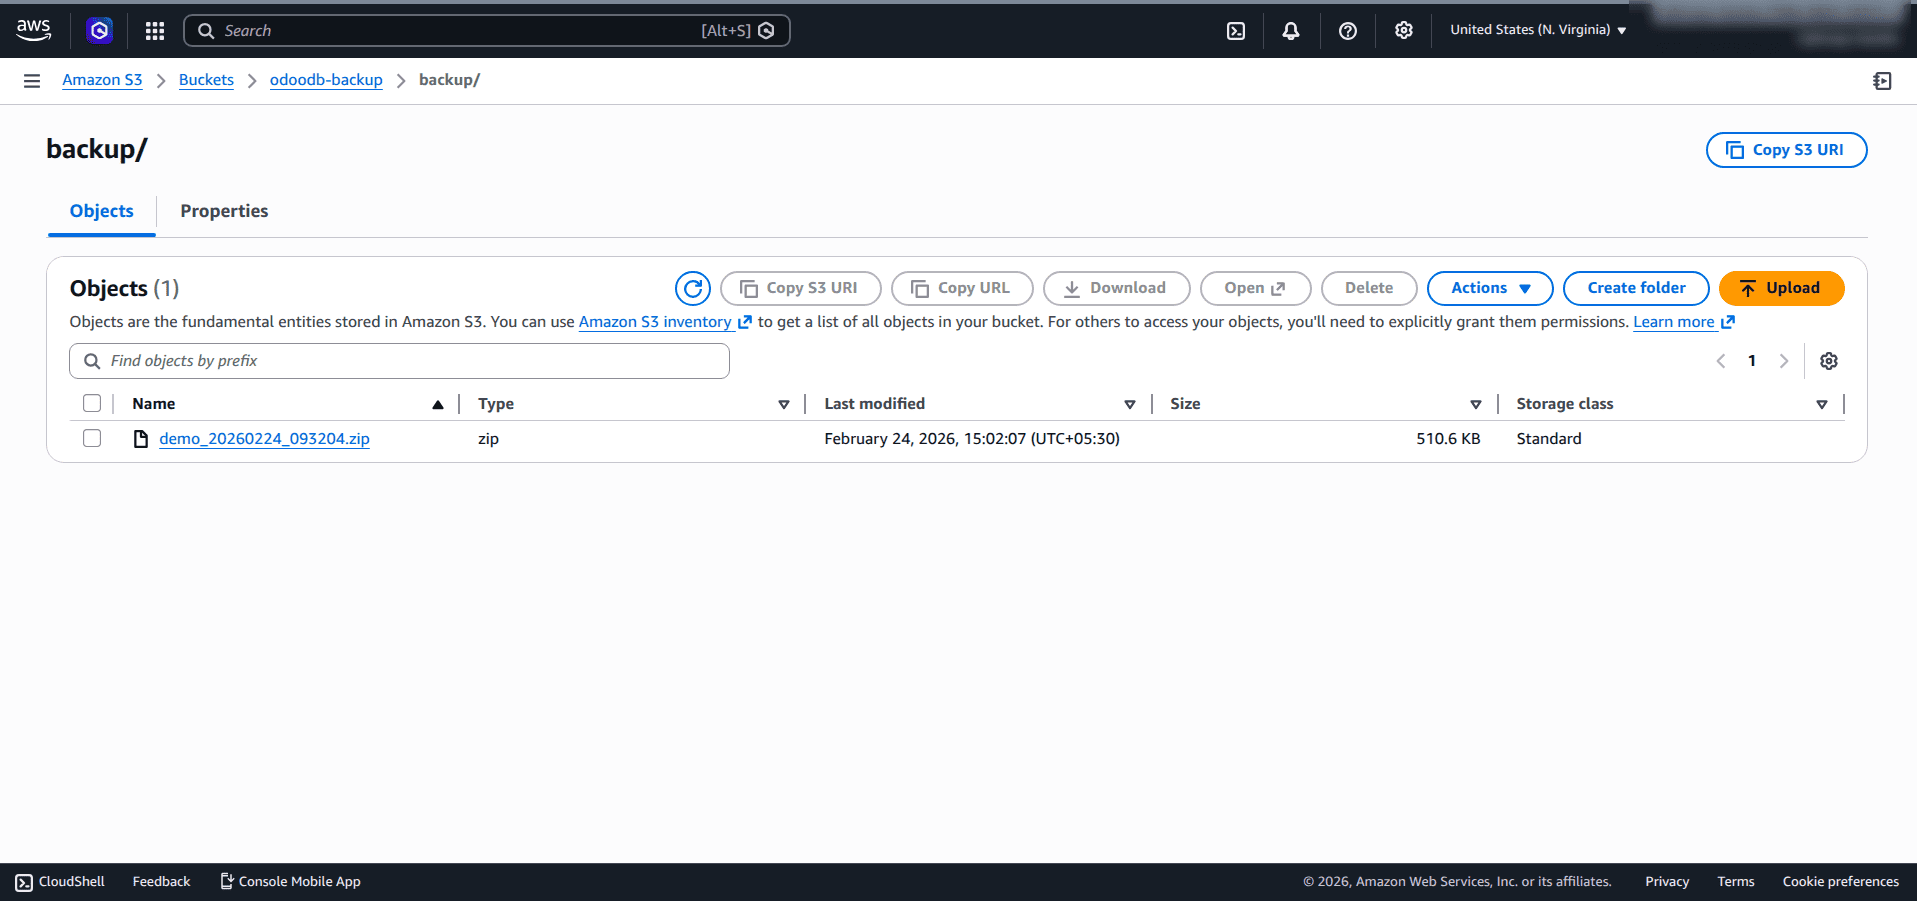
- Backups will be created in the folder based on the backup frequency.
Easy Instance makes database backup management simple, automated, and reliable by supporting multiple storage destinations such as FTP, SFTP, Google Drive, Dropbox, Nextcloud, and Amazon S3. By configuring a suitable backup destination and schedule, users can ensure that important Odoo data is regularly backed up without manual intervention.
These automated backups provide an additional layer of protection against data loss caused by server failures or accidental deletion. With flexible storage options and easy connection testing, Easy Instance helps users maintain secure and accessible backups, ensuring their data can be restored whenever required.
To read more about How to Create an Odoo Staging Instance in EasyInstance, refer to our blog How to Create an Odoo Staging Instance in EasyInstance.