Applying an efficient ERP for any type of business is
a crucial thing for making your business updated and more profitable. It will
definitely help you to increase your business efficiency, better productivity,
and cost reduction. ‘Odoo’, one of the leading ERPs available in various
editions, can create notable changes in your business and it will assist you to
manage all your business-related activities.
The Odoo ERP includes over thirty main modules and
these modules are regularly updated. Moreover, above sixteen thousand
third-party apps and plugins are available in the Odoo App Store. Each of these
modules will allow you to configure various functions and features in an
efficient way. Most of these platforms keep a separate tab for configuring
various features. This tab will provide you the provision to manage and execute
all configurations aspects. You can set all your data and all related
documents, information, and all the back-end operations under this
configuration menu.
Odoo 14 Helpdesk module also provides you a separate
and well-suited Configuration tab. Under this tab, you can configure various
configurations such as Helpdesk Teams, Ticket Type, Stages, and SLA Policies
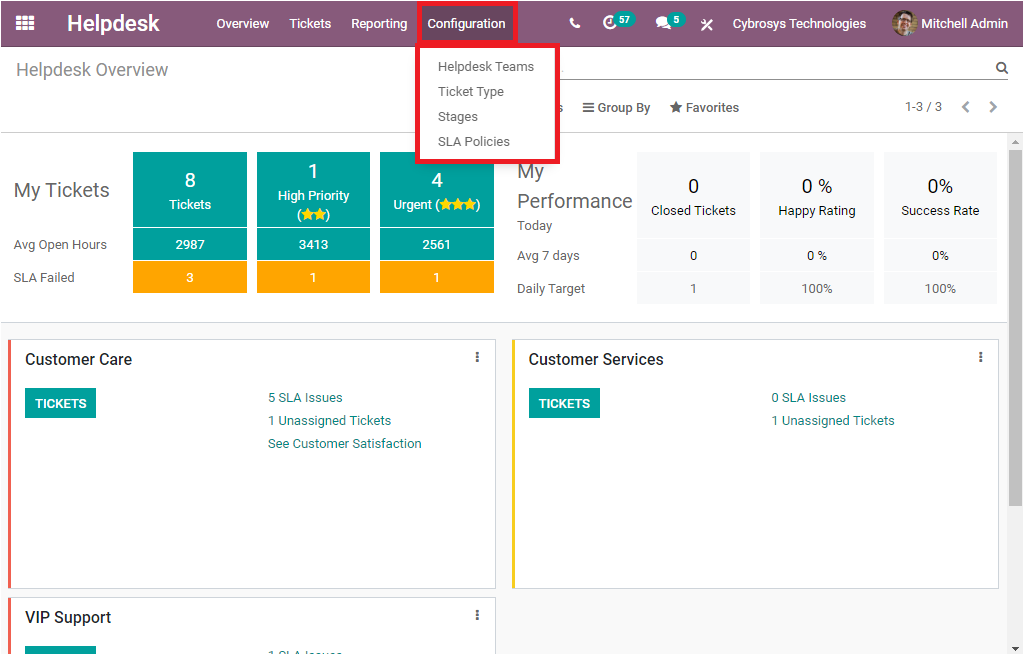
In this blog, let us have a look at how to configure Ticket Types, Stages, SLA Policies in the Odoo Helpdesk module.
First, we can discuss the configuration of Ticket Types.
Ticket Types
The user-convenient and multipurpose Odoo Helpdesk module give you the provision to create different ticket types based on your requirements. For managing Ticket Types, Odoo provides a separate window that can be accessed from the configuration tab of the Odoo Helpdesk module. You can view the image of the window below.
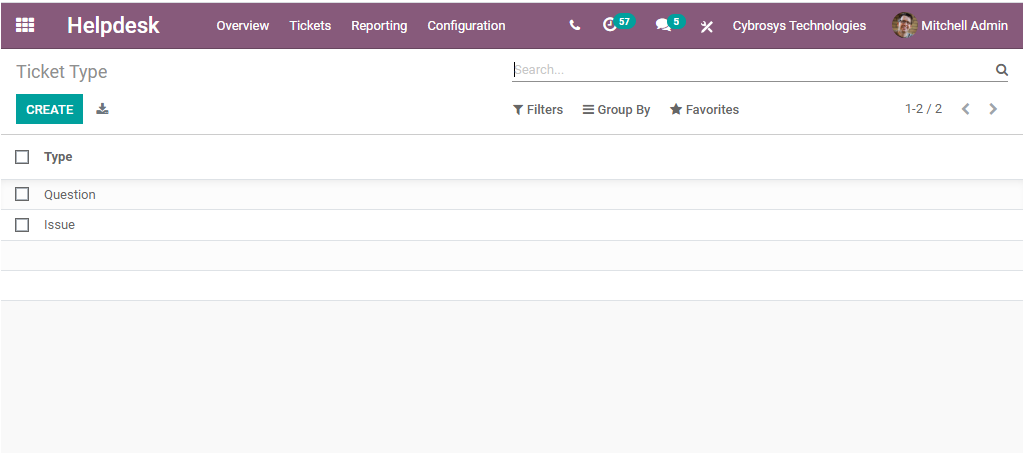
In this Ticket Type window, you can view all the configured ticket types on the platform. For configuring a new Ticket Type, you can click on the CREATE icon. Upon selecting the Create icon, a new space for creating a new type will have appeared in the same window where you can mention the Ticket Type and click on the SAVE button to save the created Ticket Type.
It is clear how to create Ticket Types in the module and now let us have a glance at the configuration of Stages.
Stages
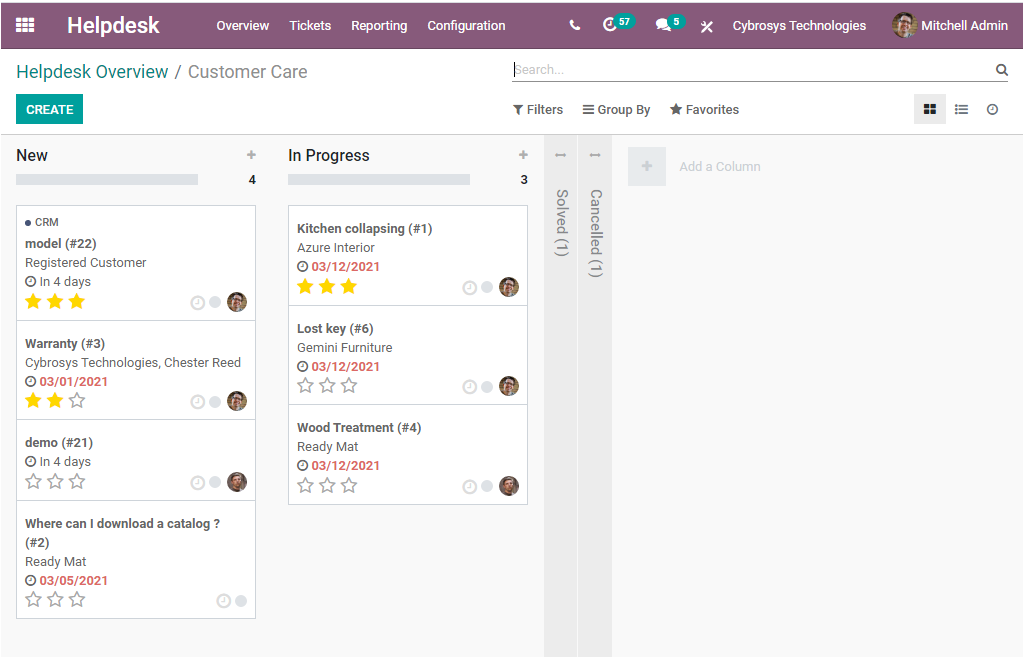
Stages are an important and useful aspect of Odoo. The Helpdesk module also allows you to define various stages for defining all the generated tickets in various stages such as New, In Progress, Solved, Cancel, and many more aspects on the basis of the current status. This will be very helpful for easy understanding.
Now let us discuss the configuration steps of Stages
in the Helpdesk module. The Stages option can be available under the
Configuration tab of the Odoo Helpdesk module. I will depict the screenshot of
the window below.
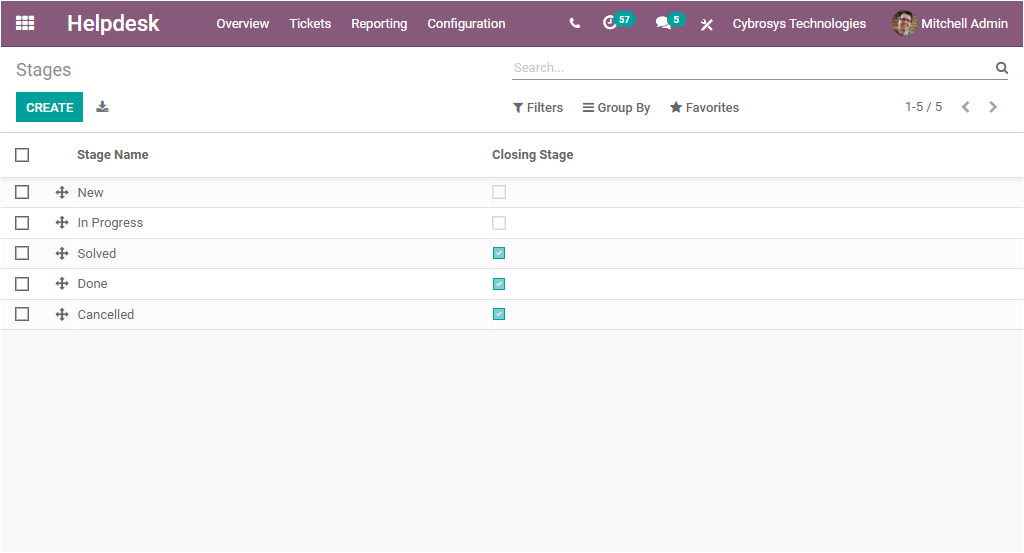
Using this window, you can configure various stages
within minutes. For creating a new stage, you can click on the CREATE button
available. Then you will be able to view a stages creation window as shown in
the below image.
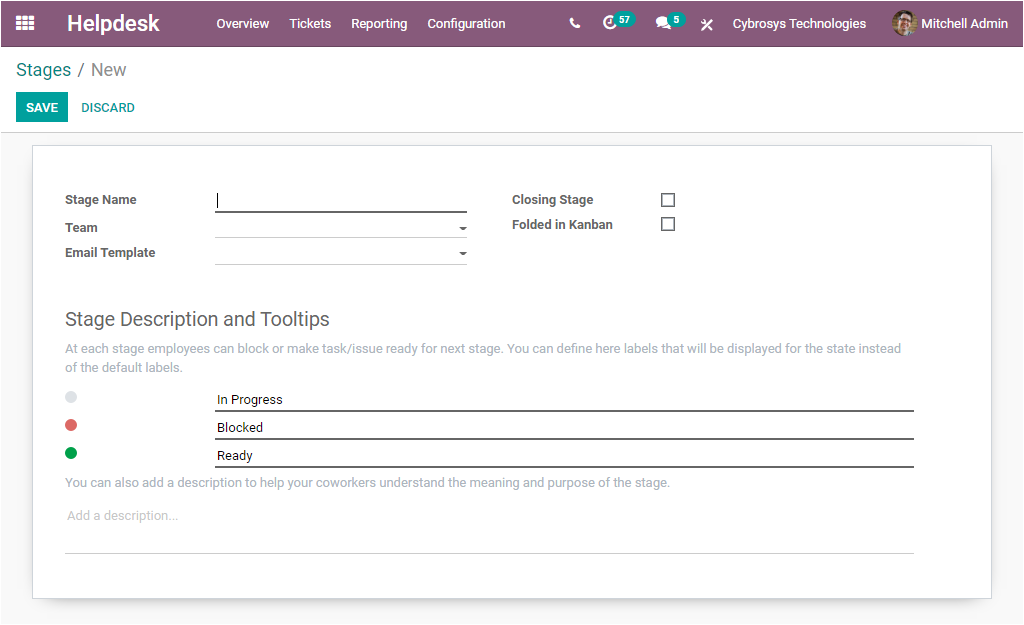
First, you can provide the Stage Name and then you can mention the specific Team that uses this stage. Other teams will not be able to see or use this stage. After mentioning the Team, you can allocate the Email Template for sending automated emails to the tickets customer when the ticket reaches this stage. Then you can enable or disable the option Closing Stage. Tickets in this stage are considered as done. Similarly, you can activate the option Folded in Kanban for folding this stage in the kanban view when there are no records in that stage to display. Finally, you can provide the Stage description and Tooltips.
So far we were discussing the configuration steps of Stages in the platform and now we can discuss the configuration aspects of SLA Policies.
SLA Policies
The comprehensive customer support Helpdesk module also allows you to configure the SLA Policies in a unique manner. The SLA Policies created in the Odoo platform can be viewed in a separate window. The window can be accessed from the Configuration tab of the Odoo Helpdesk module.
Helpdesk -> Configuration -> SLA Policies
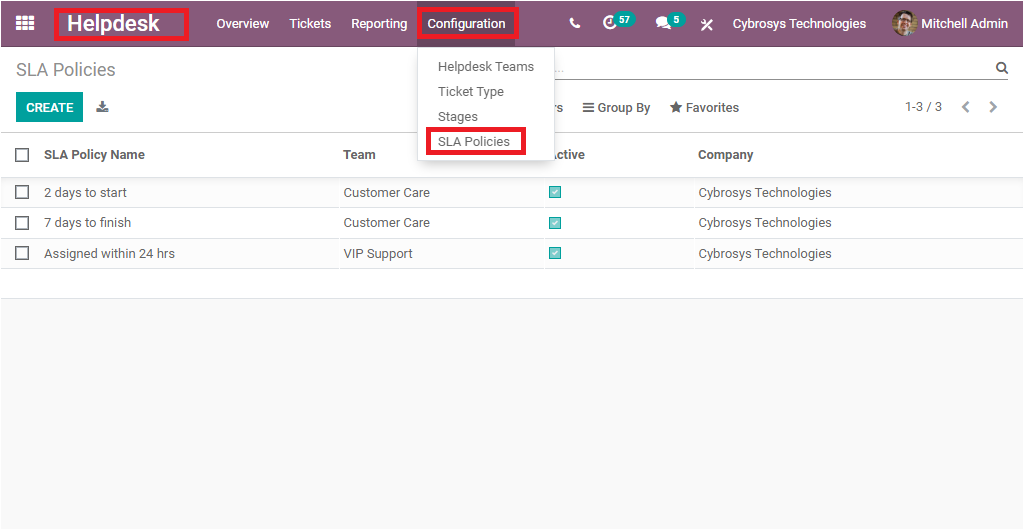
Once you select the SLA Policies option, you will be
taken to a new window as shown in the below image.
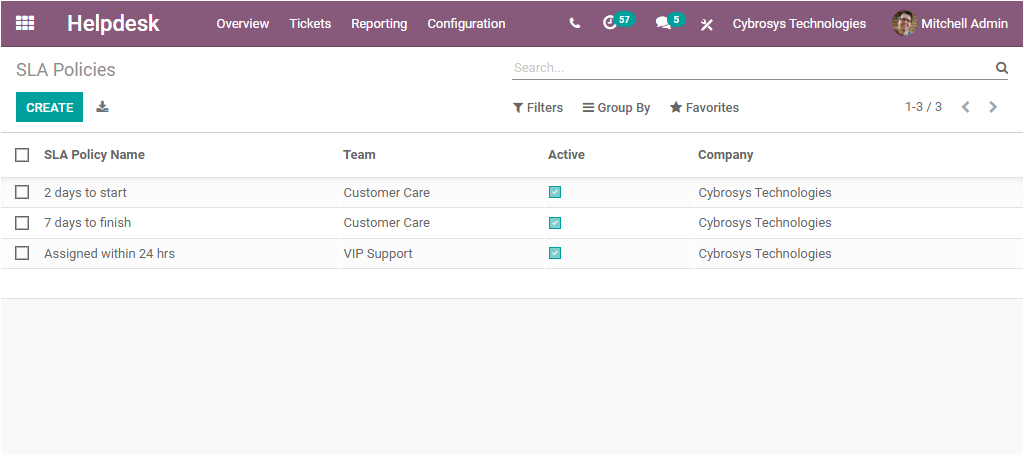
This is the SLA Policies window that Odoo designed for
managing SLA Policies. This window will provide you an insight into all the
existing or previously created SLA Policies. The window is designed in a list
format. Each of the SLA policies is defined separately along with the details
of SLA Policy Name, Helpdesk Team Name, Active, and the related Company name.
The Active option enables you to find whether the policy is in an active state
or inactive state. By viewing this window, you will get a precise idea about
the configured SLA Policies. You can also access the full details of the
configured SLA Policies by selecting the respective SLA Policy. For example, if
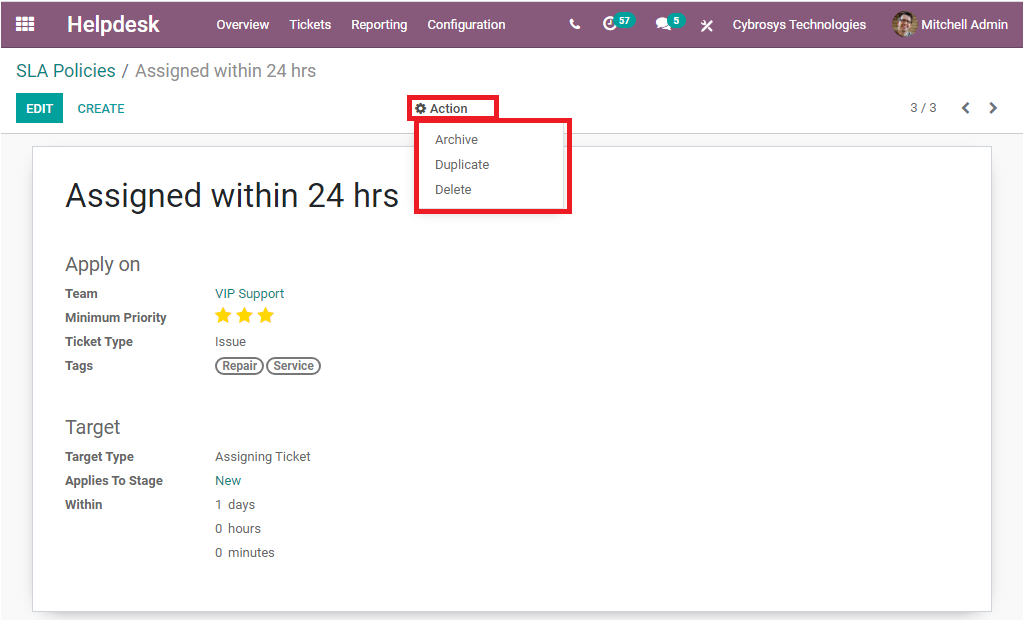
you select the Assigned within 24hrs policy,
you will be depicted with a window where you can view the detailed
configuration steps of the respective SLA Policy.
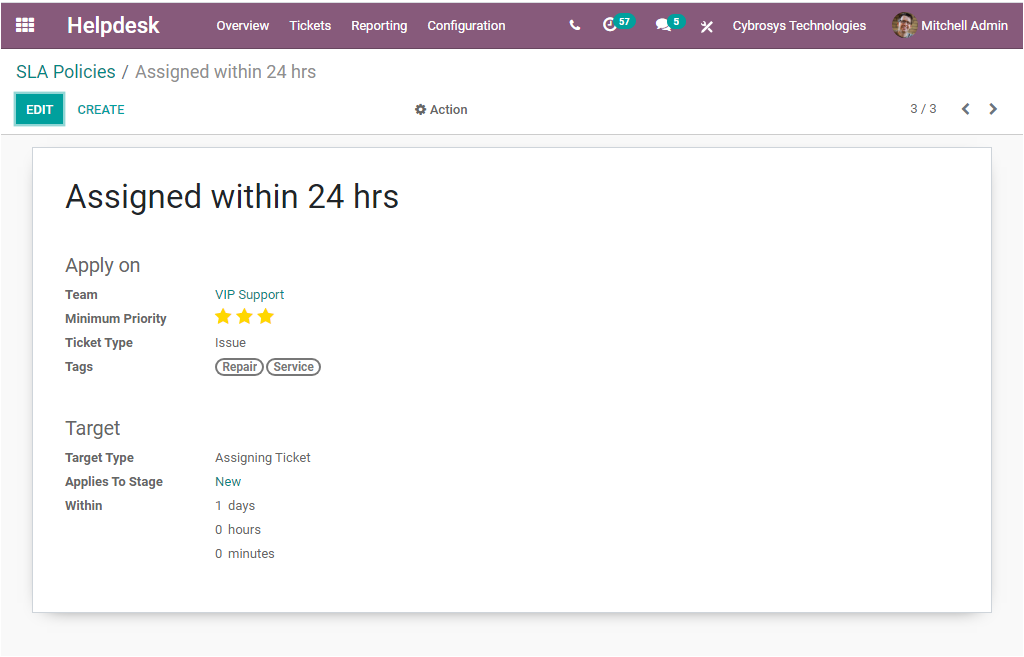
The EDIT option available in the window allows you to edit the details of the window if required. Moreover, the window includes the Action button which can be accessed from the top center of the window. This button consists of three sub-menus such as Archive, Duplicate, and Delete.
Back to the SLA Policies window, you have the customizable and default options such as Filters, Group By, and Favourite Search. These options will help you to save time and effort. For example, if the platform has lots of data and you want to select a particular SLA Policy, you can search for them by applying the Filters option available. In addition, the Group By option allows you to add custom groups. It is also possible to export all the data in the window to excel sheet by selecting the Export All option available.
The CREATE icon available in the window allows you to configure new SLA Policies. Upon selecting the CREATE icon, you will be directed to the SLA Policies creation window. Let us have a look at the window first.
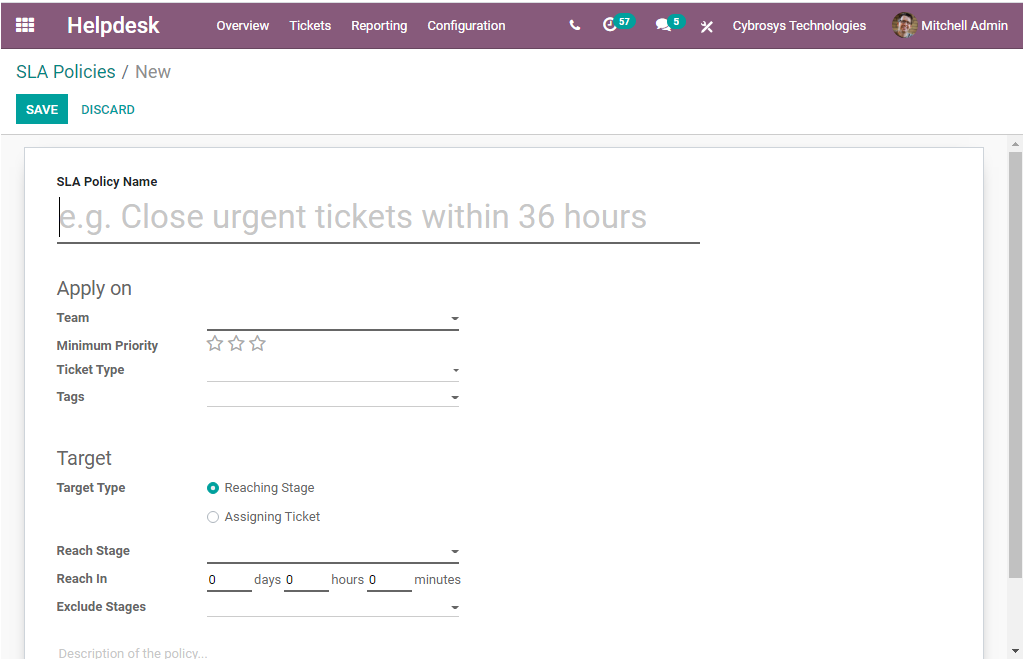
In the SLA Policy creation form, you can find different fields to fill. First of all, you can allocate SLA Policy Name in the provided space. You can include all the important terms in the name for easily identifying the importance of the respective SLA Policy. Let us name the field as Close urgent tickets within 36 hours.
Under the Apply on the field, you can choose the Team to which the policy is suitable. This team has the responsibility for taking care of customers who are part of this particular policy. After that, you can apply minimum priority for a ticket required for having the policy be applied. The tickets under this priority will not be taken into account. Here the priority is defined in the form of three stars which represent Low priority, High priority, and Urgent. Then you can specify the Ticket Type. You have the provision for creating various ticket types on the basis of queries received by the company. You can only apply the SLA to a specific ticket type. And finally, you can apply Tags. These tags will be helpful to the helpdesk team for easily identifying the type of service in the SLA Policy. For example, if you apply Repair as a tag, this SLA Policy is applicable for all the tickets generated for the Repair operation.
Under the Target option, the target type can be selected either as Reaching Stage or Assigning Tickets. If you enable the Reaching Stage option, you have to fill the following fields.
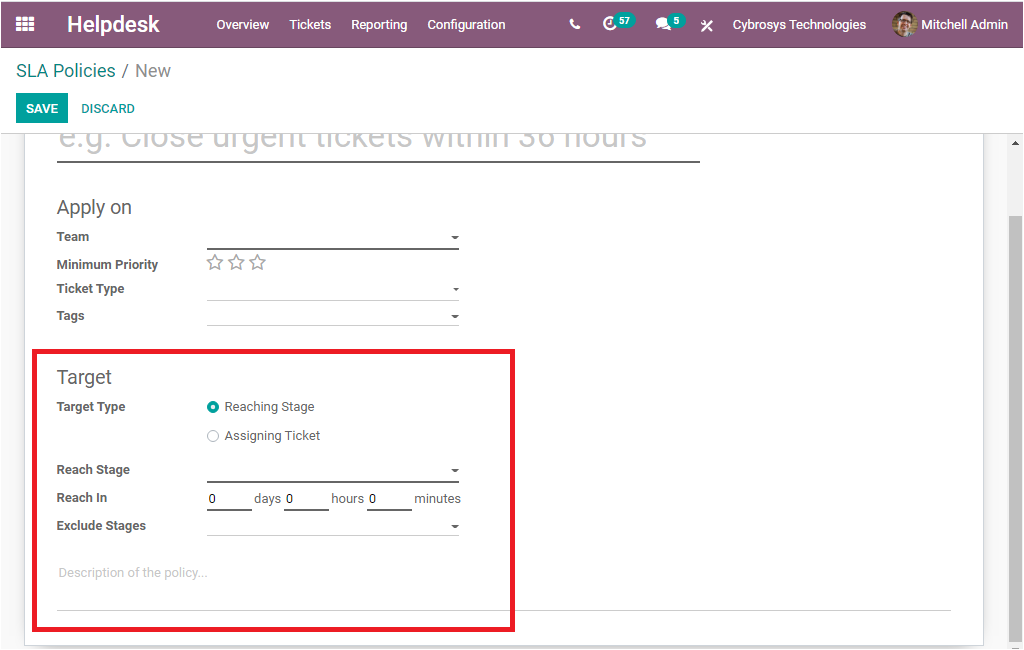
Here you can view the Reach Stage option where you can mention the minimum stage a ticket needs to reach in order to satisfy this SLA. Then the Reach-In option allows you to specify the days, hours, and minutes. In addition, you can also add Excluded Stages. The amount of time the ticket spends in this stage will not be taken into consideration when evaluating the status of the SLA Policy. After filling in the Excluded Stages option, you can provide a description of the policy.
In another case, if you enable the option Assigning Tickets as Target Type, you have the Applies To Stage option for filling the minimum stage a ticket needs to reach in order to satisfy this SLA. The stages can be configured on the basis of requirements as New, In Progress, Done, or Cancelled. The Within option can be allocated with the time period (days, hours, and minutes) within which the ticket should be considered.
Once you have completed all these steps, you can save the provided details by selecting the SAVE option available. We discussed the back-end configuration of the Ticket Type, Stages, and SLA Policies in a detailed manner. You have to complete this configuration process for managing the workflow of your organization accurately.