In Pycharm there is a feature called ‘virtual environment’ in which the projects can have their own dependencies installed in a virtual environment. This enables users to isolate the project-specific dependencies either they may be libraries or packages. It comes into use when we have different projects which require dependencies with different versions of libraries and in this case, there may be conflict on running those projects. Therefore, the feature for having a virtual environment in PyCharm will be helpful.
How to create a virtual environment in PyCharm?
Virtual environments can be considered as directories that store the required scripts. Now let’s check how to set up a virtual environment in PyCharm IDE.
For the PyCharm IDE to be configured initially, make sure that the Python library has been installed for the project for which you need to set up the virtual environment.
Further, then you should follow the following steps
Step 1: Go to the setting of the project.
Either you can use the short keys Ctrl+Alt+S or simply by going to the File->Settings to go to the settings, and there you will get a pop-up window.
Step 2: Expand the Project
By expanding the Python Project you will get two options which are Python Interpreter and Project Structure as depicted in the following image. Here few options are marked with a special symbol that indicates, those options are only for this project and all the other options are globally applicable.
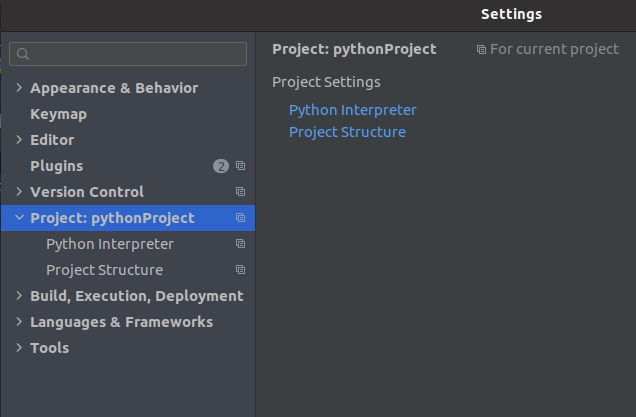
Step 3: Select the option Python Interpreter
Here you will lead to advanced options for the Interpreter. On the right side of the window, there you can specify the Interpreter and beneath this field, we are able to see all the packages available in that environment. Also its specifications like the existing version and its latest version. These features will help us to sum up the environment which is exclusive for the current project.
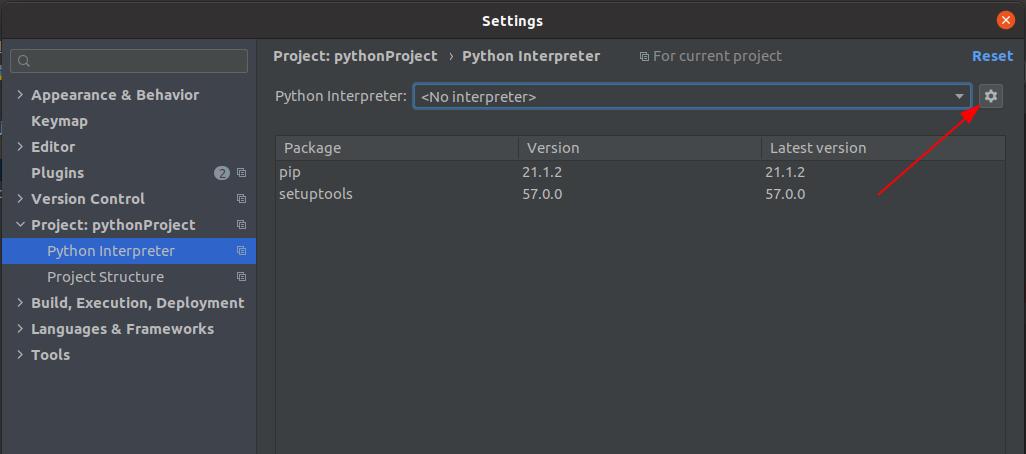
The settings option as depicted in
the above image will drop down two options in which the 1st option is for
Adding a new interpreter and the next one is to Show All the interpreters
available for the project.
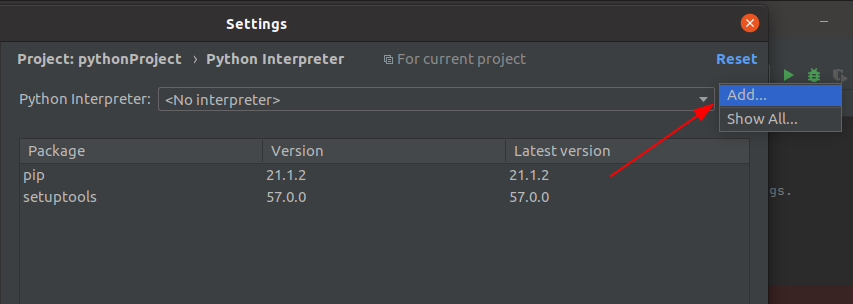
Step 4: Adding Python Interpreter
Now click on the 1st option which is Add Python Interpreter. After selecting the option a new pop-up window will appear as depicted in the following screenshot.
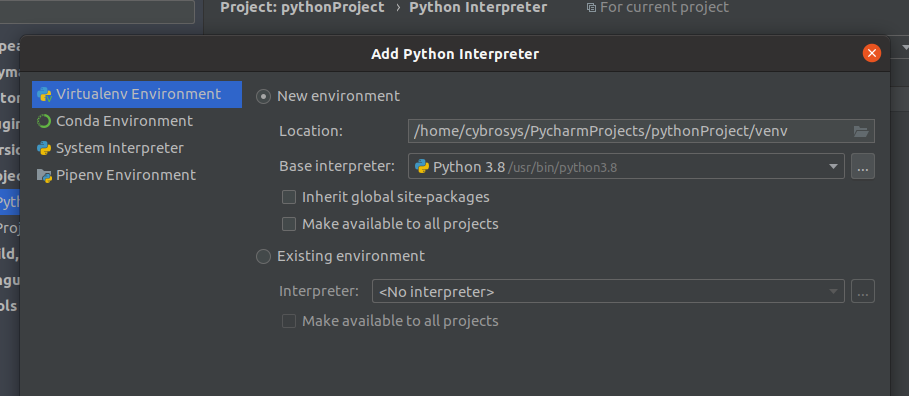
Here we have the option to specify whether the environment already exists or not.
If you are choosing ‘Existing environment’ there you can select the interpreter option from the drop-down list available in the field ‘Interpreter’. If you need to make this environment available to all projects the check box can be enabled.
Step 5: Select the option ‘New environment’ if you are going to create a new one.
The first field which needs to be filled is the ‘Location’. This is the space where you need to mention the location with the name for the virtual environment or the absolute path for the new environment. For Python versions which are above 3.3 has a built-in unit called ‘venv’ which uses instead of any third party for having virtualenv. Here the point to be noted is that which directory is used for creating the new virtual environment must be empty.
The next field is to specify the Base Interpreter (python executable). If you have already installed the Python Library you can easily fill this option either by selecting it from the drop-down or by clicking the option and then specify the Python executable.
If no Python executable exists then PyCharm provides two options for filling this. Either the executable can be downloaded and it will be the latest version or you can mention the location of the python executable.
There are two check fields under this field. The first field which is ‘Inherit global 'site-packages' enables the use of packages that are installed in global Python in the system in the virtual environment which is going to be created. The next check box is to make this environment available for all projects.
Step 6: Submit for the virtual environment
Now click the button ‘OK’ to complete the process for creating the virtual environment.
After these procedures, there will be a module for this virtual environment inside the project.