In Odoo, we can utilize the "progressbar" widget to add a progress bar in our view. This default progress bar is quite basic and we can't tweak it as we want. So, if we want to add a progress bar with specific colours and parameters we can create a new widget and apply it to our field.
In this blog, the aspects of using the "progressbar" widget to add a progress bar in the view of different menus in odoo is being explained in detail.
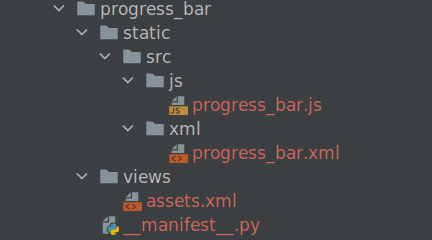
Let’s get straight to the coding part. The following image depicts the structure of the module that we are going to create.
Progress bar structure is defined in the progress_bar.xml file and the rest of the coding lies in the progress_bar.js for actions such as computing the percentage progress.
Let’s first create the progress_bar.xml file, here a new template is defined with the name “NewProgressBar”. As you can see there are two div classes, o_progress, and o_progressbar_complete. Here, the ‘o_progress’ div will act as a background for the ‘o_progressbar_complete’ div, showing the actual progress. In the style attribute, you can see that here, I have given the background color and height of the progress bar. Moreover, you can modify these style parameters as you like.
XML FIle: progress_bar.xml
<templates
id="template" xml:space="preserve">

<t t-name="NewProgressBar">

      <div>
            <div
class="o_progress" style="background-color: #c1c1dd; height:
7px;">
                <div
class="o_progressbar_complete" style="background-color:
#6f6f62;  height: 7px;"/>
            </div>
        </div>

</t>
</templates>
Now let’s come to JavaScript where we are extending ‘AbstractField’ and adding the class ‘ProgressBarNew’ for our progress bar. Additionally, we have also specified the XML template that we created in the previous step using the template name ‘NewProgressBar’. In the supported field types, we mentioned Integer and Float. However, typically we used to use float values for displaying the progress.
JavaScript File: progress_bar.js
odoo.define('progress_bar.ProgressBarNew',
function(require){

"use strict";


var AbstractField = require('web.AbstractField');

var field_registry = require('web.field_registry');

var core = require('web.core');

var _t = core._t;


var ProgressBarNew = AbstractField.extend({
        template: "NewProgressBar",
        supportedFieldTypes: ['integer',
'float'],

        start: function(){
            this._super.apply(this, arguments);

            if
(this.recordData[this.nodeOptions.currentValue]){
                this.value =
this.recordData[this.nodeOptions.currentValue];
            }

            // The few next lines determine if
the widget can write on the record or not
            this.editable_readonly =
!!this.nodeOptions.editable_readonly;
            // "hard" readonly
            this.readonly =
this.nodeOptions.readonly || !this.nodeOptions.editable;

            this.canWrite = !this.readonly
&& (
                this.mode === 'edit' ||
                (this.editable_readonly
&& this.mode === 'readonly') ||
                (this.viewType === 'kanban') //
Keep behavior before commit
            );

            // Boolean to toggle if we edit the
numerator (value) or the denominator (max_value)
            this.edit_max_value = !!this.nodeOptions.edit_max_value;
            this.max_value =
this.recordData[this.nodeOptions.max_value] || 100;

            this.title = _t(this.attrs.title ||
this.nodeOptions.title) || '';

            this.write_mode = false;
        },

        _render: function (){
            var self = this;
            this._render_value();

            if (this.canWrite) {
                if (this.edit_on_click) {
                    this.$el.on('click',
'.o_progress', function (e) {
                        var $target = $(e.currentTarget);
                        var numValue =
Math.floor((e.pageX - $target.offset().left) / $target.outerWidth() *
self.max_value);

self.on_update(numValue);
                        self._render_value();
                    });
                } else {
                    this.$el.on('click',
function () {
                        if (!self.write_mode) {
                            var $input =
$('<input>', {type: 'text', class: 'o_progressbar_value o_input'});
                            $input.on('blur',
self.on_change_input.bind(self));

self.$('.o_progressbar_value').replaceWith($input);
                            self.write_mode =
true;
                            self._render_value();
                        }
                    });
                }
            }
            return this._super();
        },

        on_update: function (value) {
            if (this.edit_max_value) {
                this.max_value = value;
                this._isValid = true;
                var changes = {};

changes[this.nodeOptions.max_value] = this.max_value;

this.trigger_up('field_changed', {
                    dataPointID:
this.dataPointID,
                    changes: changes,
                });
            } else {
                // _setValues accepts string
and will parse it
                var formattedValue =
this._formatValue(value);
                this._setValue(formattedValue);
            }
        },

        _render_value: function (v) {
            var value = this.value;
            var max_value = this.max_value;

            if (!isNaN(v)) {
                if (this.edit_max_value) {
                    max_value = v;
                } else {
                    value = v;
                }
            }
            value = value || 0;
            max_value = max_value || 0;

            var widthComplete;
            if (value <= max_value) {
                widthComplete = value/max_value
* 100;
            } else {
                widthComplete = 100;
            }


this.$('.o_progress').toggleClass('o_progress_overflow', value >
max_value)

              .attr('aria-valuemin', '0')
                .attr('aria-valuemax',
max_value)
                .attr('aria-valuenow', value);


this.$('.o_progressbar_complete').css('width', widthComplete + '%');

        },

        _reset: function () {
            this._super.apply(this, arguments);
            var new_max_value =
this.recordData[this.nodeOptions.max_value];
            this.max_value =  new_max_value !== undefined ? new_max_value :
this.max_value;
        },
        isSet: function () {
            return true;
        },

});


field_registry.add('progress_bar_new', ProgressBarNew)
});
The _render_value() function is where the width of the progress bar is determined. The width of the o_progress div which acts as the background will be the max_value, and the width of the o_progressbar_complete div will be the computed progress value. Finally, we have to add this class to the registry field_registry.add('progress_bar_new', ProgressBarNew) and we can apply this widget using the name 'progress_bar_new'.
We need to add this JavaScript file along with the backend assets. For that let’s create an ‘assets.xml’ file and mention that in our manifest.
<odoo>

<template id ="assets_backend" inherit_id
="web.assets_backend" name ="Website Backend Assets">
        <xpath expr="//script[last
()]" position="after">
            <script
type="text/javascript" src =
"/progress_bar/static/src/js/progress_bar.js"/>
        </xpath>

</template>
</odoo>
Let’s specify both XML files in the __manifest__.py.
'data': [
        'views/assets.xml'

],

'qweb': [
        'static/src/xml/progress_bar.xml'

],
Now let’s say we have a model with two fields start_date and end_date. And we need to display a progress bar between these days based on the current date. For that, we are creating a new progress field of type Float, the value will be computed using a function.
start_date = fields.Datetime()
end_date = fields.Datetime()
progress = fields.Float(compute=_compute_progress)

And the function would be,

    def _compute_progress(self):
        for rec in self:
            rec.progress = 0
            if rec.start_date and rec.end_date:
                total_days = rec.end_date -
rec.start_date
                progress = rec.end_date -
fields.Datetime.today()
                try:
                    percentage =
(total_days.days - progress.days) * 100 / total_days.days
                    rec.progress = percentage
                except ZeroDivisionError:
                    rec.progress = 0
Add this ‘progress’ field on the corresponding
view and apply our ‘progress_bar_new' widget.
<field name="progress"
widget="progress_bar_new"/>
The output will be,

In this manner we will be able to define the
progress bars at the various aspects of the Odoo platform.