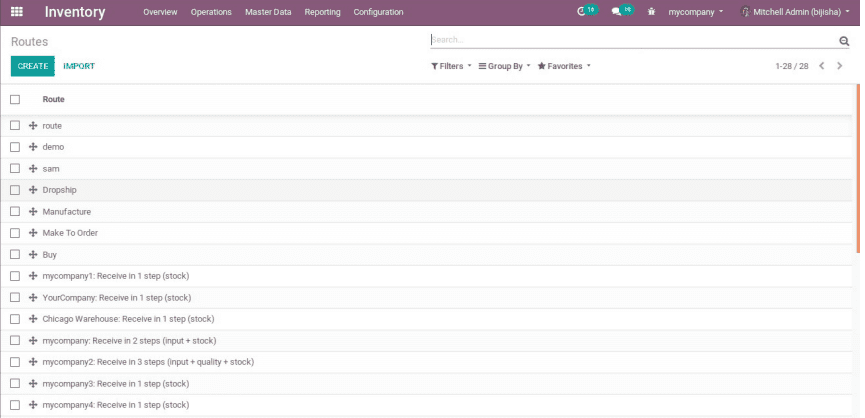
Routes are characterized as various potential ways through which an item is obtained or sold from your warehouse. These describe ways the product should seek after. Routes may be important or not, dependent upon the product, bargains, distribution center, etc. Route is a gathering of procurement rules and push rules.
To define routes to your products go to Inventory application, and activate Routes under the Configuration menu.
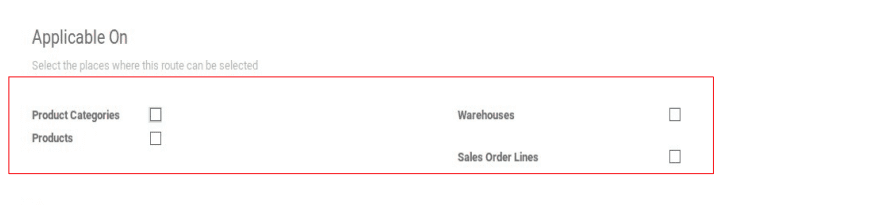
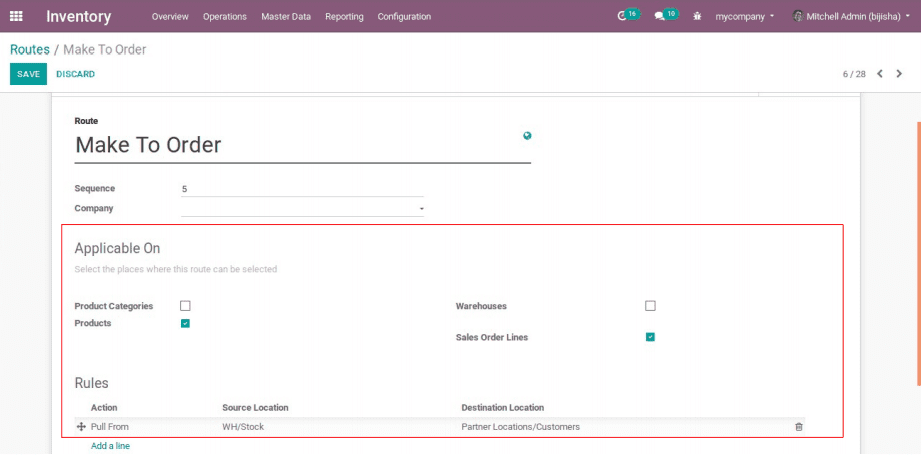
Routes Applicable on:
In Odoo, routes can be applied on products, product categories, warehouses, and sales order lines.
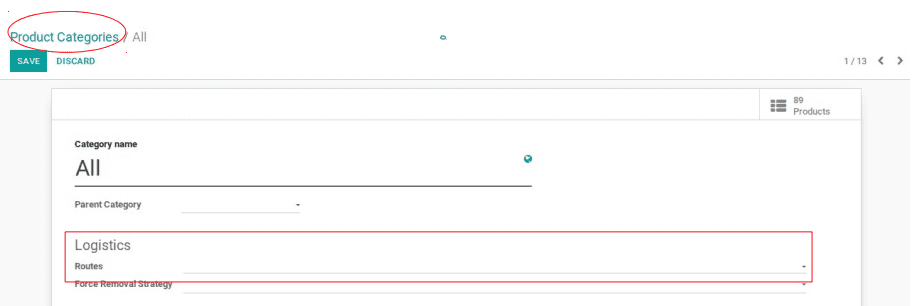
Upon selecting Product Categories, the user can manually set routes on categories. To do so, go to Configuration -> Product Categories.
Select the option Routes under the Logistics section :
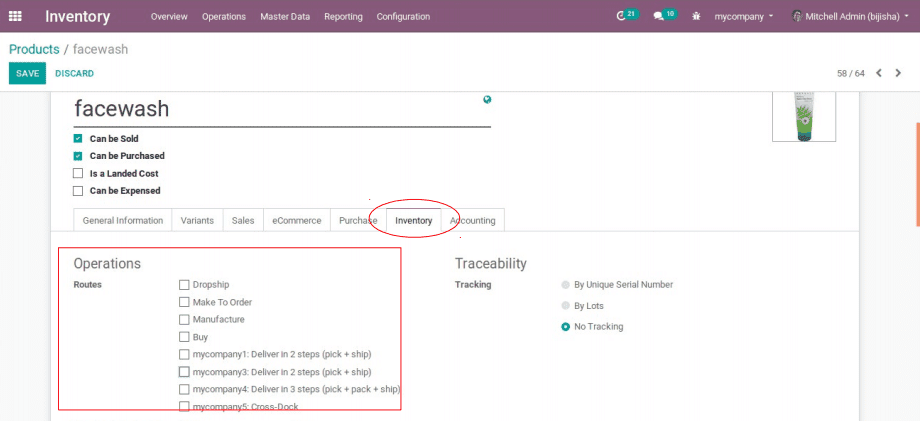
Upon selecting Products, the user can manually set routes on products.
To do so, select a product on which you need to apply routes.
Configuration is as follows, Go to Inventory -> Master Data -> Products.
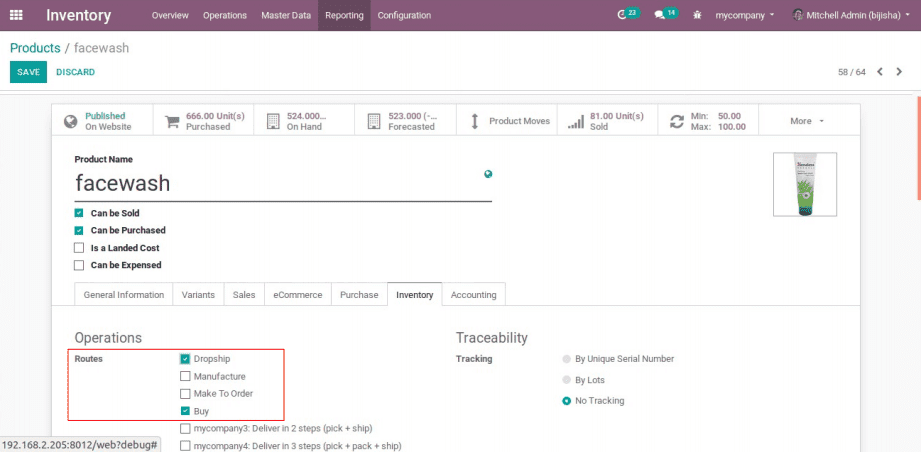
In the Inventory Tab, select the option Routes:
Upon selecting Warehouses, the end-user can set routes on the warehouse. The action makes sure that the route gets applied in all transfers happening in that warehouse that meets the conditions of both procurement and push rules.

Upon selecting the sales order lines, the end-user can manually set route on every sale order they make. In order for the feature to work, one needs to activate the use of routes on the sales order.
Under the Sales application, go to Configuration -> Settings and tick Order Specific Routes.
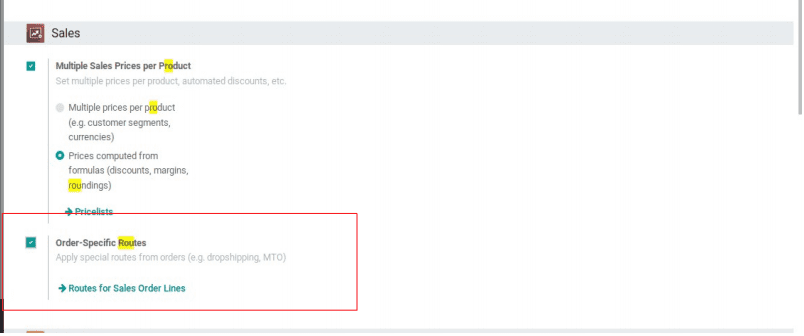
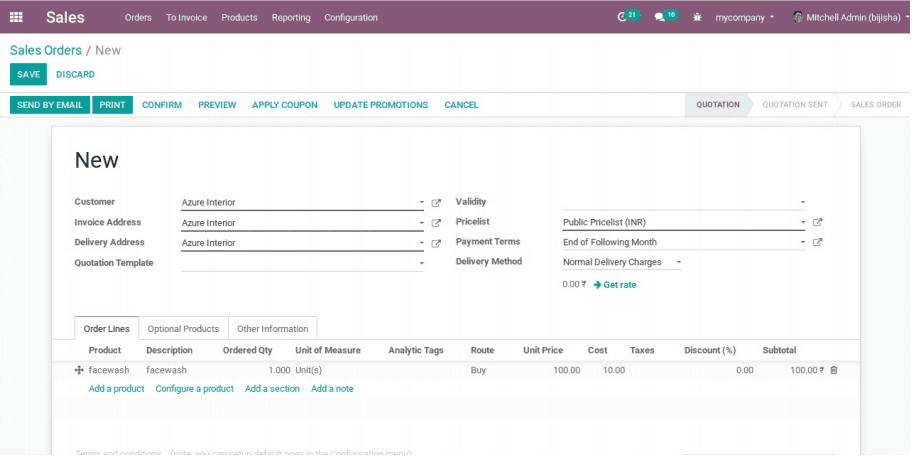
Such that you can now choose the routes for each line of your sales orders:
Let’s discuss route configuration in Odoo12. The following are the different kinds of routes used in Odoo 12
> Buy
> Make To Order
> Dropship
To explain the concept, let us consider a product named ‘face wash’ and let us configure routes on this product. You can apply routes on the product in four ways. I explained to them in Routes Applicable on.
Here I am applying route on the product.
In case, you want to apply route on other pertinent rather the product, you can select those options and continue.
Buy:
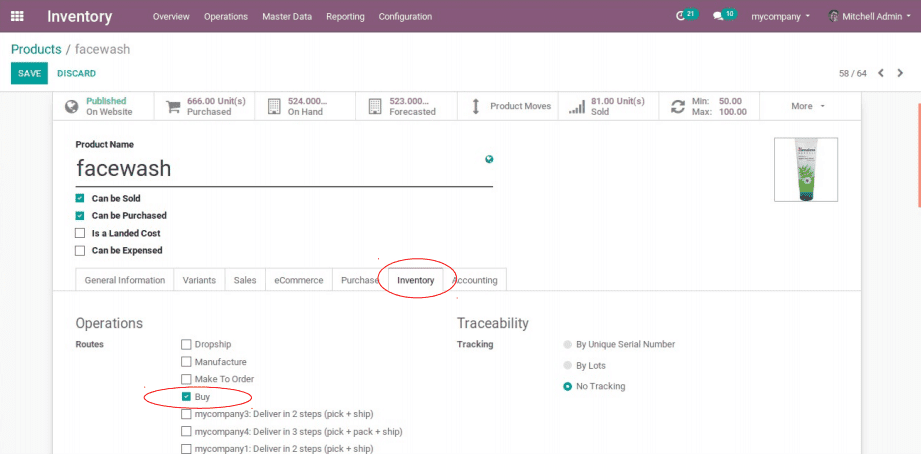
Let’s look through the route Buy first. Select any products from Products and I choose the product ‘face wash’ here.
For that Go to Inventory -> Master Data -> Products
In the Inventory Tab, select the Routes: Buy
You can know the configuration details of Buy such as which place you need to apply this route and also push and pull rules given on it.
For that Go to Inventory -> Configuration -> Routes -> Buy
According to buy, after a purchase and sale, the product will move to stock and move from the stock respectively.
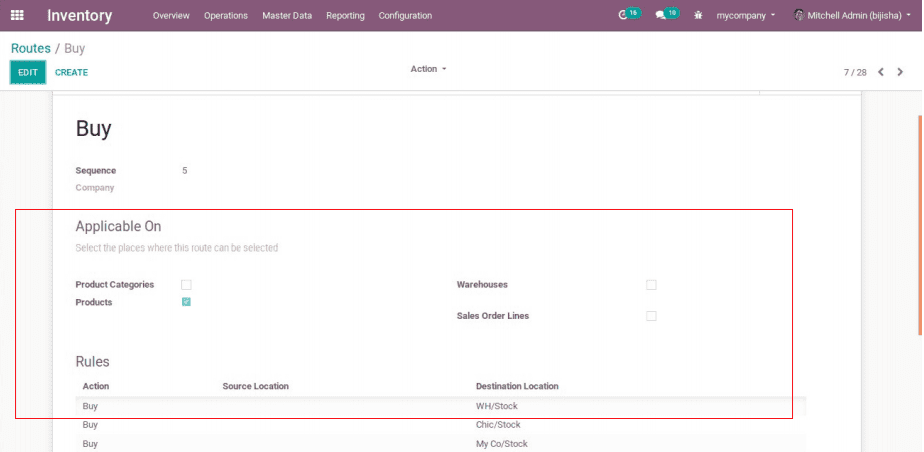
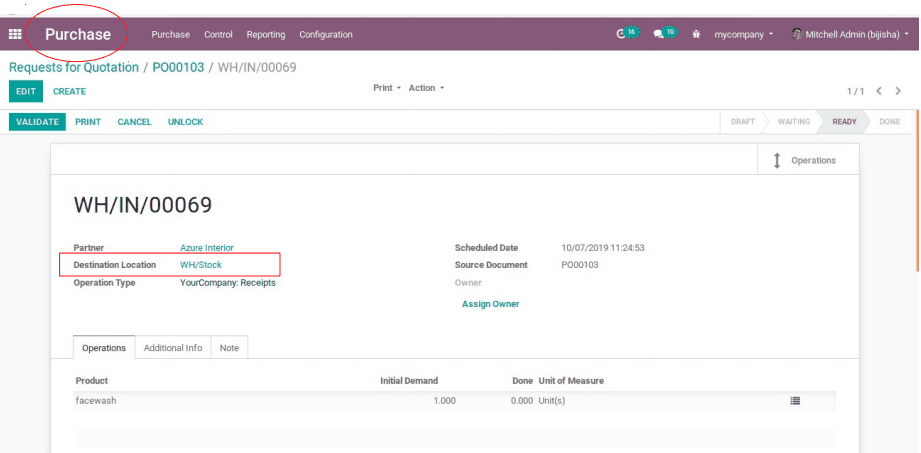
Here the current stock selected is WH/Stock. If you are making a purchase of the product ‘face wash’ you can see that the Destination Location as WH/stock.
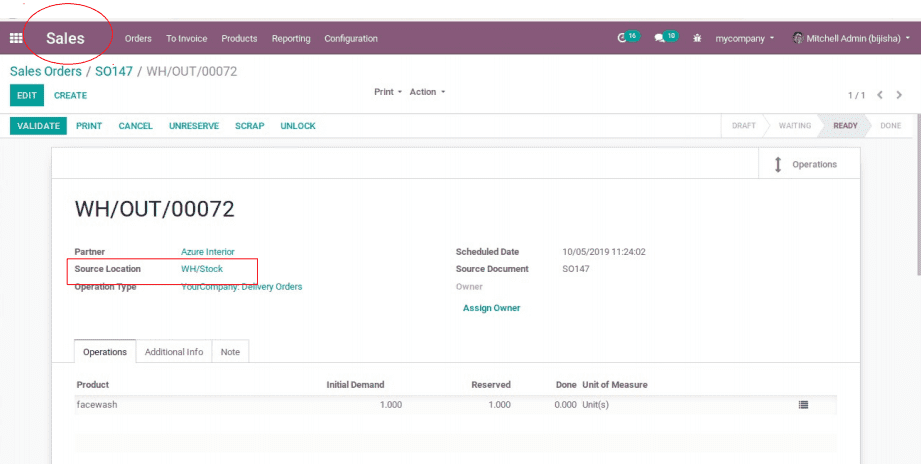
If you are making a sale order on the product ‘face wash’, you can see the Source Location as WH/stock.
Thus it could be understood that
> after a purchase, the product moved to WH/Stock from Vendor’s Location.
> after sales, the product moved from WH/Stock to Customer’s Location.
Make-to-Order:
Now consider the route Make To Order. If you work with no stock, or with minimum stock rules, it is better to make use of the Make To Order route. Combine it with the route Buy or Manufacture and it will trigger automatically the purchase order or the Manufacturing Order when your products are out-of-stock.
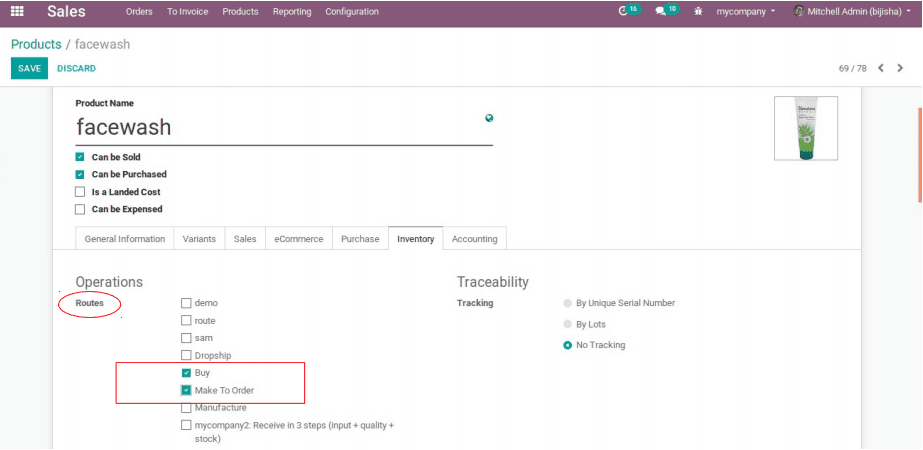
Let’s see How to Configure a Product as Make To Order. Select a product and make the route of the product to buy and make-to-order as shown below:
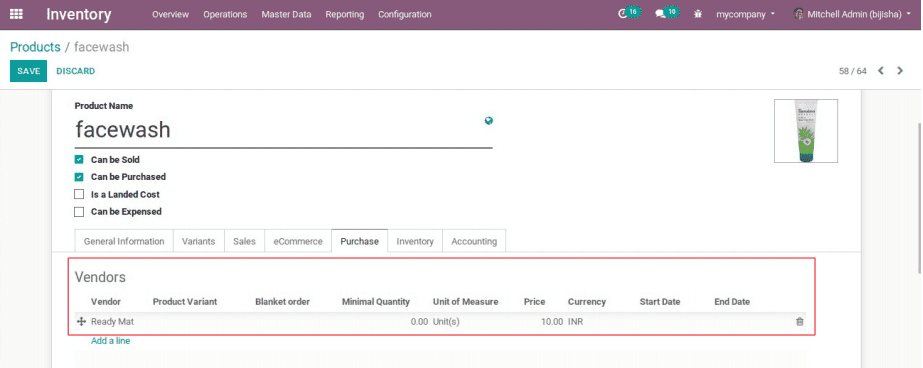
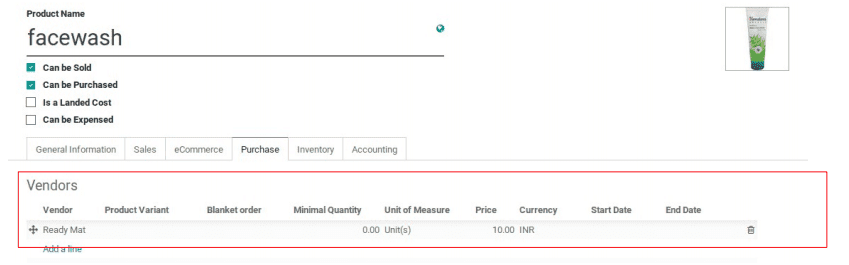
Now the route selected as Make To Order and for configuring this route, at least one vendor must be given for the product.
Here the vendor is Ready Mat.
The configuration is Go to Inventory -> Configuration -> Routes -> Make To Order.
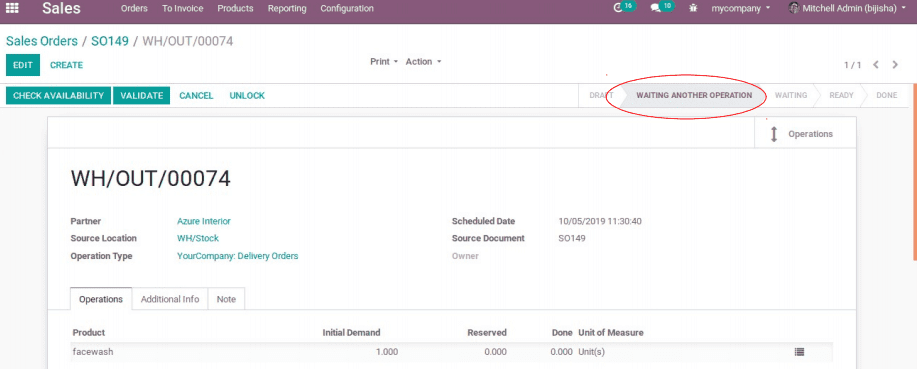
1. Create Sale order for this product and when the sales order gets confirmed, there automatically creates an RFQ in the corresponding vendor of the product.
This is waiting for another operation. ie, the product of ordered quantity needs to be purchased. RFQ gets generated automatically.
2. RFQ generated is:
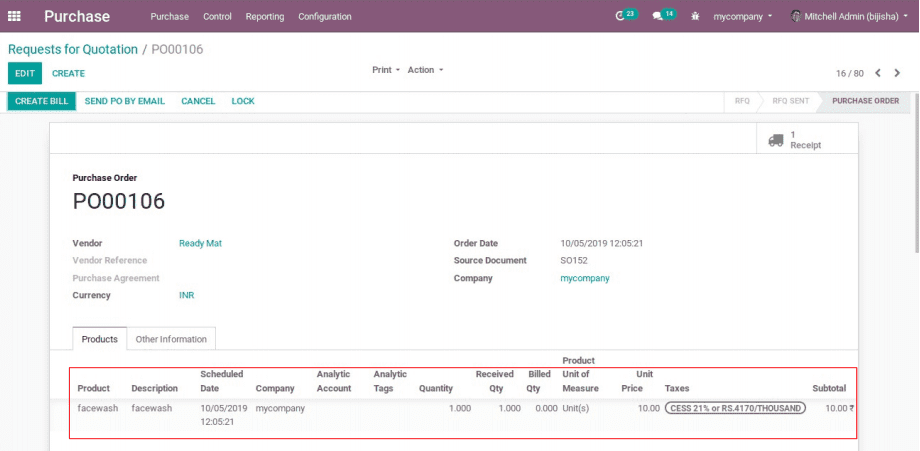
This Order is received and the corresponding sales can be validated.
Here you need to deliver the products that are purchased through RFQ to the customer.
Dropship:
Dropship is a route used to deliver products from the corresponding vendor of the product to customers directly. Let’s know how it works:
A product should be given the routes Buy and Dropship at first.
Go to Inventory -> Master Data -> Products -> Inventory -> Routes
The configuration settings of Dropship is as follows:
Go to Inventory -> Configuration -> Routes -> Dropship
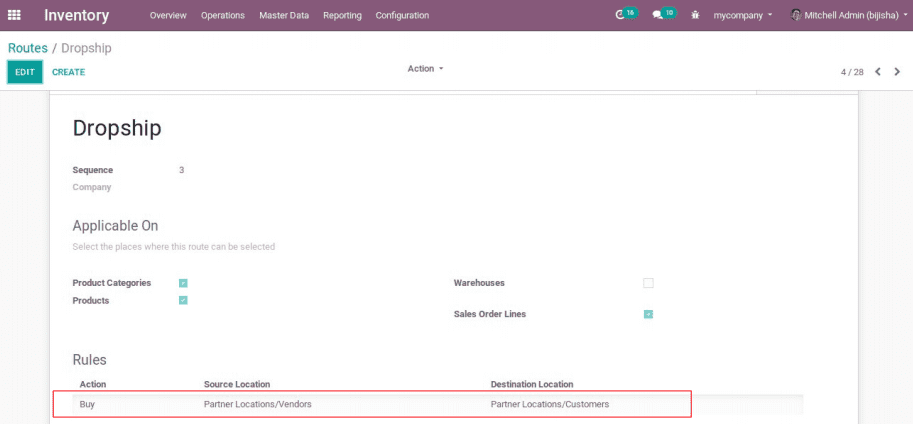
In Dropship, you need to create a sales order for the product which have set routes as Dropship. While the order is confirmed, there should not be an option for delivery. ie, the only invoicing option should be shown to you.
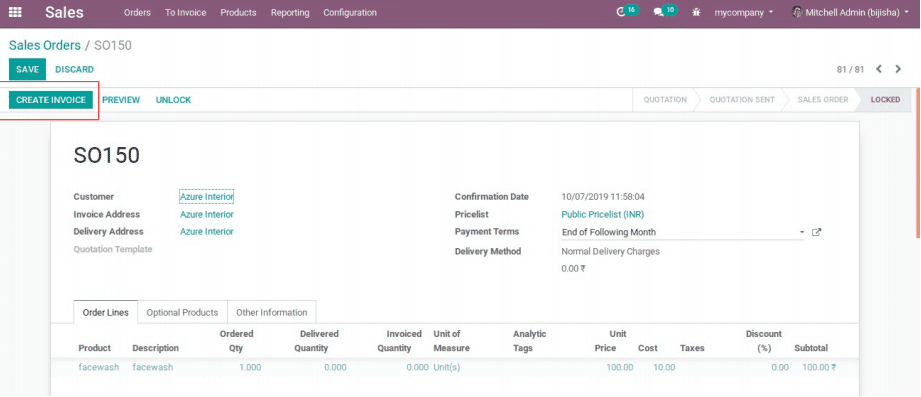
Through Dropshipping you cannot deliver products to customers. The vendors are responsible for the delivery.
In this example, the product facewash have the vendor set as Ready Mat. Such that while the order is confirmed an RFQ is generated on that vendor.
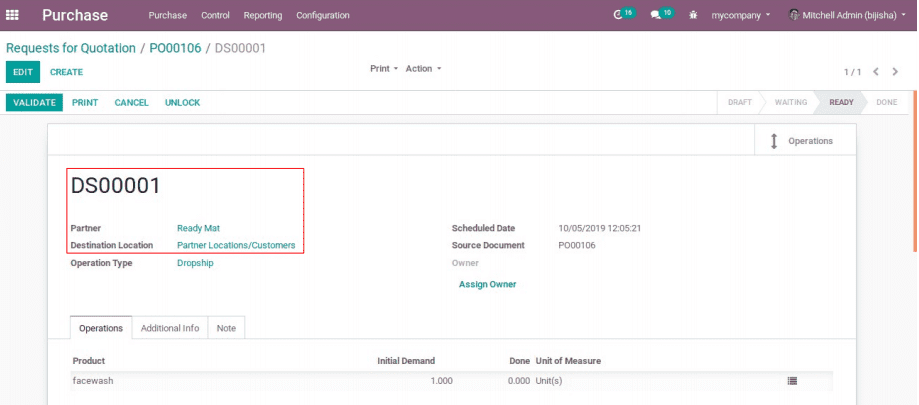
The corresponding RFQ generated is:

After confirming the order, you can see that the product is moved from the Vendor’s Location to the Customer's Location as per the routing configuration.
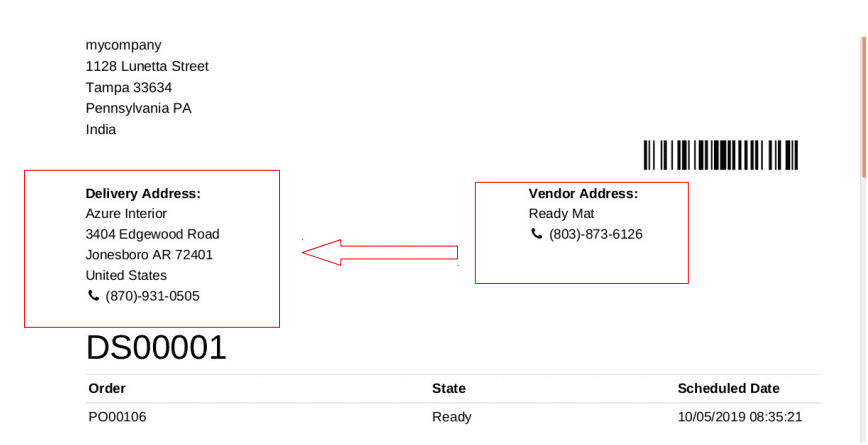
If you want a print out of this transfer, go to print -> Picking Operations, such that you can download the details about the transfer. It would come as follows:
In Odoo there are Shipments for handling receipts and delivery of products from warehouses. It can be seen from the warehouse configuration details.
Incoming shipments for receipts of products (1-step, 2-step, 3-step)
Outgoing shipments for delivery of products (1-step, 2-step, 3-step)
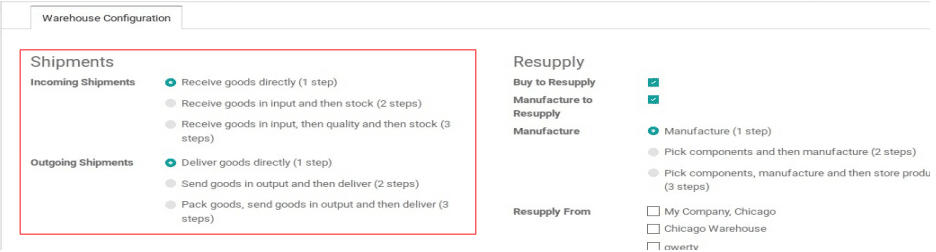
Odoo routes help to manage these shipments and it will describe how these steps can be handled effectively. For both incoming and outgoing shipment, 1 step is default configuration.ie, 1 step refers to receiving goods directly to the stock for receipts.and refers to delivering goods directly from the stock.
Let’s discuss how routes manage 2 step and 3 step process of receipts and delivery in Odoo
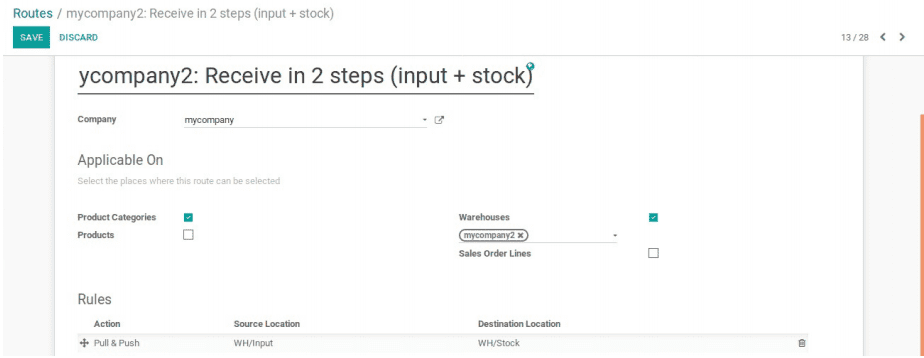
1. Receive in 2 steps: According to this route, the goods will receive in input location and then it will move to the stock. Its details are shown below:
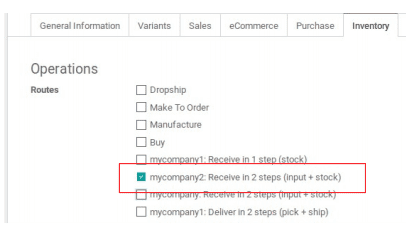
Configure the 2 step route for a product: Select a product and inventory tab -> Routes.
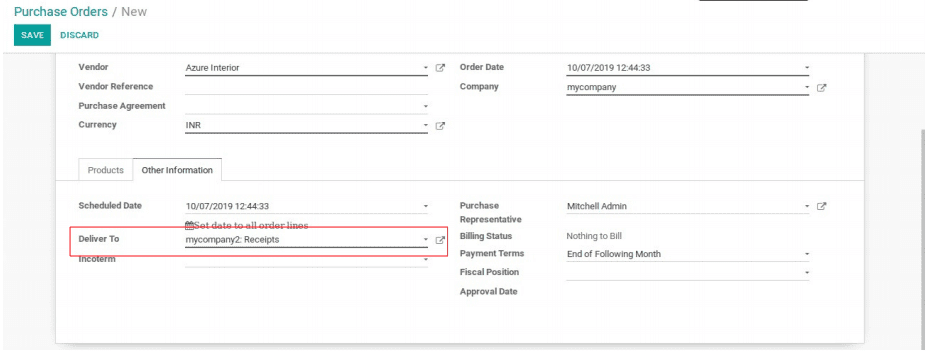
Make a purchase order for the product. As you configured the 2 step route, you can see the tab Other Information. In that, fill the section Deliver to with the corresponding warehouse’s receipts as follows:
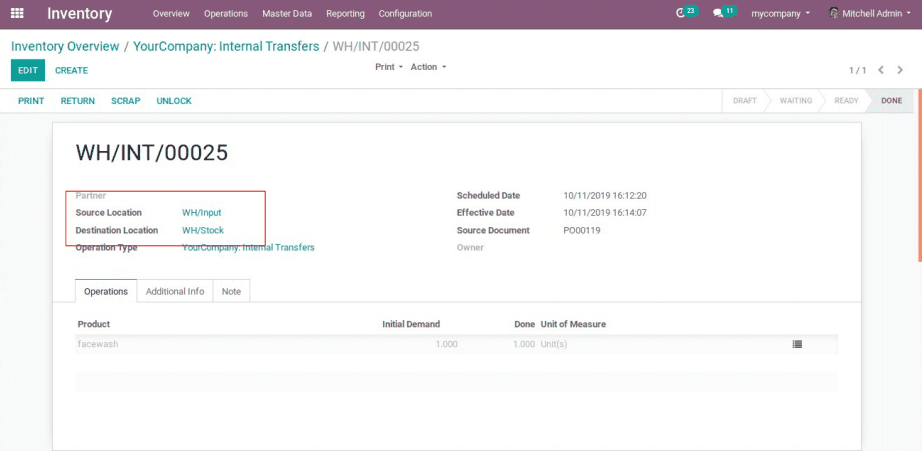
Since the purchase order is confirmed, we can see the source location and destination location.
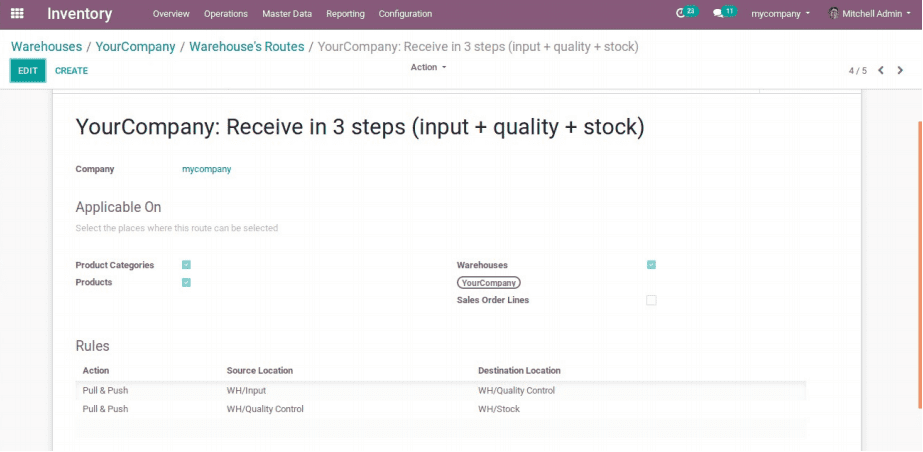
2. Receive in 3 steps: According to this route, the goods will be delivered from input location to quality control and from quality control to stock.
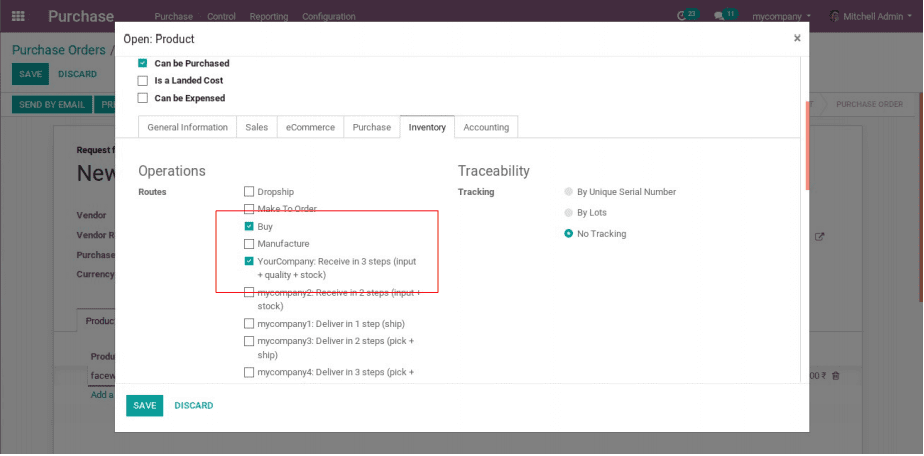
Configure the 3 step route for a product: Select a product and inventory tab -> Routes.
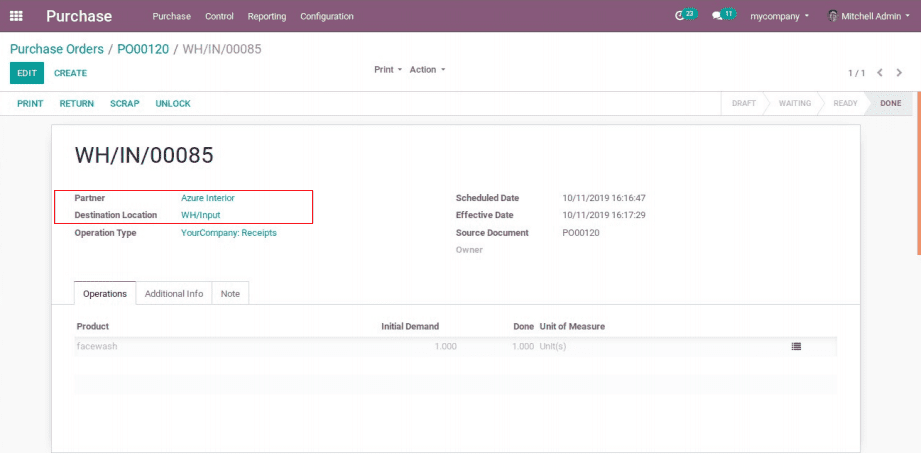
Then while making purchase order, the first product moves to input location:
In the inventory module, we can see one process in Internal transfers when we validate that product, it will move from input location to quality control:
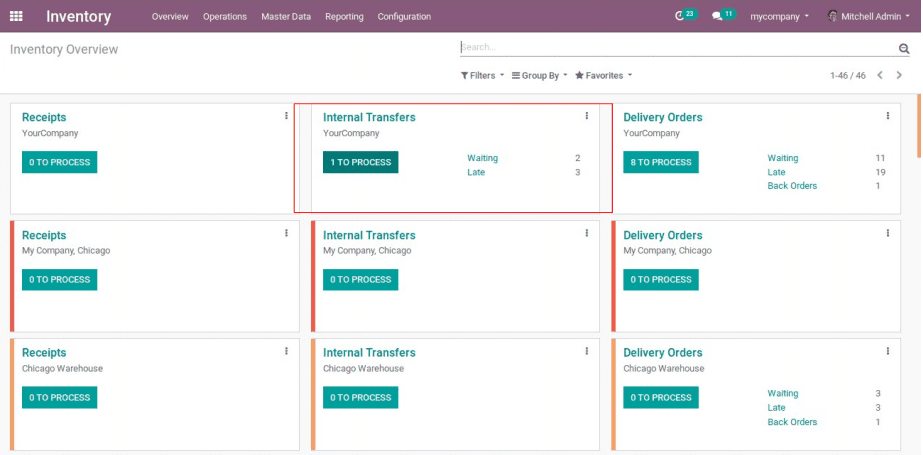
While selecting internal transfer to process, we can see the ready processes to complete.
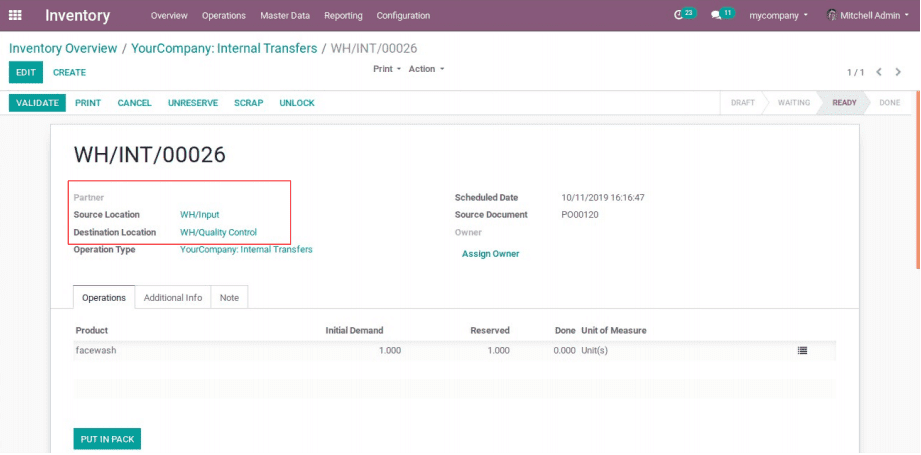
We can see one more process in the internal transfer while validating it, the product moves from quality control to stock:
Thus we can also deliver the product in 2 steps and 3 steps.
3. Deliver in two steps: First set routes for delivering in two steps.
Configure this route to a product:
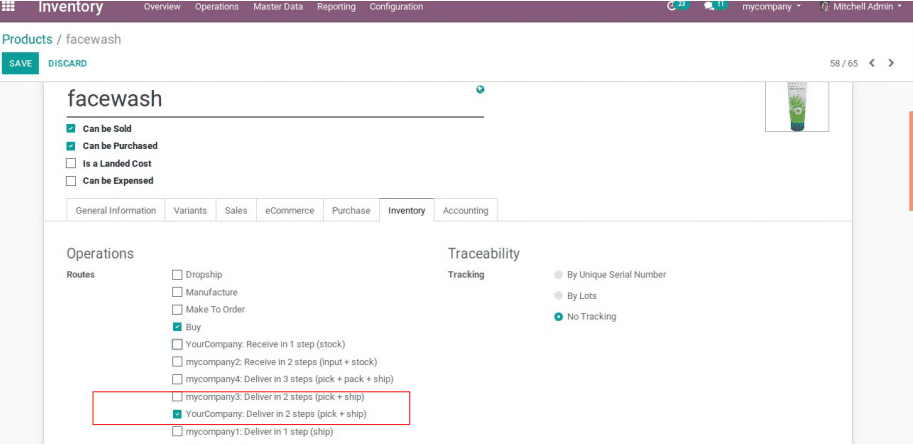
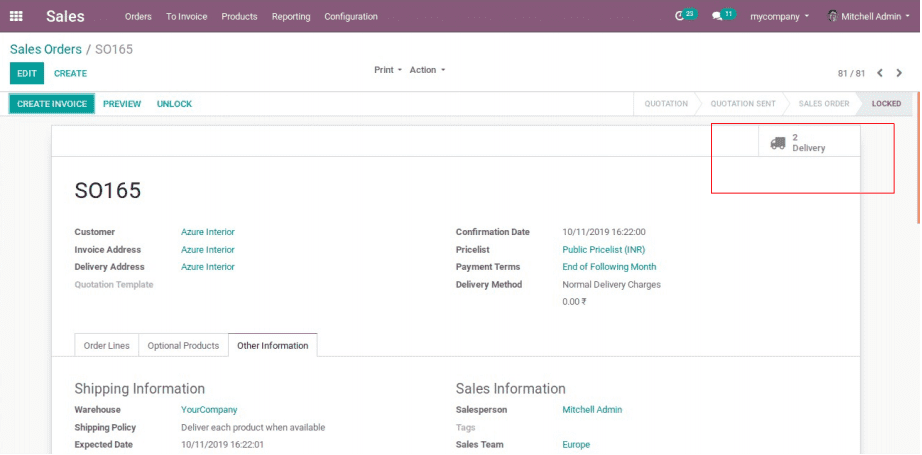
Then make sale order, on the delivery section we can see two processes that is shown below:
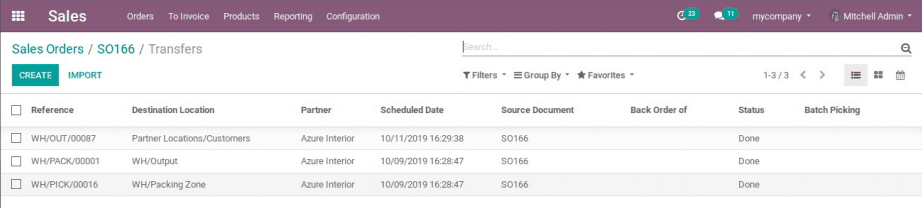
After making this order, we can see from transfers that:
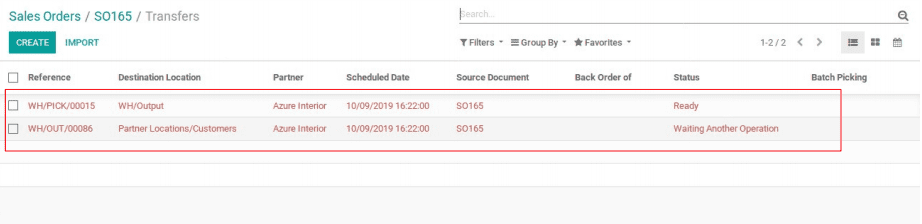
While validating each process, we can see the product moving according to the route that we created:
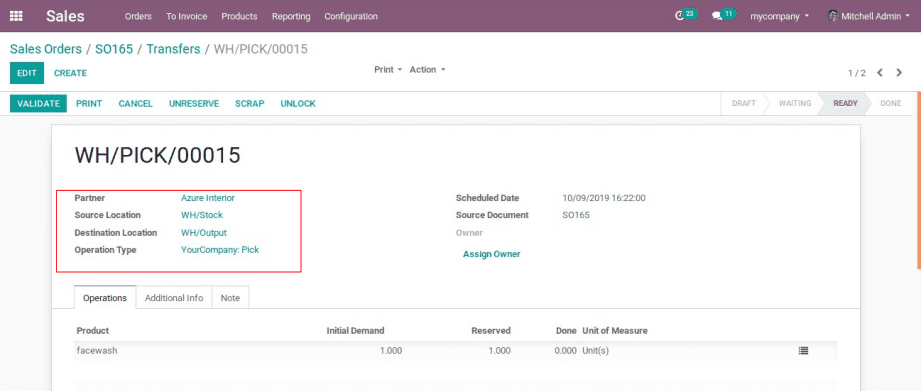
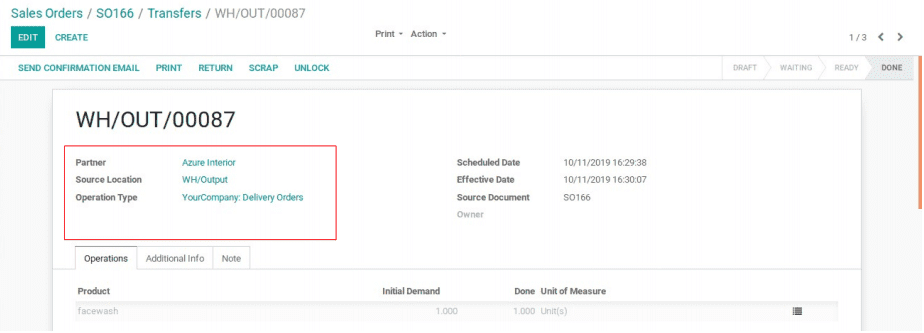
After validating the product, it will be in WH/Output,then the next process will be in the ready stage:

Here the product from WH/Output delivers to the partner location.
4. Deliver in 3 steps: First set routes for the delivery of products in three steps.
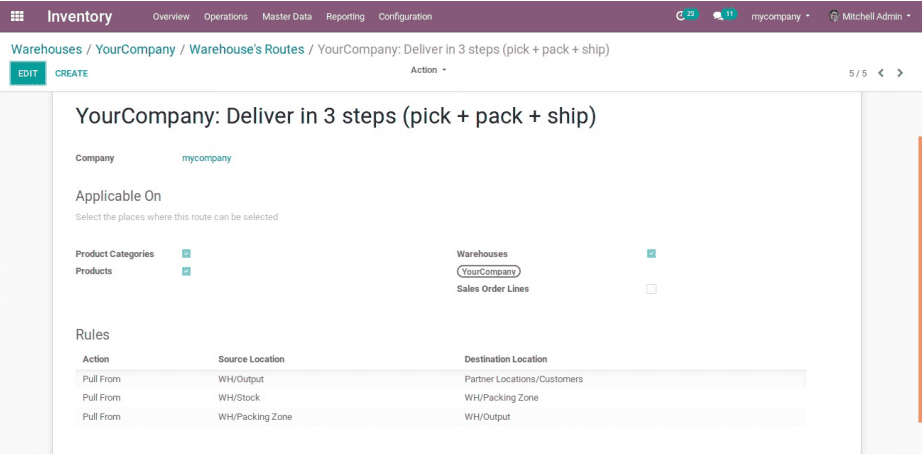
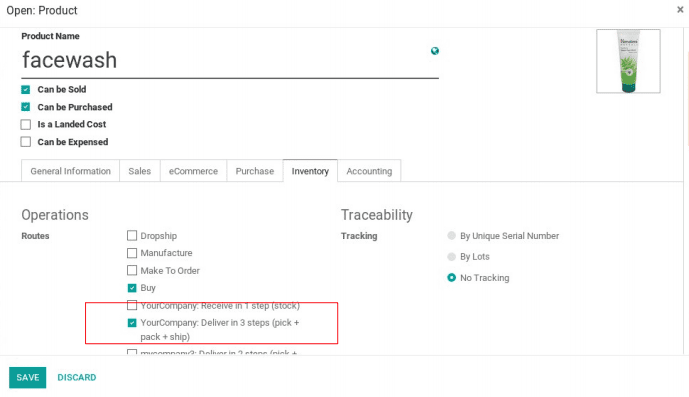
Now you need to configure this route to a particular product as follows:
Now you need to make a sale for the corresponding product.
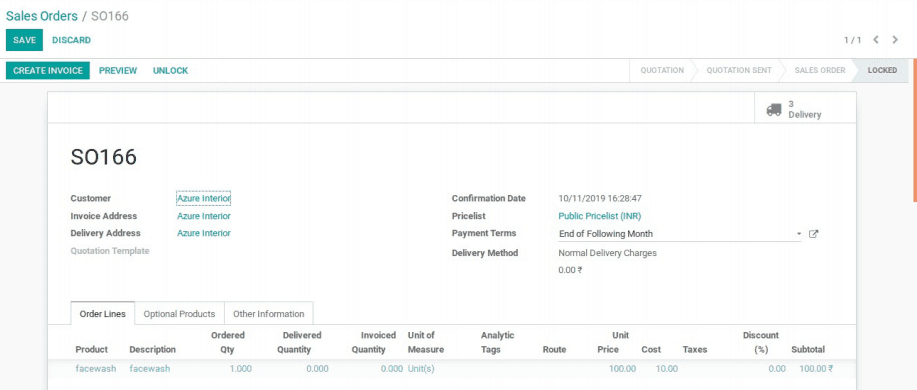
And you can see that three transfers are pending in the internal transfer of that company in Inventory.
These transfers are to be completed to perform the delivery in 3 steps.
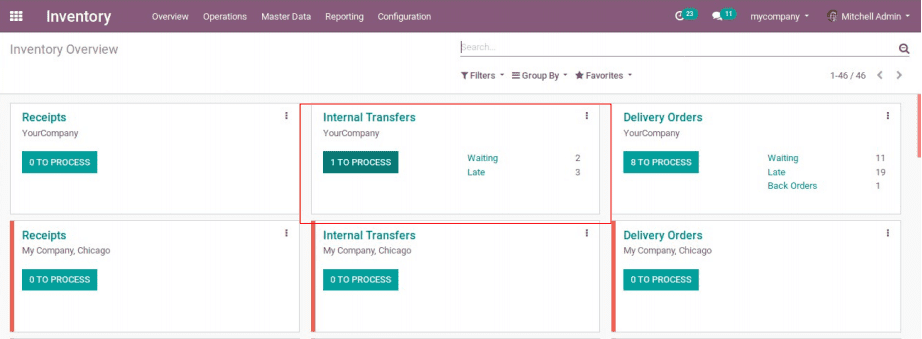
Such that you can see the transfers as follows:
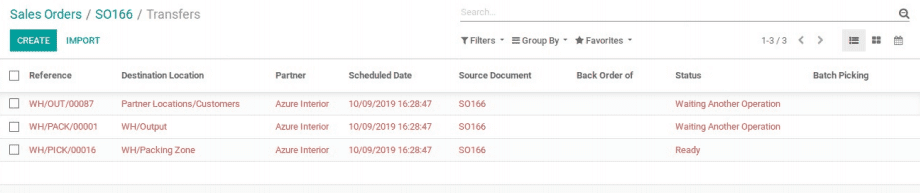
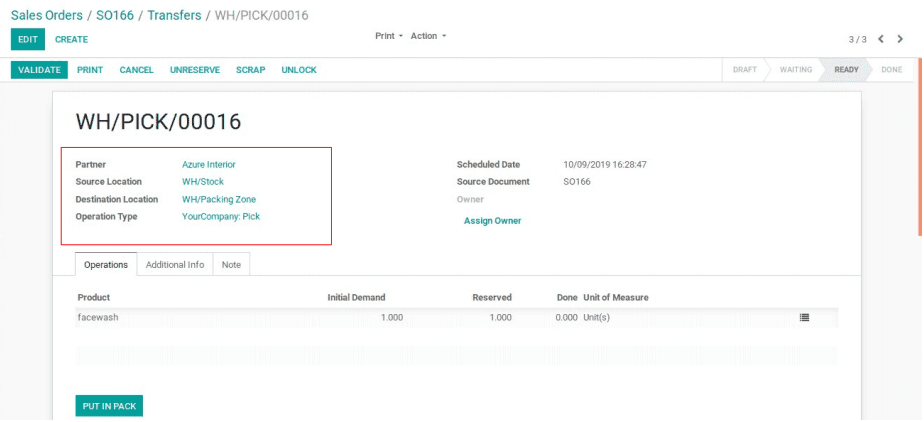
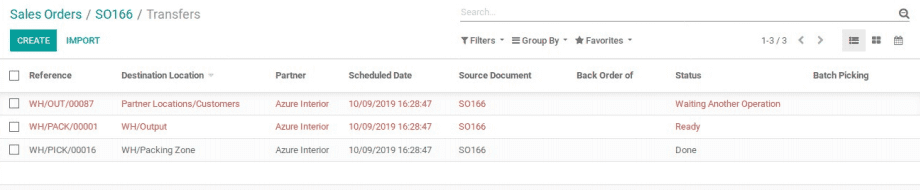
While completing the ready stage transfer, the product move from Stock to Packing Zone and the 2nd transfer will be ready to complete.
After this you can see in transfers that the second transfer is ready to complete:
If the 2nd step is completed, then the product moves from the packing zone to output location.
And 3rd transfer in waiting stage should get changed to the ready stage.

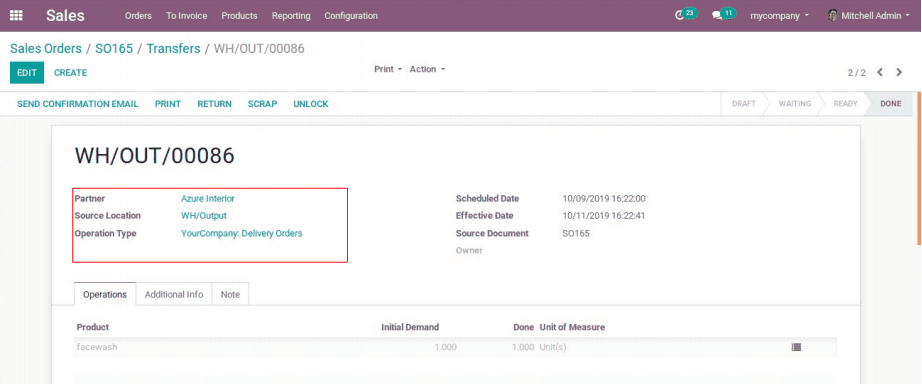
After completing this, you can see that the product moved from output location to partner location.
So the three steps are completed and now you can see the transfers as:
So we complete the delivery in 3 steps.