Mailercloud is a cloud-based email marketing and automation platform. Email marketing is one of the best ways to attract customers and build customer relationships. Manually adding the customers' details from Odoo to Mailercloud is very time-consuming.
The Odoo Mailercloud connector solves this problem by integrating the Odoo database with your Mailercloud account. Once connected, you can add the customer contacts for email campaigns without leaving Odoo.
In this blog, we will discuss the complete configuration process step by step.
What is Mailercloud?
MailerCloud is a cloud-based email marketing platform. It helps businesses to create, send, and track professional email campaigns simply. It provides features such as contact management, mailing lists, automation workflows, newsletters, and campaigns.
Why Integrate Mailercloud with Odoo?
Odoo stores the complete customer valuable information such as name, email, phone, city, country, and address. If businesses need to add the customer contact information from Odoo to Mailercloud, then businesses can use the Mailercloud Odoo connector.
The Mailercloud connector automates this process by synchronizing the contact information directly from Odoo to Mailercloud.
Some key benefits:
- Reduce manual contact exports and imports.
- Keep customers' information up to date.
- Reduce data entry errors.
- Save time.
- Set contacts for email campaigns instantly.
How to connect?
Before connecting, you need to ensure that the MailerCloud connector is installed.
Then create an account at MailerCloud. Or if you already have an account, then log in.
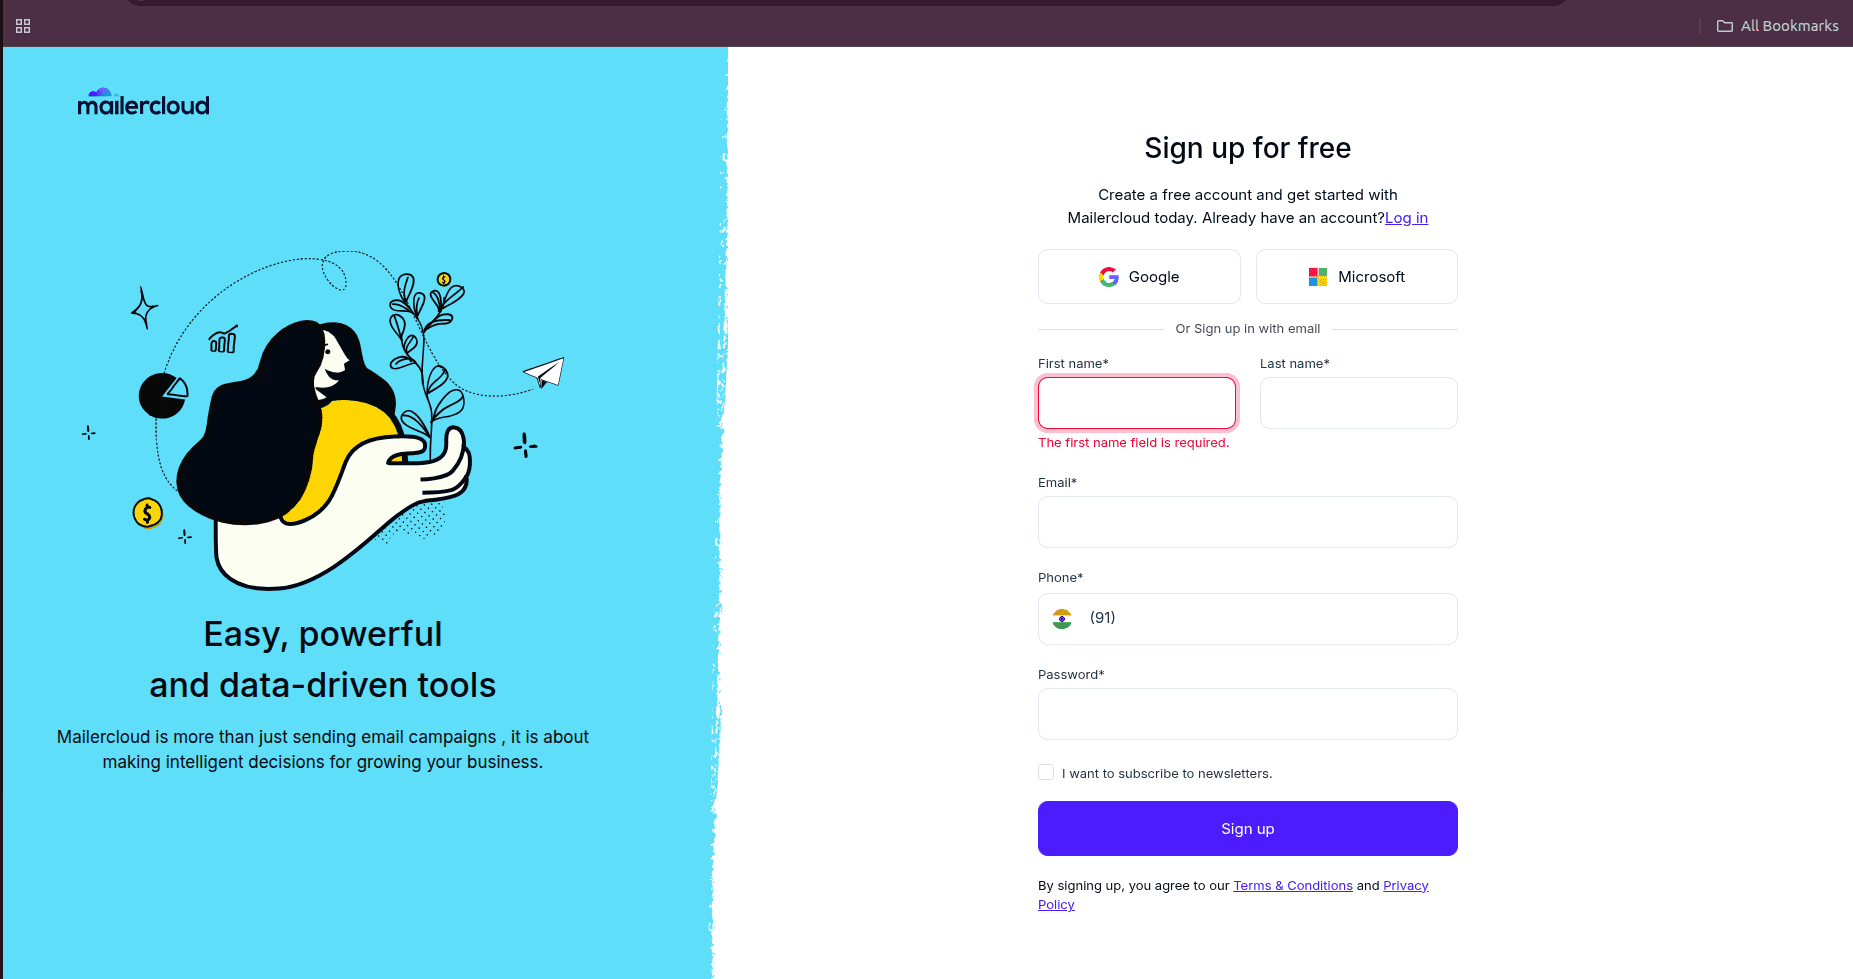
After creating the account, it will redirect you to a page ‘Add Some Details.'
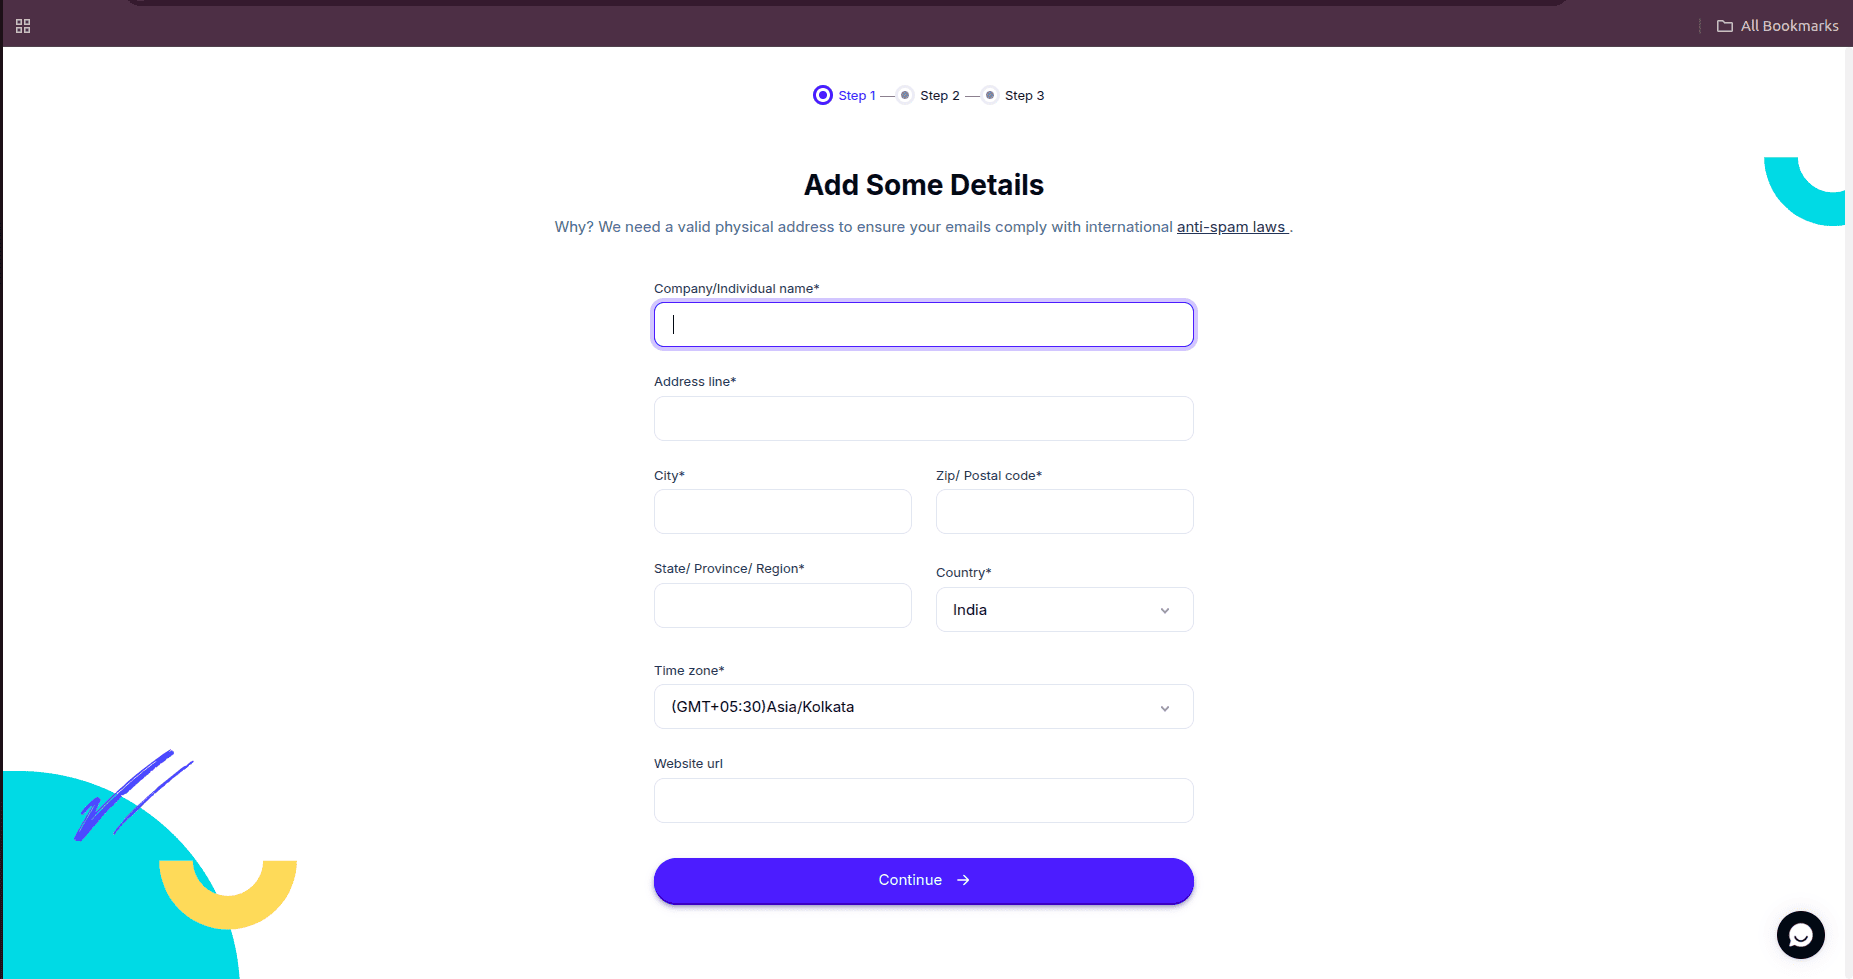
Here you need to add your company information before you can start sending email campaigns from Odoo. This information is mandatory because every marketing email must have a valid sender address.
- Enter your business or organization name.
- Provide your complete business address.
- Enter the city where your business is located.
- Fill in the postal code.
- Enter your state, country, time zone, and website URL.
After filling in all the fields, click the Continue button to move to the next page.
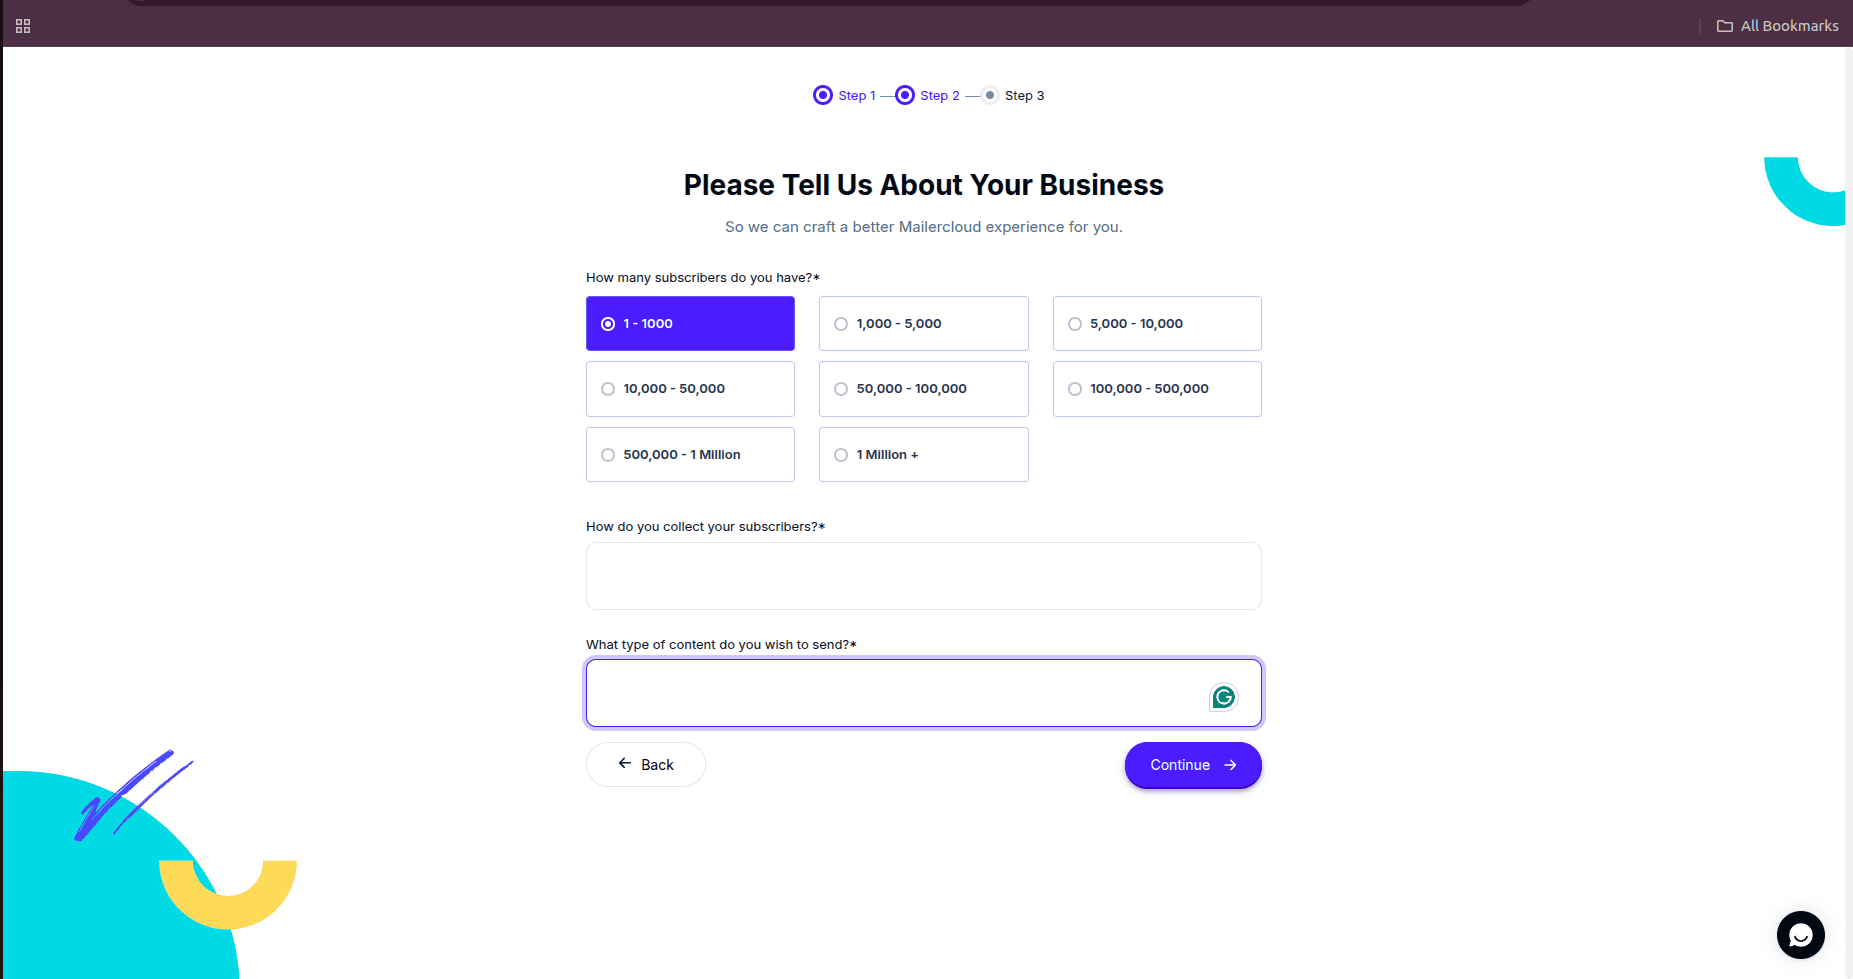
This is the second step of the onboarding process. Here, you can provide details about your subscriber/customer base and the type of emails you plan to send. This information allows Mailercloud to personalize your account and optimize your email marketing experience.
After clicking the Continue button, go to the next page.
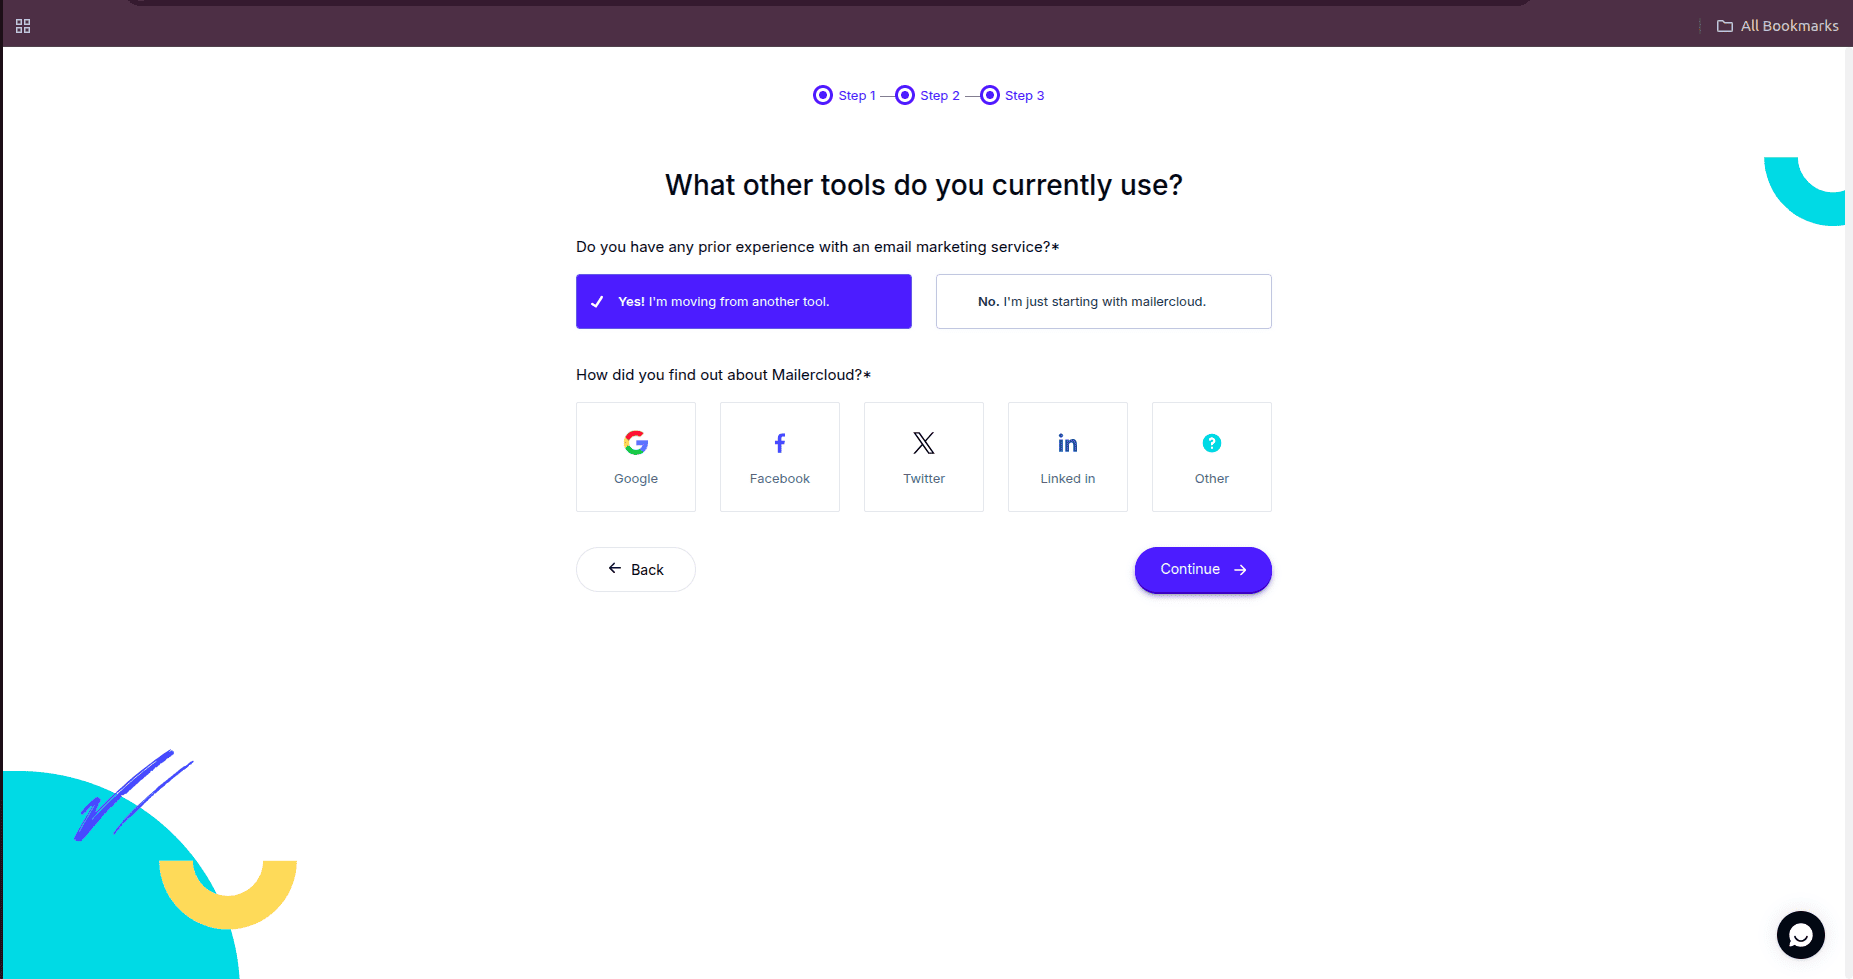
This is the final step. MailerCloud setup asks a few questions about your email marketing experience.
If you are using other tools, then you can select that. After that, click Continue to move to the next page.
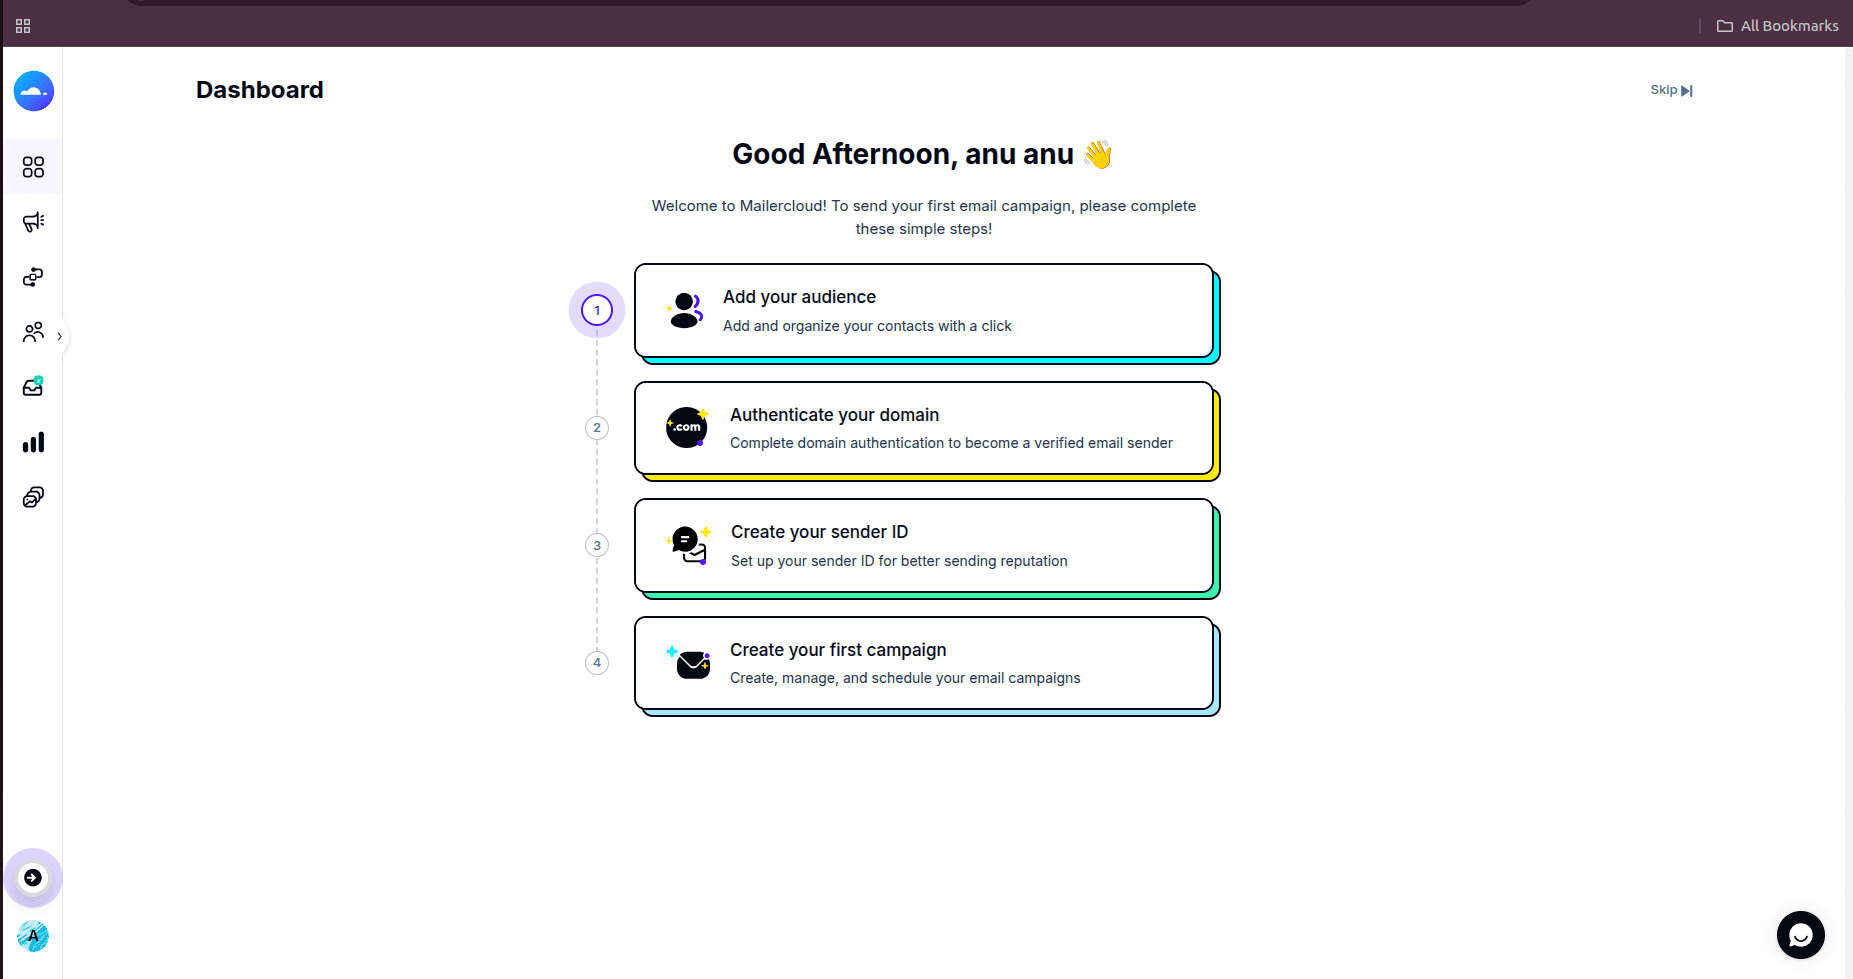
This is a dashboard page of MailerCloud.
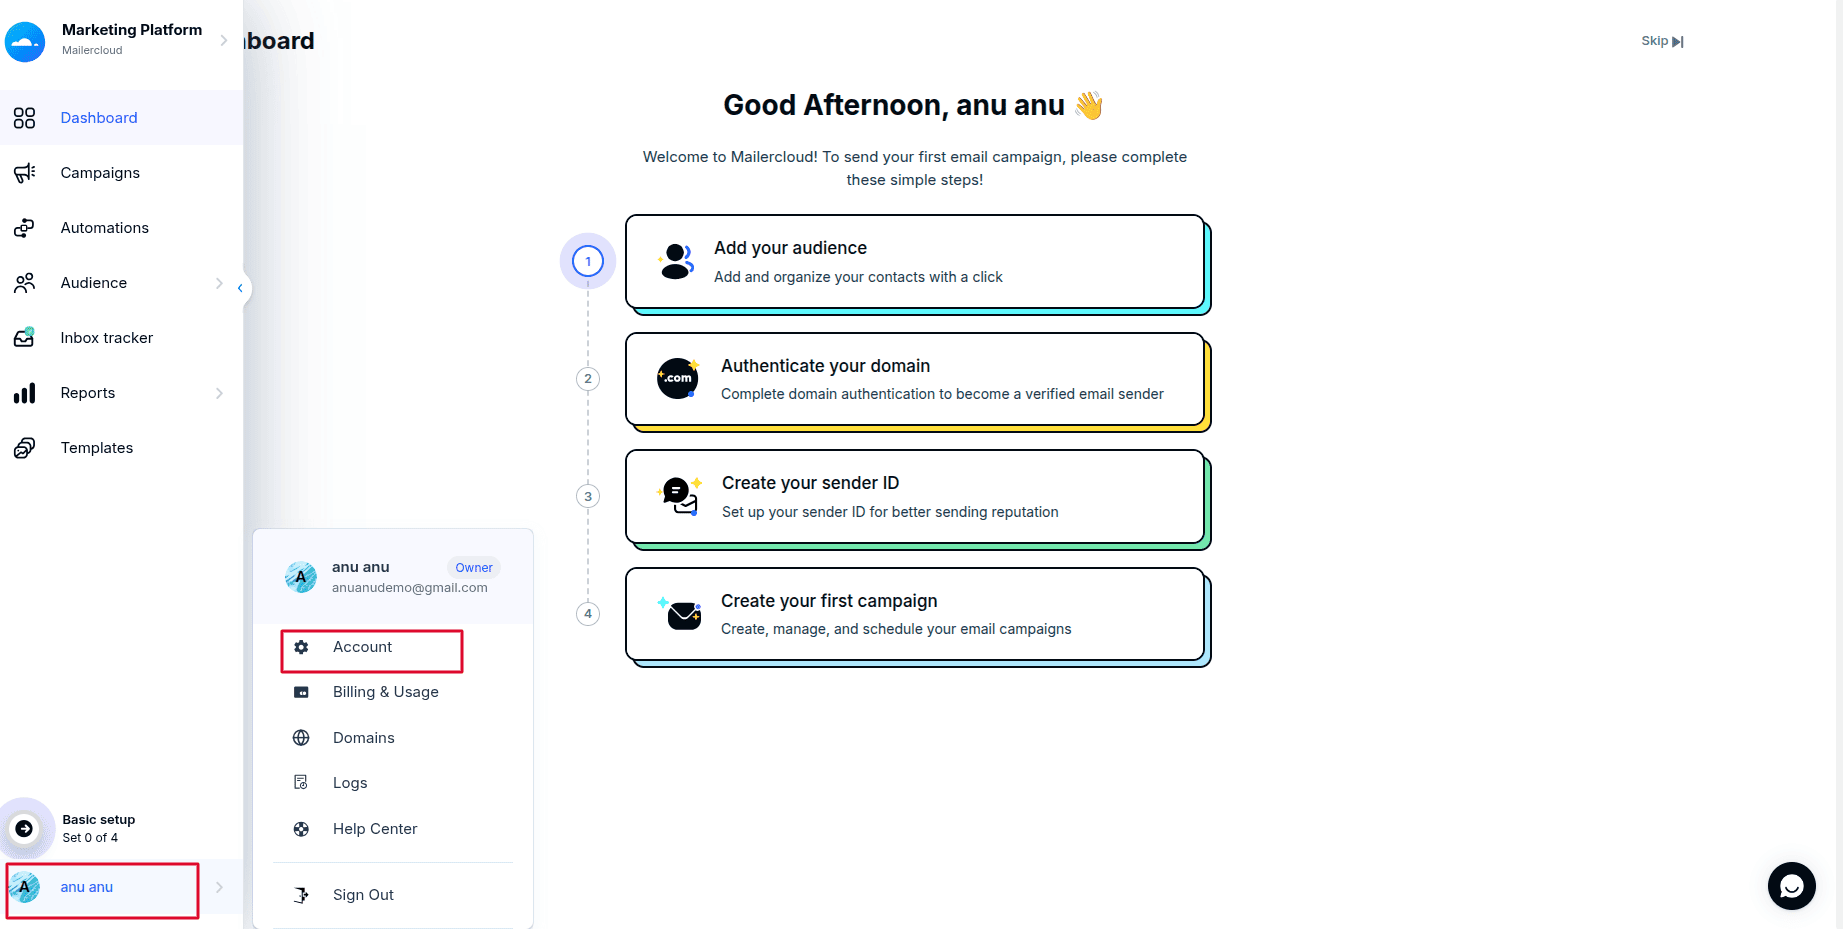
Click the profile icon, then select the account menu.
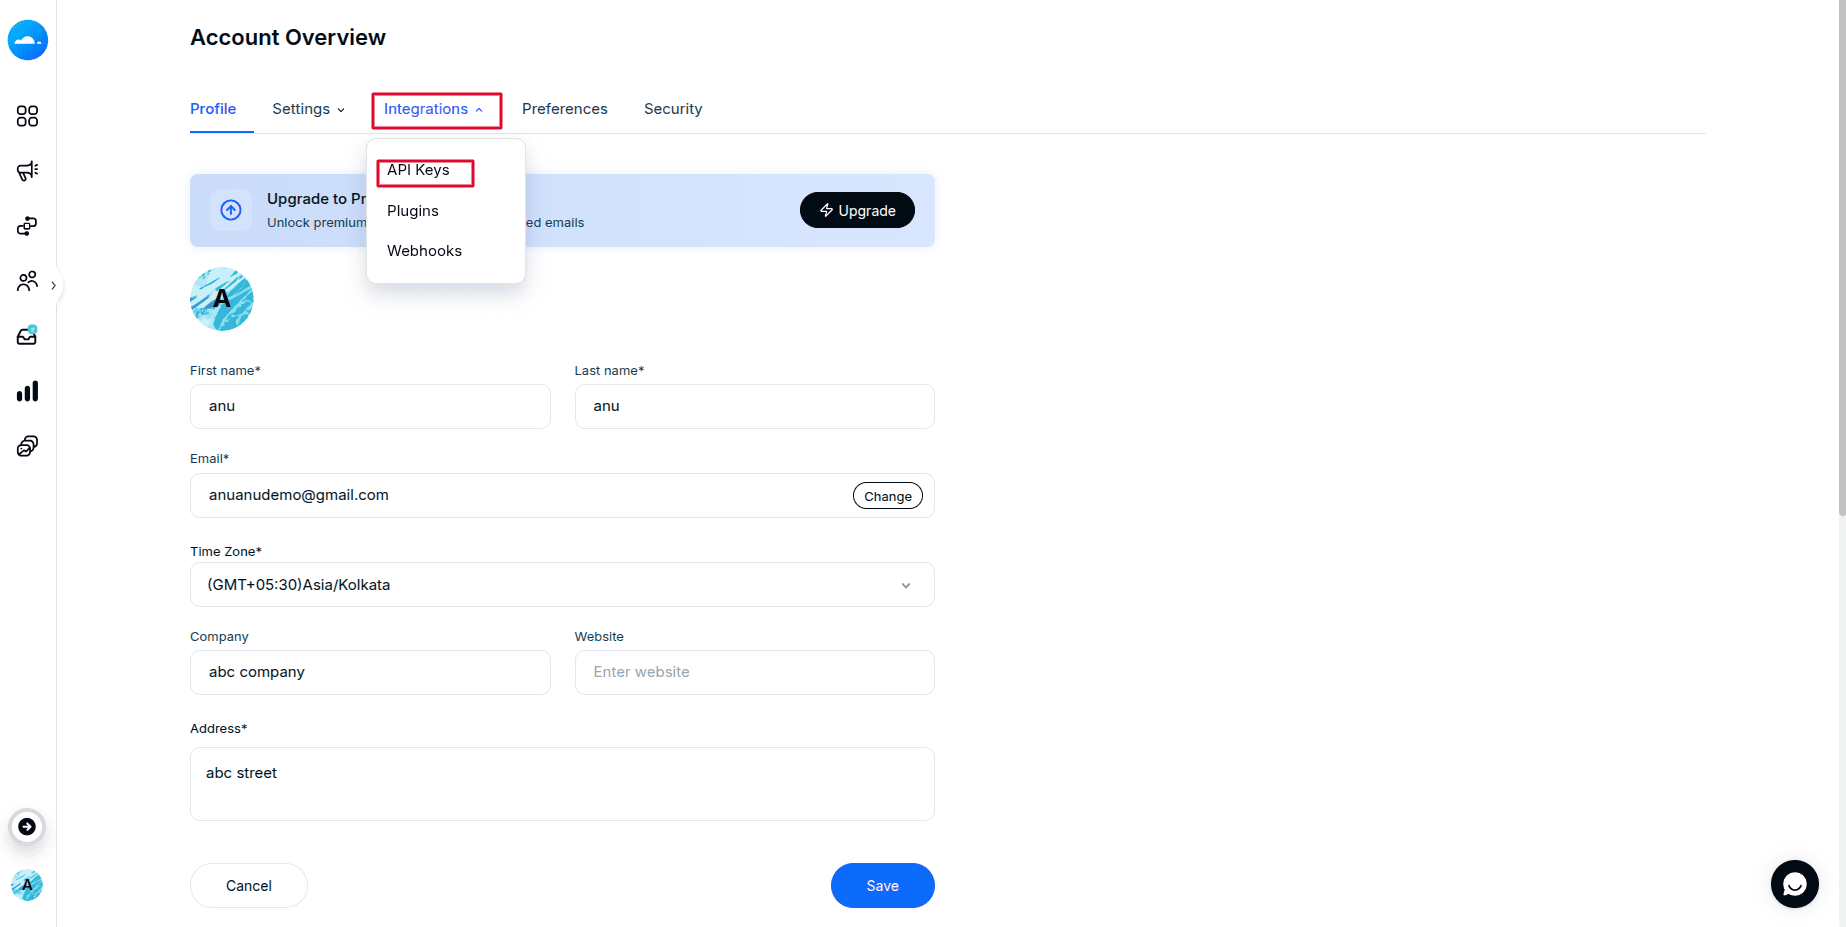
After that, redirect to the account overview page. Then click the Integrations menu.
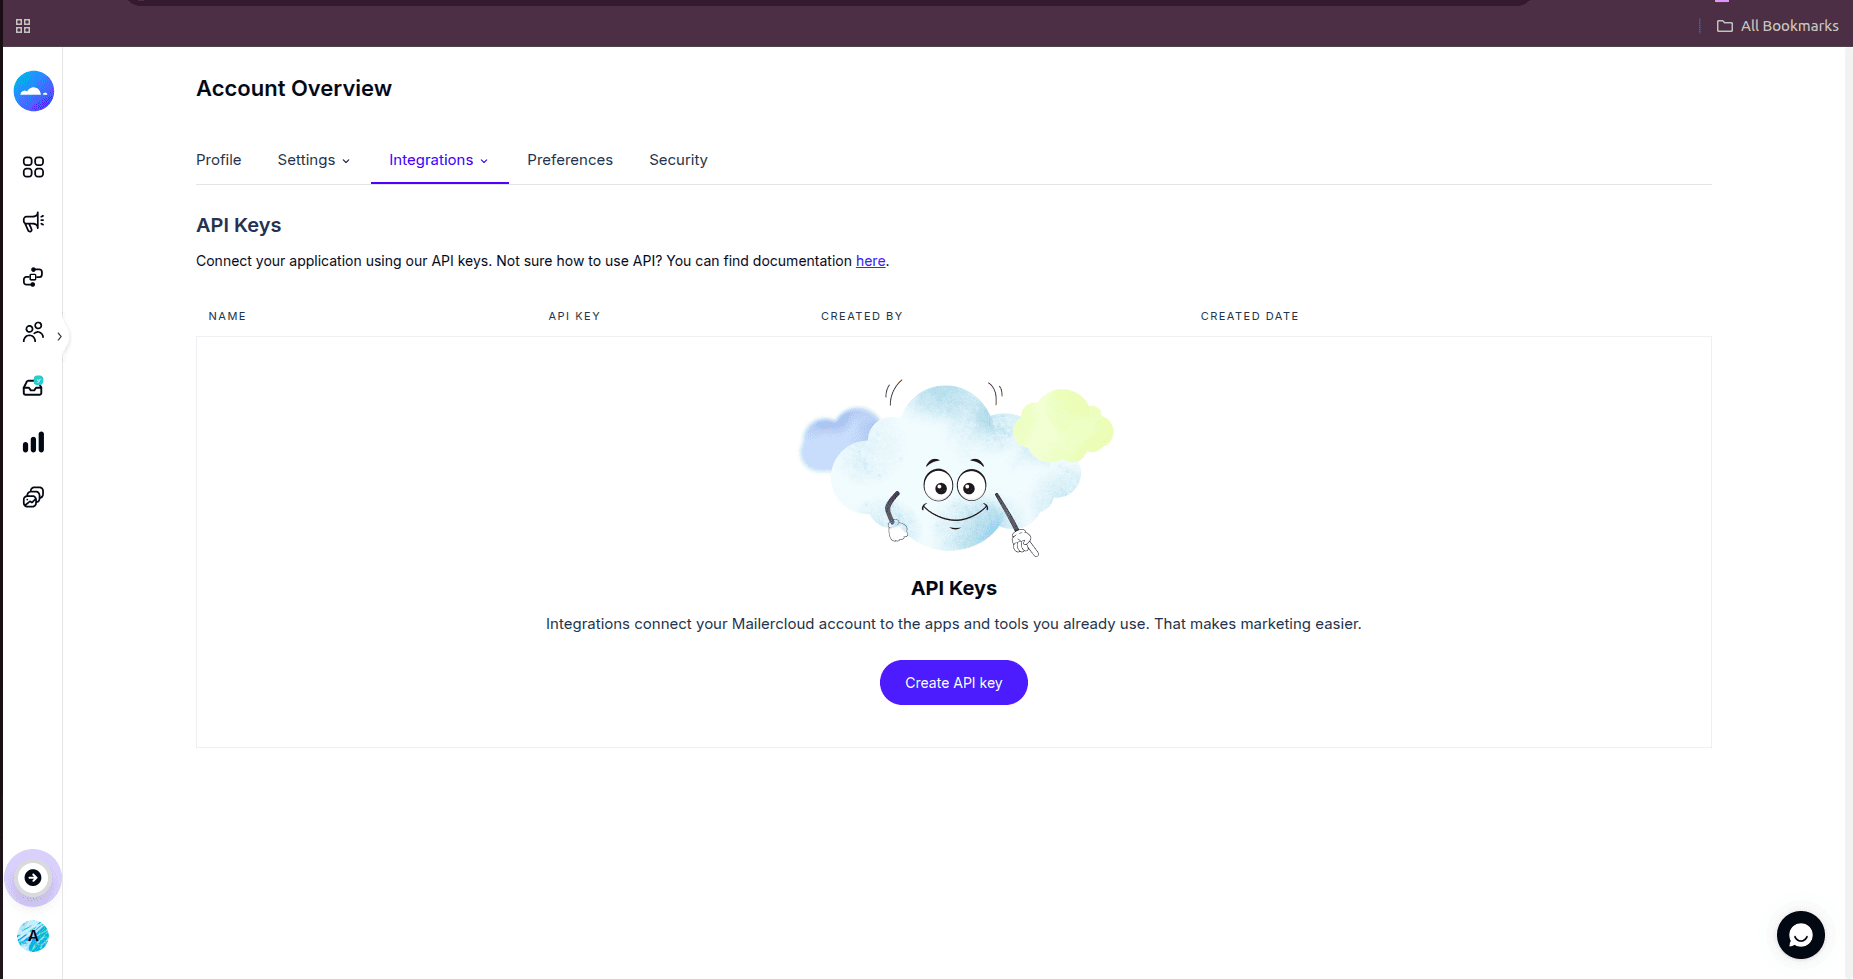
Then click the API keys menu. Here you can create the API keys.
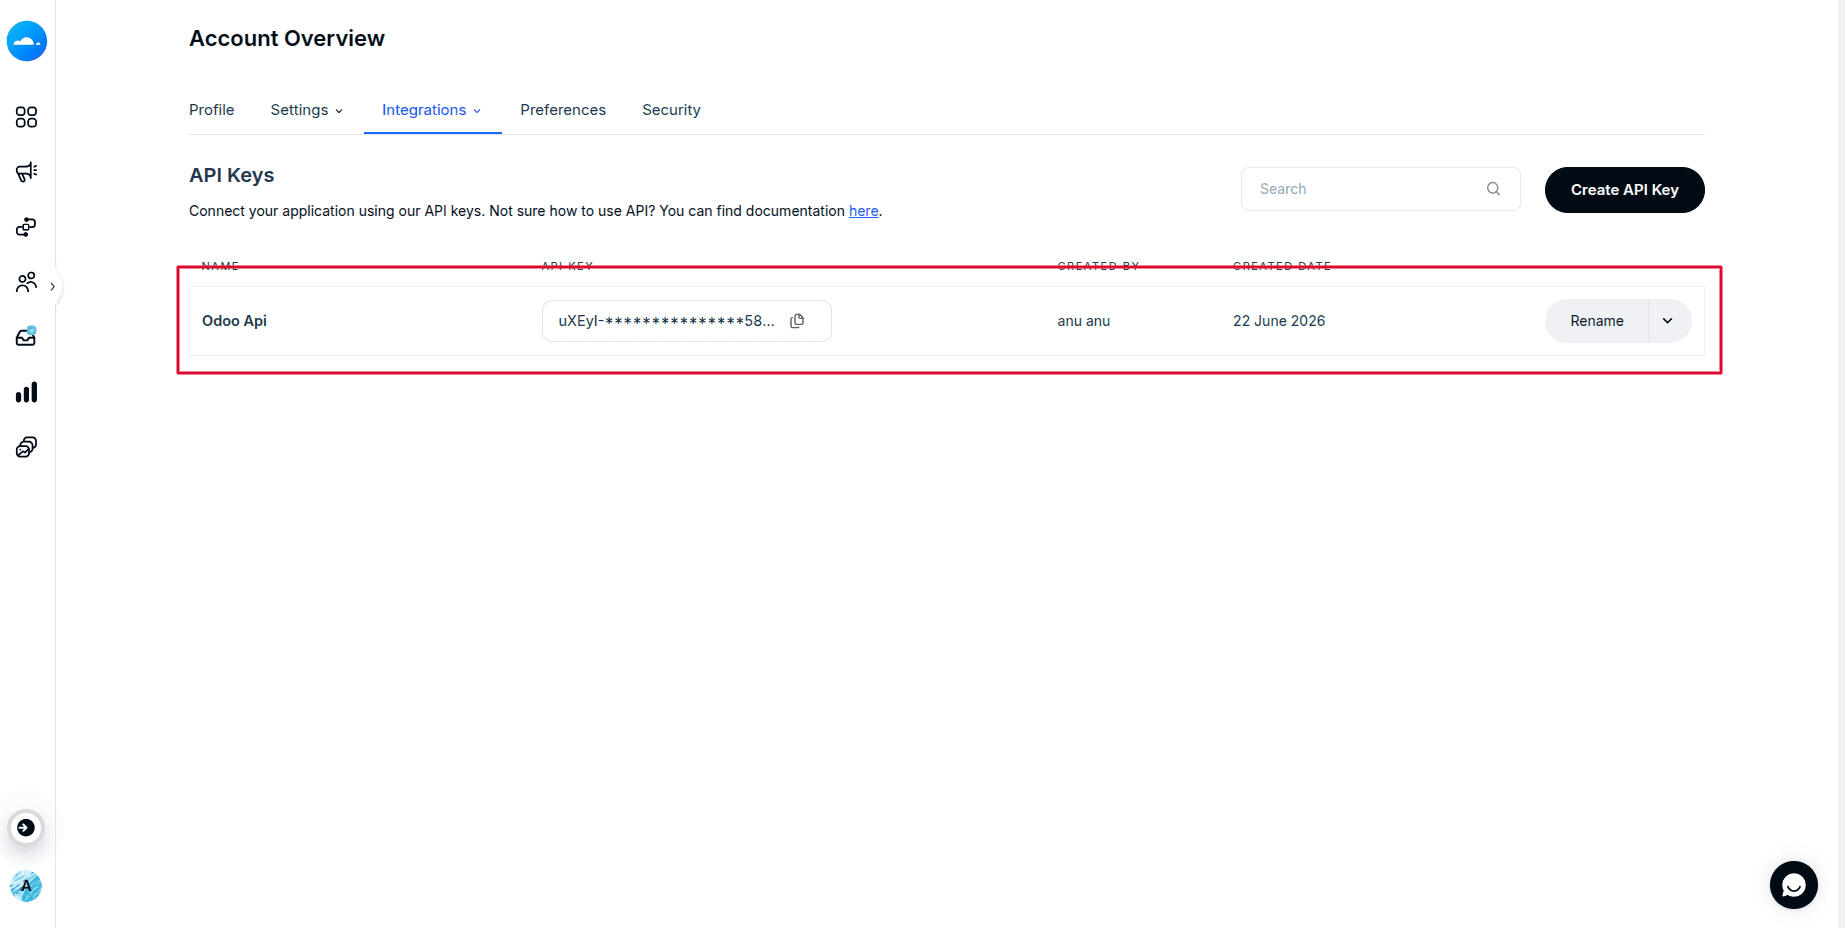
After that, copy the API key, then open the MailerCloud Odoo connector.
Then paste that API key into the API key field.
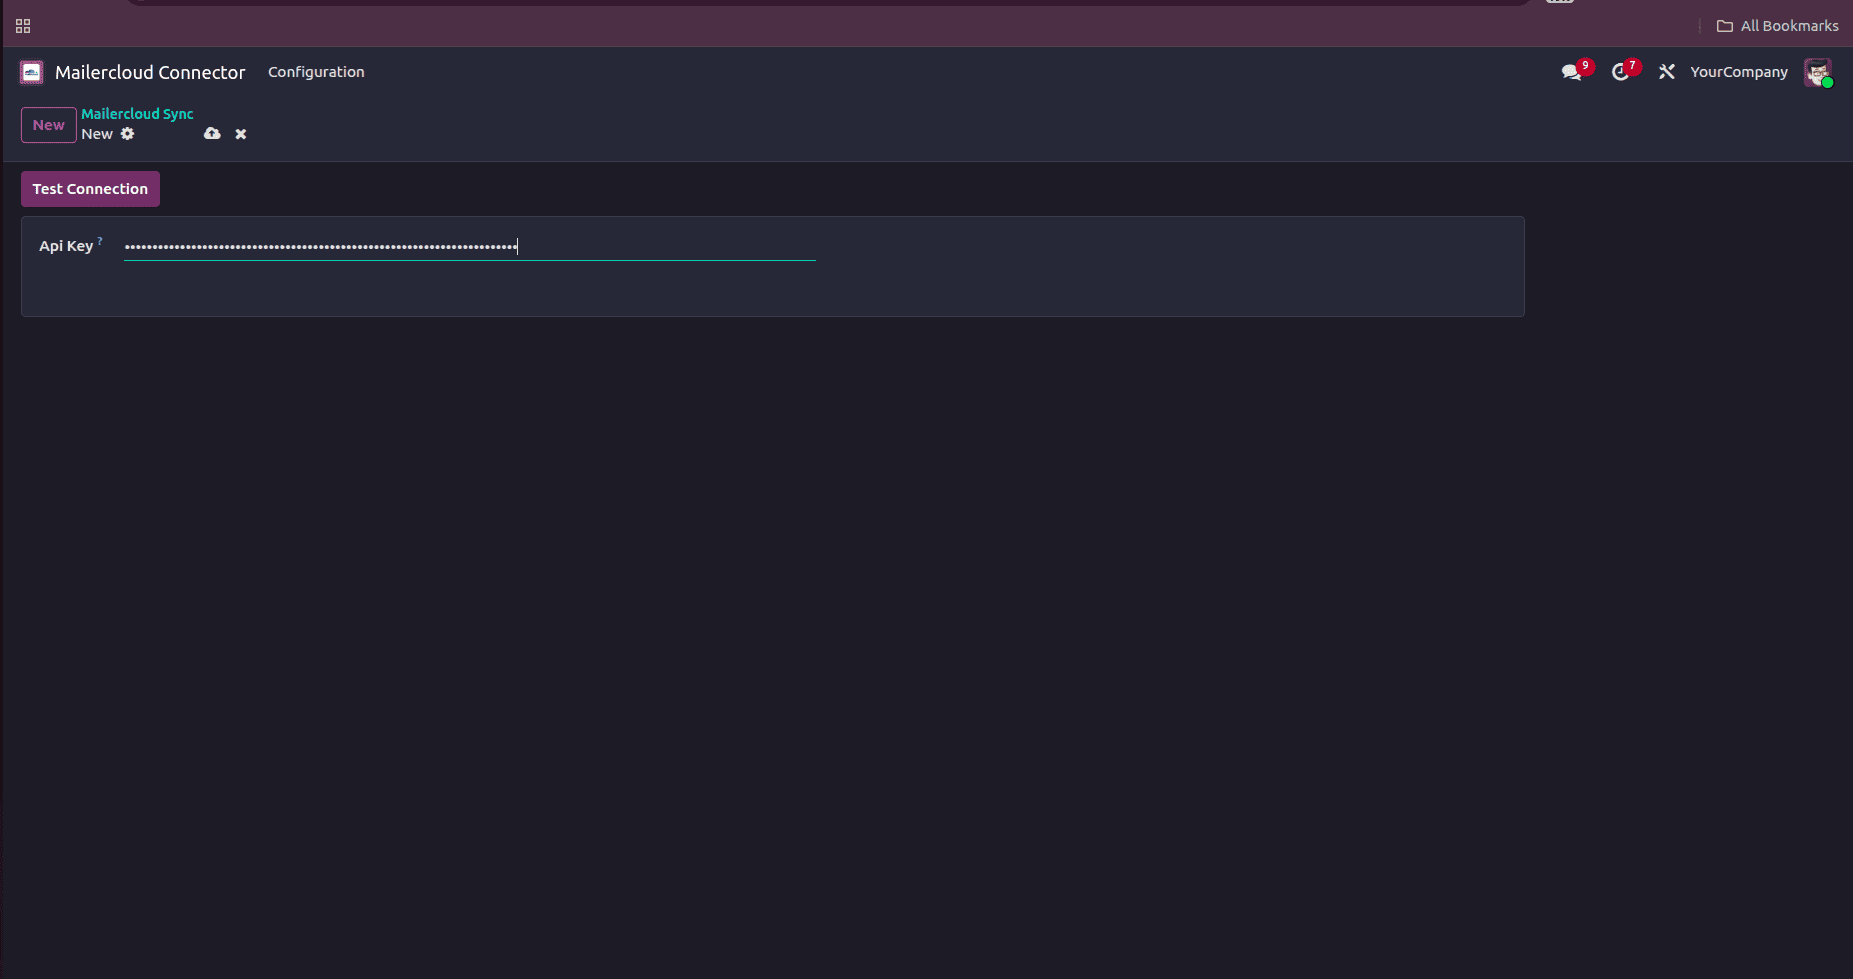
After that, click the test connection button. The connector verifies the key and retrieves your MailerCloud account information. If the API key is valid, the configuration page is displayed with your account details and contact synchronization options.
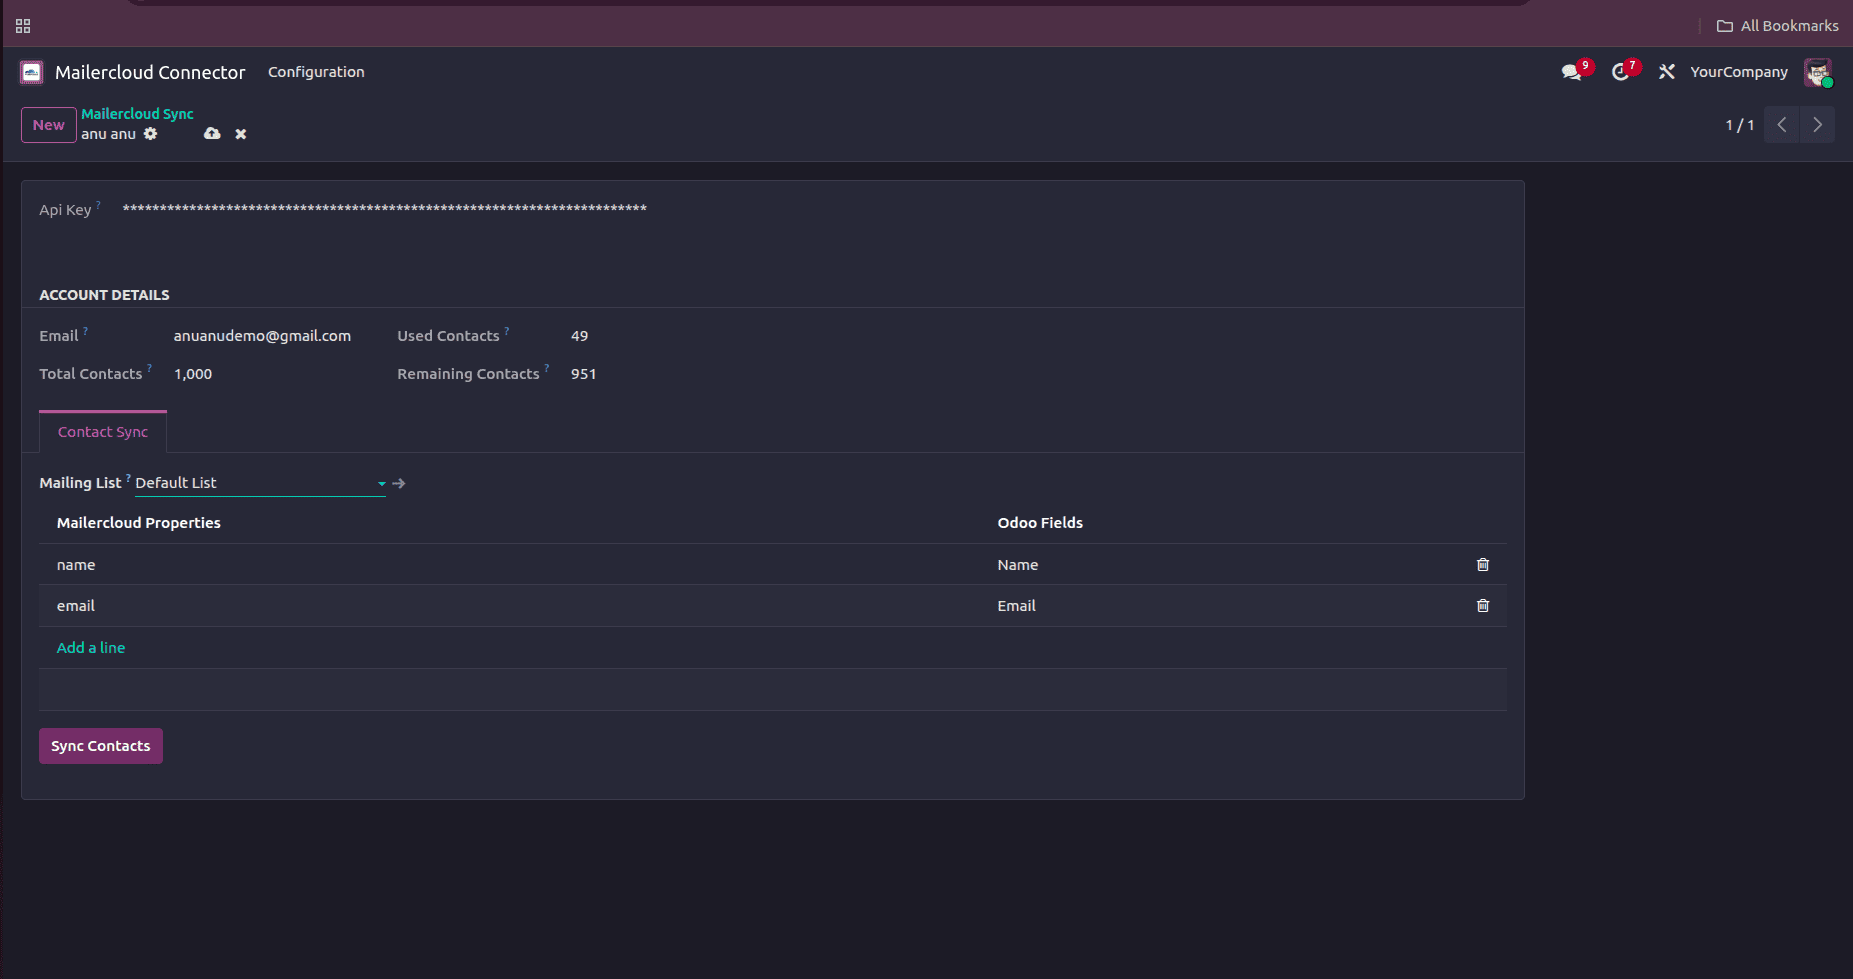
After successful connection, the Account Details section displays information retrieved directly from your MailerCloud account.
Email: It shows the email address associated with the connected MailerCloud account.
Total contacts: Displays the maximum number of contacts allowed under your current MailerCloud plan.
Used contacts: Shows how many contacts are currently stored in your Mailercloud account.
Remaining contacts: Displays the number of contacts that can still be added before reaching your account limit.
Contact Sync: The Contact Sync tab allows you to map fields between Odoo and Mailercloud before synchronizing contacts.
Field mapping ensures that information stored in Odoo is transferred to the correct fields in Mailercloud.
This mapping:
- The Name field in Odoo will be synchronized with the name property in Mailercloud.
- The Email field in Odoo will be synchronized with the email property in Mailercloud.
Click "Add a line" to add additional fields like county and company.
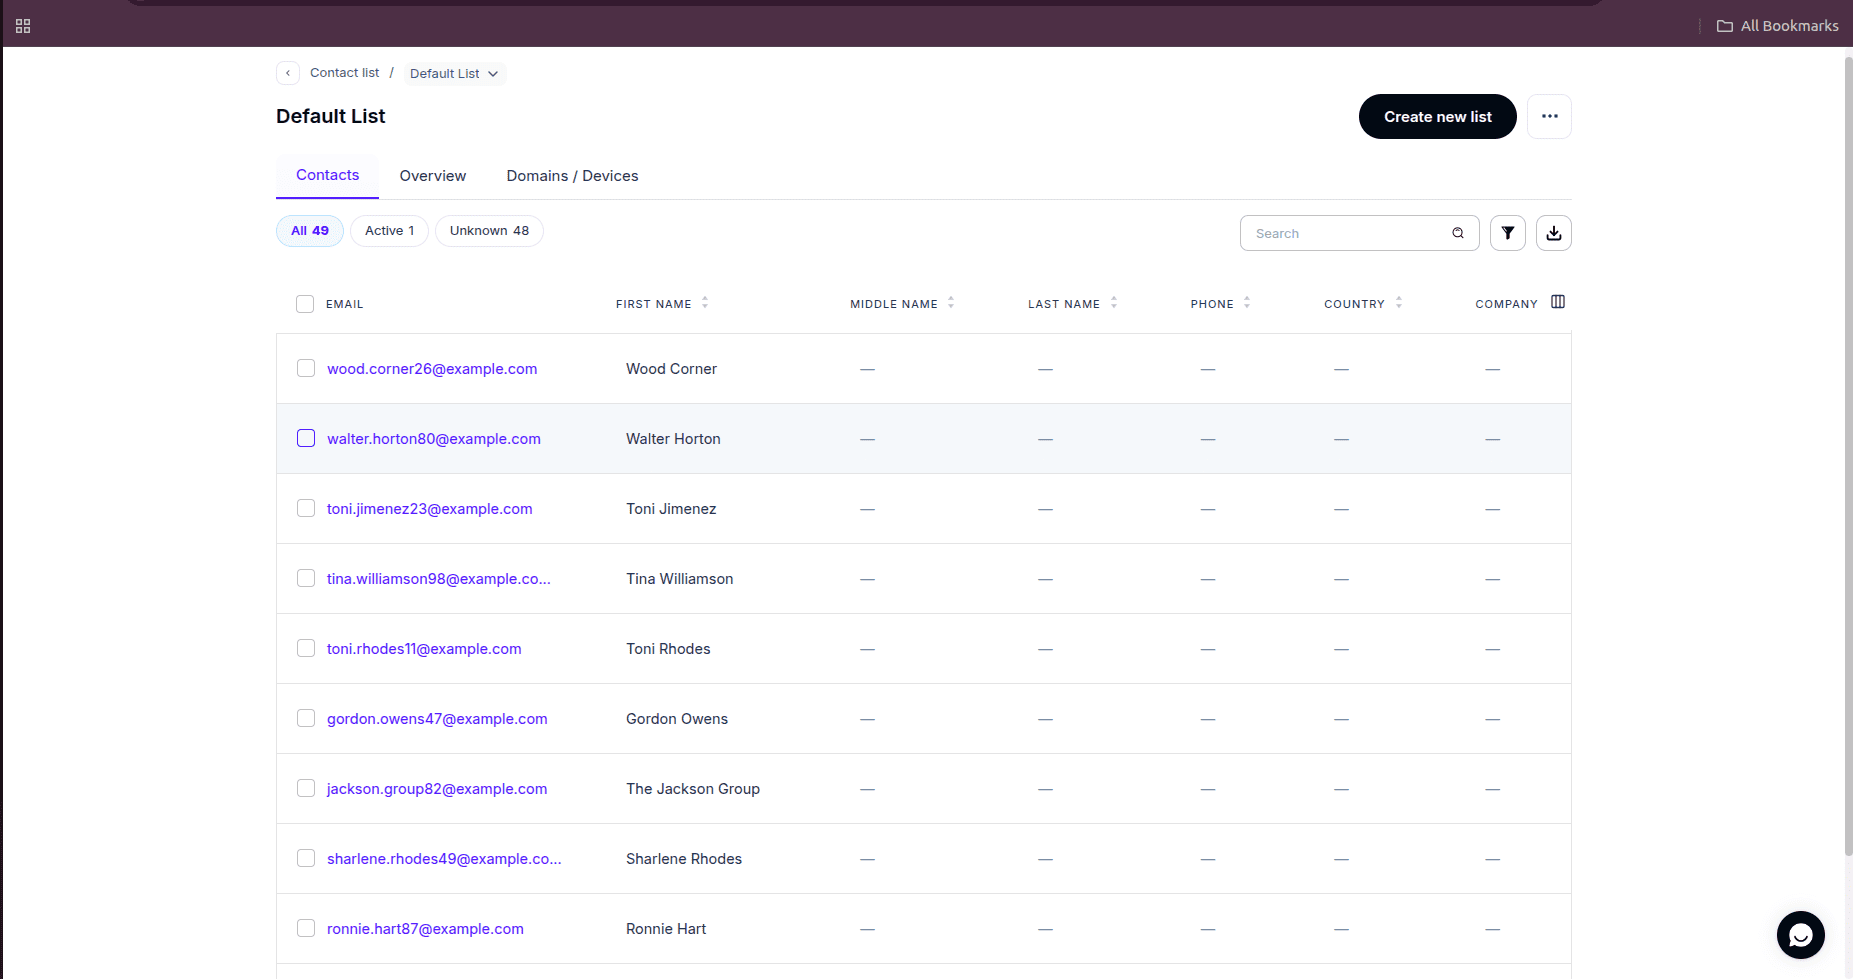
Once the field mappings are complete, click the Sync Contacts button to add the customer's information to MailerCloud.
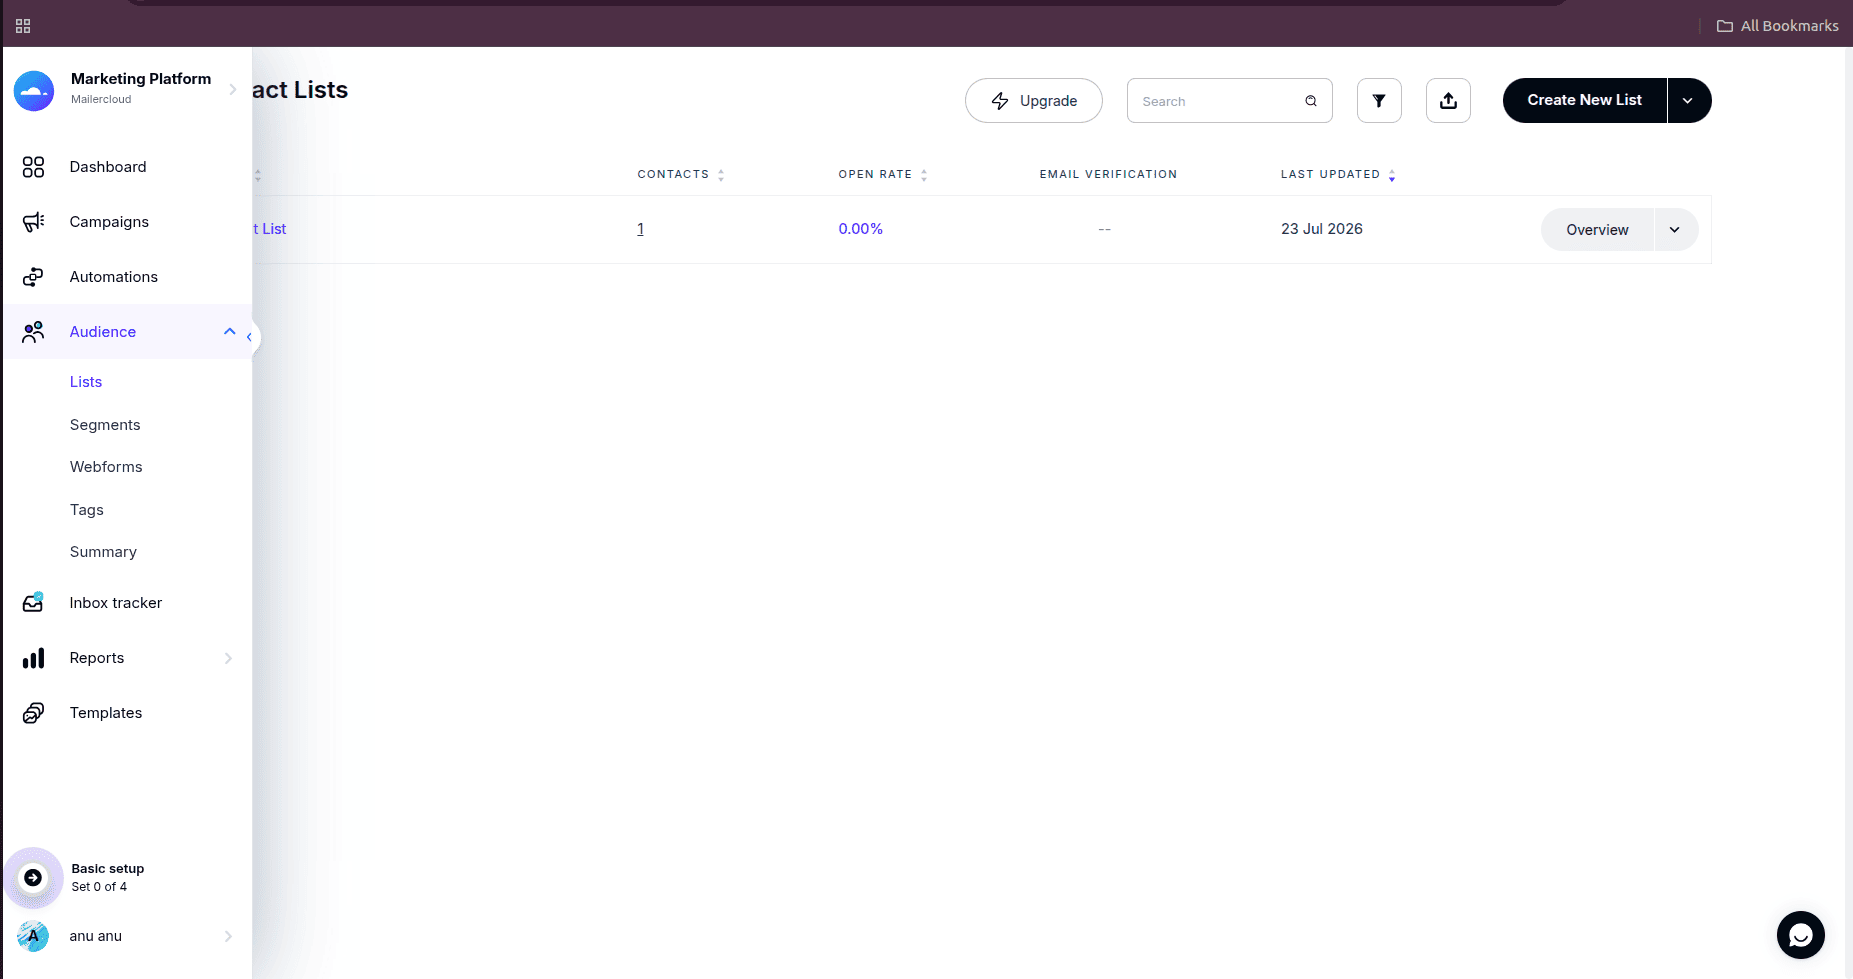
Next, go to MailerCloud, then click the menu, then click the audience.
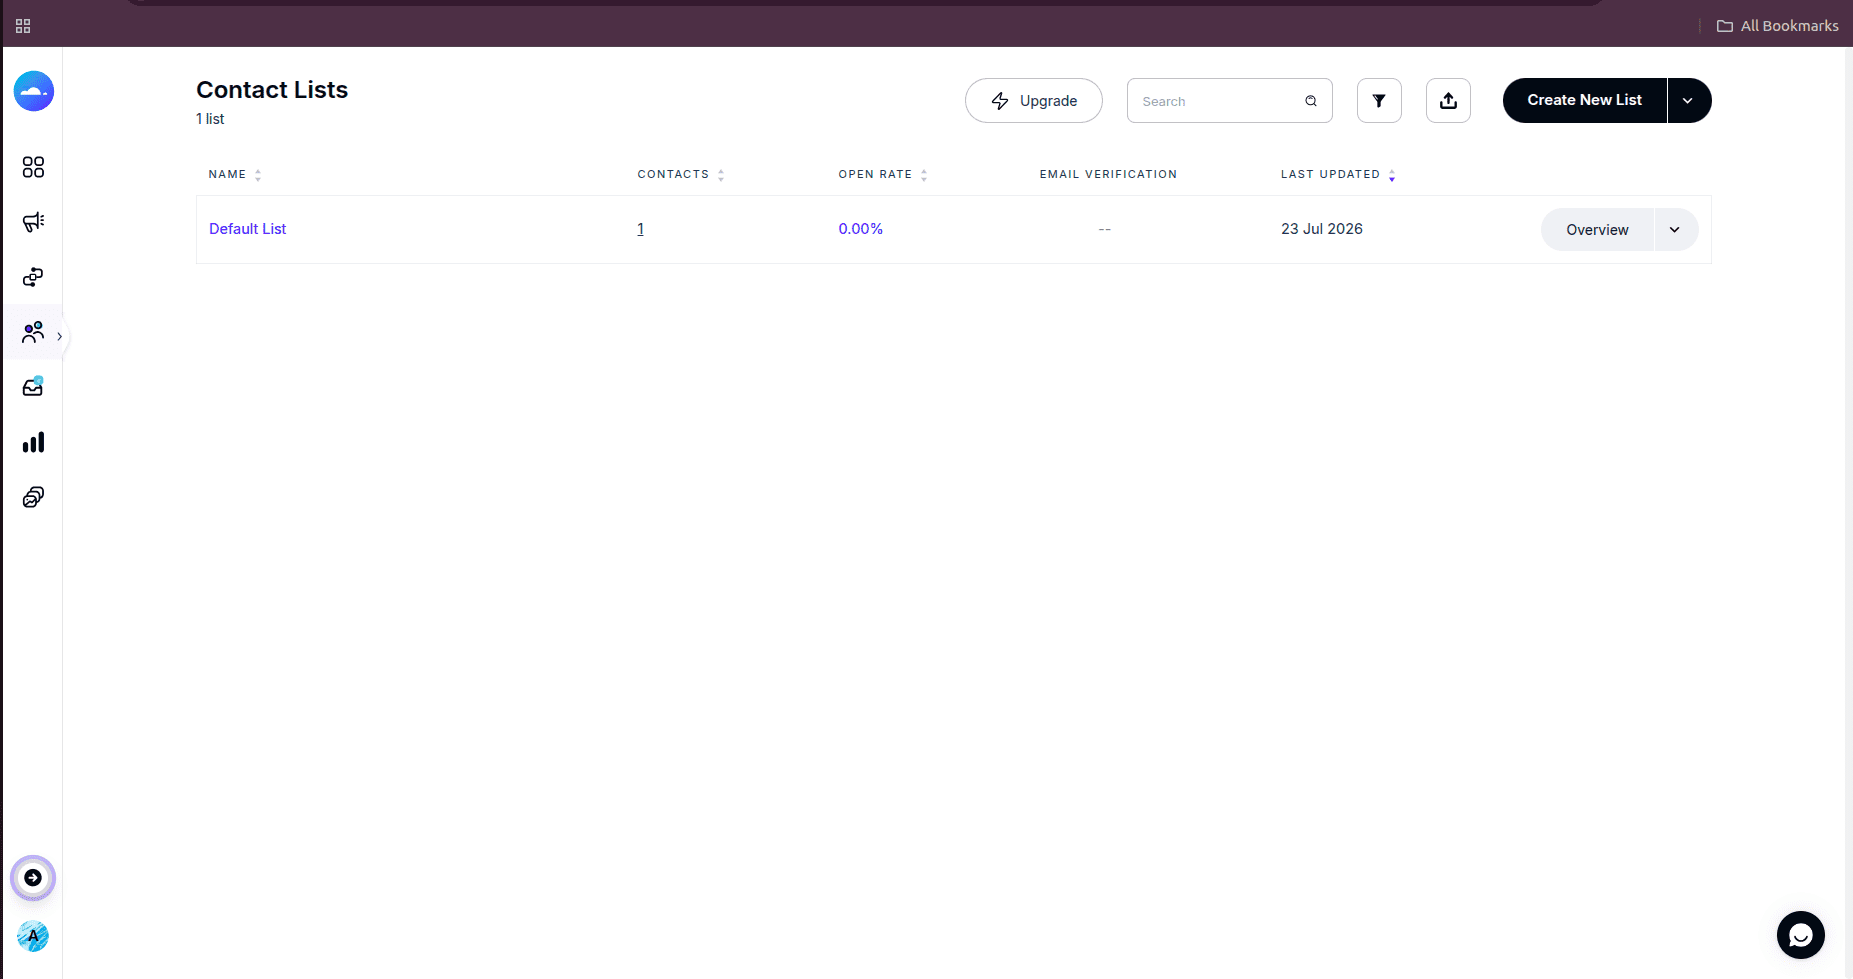
Click the list; here you can see the selected list, and by clicking the list, you will see all customer information.
The Mailercloud Connector simplifies email marketing by connecting Odoo directly with Mailercloud. Instead of manually exporting and importing customer data, businesses can synchronize contacts with just a few clicks and keep subscriber information up to date.
Once the integration is configured, your contacts are always ready for newsletters, promotional campaigns, and marketing automation, helping you save time while improving customer engagement.
Whether you're a small business or a growing enterprise, integrating Mailercloud with Odoo is an effective way to streamline your marketing workflow and make the most of your customer data.
To read more about How to Seamlessly Integrate External MySQL Data in Odoo 19, refer to our blog How to Seamlessly Integrate External MySQL Data in Odoo 19.