Application management plays an important role in the recruitment process. During recruitment, some applicants may be disqualified from applying for a position for various reasons. Odoo 20 Recruitment makes it easy for recruiters to refuse such applications and note down the reason for refusal.
In this blog, we will explore how to create applicants and refuse them in Odoo 20. We will also learn to configure refusal reasons, manage rejection emails, and handle duplicate applications using the available options in the Recruitment module.
Creating a Job Position
To manage applicants in Odoo 20 Recruitment, we first need to create a job position to which they can apply. Recruiters can create and configure job positions directly from the Recruitment dashboard.
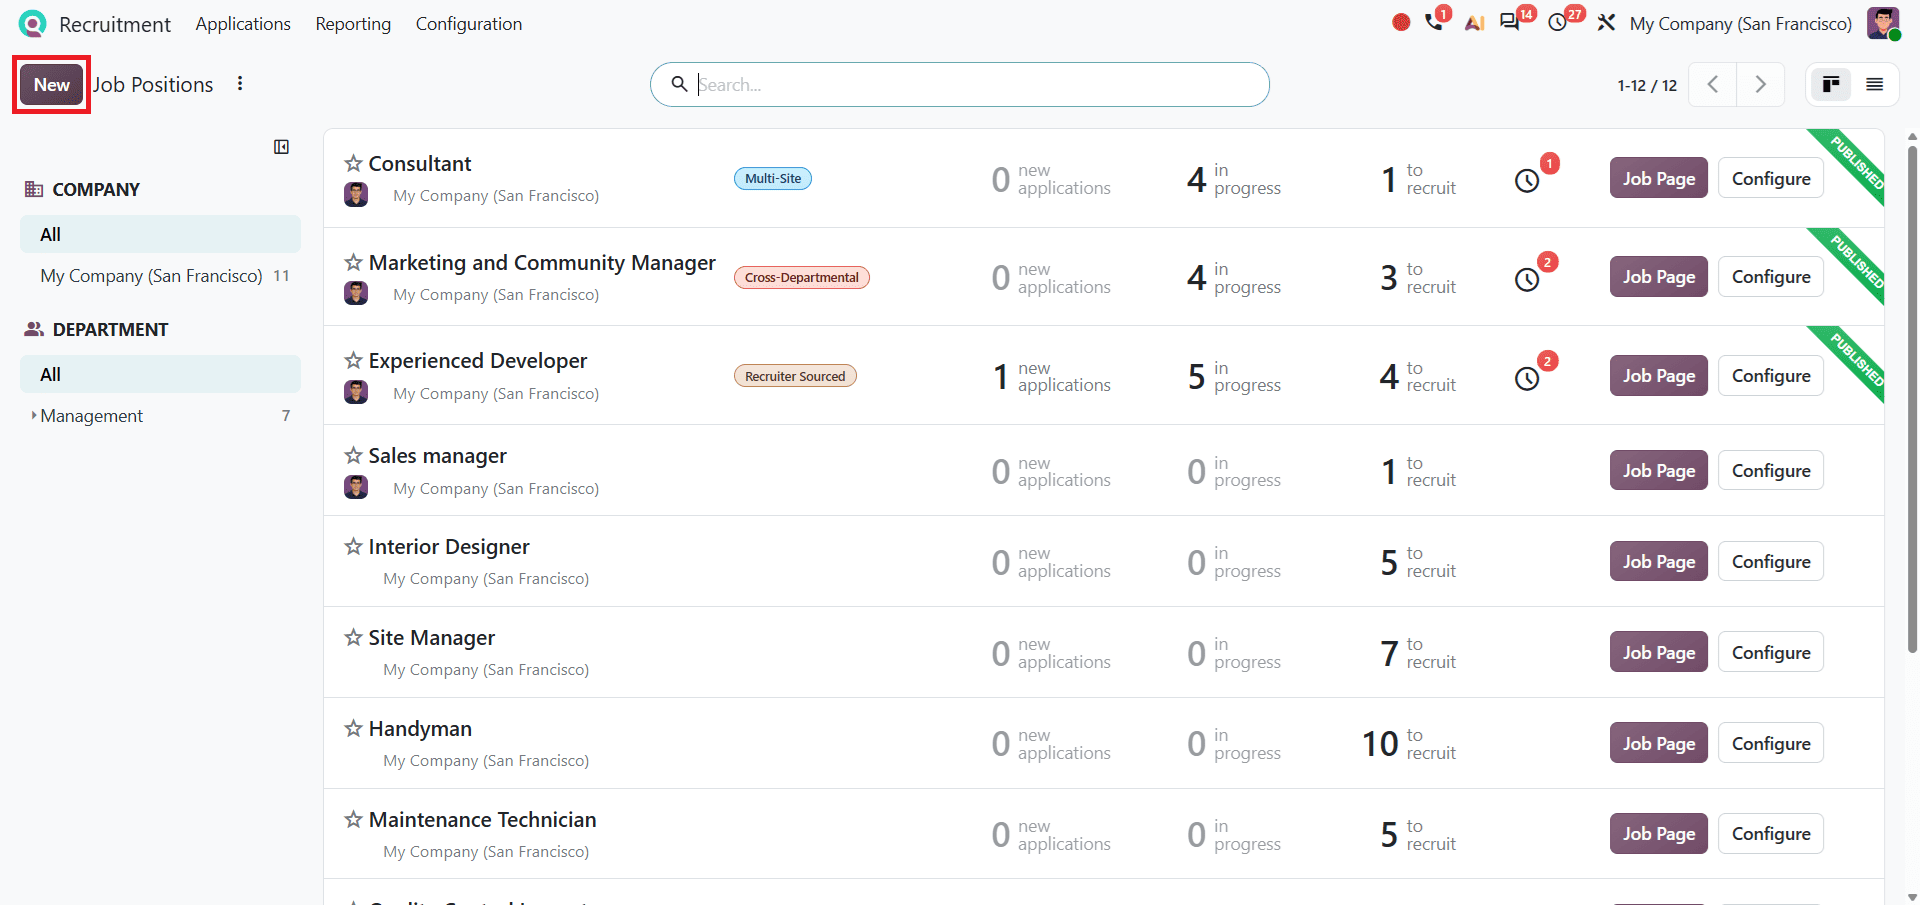
To create a new job position, open the Recruitment module and click the New button from the default Job Positions dashboard.
Configure the required information under the available tabs, such as Details, Summary, Application Info, Trackers, and Job Boards. This includes Hiring Process, Job, and Contract, where recruiters can configure the relevant information for the vacancy.
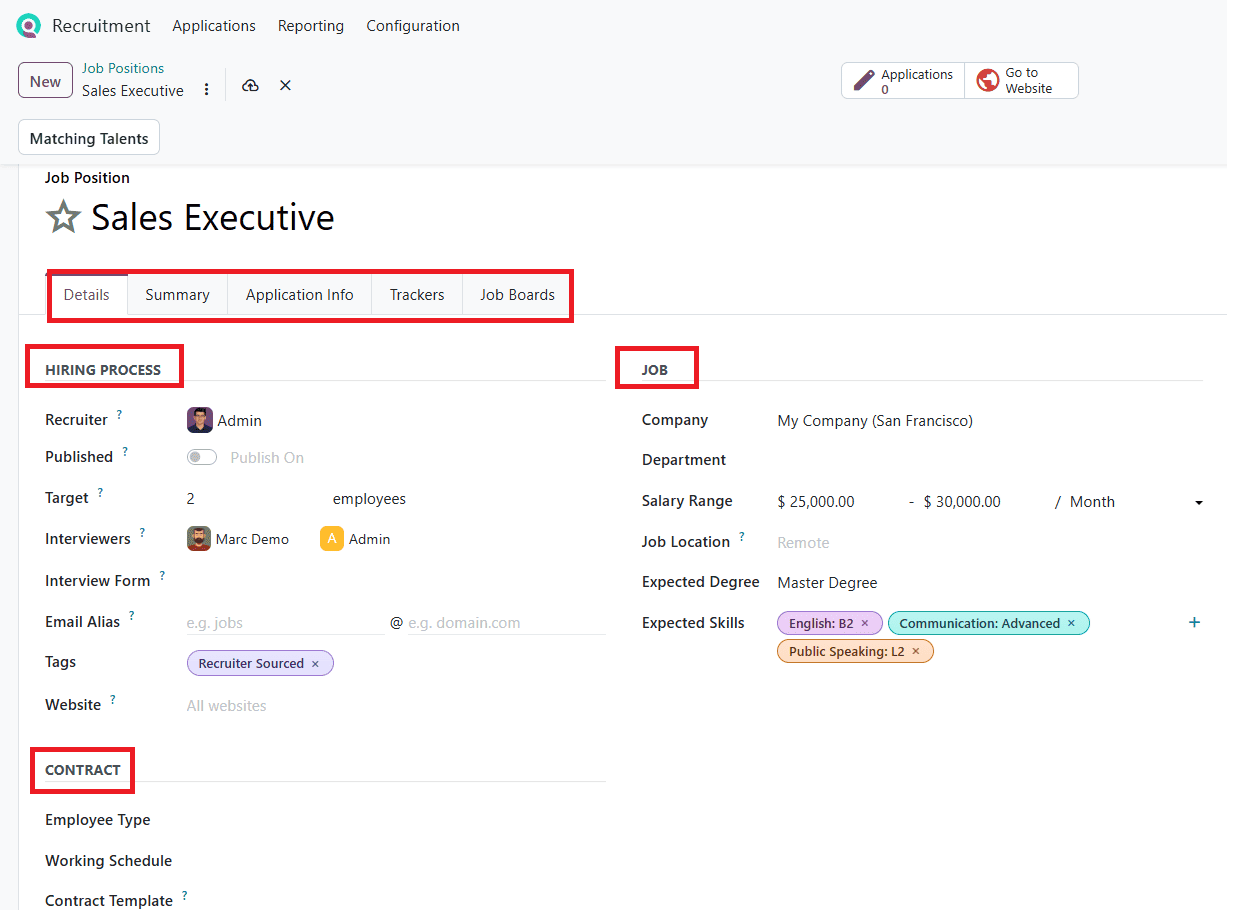
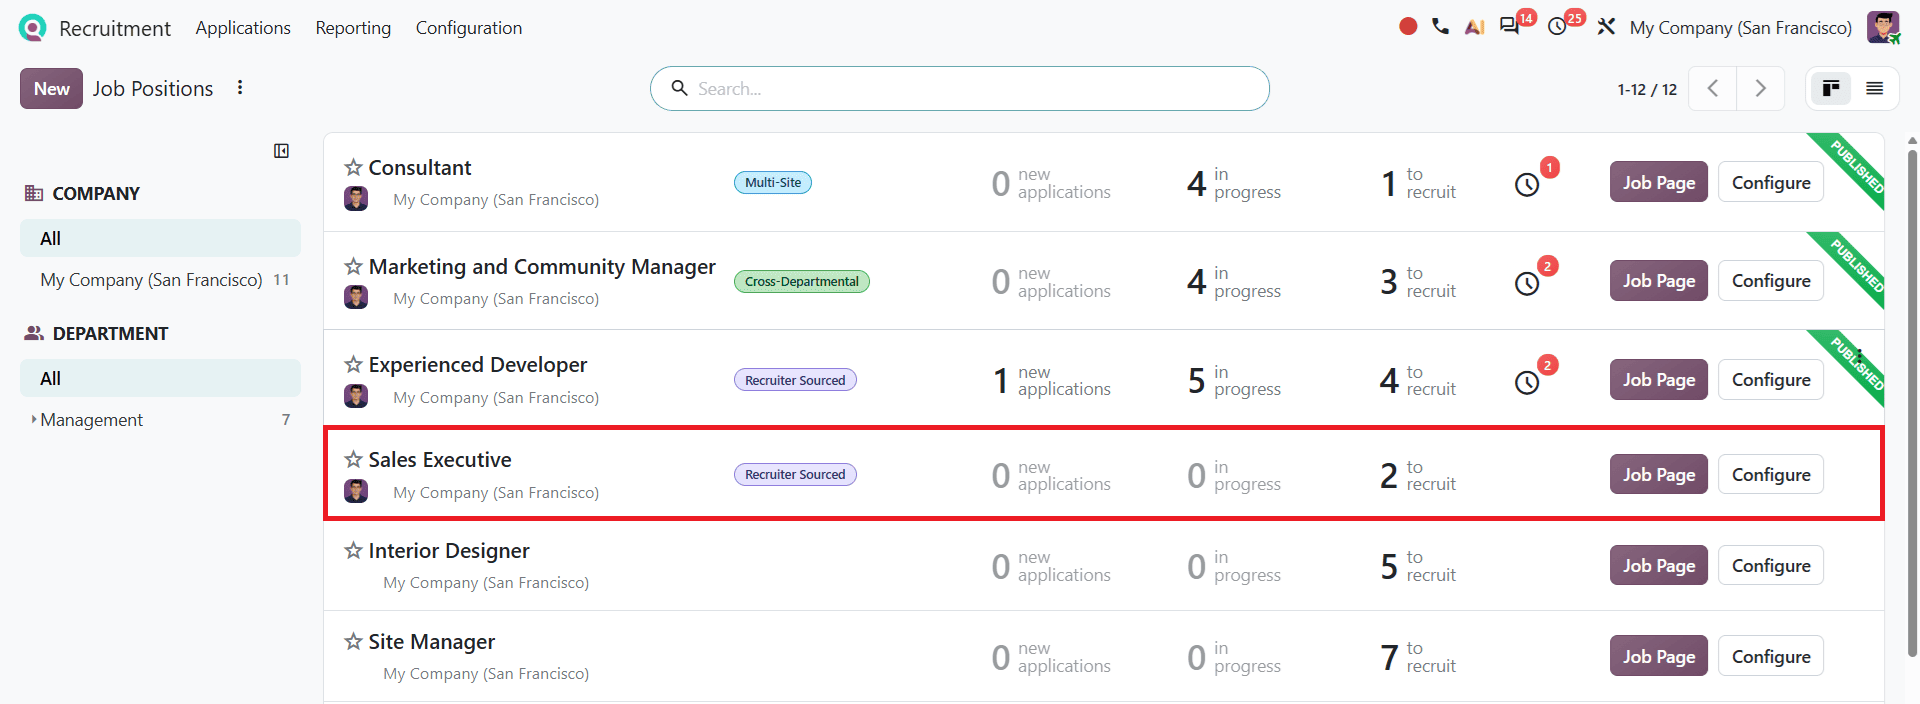
For this example, we can create a job position named Sales Executive. Once the necessary details are entered, save the record. The newly created position will then be available on the Recruitment dashboard, as shown below.
Creating an Applicant
After creating the job position, recruiters can add applicants directly from its application dashboard. To do this, open the Recruitment module and click the job position you created. This opens the applications associated with the selected stages.
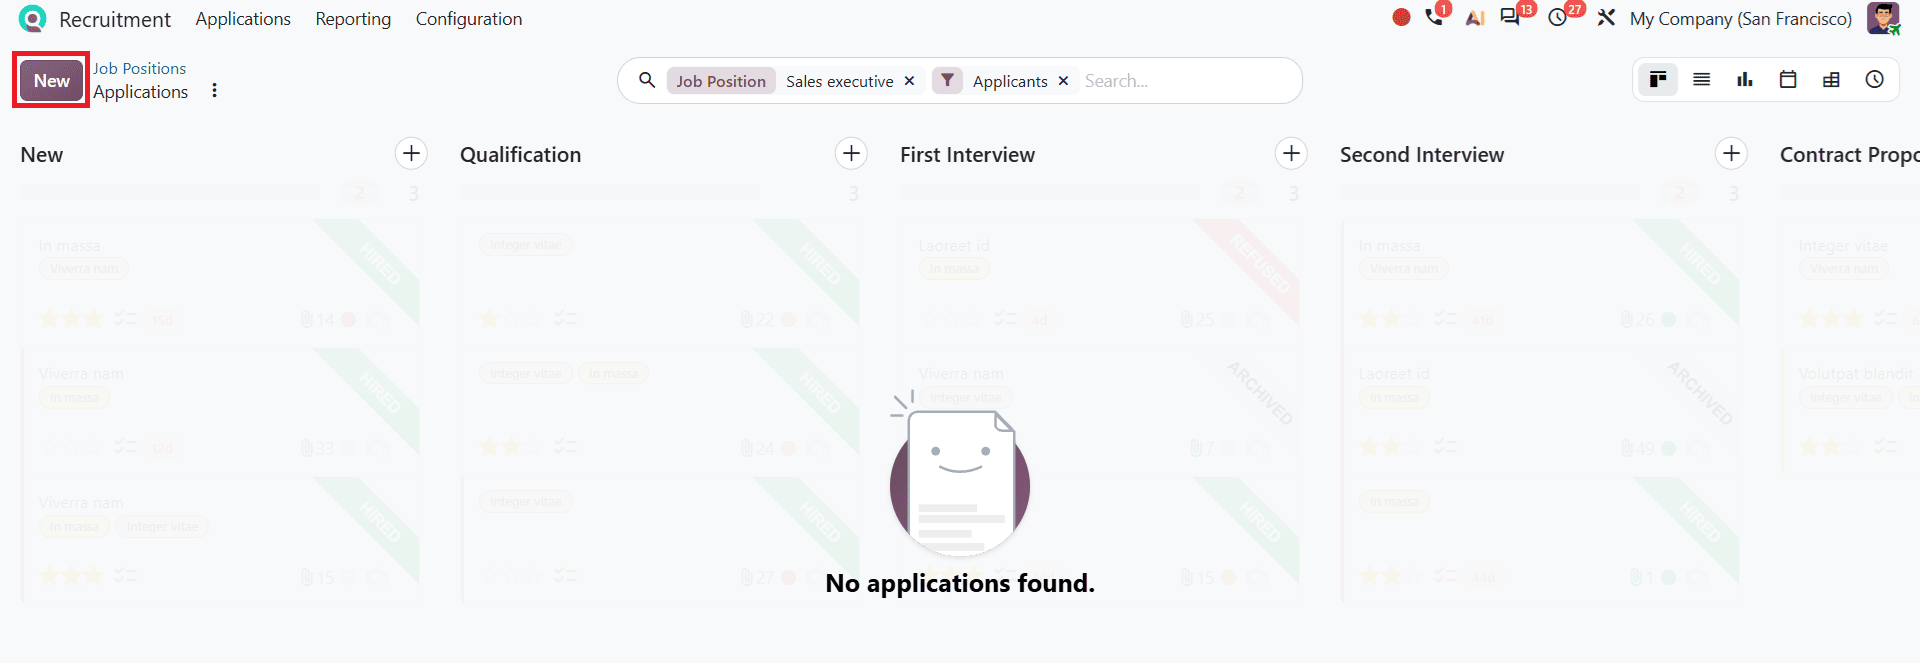
Click the New button to create an applicant. Enter the applicant's name and other required details, including their contact information, as shown below.
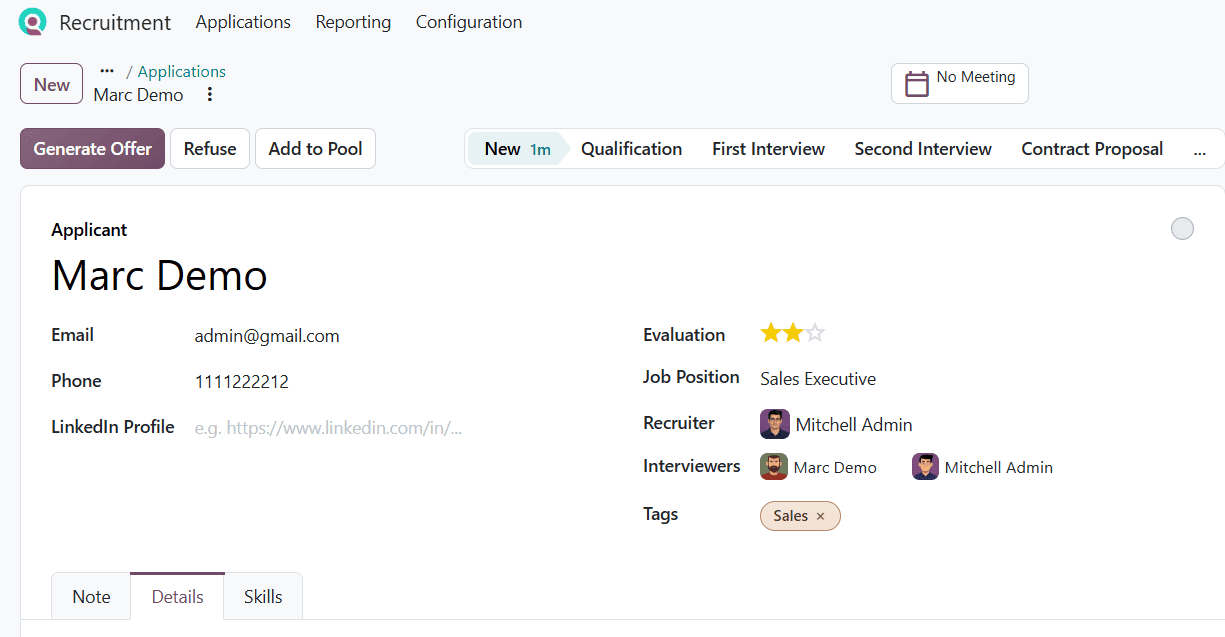
Once the details are provided, save the record. The applicant form contains additional tabs, including Notes, Details, and Skills. The Notes tab allows recruiters to add private notes about the applicant. The Details tab contains four sections, as shown below.
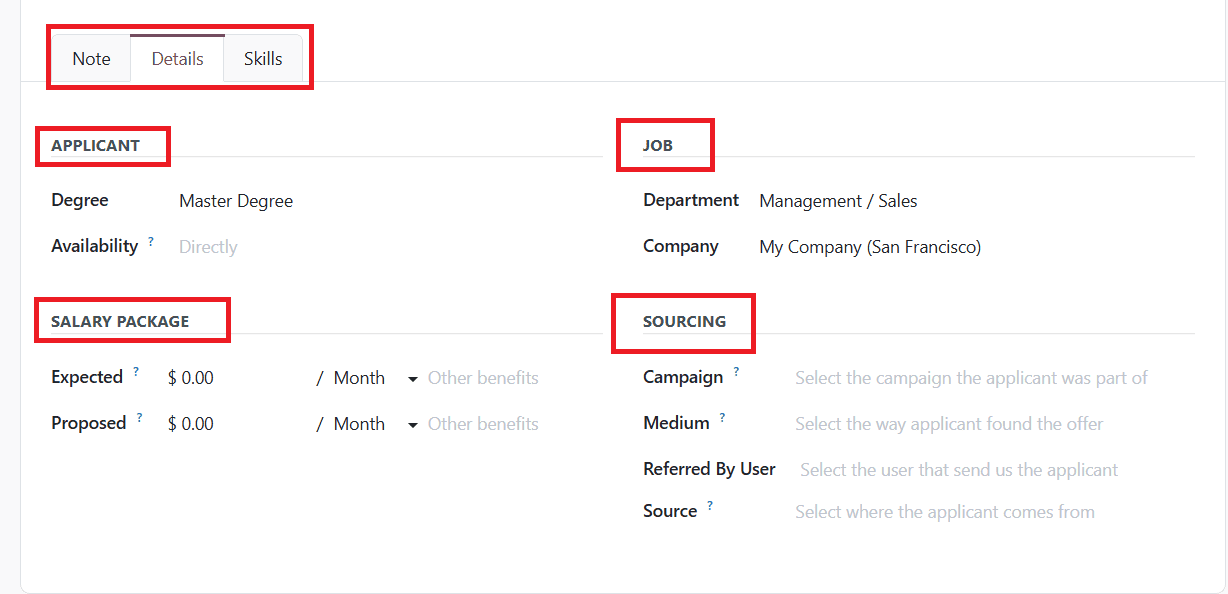
Each section contains different information related to the applicant. The Applicant section includes details such as degree and availability, while the Salary Package section displays the expected and proposed salary information. The Job section provides details about the department and company.
The Sourcing section helps recruiters identify how an applicant came across the job opportunity. It includes information such as Campaign, Medium, Referred By User, and Source. The Medium field indicates how the applicant found the job opportunity, such as directly, by email, or through the website. The recruiter can use this information to identify the applicant’s source. For example, when an applicant applies through the company's website, the Medium field is automatically set to Website.
The Skills tab allows recruiters to add the applicant's skills and skill levels. Odoo also compares these skills with the requirements configured for the job position and displays a Job Position Matching percentage, helping recruiters evaluate the applicant's suitability for the role.
After saving the applicant record, the newly created applicant will appear in the corresponding job position's application dashboard. Recruiters can open the applicant's record to view the submitted details and manage the application throughout the recruitment process.
Managing Applicants in Odoo 20
In the Odoo 20 Recruitment module, the applicant form provides several options to help recruiters manage applications throughout the hiring process. At the top of the form, users can find three action buttons: Generate Offer, Refuse, and Add to Pool. These options allow recruiters to proceed with job offers, reject applications, or add applicants to the talent pool for future opportunities.
Odoo 20 Recruitment also allows recruiters to add suitable applicants to the talent pool using the Add to Pool button. This feature helps recruiters retain candidate information for future recruitment opportunities. To add an applicant to the pool, click on the Add to Pool button. A pop-up window will appear as shown below.
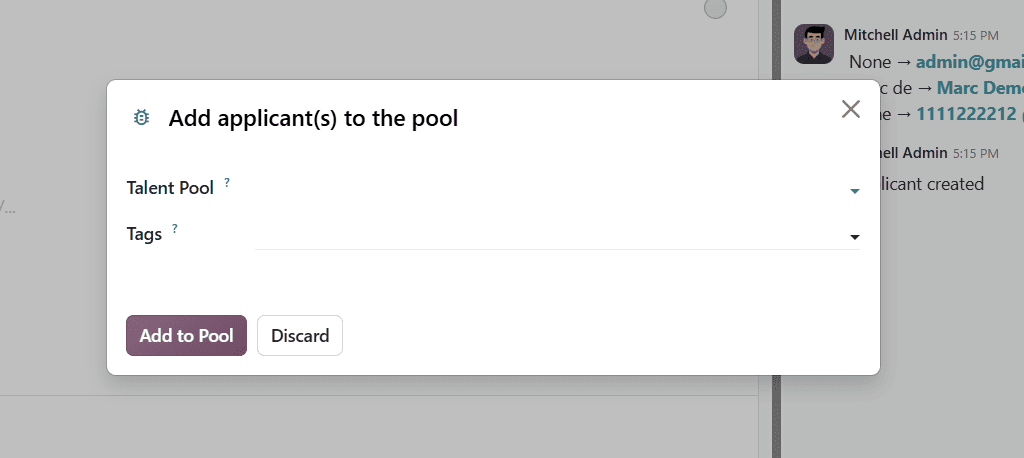
In the Talent Pool field, select the appropriate pool for the applicant. Recruiters can also assign relevant tags to categorize candidates and make them easier to identify later. After selecting the required details, click Add to Pool to complete the process.
On the right side, Odoo displays the different recruitment stages, such as New, Qualification, First Interview, Second Interview, Contract Proposal, and Contract Signed. These stages help recruiters track an applicant's progress throughout the selection process.
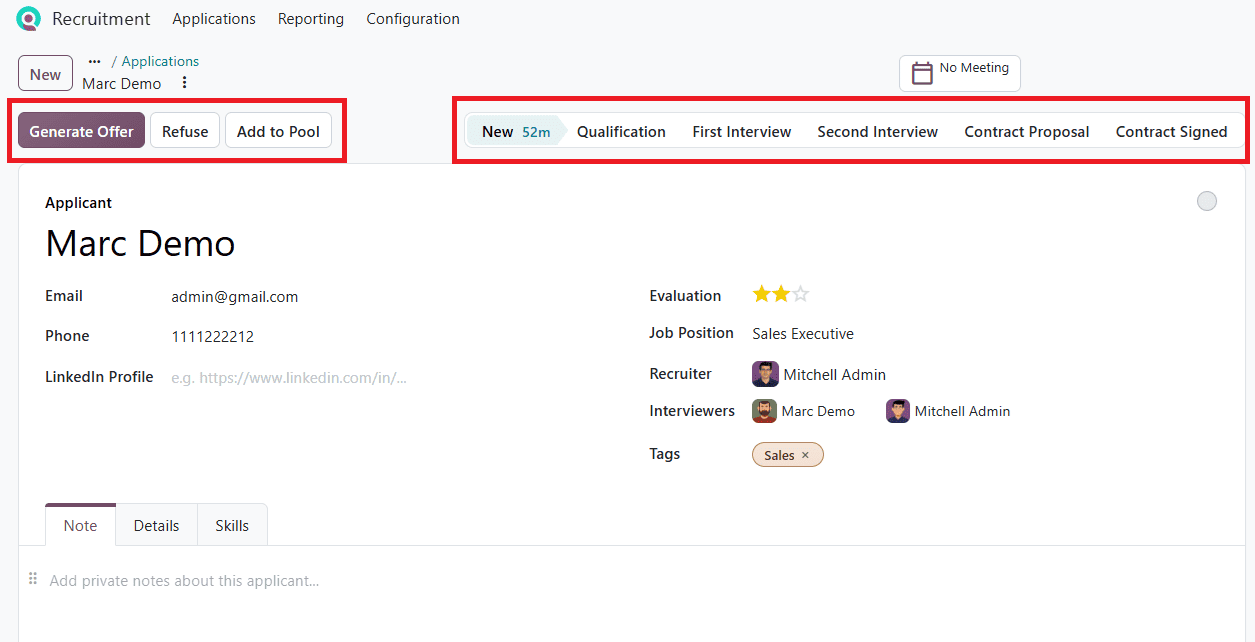
To refuse an applicant in Odoo 20, recruiters can use the Refuse button available at the top of the applicant form. Open the required applicant record and click the Refuse button. This opens a Refuse Reason pop-up window, where recruiters can select an appropriate reason for rejecting the application, as shown below.
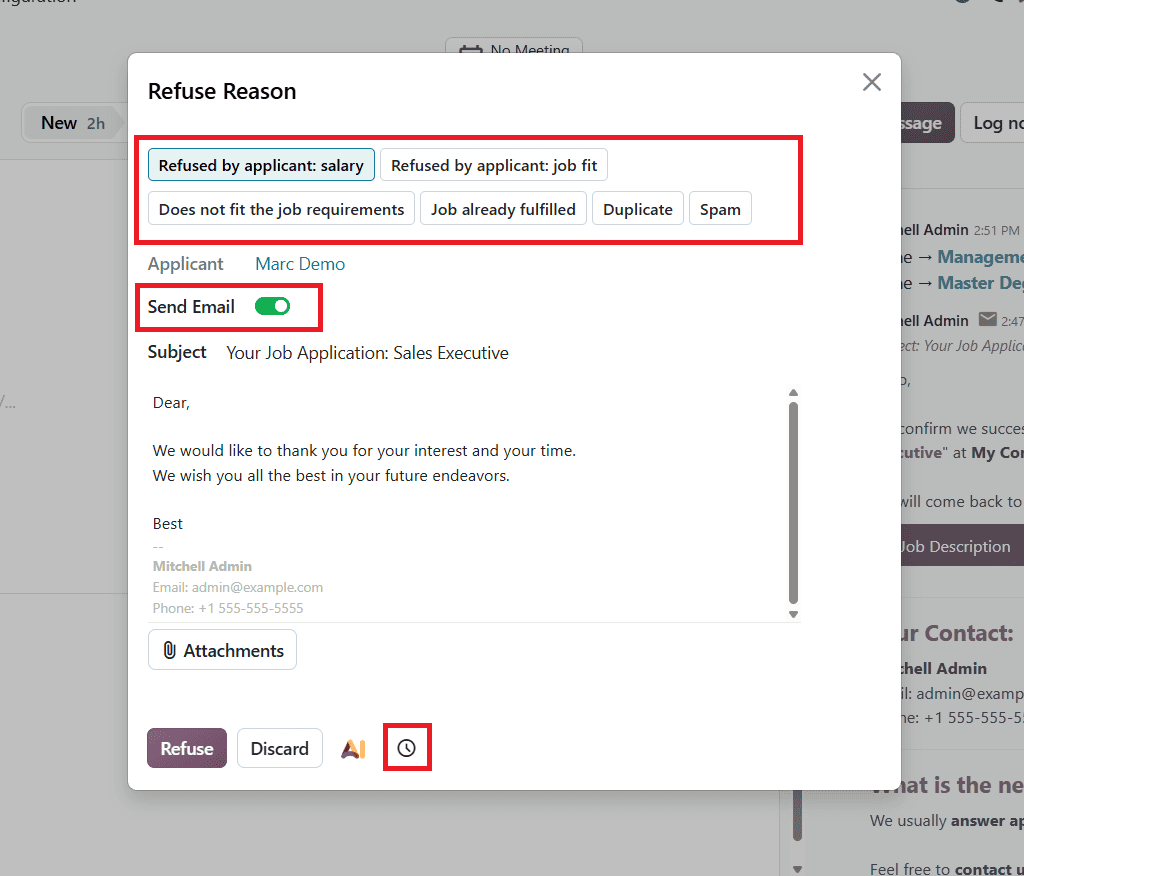
The pop-up window also provides options to manage rejection emails. Recruiters can enable or disable the Send Email option depending on whether they want to notify the applicant. The Email Template field is automatically populated based on the selected refusal reason. However, recruiters can choose a different template from the available options if required.
After selecting the appropriate reason and reviewing the email settings, click the Refuse button in the pop-up window to confirm the action. The application will then be marked as Refused.
If a recruiter wants to create a refusal reason, click Configuration and select Refuse Reasons under Application as shown below.
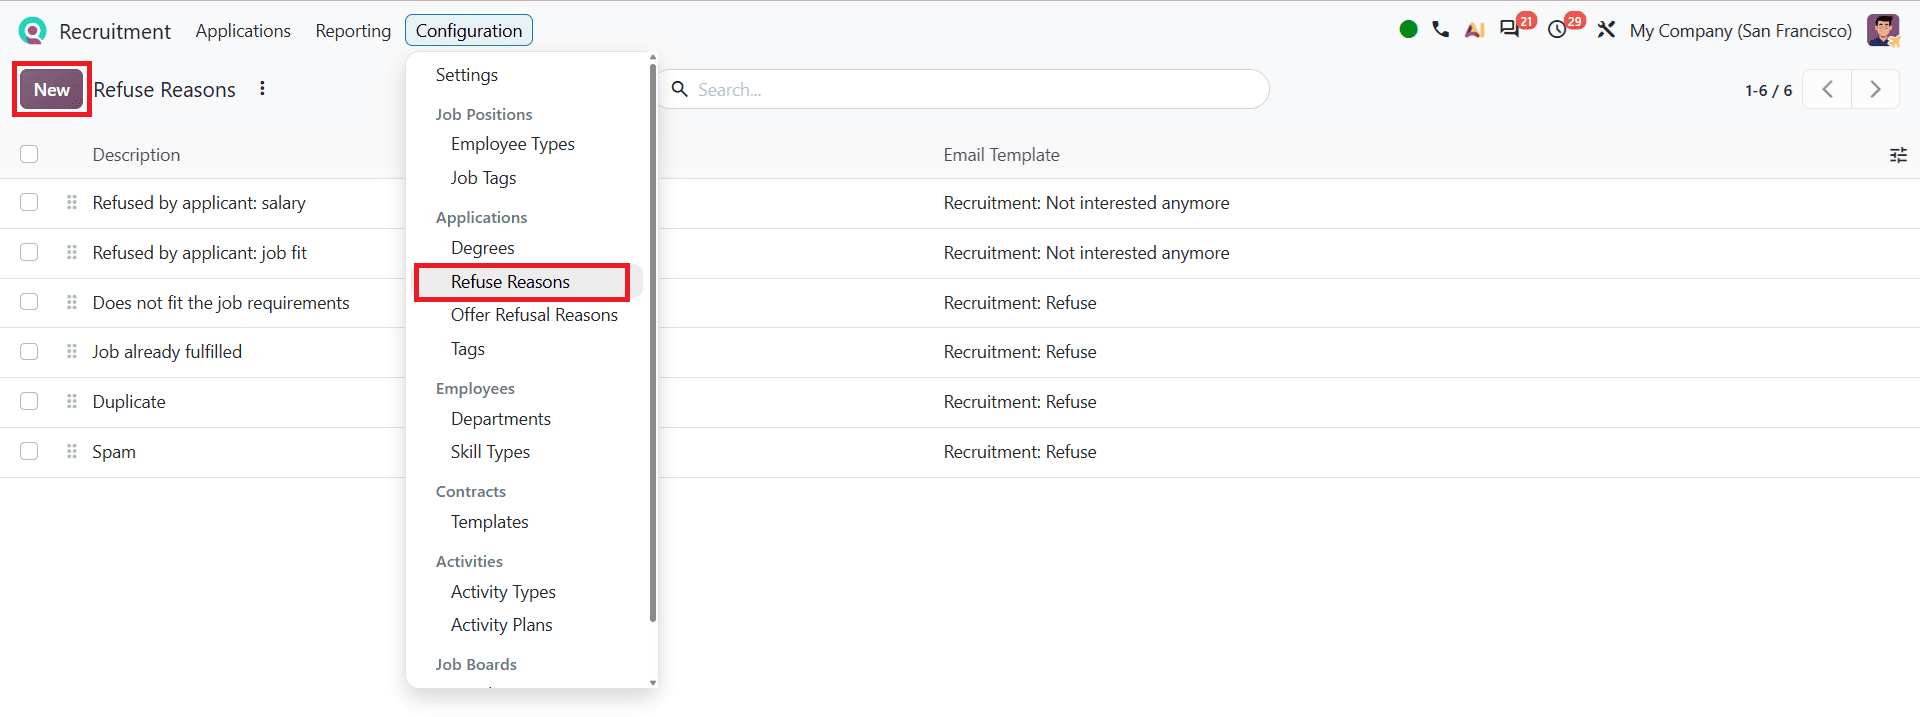
Click the New button to create a new reason, enter a Description, and select an Email Template. The newly created reason appears in the Refuse Reasons list.
Recruiters can also schedule refusal emails to be sent at a later time. To do this, click the clock icon at the bottom of the Refuse Reason pop-up window. This opens the Set Scheduled Date window, where recruiters can choose an available option, such as Tomorrow Morning, Tomorrow Afternoon, or Next Monday Morning. They can also select Pick a specific time to set a preferred date and time, as shown below.
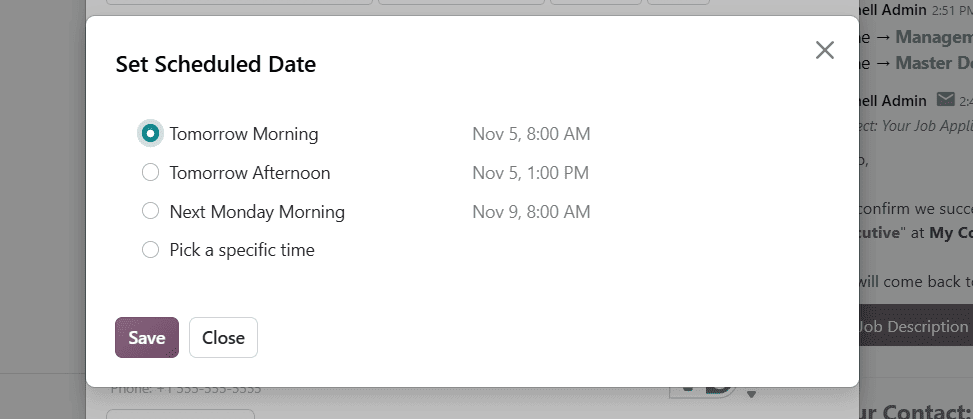
After selecting the required schedule, click Save to confirm it.
Odoo 20 Recruitment also allows recruiters to manage duplicate applications efficiently. When an applicant has submitted multiple applications, recruiters can refuse the associated entries together instead of processing each application separately.
To do this, enable the Refuse Duplicate Applications option in the Refuse Reason pop-up window. This displays the Duplicate Applications field, which lists the other applications associated with the applicant.
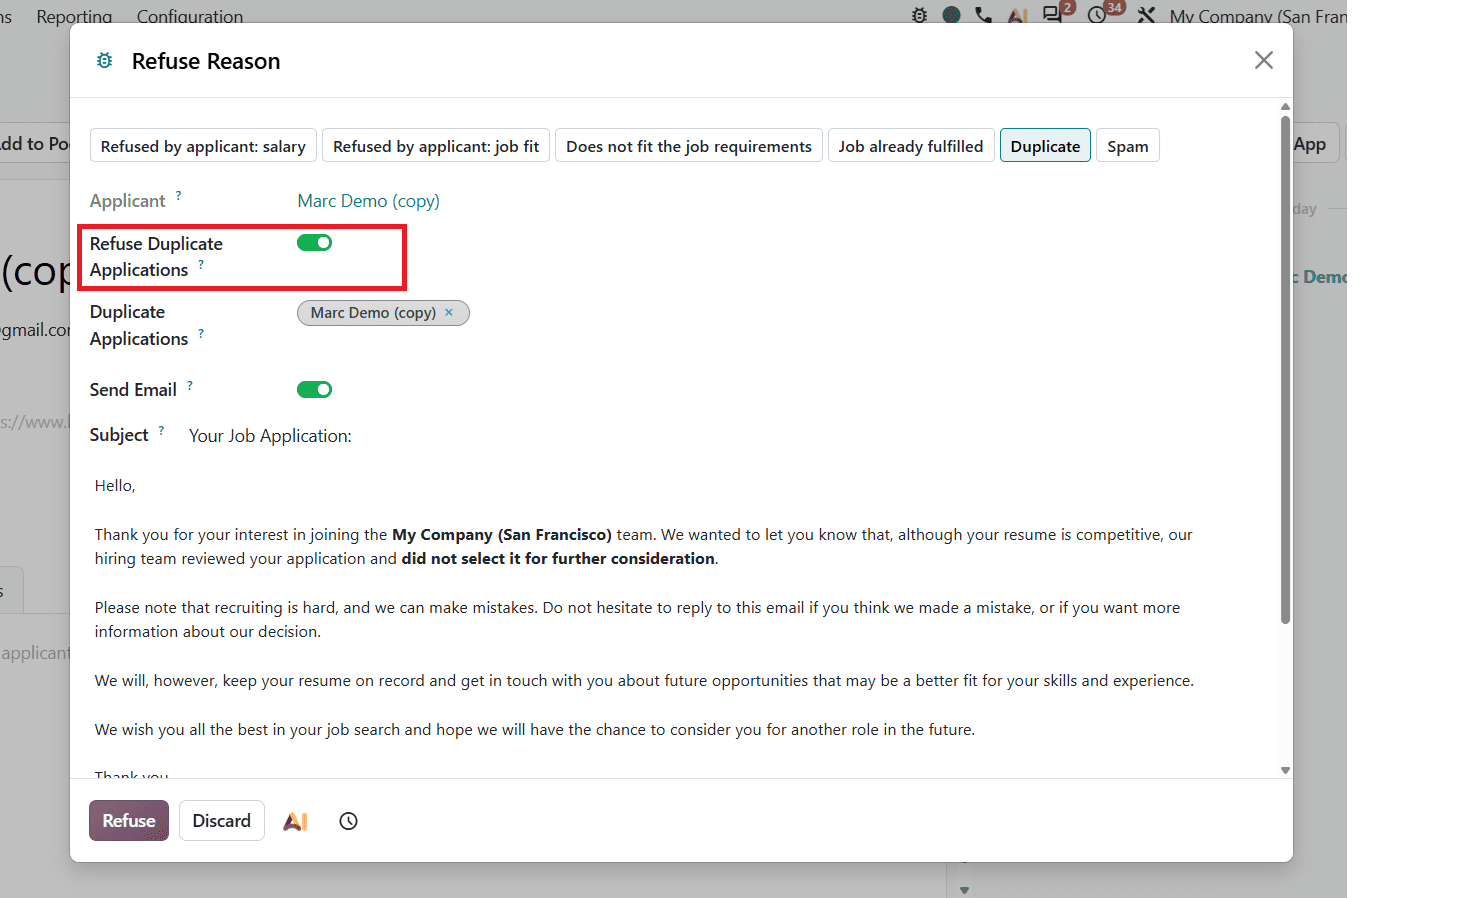
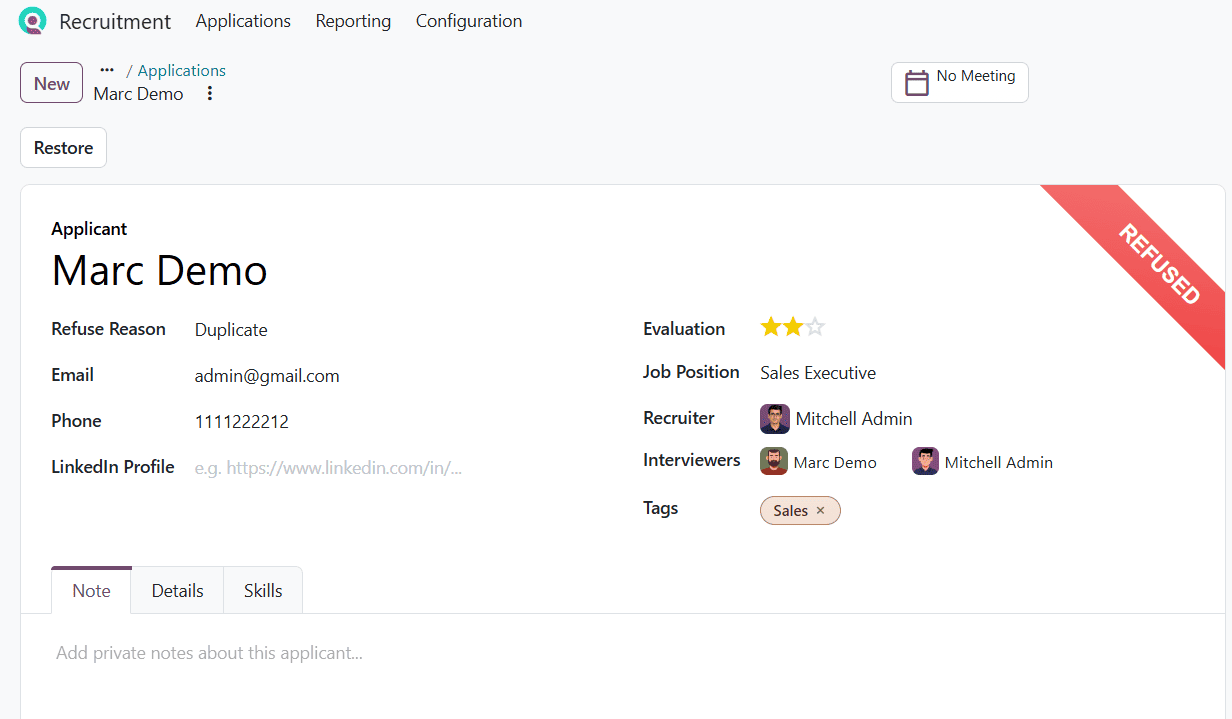
Once the associated applications are displayed, click the Refuse button to refuse them together. This helps recruiters manage duplicate entries while ensuring that the applicant receives only one refusal email. Once the refusal is confirmed, the applicant’s form displays a REFUSED ribbon.
Application Analysis
Odoo 20 Recruitment also provides an Application Analysis report that helps recruiters evaluate the overall recruitment process. It displays the total number of applications submitted over the past 365 days, including hired applicants, refused applicants, and those still in the recruitment pipeline.
To access this report, navigate to the Recruitment module and select Reporting > Application Analysis. You can see the default line chart view as shown below.
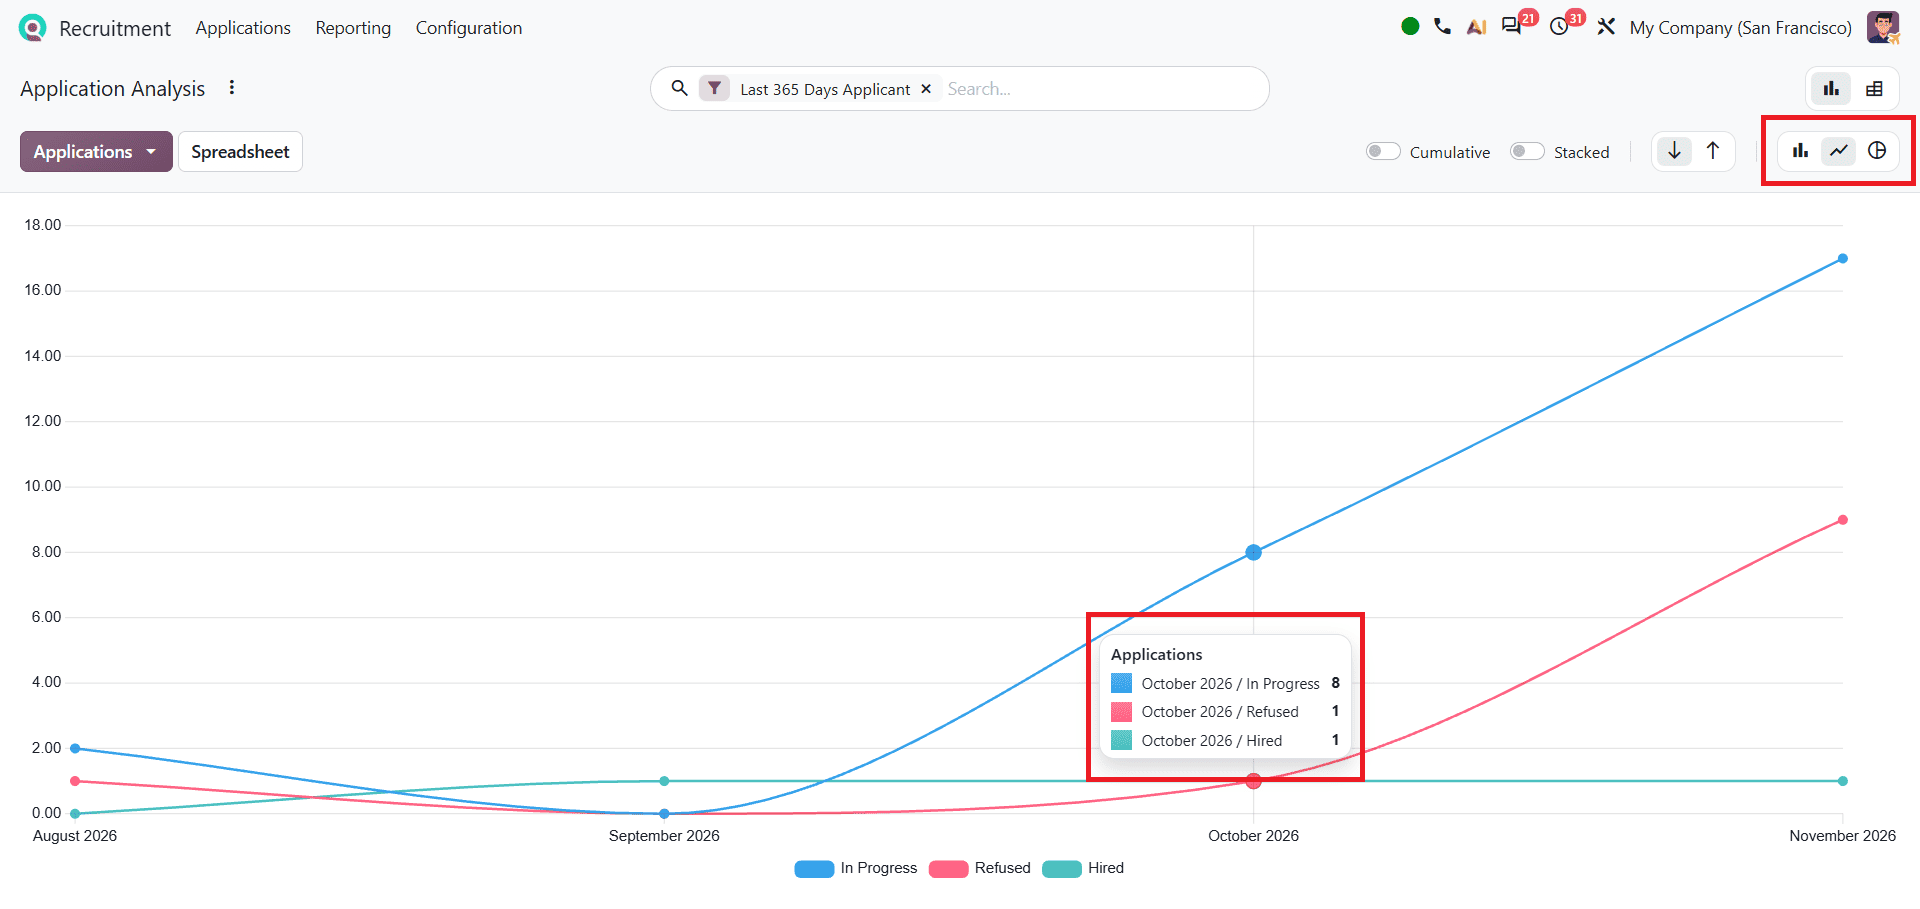
For more detailed analysis, users can switch to Bar chart and Pie chart views. By hovering over a particular month in the chart, users can see a pop-up displaying the matching application statistics.
Odoo 20 Recruitment module simplifies organizing applicants and managing rejection emails. These features are an important part of the recruitment process. They enable recruiters to refuse applicants, configure refusal reasons, and handle duplicate applications effectively. The Recruitment module also includes an Application Analysis report to help recruiters monitor hiring outcomes and review application status. This helps recruiters stay organized and deal with applications more efficiently.
To read more about How to Manage Job Applications in Odoo 19, refer to our blog, How to Manage Job Applications in Odoo 19.