A deeper integration of the OWL (Odoo Web Library) framework for more dynamic and effective user interfaces is one of the many improvements Odoo 19 offers to its web client. One of the most delightful features in Odoo is the "Rainbow Man"—a celebratory animation that appears after completing key tasks, like confirming a sales order or winning a CRM opportunity. This effect adds a touch of fun and motivation to the user experience, making routine actions feel rewarding.
In this blog post, we'll go over how to add and modify the Rainbow Man effect in Odoo 19.
What is the Rainbow Man Effect?
The Rainbow Man is a built-in Odoo animation featuring a colorful, dancing character that pops up with a success message. It's triggered on actions like button clicks that complete a task (e.g., "Order Confirmed!"). In Odoo 19, this effect remains consistent with prior versions
Key benefits:
- Feedback Loop: Offers immediate visual proof of accomplishment.
- Potential for Customization: Modify messages, fadeout timing, and even add custom animations with ease.
The effect works flawlessly with new UI features like dynamic ribbons and AI-driven automations in Odoo 19's updated web client, making it perfect for contemporary workflows.
Method 1: Using Odoo Studio (No-Code Approach)
Odoo Studio allows you to add the Rainbow Man effect to buttons without writing code. This is perfect for quick customizations in apps like Sales or CRM.
Steps:
1. Navigate to Your Model: Navigate to the app's desired effect (Sales > Orders, for example). Enter Studio mode by clicking the Studio icon (pencil) in the top-right
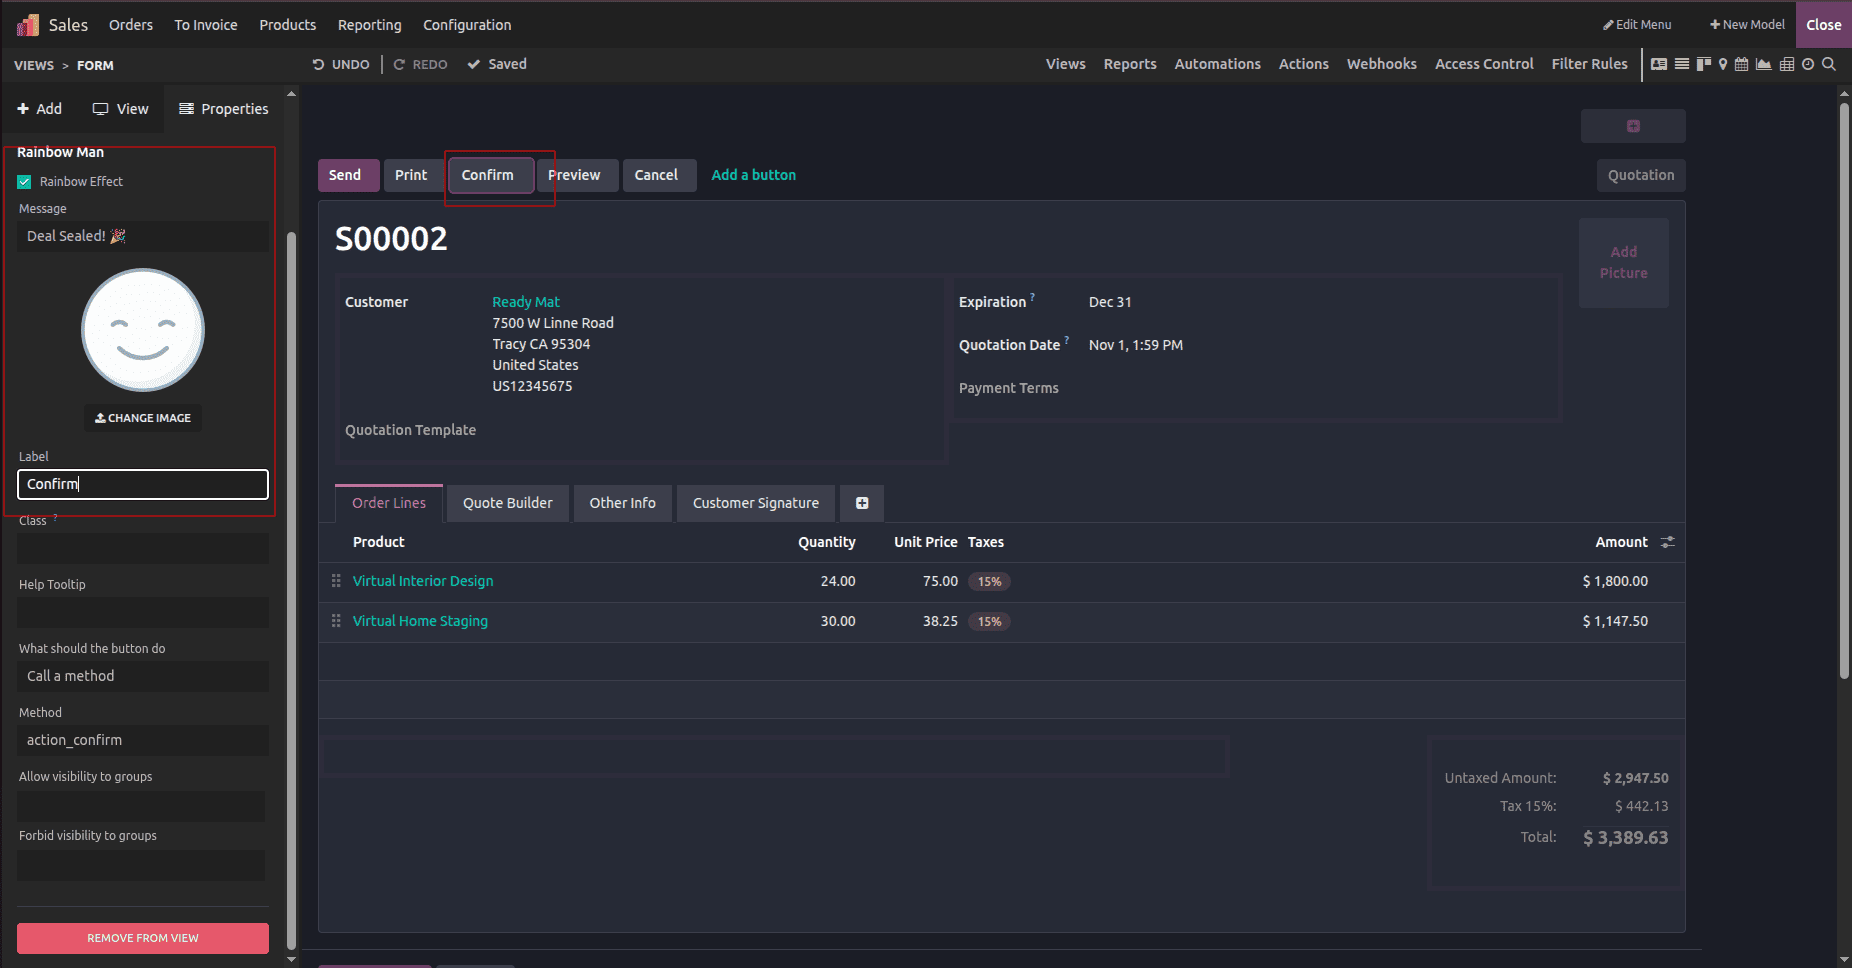
2. Select a Button: Click a button (such as "Confirm" on a sales order) in the form or list view. Editable elements are highlighted in Studio.
3. Access Button Properties: With the button selected, open the Properties panel on the left.
4. Enable Rainbow Man:
- Under "Success Effect," toggle on "Show Rainbow Man".
- Customize:
- Message: Enter a fun text like "Deal Sealed!".
- Close Studio after saving it.
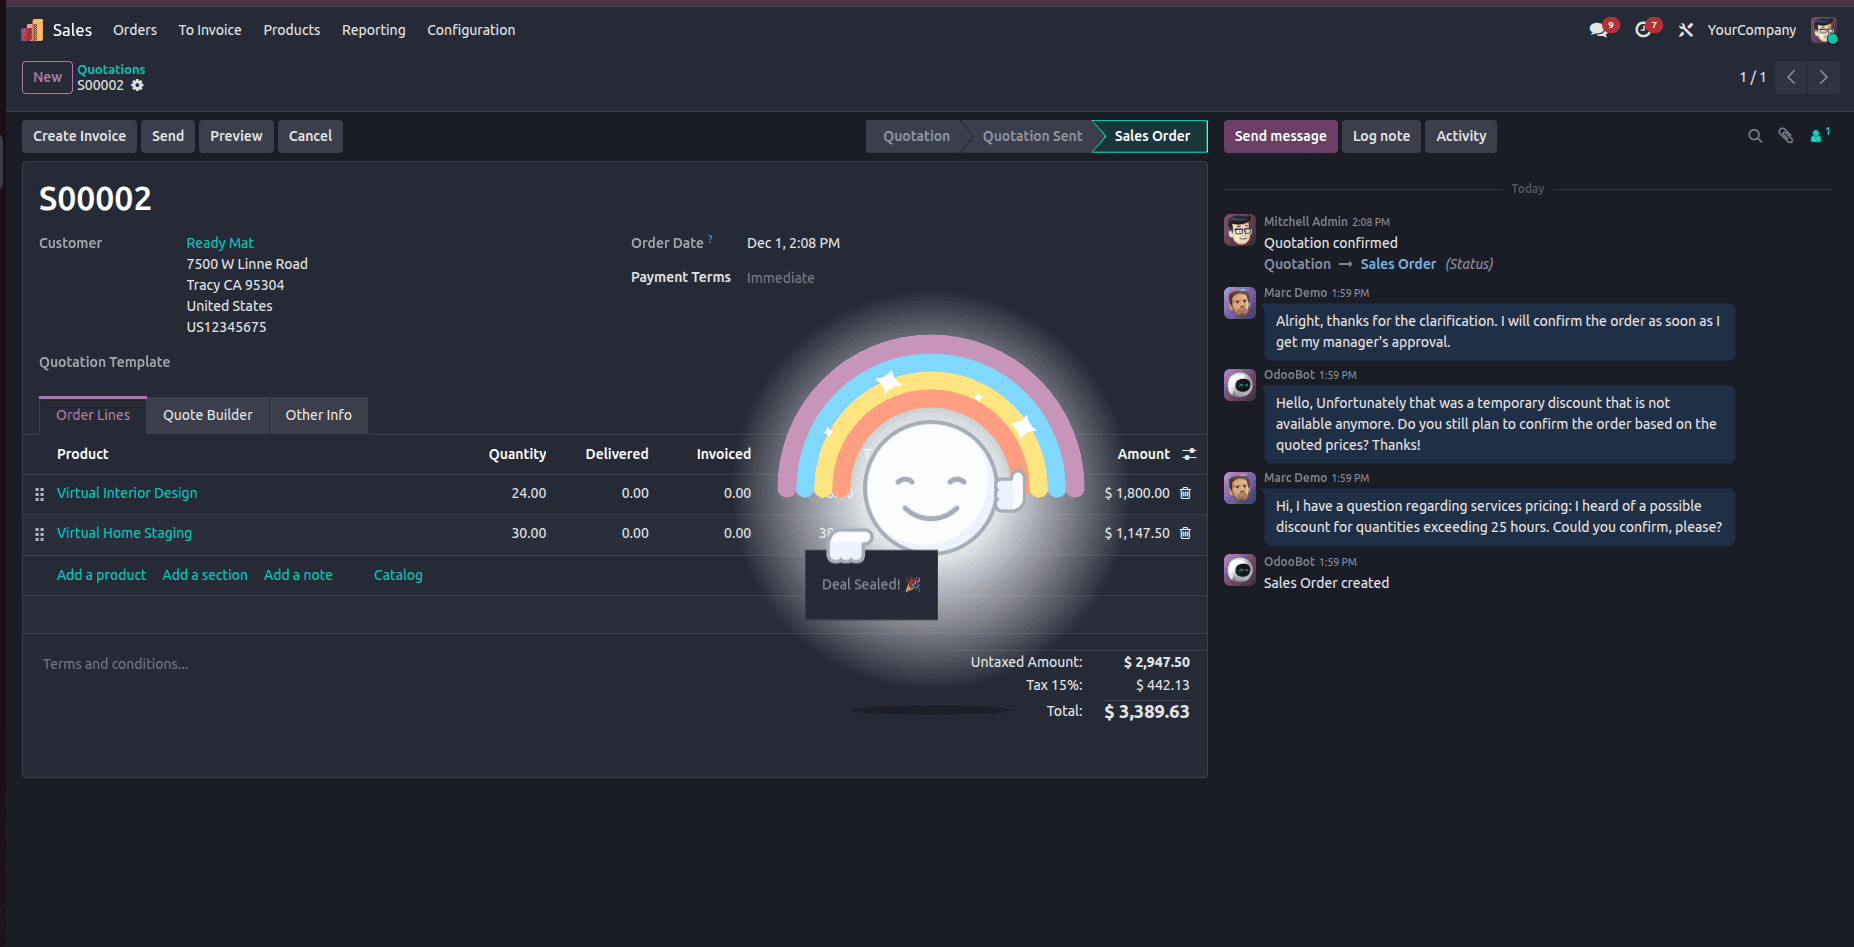
5. Test It: Exit Studio, perform the action (e.g., confirm an order), and watch the magic!
This method leverages Odoo's backend to return the effect dictionary automatically. In Odoo 19, it works flawlessly with new features like optional quotation sections.
Studio effects are model-specific, so repeat for other views if needed.
Method 2: Custom Module Development (Code-Based)
For more control, create a custom module. We'll add the effect to a sample button in a Sales extension module.
Step 1: Create the Module Structure
Assume a module named rainbow_custom:
+-- __init__.py
+-- __manifest__.py
+-- models/
¦   +-- purchase_order.py
In __manifest__.py:
{
    'name': 'Rainbow Custom Effect',
    'version': '19.0.1.0.0',
    'depends': ['purchase'],
    'data': []
}
Step 2: Extend the Model
# -*- coding: utf-8 -*-
from odoo import models, fields, api, _
class PurchaseOrder(models.Model):
_inherit = 'purchase.order'
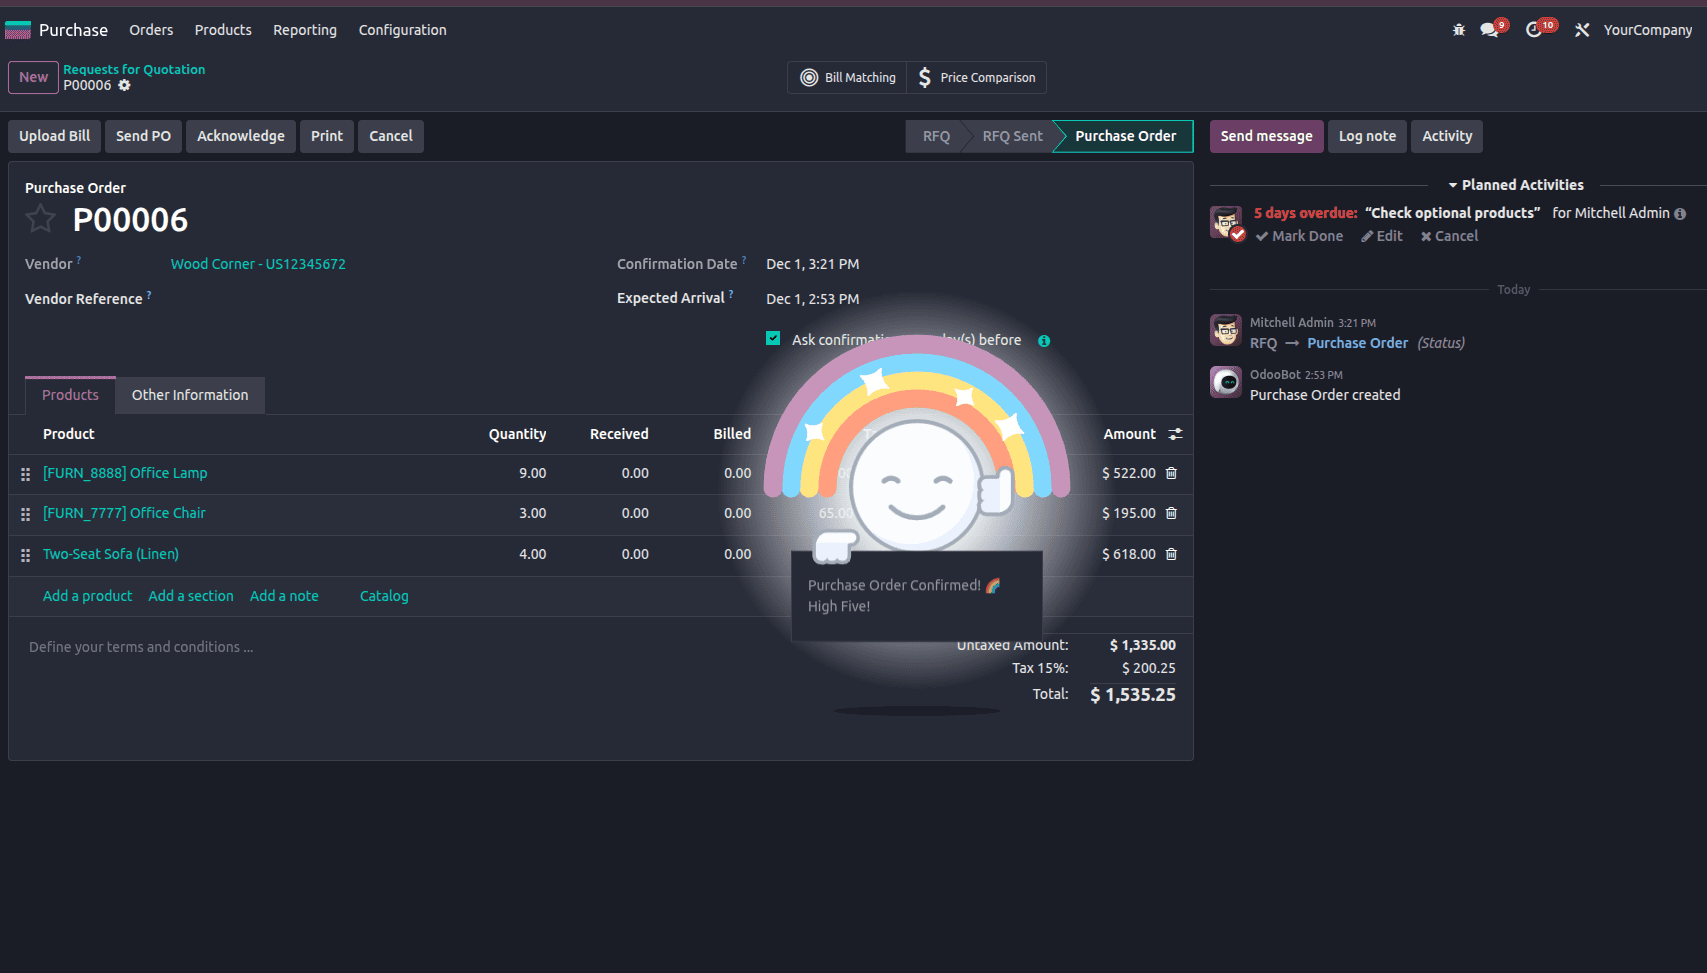
def button_confirm(self):
super(PurchaseOrder, self).button_confirm()
return {
'effect': {
'fadeout': 'slow',
'message': 'Purchase Order Confirmed!!',
'type': 'rainbow_man',
}
}
- Explanation: The action_confirm method should be overridden. After the super call (which handles the actual confirmation), return a dict with the effect key. The type: 'rainbow_man' triggers the animation. Personalise the fadeout and message as needed.
Let's explore another example:
Clicking a button can trigger the rainbow_man effect.
In views/sale_views.xml (to add a custom button if desired):
<?xml version="1.0" encoding="utf-8"?>
<odoo>
<record id="view_order_form_inherit" model="ir.ui.view">
<field name="name">sale.order.form.inherit</field>
<field name="model">sale.order</field>
<field name="inherit_id" ref="sale.view_order_form"/>
<field name="arch" type="xml">
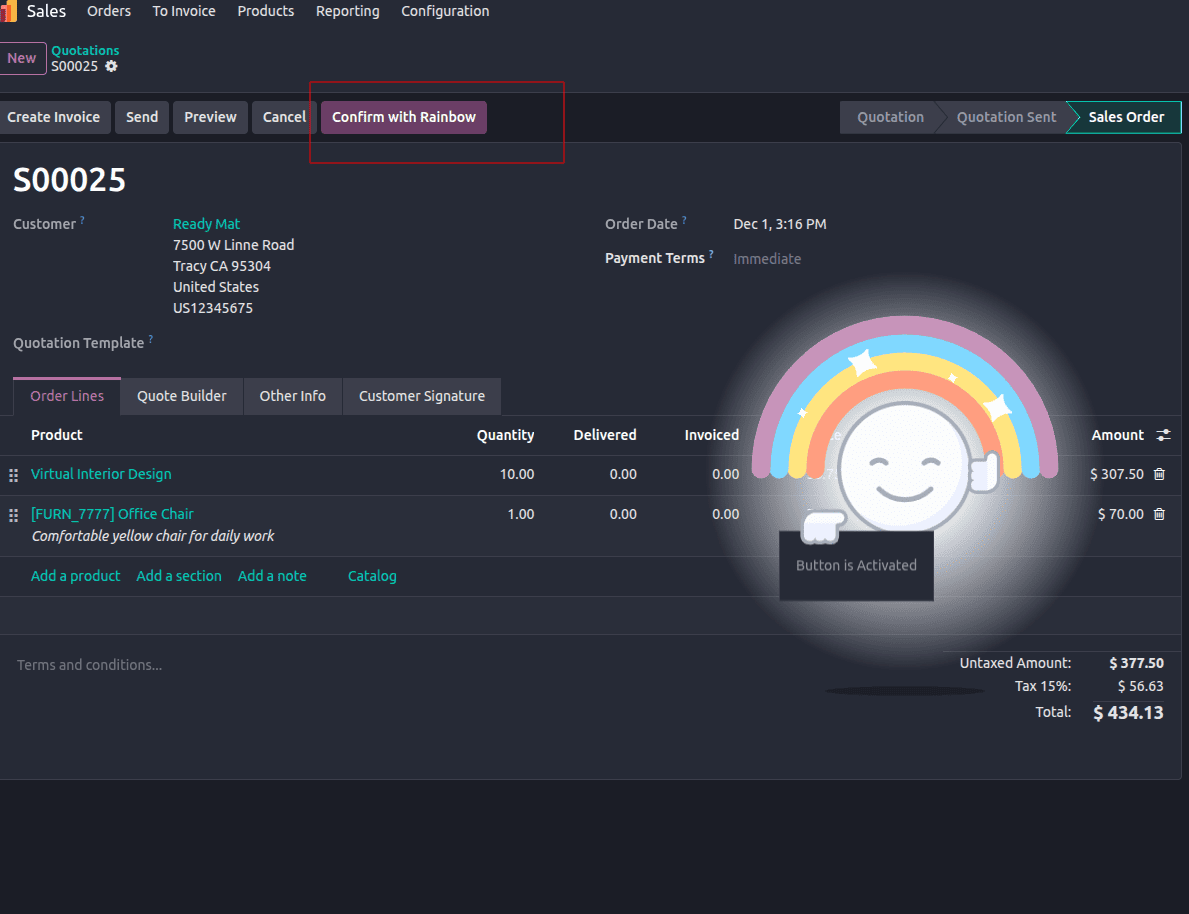
<xpath expr="//header" position="inside">
<button name="activate_rainbow" string="Confirm with Rainbow" type="object" class="btn-primary"/>
</xpath>
</field>
</record>
</odoo>
Extend the Model (Python)
class SaleOrder(models.Model):
   _inherit = 'sale.order'
   def activate_rainbow(self):
       return {
           'effect': {
               'fadeout': 'slow',
               'message': 'Button is Activated',
               'type': 'rainbow_man',
           }
       }
This approach works in Odoo 19's core and integrates with new automations like AI-generated leads.
Creating a Rainbow Man effect in Odoo 19 is straightforward and elevates user satisfaction with minimal effort. For quick wins, start with Studio; for customized experiences, scale to custom modules. These kinds of effects will become even more crucial to immersive ERPs as Odoo continues to develop.
To read more about How to Create a Rainbow Man Effect in Odoo 18, refer to our blog, How to Create a Rainbow Man Effect in Odoo 18.