Effective business management requires adaptable software. Odoo 18 offers a customizable, user-friendly platform that simplifies application development without the need for complex backend work. The Studio module in the Enterprise edition enables low-code creation and customization of apps through an intuitive drag-and-drop interface.
Within Studio, the "Views" and "Reports" menus enable users to personalize elements such as Form Views, List Views, Kanban, and Calendar Views. Users can also design and customize reports to meet specific business needs.
These features help streamline operations, enhance data visibility, and empower teams to build tailored solutions that support efficient business processes, all with minimal coding.
Views and Customizing Views in the Studio Module
In Odoo 18, the Studio Module offers a Views menu that allows users to design and customize various view types, enhancing both the usability and appearance of applications. This includes General Views, Multi-record Views, Timeline Views, and Analytical Reporting Views.
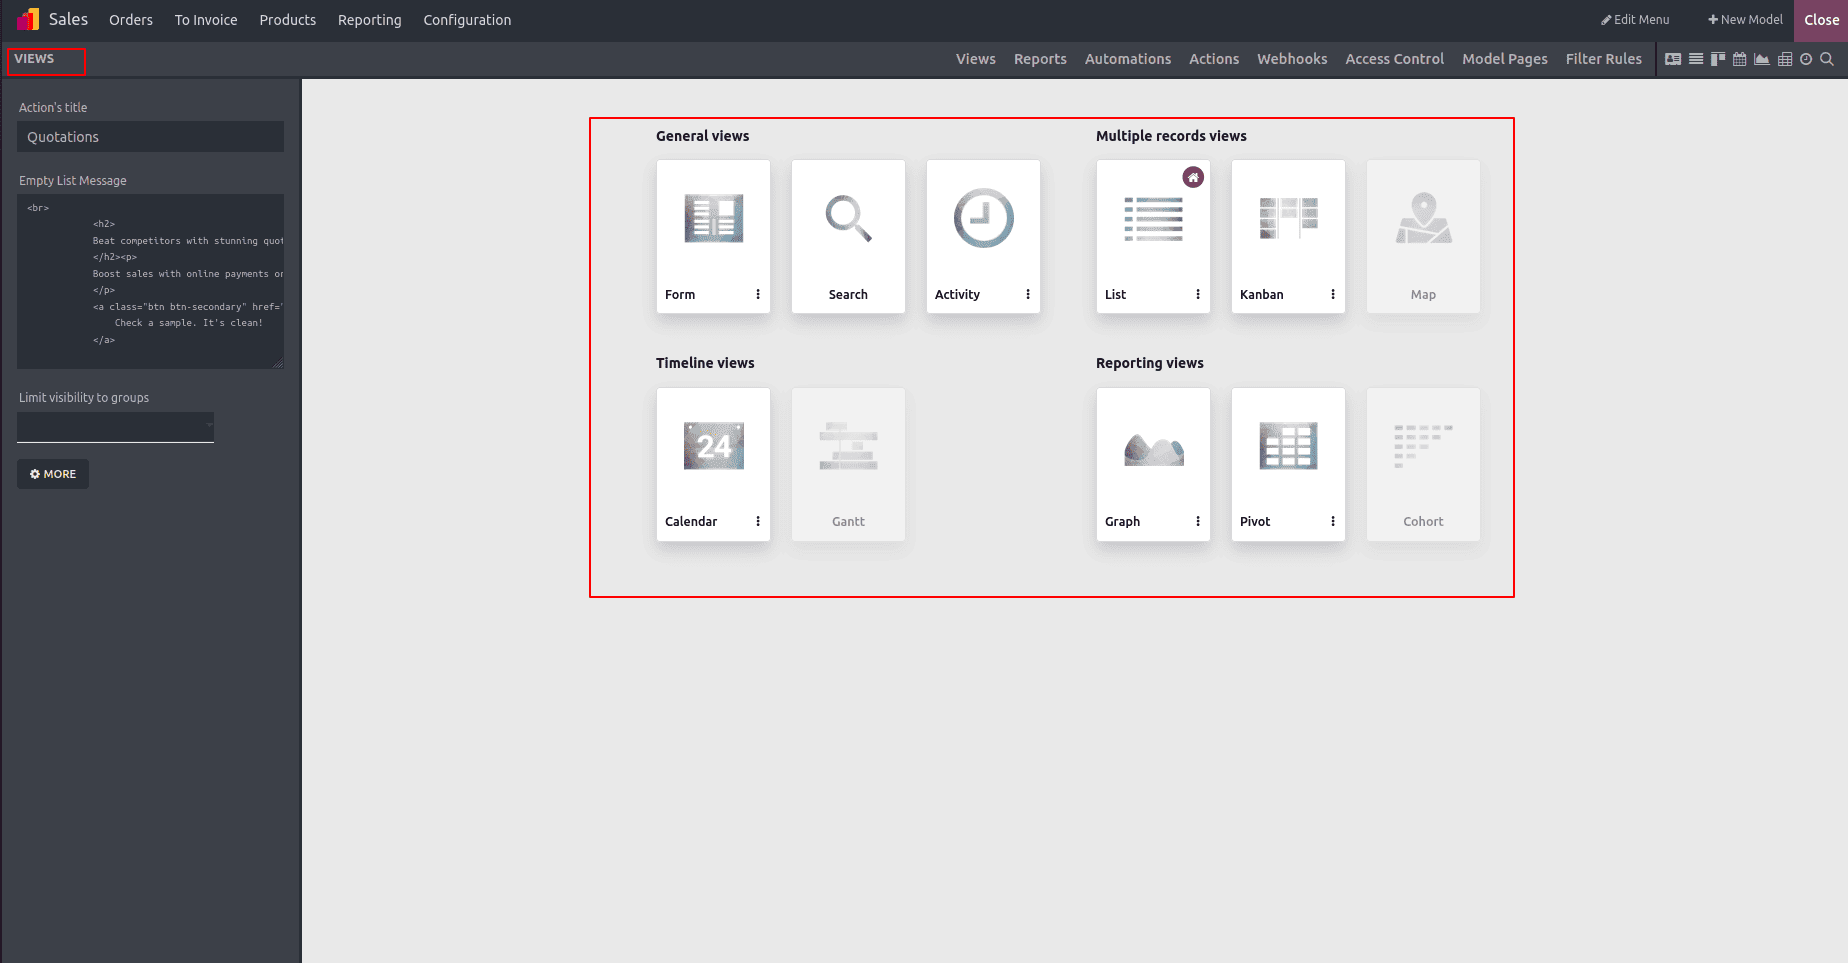
Users can also set a specific view as the default for a model. To do this, simply open the Views menu, click the three-dot menu on the desired view, and select "Set as Default" to apply it as the primary display for that application.
General Views and Form View
In Odoo 18, the Form, Search, and Activity views fall under the category of General Views in the Studio module. Among these, the Form View plays a central role, as it allows detailed customization of how data is entered, displayed, and managed within an application. Users can personalize the form’s title, buttons, and layout to align with specific business workflows
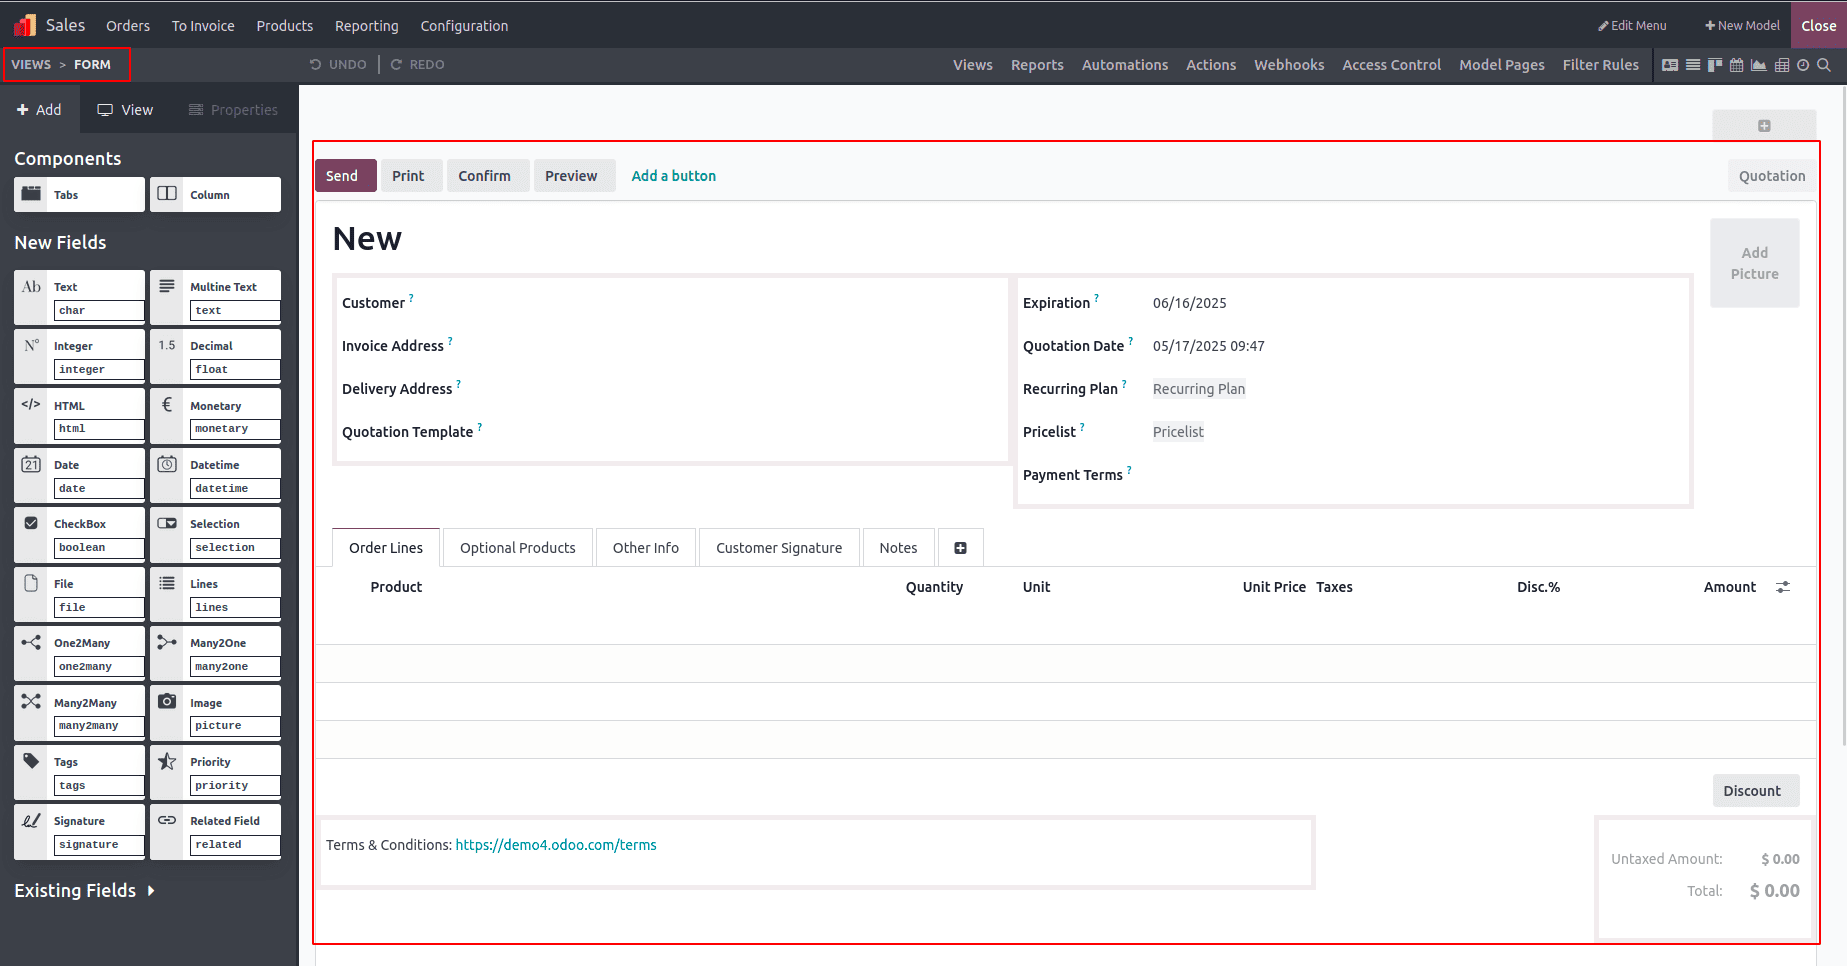
Customization options are easily accessible—on the left panel, you’ll find tools for adding fields, components, and design elements, while the right side displays status buttons such as NEW, IN PROGRESS, and DONE, all of which can be modified to reflect your workflow stages.
To enhance the form further, additional action buttons like Delete, Archive, Unarchive, or Mark can be added by clicking the "+" icon that appears in the top-right corner when hovering. Visual elements can also be included, such as adding an Image or enabling a Kanban State, both of which are located near the Description field.
For better data organization, users can insert tabbed sections by clicking the "+" icon next to existing tabs like Details, allowing for a more structured and user-friendly form layout.
Search View
The Search View in the Studio module offers a set of flexible filtering tools that enable users to efficiently organize and retrieve records. These tools can be easily added and positioned to suit the structure of the application, allowing users to design custom search experiences.
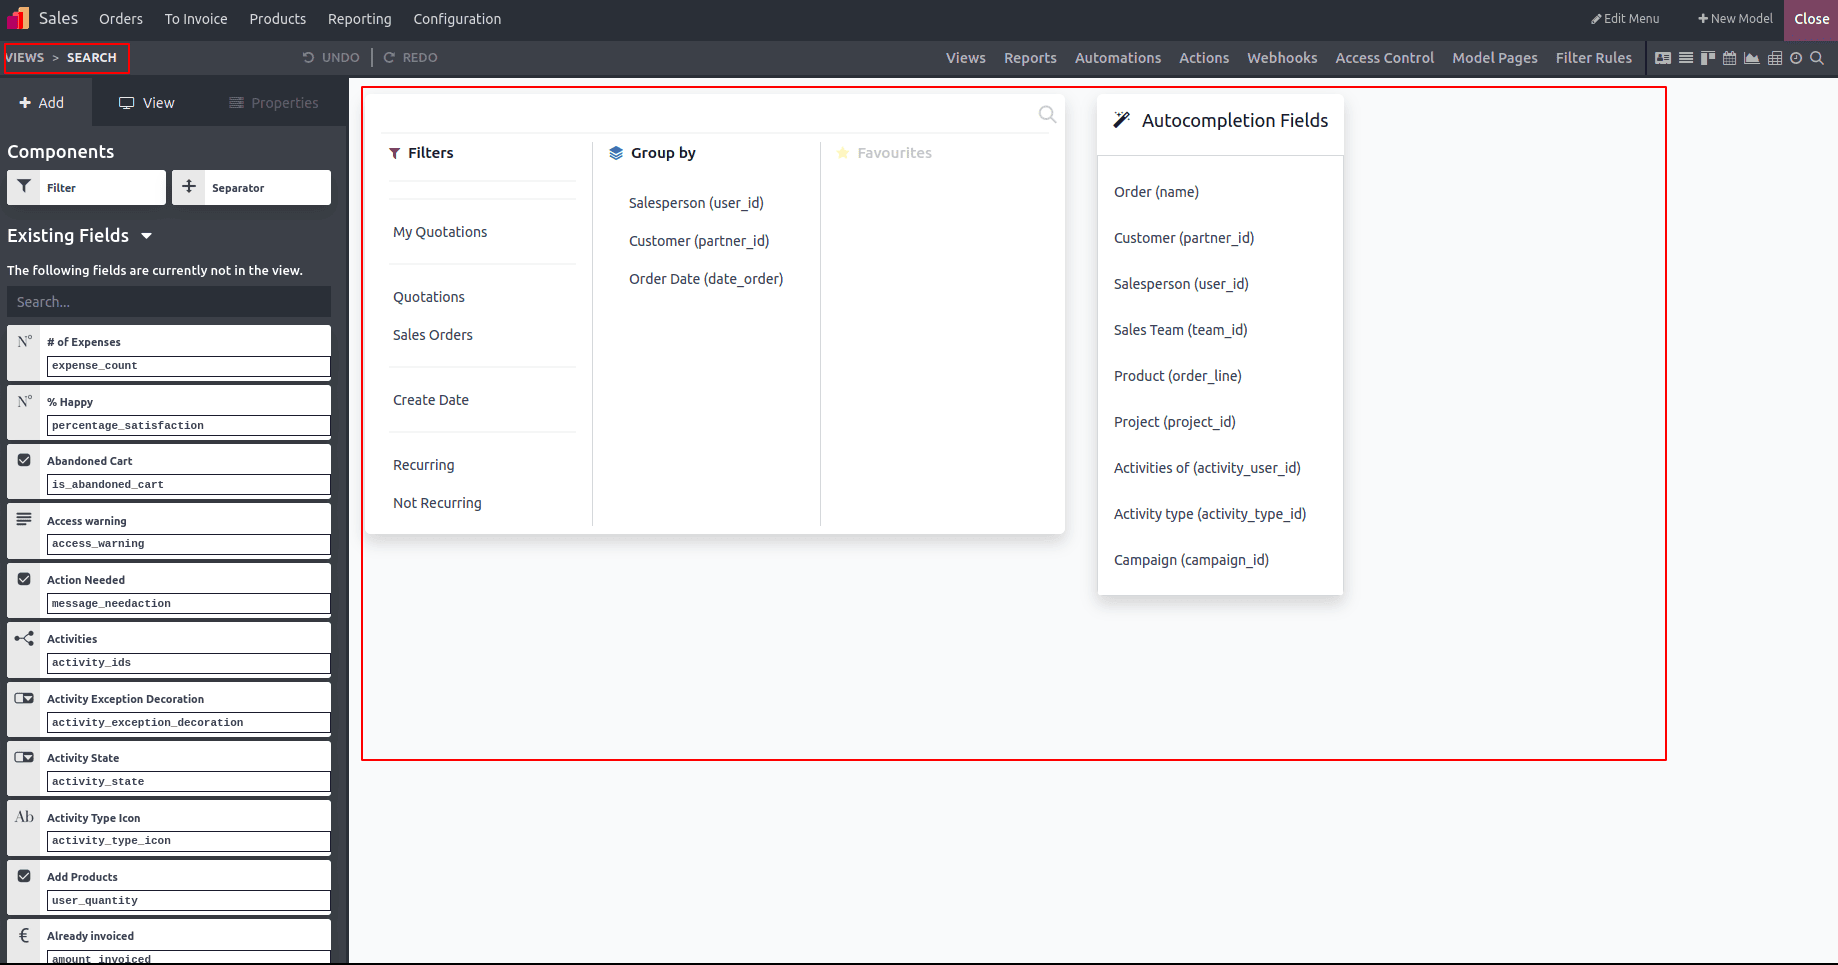
With full customization options, users can define how the Filters and Group By functions behave, adapting them to match specific operational needs. Each filter or grouping option includes an editable link, enabling quick modifications to labels, domains, or conditions. The left-side editor panel allows for easy adjustments, such as editing or removing filters as required.
Additionally, the Auto Completion Fields section allows users to determine which fields should automatically populate when specific values are entered in the form. This feature can be customized further by adding or removing fields, ensuring the search and data entry process remains aligned with business workflows.
Activity View
The Activity View allows users to manage and track scheduled actions through the Chatter feature, promoting effective collaboration before key tasks or deadlines. This view provides a centralized space for communication and planning, enabling team members to stay aligned.
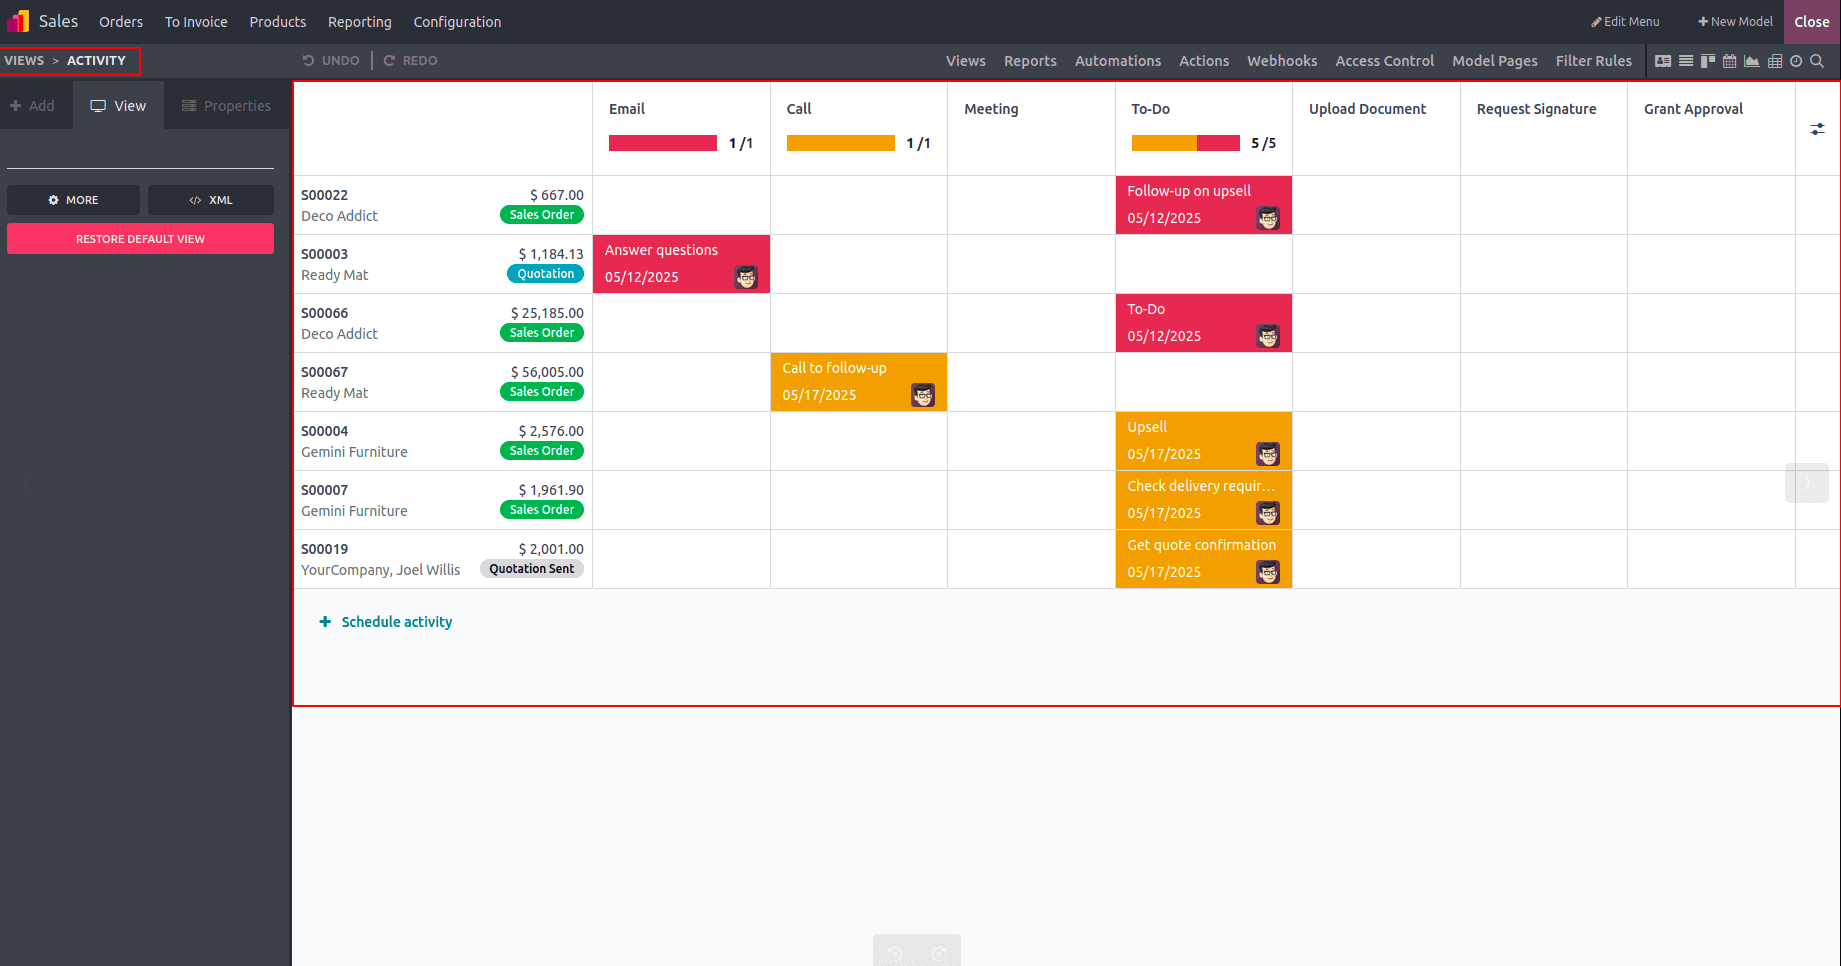
By using the “+ Schedule Activity” button, users can effortlessly create reminders for various tasks such as emails, phone calls, meetings, and to-do items. This helps ensure timely follow-ups and smooth workflow coordination across different business processes.
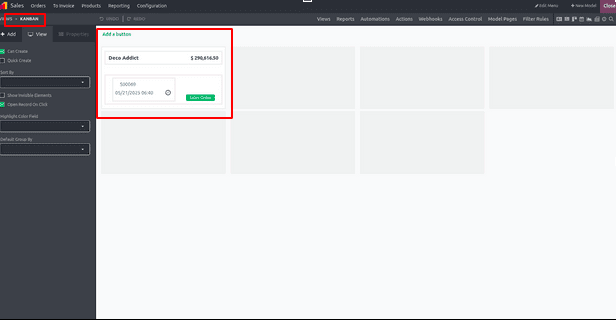
Multiple Records Views and Kanban View:
You can create multiple Kanban views from the "Multiple Record Views" section and easily tailor each view by selecting a sample template and adjusting the fields and components using the tools available on the left panel.
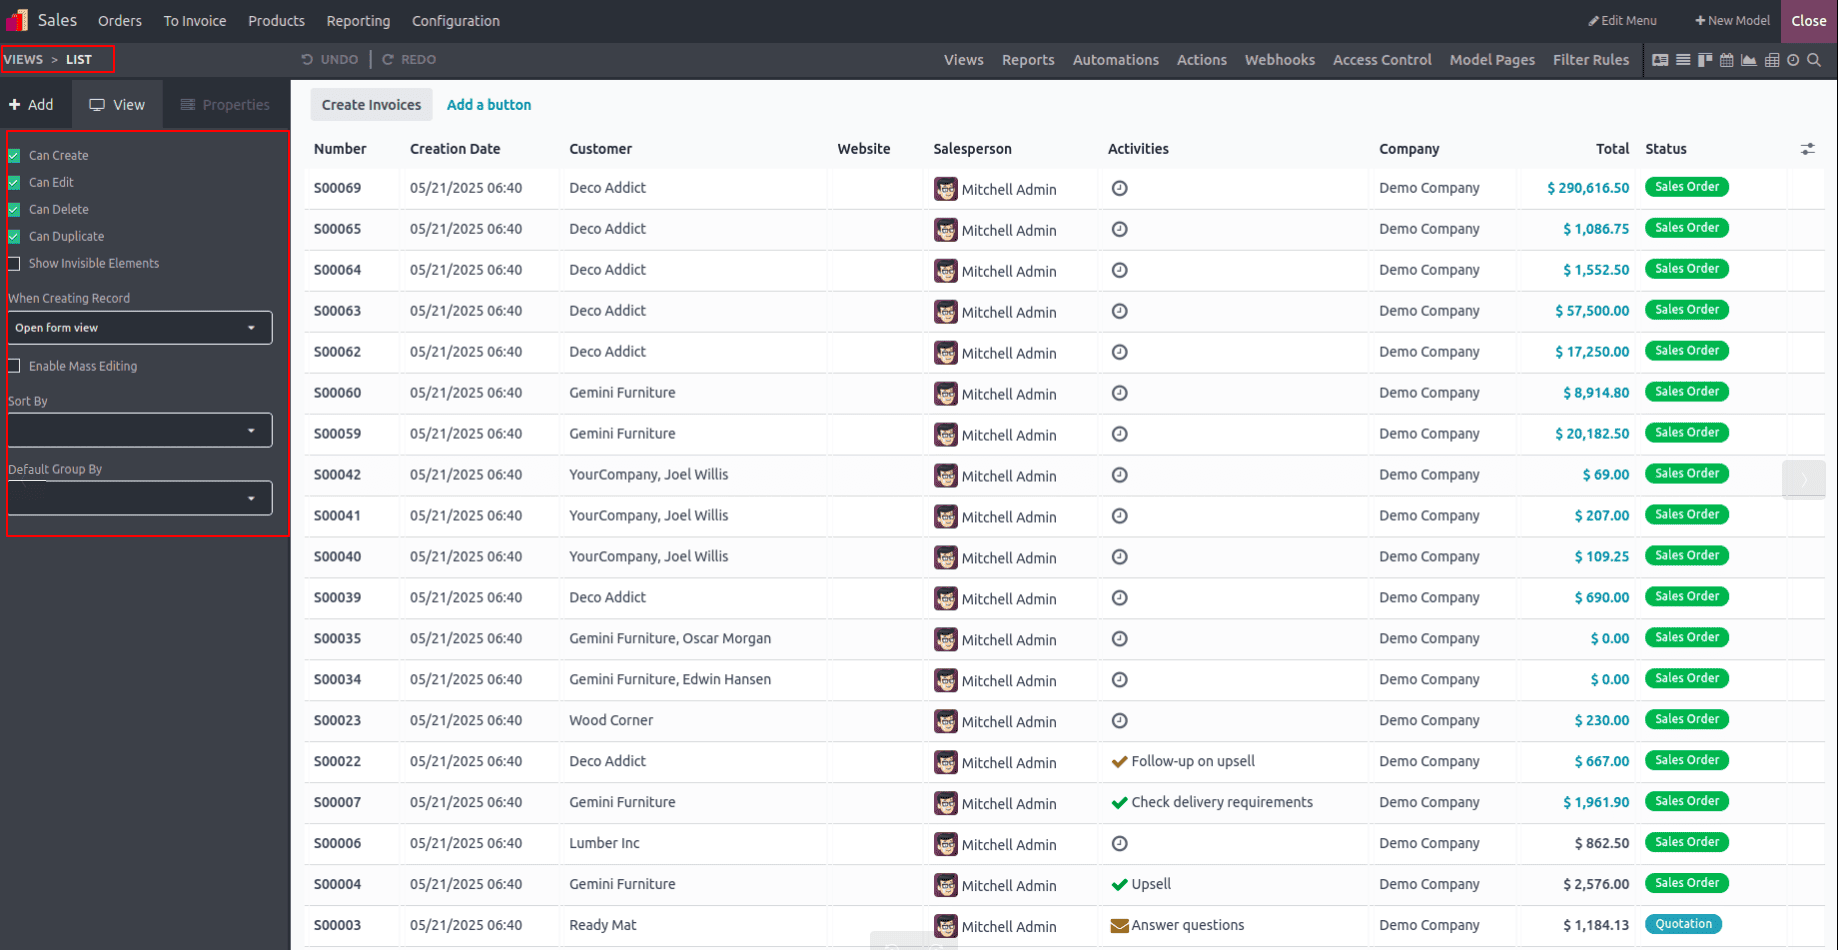
List View:
The "List" view allows you to manage key operational fields such as Priority and Contact, offering flexibility to edit, hide, modify, or remove them entirely according to user requirements.

The List view is an efficient way to manage and edit large volumes of records at once. To restrict user actions, options like "Can Create," "Can Edit," and "Can Delete" can be unchecked. For quick data entry and updates, users can choose to add new records at the top or bottom using the "Editable" settings. Furthermore, selecting a field under "Sort By" allows users to perform bulk edits and change the default sorting order at the same time.
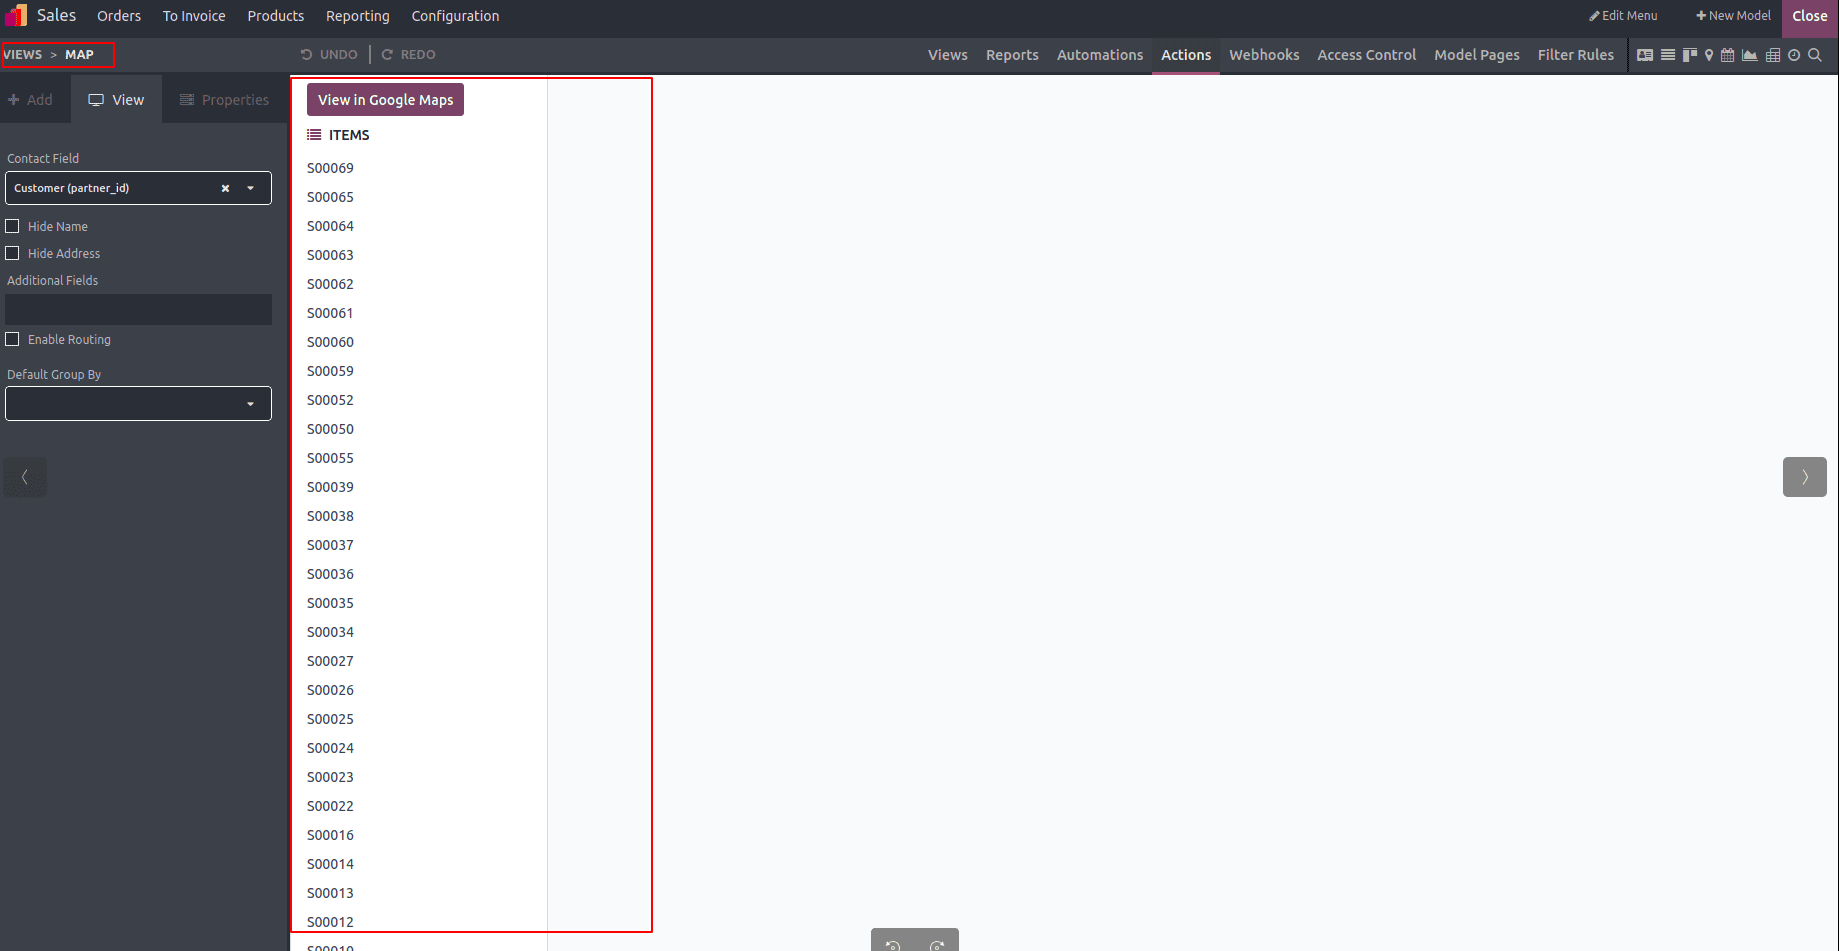
Map View:
The "Map" view offers customization options such as hiding the Name and Address using the "Hide Name" and "Hide Address" settings in the edit panel. You can also activate the "Enable Routing" feature to assist with location details and route planning. Moreover, additional fields can be added to enrich the view based on specific requirements.
Timeline Views and Calendar:
Within the "Timeline views" section, you have the ability to configure Calendar, Cohort, and Gantt views. In the Calendar View specifically, settings like Start Date and Stop Date fields can be adjusted, along with advanced options such as Delay Field, Color
coding, All Day events, and the Default Display mode—all accessible through the editing panel, as shown in the example screenshot.
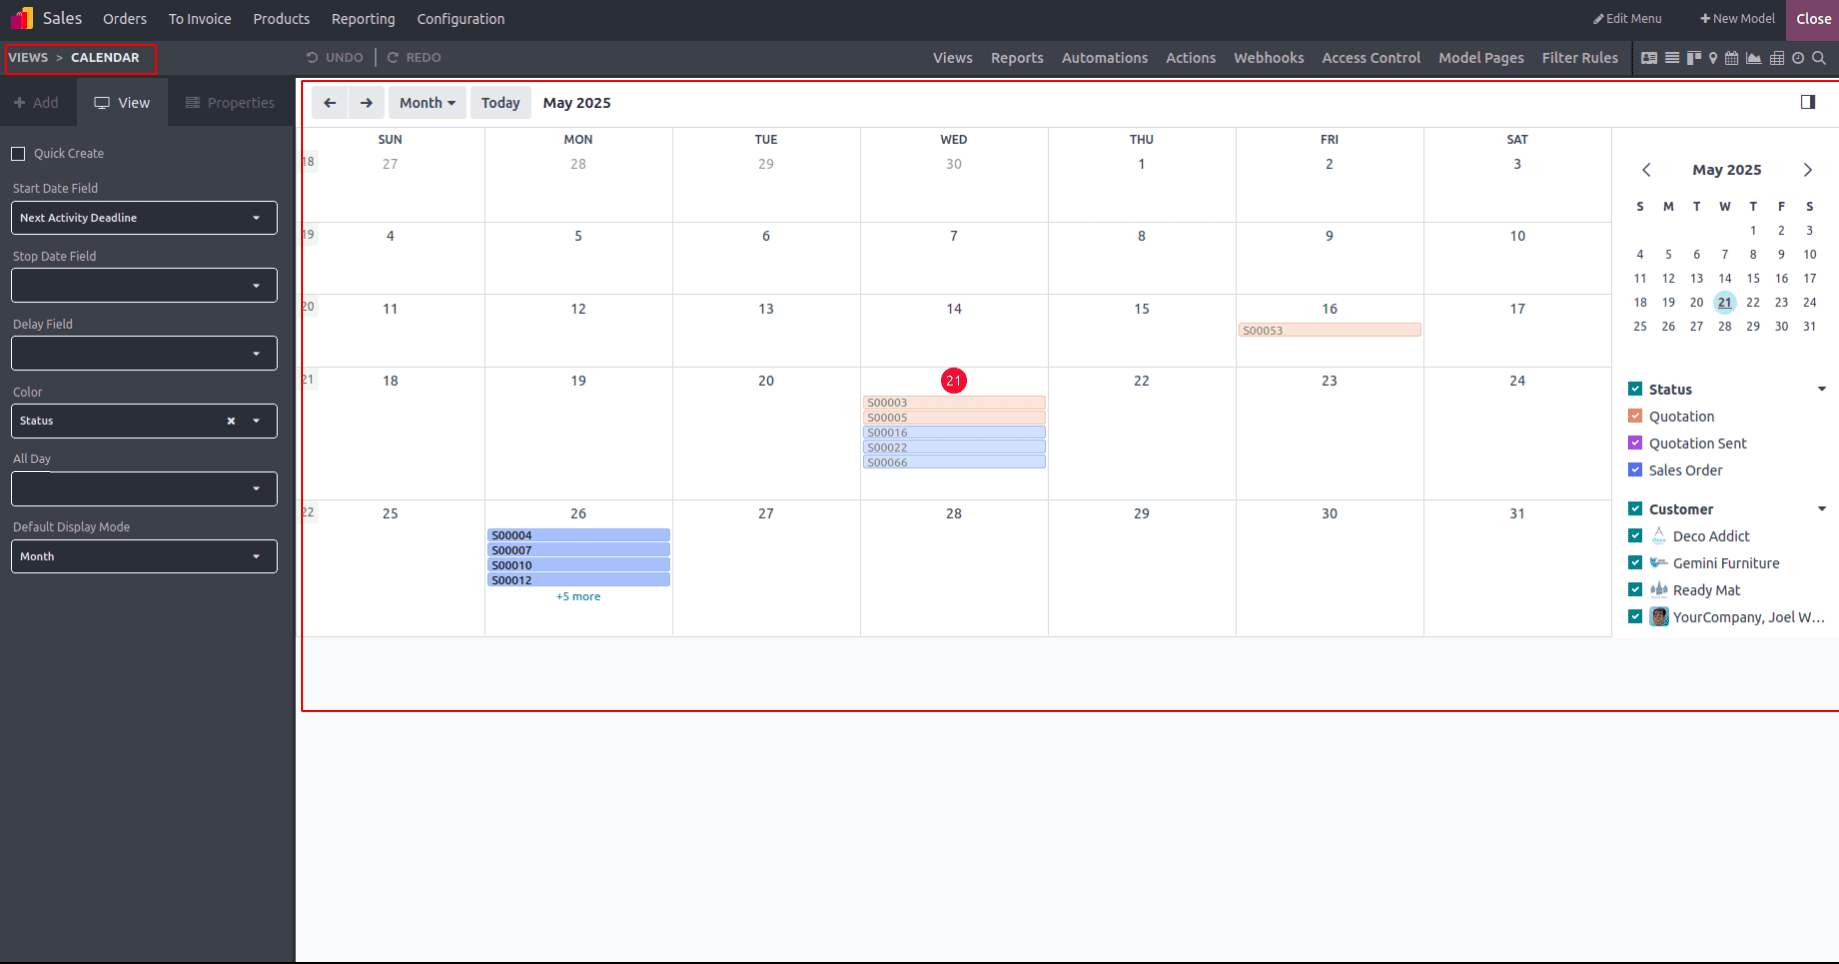
Enabling the Quick Create option allows users to add new records directly without navigating to the Form view. This feature is limited to models that can be created using just a name, as many require additional data. Additionally, selecting a field under the "Color" option helps categorize and visually distinguish calendar events. You can also define the default calendar view—Day, Week, Month, or Year—by setting the Default Display Mode, which controls how events appear when the calendar is first loaded.
Gantt View
The Gantt view offers a comprehensive way to visualize and track the progress of records over time, with each record represented as a bar across a timeline. Users can tailor the view by toggling options like "Display Unavailability," "Display Total Row," and "Collapse First Level." Additionally, key settings such as Start and End Date fields, Label, and time precision (Day or Week) can be customized to align the Gantt view with particular project or workflow needs.
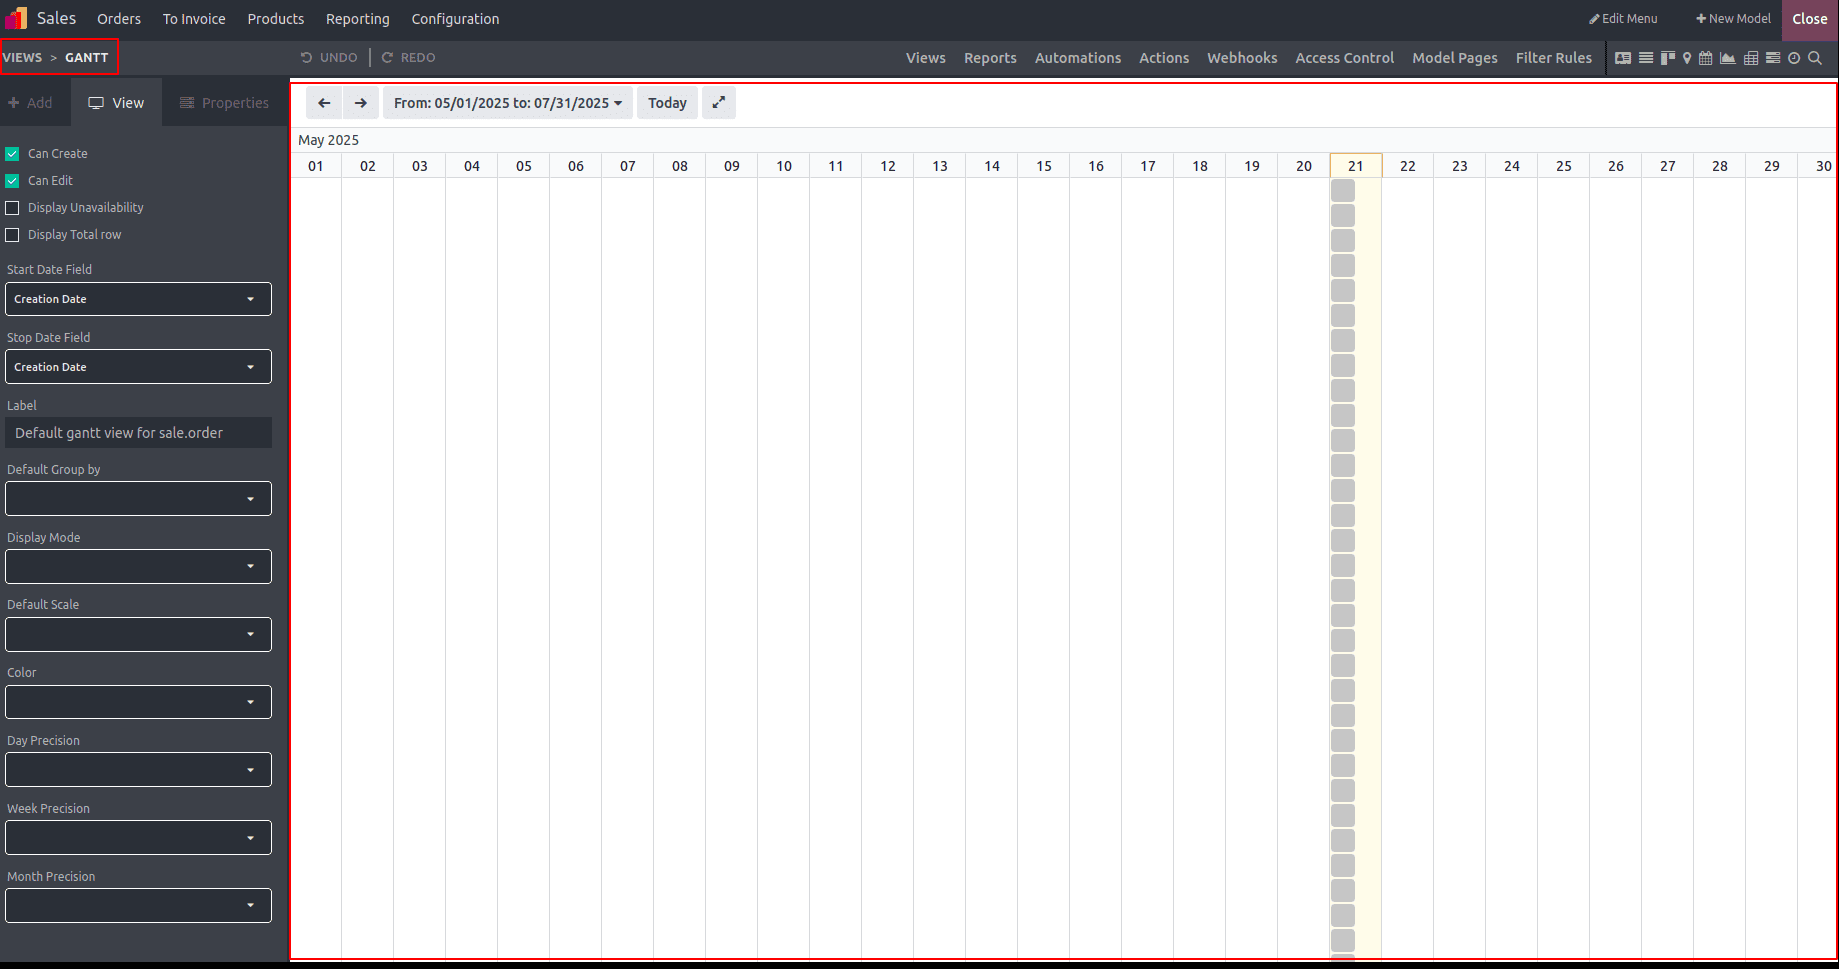
To restrict record creation or modification, users can disable the "Can Create" and "Can Edit" settings. Activating "Display Unavailability" highlights unavailable periods in grey, while the "Display Complete Row" option ensures full visibility of each row. The "Collapse First Level" feature allows for collapsing multiple entries at once. Users can also set a preferred time scale through the "Default Scale" setting and group records automatically. For better organization and visual clarity, a specific field can be chosen under the "Color" option to apply color coding to records.
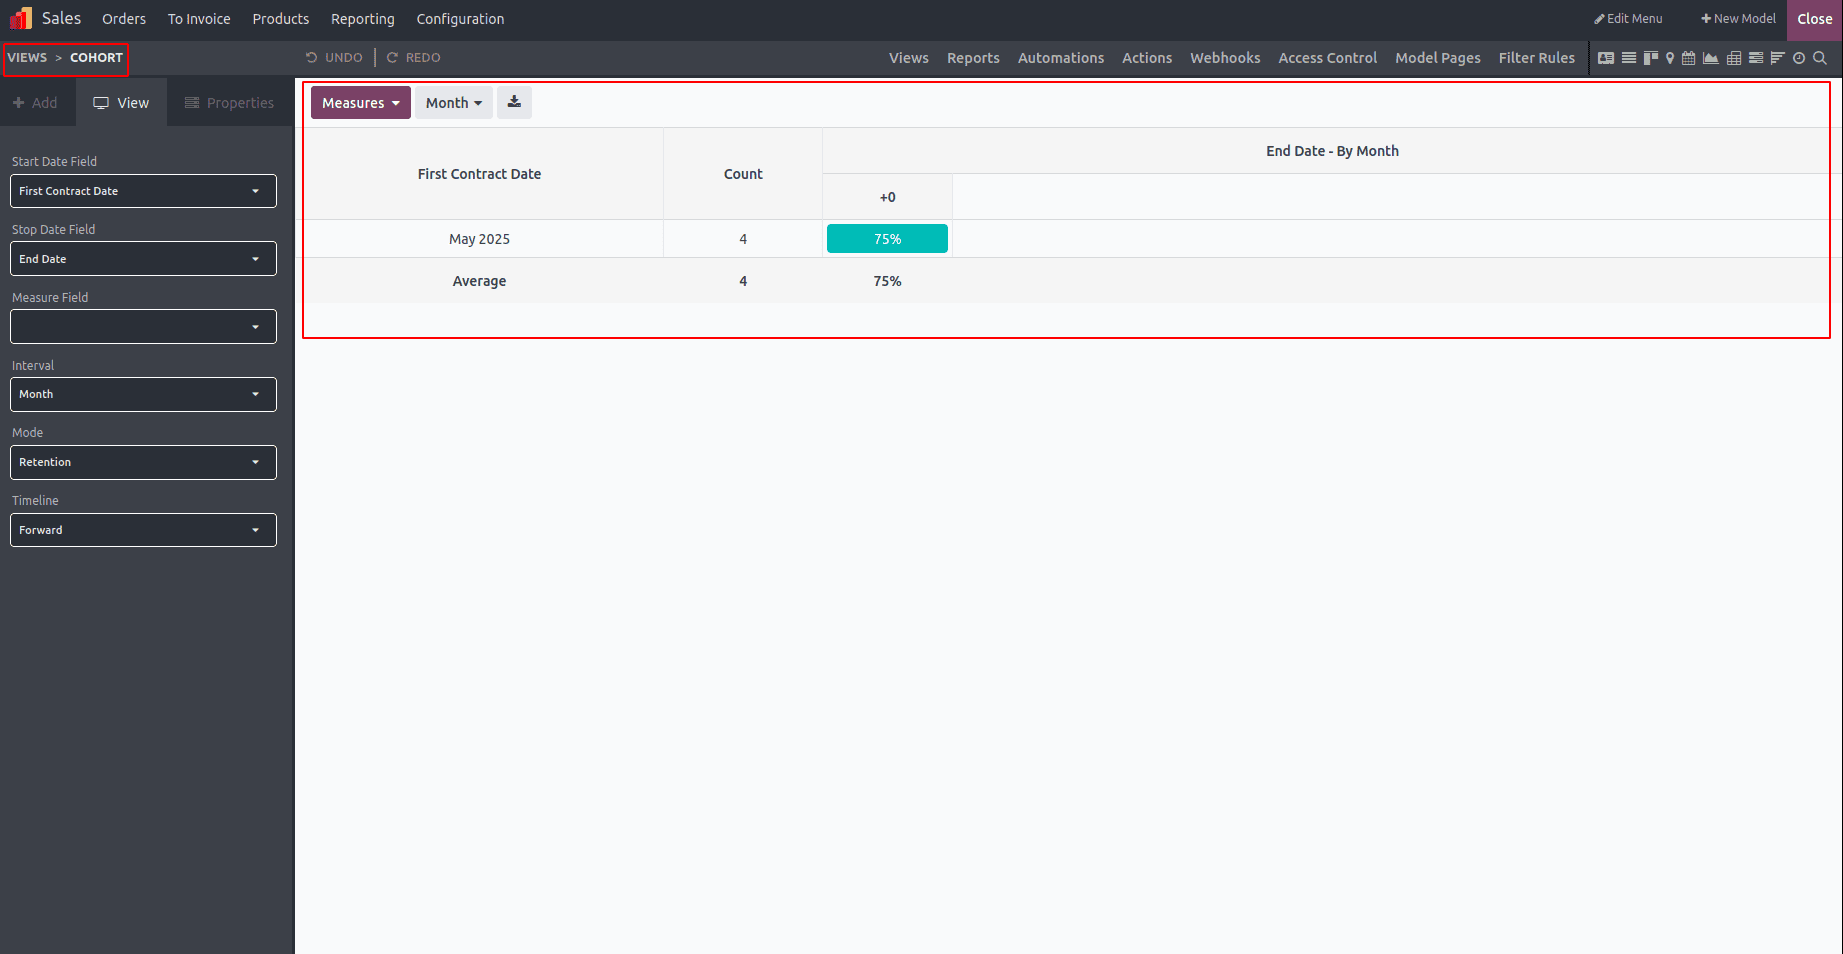
Cohort View
In the "Cohort" view, users can adjust the Start Date and Stop Date fields based on their needs. They also have the option to fine-tune various settings like Timeline, Interval, Mode, and Measure Field to enhance data visualization and analysis.
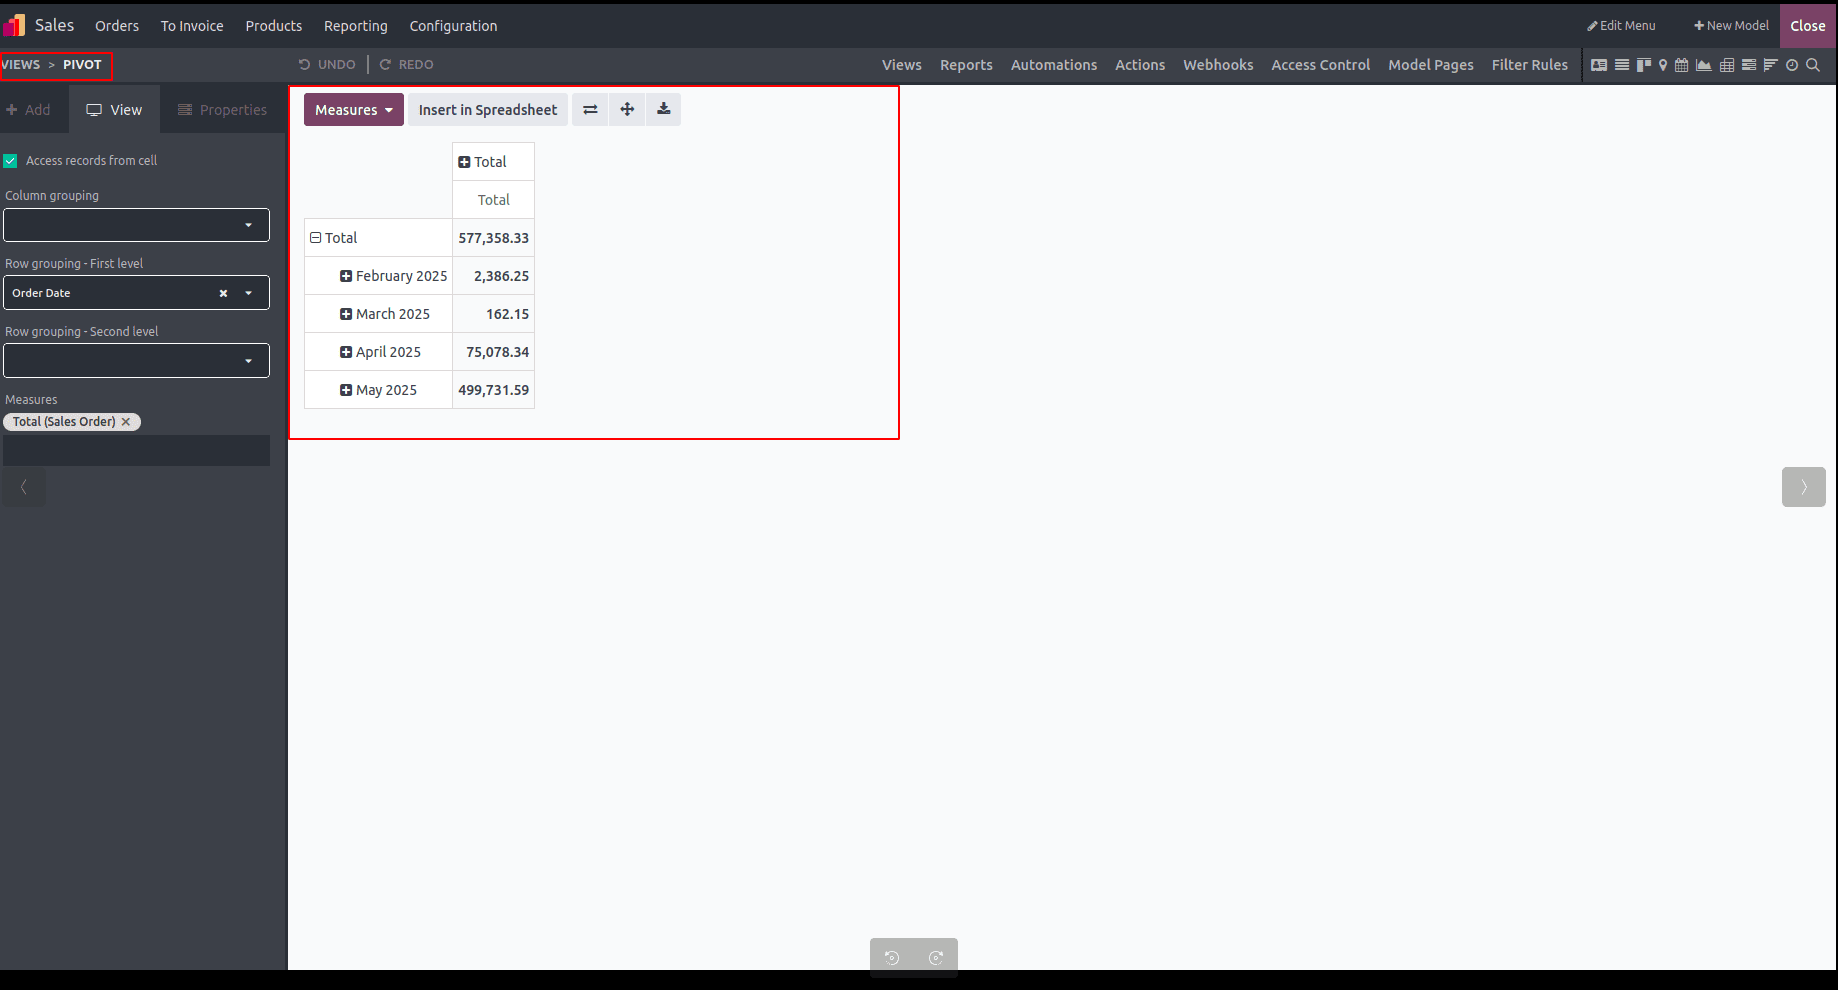
Pivot View
By enabling the "Access records from cell" feature, users can navigate directly to data records from the pivot table. Additionally, options like Column grouping, Row grouping (both First and Second levels), Measures, and Display count can be configured within the Pivot View to support detailed data analysis and visualization.
Graph View
The Graph view displays data using bar, line, or pie charts and offers customization options including graph types, sorting methods, and selections for the first and second dimensions as well as measures. Users can enhance their charts by adding additional dimensions during setup. Within the "Type" field, users choose between Bar, Line, or Pie charts to define the chart style. They can also set default categories for the "First dimension" and "Second dimension," and select a default data type in the "Measure" field to control how data is measured and displayed.
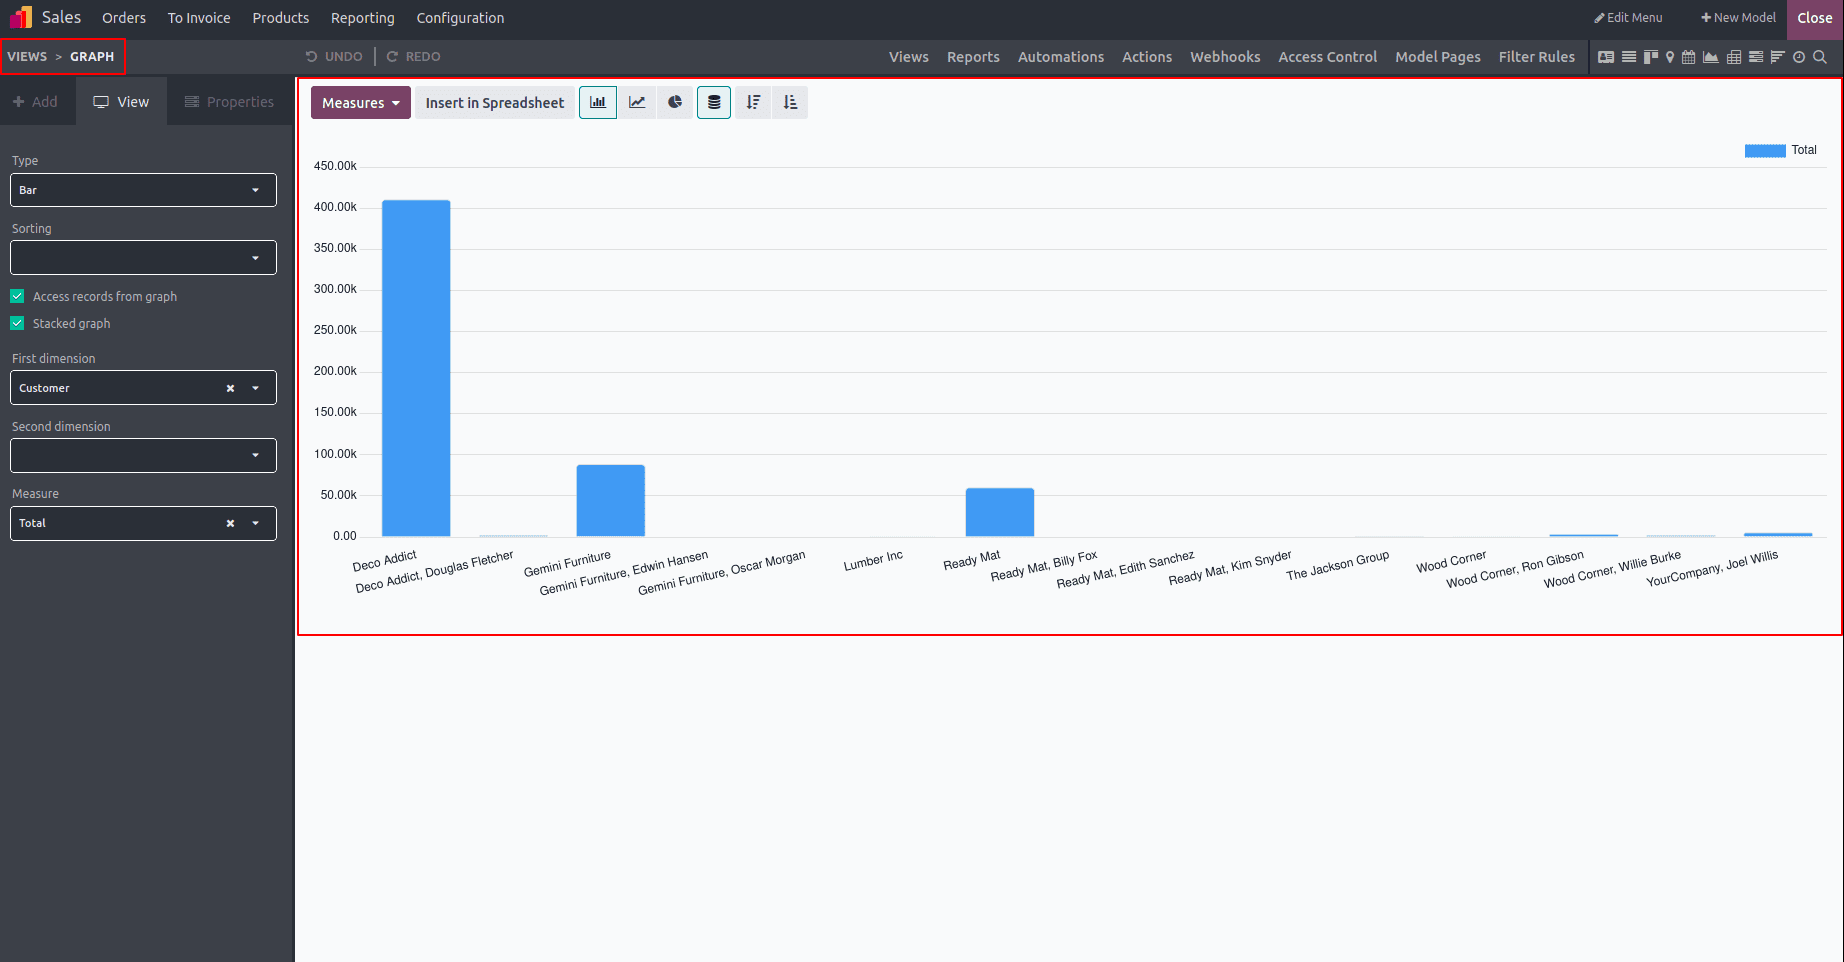
Users have the option to enable "Access Records from Cell" to download data directly from the graphical report view, and can also activate the "Stacked Graph" feature to visualize data in a stacked format. These settings are found within the "View" menu of the Odoo 18 Studio Module. Next, let's explore the platform’s "Reporting" section.
Reporting Menu
Within the Odoo platform's "Reports" menu, users can utilize filtering and grouping tools to design and manage customized reports easily. This section provides built-in features that simplify the configuration of reporting windows when building new applications, allowing full control over Search, Filter, and Group By settings.
To access and explore these capabilities, simply go to the "Reports" menu inside the Studio Module.
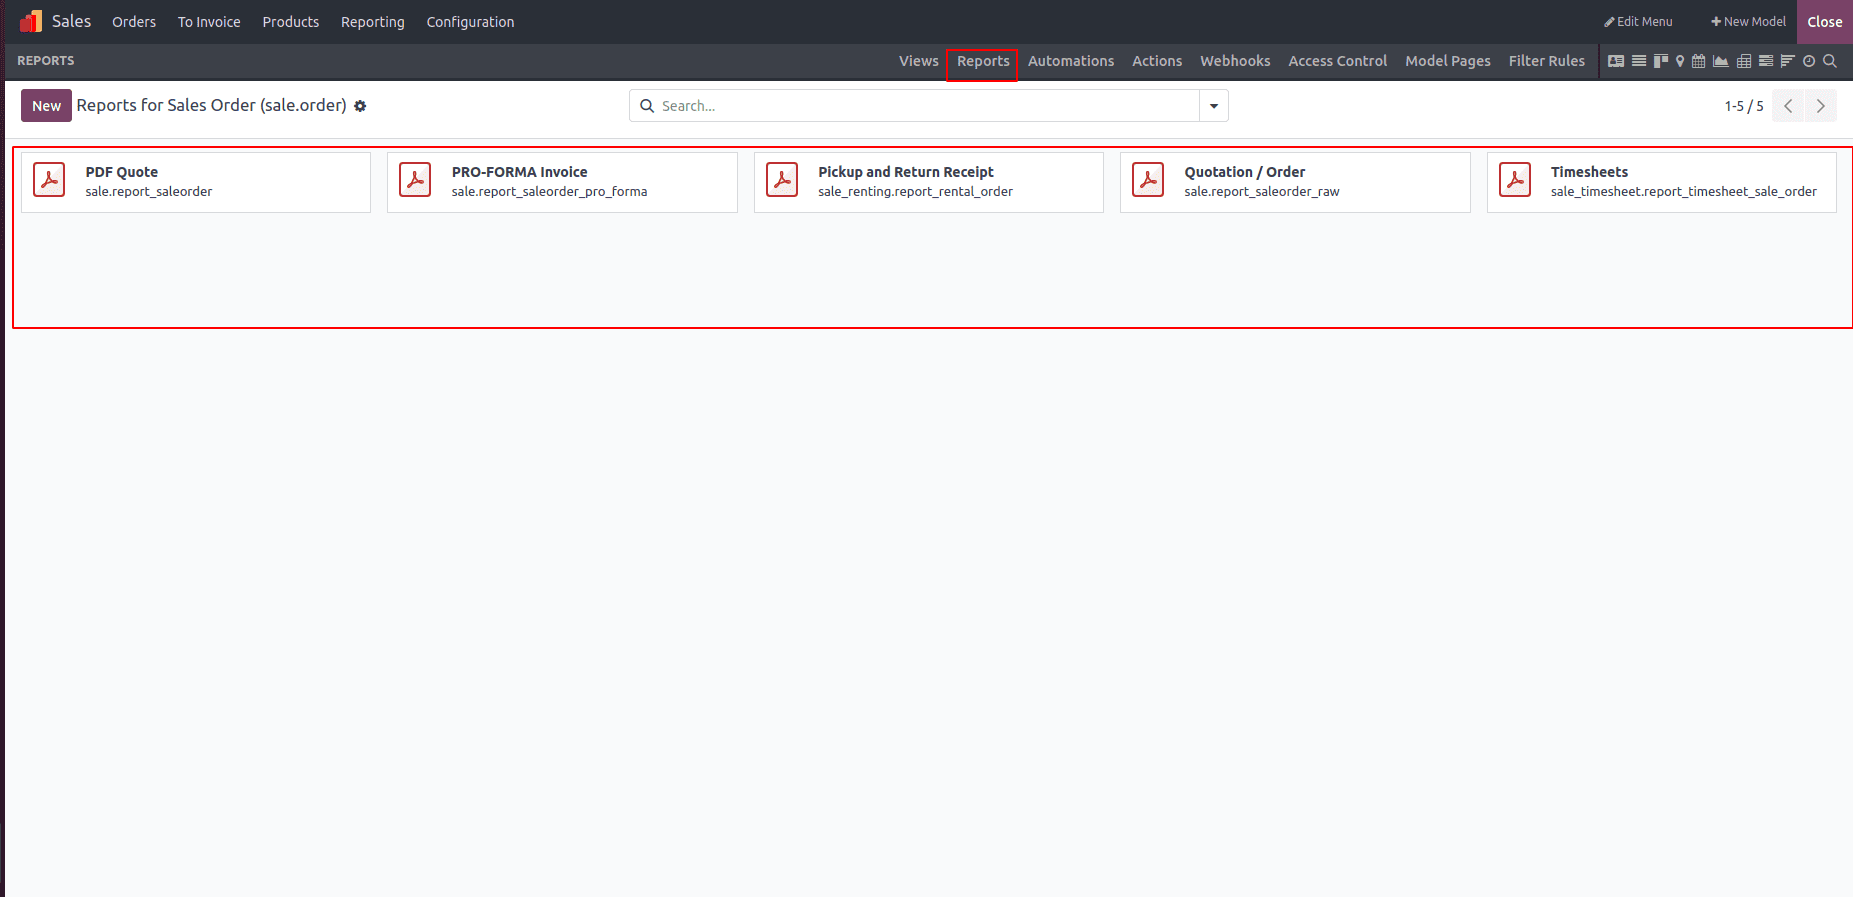
In the filter search area, locate and select the application model for which you want to create a report. After choosing the model, click the "New" button to start setting up a new Reporting section.
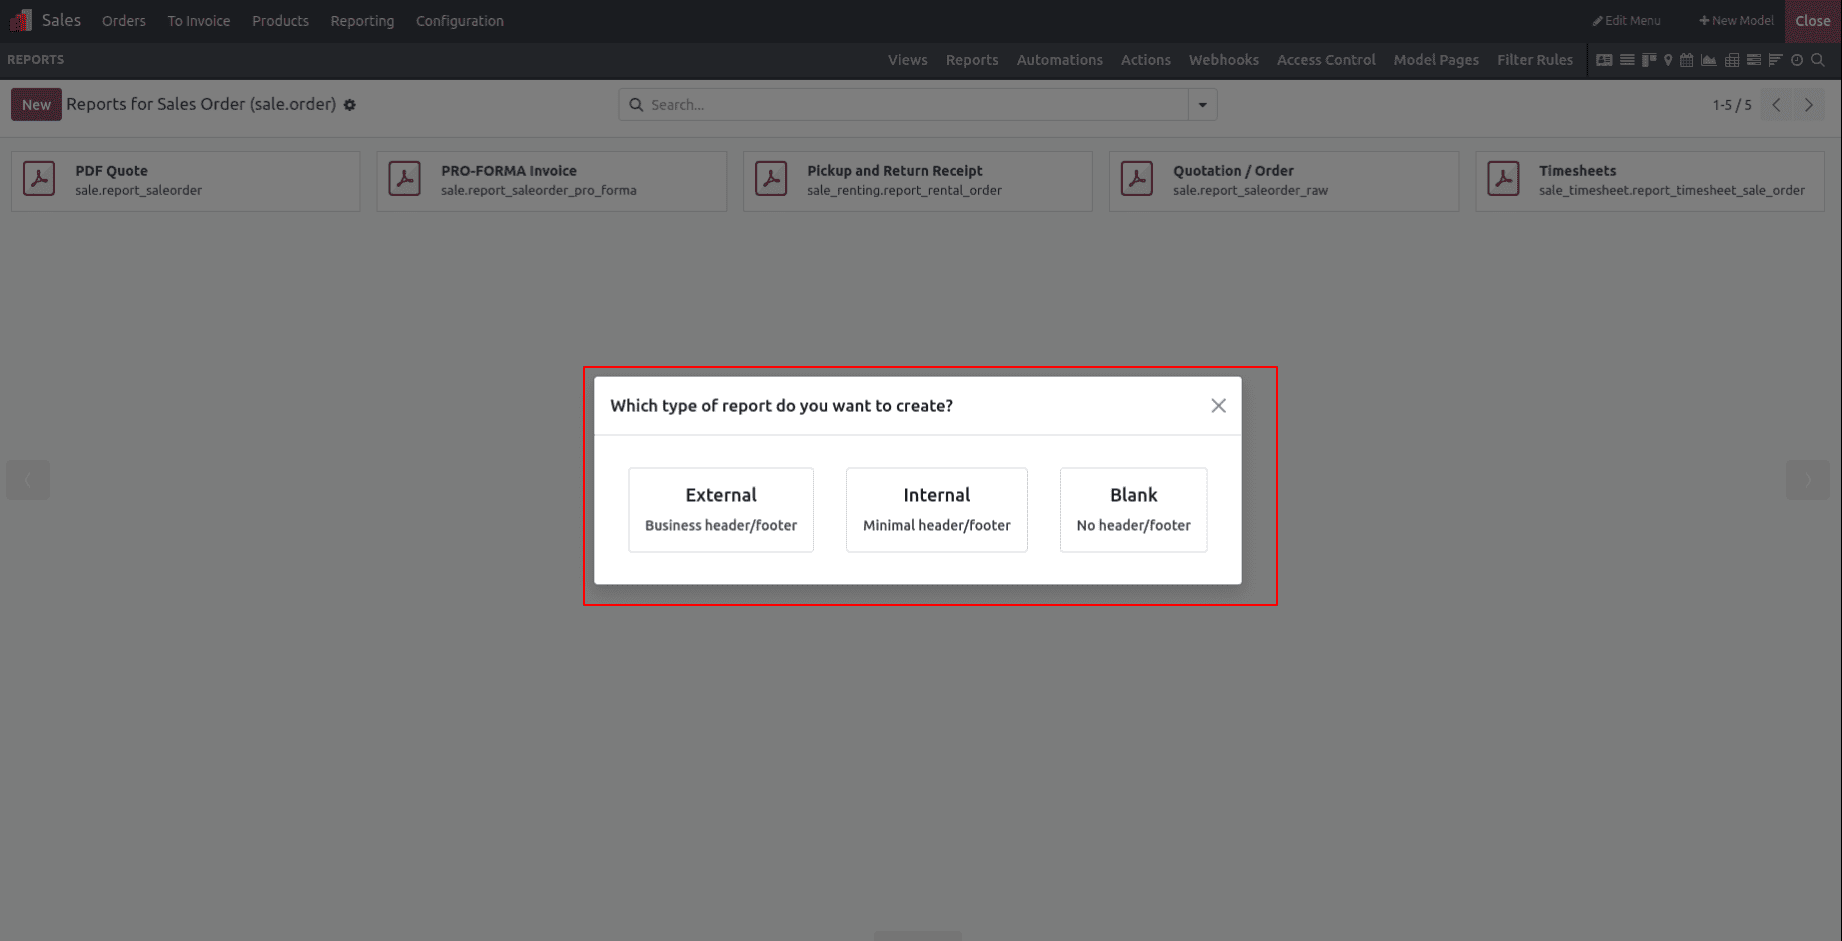
After choosing the application model and clicking "New," a dialog box will prompt you to select the type of report you want to create: External, Internal, or Blank. Based on your selection, the settings menu will appear, allowing you to configure all required details in the Translate View section. Choosing any option will open the respective report configuration form for further customization.
Creating a New Report
Choosing the External Reporting option will create a new report section within your "Reports" dashboard, as shown in the example below.
To modify a report's details, ensure that records exist in your application database. Once available, you can access and edit the report by clicking its card, which opens the report configuration area as illustrated below. Within this menu, users can customize the report title, choose the paper format, and apply visibility restrictions. Reports can also be printed directly from this window by activating the "PRINT PREVIEW" option. Moreover, by enabling the "Limit Visibility to Groups" setting, access to the report can be restricted to specific user groups for better control.
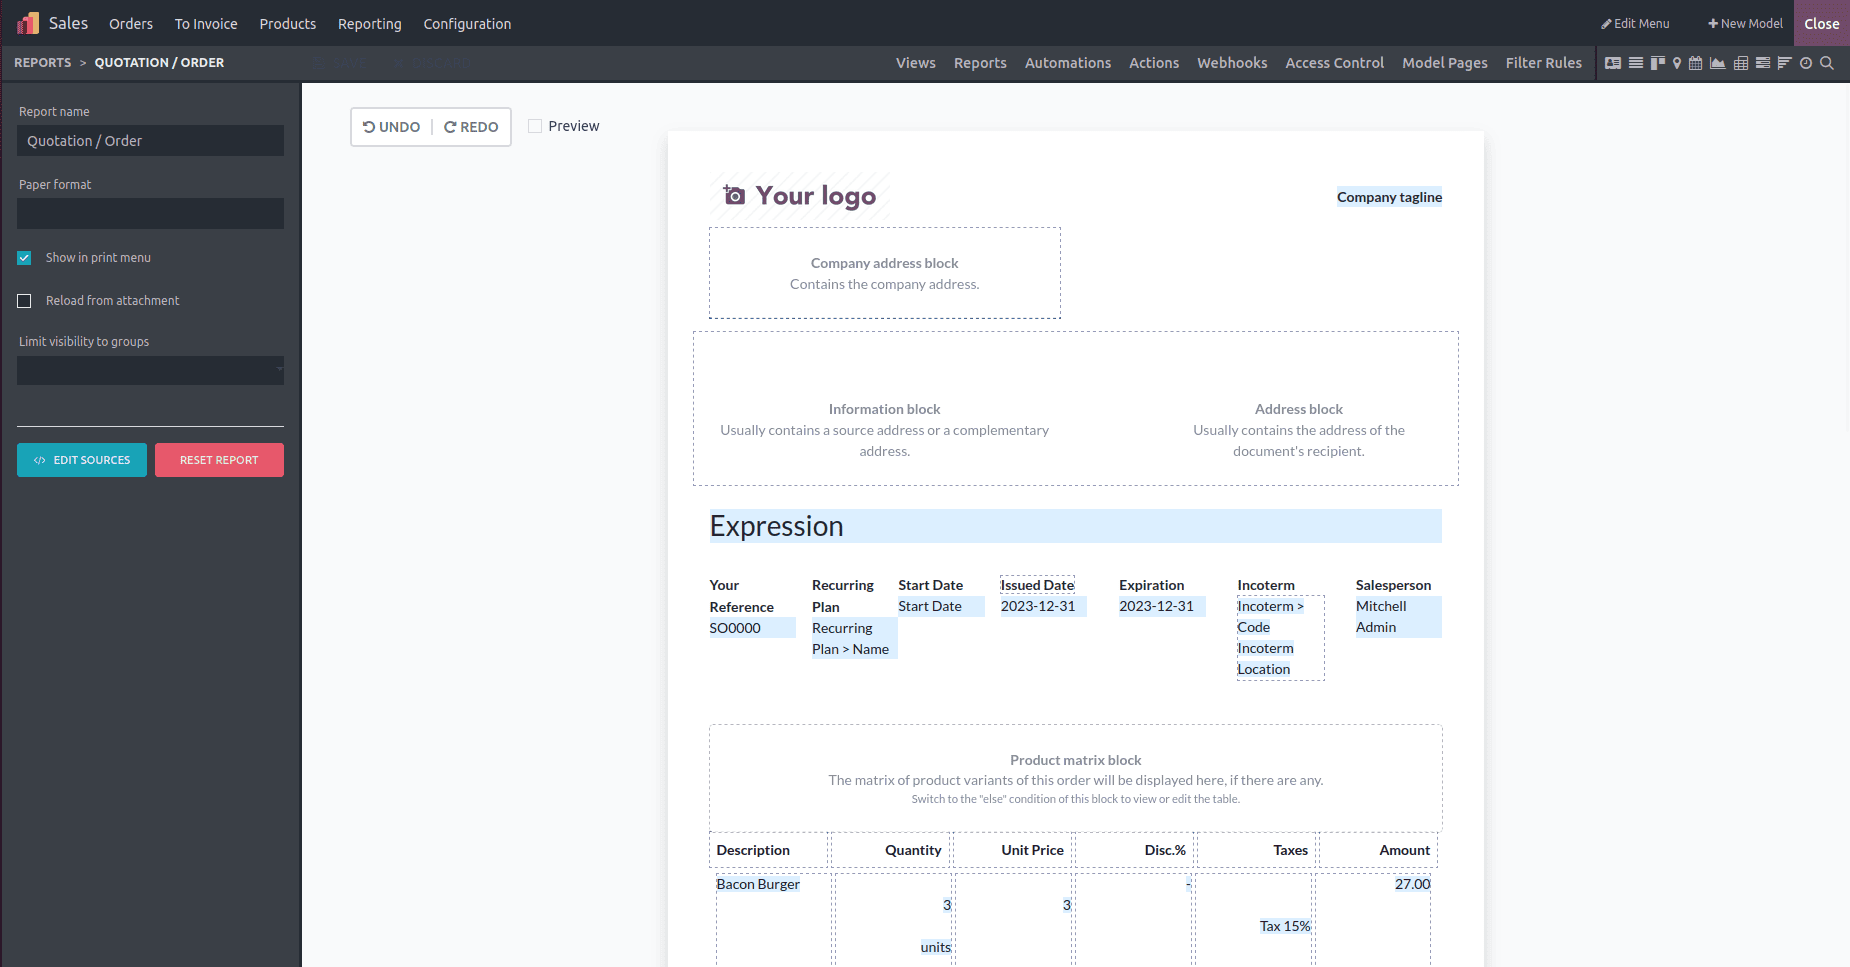
To create a personalized report design, begin by choosing the appropriate report type and then build your template by adding various tools and components. These elements can be inserted by typing '/' in the dropdown menu and selecting the needed option. You can expand sections of your template using blocks like Text, Field, Title Block, Field and Label, Image, and Address Block, each offering customizable features through inline settings. Additionally, the Reporting menu allows you to define tables with components such as Data Table, Field Column, Text in Cell, Field in Cell, Subtotal, and Total. You can also organize your layout using "Column" types to create two or three-column formats. Below is a basic example of a Report page I designed for demonstration, which you can tailor by adding more columns and data based on your application’s needs.
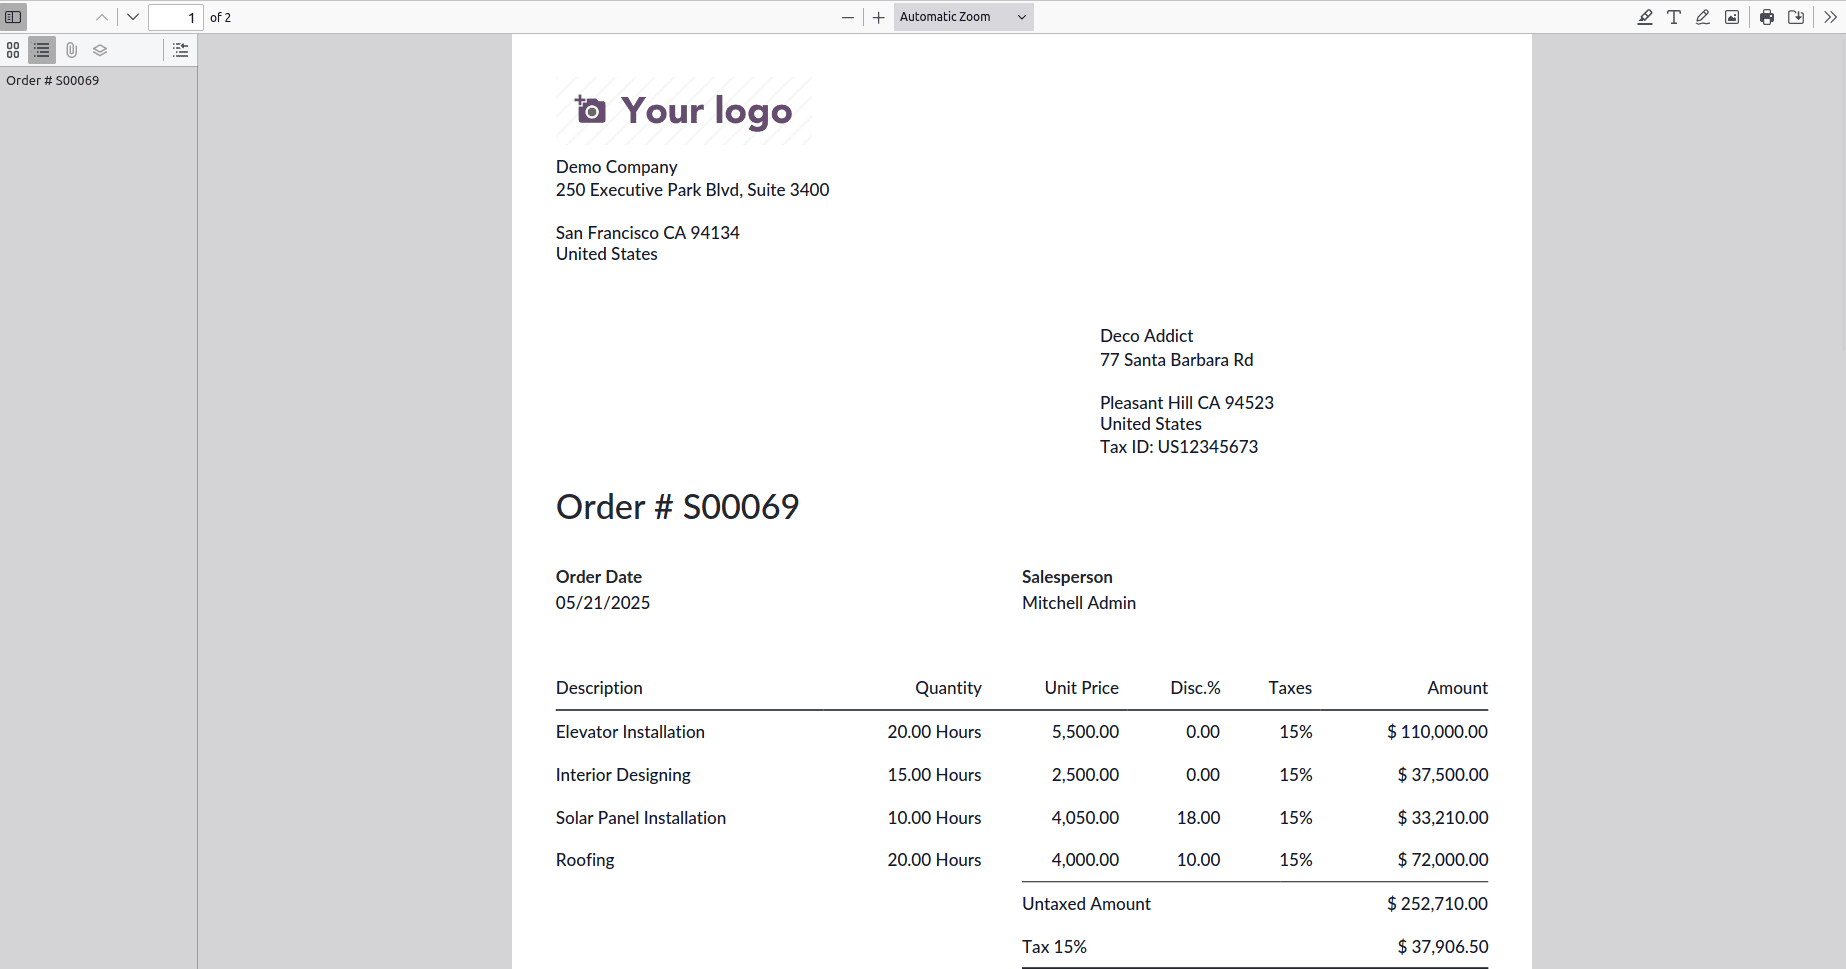
Users working with the Odoo Studio module can tailor report menus using a variety of business-focused tools. They can review and confirm report details by clicking the "PRINT" button and make adjustments within the Print Preview as needed. Furthermore, reports can be exported as PDF files, offering convenient options for data handling and sharing.
Odoo Studio provides powerful and flexible tools that enable users to easily customize, preview, and manage reports, enhancing business workflows and simplifying data sharing.
To read more about How to Customize Views & Reports in Odoo 17 Studio, refer to our blog How to Customize Views & Reports in Odoo 17 Studio.