Odoo 18 marks a major step forward in enterprise resource planning, offering a more refined user experience, faster system performance, and greater flexibility for customization. Building on the strengths of earlier versions, it brings significant upgrades to essential modules such as CRM, inventory management, and accounting. The platform now includes advanced analytics, better cross-departmental workflows, and automation powered by artificial intelligence. These enhancements empower businesses to streamline their processes, improve decision-making, and scale effectively. Designed to adapt to evolving market needs, Odoo 18 is a robust solution for organizations aiming to boost productivity and maintain a competitive edge.
Views play an essential role in Odoo's user interface by determining how business data is presented to the user. Odoo offers several types of views, such as list, form, kanban, calendar, pivot, and cohort, each tailored to manage and visualize information effectively. These views not only help users interact with records but also guide user actions within the system.
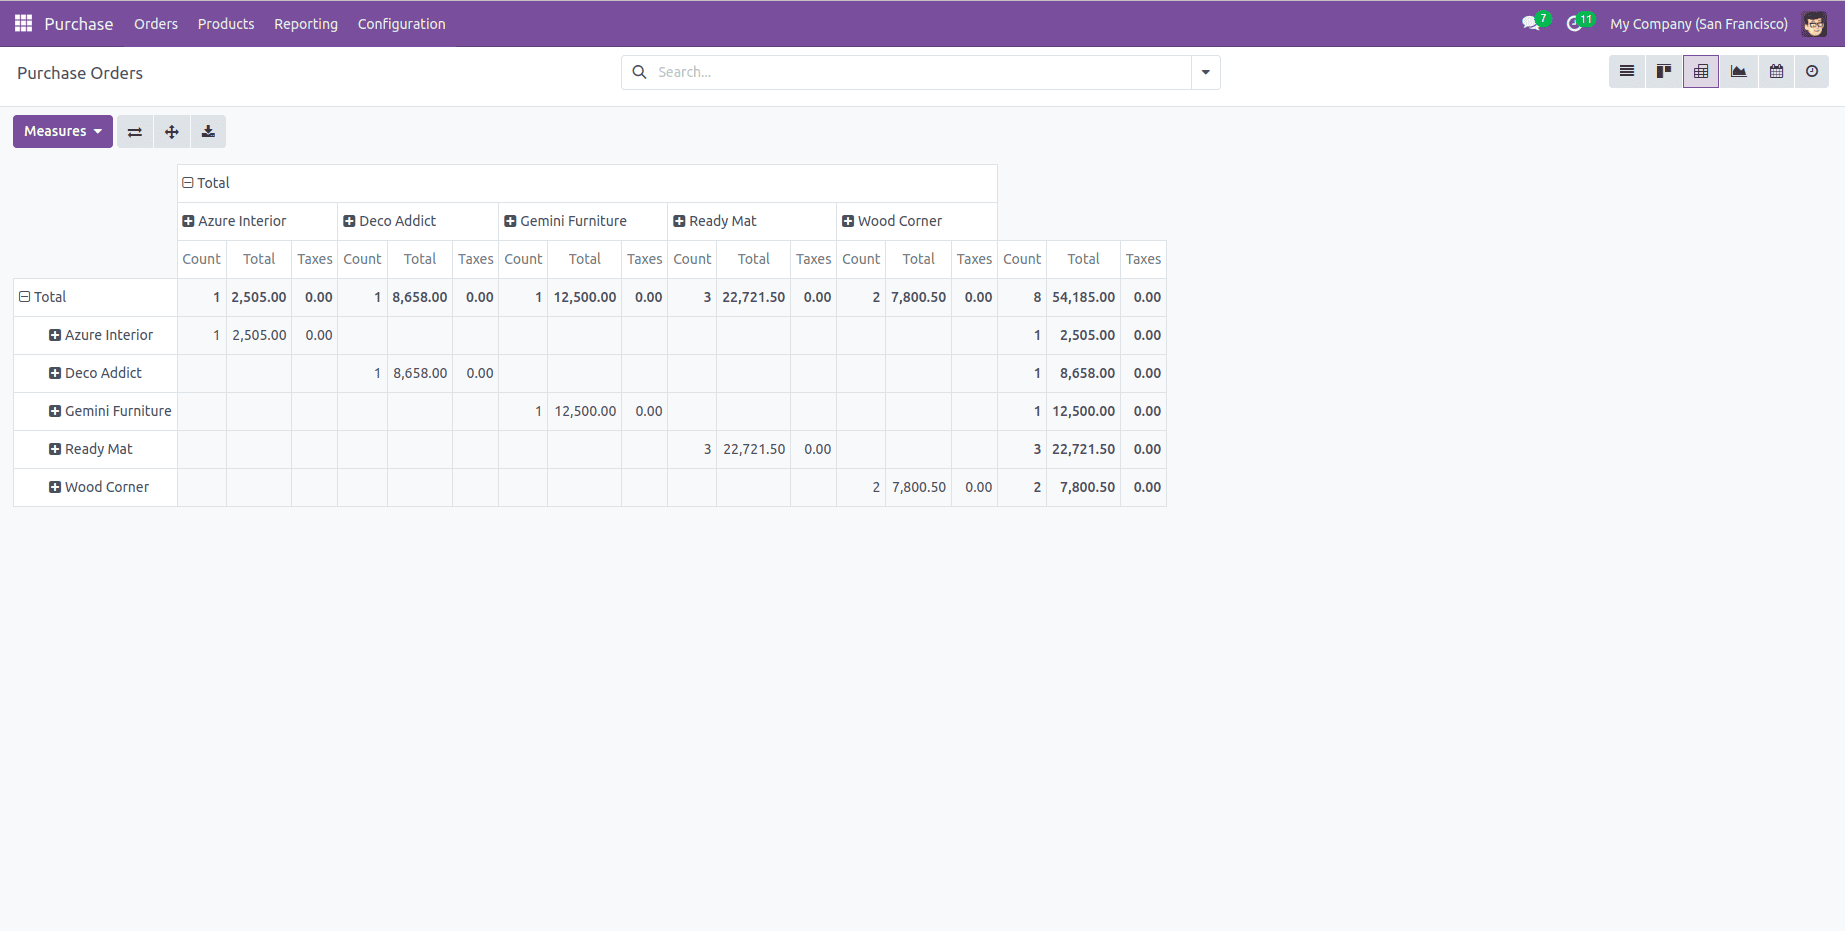
A Pivot view in Odoo 18 offers a clear and efficient way to visualize your data. It allows users to group, summarize, and analyze records, making it simpler to identify key insights and trends. With built-in filtering and sorting options, users can quickly organize the data based on specific fields for more focused analysis.
The image shown provides an example of the Pivot view in Odoo 18, specifically displaying data related to Purchase Orders.
Let’s explore how to build a Pivot view in Odoo 18 from scratch.
The first step involves creating a new model that includes the fields you want to analyze. These fields will serve as the dimensions and measures for your pivot table.
As an example, consider the model student.performance, which includes the fields student_id, subject, date, status, and marks. The student_id field is used as the record name by specifying _rec_name = 'student_id'. This structure allows the model to track students' performance details such as exam date, subject, obtained marks, and pass/fail status
Python code:
from odoo import models, fields
class StudentPerformance(models.Model):
    _name = 'student.performance'
    _description = 'Student Performance'
    _rec_name = 'student_id'
    student_id = fields.Many2one('res.partner', string='Student Name')
    subject = fields.Selection([
        ('math', 'Mathematics'),
        ('sci', 'Science'),
        ('eng', 'English'),
        ('hist', 'History'),
        ('geo', 'Geography'),
    ], string='Subject')
    date = fields.Date(string='Exam Date')
    status = fields.Selection([
        ('pass', 'Pass'),
        ('fail', 'Fail')
    ], string='Status', default='pass')
    marks = fields.Float(string='Marks')
To set up a pivot view for the model above, you must define two XML files: one for the window action and another for the actual view.
<record id="action_student_performance" model="ir.actions.act_window">
        <field name="name">Student Performance</field>
        <field name="res_model">student.performance</field>
        <field name="view_mode">list,form,pivot</field>
    </record>
In this XML code, we define a window action called "Student Performance" for the model "student.performance." The view_mode field specifies the views that will be available when the action is accessed. In this case, it includes the list, form, and pivot views.
<record id="student_performance_view_pivot" model="ir.ui.view">
        <field name="name">student.performance.view.pivot</field>
        <field name="model">student.performance</field>
        <field name="arch" type="xml">
            <pivot string="Student Performance">
                <field name="status" type="row"/>
                <field name="subject" type="col"/>
                <field name="marks" type="measure"/>
            </pivot>
        </field>
    </record>
Here, you're defining a pivot view for the "student.performance" model.
The <pivot> element is the main container that specifies this is a pivot view. The string attribute sets the title of the pivot view to "Student Performance." Within the pivot definition, the structure of the pivot table is configured using three fields:
<field name="status" type="row"/>
This field is used to define the rows of the pivot table. It means that the records will be grouped vertically based on the status of student performance (e.g., passed, failed, etc.).
<field name="subject" type="col"/>
This field defines the columns of the pivot table. It allows data to be arranged horizontally by subject, so each column represents a different subject.
<field name="marks" type="measure"/>
This is the numeric field to be aggregated in the pivot view. The pivot table will compute totals or averages of the marks field across different combinations of status and subject.
This is the list view that displays the records from the student.performance model

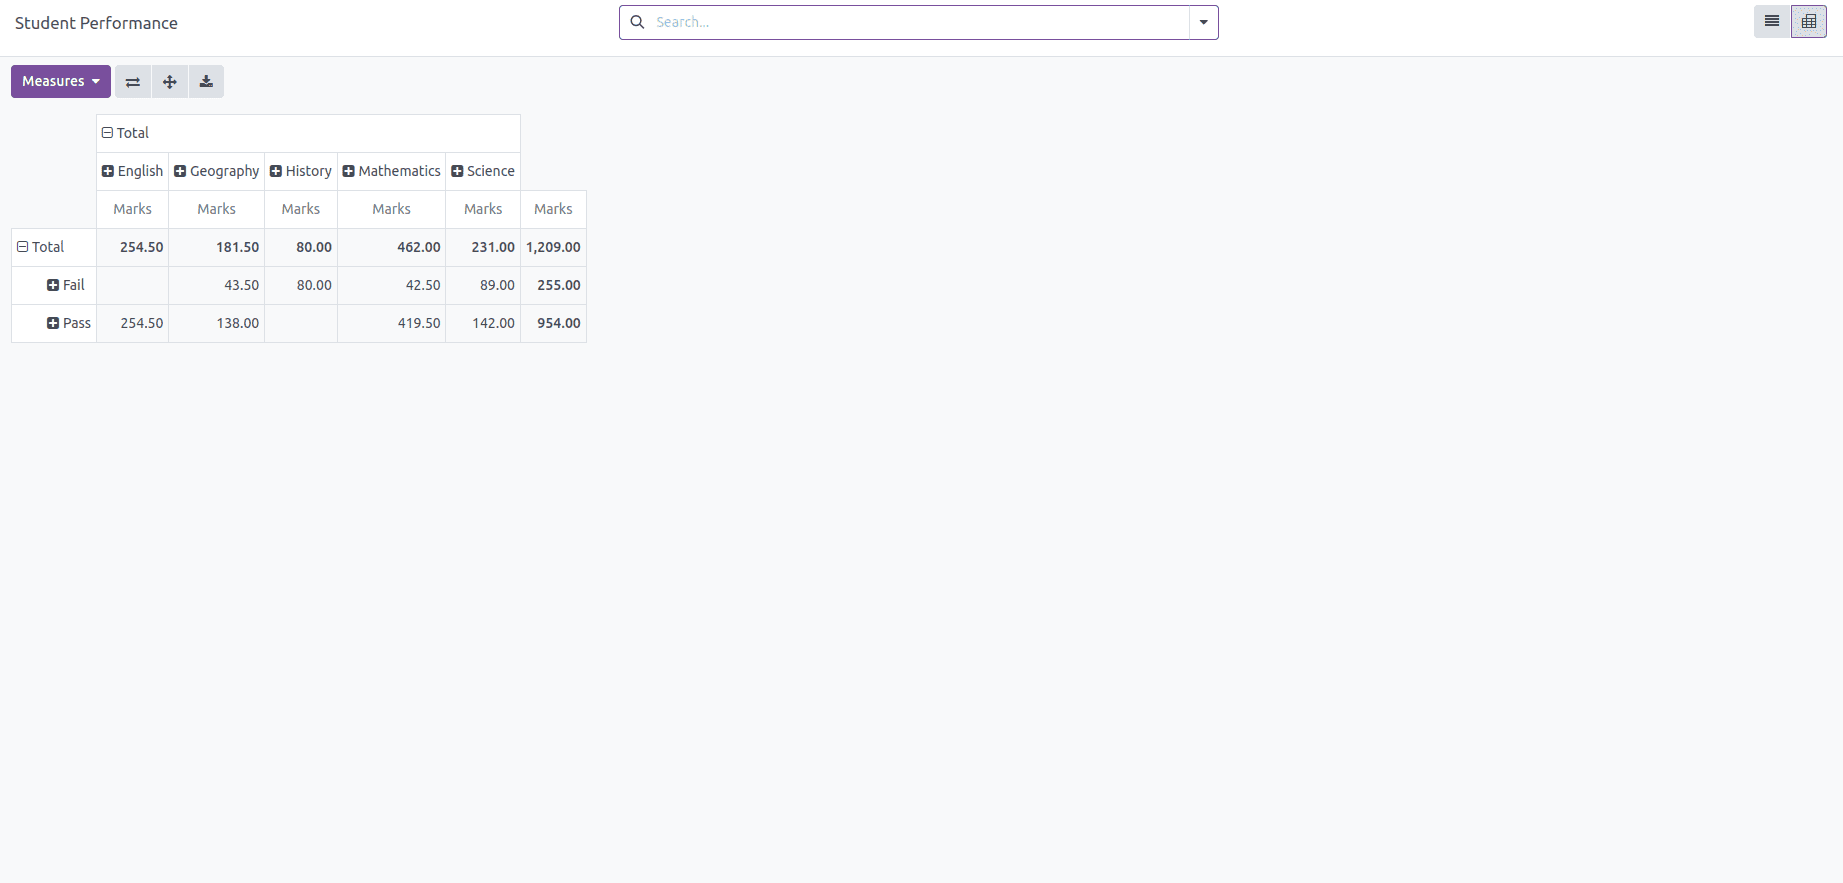
Pivot View: This pivot view presents a summarized analysis of student performance records. It organizes data using the status field as rows (e.g., pass or fail), the subject field as columns (e.g., Mathematics, Science), and aggregates the marks field to show total or average scores across different categories. This helps in quickly identifying performance trends across subjects and statuses as shown in the figure below.
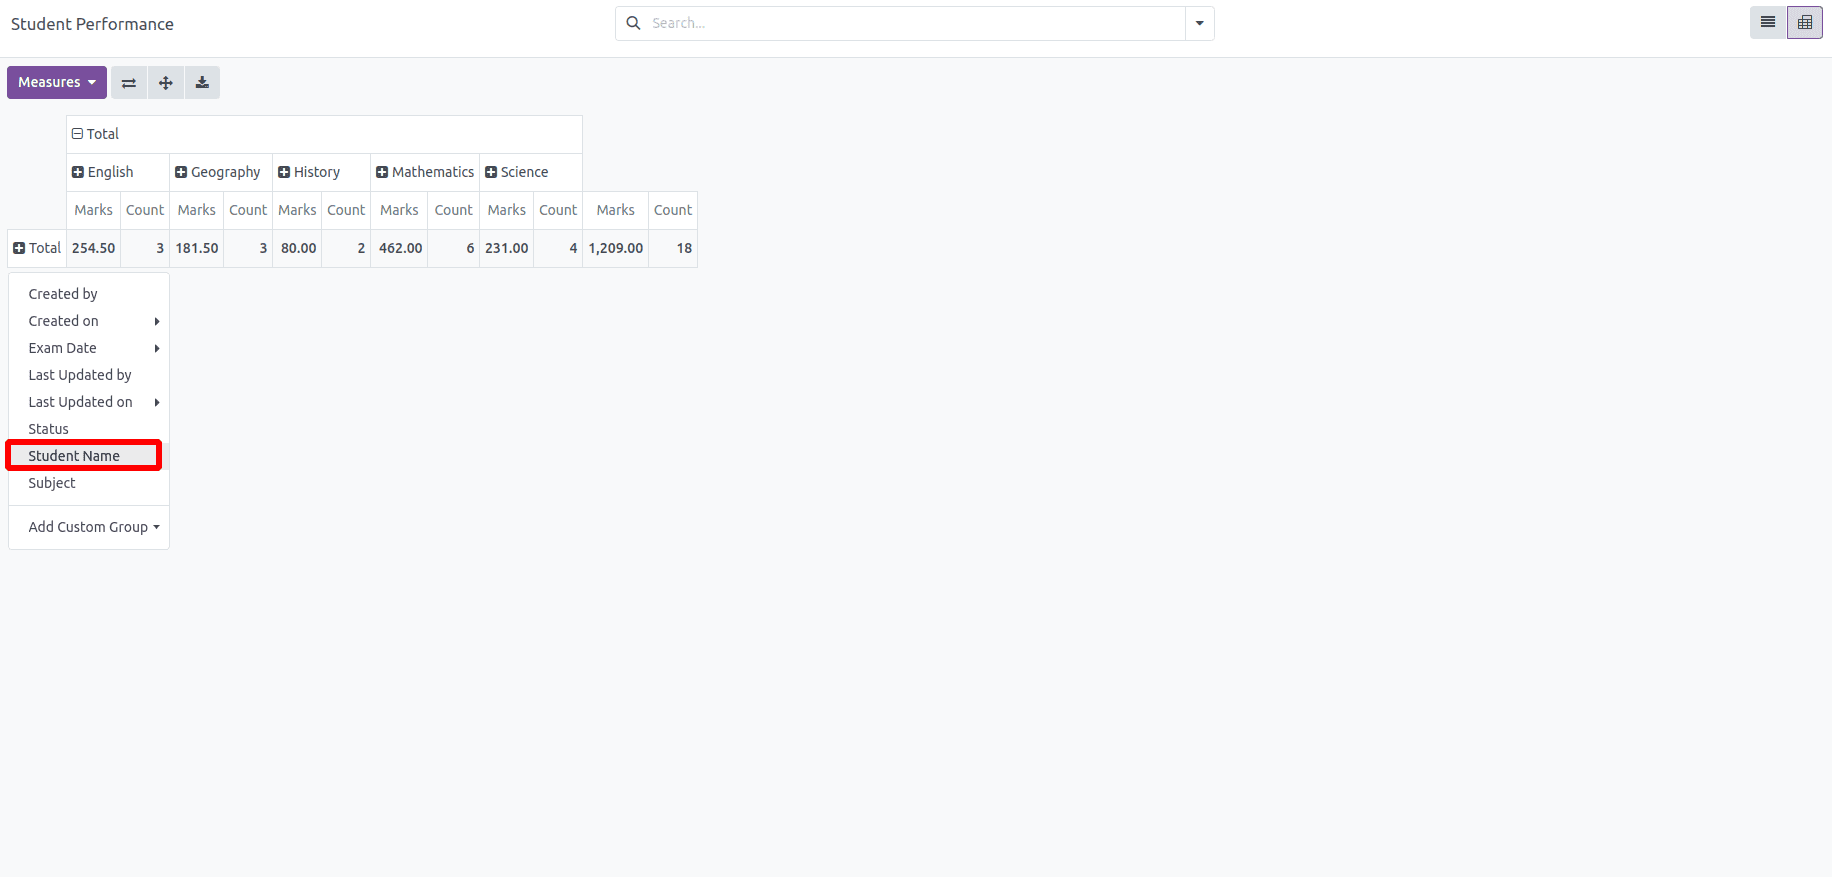
The pivot view groups data by status and subject, showing total marks by default. Users can click the Measure button to switch between Marks and the default Count for flexible analysis, as shown in the figure below.

You can also group data by different fields.
To group by ‘Student Name,’ click the plus button, then select Student Name as the filter as shown in the figure below.
You will receive the results as follows:
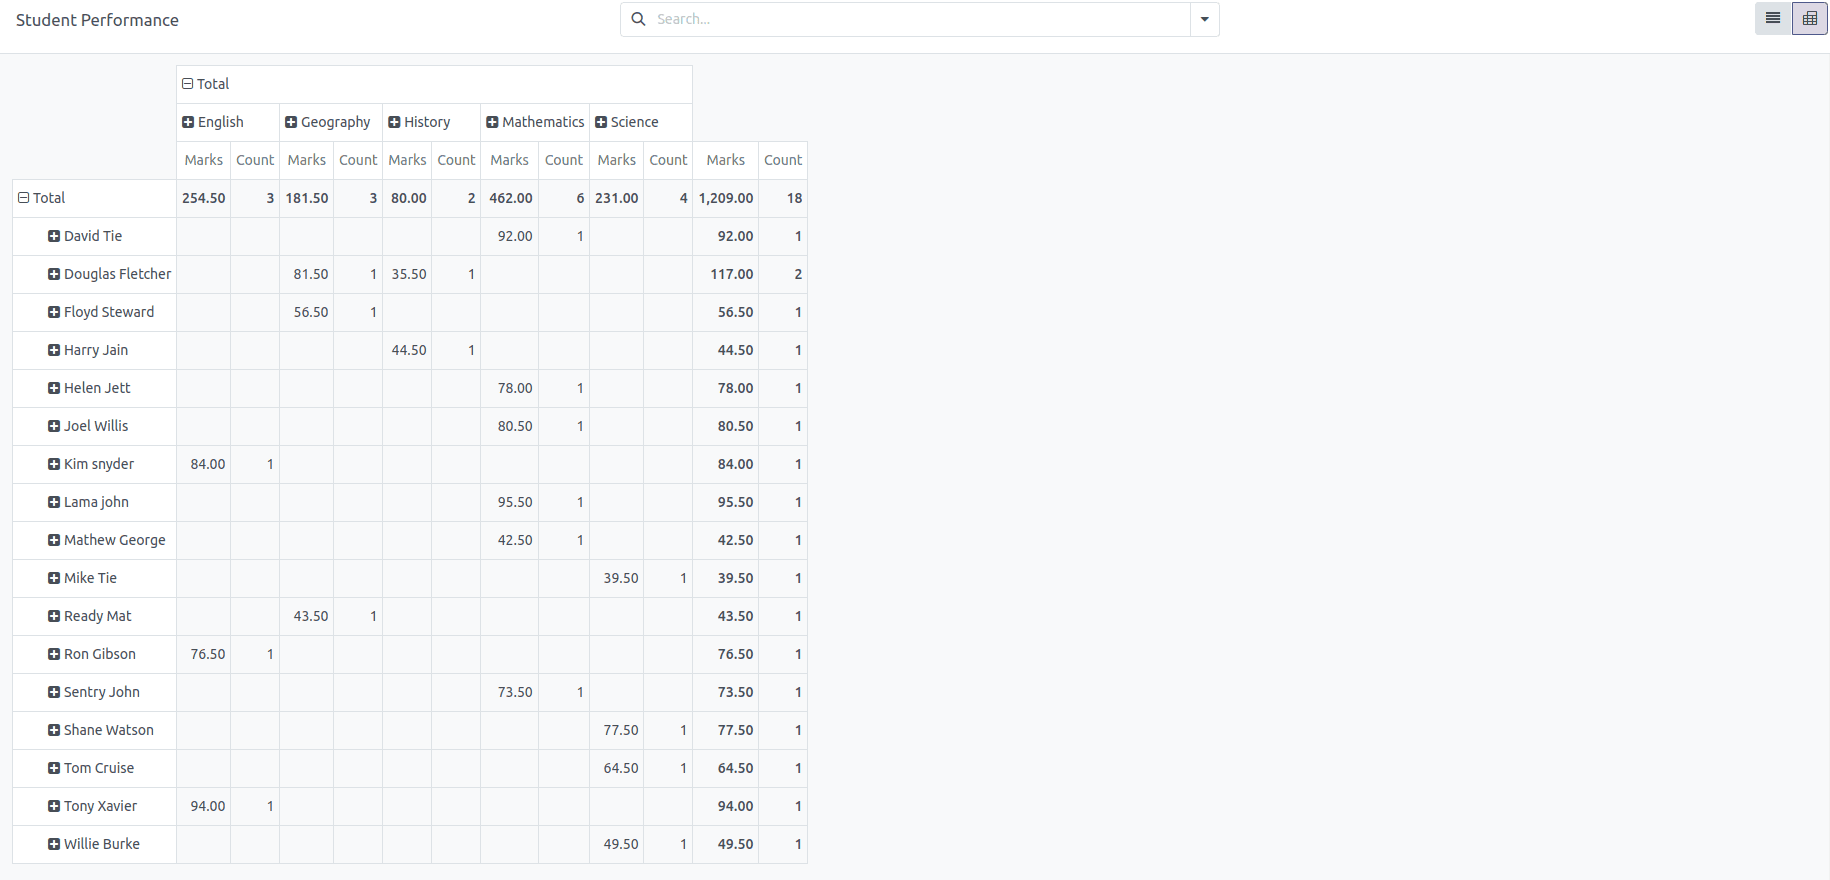
In this way, the Pivot view helps simplify data visualization. It allows you to organize and summarize data by grouping it based on different fields, which makes it easier to spot patterns and trends. By creating Pivot views, you can efficiently manage complex data and gain meaningful insights. Overall, Pivot views provide a powerful method for organizing, analyzing, and presenting your data in a more accessible way.
To read more about How to Create Pivot View in Odoo 17, refer to our blog How to Create Pivot View in Odoo 17.