Odoo describes the Odoo Web Library (OWL) as a compact UI framework designed to be the underlying structure for the Odoo Web Client. Built-in TypeScript, OWL draws inspiration from the strengths of both React and Vue, offering a contemporary approach to presenting ideas in a coherent and organized manner.
Now, let's explore the process of creating a custom number popup in Odoo 17.
The following diagram depicts the construction of the custom number popup.
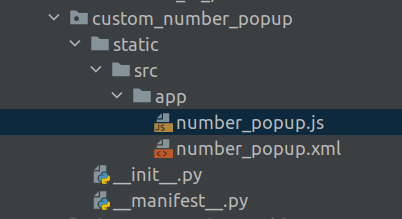
For creating a custom number popup create a new template that inherits the number popup template. Create a new XML file number_popup.xml.
<templates id="template" xml:space="preserve">
        <t t-name="CustomPopup">
        <div class="popup popup-number custom-popup w-auto">
            <div class="modal-header drag-handle">
                <h4 class="modal-title title"><t
                   t-esc="props.title"/></h4>
                <span t-if="props.subtitle" class="subtitle
                    p-1"><t t-esc="props.subtitle"/></span>
            </div>
            <div class="input-symbol pt-3">
                <div class="popup-input value active form-control
                   form-control-lg w-75 mx-auto">
                    <span class="input-value"
                t-att-class="{ 'highlight': state.toStartOver
                    }"><t t-esc="inputBuffer"/></span>
                    <span t-if="props.inputSuffix"><t
                      t-esc="props.inputSuffix" /></span>
                </div>
            </div>
            <Numpad buttons="getNumpadButtonsPOS()"
                class="'mx-auto my-3 w-75 max-width-325px'"/>
            <footer class="footer centered modal-footer
                 justify-content-center">
                <button class="button cancel btn btn-lg
                   btn-secondary" t-on-mousedown.prevent="cancel">
                    <t t-esc="props.cancelText" />
                </button>
            </footer>
        </div>
    </t>
</templates>
In this code,
<Numpad buttons="getNumpadButtonsPOS()" class="'mx-auto my-3 w-75 max-width-325px'"/>
This line returns the numbers in the number popup. We can pass the numbers and the values needed in the function getNumpadButtonsPOS().
Now, create a js file number_popup.js
/** @odoo-module **/
import { AbstractAwaitablePopup } from "@point_of_sale/app/popup/abstract_awaitable_popup";
import { _t } from "@web/core/l10n/translation";
import { useState } from "@odoo/owl";
import { useService } from "@web/core/utils/hooks";
import { Numpad } from "@point_of_sale/app/generic_components/numpad/numpad";
export class CalculatorPopup extends AbstractAwaitablePopup {
    static template = "CustomPopup";
    static components = { Numpad };
    static defaultProps = {
        cancelText: _t("Close"),
        title: _t("Number Popup"),
        getInputBufferReminder: () => false,
    };
    setup() {
        super.setup();
        let startingBuffer = "";
        if (typeof this.props.startingValue === "number" &&
             this.props.startingValue > 0) {
            startingBuffer = this.props.startingValue
                .toFixed(this.props.nbrDecimal)
                .toString()
                .replace(".", this.decimalSeparator);
        }
        this.state = useState({
            buffer: startingBuffer,
        });
        this.numberBuffer = useService("number_buffer");
        this.numberBuffer.use({
            triggerAtEnter: () => this.confirm(),
            triggerAtEscape: () => this.cancel(),
            state: this.state,
        });
    }
    getNumpadButtonsPOS() {
        return [
            { value: "1" , class:"input-btn"},
            { value: "2" , class:"input-btn"},
            { value: "3" , class:"input-btn"},
            { value: "4" , class:"input-btn"},
            { value: "5" , class:"input-btn"},
            { value: "6" , class:"input-btn"},
            { value: "7" , class:"input-btn"},
            { value: "8" , class:"input-btn"},
            { value: "9" , class:"input-btn"},
            { value: "0" , class:"input-btn"},
            { value: "Delete", text:"AC",
                      class:"operator-btn"},
            { text:"+" , class:"operator-btn"},
            { text: "-", class:"operator-btn"},
            { value:
              this.env.services.localization.decimalPoint,
                    class:"operator-btn"},
        ];
    }
}
We passed the numbers and other values through the function getNumpadButtonsPOS(). And this code will return a number popup like this.
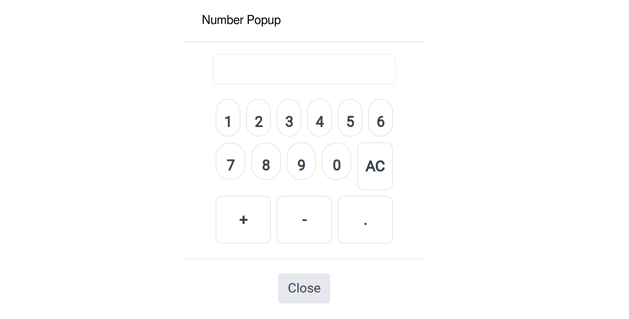
Using Odoo's Web Library (OWL), the creation of a custom number popup in Odoo 17 is achieved by creating a JavaScript and XML file. By employing the getNumpadButtonsPOS() function, this code facilitates the generation of a numeric interface for seamless integration into the Odoo Web Client.