An online forum is a place where individuals can talk online. It varies from a chat room in that it allows conversations to take place over time rather than back and forth in rapid succession of messages. Members of online forums can submit questions or conversation starters and respond to each other in forums that are often divided into a number of topics. Often, forum posts are lengthier than those on social networking platforms or in chat rooms due to the ability to publish both text and audiovisual information. Online forums allow for more effective interaction and more involvement, making online collaborations easier and more effective.
The Odoo 16 eLearning module enables users to create and maintain forums and publish them online, increasing website engagement and creating a community of clients, consumers, and readers. Through the Forum feature included in the Website Module, students enrolled in e-learning courses can discuss topics of interest and talk with their tutors.
Now we can discuss a detailed overview of the “Forums” available in the Odoo 16 website module, which includes establishing new forums, managing them, and configuring various components of the forums.
Go to the Website Module from the Odoo 16 Enterprise edition platform.
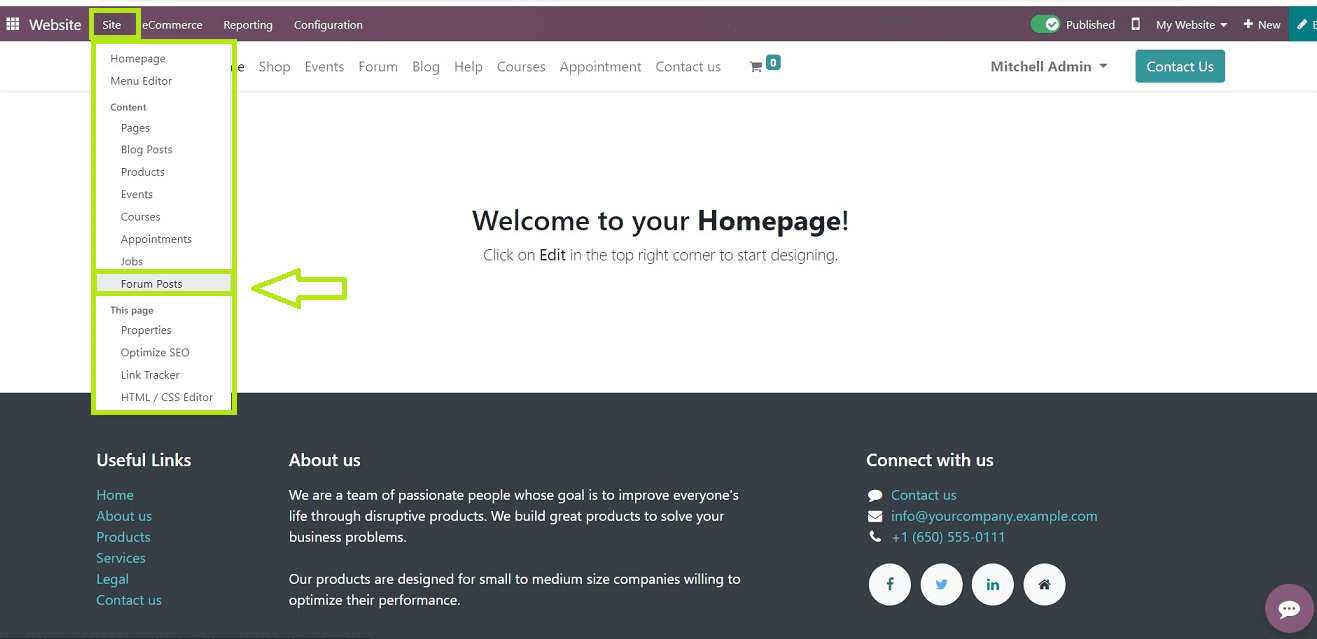
You can see the “Website” platform homepage as a demonstration website with a menu and menu items such as “Site,” “E-commerce,” “Reporting,” and “Configuration.” you can see the previously created forums by selecting "Forum Posts" under the "Site" menu.
You can see the “Forum Posts’ sections homepage dashboard view arranged in a list based on forum Title, Website URL, Forum Type, Status, SEO Optimized, and Website name, as shown in the screenshot below.
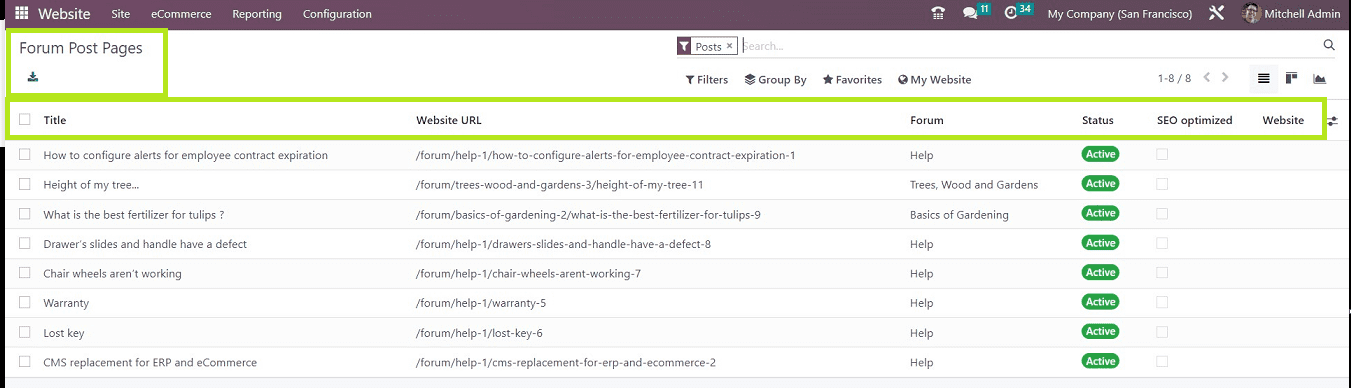
The "Filter," "Group By," and "Favourites" choices allow you to sort the forum pages according to a variety of categories. The "Website" option allows you to arrange the forum posts according to certain websites.
Configuration and Creation of Forums
Odoo provides an exclusive configuration section for creating and maintaining forums inside the Website Module. You can employ these features from the “Forum” section provided in the “Configuration” menu dropdown section illustrated in the screenshot below.
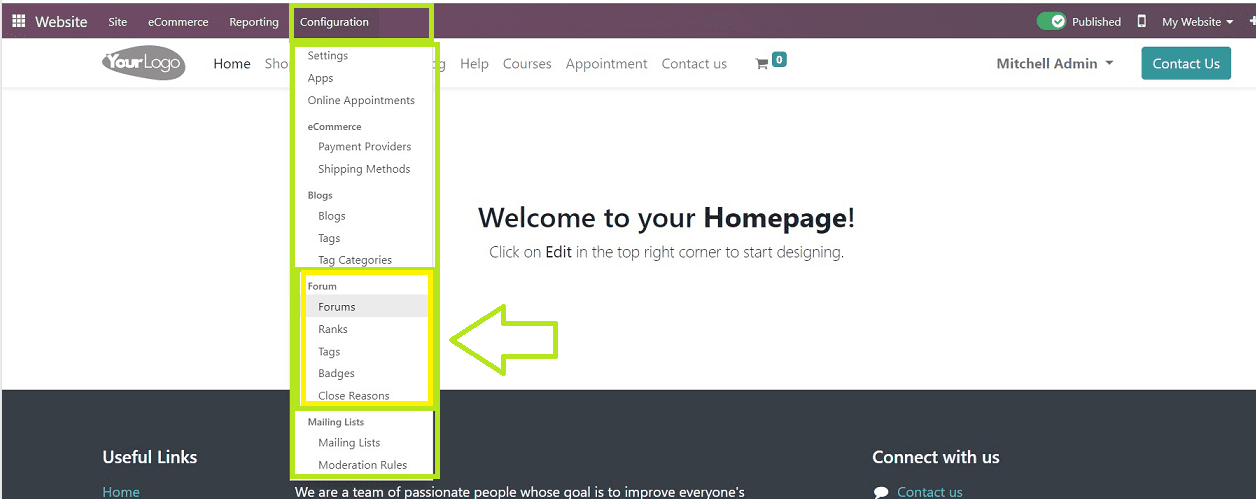
Users can configure their forum-related components using this section which includes “Forums,” “Ranks,” “Tags,” “Badges,” and “Close reasons.” So, let's dive into the Forums Configuration section.
Forums
This section helps us to create a new forum. The menu item's click will launch the homepage of the “Forums” menu, where we can see the list view of pre-configured forums, as you can see from the screenshot below.
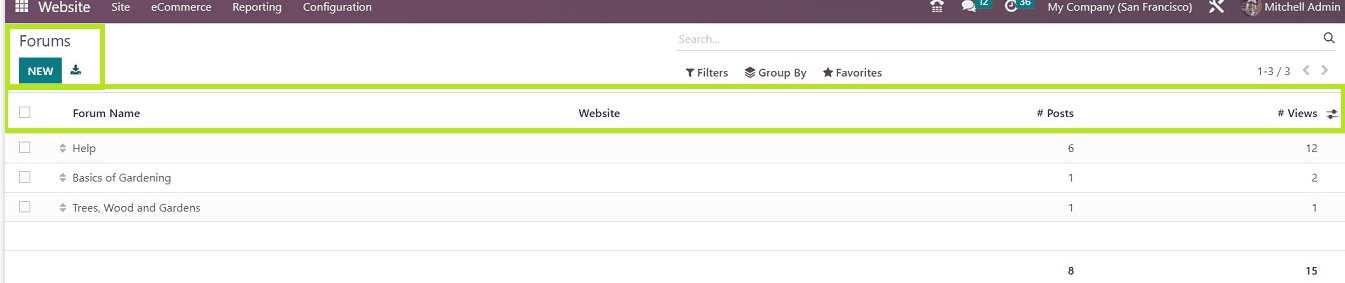
You can see the “Forum Names,” ‘Websites,” “Posts,” and the number of “Views” from the Forums dashboard view.
Click on the “NEW” button to create a new forum post. You can customize the Forum details in the configuration form.
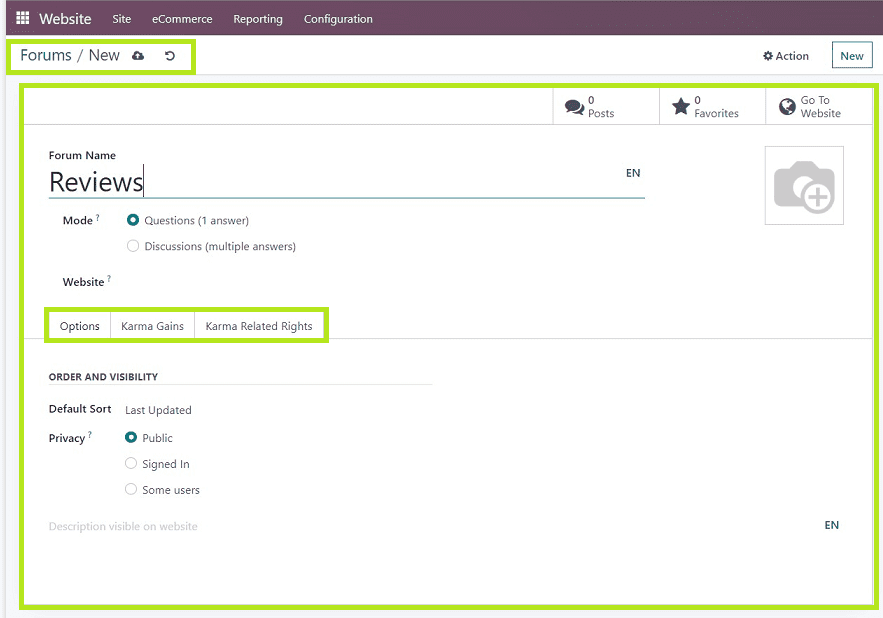
As the first step, you can give the appropriate name for the required forum in the “Forum Name” field and mention the mode of the forum by selecting the options from the “Mode” section. You can select the type of forum section, like Questions or Discussion. if you have multiple websites, then mention the required one in the “Website” area.
As you can see from the screenshot, this form contains three tab sections such as “Options,” “ Karma Gains,” and “ Karma Related Rights.”
Options Tab
Configure the “Default Sort” method and the “Privacy” of the Forum under the “ORDER AND VISIBILITY” tab section available in the “Options” tab. Choose the "Default Sort" option from the dropdown list fixated under the respective field. Such as Newest, Last Updated, Most Voted, Answered, etc. There are three privacy options for the website: "Public," "Signed In," and "Some Users." As seen in the screenshot below, you may alter any text that has displayed on the website in the text box provided.
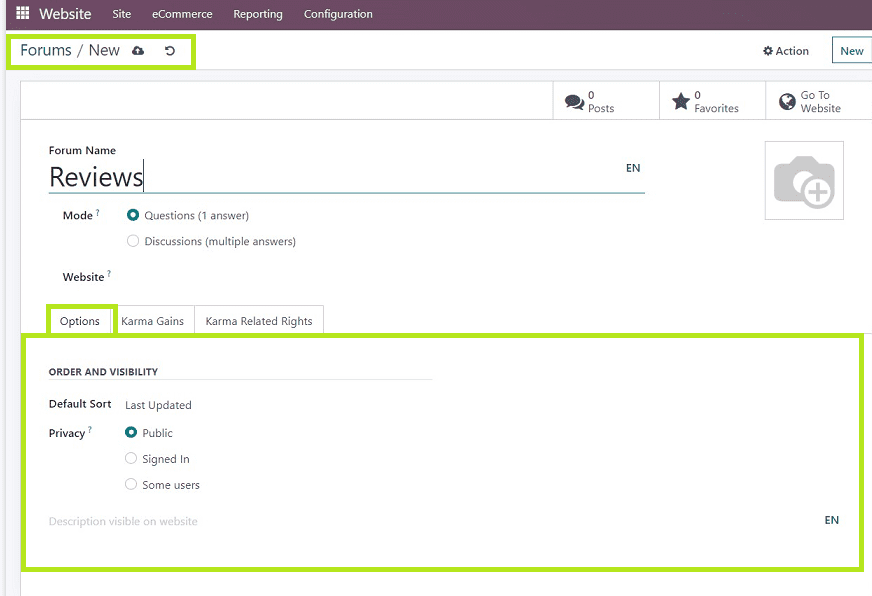
Users can change the description language to other languages by clicking on the “EN” button provided near certain fields. After editing the details, save them using the “Save” icon.
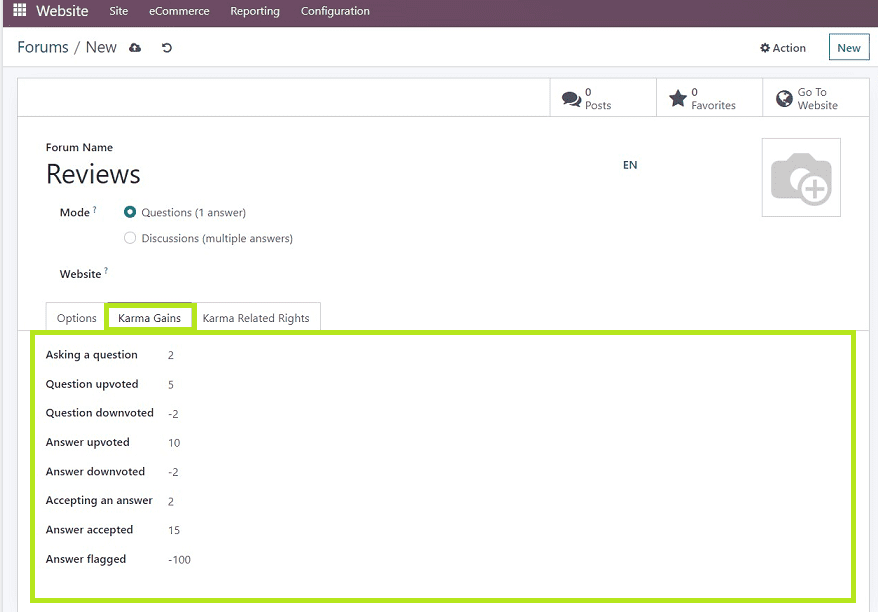
Karma gains Tab
Karma points are incentives that can be earned in the eLearning part of Odoo if an applicant or employee successfully completes their course. They can be earned by customizing data fields, posting comments, asking questions, and voting on content.
The Karma Gains tab lists the points that forum users can gather by engaging in the different actions indicated under the subject, such as asking questions, upvoting questions, downvoting questions, accepting answers, etc.
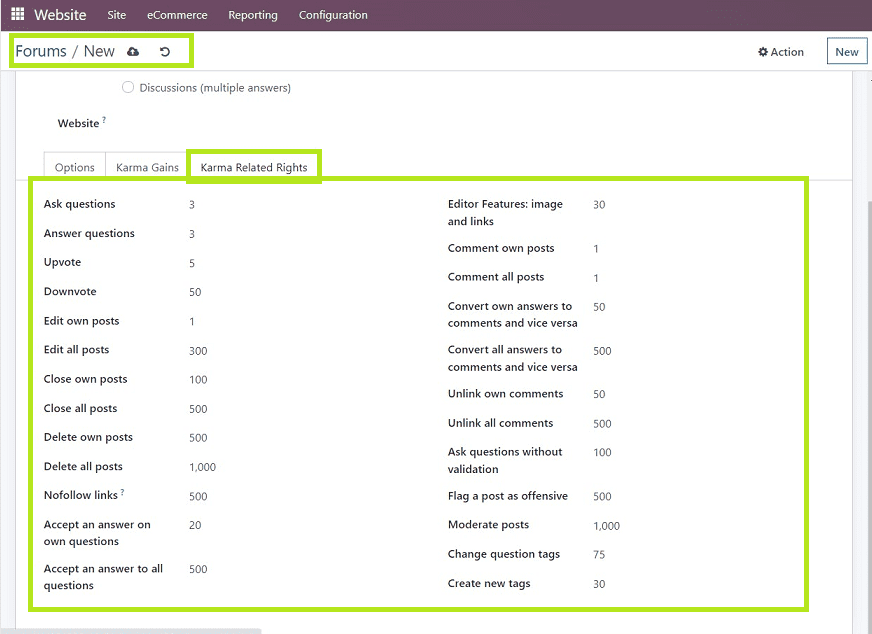
Karma Related Rights Tab
The number of points required for a participant to complete forum-mandated actions, such as "Ask Questions," "Posting," "Answering," "Editing their Own Posts," "Closing Their Own Posts," "Deleting Their Own Posts," "Comment Own Posts," "Comment All Posts," etc., will be displayed in the Karma-Related Rights tab, which is labeled in the screenshot below.
After editing is finished, save the data you've edited. Our current forum page is now available for use; to access the forum preview on the website, use the "Go To Website" button in the Smart Buttons area.
You may access the forum website by clicking the "Go To Website" button, as seen below.
To add new Posts, Queries, Doubts, etc., click the "NEW POST" button. Following that, you may modify your posts in the page's editing section, as seen in the picture below.

By selecting the "Go to Website" button, you can reach the forum's website, as seen below.
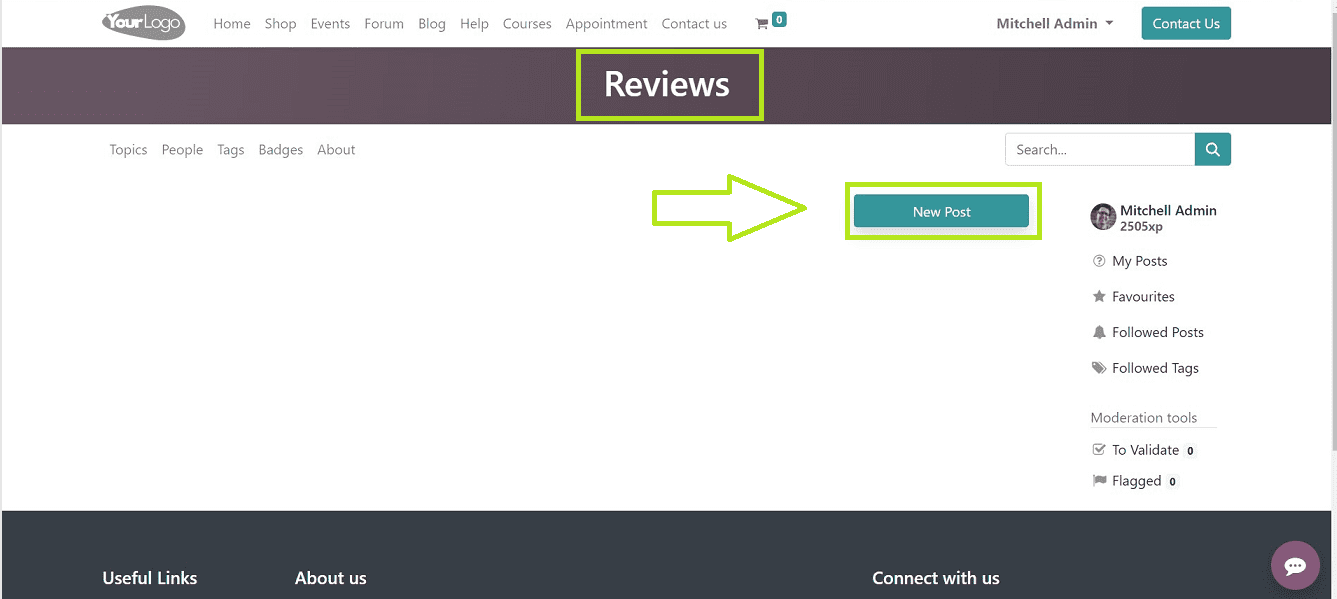
Users can use the "NEW POST" button to create new Posts, Queries, Doubts, etc. After that, you can edit your posts in the editing area that appears on the page, as illustrated in the screenshot below.
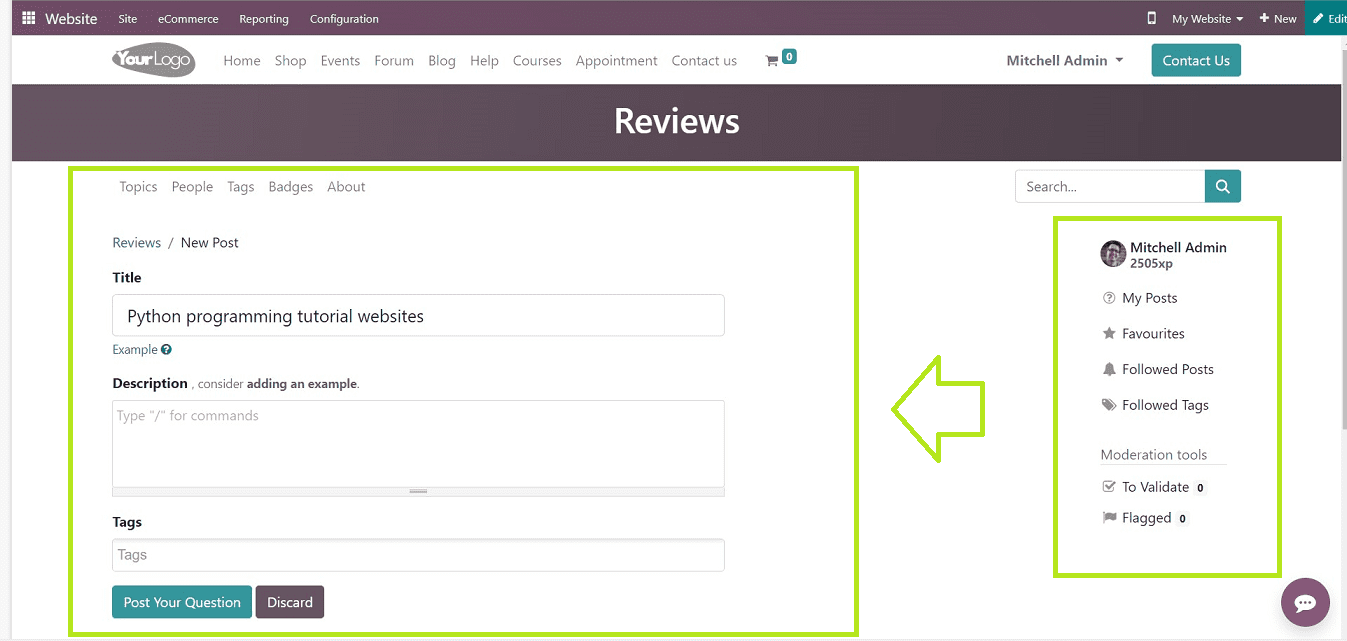
It's now possible to change the Title and Description of your post in the respective fields and also add tags related to the post. Once completed, post your question or doubt using the “Post Your Question” button. Your personal forum is shown on the page's right side. With data like the details of your posts from My Posts, Favorites, Followed Posts, Followed Tags, etc.
Ranks
Ranks can be assigned to forum users based on their Karma points, which can be created and managed from the “Configuration” menu using the “Ranks” menu platform.
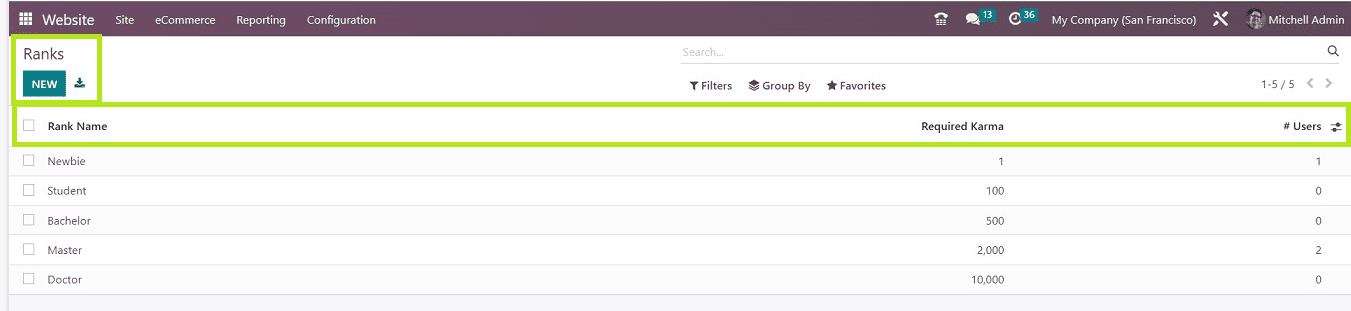
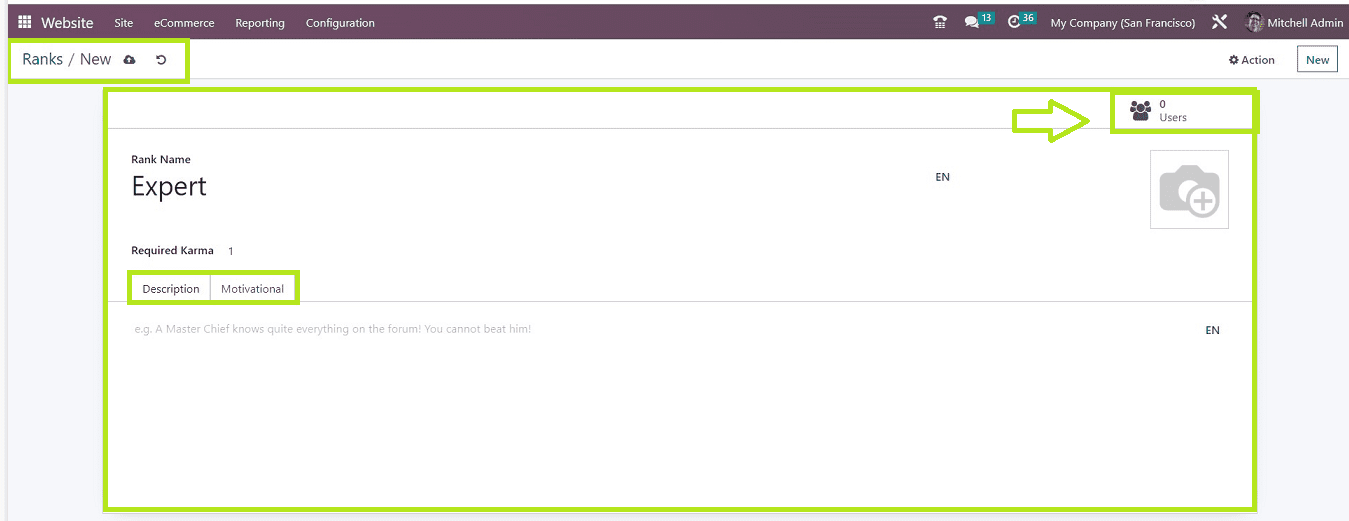
On the Ranks homepage, you can see the list view of all available ranks arranged in a list view based on “Rank Names,” “Required Karma,” and “number of “Users.” You can use the “NEW” button to create a different Rank.
You can fill up the fields for "Rank Name" and "Required Karma" in the Rights Configuration form, respectively, and also you can include any notes in the “Descriptions” tab and add motivational phrases in the “Motivational” tab regarding the Rank or karma points. Click the “Save” icon after editing. You can see the number of users who earned this particular rank from the “Users” smart button, as illustrated below.
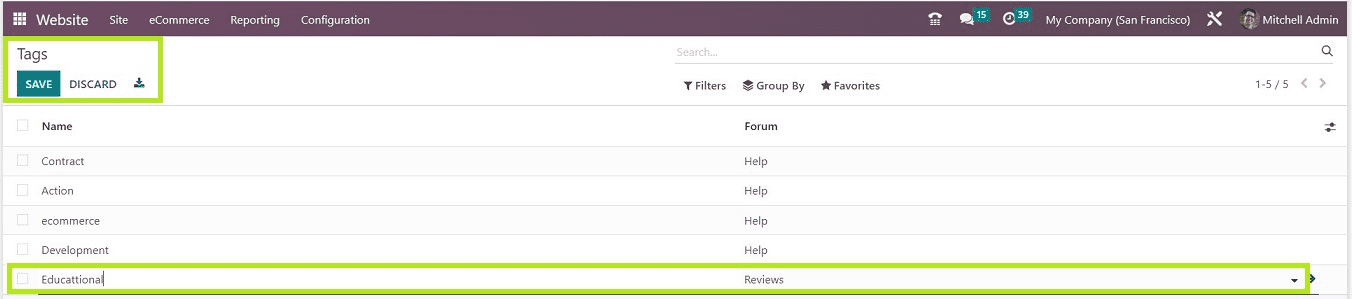
Tags
Creating tags to categorize forum posts is quite a simple task. Access the “Tags” section from the “Configuration” Menu.
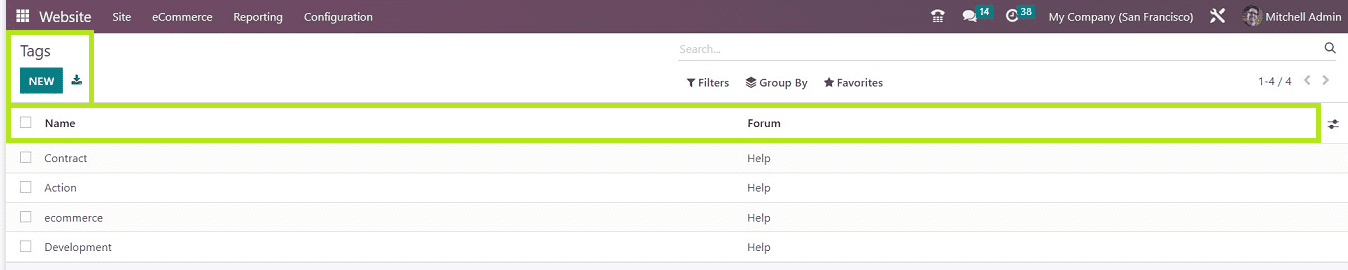
When you click the "NEW" button, a new text box will appear on the tags list where you can input the new tag name and the associated forum name. Multiple tags can be created using the same procedure. After you've finished adding the tags, save them by simply selecting "SAVE" from the menu in the top left corner of the display screen.
Badges
In forums, badges are a mark of appreciation or acknowledgment for completing a certain activity or competition. Select “Badges'' from the “Configuration’ menu to create or manage Badges. You can see the “Badges' ' homepage arranged as a Kanban Card dashboard view. In the Kanban Card, we can see the name of each badge, the total number of awarded Badges, and a description of the Badge Condition. Each Kanban Card has a "GRANT" button that allows admin users to award a badge to an eligible employee.
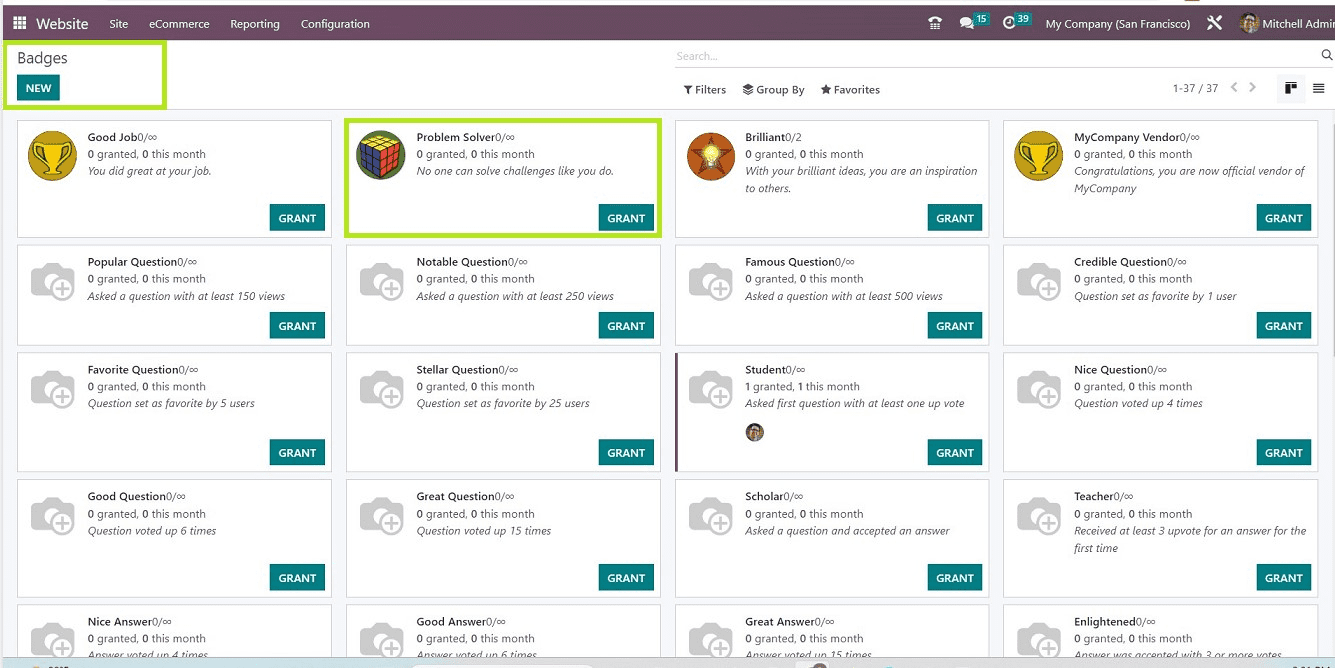
Use the “NEW” button to configure new badges. The Badge Configuration form has three areas: "GRANTING," "REWARDS FOR CHALLENGES," and "STATISTICS." In the "Badge" field, enter a suitable name for the new badge and include a brief explanation.
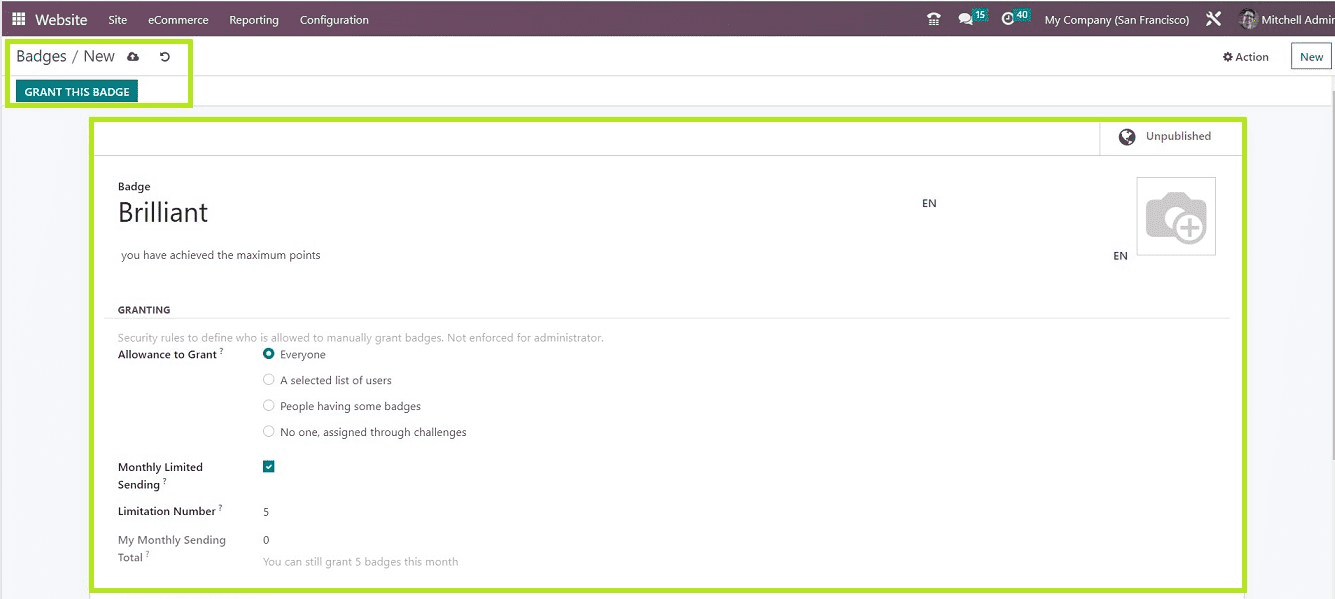
GRANTING Tab
In the “Allowance to Grant” field, you can mention who can manually distribute badges to the forum or website users. The "Monthly Limited Sending" and "Limitation Number" settings allow you to set monthly limits on how many badges you can send to a single user and see the current month's total badge count in the "My Monthly Sending Total" section.
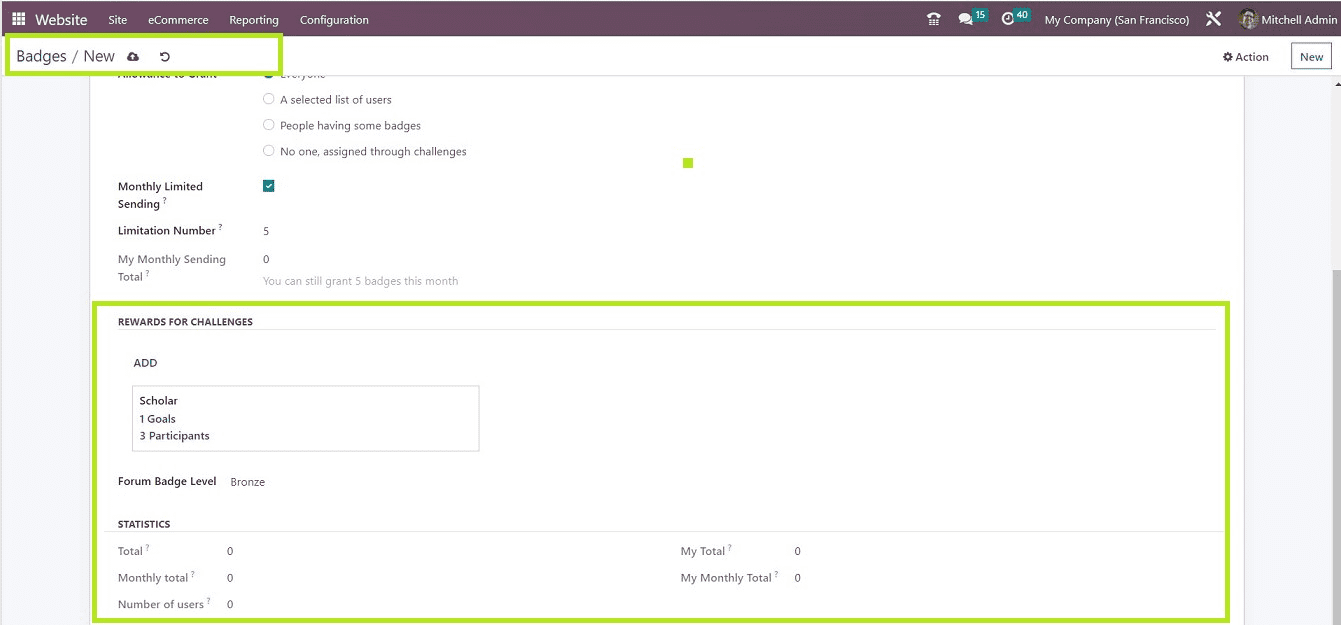
REWARDS FOR CHALLENGES Tab
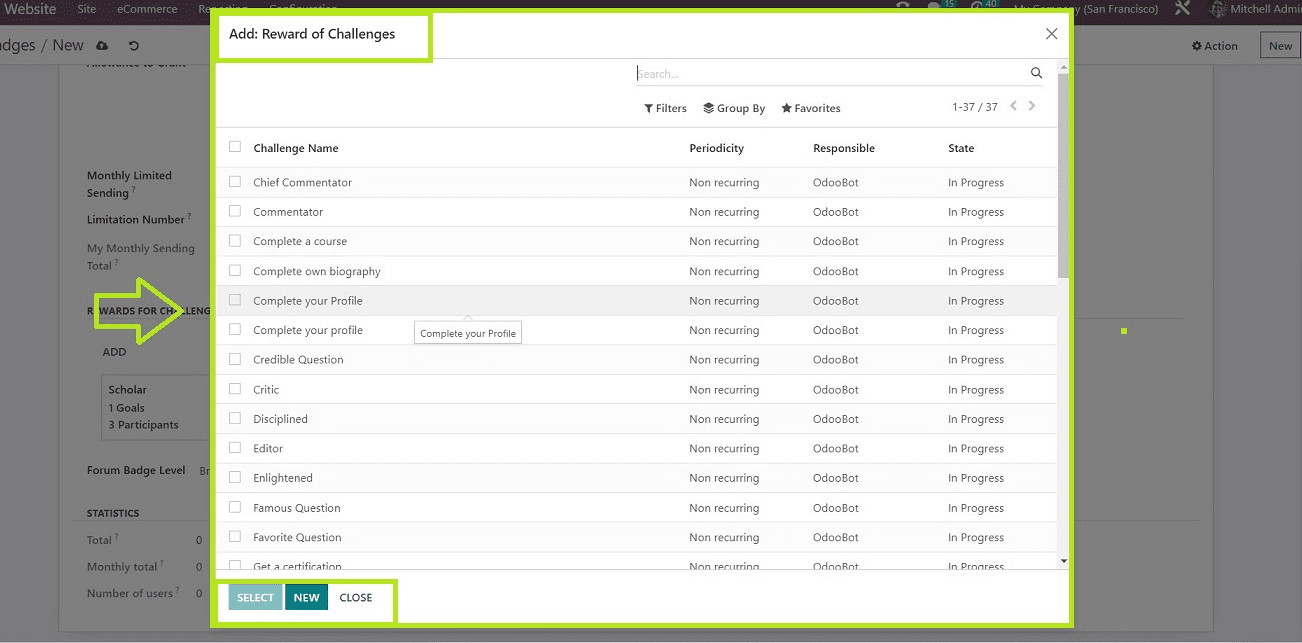
Clicking the "ADD" button in the "REWARDS FOR CHALLENGES" section will open a pop-up window list to add additional rewards or challenge requirements. Select an appropriate task from the pop-up list and click on the “SELECT” button of the “Reward of Challenges” Badge configuration form will retain the Challenge you've selected.
You can also select the “Forum Badge Level” from the drop-down section.
STATISTICS Tab
This tab contains the statistical data of the "Total" number of times this badge has been granted, the "Monthly Total," the "Number of users," "My Totals," and "My Monthly Total.”After editing the required fields, save the badge data using the “Save” icon.
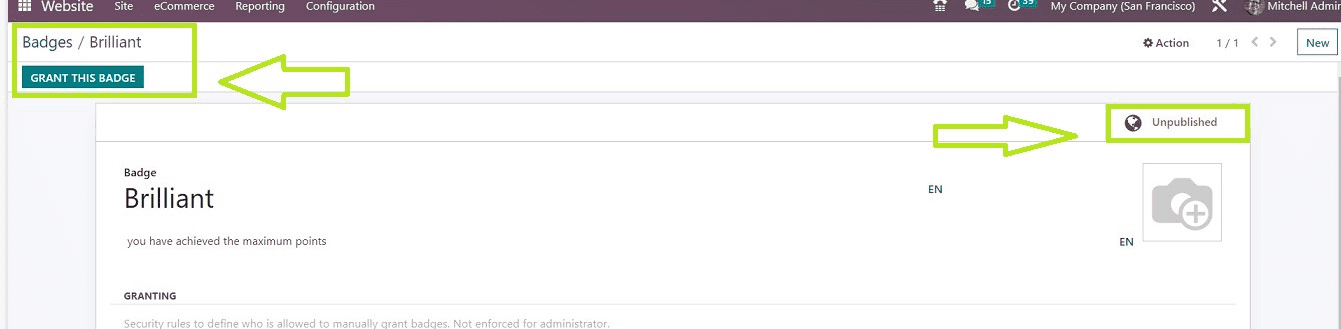
You can publish the badge using the “Publish & Unpublish” smart button and grant the badge to a particular user using the “GRANT THE BADGE” button, as depicted in the above screenshot.
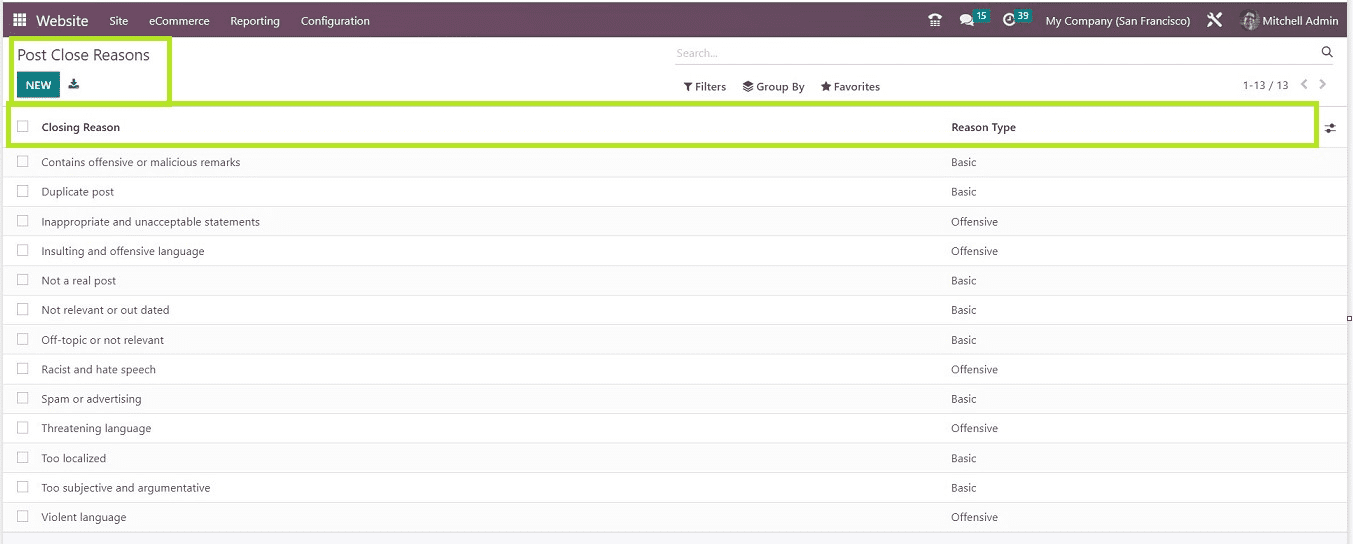
Close Reasons
With the help of the “Close Reasons” feature located under the “Configuration menu,” you can specify the reasons for closing certain posts from forums published on your website. From the homepage, you can discover a list of all the pre-created Close reasons sorted in a list format on the basis of "Close Reasons" and "Reason Type."
Clicking on the “NEW” button will help you to add a new Close reason by opening a new data field, as shown in the screenshot below.
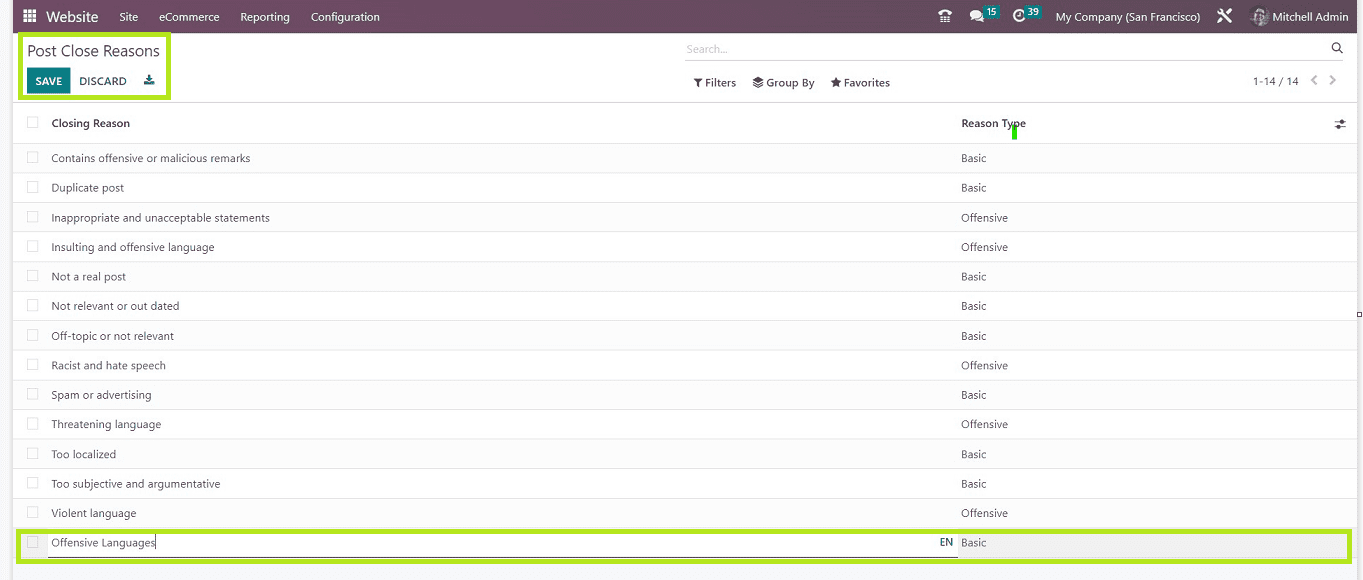
By utilizing the "SAVE" button in the page's top left corner, you're allowed to input the "Close Reason" and "Reason Type" in the mentioned fields and save your changes.
We have reviewed the functionality, features, configuration, and management processes of the Odoo 16 Website module's "Forums" function. Odoo users can utilize this simple but powerful platform to manage their website forum pages successfully.
To read more about the importance of creating eLearning forums in the Odoo 15 eLearning Module, refer to our blog How to Create an eLearning Forums in the Odoo 15 eLearning Module