Odoo 15 is more advanced and has more features to edit the website from the UI itself from the drag and drop(snippets) feature. There we can see many options to build a website or customize the website from the UI itself with the help of the Odoo Website Builder. To know more about creating or customizing a website from UI itself, please visit our blog Odoo 14 Website Builder.
In this blog, we will discuss how to customize the website template from the backend or through code.
We can do this by inheriting the website template or by overriding the template.
To know more about these two, you can click How to Customize Odoo 14 Website Templates.
So here, I will take the portal user details from View and add a field to the form View by inheriting the template.
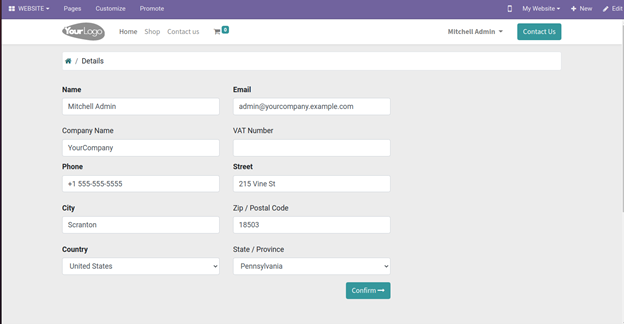
On this Form, I will add a new field and save the value to the customer form[res.partner form view].
<template id="portal_my_details_inherit" inherit_id="portal.portal_my_details" name="User Deatails Inherit">
<xpath expr="//label[@for='email']/parent::div" position="after">
<div t-attf-class="form-group #{error.get('alternative_email') and 'o_has_error' or ''} col-xl-6">
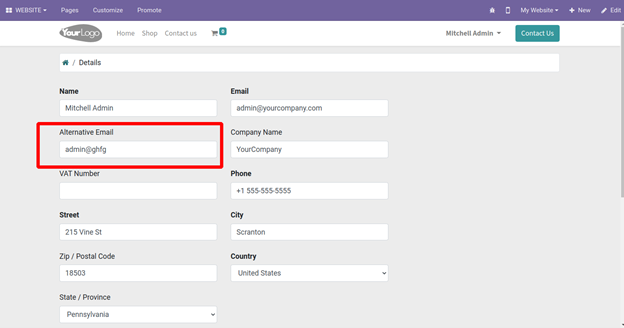
<label class="col-form-label label-optional" for="alternative_email">Alternative Email</label>
<input type="email" name="alternative_email" t-attf-class="form-control #{error.get('alternative_email') and 'is-invalid' or ''}" t-att-value="alternative_email or partner.alternative_email" />
</div>
</xpath>
</template>
The template ID for this form is portal_my_details and is in the portal module. So I am inheriting the template and adding the new field after the email field. The inherit id attributes help in inheriting the original template from the portal, and XPath will help position the new field. The XPath expression has parent::div at the end; this will find the parent div of the field, which helps add the new field after the email field. The new field I will add is an alternative email, so after positioning the XPath, add the area and its label.
On clicking the confirm button in the form, we need to save the details to the res.partner model. Currently, it will keep all the values except the alternative email. To do that first, I am going to inherit res.partner and add the field.
class ResPartner(models.Model):
   _inherit = "res.partner"
   alternative_email = fields.Char("Email")
So, here I am adding a field for alternative emails. The confirm button or the portal form has an action /my/account defined, which on clicking the button will call a controller function.
from odoo.http import content_disposition, Controller, request, route
from odoo.addons.portal.controllers.portal import CustomerPortal
from odoo import http, _

class CustomerPortalInherit(CustomerPortal):
   MANDATORY_BILLING_FIELDS = ["name", "phone", "email", "street", "city", "country_id"]
   OPTIONAL_BILLING_FIELDS = ["zipcode", "state_id", "vat", "company_name", "alternative_email"]
   @route(['/my/account'], type='http', auth='user', website=True)
   def account(self, redirect=None, **post):
       print("xdcjsknfk ", post)
       values = self._prepare_portal_layout_values()
       print(" nn j", values)
       partner = request.env.user.partner_id
       values.update({
           'error': {},
           'error_message': [],
       })
       if post and request.httprequest.method == 'POST':
           error, error_message = self.details_form_validate(post)
           values.update({'error': error, 'error_message': error_message})
           values.update(post)
           print("Xcn...... ii a", values)
           if not error:
               values = {key: post[key] for key in self.MANDATORY_BILLING_FIELDS}
               values.update({key: post[key] for key in self.OPTIONAL_BILLING_FIELDS if key in post})
               for field in set(['country_id', 'state_id']) & set(values.keys()):
                   try:
                       values[field] = int(values[field])
                   except:
                       values[field] = False
               values.update({'zip': values.pop('zipcode', '')})
               partner.sudo().write(values)
               if redirect:
                   return request.redirect(redirect)
               return request.redirect('/my/home')
       countries = request.env['res.country'].sudo().search([])
       states = request.env['res.country.state'].sudo().search([])
       values.update({
           'partner': partner,
           'countries': countries,
           'states': states,
           'has_check_vat': hasattr(request.env['res.partner'], 'check_vat'),
           'redirect': redirect,
           'page_name': 'my_details',
       })
       response = request.render("portal.portal_my_details", values)
       response.headers['X-Frame-Options'] = 'DENY'
       return response
Here I am importing the CustomerPortal
Class from the portal module, we have to define the mandatory and optional fields.
MANDATORY_BILLING_FIELDS = ["name", "phone", "email", "street", "city", "country_id"]
   OPTIONAL_BILLING_FIELDS = ["zipcode", "state_id", "vat", "company_name", "alternative_email"]
If not, the form will show an error for an unknown field.
Actually, we don't need to do anything much with this controller because the newly added field in the form and res.partner have the same name, and the controller, post, and values variable have the area and its values, which will write directly into the res.partner model.
We can give the email widget in the XML view defined for the res.partner form for the form validation.
<record id="trader_inherit_form" model="ir.ui.view">
       <field name="name">website.partner</field>
       <field name="model">res.partner</field>
       <field name="inherit_id" ref="base.view_partner_form"/>
       <field name="arch" type="xml">
           <field name="email" position="after">
               <field name="alternative_email" widget="email"/>
           </field>
       </field>
   </record>
But this widget alone will not do the proper form validation.The CustomerPortal class has another function[details_form_validate()] which does the validation for fields.Hence, adding a line for validating the new field will help to properly validate the field.