Customization is required in every business stream as in this advanced techy world. As in the automobile industry or the electronic industry, people buy items and customize them as per their needs and use them. People in this world buy items by identifying their features and whether they can customize them with the upcoming upgrades. Hence, the business magnets need to develop their business planning and perceptions of this type. As in this competitive world, to stand peculiar, the vendor needs to put forward new business scenarios with customization products that target more productivity and scale up your business, among others. While implementing new business strategies, you need to be well skilled to know the customers' multiple needs and work or organize your business accordingly. To work your industry as per the customization, if a dedicated tool is implemented to manage your business operations, the task is done with more simplicity. It can be placed without any coded platform.
The people in this 21st century are thinking and placing more advanced solutions that may impact their life skills. Why do they select a dish with a customized option of ingredients? For example, if you buy a sandwich, you can choose the inner fillings, which makes them prioritize their wish. As in a business, if you need to apply the functionalities and create a business management software as per your desire, what all possibilities are available to let us consider the facts that can apply? The Odoo Enterprise and Resource Planning software come with its Odoo 15 Studio application.
With the Odoo 15 Studio app, you can use this application by simple drag and drop steps if you are unaware of programming and coding. It is just developed by Odoo developers considering that people who lack programming knowledge can imply their functions easily and manage their business operations dexterously.
This blog emphasizes insight into dealing with customizing your business applications with Odoo ERP in Odoo 15 Studio application very easily and dexterously.
Now let us discuss more in detail about Odoo Studio and how significantly you can use the Odoo 15 Studio in your business.
Why Is Odoo Studio Used in Your Business?
a) Built your data model without programming or the use of any complex code.
While using Odoo Studio in your business, you need not stick to developers or any programming individual to develop your data model. You can easily configure your data model and build your business operations as per your desire. You need not type the codes manually to construct your data model. And also, you can create your data model with an easy-to-use web interface without the use of any complex code.
b) Without XML code, you can configure your webpage by customizing the views and modifying the lists, views, formats, etc.
While in Odoo Studio, with the web designing tool, you can create views, lists, and formats without using any XML code. With the editor tool in Odoo Studio, you can create a prototype, customize your views, and modify the lists, views, and formats as per your requirements.
c) Acquire the built-in option of XML editor and customize the views.
With the Odoo Studio, you can handle a built-in XML editor option that makes you flexible in customizing the views as per your requirements. While creating your customized application in Odoo, the built-in feature of the XML editor enables a database in Odoo. This built-in option makes you create the XML and view it as your fit.
d) Manages the automated action.
The Odoo Studio executes you with the help of Python in managing the automated actions.
e) Promotes exporting your custom applications.
You can export your custom applications in a zip file and export it into the existing Odoo, which has been installed. It enhances to install in Odoo from your network.
Now let us discuss how you can customize your business applications with Odoo in Odoo 15 Studio.
You need to install Odoo Studio from the Odoo Apps Store.
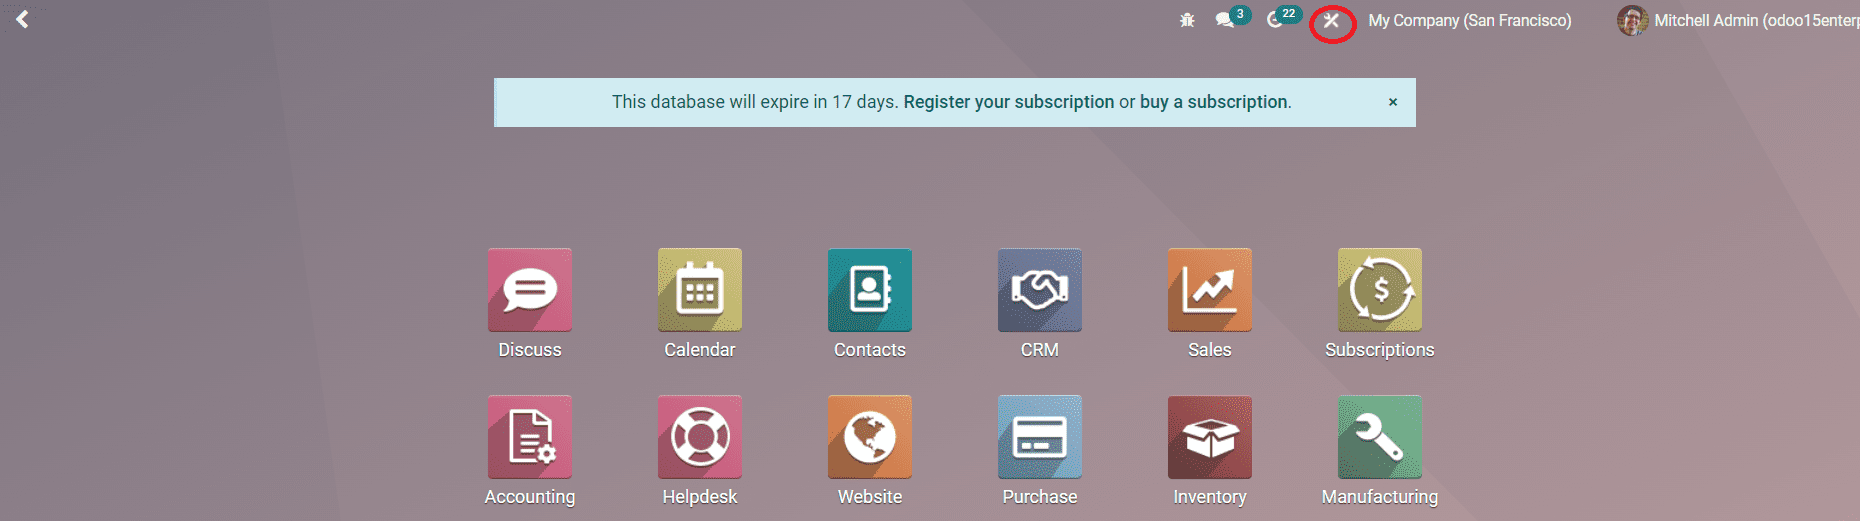
After installing, you get an icon representing the Toggle Studio at the top of the Odoo software from the main page, as seen below in the highlighted screenshot.
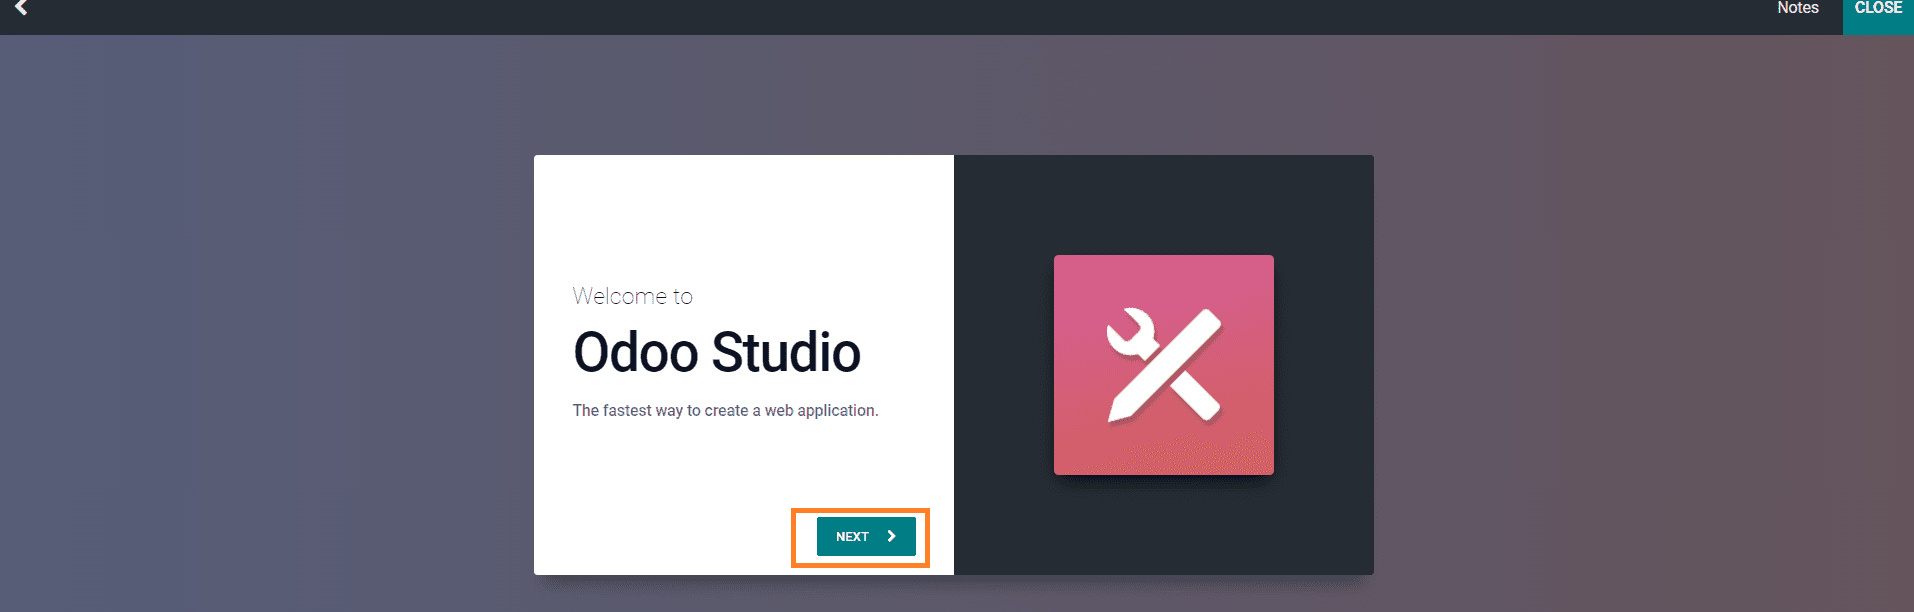
By moving to and clicking on the icon of the toggle studio, you will be redirected to a window, which makes you create new applications required for your business. The Odoo 15 Studio in enterprise edition can generate the applications in the customized form needed for your business.

And now, by clicking on the New App button, which is seen in the above screenshot, the highlighted one, you will get a small window where you can create the new application as your requirement.
Upon clicking on the Next button, you get a new small window, as seen in the below screenshot, where you need to add a name for the application, and you can add an image from the built-in images in the application or upload an image from your system to design your icon.
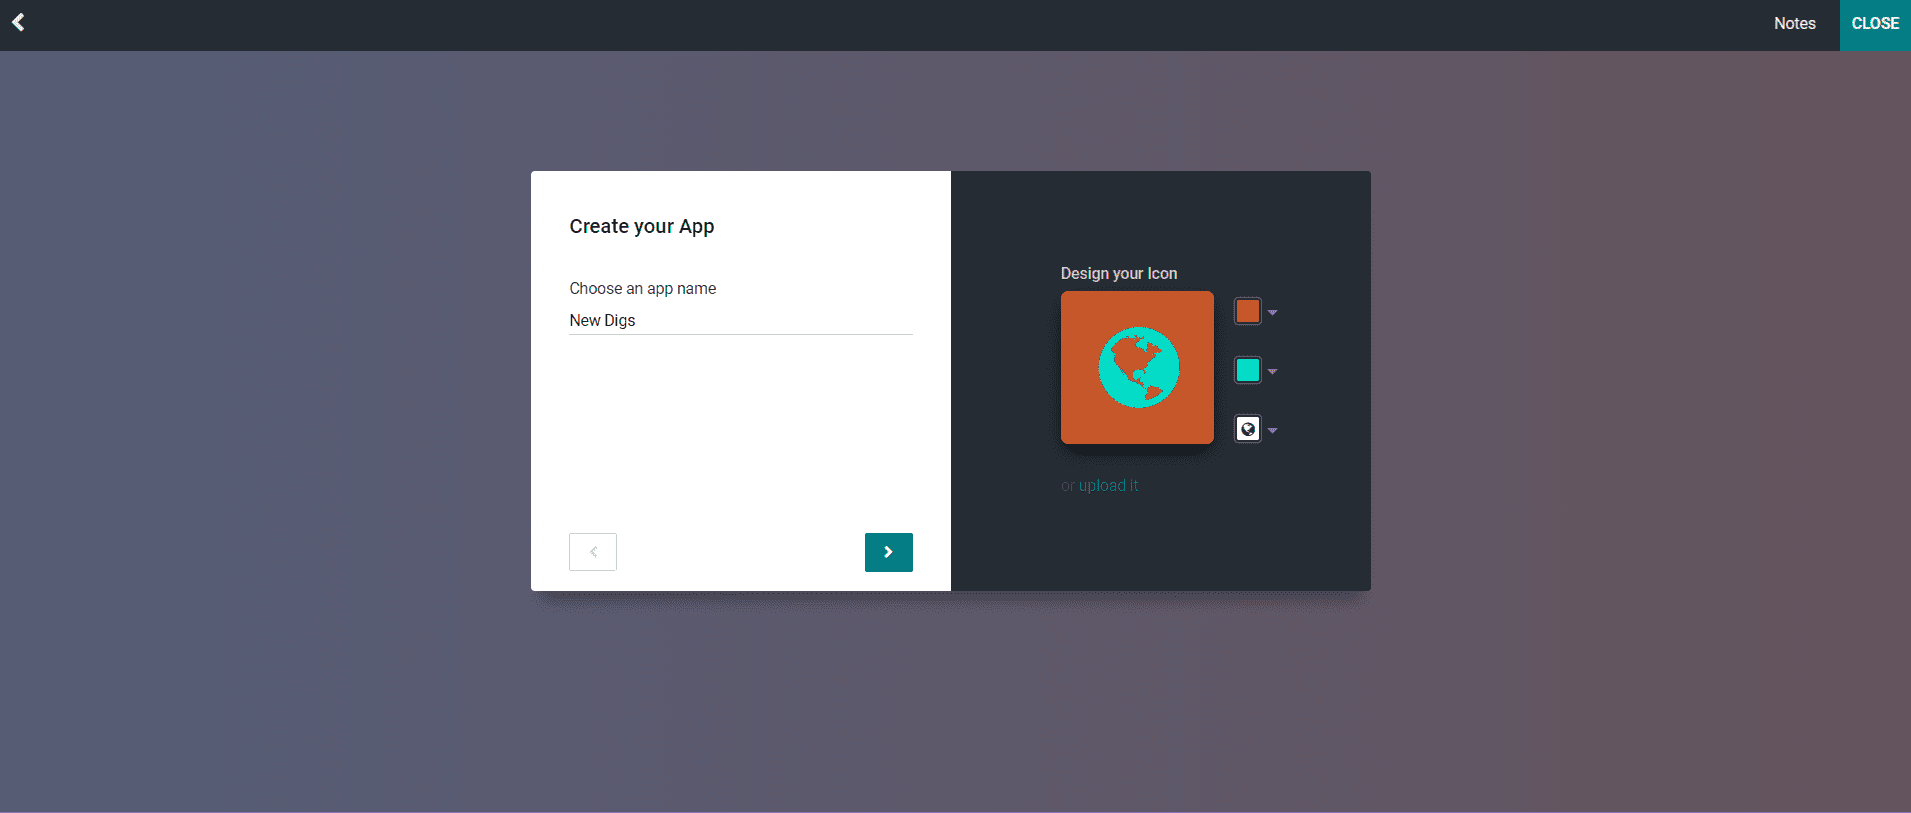
By entering your name of the application and inserting the icon as per your design, you can now click on the next arrow, where you get another window of the first menu.
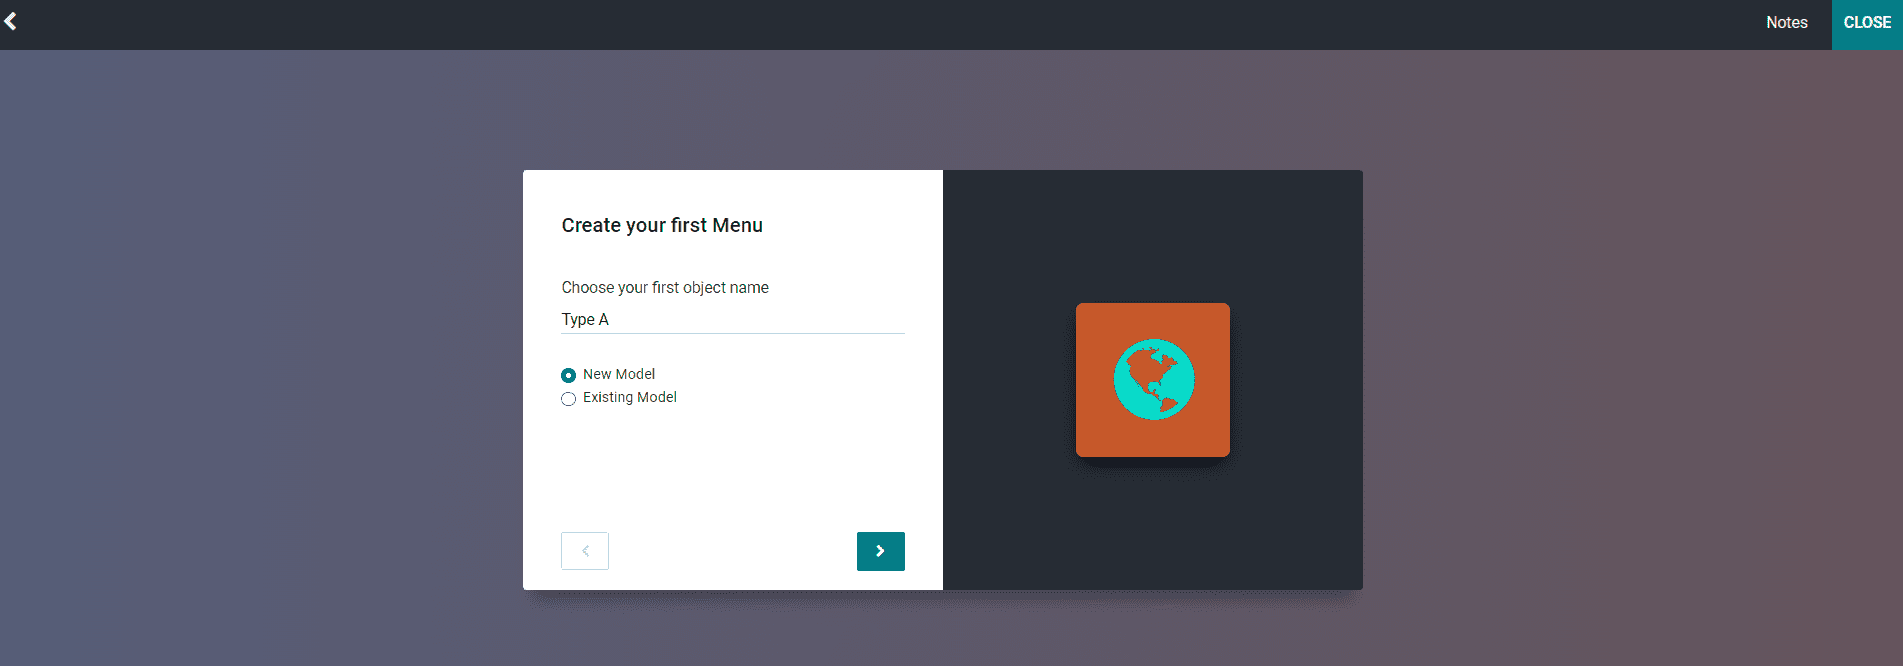
In the above screenshot, by giving the name of your object name if it is a new object, then click on the new model, and if it is from the existing model, you will get a drop menu where you can select it from the list of drop menu, and you can enter in the space provided.
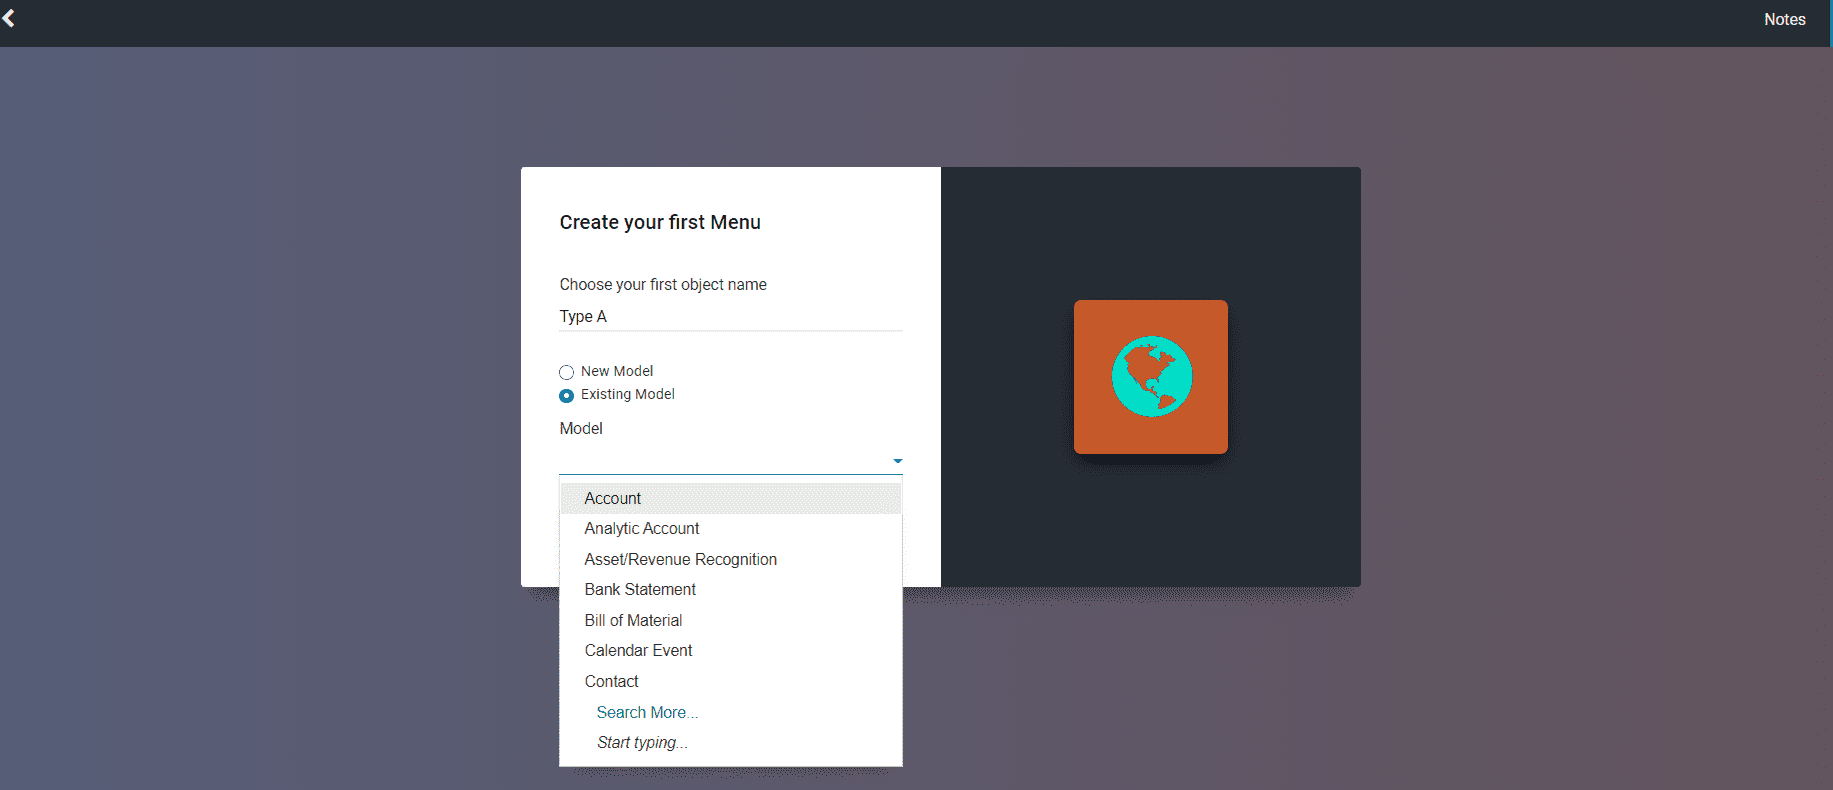
As seen in the above screenshot, you can click on the next arrow for the following menu by entering the model as per your requirement. By clicking on the new model, you get a box suggesting features that should include in the application. You need to enable each function that should involve, and later you get a window as with all the enabled features. But if you select the Existing Model, you get the features already built-in for the respective model you are choosing. Now let us see the difference between the New Model and the Existing Model.
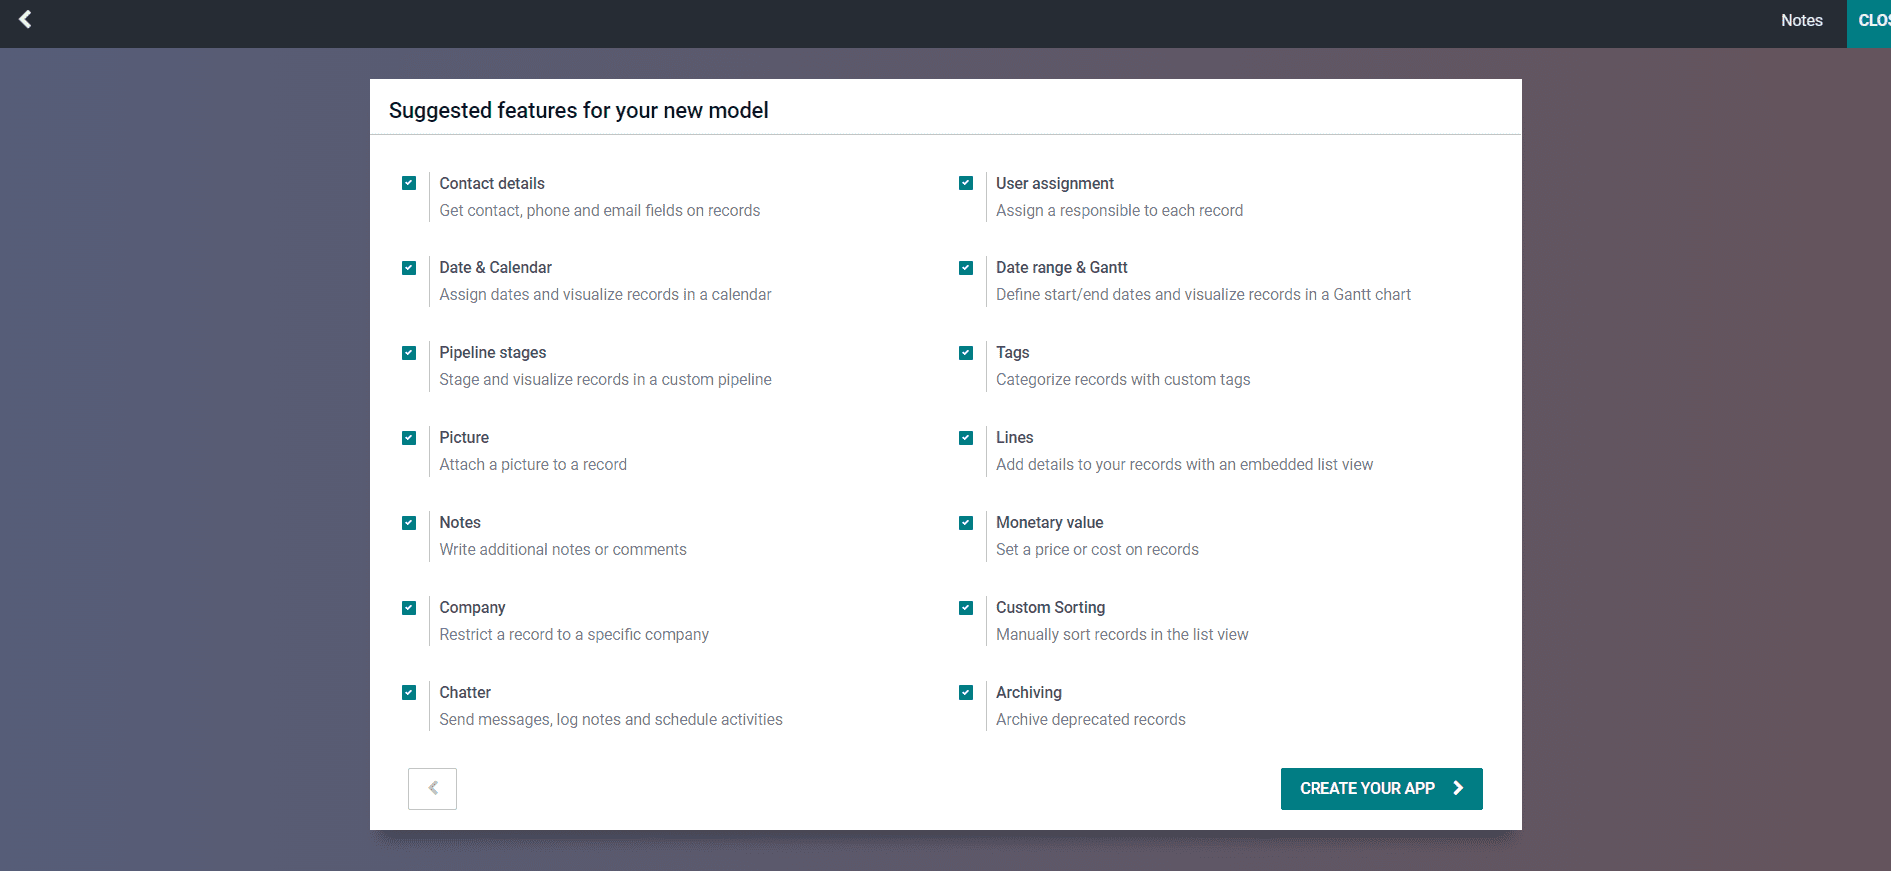
As seen in the above screenshot, you get the box of suggested features for your new model with functions; as you enable each function, it is marked in your application. Here you can enable the features as per the functions you require in the application for your business requirement. When selecting the suggested features in the New Model, which you need from the given box, you can move on by clicking on the CREATE YOUR APP button, as seen in the above image. You will be redirected to another window with the features as seen in the screenshot below by clicking on the button.
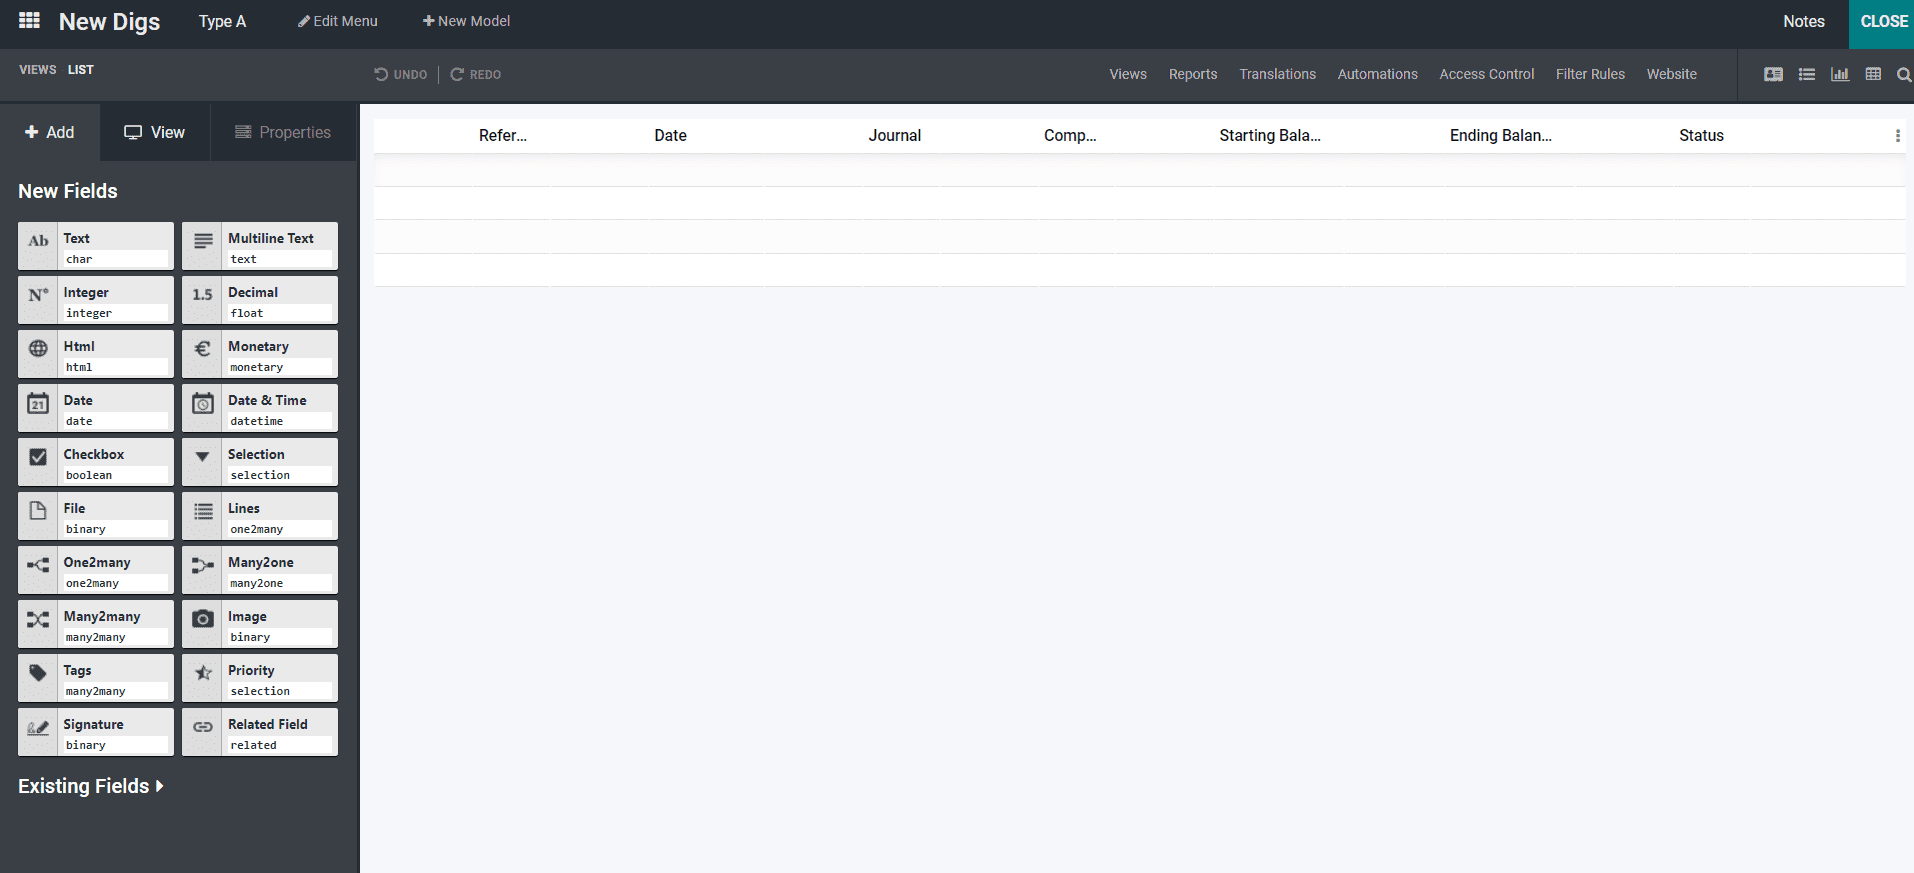
As seen in the above screenshot, you get configured window with the suggested features. You get the enabled features, and here you get a default view with a list view. By moving the VIEWS option, you get different views, and you can select it accordingly.
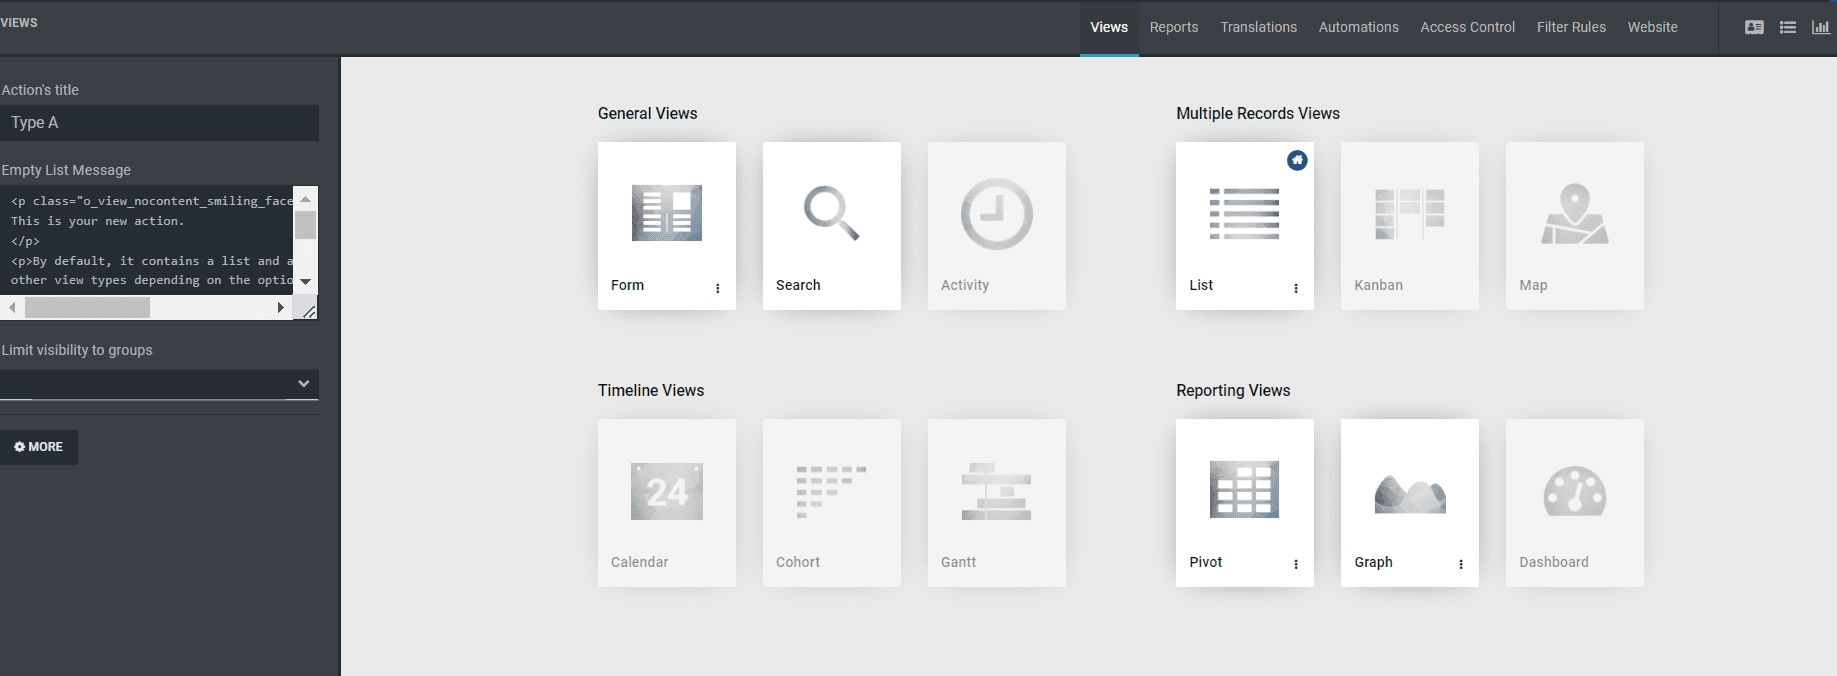
By seeing the above screenshot, you can categorise the views as General views, Multiple Records Views, Timeline Views and Reporting Views. You can activate the views required for your application by selecting the option you require from each category and activating it accordingly to get the specific view. For example, if you require the Form view under the General views category, then let us see the difference and how it is activated. Selecting the General views category allows you to get the views directly without activating any features. You are now depicted as seen in the screenshot below by clicking the Form View button.
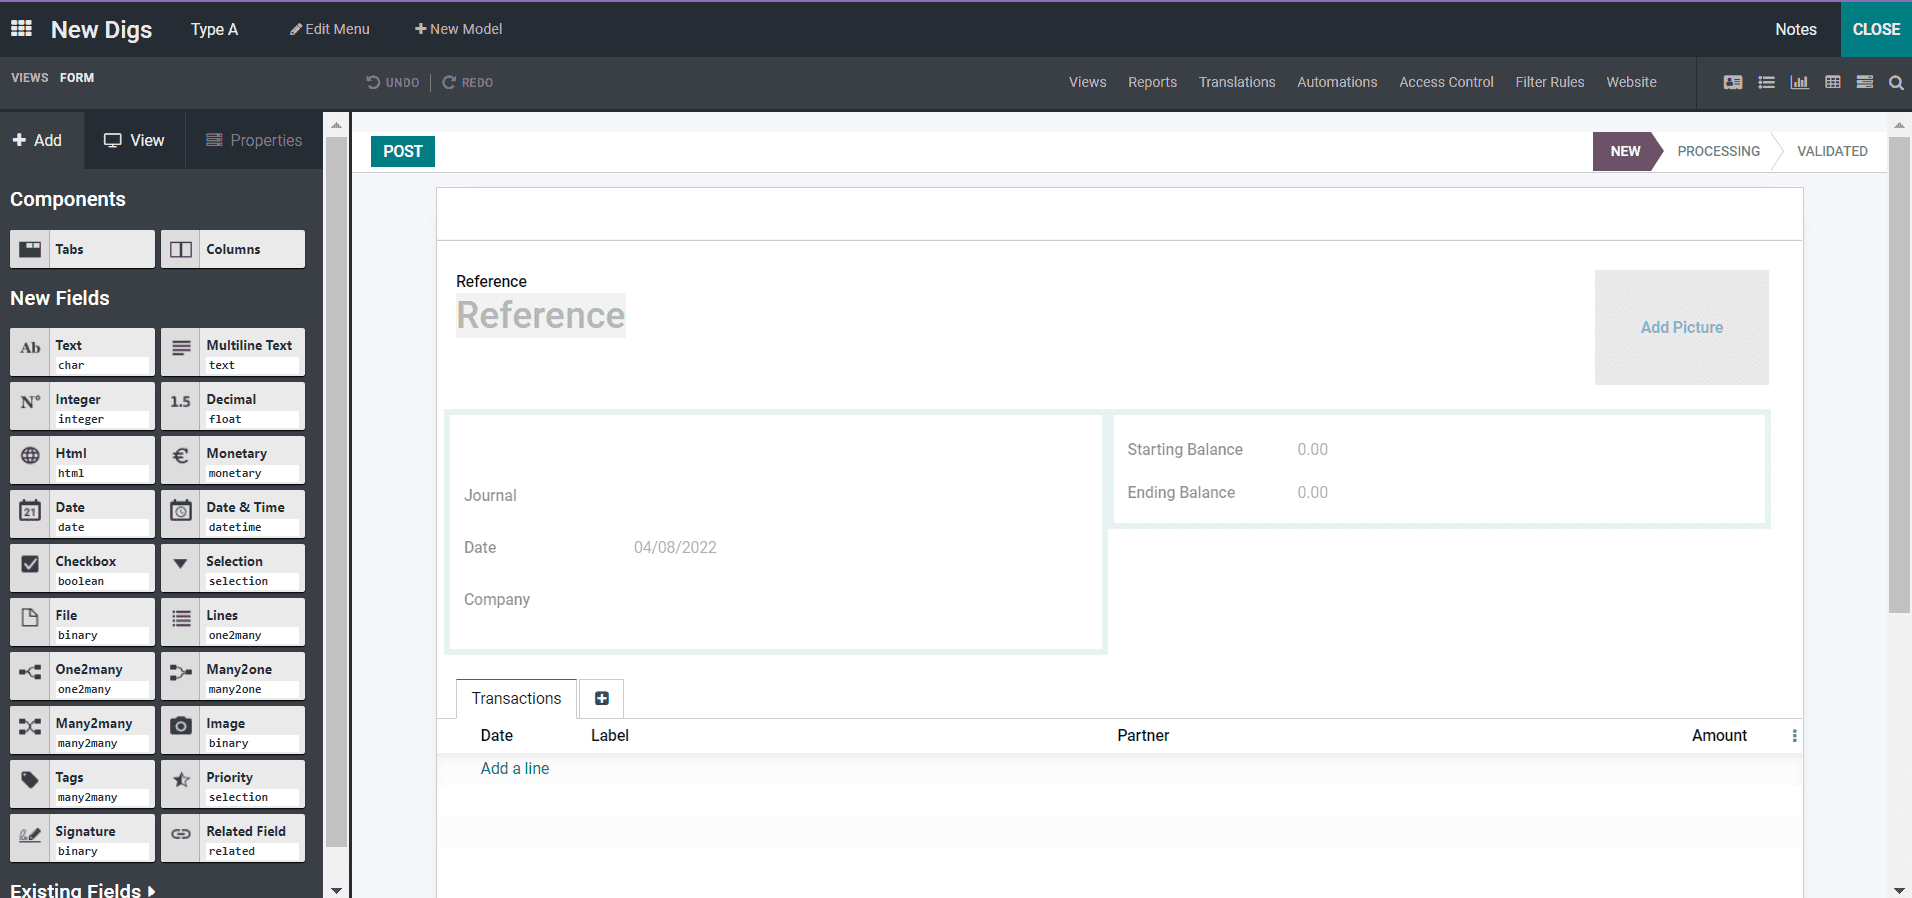
Here in the above screenshot, you can see in Form view, that you get an additional feature with Components, which is differentiated with Tabs and Columns. As seen till now, the windows with the features were all with the New Model, and now we can see the difference in Existing Model.
Similarly, by adding an object name and designing the icon as per your requirement, you can opt for the Existing Model, and while selecting it, you get a drop-down menu. You need to choose any of the ones from the drop-down menu as your business requirement. Later by clicking on the arrow which denotes the next mark, you will be directly illustrated to the given window, as seen in the below screenshot.
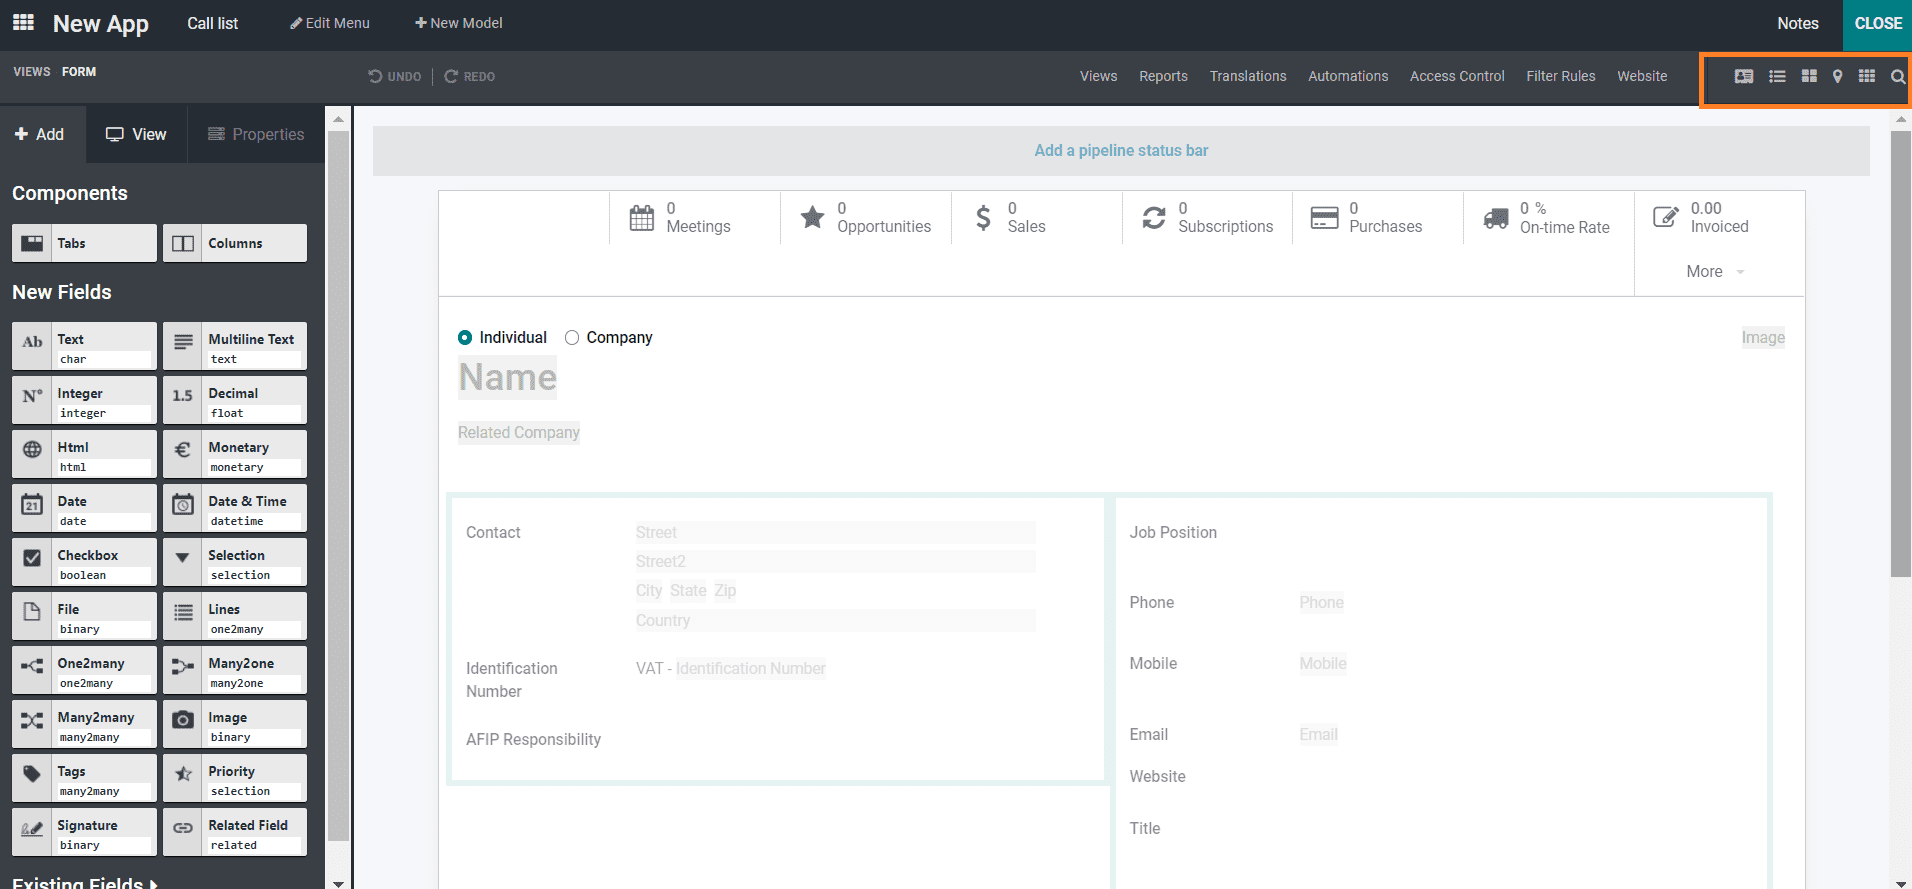
As seen in the above image, you will be getting this window for an existing model as you select, for example, if it is Contacts from the drop-down menu. The highlighted portion recognizes the redirected views by a click in the screenshot. It will enhance you with a Form view, List view, Kanban view, a Map view, Activity, and Search by clicking a specific icon as demonstrated. Here in the screenshot demonstrated with the Form view where you can add the Meetings, Opportunities, Sales, Subscriptions, Purchases, On-time Rate, Invoiced, and by clicking on the More button you get the Vendor Bills, Partner Ledger, and Go To Website buttons as the smart buttons. Here you can also observe that with an Add a pipeline Status Bar which is formed from enabling the suggested features as Pipeline stages. As seen in the screenshot below, you can use it here to add the possible values' status.
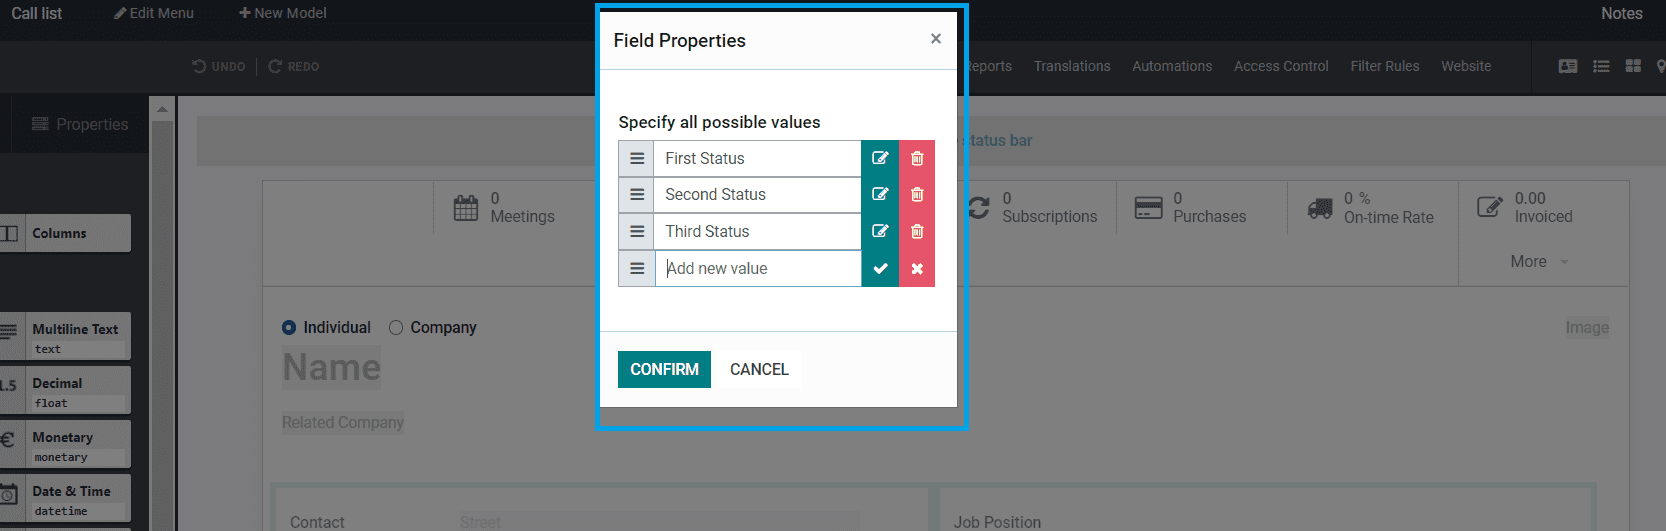
Here you can add the possible values and edit those that exist by clicking on the icon near it.
Before moving into detail in the Existing Model, let us see how to add each section in the New Model below.
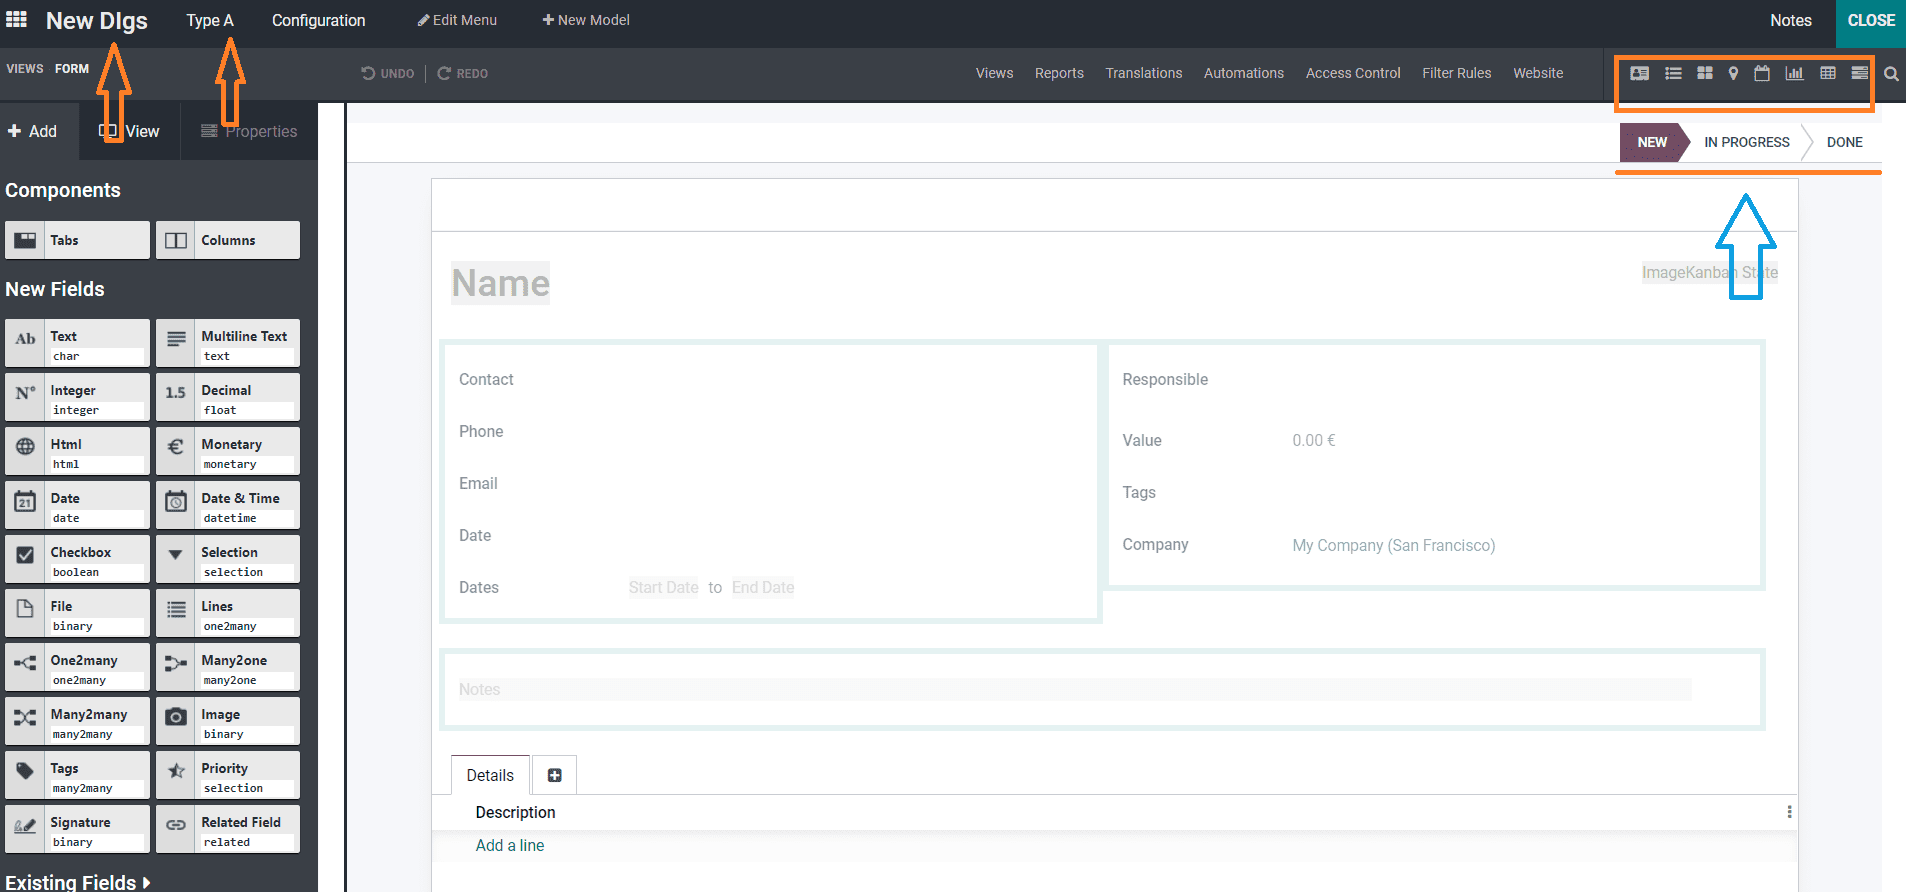
As seen in the above screenshot, you will be able to get into New Model with different views, namely form, list, kanban, map, calendar, graph, pivot, Gantt, and a search icon. Also, you can see that it is differentiated into different stages like NEW, IN PROGRESS and DONE. And now we can see how we can enter the details in each section based on the business operations. As seen in the above screenshot, you can see a +Add button. You can add the respective fields by clicking on them and dragging and dropping the filled section. And it is automatically saved. If any corrections are required, you can use undo or redo option. And if you need to add any extra fields from the right-hand side of the window in the screenshot, you can click the respective box and just by dragging and dropping, the field is entered.
As seen in the above screenshot, if you require to add a section in your business application then you can select the section that you need to add you need to select the section from the right-hand side of the box by dragging and dropping to the part you need you can add the section.
Now if you need to modify the aspects with any configurable properties you can use it in regard to the above screenshot by just observing the right-hand side of the portion.
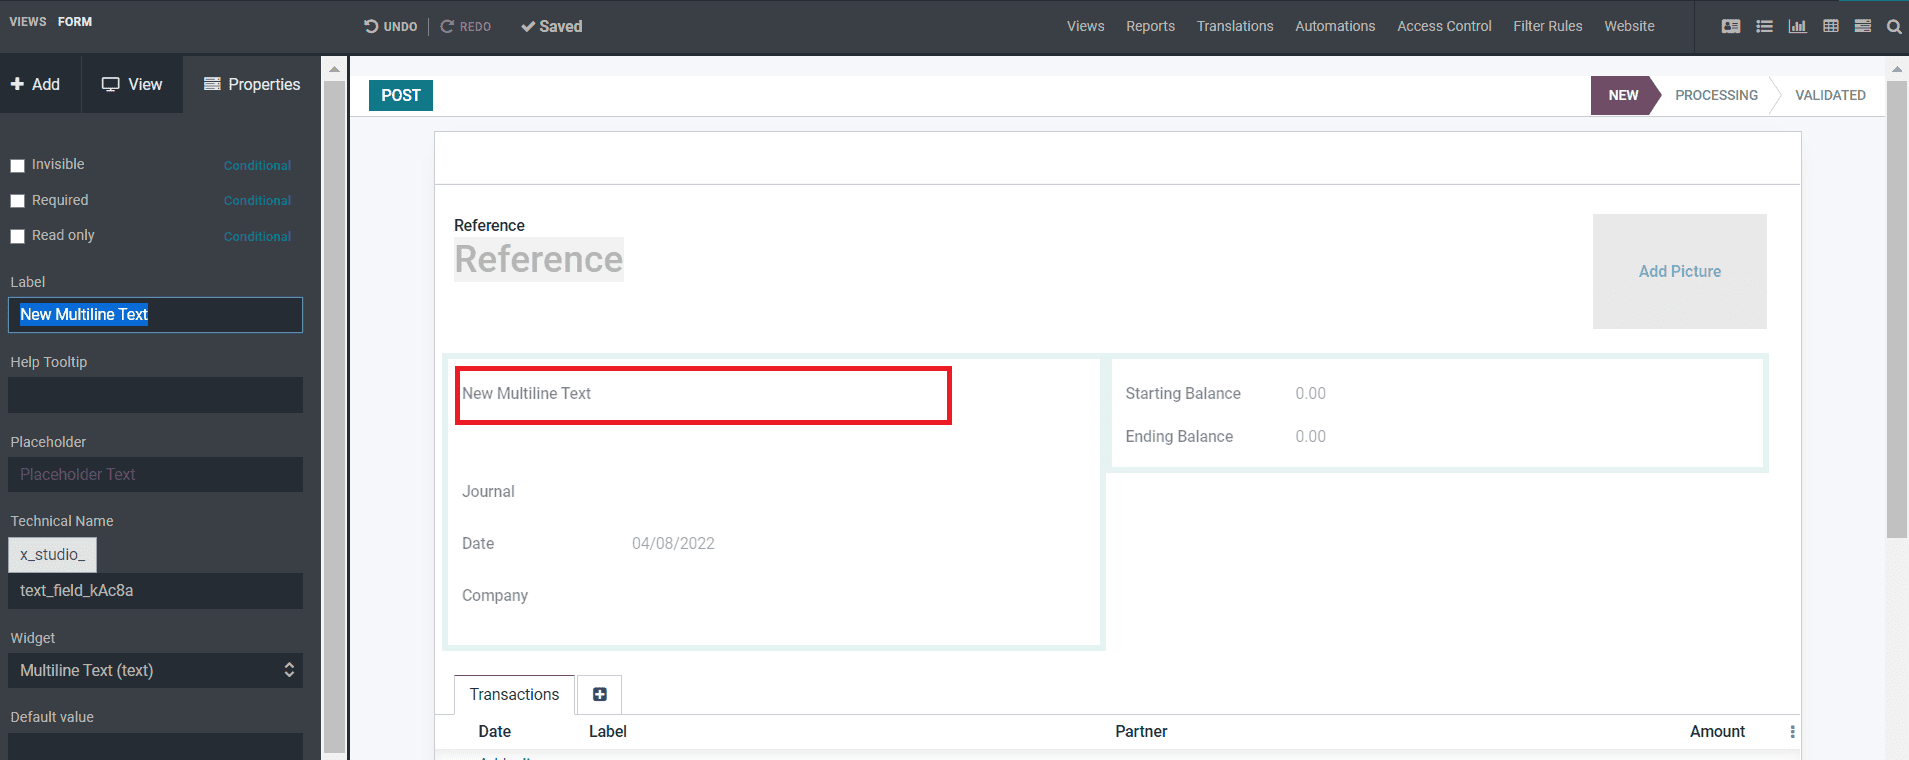
The respective configurable properties are listed below:-
Invisible: It indicates whether the field is invisible to users until the authorized user's authorization lets the field be visible only if it is visible or enhances to invisible.
Required: By enabling this field you can allow the entries in your application menu.
Read Only: In this feature by enabling it to any field, the user is supposed to read the content without changing the content.
Label: In this portion, if enabled, it is provided with a label with a description provided.
Help Tooltip: By adding this field to any section it enables a feature by adding any helpful tip to the respective part of the application.
Placeholder: It indicates that visitors who enter the application can add their details. Additionally, it also provides the details that must be entered by the visitors.
Widget: It enhances the users who enter the application can be described in the widget if entered.
Default Value: It indicates in an application menu where the application is illustrated with it.
Limit Visibility To Groups: As the name limits visibility to groups, it indicates that only respective people or groups will be allowed to be visible.
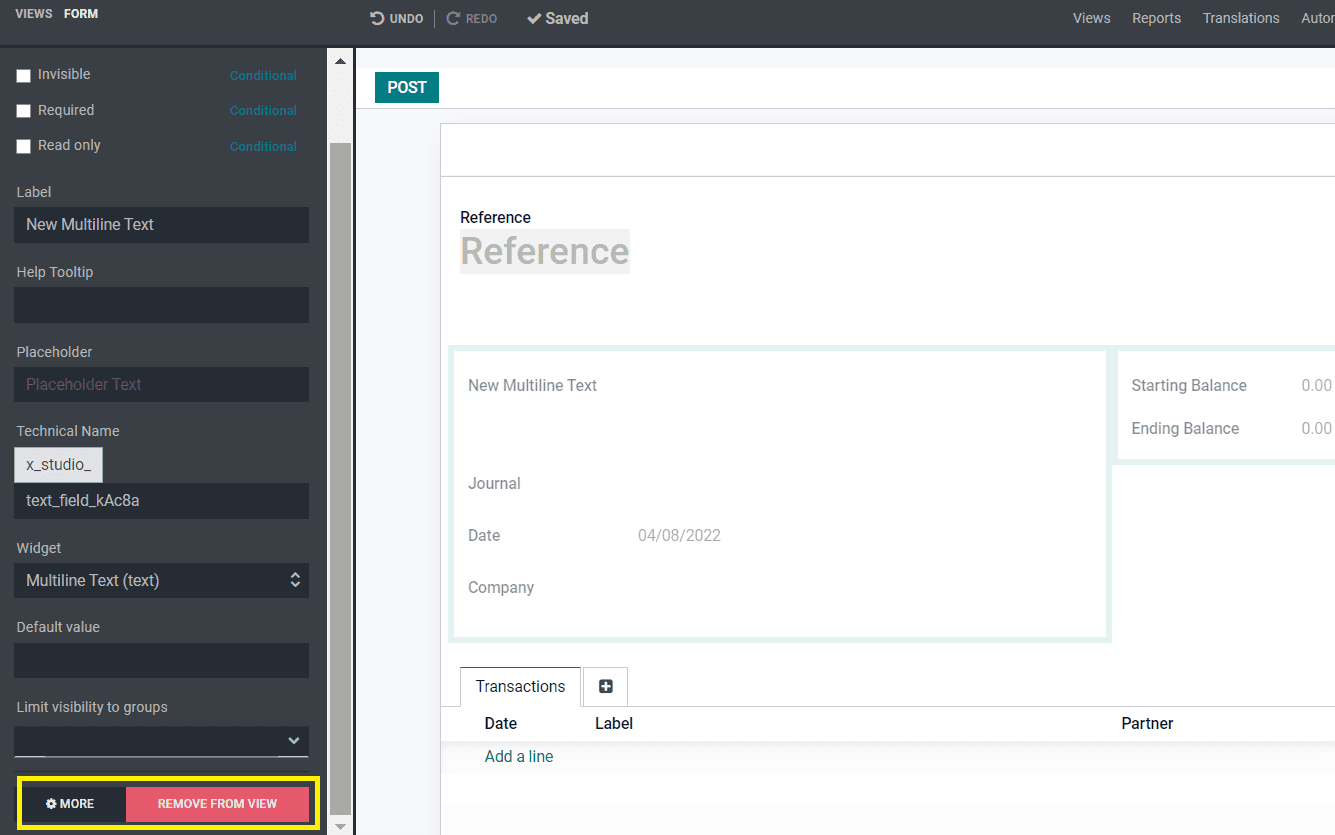
In the given above screenshot, you also see an additional option, REMOVE FROM VIEW, which indicates that if you need to delete any field, you can click on it, and the function will be applied.
We hope you have got an understanding of how the business application is configured as per your requirement. And you have an essential idea in customizing your business application with your operations and functions. With more customization options and functions, we will be able to approach you with a new blog in Odoo 15 Studio.