Module deployment in Odoo.SH is an integral part of contemporary Odoo development. Being the cloud-based PaaS platform of Odoo, Odoo.sh allows for easy application hosting, code management, testing, and deployment thanks to its automation. Knowing how module deployment works is key to managing modules effectively, detecting any problems in time, and having stable and production-ready Odoo instances.
What is Odoo.sh?
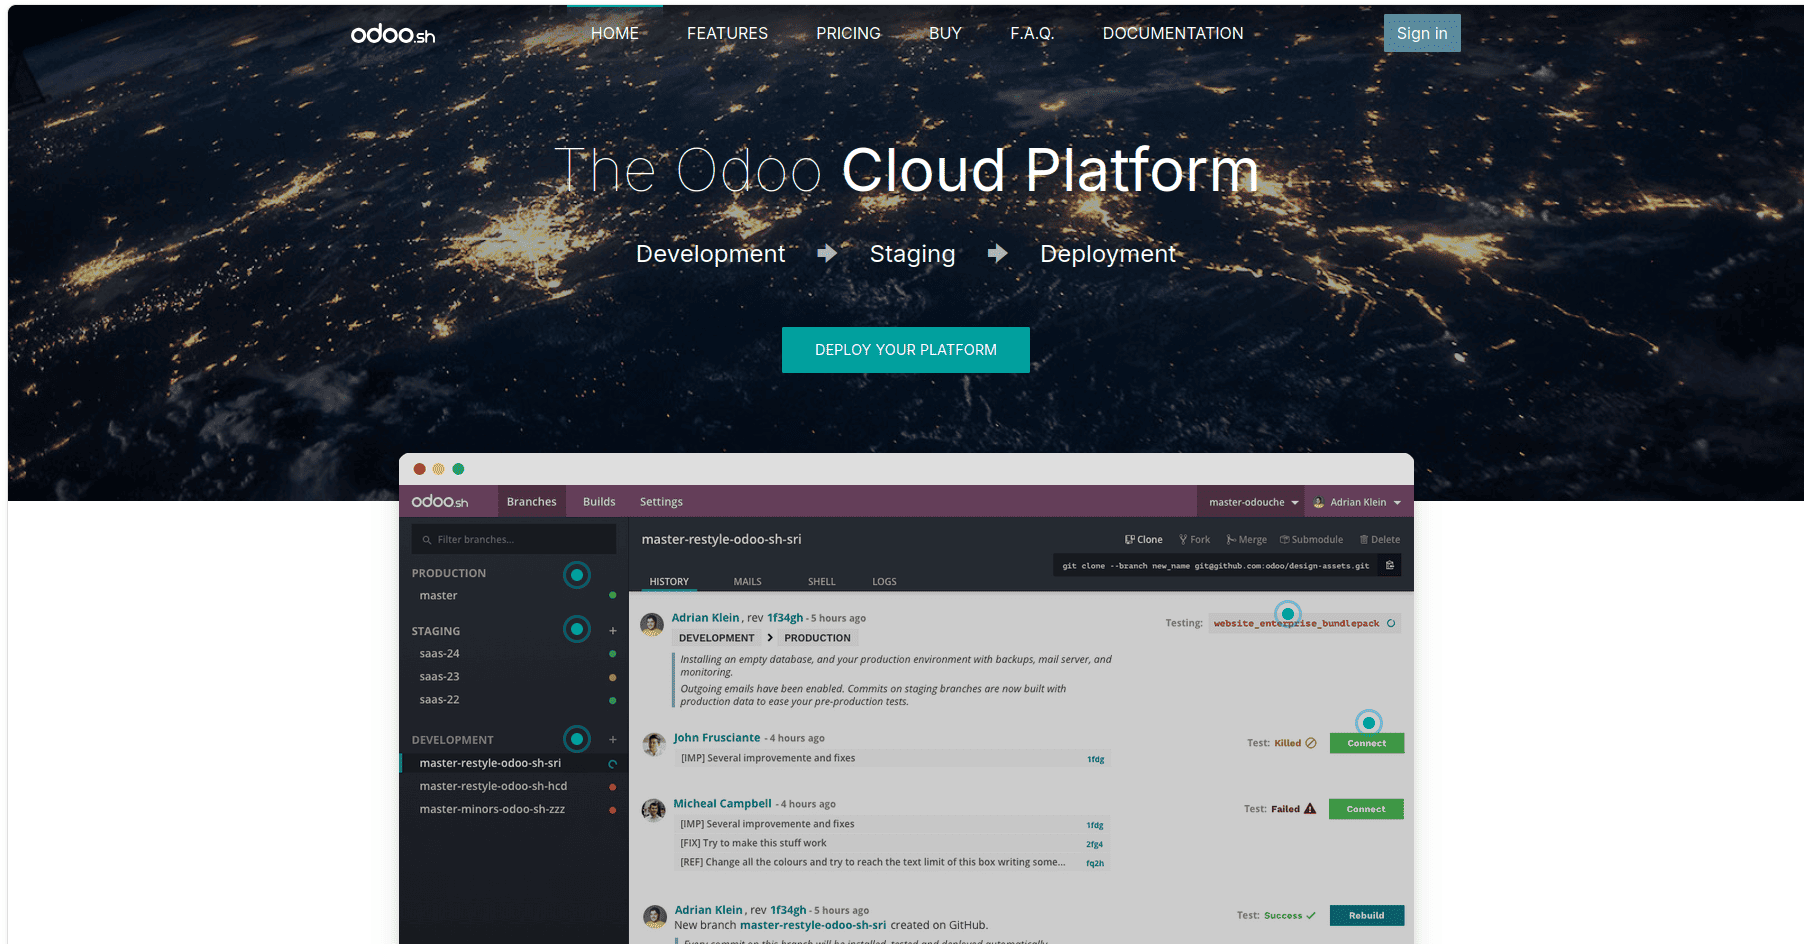
Odoo.sh is the official Odoo PaaS cloud platform that enables developing, hosting, testing, and deployment of Odoo apps. This is a whole ecosystem allowing developers to use Git for managing their code, deploy custom modules, and manage development, staging, and production environments without taking care of server infrastructure manually.
Odoo.sh also allows for automated building, testing, backups, and CI/CD processes (Continuous Integration and Continuous Deployment). Every time developers push code into Git repositories, Odoo.sh builds a new app, installs necessary packages, and deploys the latest updates.
Module Deployment Workflow in Odoo.sh (Odoo 19)
Example: Deployment of a Custom Module in Odoo.sh
To understand how modules can be deployed using Odoo.sh, let us discuss a simple example. Let us suppose that we have created a custom module named “website_inner_content_demo” in Odoo 19 that will enable us to add the inner content snippet to our website. We can create a custom module, upload the code to the Git repository of Odoo.sh, and see how the Odoo.sh deploys the module automatically.
Step 1: Log on to Odoo.sh
Open Odoo.sh.
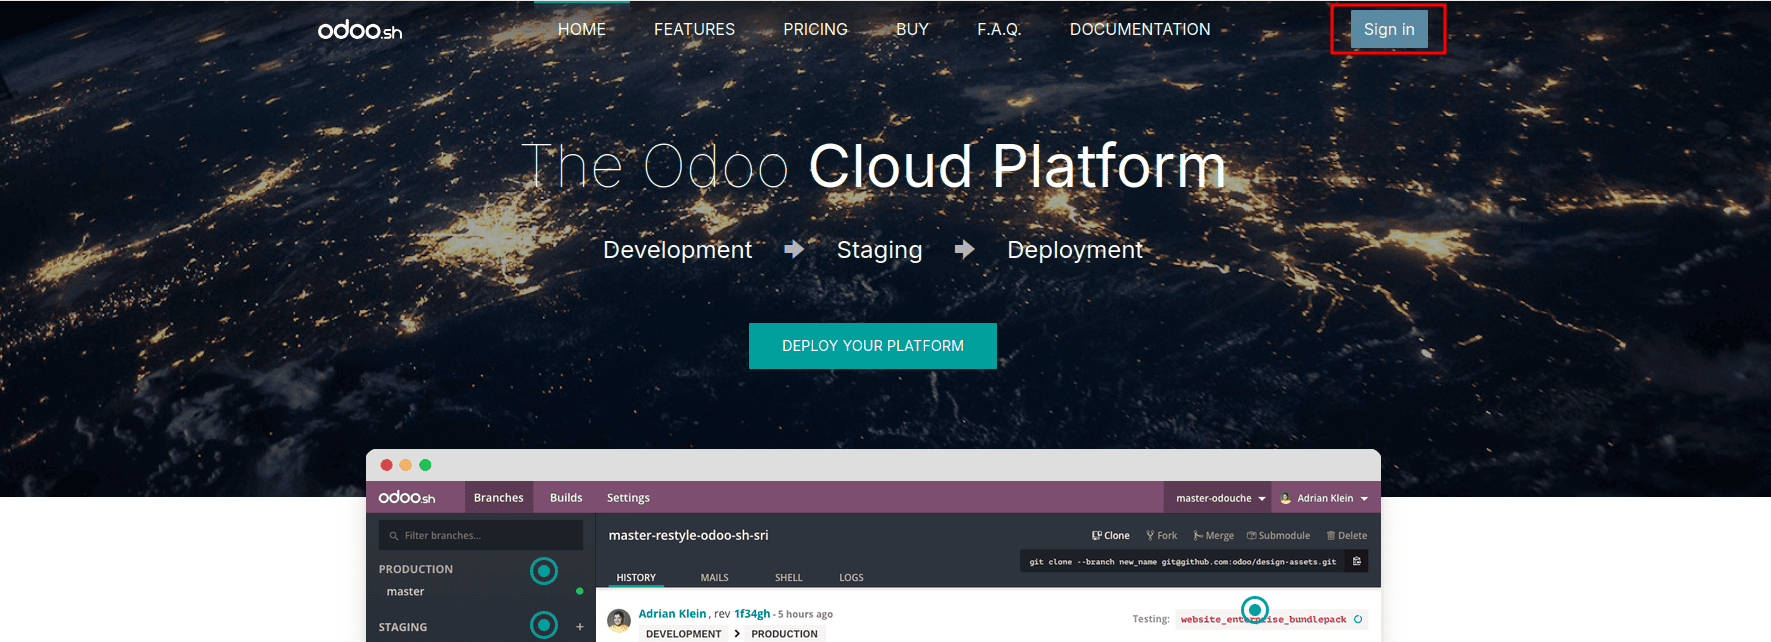
and sign in using your GitHub account credentials.
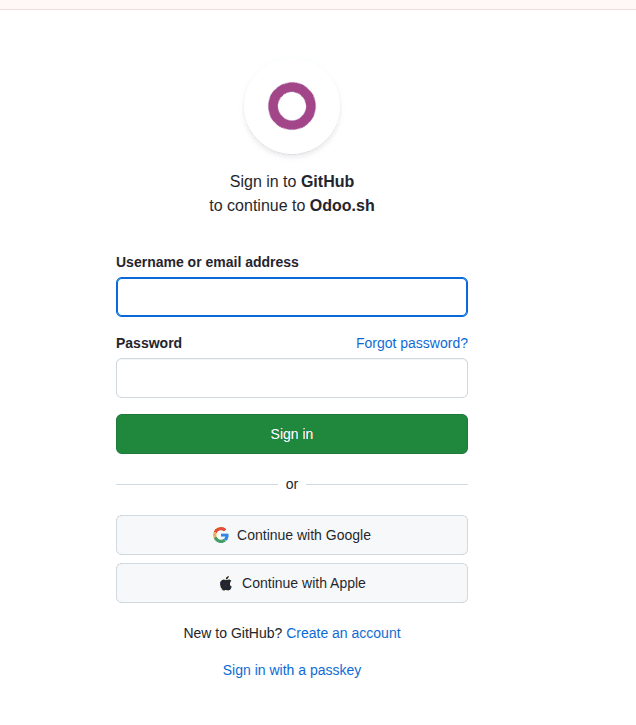
After signing in, you shall be able to access your Odoo.sh projects, branches, and deployment environments.
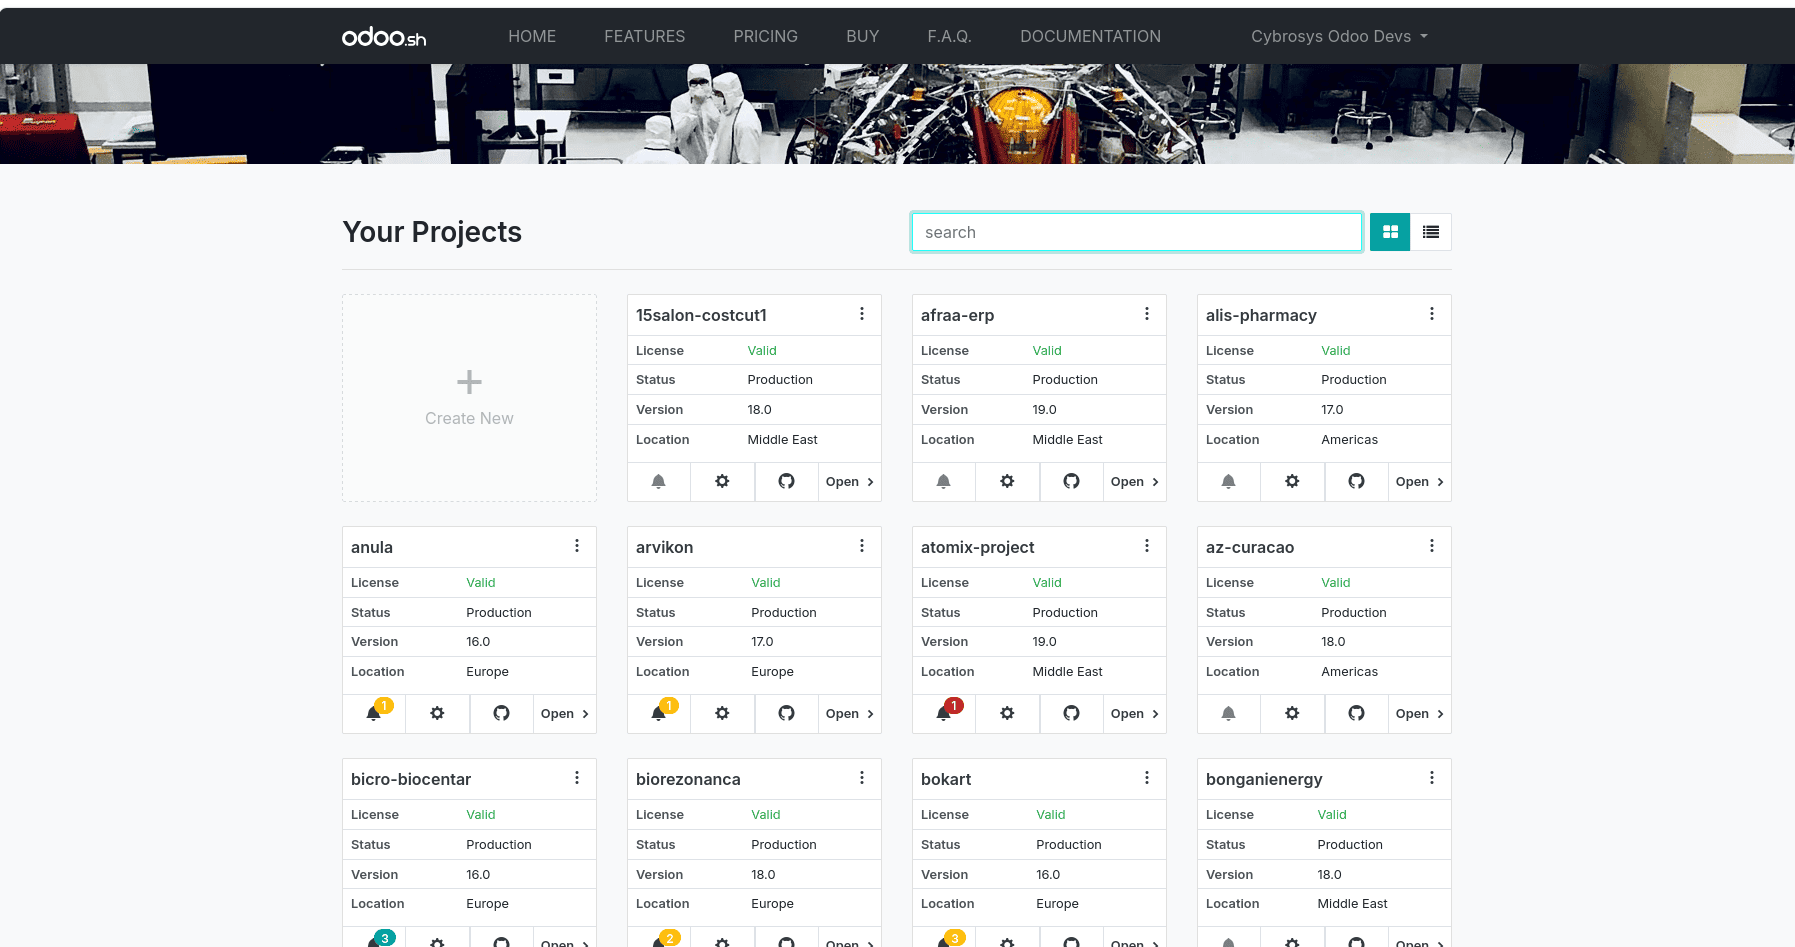
Step 2: Creating a new project
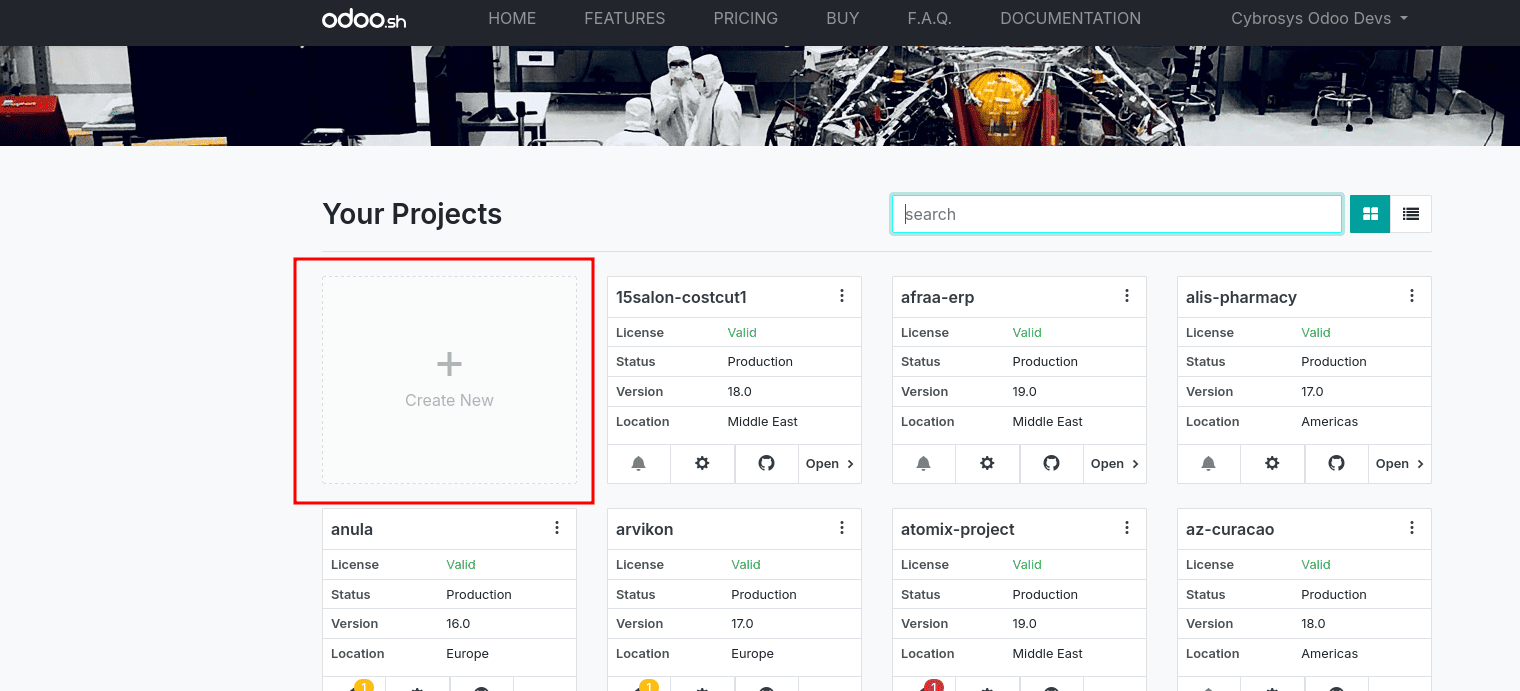
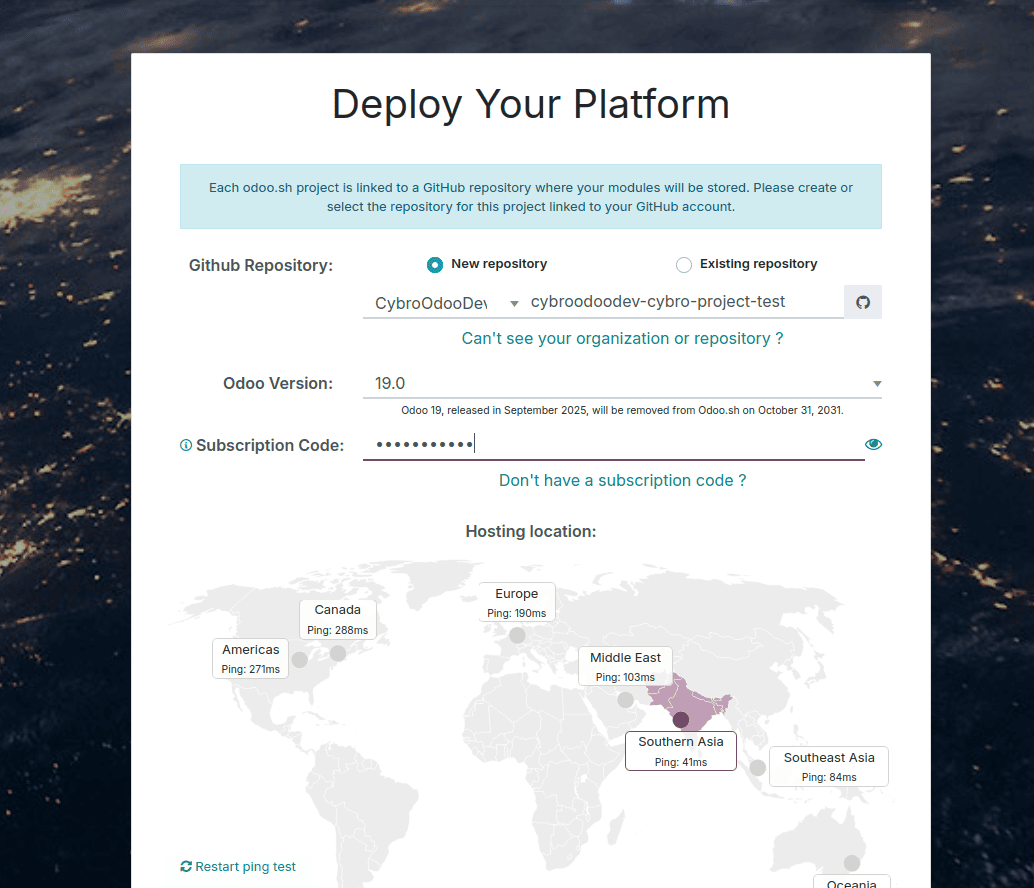
On clicking “new project”, Odoo.sh opens up the Deploy Your Platform page. Here, you need to set up your project repository, Odoo version, subscription, and region for hosting.
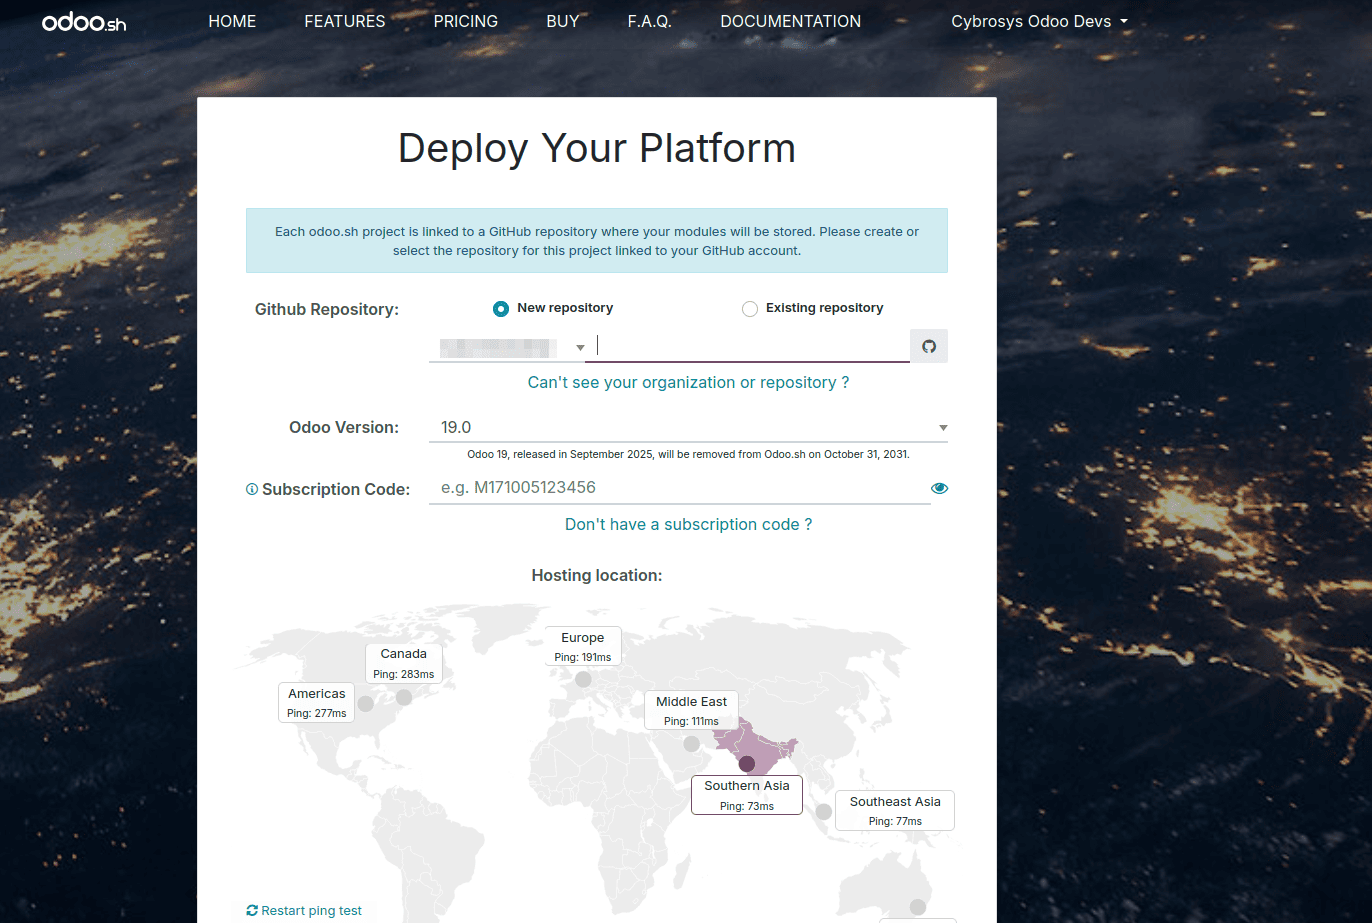
GitHub Repository
It is the section used for connecting the GitHub repository, which will hold your Odoo source code and any custom modules that you create.
- New repository: It creates a new GitHub repository through Odoo.sh.
- Existing repository: It connects to a GitHub repository that is already created.
Odoo Version
Using this dropdown, you can select an Odoo version that will be used in the project.
For example, here the Odoo 19.0 version is chosen for installing and testing modules that can work on Odoo 19.
Subscription Code
This code connects your Odoo.sh project with your Odoo Enterprise license.
It is necessary for using Enterprise features and confirming the subscription.
This part gives you an opportunity to select a server location where your project will be located.
Selecting a closer location can:
- Decrease the latency
- Speed up the application
- Make your users feel comfortable while working with the system.
Odoo.sh also shows the ping time for each region to help you choose the best place for hosting your project.
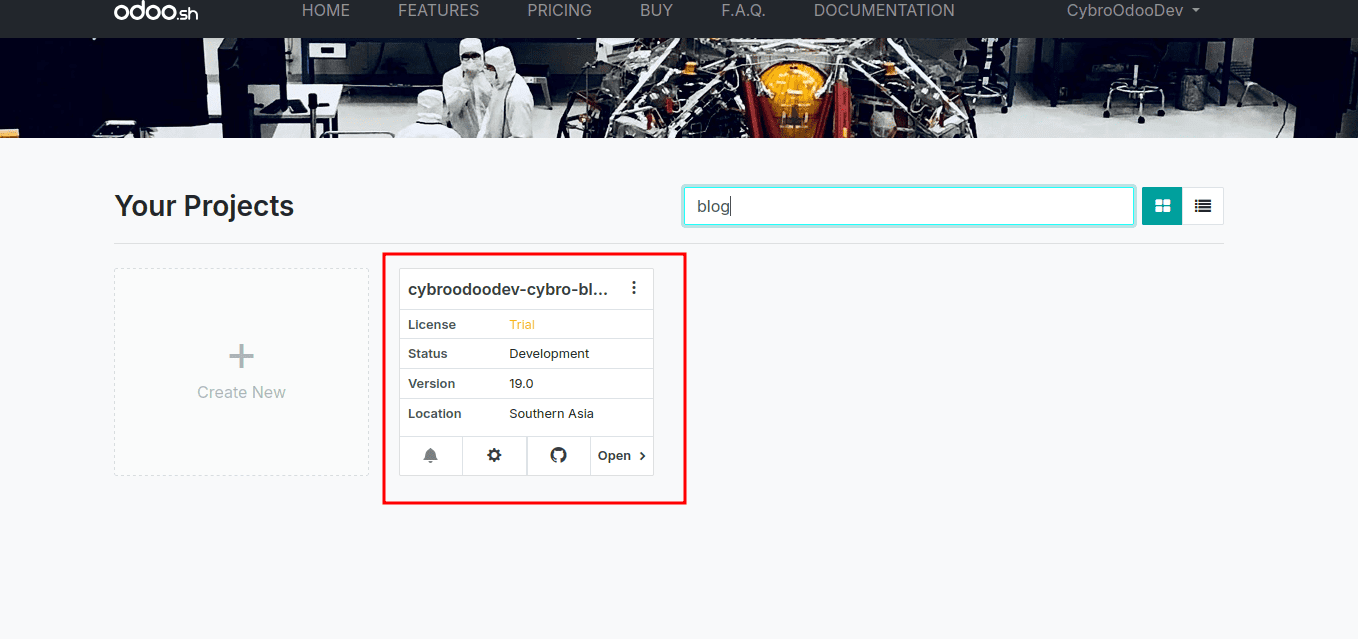
Once the project has been deployed, click ‘open’ to open the project
Understanding the Branches in Odoo.sh
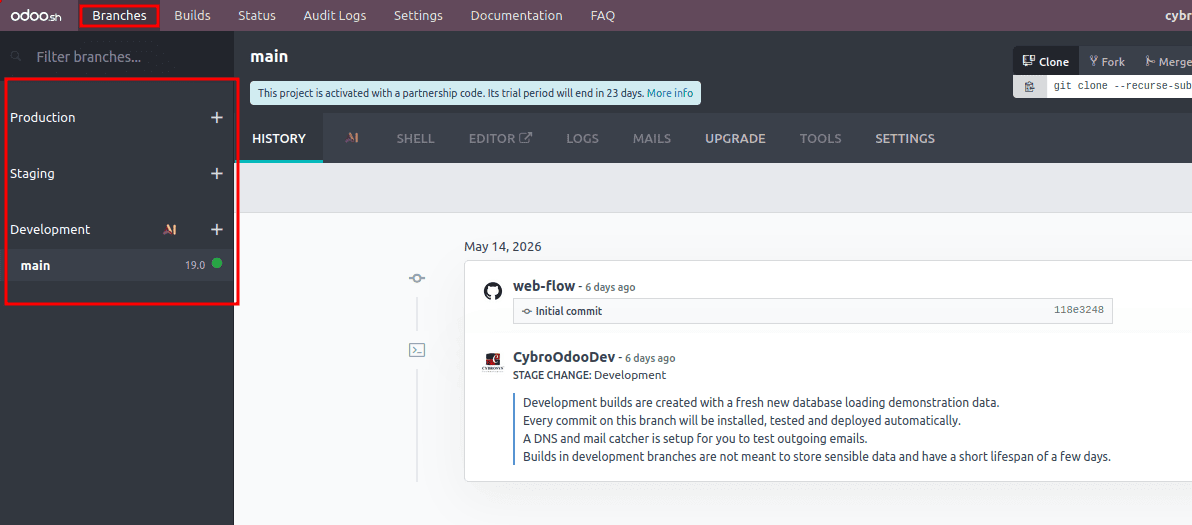
There are different environments in the left panel, which can be used for development and deployment.
Odoo.sh basically classifies projects according to three types of branches, and these are as follows:
1. Production Branch
The production branch has the live version of the application used by end-users/customers.
Important Information
- It is the stable environment.
- Code that is tested and approved only can be deployed.
- Any bug in the environment will affect live users.
- Generally connected to the main business database.
Usage
Tested code usually gets merged into production after staging.
2. Staging Branch
The Staging Branch is used as a testing ground before production deployment.
Points To Note
- Is utilized as a testing ground before production deployment.
- It allows the verification of:
- Stops unstable code from being deployed to production.
How To Use It
Prior to pushing code to production, developers test the entire workflow on staging.
3. Development Branch
The Development Branch is utilized for development and experimentation purposes.
In this case, the branch called main is considered to be a development branch.
Main Features
- New code and modules get pushed into this branch initially by the developers.
- Every commit made through Git creates a new build.
- Environment which enables testing code changes safely.
- Any error caused in development will not affect production.
Standard Odoo.sh Deployment Workflow
The regular deployment workflow in Odoo.sh is:
Development > Staging > Production
- Development of features in the Development branch
- Validation of the full application in the Staging environment
- Deployment of stable code to the Production environment
Such a workflow contributes to code quality assurance in Odoo 19 projects.
Step 4: Push the Custom Module to GitHub
After creating the Odoo.sh project and understanding how branches operate, the next thing to do will be pushing the custom module to the GitHub repository.
Odoo.sh depends on GitHub integration. Every time any code is pushed to the repository, Odoo.sh will notice the changes and will start the building process according to the branch
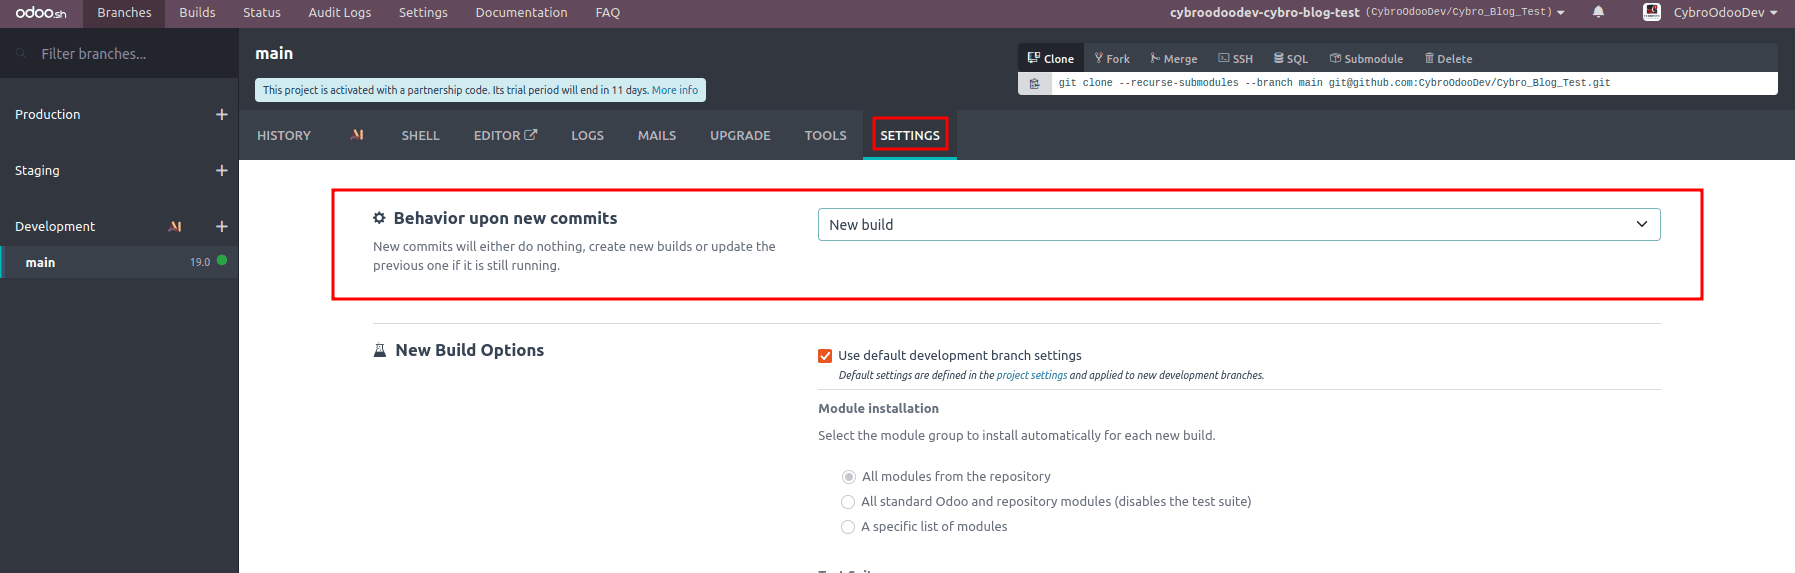
Place the custom module in the custom addons folder and commit and push it to the development branch.
Example commands:
git add .
git commit -m "Added custom module"
git push origin main
Here in this example, the module website_inner_content_demo is pushed to the development branch.
Step 5: Automated Build Procedure
Once the code is pushed, Odoo.sh automatically triggers a new build for the branch. The steps involved in the procedure include:
- Creating a build environment
- Installing the customized module
- Running the Odoo server
- Checking for installation errors and testing the module.
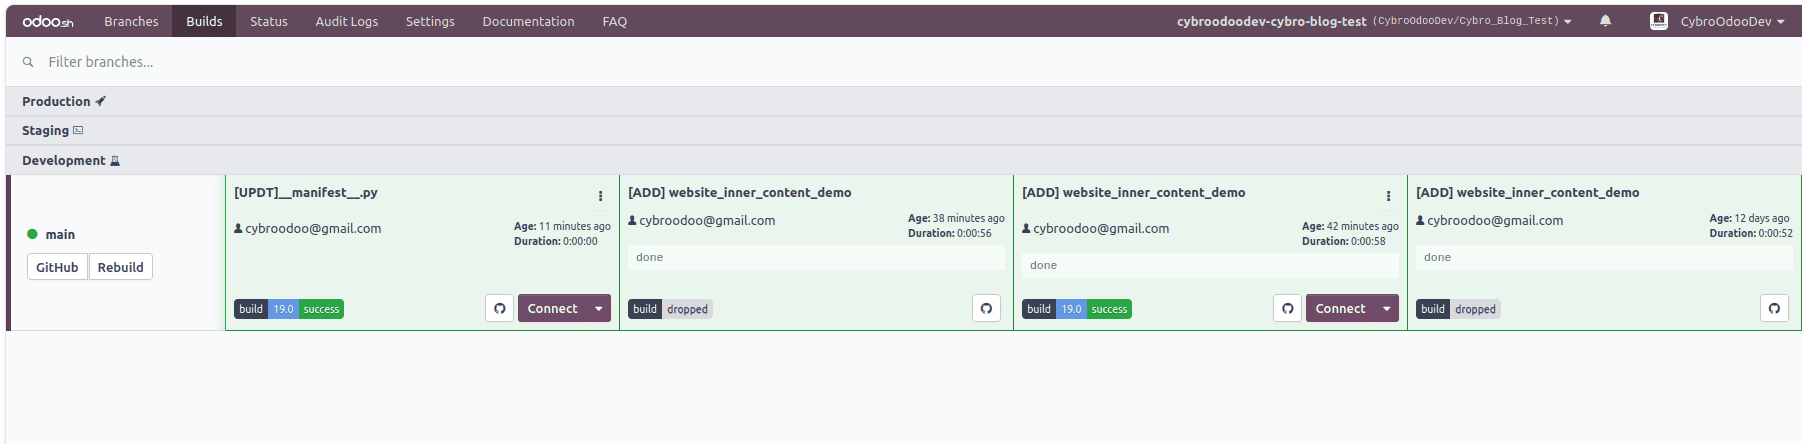
As shown in the build pane, the build status will be set to success once the deployment process is successful.
Build Status Indicators
- Success - Build Successfully Completed
- Dropped - Build was stopped/cancelled due to another build
- Warning - Build was successfully completed but with warnings
- Failed - Deployment error occurred
The Connect button (appears only in case of success and warning status) helps you to access the Odoo instance.
Step 6: Open the Odoo Instance and Install the Module
After the build is completed successfully, click the Connect button available in the branch build panel. This redirects to the Odoo user interface (UI) of the deployed branch.
Once inside Odoo:
- Enable Developer Mode
- Navigate to Apps
- Click Update Apps List
- Search for the custom module
- Click Install
After installation, the module becomes active in the Odoo.sh environment and is ready for testing and usage.
The following shows how to deploy an Odoo module in odoo.sh. Using Odoo.sh in conjunction with Github enables developers to effectively control code, automate builds, perform testing in various environments, and deploy the modules easily without any need for setting up servers manually. The development, staging, and production deployment workflow ensures safe deployment in practice.
To read more about How to Configure Submodules in Odoo.sh, refer to our blog How to Configure Submodules in Odoo.sh.